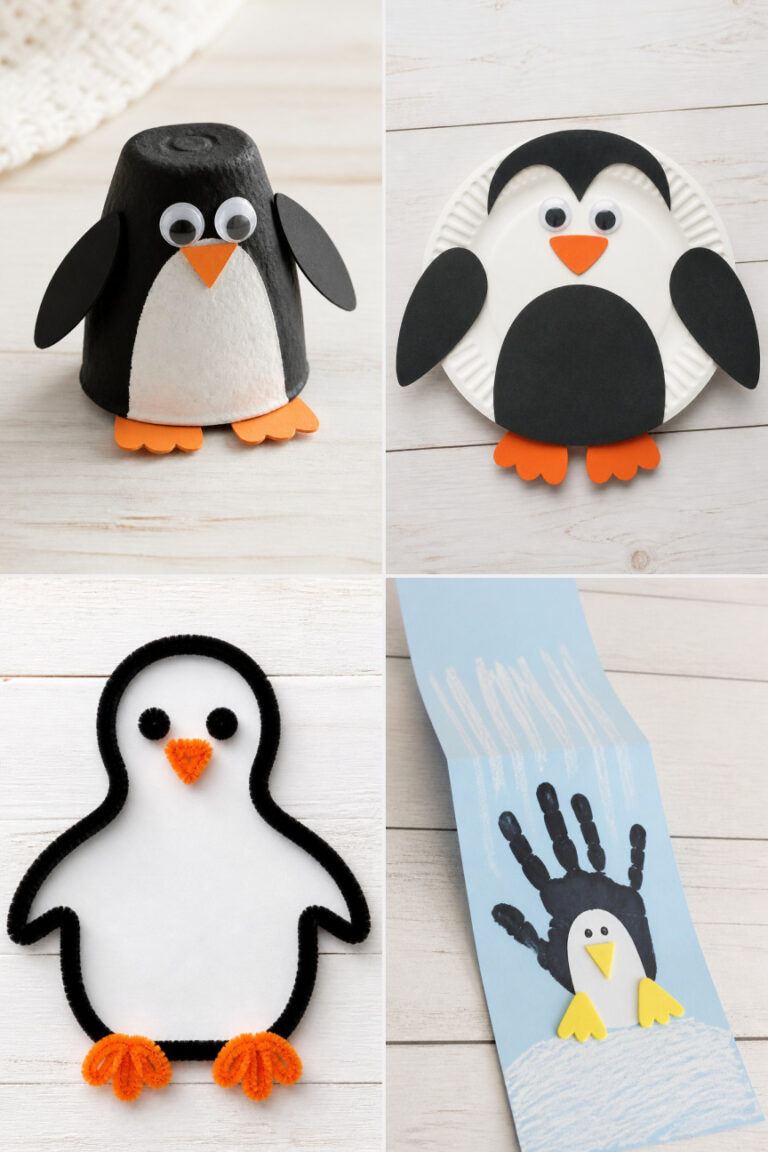
25 Easy Winter Crafts for Kids Using Simple Supplies

Flickering paper snowflakes drift across the windowpane, each cut edge catching the low winter light. Inside, little hands move with purpose, shaping mittens from felt and threading beads like frozen raindrops.
You don’t need a craft room or fancy tools to bring cozy creativity into your home. With everyday supplies and simple steps, these projects turn quiet afternoons into keepsakes that last beyond the season.
1. Cotton Ball Snowmen
Easy
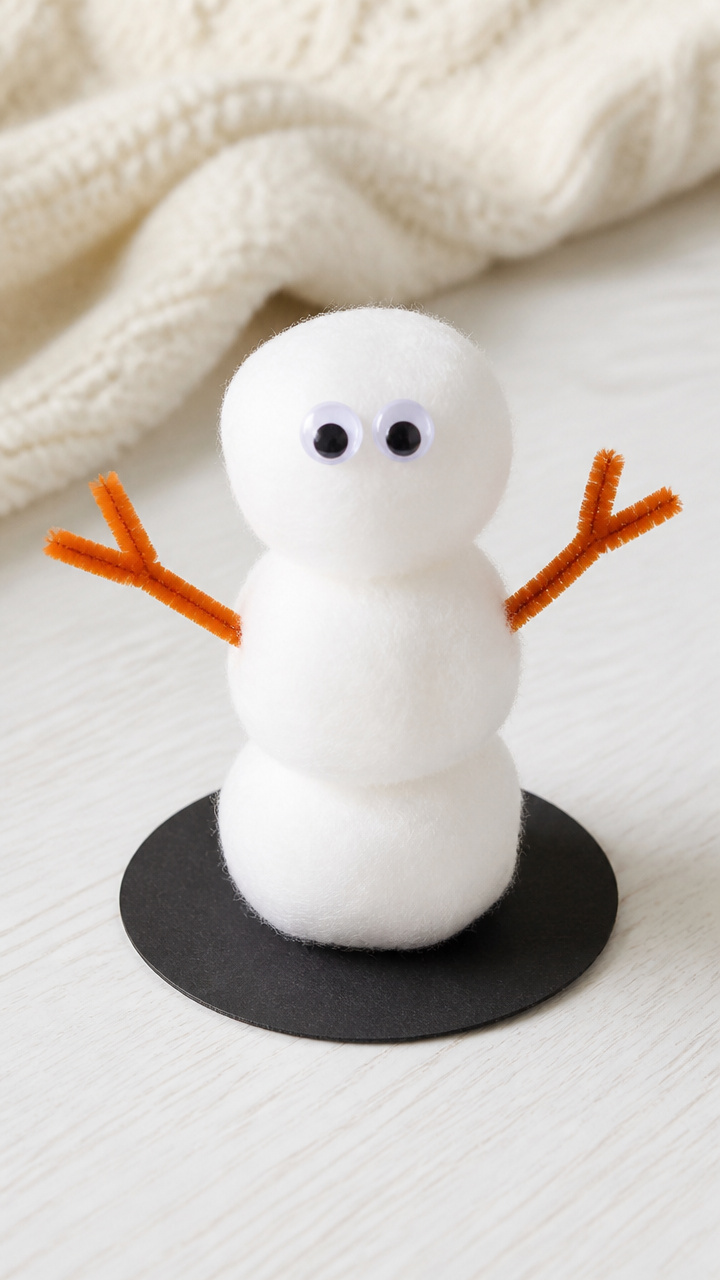
Three fluffy spheres stacked high become cheerful snowmen with tiny twig arms and a mini scarf twist. These soft sculptures add instant charm to any shelf or windowsill.
Materials Needed
- 3 large white cotton balls per snowman
- Black construction paper (6×6 inch sheet)
- Orange pipe cleaner (1 per snowman)
- Googly eyes (2 per snowman)
- Glue stick
- Scissors
- Pencil
How to Make It
- Place one cotton ball on a flat surface as the base, then stack the second slightly smaller one on top, and the third on the very top to form a snowman shape.
- Cut two small arms from the orange pipe cleaner, each about 1.5 inches long, and glue them to the middle cotton ball.
- Cut a 2-inch strip of black construction paper and curl it into a top hat; glue it to the top cotton ball.
- Glue on googly eyes just below the hat and snip a tiny triangle from the orange pipe cleaner for the nose, attaching it between the eyes.
2. Popsicle Stick Reindeer
Easy
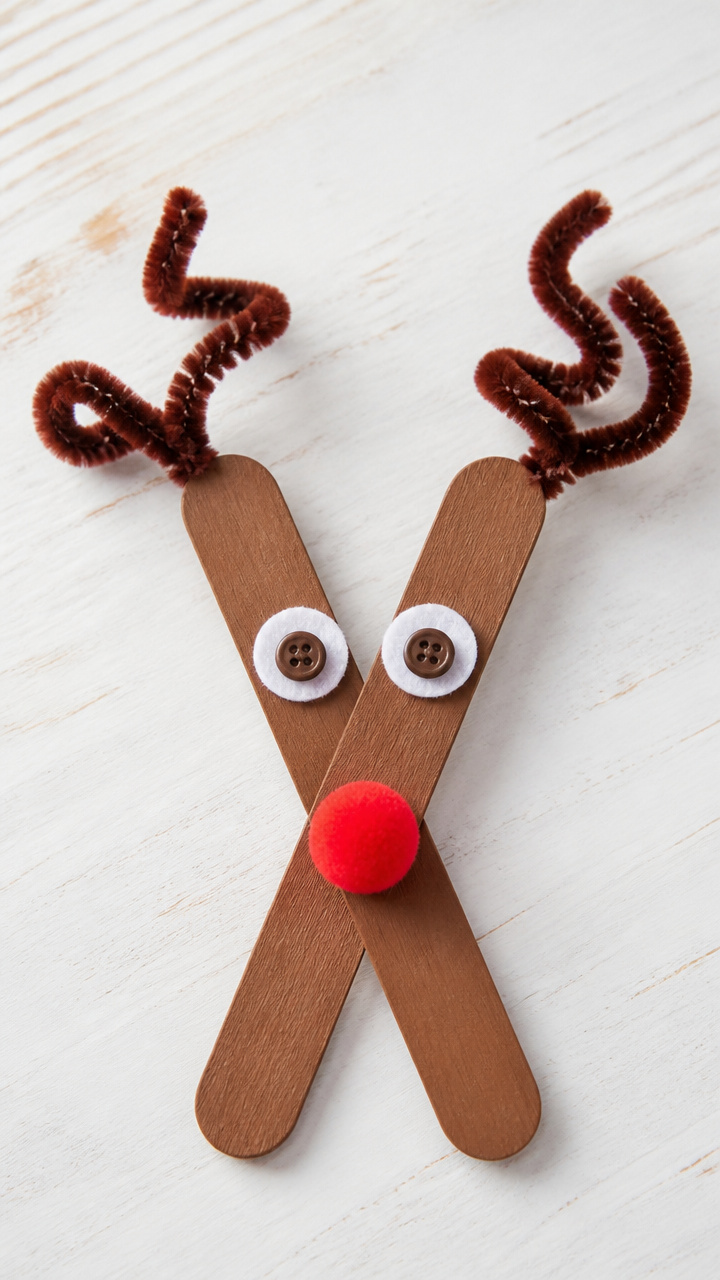
Rustling through pine-scented air, these wooden reindeer prance with curled antlers and bright red noses. A favorite for holiday tablescapes or handmade gift tags.
Materials Needed
- 2 flat wooden popsicle sticks per reindeer
- Red pom-pom (0.5 inch diameter, 1 per reindeer)
- Brown chenille stem (1 per reindeer)
- White craft glue
- Small brown buttons (2 per reindeer)
- Hole punch
- Scissors
How to Make It
- Lay one popsicle stick vertically and place the second horizontally across it about 1 inch from the top to form a cross shape; glue them together at the intersection.
- Twist the chenille stem in half to create antlers and press the ends into the top of the vertical stick.
- Glue the red pom-pom to the front tip of the vertical stick for the nose.
- Glue a button on each side of the horizontal stick for the eyes.
3. Salt Dough Ornaments
Moderate
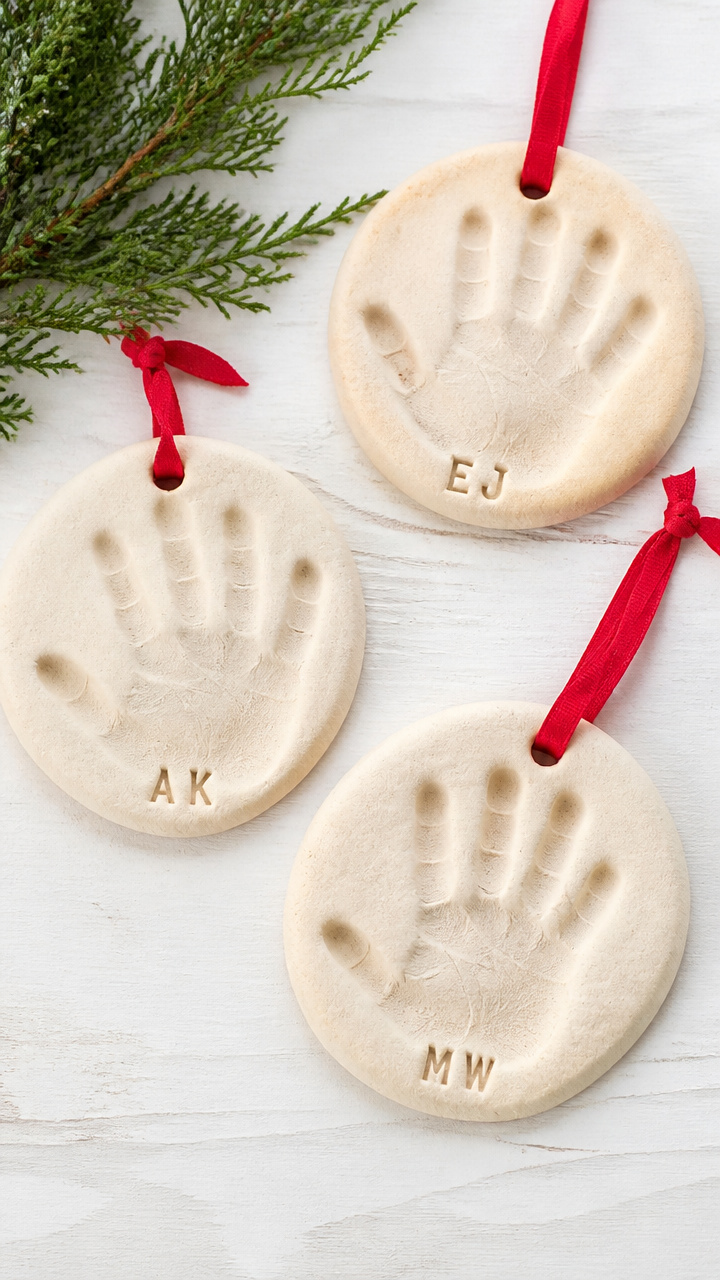
Warm, earthy-smelling shapes pressed with tiny fingers hang from ribbons on the tree. These keepsake ornaments capture little handprints and initials year after year.
Materials Needed
- 2 cups all-purpose flour
- 1 cup table salt
- 3/4 cup warm water
- Rolling pin
- Straw (for hole punching)
- Baking sheet
- Parchment paper
- Acrylic paint (red, green, gold)
- Paintbrush (size 4 round)
- Ribbon (12-inch length per ornament)
How to Make It
- Mix flour, salt, and warm water in a bowl until a smooth dough forms, kneading by hand for 3 minutes until no lumps remain.
- Roll the dough to 1/4-inch thickness on a floured surface, then cut into circles or stars using a cookie cutter.
- Press a straw just above the top edge of each shape to make a hanging hole, then place on a parchment-lined baking sheet.
- Bake at 200°F for 3 hours until hard, let cool completely, then paint with acrylics and thread ribbon through the hole.
4. Tissue Paper Snowflakes
Easy
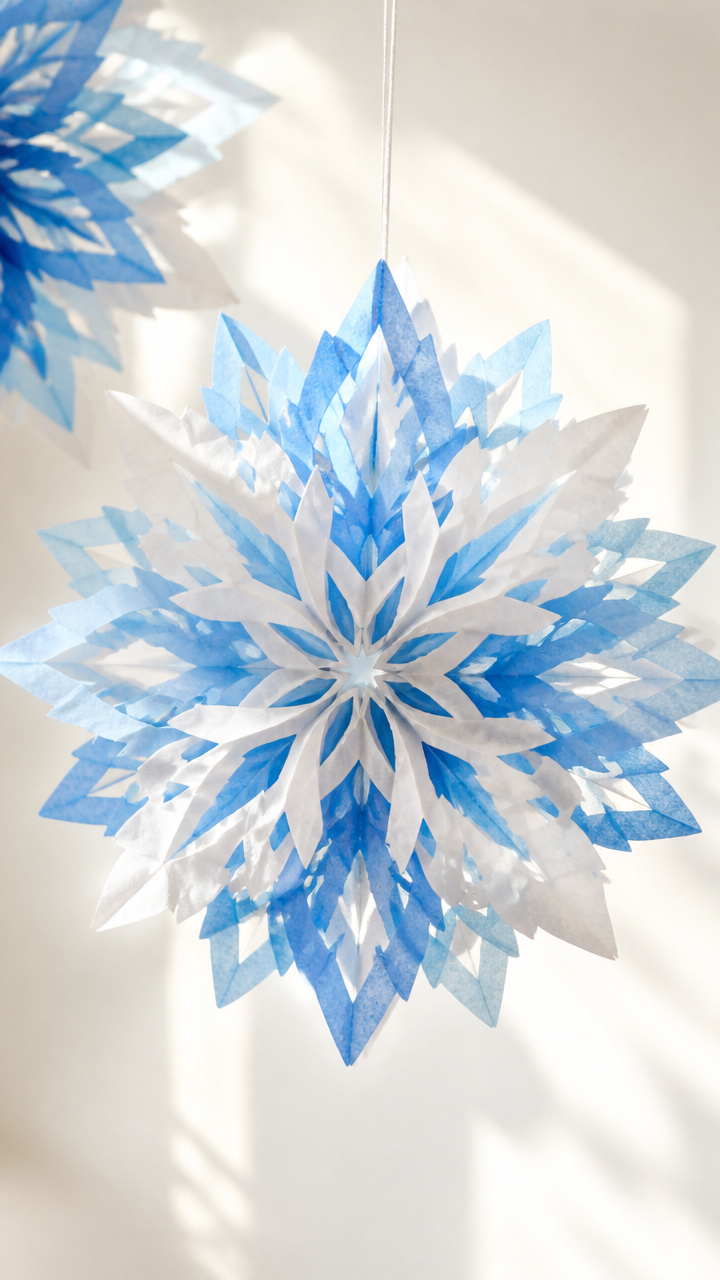
Delicate layers of blue and white tissue puff like real snowdrifts when hung near a window. Light catches the translucent folds, creating gentle shadows on the wall.
Materials Needed
- Blue tissue paper (8×8 inch square, 1 per snowflake)
- White tissue paper (8×8 inch square, 1 per snowflake)
- Scissors
- Glue stick
- Clear tape
- String (6-inch piece per snowflake)
How to Make It
- Lay the blue tissue square flat, then center the white square on top and glue them together at the corners only.
- Fold the layered square in half diagonally to form a triangle, then fold into thirds to create a cone shape.
- Cut small notches and curves along the edges with scissors, avoiding the folded corner, then unfold carefully.
- Attach a piece of string to the back with clear tape for hanging.
5. Cardboard Tube Penguins
Easy
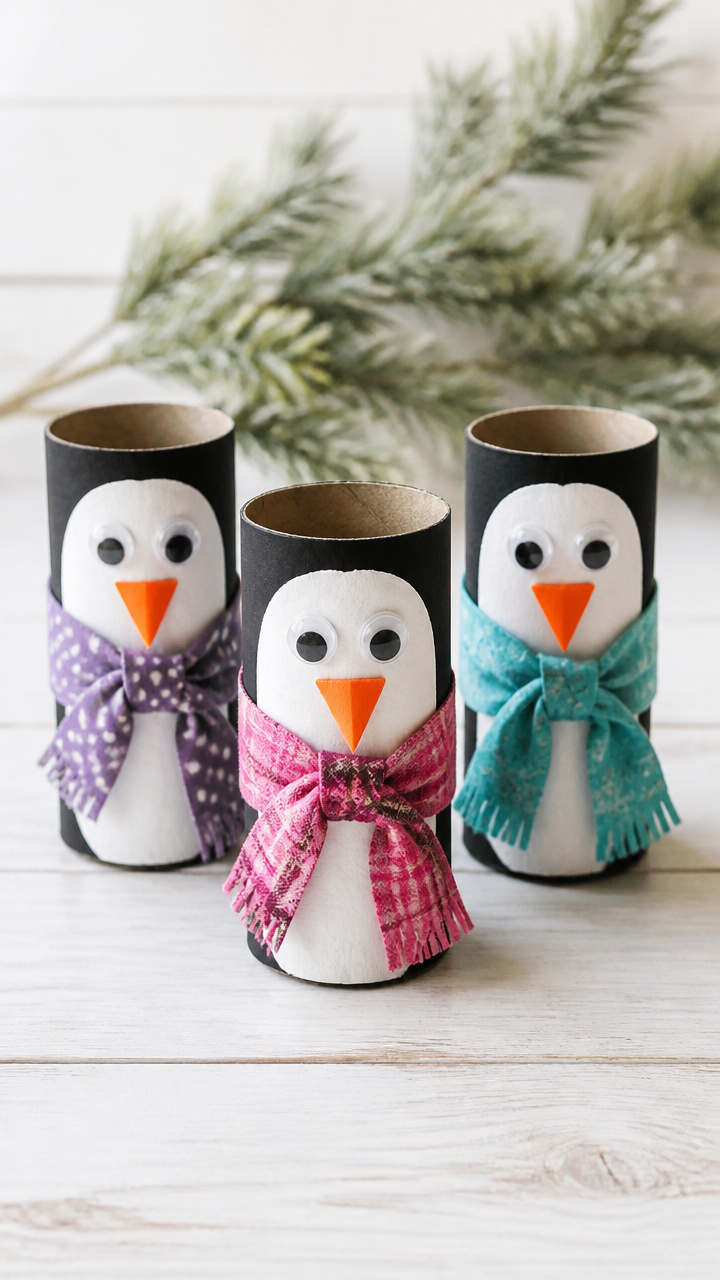
Waddling figures with glossy eyes and snug scarves stand tall inside toilet paper rolls. Their round bodies and happy expressions make them perfect for storytelling play.
Materials Needed
- Empty toilet paper roll (1 per penguin)
- Black construction paper (5×7 inch sheet)
- White craft paint
- Paintbrush (size 3 flat)
- Googly eyes (2 per penguin)
- Orange construction paper (2×2 inch square)
- Glue stick
- Scissors
How to Make It
- Paint the entire toilet paper roll with white craft paint and let dry for 15 minutes on a paper towel.
- Cut a teardrop shape from black construction paper for the back and glue it to the rear of the roll.
- Cut a small triangle beak from orange paper and glue it to the front just below eye level.
- Glue on googly eyes above the beak and wrap a narrow strip of orange paper around the neck as a scarf.
6. Pipe Cleaner Icicles
Easy
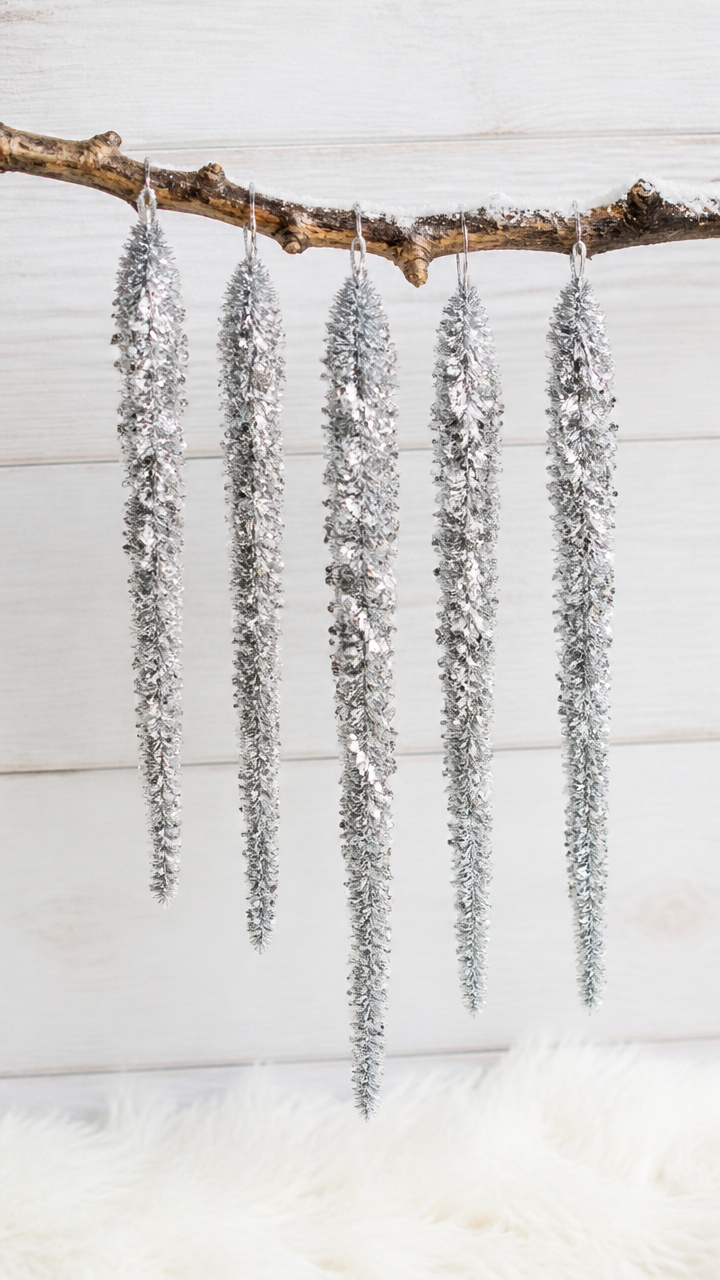
Shimmering strands of silver dangle from mantels and doorframes, catching glints like real frost. Bendable wire lets kids shape their own icy drips.
Materials Needed
- Silver chenille stems (5 per icicle strand)
- Clear tape
- Scissors
- Glitter glue (optional)
How to Make It
- Line up five silver chenille stems end to end, slightly overlapping each tip by 1/2 inch.
- Wrap the overlap points tightly with clear tape to connect them into one long strand.
- Gently bend the strand into a soft curve resembling an icicle’s drip shape.
- Optional: Run a thin line of glitter glue down the center and let dry for 20 minutes before hanging.
7. Button Mitten Art
Easy
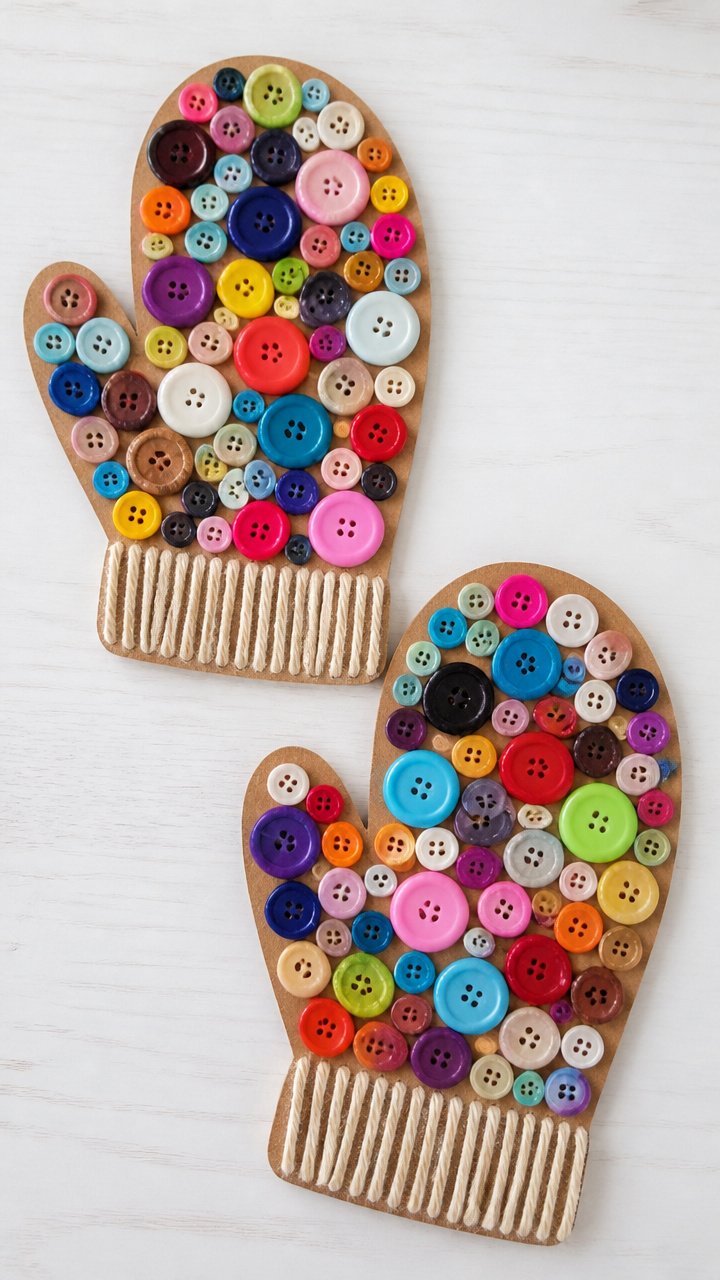
Two cardboard mittens brimming with mismatched buttons invite sorting, counting, and color games. This tactile piece doubles as a fine motor skill builder.
Materials Needed
- Brown cardboard (9×12 inch sheet)
- Assorted buttons (at least 20, various sizes and colors)
- White craft glue
- Scissors
- Pencil
- Ruler
How to Make It
- Draw two mitten shapes measuring 5 inches tall and 3 inches wide on the cardboard using pencil and ruler, then cut them out with scissors.
- Arrange buttons within the outline of each mitten, pressing each into a dab of glue placed beneath.
- Let glue dry completely for 30 minutes before handling.
- Display flat on a shelf or hang with tape on the wall.
8. Paper Bag Snow Suits
Easy
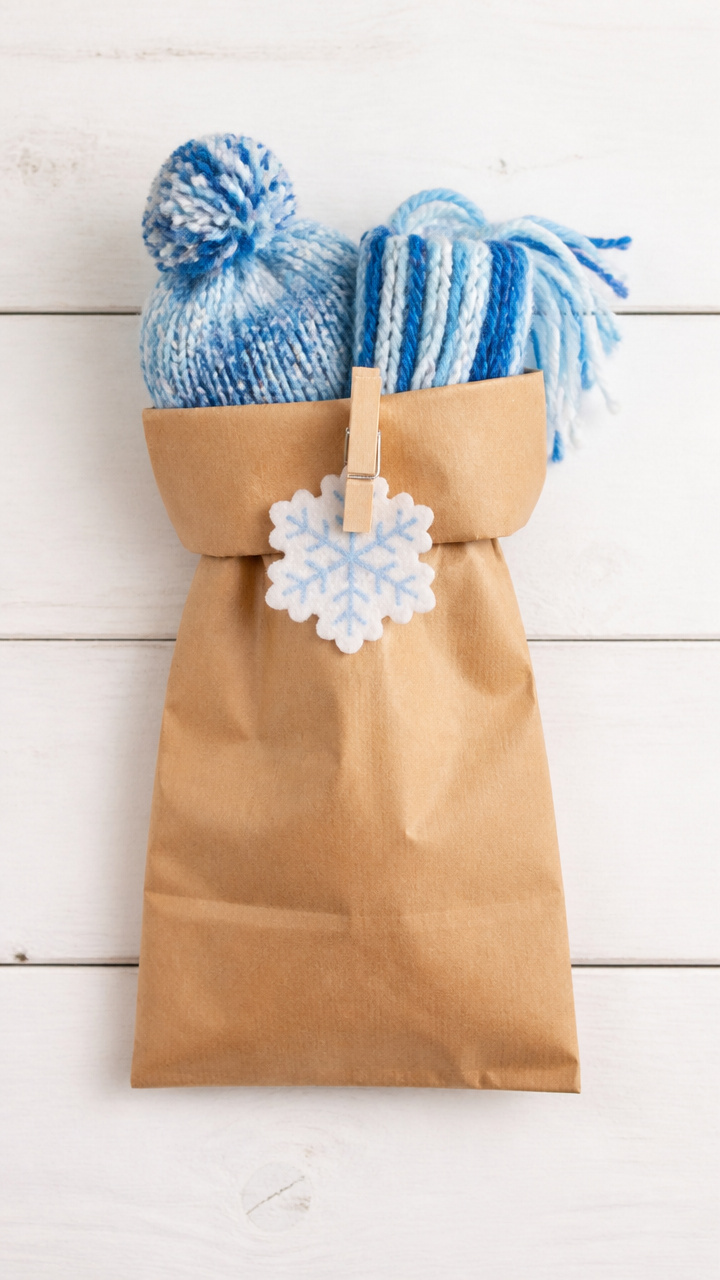
Miniature winter outfits stuffed into brown lunch bags make surprise gifts or classroom swaps. Each bundle holds a tiny knitted hat and scarf.
Materials Needed
- Brown paper lunch bag (1 per suit)
- White yarn (12-inch length)
- Blue yarn (12-inch length)
- Scissors
- Clothespin (1 per bag)
- Sticker (snowflake design, 1 per bag)
How to Make It
- Roll the white yarn into a small ball for the scarf and the blue yarn into another for the hat.
- Place both yarn balls inside the paper bag and fold the top down once.
- Clip the folded edge shut with a clothespin.
- Stick a snowflake sticker on the front of the bag.
9. Glitter Mason Jar Lamps
Moderate
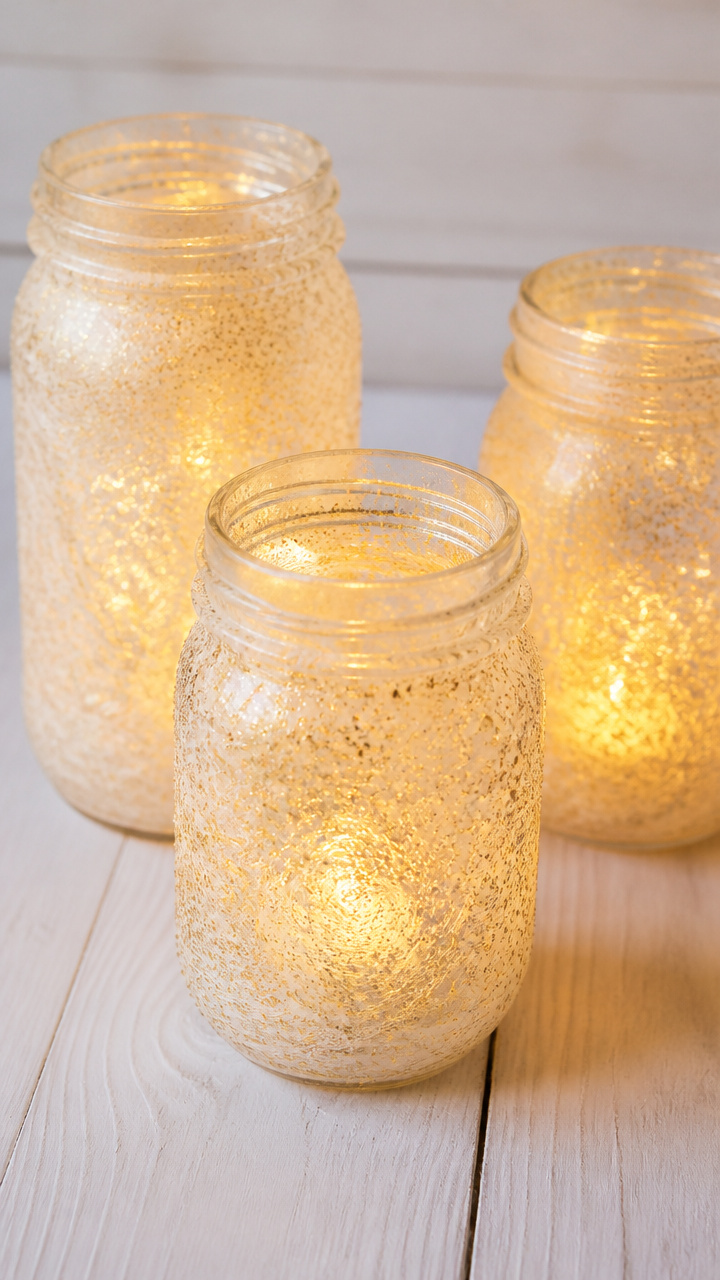
Golden sparkle swirls inside glass jars lit by battery tea lights. These glowing vessels cast soft patterns across bedroom walls at bedtime.
Materials Needed
- Clear 8 oz mason jar (1 per lamp)
- Gold glitter (fine, 2 tablespoons)
- White glue (3 tablespoons)
- Plastic spoon
- Battery-operated tea light (1 per jar)
- Paper plate
- Painter's tape
How to Make It
- Mix gold glitter and white glue thoroughly on a paper plate using the plastic spoon until fully combined.
- Use painter's tape to mask off the bottom 1 inch of the jar, then spread the glitter mixture evenly over the exposed upper portion with your finger.
- Let dry upright for 2 hours, then remove the tape and peel off any excess from the base.
- Place the tea light inside and switch it on after dark.
10. Yarn-Wrapped Snowflakes
Easy
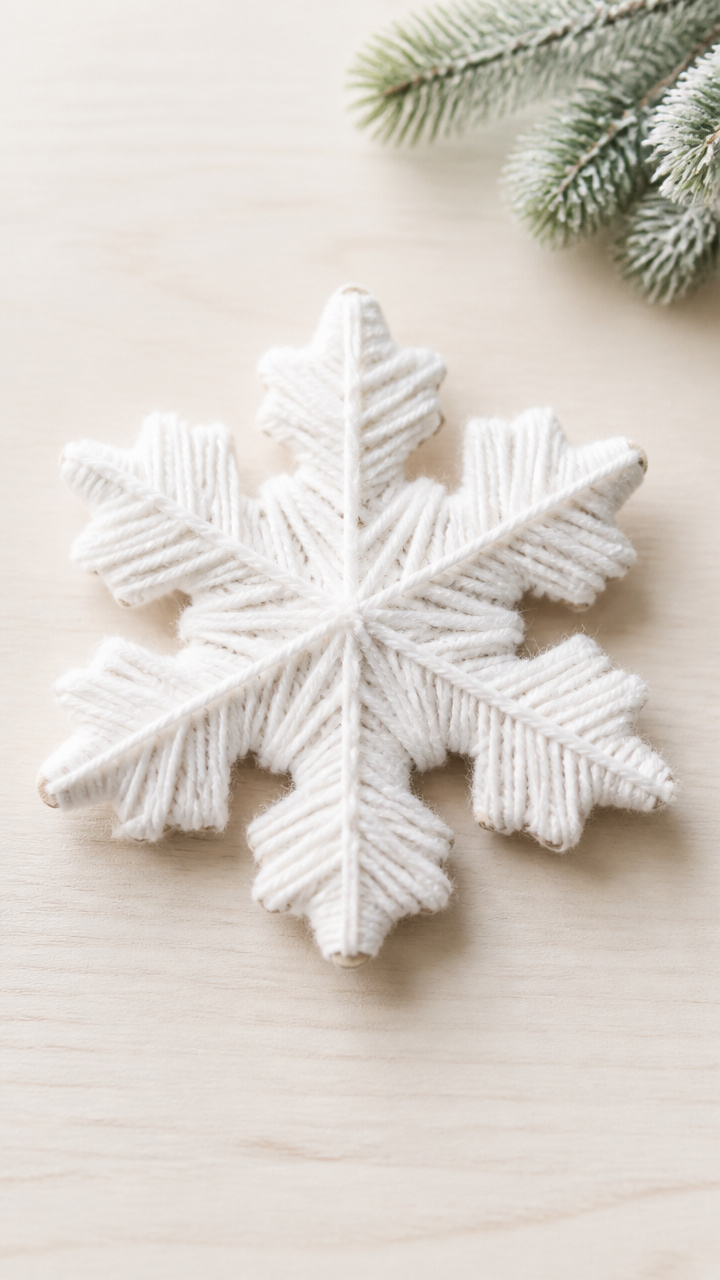
Stiff cardboard frames wrapped tightly in white yarn bloom into 3D snow crystals. Hang them singly or group several for a drifting effect.
Materials Needed
- White cardboard (6×6 inch sheet)
- White yarn (10 feet per snowflake)
- School glue
- Scissors
- Pencil
- Ruler
How to Make It
- Draw a six-pointed snowflake frame on cardboard using pencil and ruler, with each arm 2 inches long and 1/2 inch wide, then cut it out.
- Apply a small dot of glue to one end of the cardboard arm and press the yarn end onto it.
- Wrap the yarn tightly around each arm, adding a dab of glue every inch to secure, and continue until all arms are covered.
- Trim the yarn end and glue it down; let dry 15 minutes before hanging with thread.
11. Cereal Loop Chains
Easy
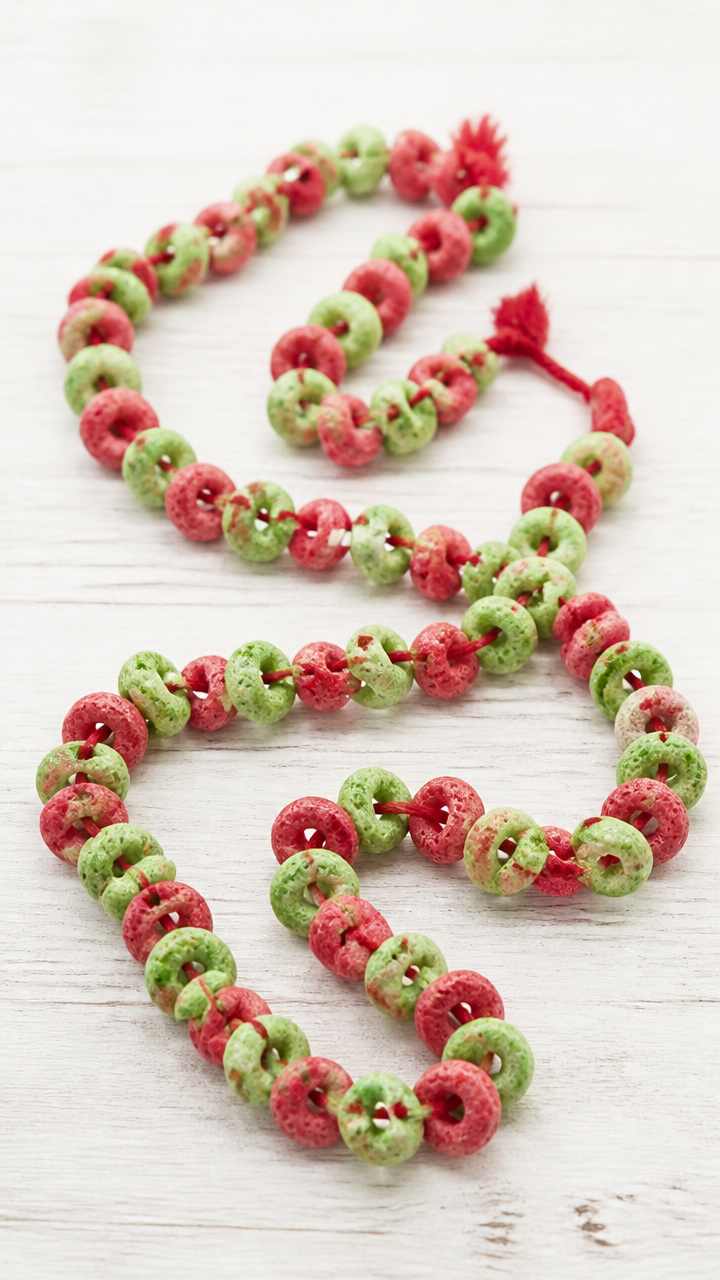
Bright garlands made from dyed oat rings loop together with yarn. The scent of cinnamon rises as little hands string breakfast into decoration.
Materials Needed
- Plain oat cereal (1 cup)
- Red food coloring (10 drops)
- Green food coloring (10 drops)
- Two small bowls
- Yarn (3 feet length)
- Tapestry needle (large-eye)
- Paper towels
How to Make It
- Divide cereal between two bowls and add red food coloring to one, green to the other, stirring gently until evenly tinted.
- Spread colored cereal on paper towels and let dry for 1 hour, flipping halfway.
- Thread the tapestry needle with yarn and knot the end.
- String dried cereal loops alternating colors until yarn is full, then tie ends together to form a circle.
12. Construction Paper Mittens
Easy
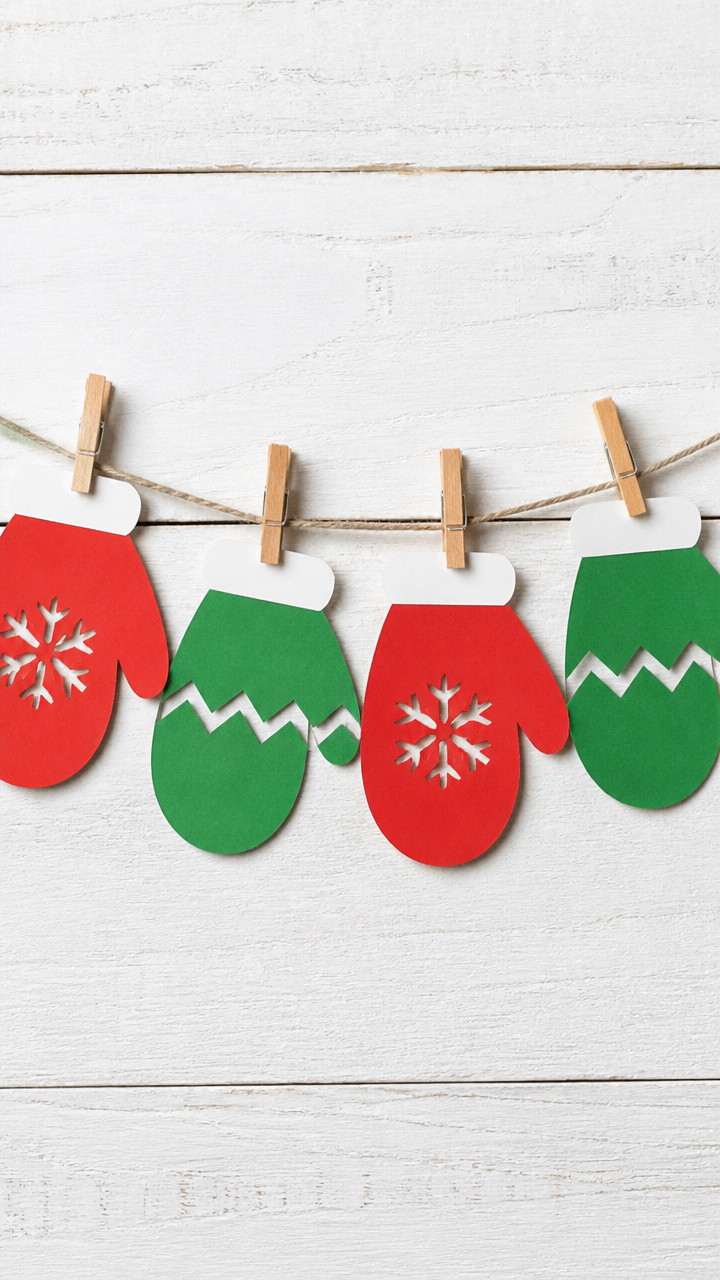
Bold pairs of mittens cut from red and green paper dangle from a clothesline of twine. These make a festive classroom border or hallway display.
Materials Needed
- Red construction paper (8.5×11 inch sheet)
- Green construction paper (8.5×11 inch sheet)
- Scissors
- Glue stick
- Twine (4 feet length)
- Clothespins (10 per display)
How to Make It
- Fold each paper sheet in half lengthwise, draw half a mitten shape along the fold measuring 4 inches tall, then cut through both layers.
- Unfold to reveal full mittens and repeat to make five red and five green pairs.
- Glue matching mittens back to back so color shows on both sides.
- Clip each pair to the twine using clothespins, spacing evenly, and hang across a doorway or wall.
13. Pinecone Bird Feeders
Easy
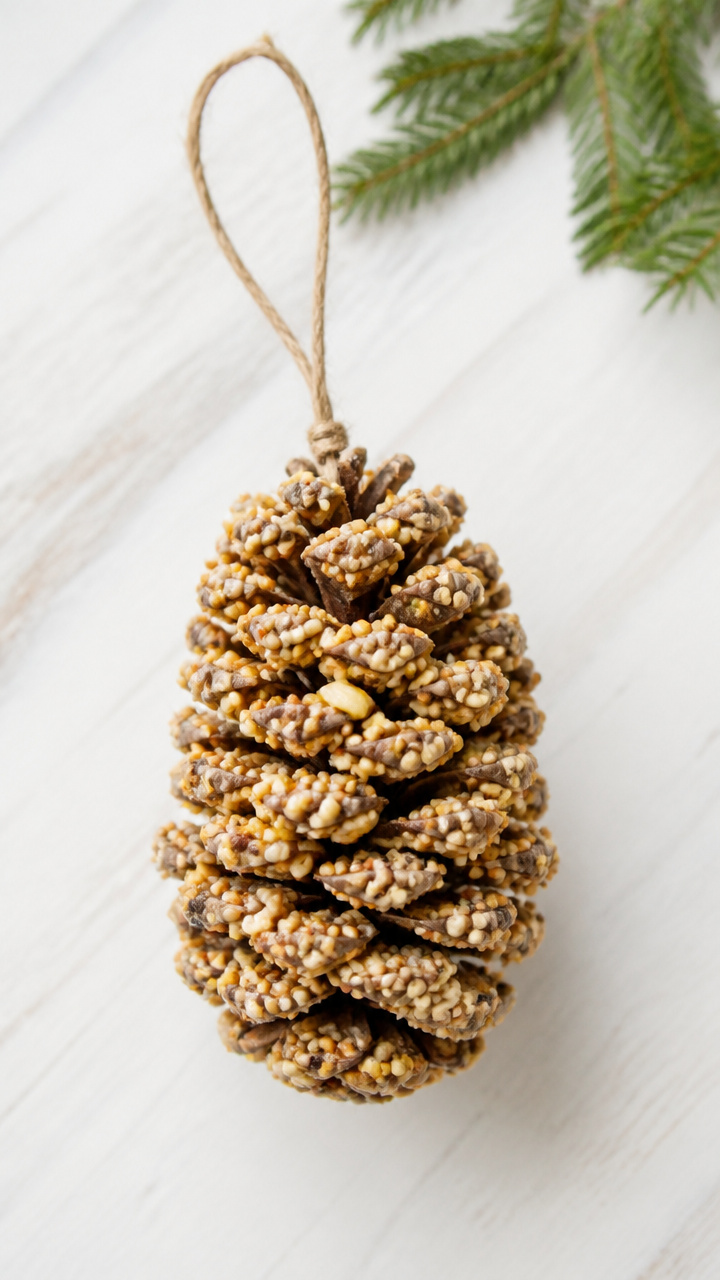
Sticky cones rolled in seeds become outdoor treats for chirping visitors. Hang them from bare branches and watch feathered friends arrive.
Materials Needed
- Pinecone (1 per feeder)
- Peanut butter (3 tablespoons)
- Birdseed (1/2 cup)
- Butter knife
- String (12-inch length)
- Plate
How to Make It
- Tie a knot around the pinecone’s top so it can hang freely.
- Spread peanut butter all over the pinecone using the butter knife, pressing into crevices.
- Pour birdseed onto a plate and roll the coated pinecone in it until fully covered.
- Let dry for 30 minutes on wax paper before hanging outside.
14. Crayon Melting Art
Moderate
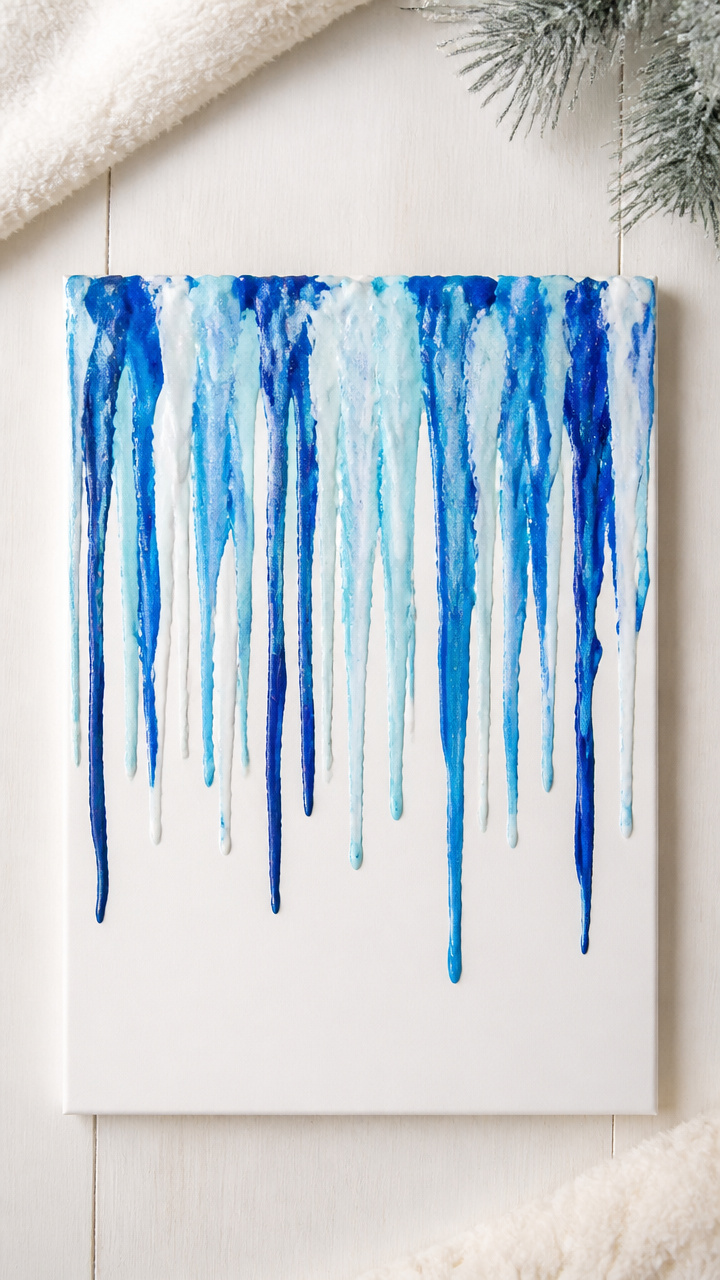
Broken crayon bits melt into colorful icicles down thick cardstock. Heat reveals waxy rivers in shades of frost and flame.
Materials Needed
- Old crayons (peeled, 5 blue/white ones per project)
- A4 white cardstock (1 sheet)
- Hairdryer
- Push pin
- Tape
- Aluminum foil
How to Make It
- Use push pin to make a small hole near the top center of the cardstock and insert crayon tips point-down through the hole.
- Tape the cardstock upright against a wall with aluminum foil spread below to catch drips.
- Turn on hairdryer to high heat and aim it upward at the crayons, moving slowly until wax begins to melt and run down the paper.
- Let cool completely before removing tape and displaying.
15. Foam Sheet Polar Bears
Easy
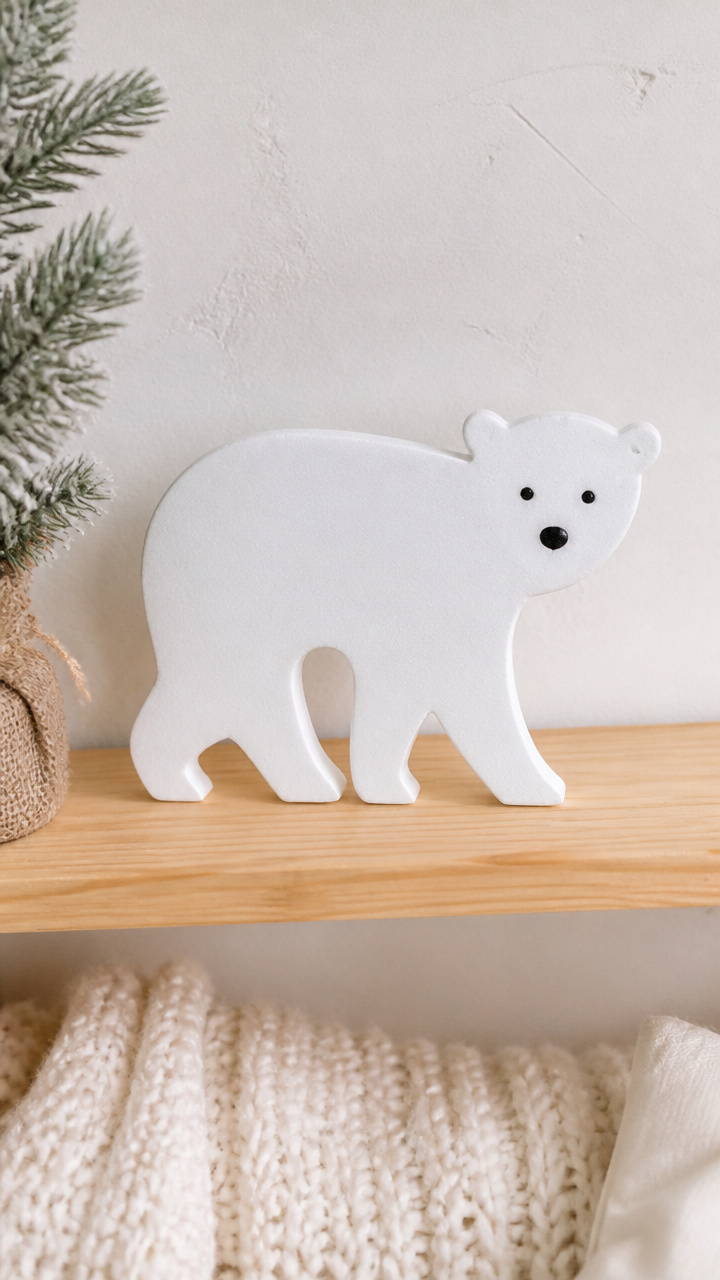
Thick white foam cut into bear silhouettes stands stiffly on shelves or magnet boards. Smooth edges make them safe for tiny explorers.
Materials Needed
- White craft foam sheet (9×12 inch)
- Black craft foam scrap
- Scissors
- Glue stick
- Pencil
- Magnet strip (1×0.5 inch, optional)
How to Make It
- Draw a simple polar bear side profile on the white foam with pencil, about 4 inches tall, then cut it out with scissors.
- Cut two small circles from black foam for eyes and glue them near the top of the head.
- Glue a tiny black oval below for the nose.
- Optional: Glue a magnet strip to the back for fridge display.
16. Toilet Paper Roll Trees
Easy
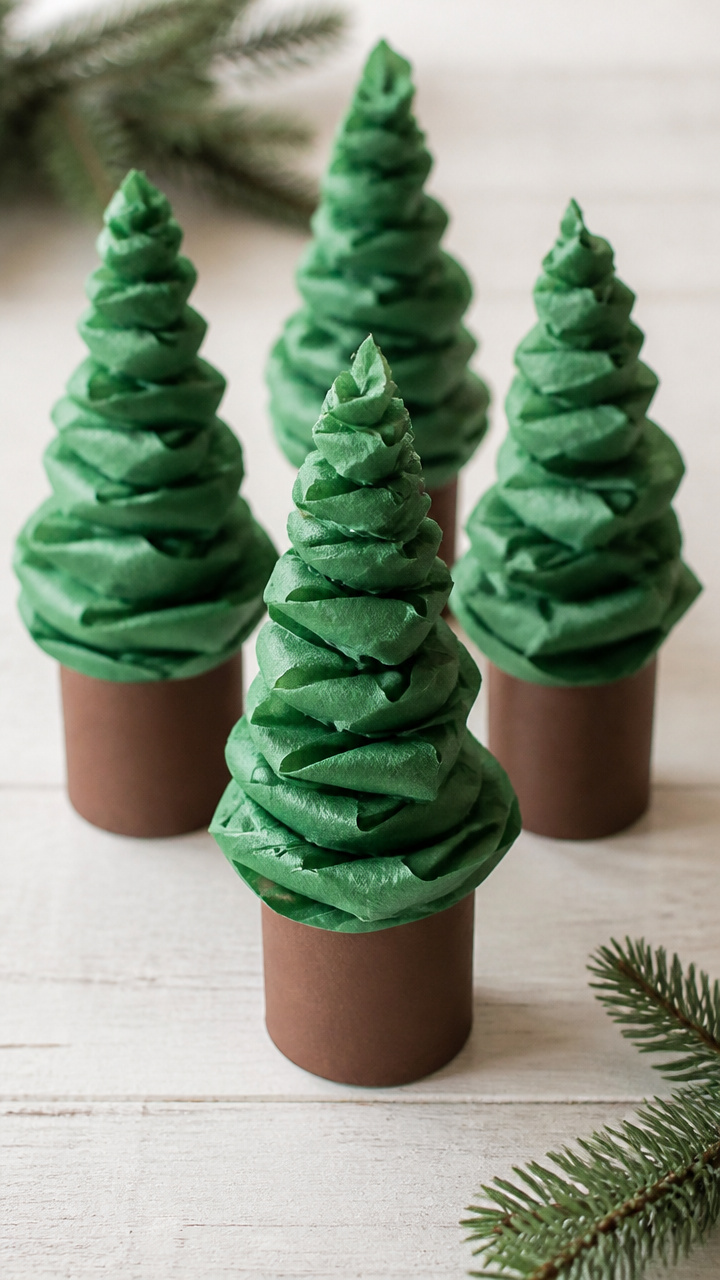
Rolled green streamers spiral up cardboard tubes to form miniature evergreens. Line several on a tray for a wintry forest scene.
Materials Needed
- Empty toilet paper roll (1 per tree)
- Green tissue paper (10×10 inch square)
- Brown paint
- Paintbrush (size 3 flat)
- White craft glue
- Scissors
How to Make It
- Paint the toilet paper roll with brown paint and let dry for 15 minutes on a paper towel.
- Cut the tissue paper into 1-inch wide strips, stopping 2 inches from one edge to create a fringe.
- Starting at the bottom, wrap the uncut edge around the roll and glue it in place, then fan out the fringes upward in layers.
- Overlap new rows slightly as you spiral up until the roll is fully covered.
17. Glitter Slime Snow Globes
Moderate
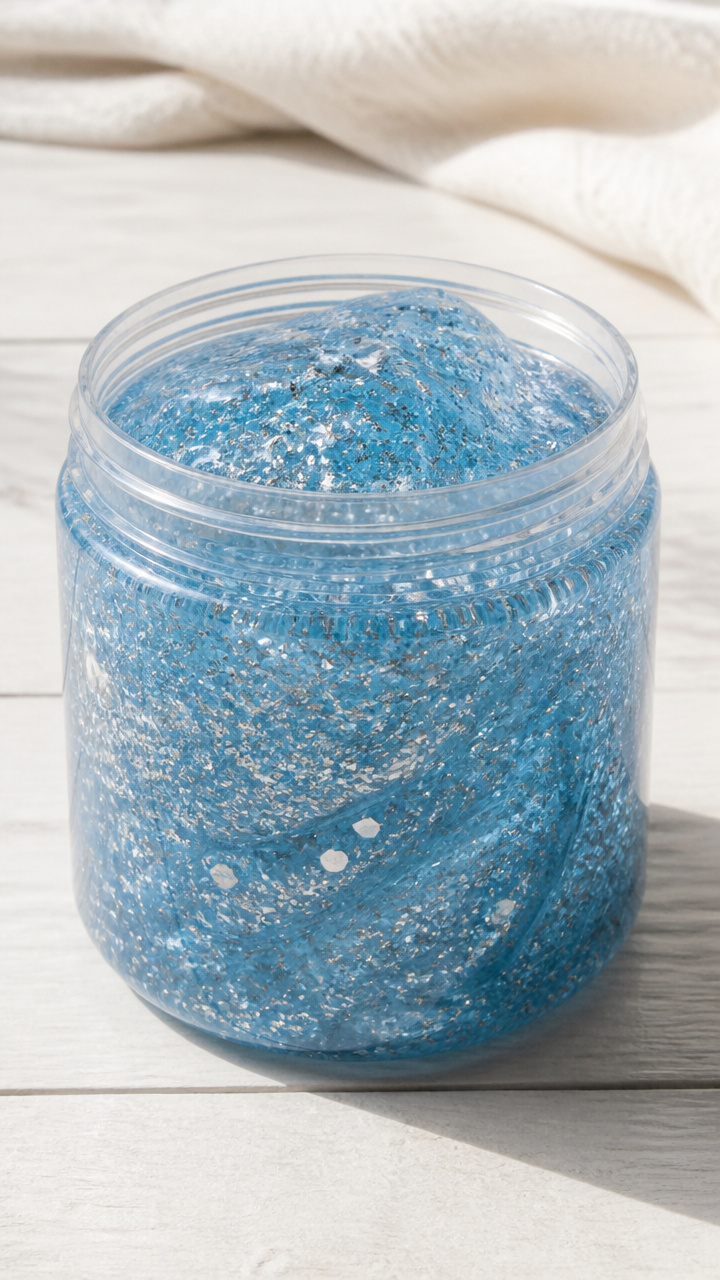
Stretchy blue slime swirled with silver glitter tumbles inside sealed jars. Poke and pull it for calming sensory fun.
Materials Needed
- Clear school glue (4 ounces)
- Liquid starch (2 ounces)
- Distilled water (1 tablespoon)
- Blue food coloring (5 drops)
- Fine silver glitter (1 tablespoon)
- Plastic jar with lid (6 oz, wide mouth)
- Mixing bowl
- Spoon
How to Make It
- Pour glue into mixing bowl, add water and blue food coloring, stir well until uniform in color.
- Sprinkle in glitter and mix gently.
- Add liquid starch slowly while stirring until slime pulls away from the bowl and forms a stretchy ball.
- Knead for 2 minutes, then place inside jar, seal tightly, and store with lid on.
18. Felt Hat Hats
Easy
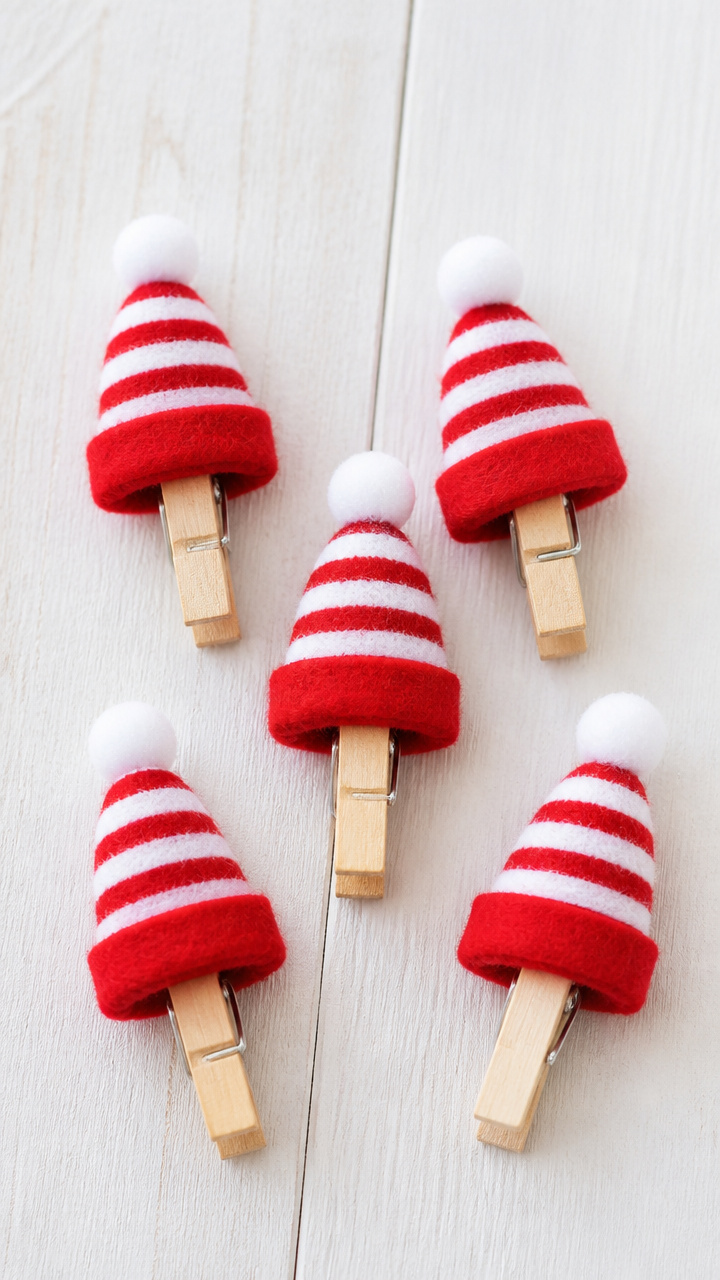
Tiny wool hats in red and white stripes fit snugly over clothespins. Clip them to photos or cards for a personal winter touch.
Materials Needed
- Red felt sheet (6×6 inch)
- White felt sheet (6×6 inch)
- Clothespin (1 per hat)
- Fabric glue
- Scissors
- Ruler
How to Make It
- Cut a rectangle from red felt measuring 2 inches wide by 4 inches long.
- Cut a 0.5-inch wide strip from white felt and glue it horizontally across the red rectangle 1 inch from the bottom.
- Roll the rectangle into a cylinder and glue the seam closed.
- Glue the cylinder cap to the flat side of the clothespin to form a standing hat.
19. Puffy Paint Windows
Easy
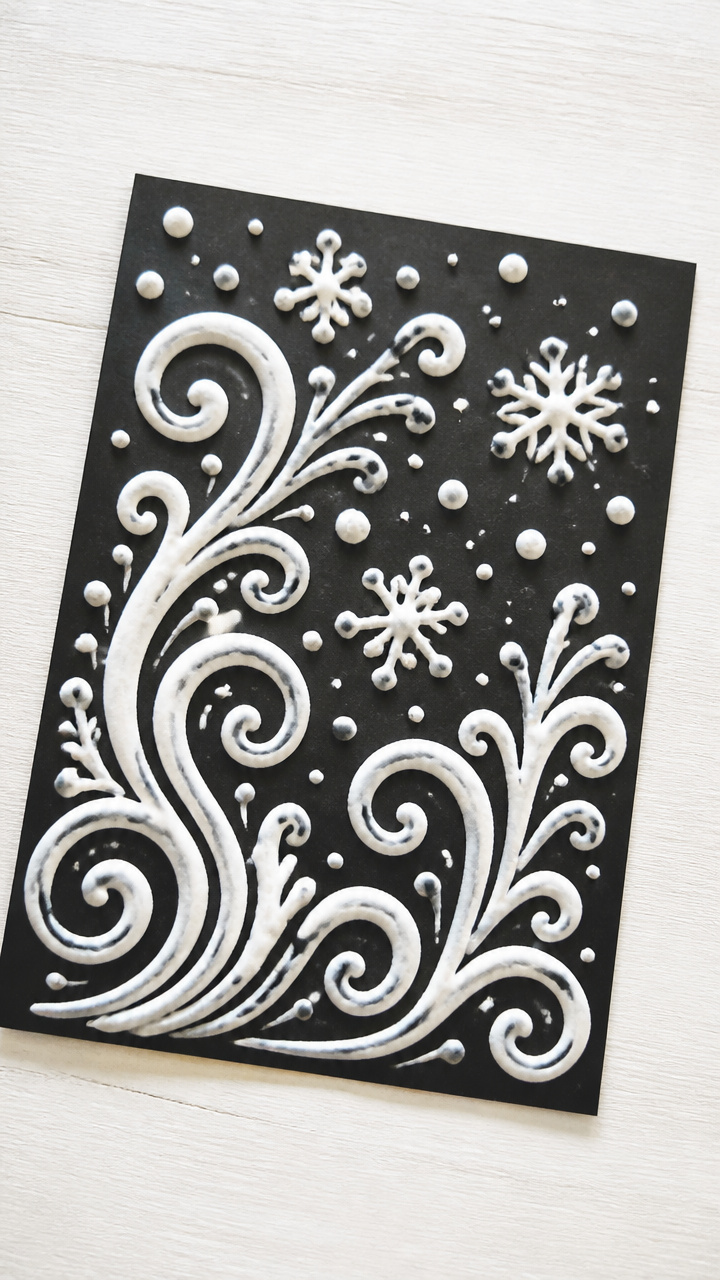
Swirled blobs of homemade paint rise slightly from paper, mimicking frost patterns. When dry, they feel soft and cushiony to the touch.
Materials Needed
- White school glue (1/2 cup)
- Shaving cream (1 cup)
- Mixing bowl
- Spoon
- Black construction paper (9×12 inch sheet)
- Plastic condiment bottle with tip
How to Make It
- Mix equal parts white glue and shaving cream in a bowl with a spoon until smooth and fluffy.
- Spoon the mixture into the condiment bottle.
- Squeeze lines and swirls onto the black paper to resemble frost on glass.
- Let dry flat overnight until puffy and firm to the touch.
20. Candy Cane Reindeer
Easy
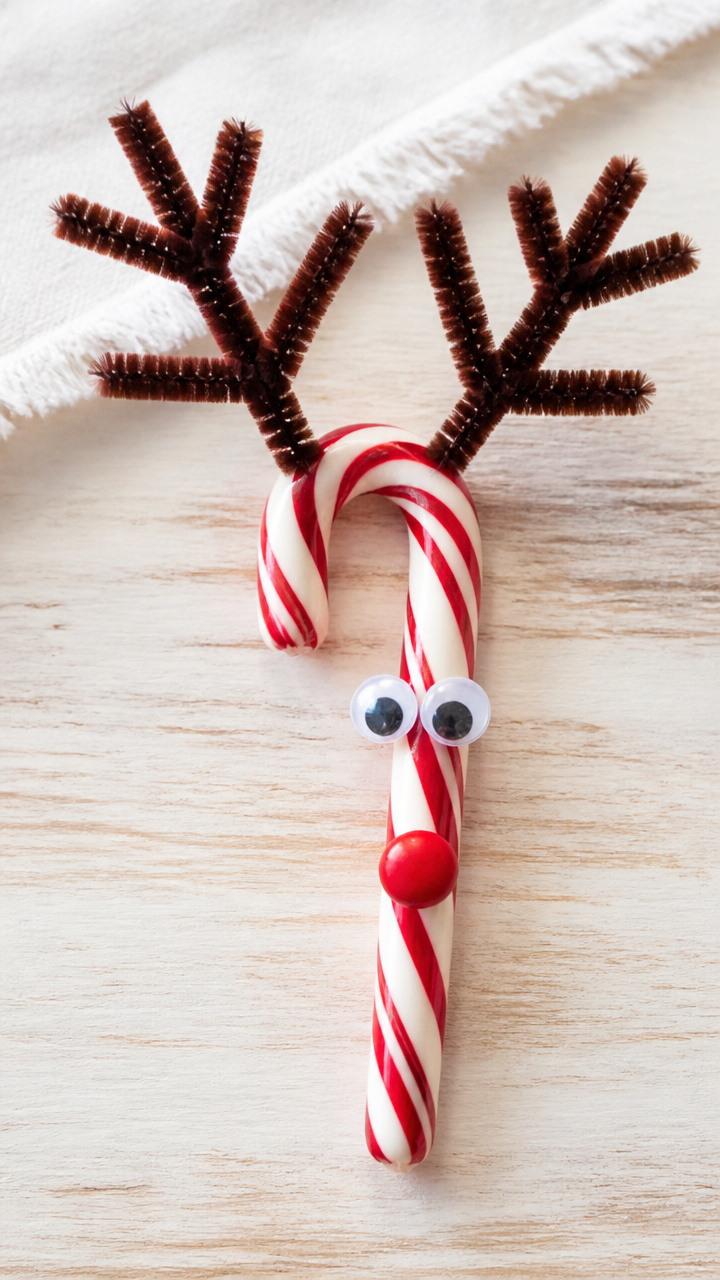
Peppermint-striped candies become reindeer heads with googly eyes and pipe cleaner antlers. Sweet and simple, they double as edible gifts.
Materials Needed
- Red and white striped candy cane (1 per reindeer)
- Glue dots (2 per reindeer)
- Googly eyes (2 per reindeer)
- Brown chenille stem (1 per reindeer)
- Scissors
How to Make It
- Press a glue dot to the curved part of the candy cane and attach two googly eyes just below the hook.
- Cut the chenille stem in half and twist each piece into a spiral antler shape.
- Press one glue dot to the top center of the candy cane and attach both antlers.
- Let set for 5 minutes before handling or gifting.
21. Paper Plate Snowmen
Easy
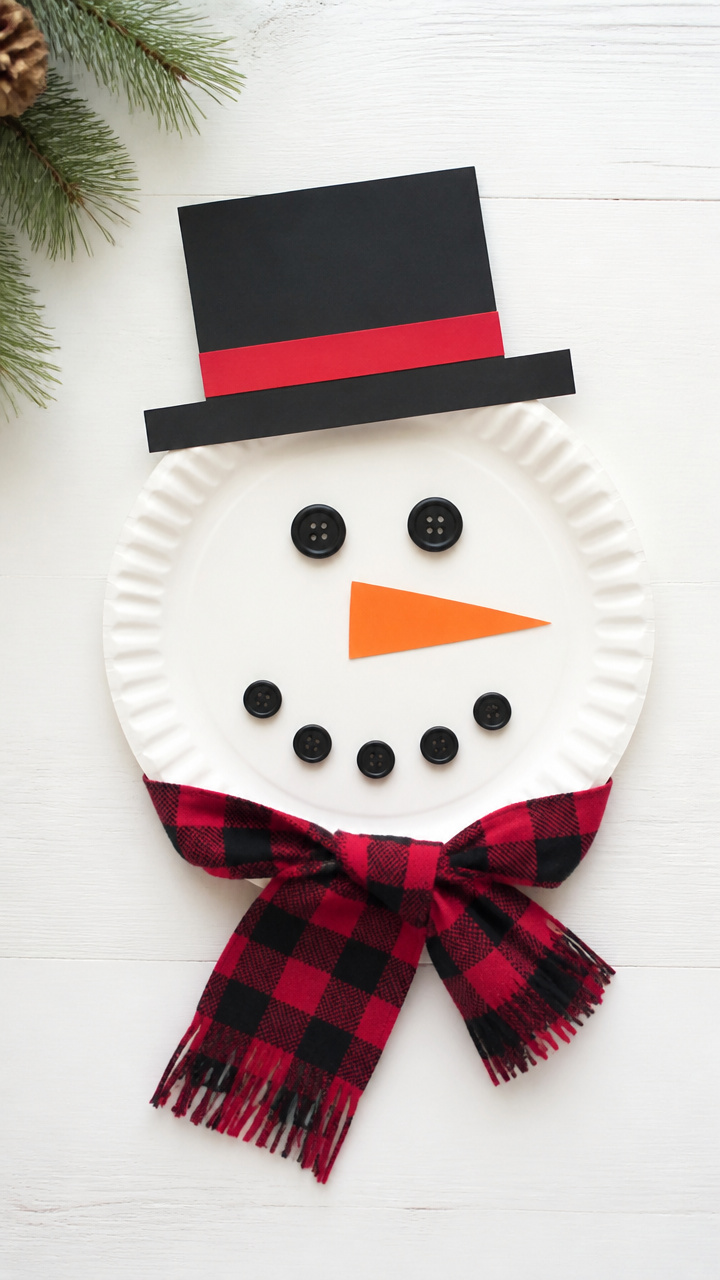
One white plate becomes a smiling snowman with carrot nose and coal-button belly. Kids love adding scarf and hat details with scraps.
Materials Needed
- White paper plate (1 per snowman)
- Orange construction paper
- Black construction paper
- Glue stick
- Scissors
- Brown marker
- Fabric scrap (2×6 inch strip)
How to Make It
- Cut a small triangle from orange paper for the nose and three circles from black paper for buttons.
- Glue the nose slightly off-center on the plate and the buttons in a downward row.
- Draw two eyes and a smile with the brown marker above the nose.
- Tie the fabric scrap around the lower third of the plate as a scarf.
22. Ice Tray Igloos
Easy
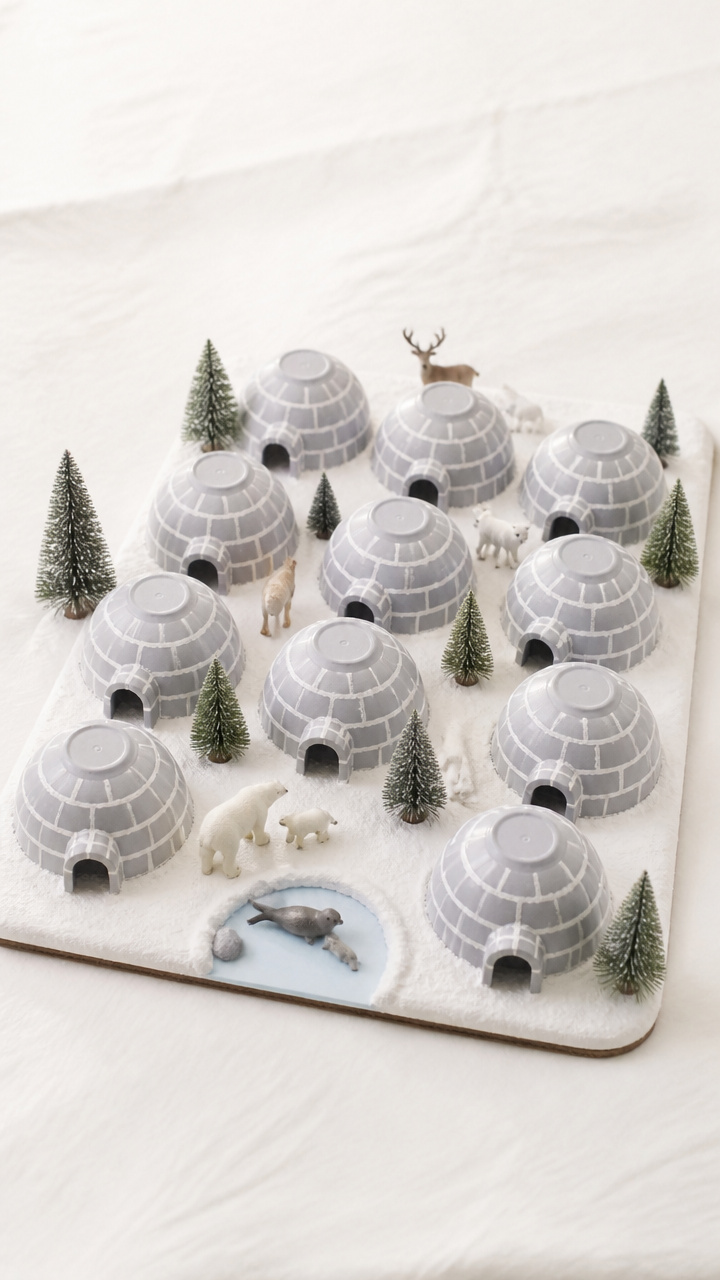
Miniature domes built from painted ice cube trays hold tiny animals inside. Perfect for imaginative play on snowy days.
Materials Needed
- White plastic ice cube tray (standard 12-cup size)
- Gray acrylic paint
- Paintbrush (size 2 round)
- White craft glue
- Plastic arctic animals (3-5 pieces)
- Cardboard base (6×6 inch)
How to Make It
- Paint each cup of the ice tray with gray acrylic paint and let dry for 20 minutes on a flat surface.
- Glue six cups together in a half-circle on the cardboard base to form the igloo wall.
- Glue a second row of five cups on top, staggering the joints, then cap with one centered cup at the peak.
- Let dry 30 minutes, then place animals inside for play.
23. Wax Resist Snow Scenes
Easy
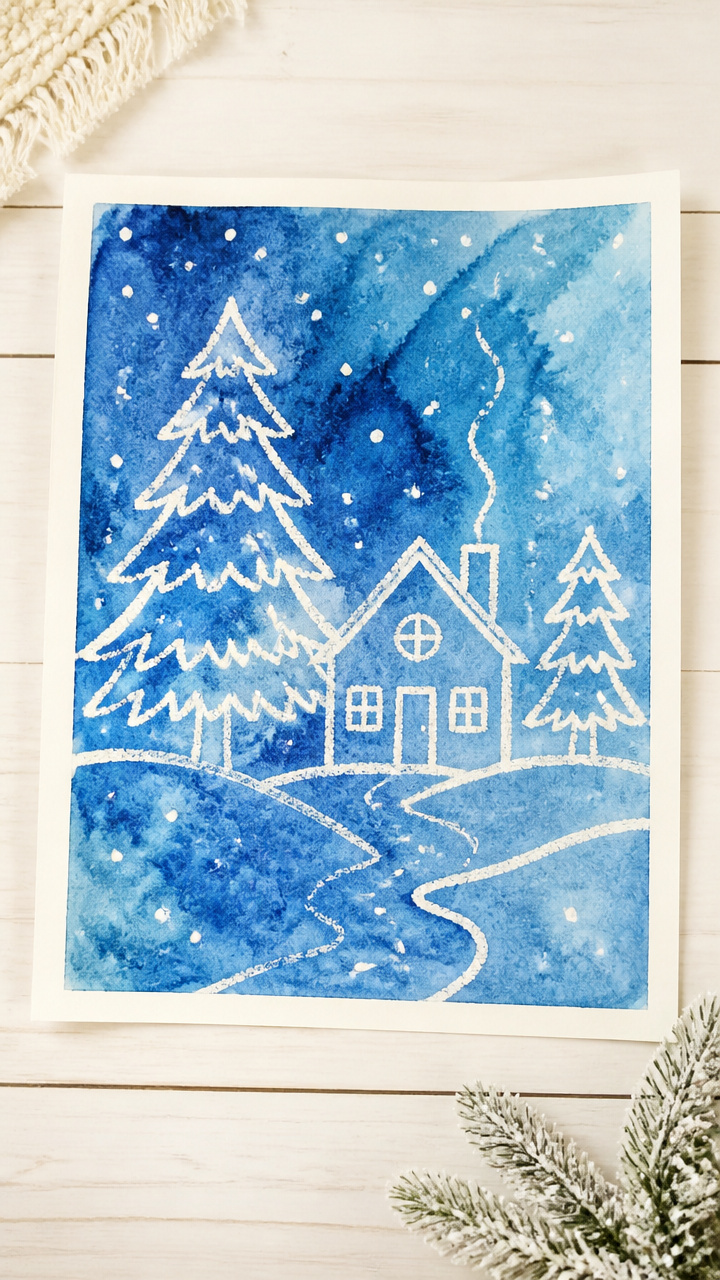
Crayon-drawn trees and houses hide under blue paint, revealing crisp white outlines when washed over. A magic-like reveal every time.
Materials Needed
- White drawing paper (8.5×11 inch)
- White crayon
- Blue liquid watercolor (2 tablespoons)
- Paintbrush (size 5 flat)
- Spray bottle (filled with water)
- Tray
How to Make It
- Draw trees, houses, or snowmen on the paper using the white crayon, pressing firmly to leave visible wax trails.
- Lay the paper on a tray and mist lightly with water from the spray bottle.
- Paint a wash of blue watercolor over the entire surface using broad strokes.
- Let dry flat for 1 hour; the crayon areas will resist the paint and stay white.
24. Sock Snow Dolls
Moderate
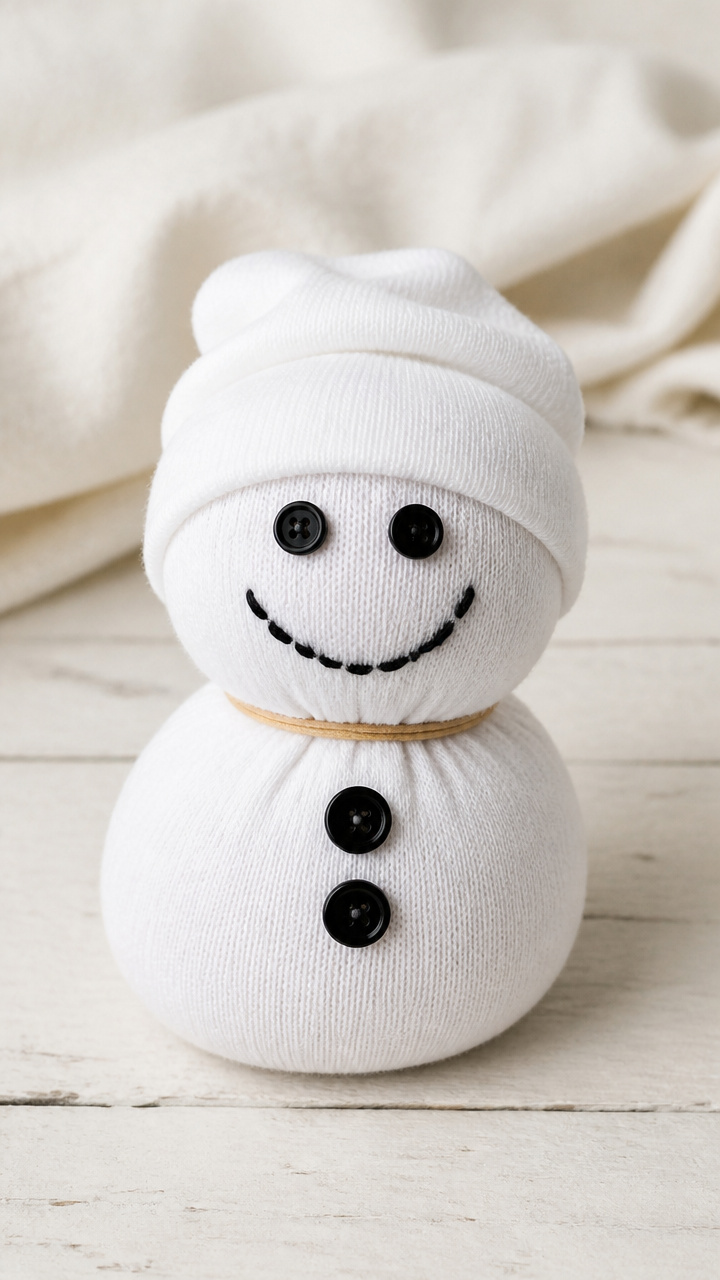
Leftover socks stuffed with rice become weighted snow figures with embroidered smiles. They sit steadily on windowsills without tipping.
Materials Needed
- White ankle sock (1 per doll)
- Uncooked rice (1/2 cup)
- Rubber band
- Embroidery floss (black, 12-inch length)
- Needle (blunt tip)
- Buttons (2 per doll)
- Fabric scraps (for scarf)
How to Make It
- Fill the sock with rice, packing it firmly to form a rounded base, then tie the open end shut with a rubber band.
- Thread the needle with black floss and stitch a curved smile just above the tied end.
- Glue two buttons above the mouth for eyes.
- Wrap a small fabric scrap around the neck as a scarf and secure with a dot of glue.
25. Cinnamon Playdough Orbs
Easy
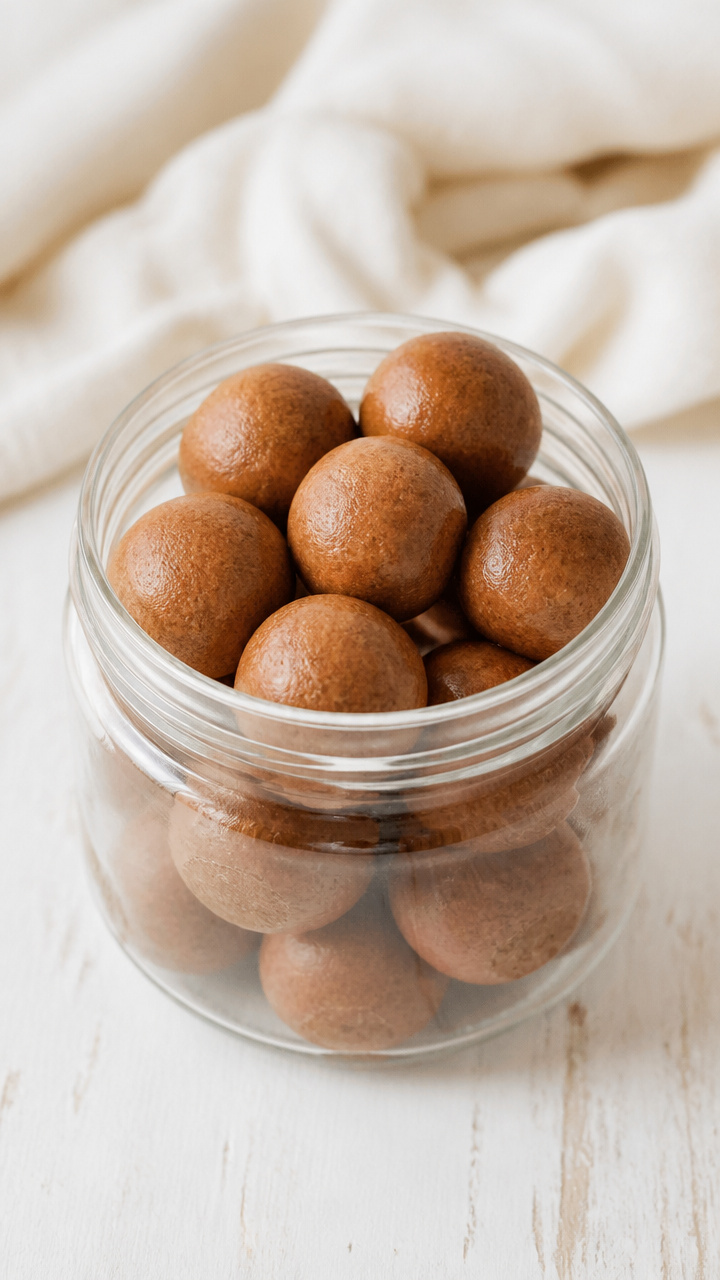
Spiced dough rolled into balls fills the room with warmth and comfort. Safe to taste but too pretty to eat, they last weeks in a jar.
Materials Needed
- 1 cup all-purpose flour
- 1/2 cup table salt
- 1 tablespoon ground cinnamon
- 1 tablespoon vegetable oil
- 3/4 cup boiling water
- Mixing bowl
- Spoon
- Airtight container
How to Make It
- Combine flour, salt, and cinnamon in a mixing bowl and stir with a spoon.
- Add oil and slowly pour in boiling water while stirring until a shaggy dough forms.
- Cool for 5 minutes, then knead by hand for 3 minutes until smooth.
- Roll into balls and store in an airtight container for up to 3 months.
Grab a few sheets of paper, a glue stick, and whatever buttons or yarn you have nearby. One small step is all it takes to start a tradition.