22 Winter Table Centerpiece Crafts for Cozy Dinners

Flickering candlelight reflects off frosted pinecones and hand-poured beeswax tapers, turning your dining table into a quiet sanctuary. The air carries the faint scent of cinnamon and evergreen as snow dusts the windowsill outside.
These centerpieces aren’t just decoration. They’re small acts of care that slow down winter evenings and invite conversation. Each one is made with intention, using materials you can hold in your hands and shape with your own rhythm.
1. Pinecone Candle Ring
Easy
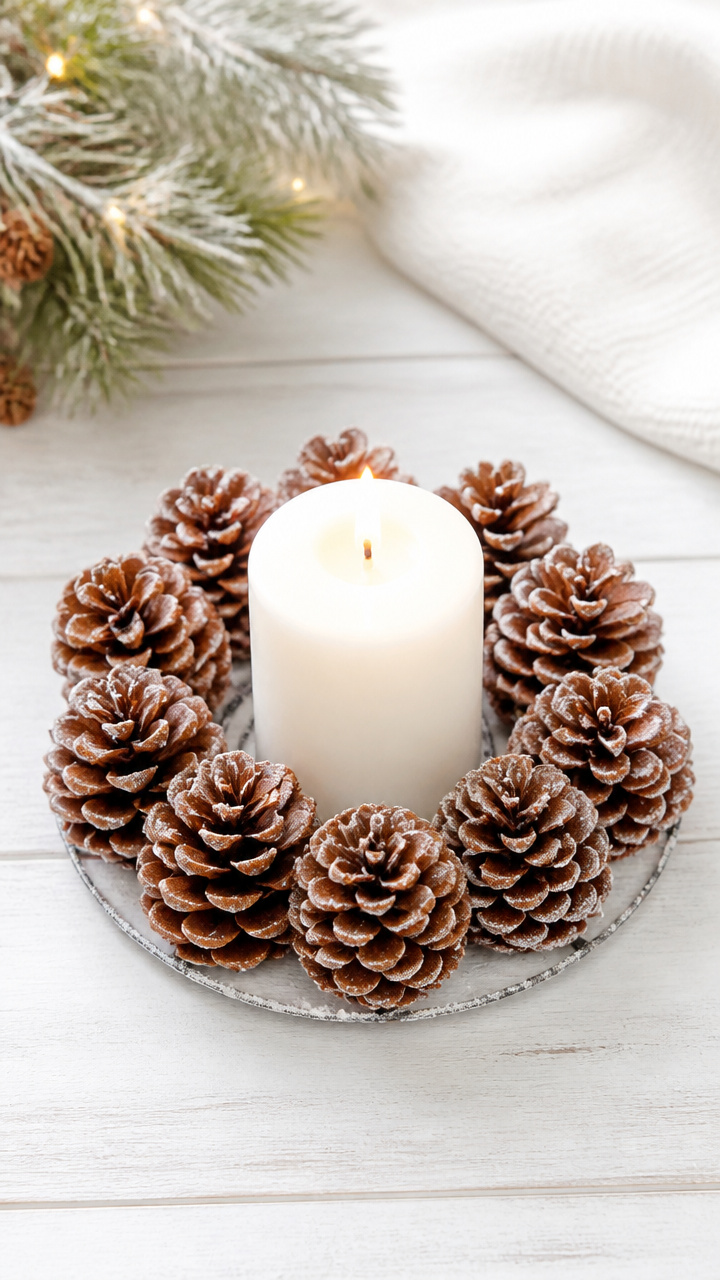
Natural pinecones spiral around a pillar candle, held by a wire base and lightly dusted with faux snow for woodland charm. This centerpiece brings forest warmth to any dinner table.
Materials Needed
- 12 medium pinecones, dry and clean
- 18-inch silver floral wire
- 1 white pillar candle, 3 inches tall
- Faux snow spray, 4 oz can
- Wire cutters
How to Make It
- Shape the floral wire into a circle slightly larger than the candle's diameter and twist the ends to secure.
- Apply a dab of hot glue to the base of each pinecone and attach them point-side out around the wire ring, spacing evenly.
- Spray the pinecones lightly with faux snow, holding the can 10 inches away, and let dry for 15 minutes.
- Place the candle upright in the center of the ring, ensuring it sits stable before lighting.
2. Salt Dough Ornaments Display
Moderate
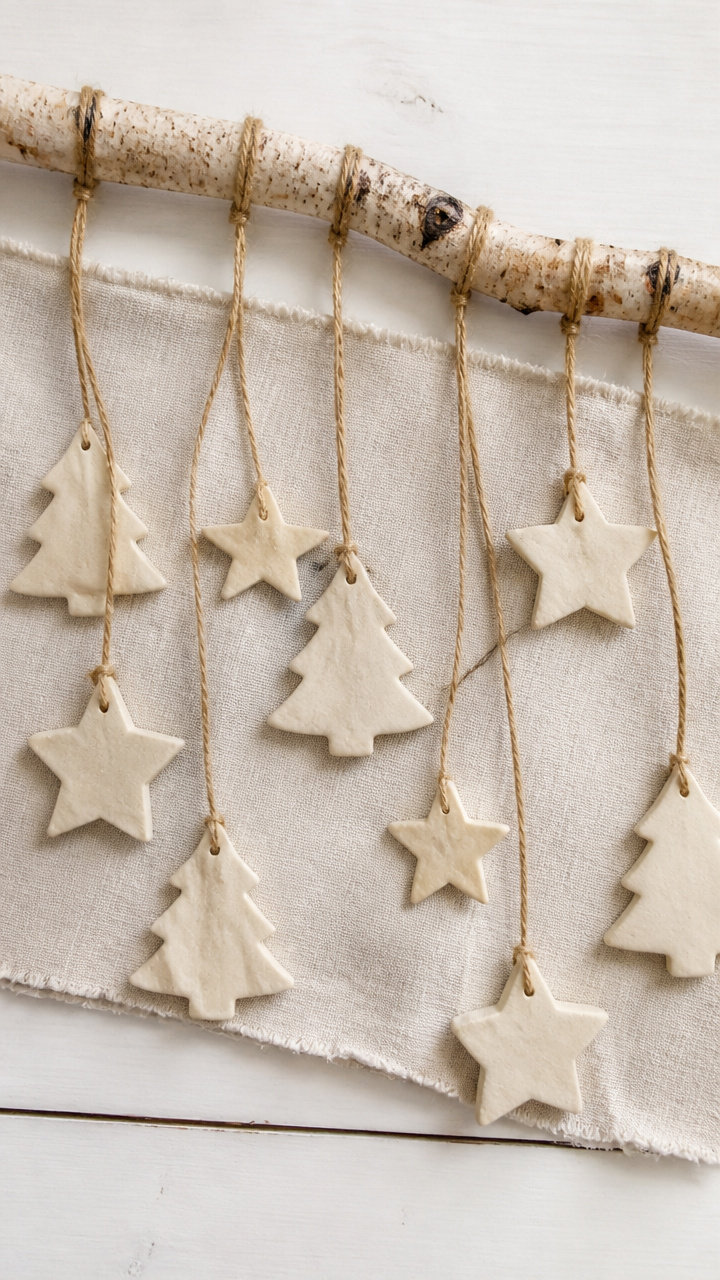
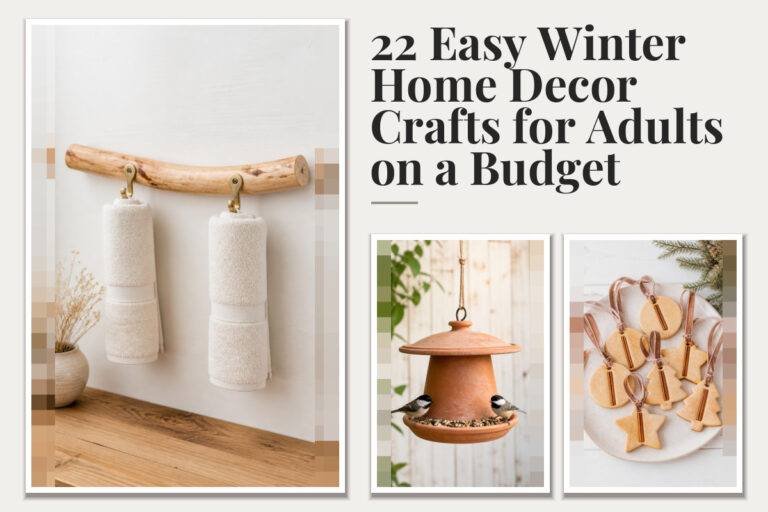
Hand-shaped salt dough stars and trees bake crisp and pale, then hang from a low birch branch above a linen runner. This craft invites simple joy with every handmade curve.
Materials Needed
- 2 cups all-purpose flour
- 1 cup table salt
- 1 cup water
- Wooden rolling pin
- Star and tree-shaped cookie cutters, 2 each
- Birch branch, 18 inches long
- Twine, 10 feet
- Small eye hooks, 6
- White acrylic paint
- Paintbrush, 1/2 inch flat
How to Make It
- Mix flour, salt, and water in a bowl until a smooth dough forms, kneading briefly on a floured surface.
- Roll the dough to 1/4 inch thickness and cut out six shapes using the cookie cutters.
- Use a straw to poke a hole near the top of each ornament for hanging.
- Bake at 200°F for 3 hours, then let cool completely.
- Paint each ornament with white acrylic paint and let dry for 30 minutes.
- Screw eye hooks into the birch branch spaced 3 inches apart.
- Cut six 16-inch lengths of twine and tie one end through each ornament hole, the other to an eye hook.
- Lay the branch across the center of your table on a folded linen runner.
3. Frozen Berry Lantern
Moderate
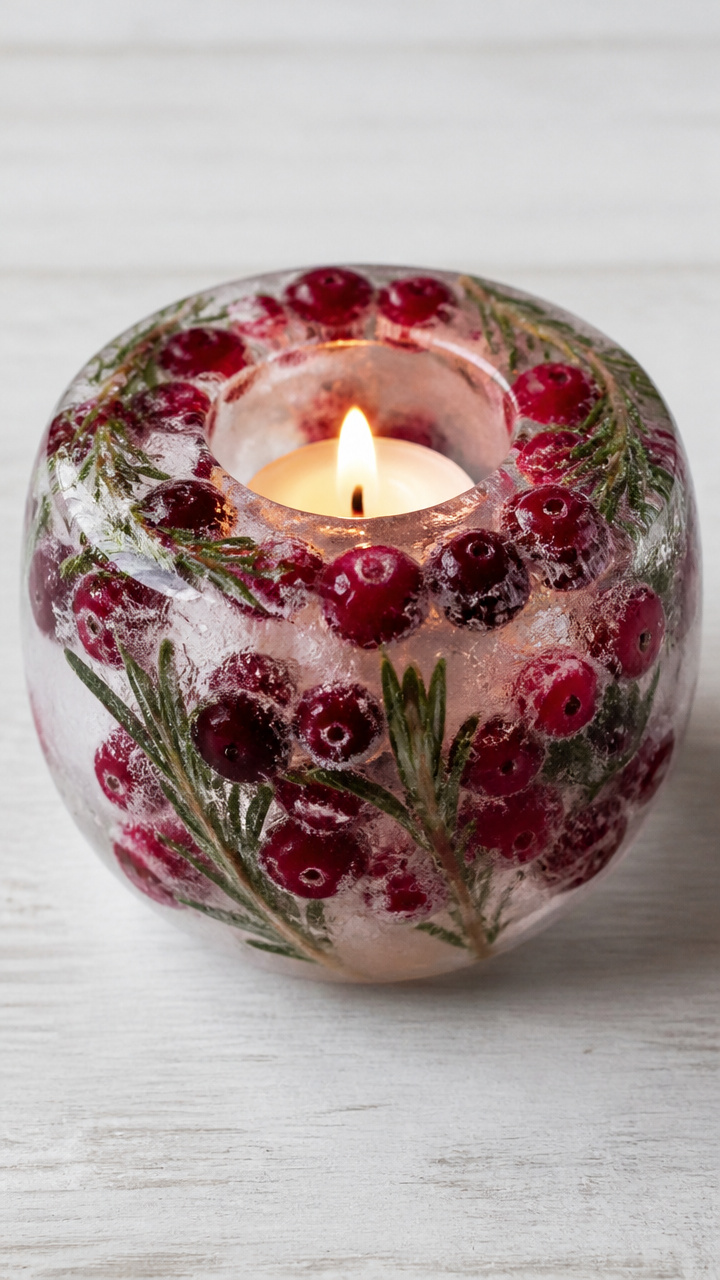
Cranberries and rosemary sprigs freeze inside a clear mold, forming a glowing ice lantern that softens candlelight. It’s a fleeting piece of winter magic.
Materials Needed
- Silicone bundt pan, 8-cup capacity
- 2 cups fresh cranberries
- 4 sprigs fresh rosemary
- Distilled water, 6 cups
- Tealight candle, LED recommended
- Large mixing bowl
How to Make It
- Arrange cranberries and rosemary sprigs in the bottom of the bundt pan, pressing gently to layer.
- Pour 2 cups of distilled water over the fruit and herbs and freeze for 4 hours or until solid.
- Add another 2 cups of water and refreeze for 4 more hours.
- Repeat with final 2 cups of water and freeze overnight.
- Invert the pan under lukewarm running water for 15 seconds to release the ice dome.
- Place the tealight in the center cavity and set the lantern on a heat-safe plate.
4. Knitted Mug Cozy Garland
Advanced
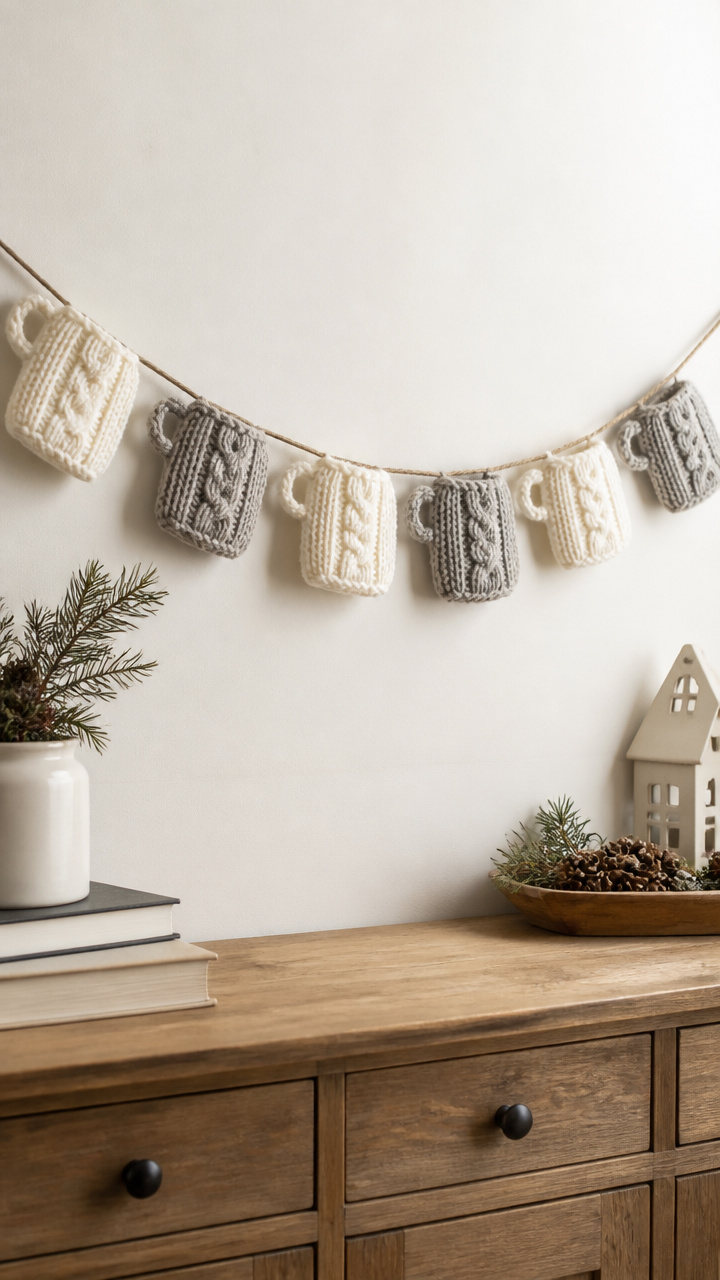
Mini knitted sleeves in cream and gray wool loop onto twine, strung like bunting above a sideboard. This soft display adds texture without taking up table space.
Materials Needed
- Worsted weight cream wool yarn, 50 yards
- Worsted weight heather gray wool yarn, 50 yards
- Size 7 (4.5 mm) knitting needles
- Scissors
- Tapestry needle
- Twine, 8 feet
- 6 wooden clothespins
How to Make It
- Cast on 16 stitches using cream yarn and knit in garter stitch for 6 inches.
- Bind off and cut yarn, leaving a 6-inch tail.
- Repeat to make five more cozies, alternating colors every other cozy.
- Weave in all loose ends with the tapestry needle.
- Fold each cozy in half and sew the side seam closed.
- Thread the twine through the folded top edge of each cozy.
- Clip the garland to the wall or mantel using the clothespins.
5. Citrus Slice Wreath
Moderate
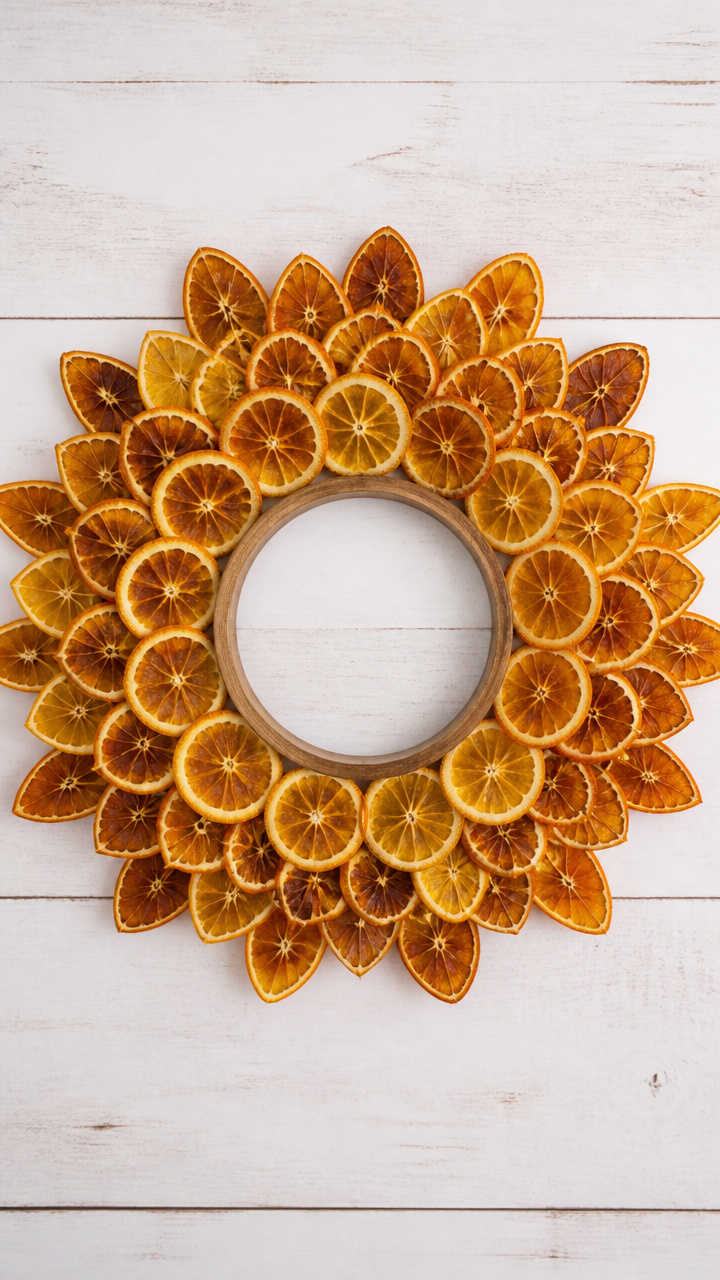
Thin orange and lemon rounds bake until crisp and leathery, then wire together into a sunburst wreath. Drying citrus fills your kitchen with bright warmth.
Materials Needed
- 4 oranges
- 2 lemons
- Chef's knife
- Baking sheet
- Parchment paper
- 12-inch embroidery hoop
- Floral wire, 18 inches
- Wire cutters
How to Make It
- Slice each citrus into 1/4 inch rounds using the chef's knife.
- Line the baking sheet with parchment and arrange slices in a single layer.
- Bake at 200°F for 3 hours, flipping slices halfway through.
- Let cool for 20 minutes after removing from oven.
- Lay the inner hoop on a flat surface and begin wiring slices together in a circle, overlapping edges.
- Continue until the full wreath fits snugly within the outer hoop, securing last slice to first with wire.
- Trim excess wire with cutters and leave the wreath in the hoop for display.
6. Moss and Tealight Tray
Easy
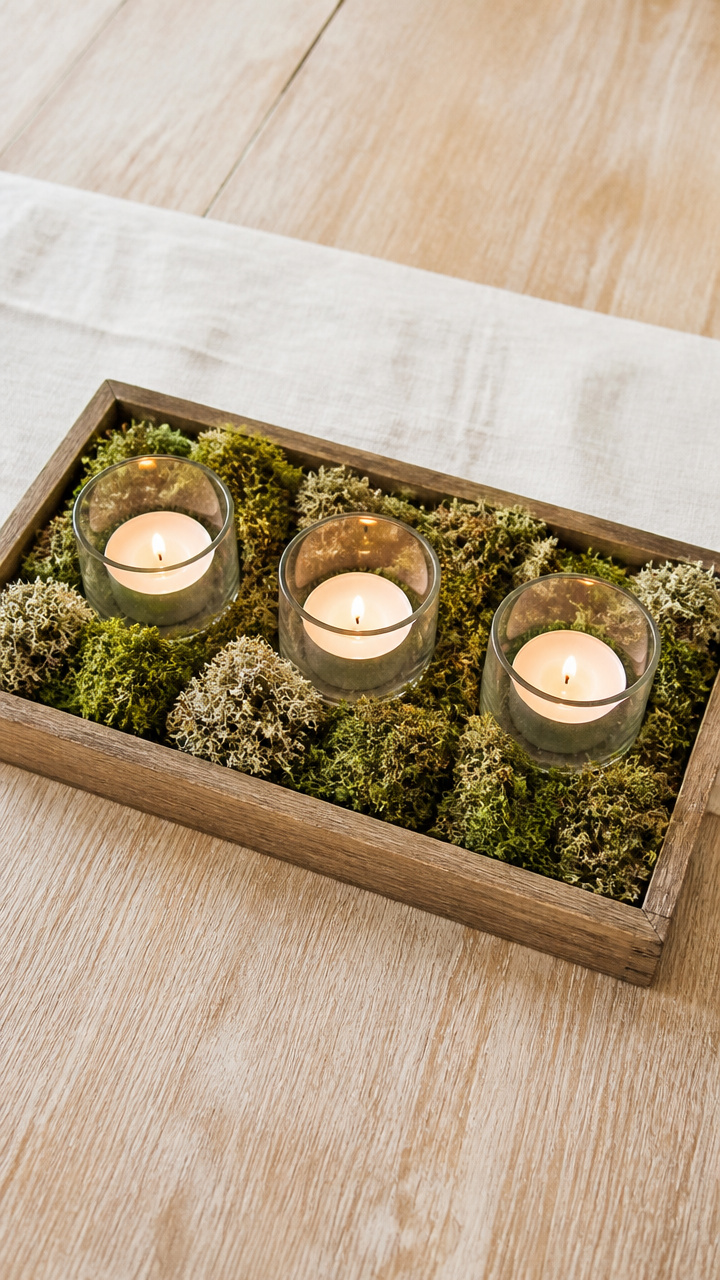
Sheet moss pads a shallow wooden tray, cradling three glass-enclosed tealights like embers in a forest bed. This centerpiece feels quietly alive.
Materials Needed
- Shallow wooden tray, 12×8 inches
- Dried sheet moss, 12×10 inch piece
- 3 battery-powered tealights in glass holders
- Scissors
- Low-tack double-sided tape
How to Make It
- Trim the moss with scissors to fit the bottom of the tray, leaving a 1/2 inch border visible.
- Press strips of double-sided tape along the underside edges of the moss and lay it flat in the tray.
- Place one tealight at each end and one in the center, nestled into the moss.
- Turn on the lights and adjust moss around the bases for a natural look.
7. Cinnamon Stick Bundles
Easy
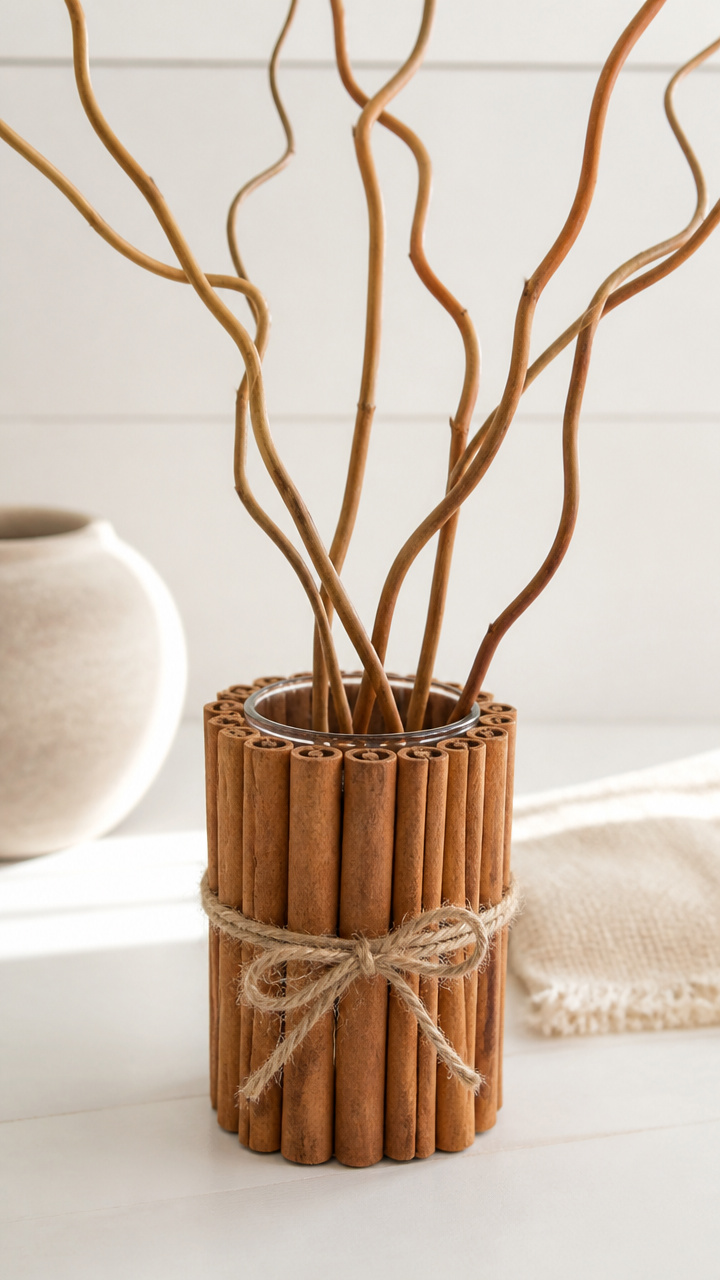
Five cinnamon sticks tie with jute cord and flank a low vase of bare branches. The subtle spice scent rises when guests brush past.
Materials Needed
- 15 cinnamon sticks, 6 inches long
- Jute cord, 3 feet
- Small pair of scissors
- Clear glass vase, 5 inches wide
- 3 curly willow branches, 10 inches tall
How to Make It
- Group five cinnamon sticks together and wrap jute cord 1 inch from the top, tying a square knot.
- Repeat to make three bundles.
- Trim excess cord ends to 1 inch with scissors.
- Fill the vase with branches and place one bundle on each side and one behind the vase.
8. Waxed Paper Snowflakes
Easy
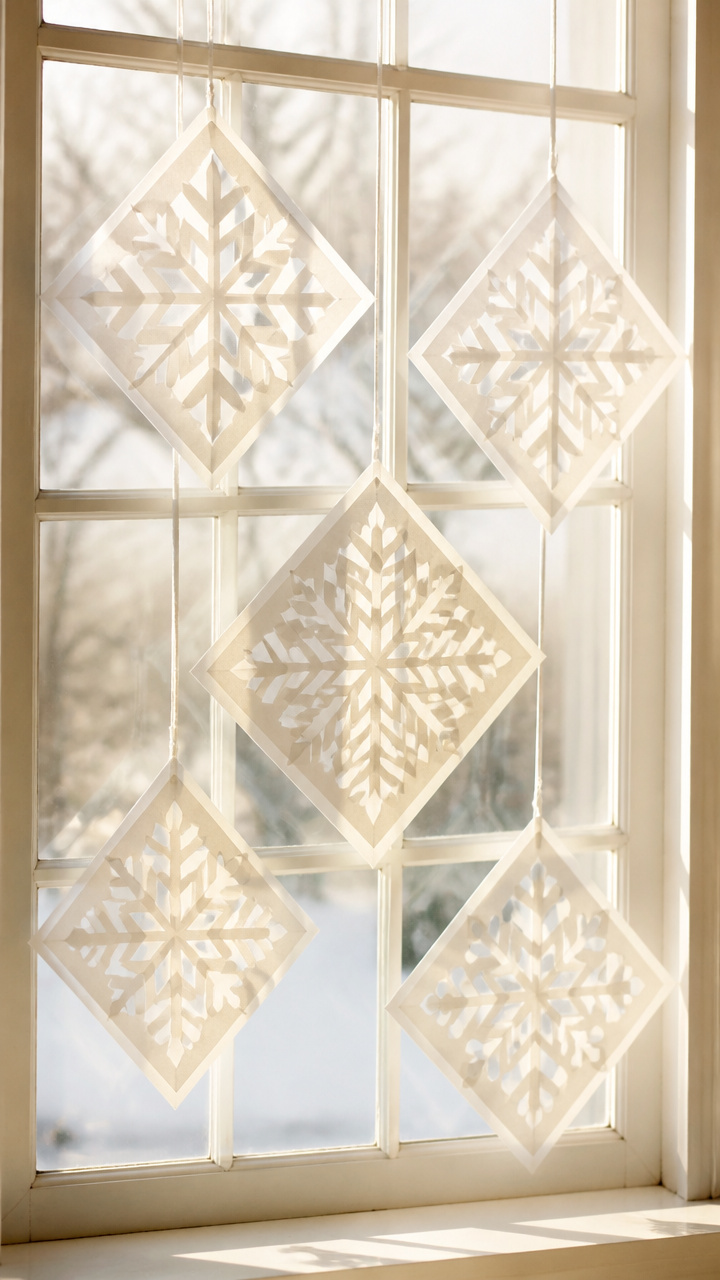
Delicate paper snowflakes sandwich between layers of waxed paper and hang in a window, catching candle glow like stained glass. Light dances through each cut edge.
Materials Needed
- White printer paper, 8 sheets
- Waxed paper, 8 sheets, 8.5×11 inches
- Iron
- Parchment paper, 2 sheets
- Scissors
- String, 3 feet
- Hole punch
How to Make It
- Fold one sheet of printer paper into eighths and cut small shapes along the edges to create a snowflake.
- Unfold and repeat to make seven more snowflakes.
- Place one snowflake between two sheets of waxed paper.
- Cover with a sheet of parchment and press the iron on low heat for 10 seconds, lifting and repositioning until sealed.
- Repeat for all snowflakes.
- Punch a hole in the top corner of each and thread string through to make a garland.
9. Mini Evergreen Topiary
Moderate
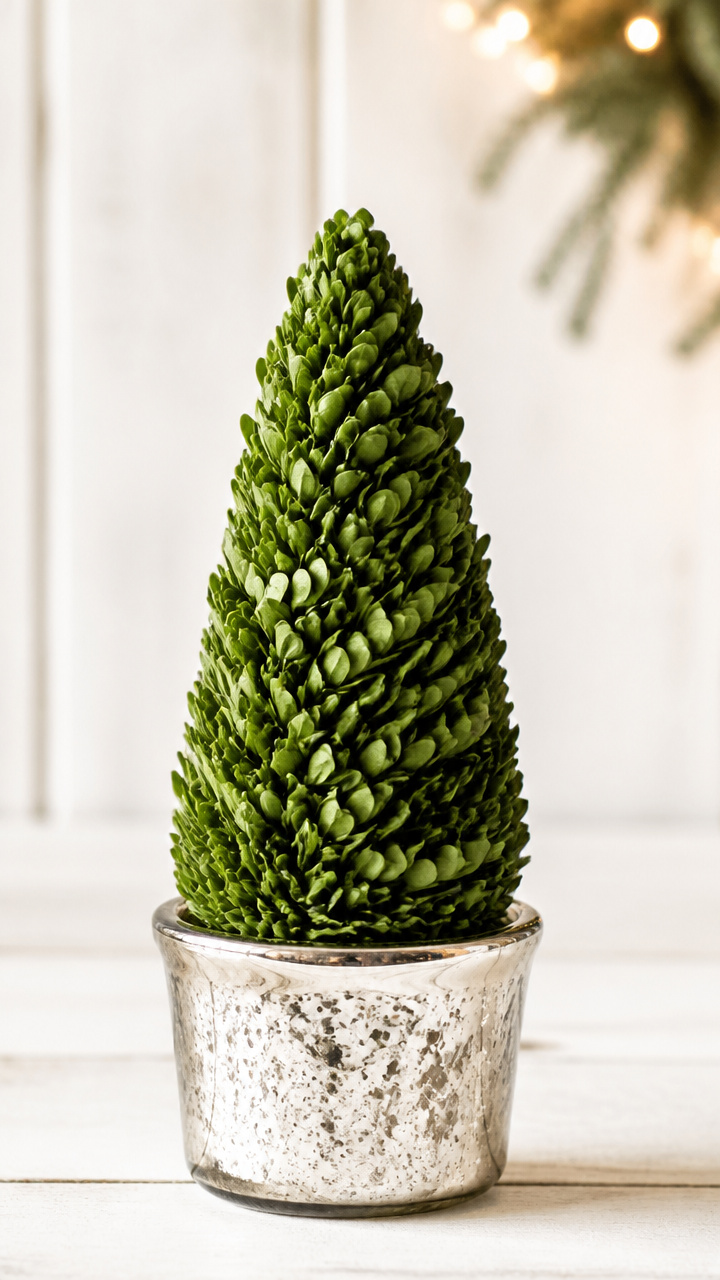
Boxwood clippings spiral around foam cones, wired tight and displayed in mercury glass pots. These tidy green spheres feel both classic and fresh.
Materials Needed
- Floral foam cone, 6 inches tall
- Fresh boxwood clippings, 30 stems
- Green paddle wire, 22 gauge, 10 feet
- Wire cutters
- Mercury glass pot, 4 inches diameter
- Floral pins, 10
How to Make It
- Begin at the base of the foam cone and lay a boxwood stem flat against the slope.
- Wrap wire once around the stem and into the foam, securing it in place.
- Add the next stem slightly overlapping the first and continue upward in a spiral.
- Use floral pins to anchor any loose ends into the foam.
- Once the cone is fully covered, trim stray tips with scissors.
- Insert the base of the cone into the mercury glass pot for display.
10. Maple Seed Lanterns
Easy
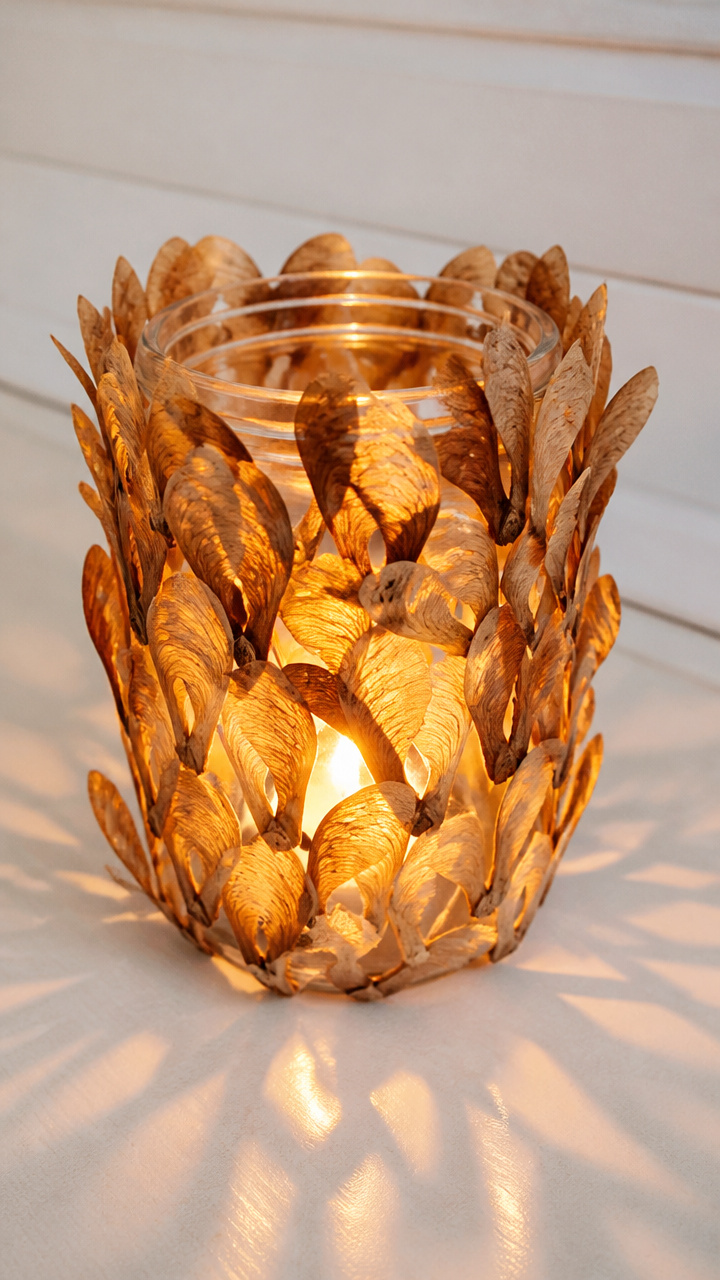
Helicopter seeds gather from winter walks and encase votive candles in glass jars. Their papery wings cast lacy shadows on tabletops.
Materials Needed
- 30 maple seeds (samaras), collected and dried
- Hot glue gun
- Glue sticks
- Clear glass mason jar, 16 oz
- Votive candle, unscented
How to Make It
- Lay the maple seeds on a flat surface with wings spread.
- Apply a small dot of hot glue to the seed pod of one and press it onto the outside of the jar, wing curving outward.
- Continue gluing seeds in overlapping rows from base to neck, letting glue set 10 seconds between each.
- Let the jar sit undisturbed for 20 minutes to cure.
- Place the votive candle inside before lighting.
11. Linen Napkin Pine Tree
Easy
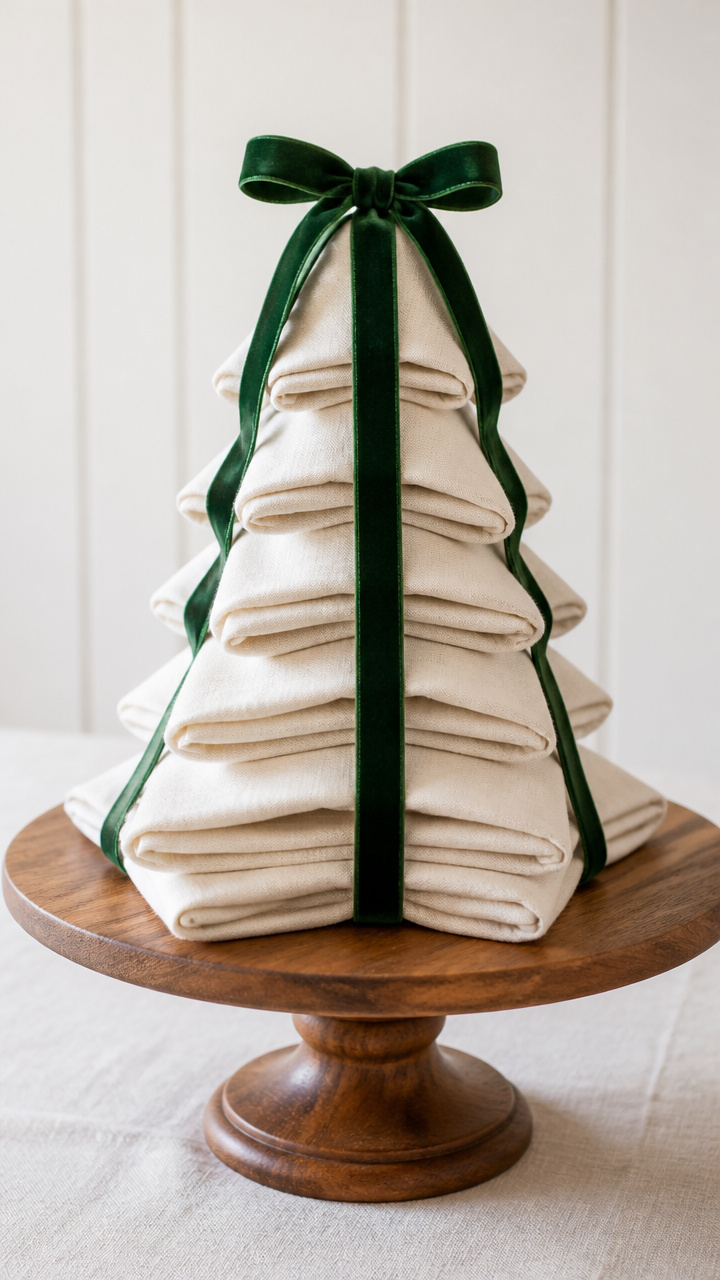
Rolled ivory napkins stack like tree tiers on a wooden cake stand, tied with velvet ribbon. This edible-free centerpiece doubles as guest favors.
Materials Needed
- 6 ivory linen napkins, 16×16 inches
- Wooden tiered cake stand, 3 levels
- Forest green velvet ribbon, 1/4 inch wide, 6 feet
- Scissors
- Clothespin
How to Make It
- Roll one napkin tightly from one corner to form a cone shape and place it on the top tier.
- Roll two napkins and place side by side on the middle tier.
- Roll three napkins and arrange in a row on the bottom tier.
- Cut three 12-inch lengths of ribbon and tie each bundle at the base with a bow.
- Clip any stray threads with scissors and adjust ribbons to face forward.
12. Ice Ring with Berries
Moderate
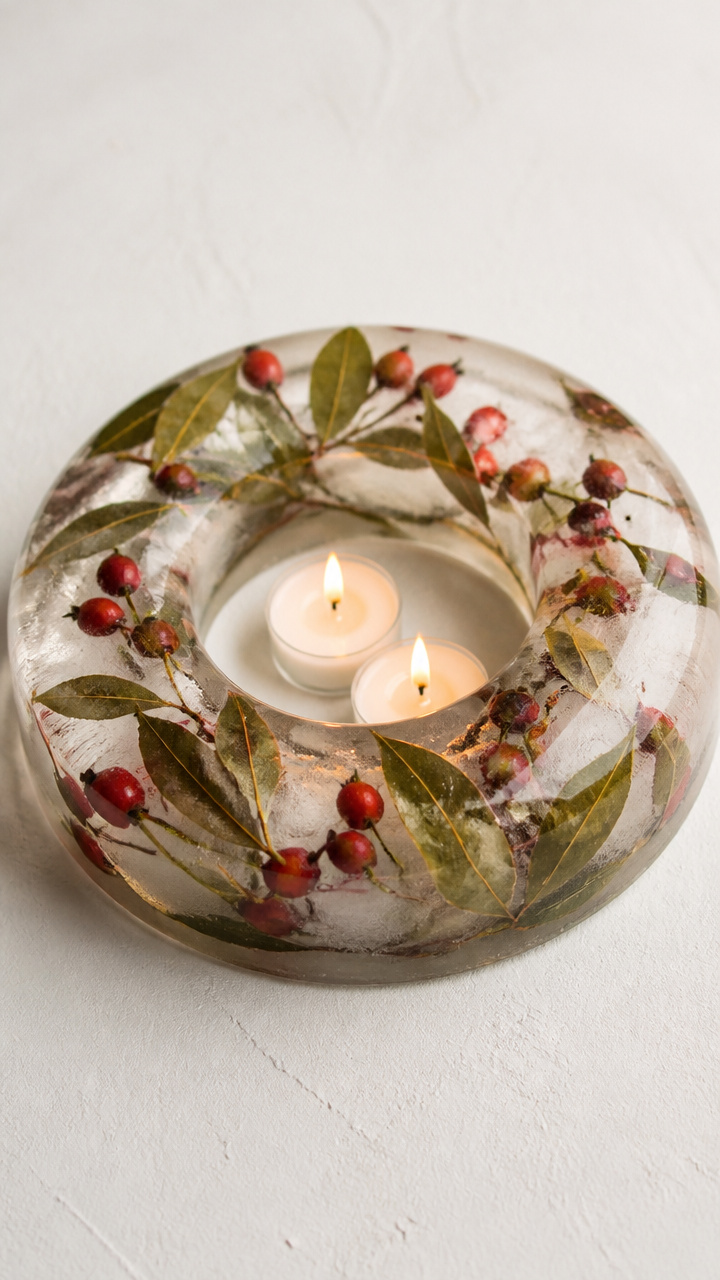
A donut-shaped mold freezes rose hips and bay leaves in layers, forming a luminous ring that holds floating candles. It melts slowly through long dinners.
Materials Needed
- Two nested metal bowls, one 6 inches, one 4 inches
- Plastic wrap
- Fresh rose hips, 1/2 cup
- Dried bay leaves, 8
- Distilled water, 4 cups
- 2 floating candles, 2 inches wide
How to Make It
- Line the 6-inch bowl with plastic wrap, letting excess drape over the edges.
- Place the 4-inch bowl upside down in the center to create a ring mold.
- Arrange rose hips and bay leaves around the space between bowls.
- Pour 2 cups of distilled water into the mold and freeze for 4 hours.
- Add remaining 2 cups water and freeze overnight.
- Remove the bowls by running warm water over the outside, then lift out the ice ring.
- Set the ring in a shallow serving dish and place one candle in each open end.
13. Quilted Fabric Pincushion
Advanced
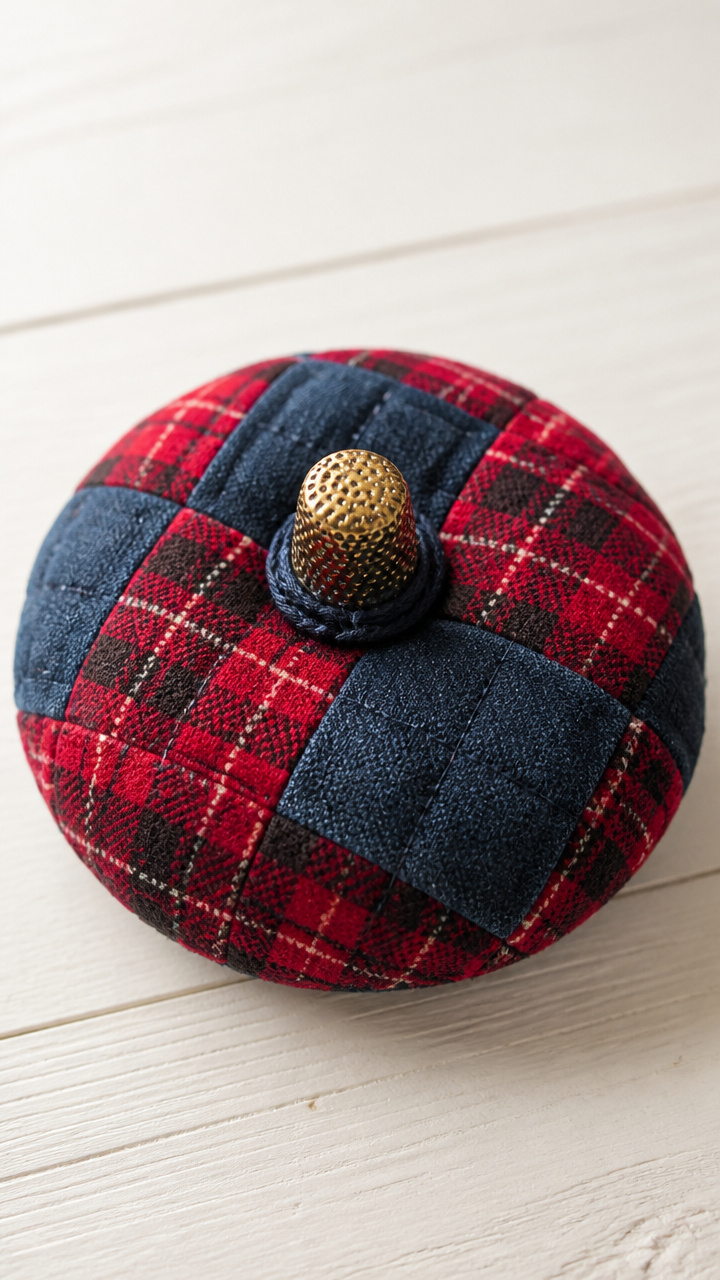
Scraps of plaid flannel and denim stitch into a fat little pincushion topped with a brass thimble. This nostalgic piece sparks stories between courses.
Materials Needed
- Red plaid flannel scrap, 6×6 inches
- Indigo denim scrap, 6×6 inches
- Polyester fiberfill, 1/2 cup
- Brass thimble
- Embroidery floss, navy blue
- Needle
- Fabric scissors
- Straight pins
- Disappearing fabric marker
How to Make It
- Place the fabrics right sides together and trace a 5-inch circle using the fabric marker.
- Cut both layers along the line with fabric scissors.
- Sew around the edge with a 1/4 inch seam allowance, leaving a 2-inch gap.
- Turn the circle right side out through the gap and push out corners gently with a pencil.
- Stuff with fiberfill until firm but not tight.
- Hand-stitch the gap closed with a ladder stitch using navy floss.
- Sew the thimble to the top center with three anchoring stitches through the rim.
14. Foraged Twig Frame
Moderate
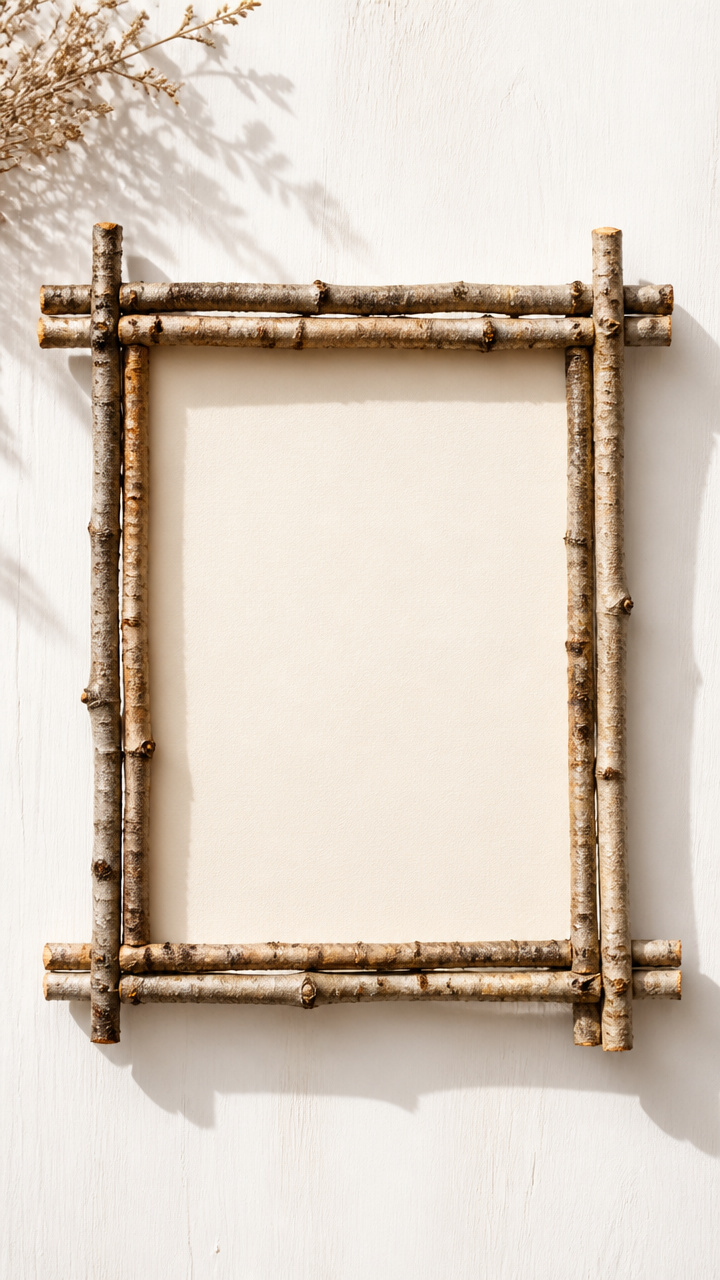
Slender birch twigs glue into a rectangle around a blank cardstock panel, ready for a seasonal quote or menu. The frame’s bark catches lamplight.
Materials Needed
- 8 birch twigs, 8 inches long and pencil-thin
- Craft knife
- Ruler
- A4 cream cardstock
- Hot glue gun
- Glue sticks
- Sandpaper, 120 grit
How to Make It
- Cut four twigs to 8 inches and four to 6 inches using the craft knife on a cutting mat.
- Lightly sand rough ends with sandpaper until smooth.
- Lay the cardstock horizontally and position the 8-inch twigs along the top and bottom edges.
- Glue each in place with a continuous bead of hot glue, holding for 15 seconds.
- Repeat with 6-inch twigs on the left and right sides, mitering corners where they meet.
- Let dry for 10 minutes before writing a menu or quote in calligraphy ink.
15. Clay Snowman Trio
Moderate
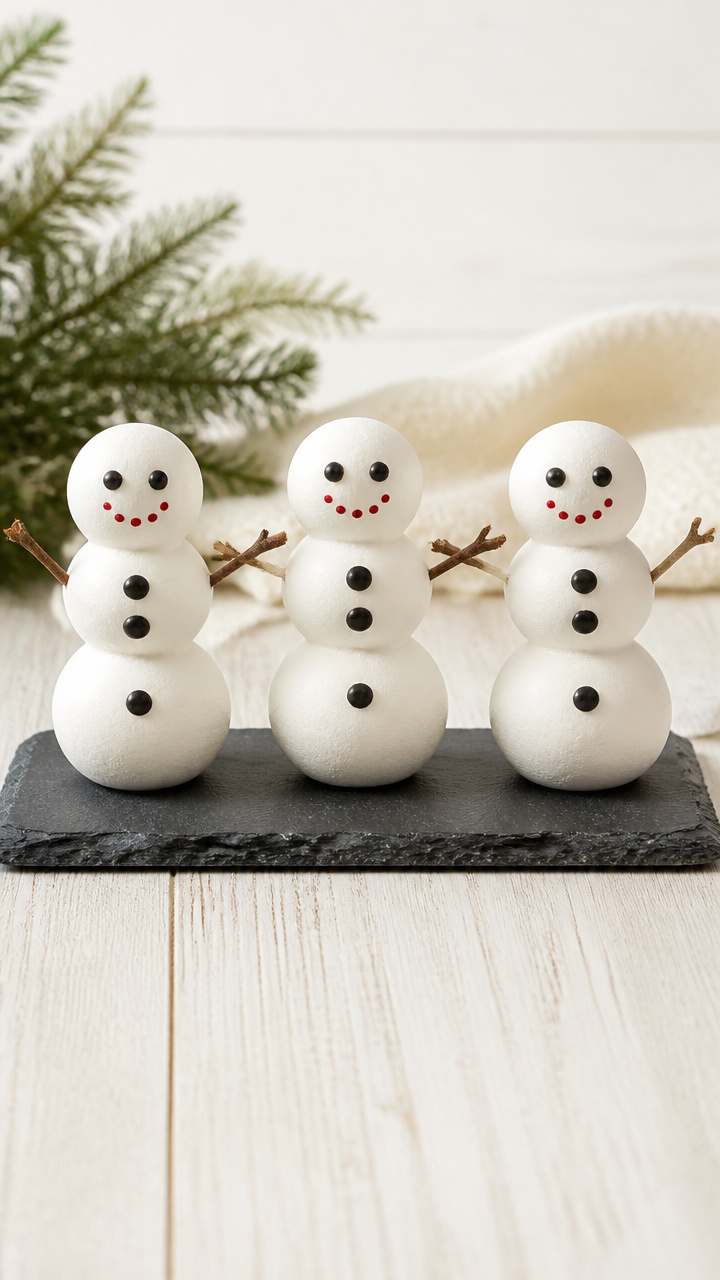
Air-dry clay shapes into stacked-sphere snowmen with twig arms and button eyes, painted matte black and white. These tiny figures stand in a row on a slate tile.
Materials Needed
- White air-dry clay, 1 lb block
- Acrylic paint, black and red
- Paintbrush, #2 round
- Three black buttons, 1/2 inch
- Two twigs, 2 inches long
- Craft glue
- Slate tile, 6×4 inches
- Rolling pin
- Straw
How to Make It
- Divide clay into six equal balls: three large, three small.
- Roll each ball smooth and stack one small on one large to form three snowmen.
- Use the straw to poke two holes for eyes on each head.
- Insert a twig into each side of the middle section for arms.
- Let dry according to package instructions, usually 24 hours.
- Paint two dots for eyes and a short line for a mouth on each with black paint, and a tiny red scarf with red paint.
- Glue one button below the mouth on each front.
- Arrange the snowmen on the slate tile and place at the table center.
16. Cardamom Pod Cluster
Easy
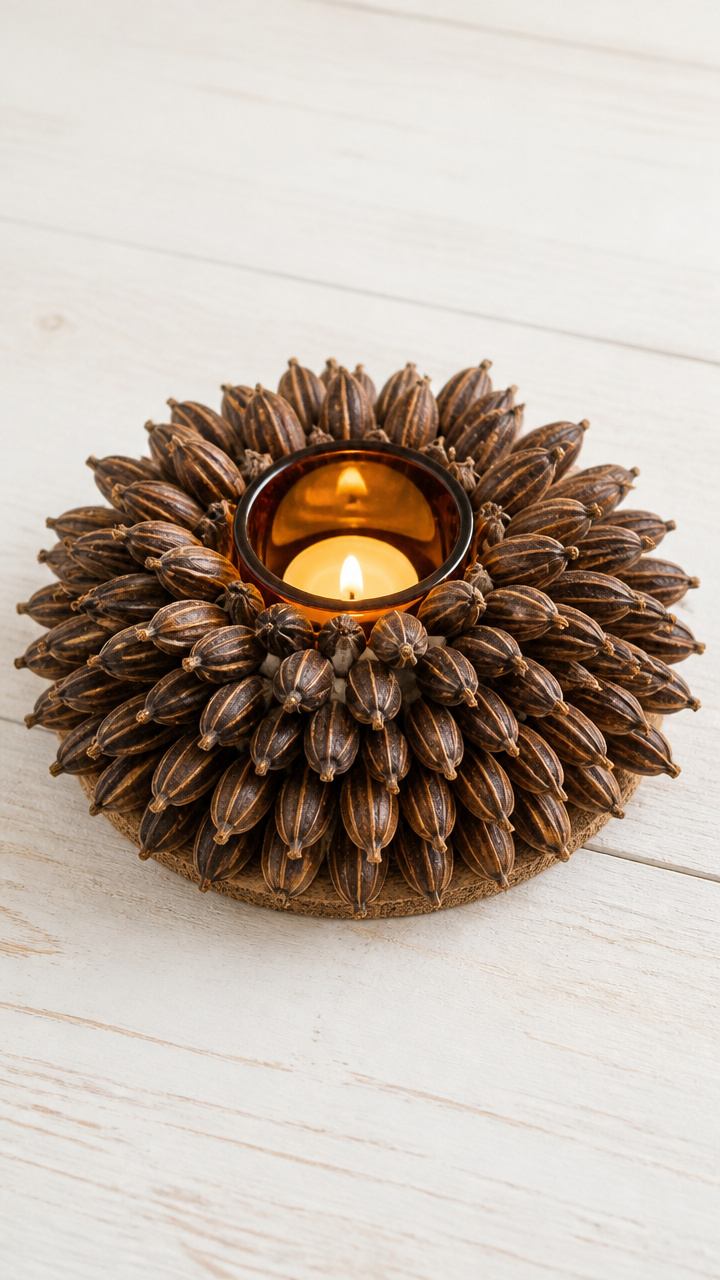
Dark brown cardamom pods glue stem-down to a cork disc, fanning like a sea urchin around a tea light. Their sweet aroma blooms with warmth.
Materials Needed
- 30 cardamom pods
- Cork trivet, 5 inches diameter
- Hot glue gun
- Glue sticks
- Tea light candle, amber glass
How to Make It
- Arrange the cardamom pods in a circle on the cork, points facing outward.
- Apply a dab of hot glue to the stem end of each pod and press firmly into place.
- Work in concentric circles from the outside in, overlapping slightly.
- Leave the center open and place the tea light there once glue has set for 15 minutes.
17. Felted Wool Balls
Advanced
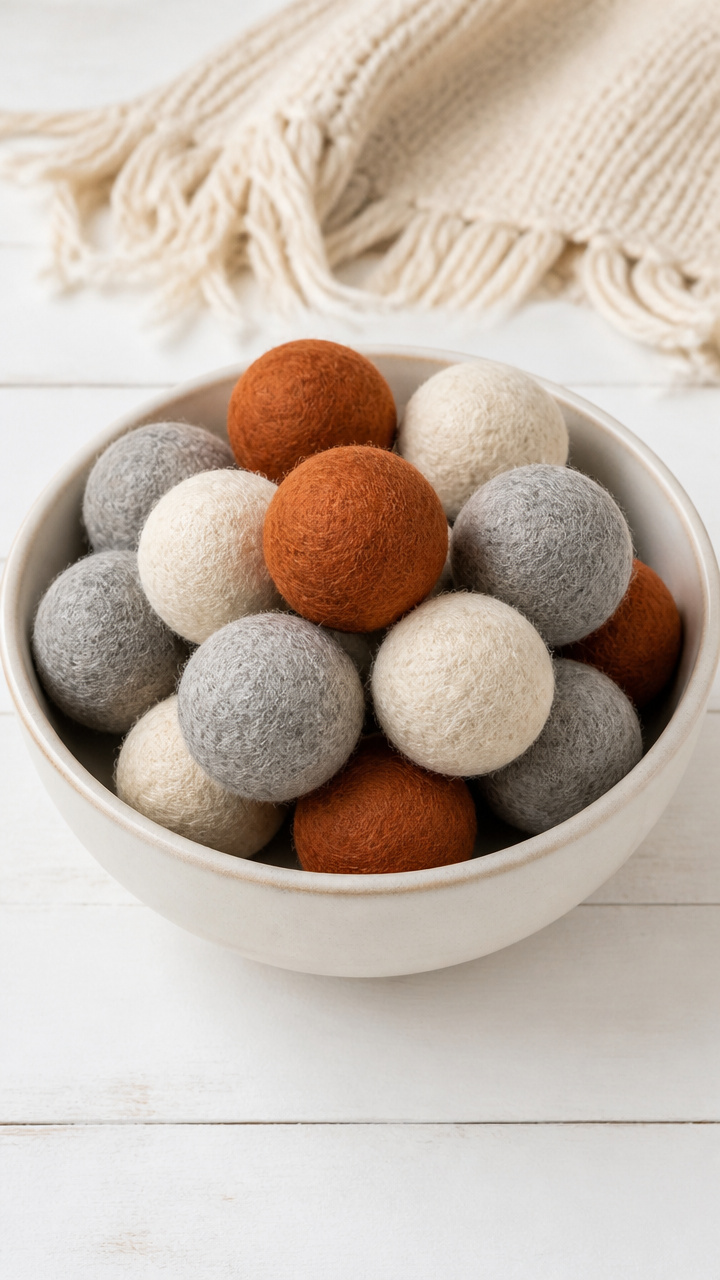
Merino wool roving tangles into dense spheres using soap and agitation, then nest in a ceramic bowl. These fuzzy orbs absorb and soften sound.
Materials Needed
- Merino wool roving, 3 oz each in cream, gray, and rust
- Rubber gloves
- Liquid olive oil soap, 4 oz
- Large bowl of hot water
- Nylon stocking
- Ceramic bowl, 8 inches wide
How to Make It
- Pull off a golf ball-sized piece of roving and roll it loosely between your palms.
- Submerge the ball in hot, soapy water and swirl for 2 minutes using gloved hands.
- Rub the ball between your palms with increasing pressure for 5 minutes until it firms.
- Rinse in cold water to felt further and stop shrinking.
- Repeat to make nine balls total, three of each color.
- Slide each ball into the nylon stocking and tie knots between them.
- Agitate in warm water for 10 minutes, then remove and dry overnight.
- Place the finished balls in the ceramic bowl on your table.
18. Vintage Spoon Tree
Advanced
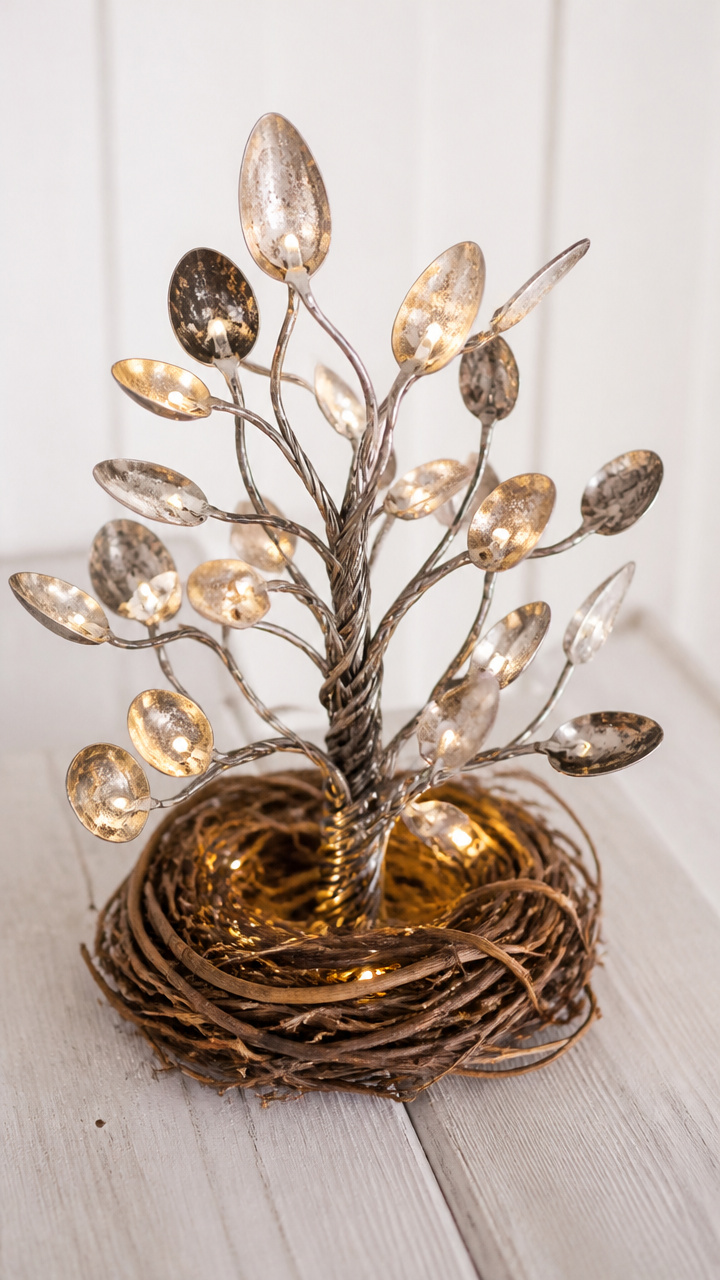
Antique teaspoons bend at the handle and insert into a grapevine base, their bowls catching small LED lights. Silver glints like frost in low light.
Materials Needed
- 6 vintage teaspoons
- Grapevine wreath base, 6 inches
- Pliers
- Drill with 1/8 inch bit
- 6 micro LED fairy lights, battery-powered
- Hot glue gun
- Glue sticks
How to Make It
- Mark the handle of each spoon 1 inch from the bowl.
- Use pliers to bend the handle sharply at that point, creating a 90-degree angle.
- Drill a pilot hole at the top edge of the grapevine base for each spoon.
- Insert the bent end of each spoon into a hole and secure with a dab of hot glue.
- Weave the fairy light wires around the base and tuck the battery pack underneath.
- Position each light bulb inside a spoon bowl and turn on.
19. Pressed Fern Placemats
Moderate
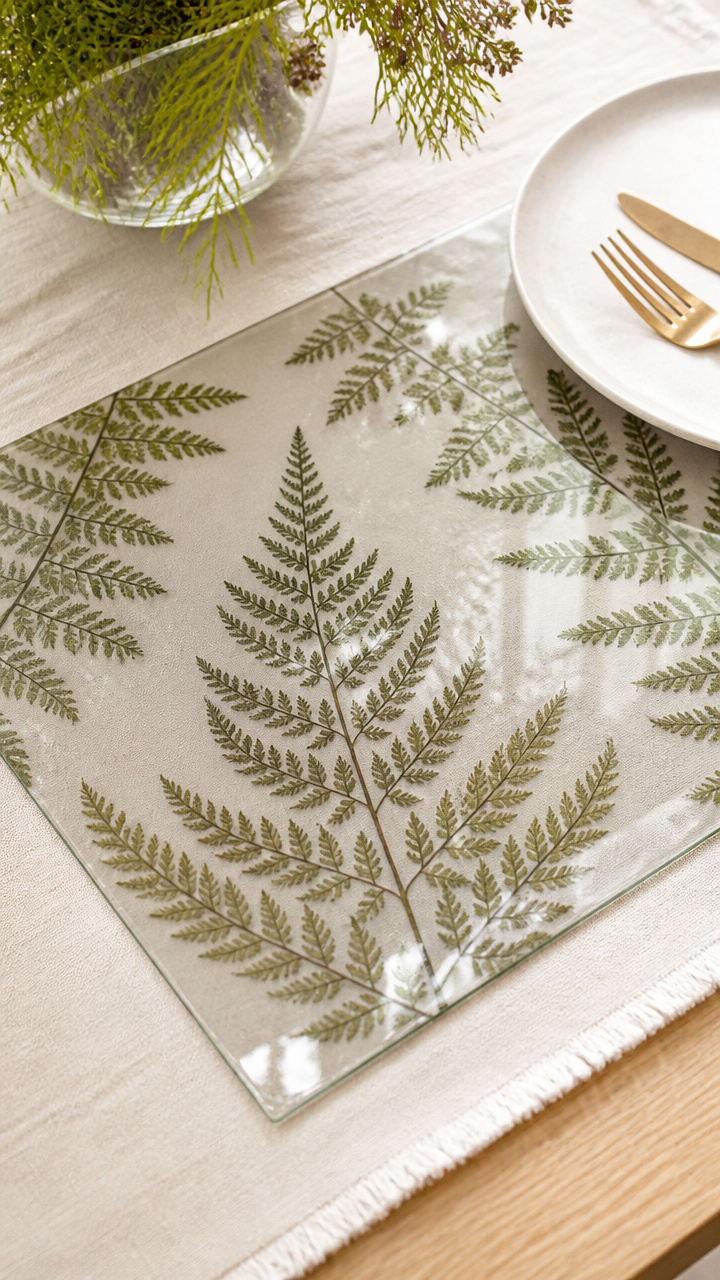
Delicate maidenhair fern fronds press in wax paper and iron flat, then seal between clear contact paper. Each mat protects surfaces while showing nature’s veins.
Materials Needed
- Fresh maidenhair fern fronds, 8
- Wax paper, 8 sheets, 9×12 inches
- Iron
- Parchment paper, 2 sheets
- Clear contact paper, 12×18 inch sheet
- Utility knife
- Cutting mat
- Ruler
How to Make It
- Place one frond between two sheets of wax paper.
- Cover with parchment and press iron on low heat for 10 seconds, repeating until the fern is flat and dry.
- Repeat for all fronds.
- Cut the contact paper into four 9×12 inch pieces.
- Center one fern between wax paper on each piece and smooth out bubbles with your palm.
- Trim edges with the utility knife on the cutting mat to match the fern’s outline.
- Place one mat at each seat before setting the table.
20. Birch Log Candle Holders
Moderate
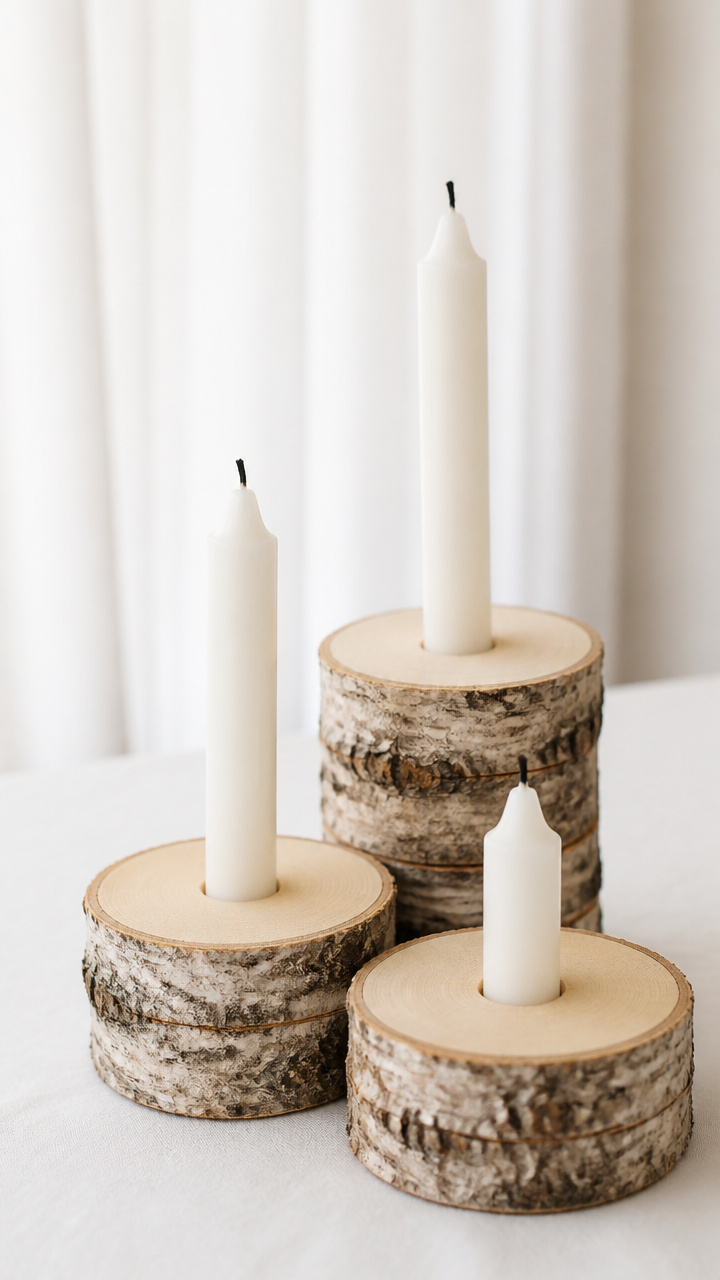
Short birch logs drill with tapered holes to hold slim tapers, their bark intact and creamy wood exposed. Stacked heights add dimension.
Materials Needed
- 3 birch logs, 4 inches diameter, cut to 2, 3, and 4 inches tall
- Drill with 7/16 inch bit
- 3 unscented white taper candles, 12 inches
- Sandpaper, 120 grit
- Damp cloth
How to Make It
- Sand the top and bottom of each log with sandpaper until flat.
- Wipe sawdust from surfaces with a damp cloth and let dry.
- Mark the center of the top face on each log.
- Drill a 1.5 inch deep hole at each mark using the 7/16 inch bit.
- Insert one taper candle into each log and place in a staggered triangle on the table.
21. Glass Gem Terrarium
Easy
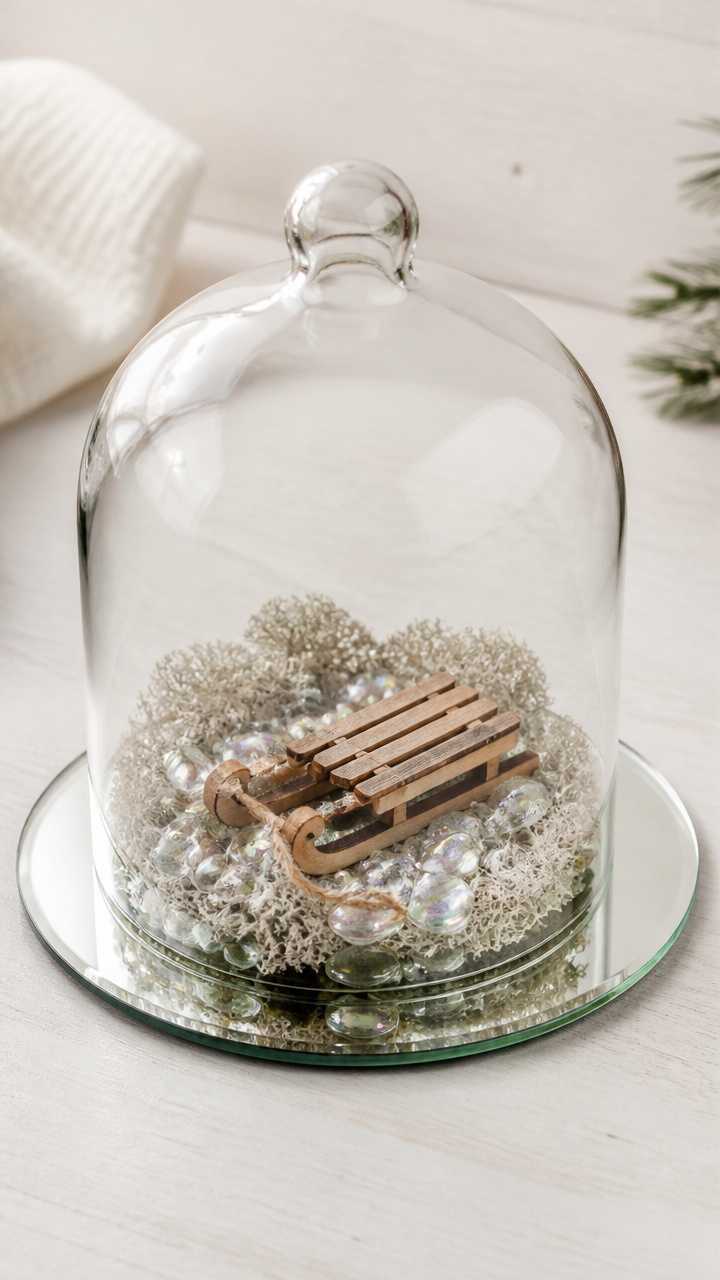
Iridescent glass gems layer in a cloche with silver reindeer moss and a tiny sled figurine. Light fractures into rainbows across the table.
Materials Needed
- Glass cloche with base, 7 inches tall
- Silver reindeer moss, 1/2 cup
- Assorted glass gems, iridescent, 1 cup
- Mini wooden sled figurine, 2 inches long
- Tweezers
How to Make It
- Place the cloche upside down on a flat surface.
- Use tweezers to spread moss evenly across the base.
- Layer glass gems on top, grouping colors in clusters.
- Position the sled in the center and gently press into the moss.
- Lift the cloche and place it over the arrangement.
22. Dried Lavender in Milk Jug
Easy
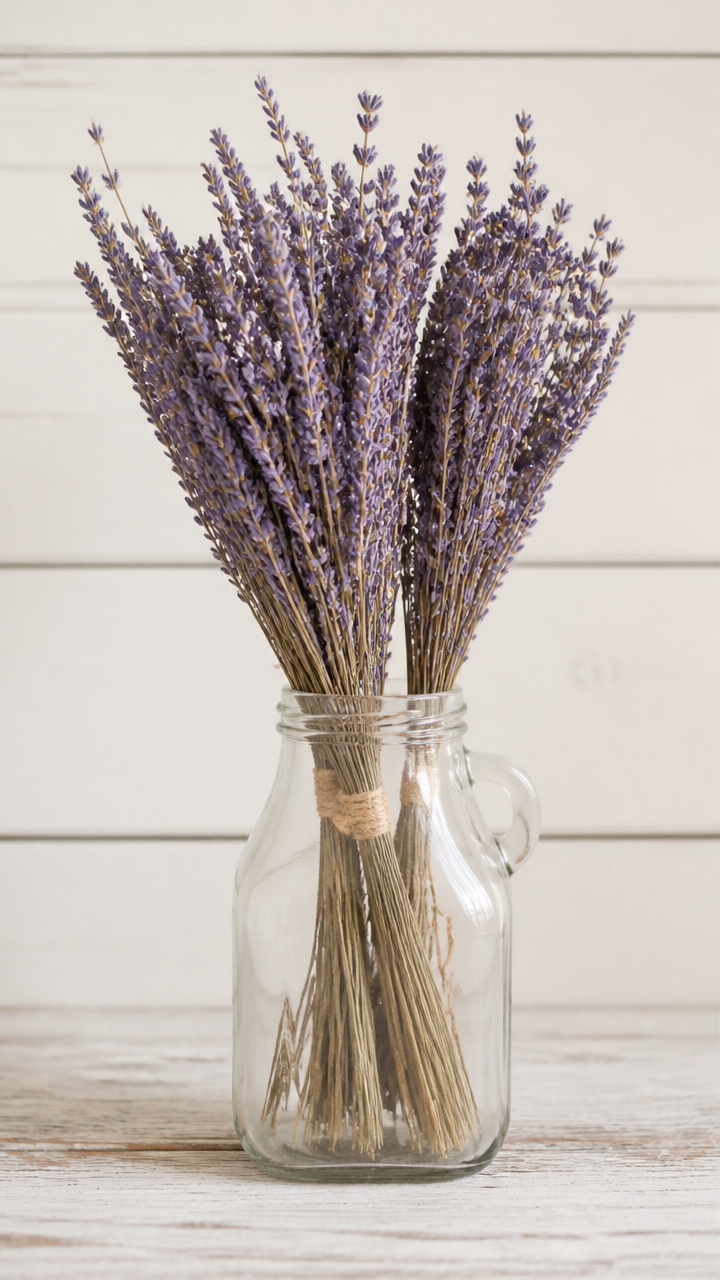
Pale purple lavender bunches wrap with twine and stand in a repurposed glass milk jug. Their calm scent lingers long after dessert.
Materials Needed
- 3 dried lavender bunches, 6 inches tall
- Natural twine, 2 feet
- Empty glass milk jug, 1 quart, cleaned
- Scissors
- Water, 1 cup
How to Make It
- Gather the three lavender bunches together at the stems.
- Wrap twine around the stems 2 inches from the base and tie a square knot.
- Trim the stems to 8 inches with scissors.
- Pour water into the milk jug and insert the lavender stems.
- Place on a folded linen napkin at the table center.
Pick one that calls to you, gather what you need, and let your hands move slowly. These small creations are meant to be made and enjoyed, not perfected.