17 Preschool Winter Crafts with a Snowman Theme

Cotton balls stick to glue, round and soft, building up snowy layers on paper. Little hands shape snowmen with pom-poms for buttons, pipe cleaners for arms, and googly eyes that blink back with joy.
These crafts bring winter’s quiet magic into your classroom or home. Each one invites tiny fingers to create, explore textures, and celebrate the season with pride in every lopsided hat and crooked scarf.
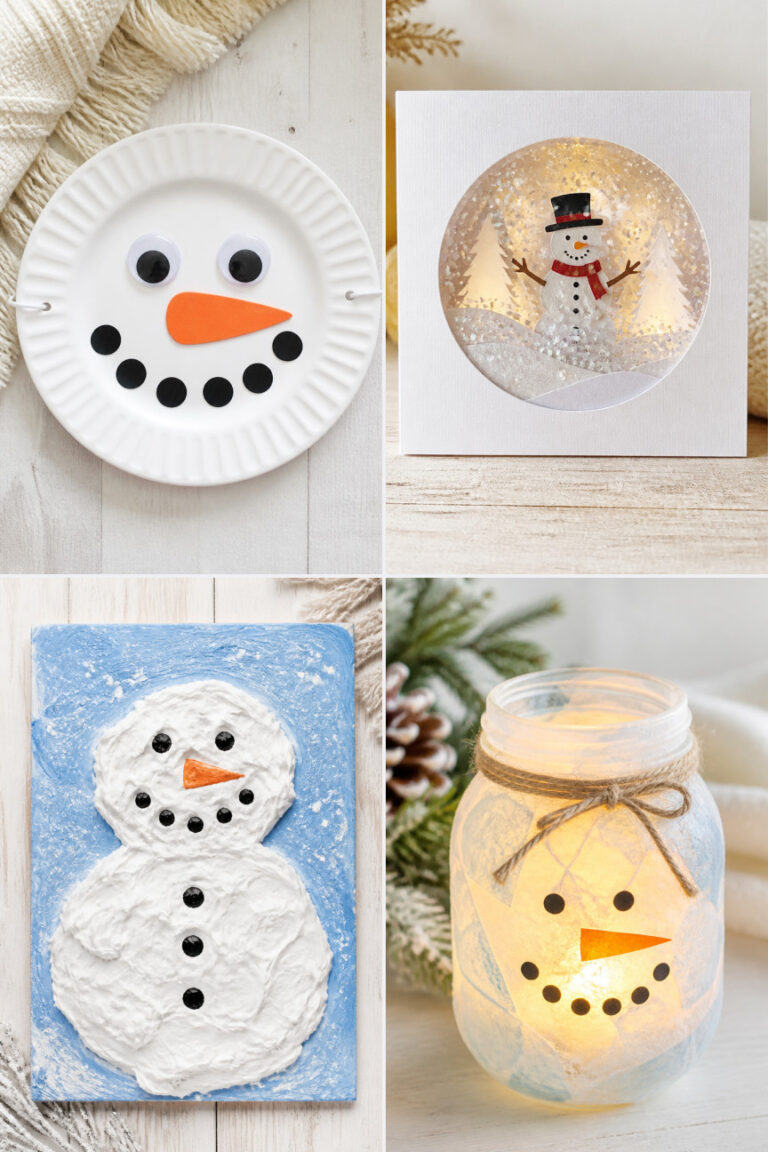
1. Cotton Ball Snowman Painting
Easy
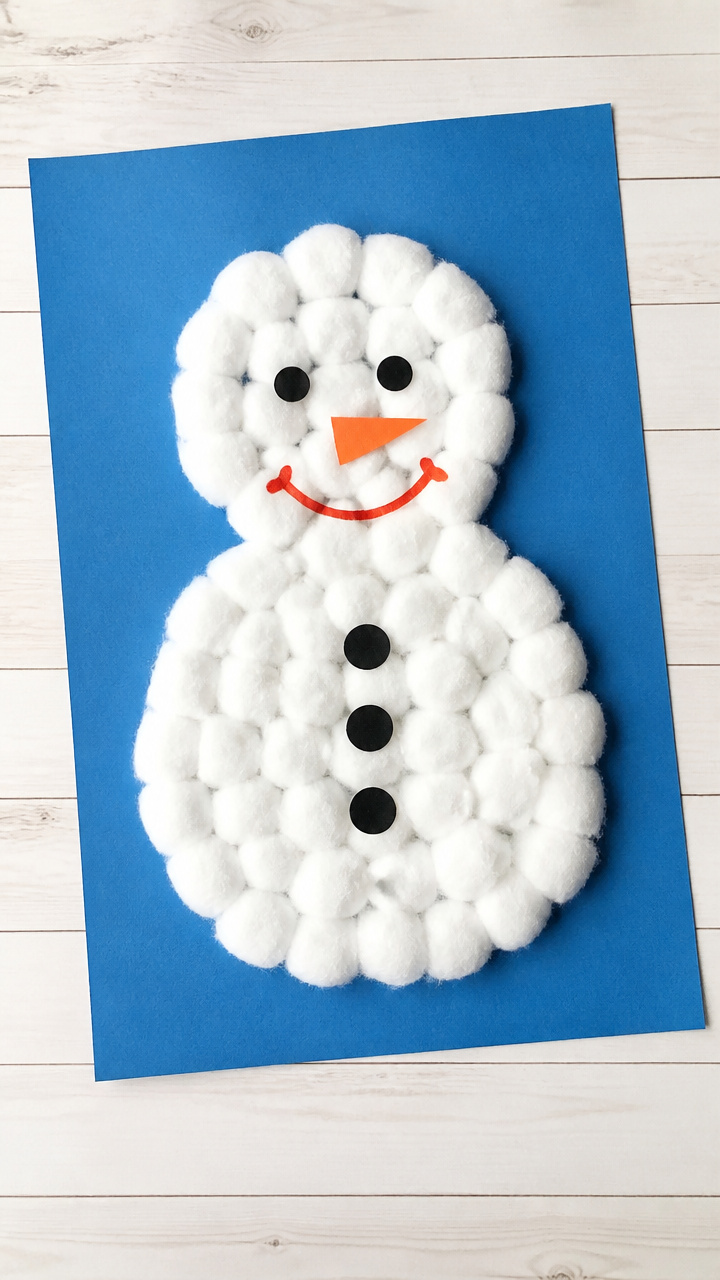
Fluffy white layers form a soft-bodied snowman against a cool blue background. This sensory-rich painting builds fine motor control while delivering big visual charm.
Materials Needed
- A4 blue construction paper
- White school glue in a squeeze bottle
- Small cotton balls
- Black, orange, and red acrylic paint
- Paintbrush set (small flat and round)
- Plastic plate for paint
How to Make It
- Squeeze glue in a tall oval shape down the center of the blue paper to form the snowman's body.
- Press cotton balls firmly into the glue, covering the entire outline to create a fluffy texture.
- Dip the flat brush into black paint and dot on two eyes and three body buttons.
- Use the round brush with orange paint to draw a small triangle for the nose.
- Paint a short red line for the mouth just below the nose.
2. Pom-Pom Sticker Snowmen
Easy
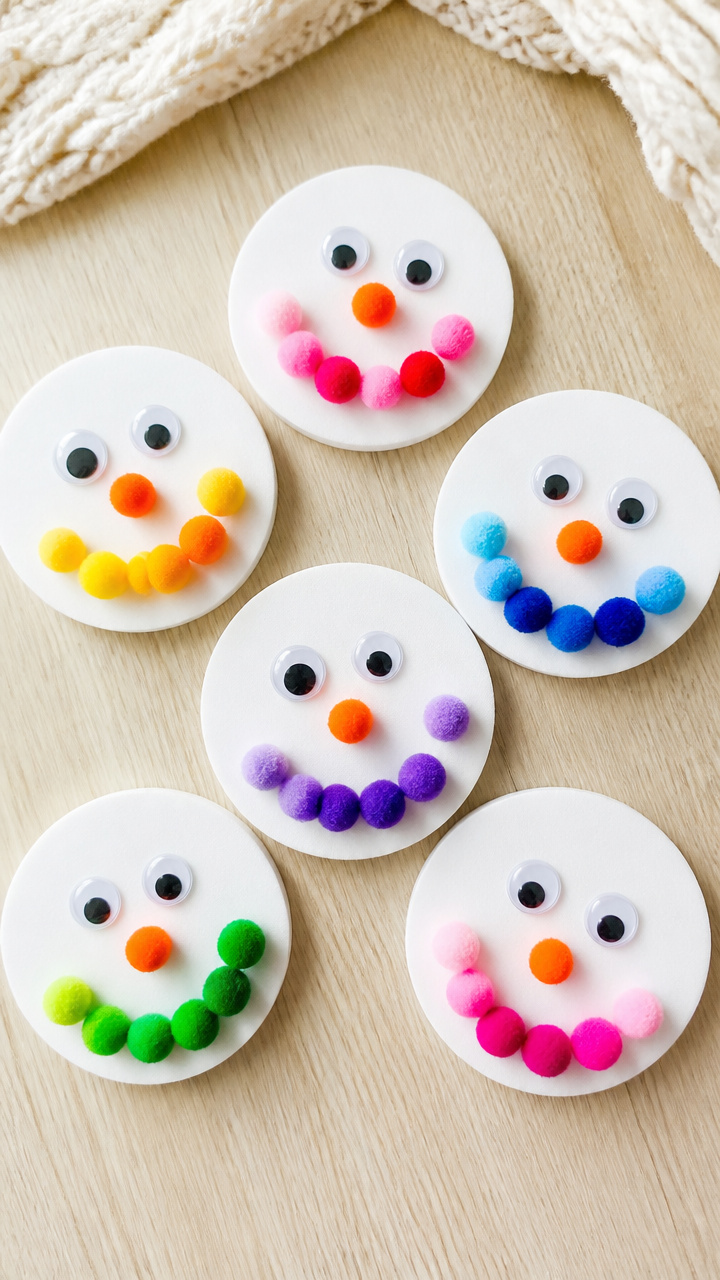
Brightly colored pom-poms stick to foam circles using peel-and-place stickers. These no-mess snowmen are perfect for quick circle time fun.
Materials Needed
- 3-inch white craft foam circles, 5 per child
- Assorted small pom-poms (red, black, orange, blue), 15 per child
- Round sticker dots (1/2 inch), 5 per child
- Googly eyes (6mm), 2 per child
- Black chenille stems, cut into 1-inch pieces, 2 per child
How to Make It
- Peel the backing off one sticker dot and press it onto the center of a foam circle.
- Press a black pom-pom onto the sticker to make a button, repeat twice more down the middle.
- Stick googly eyes near the top edge of the foam circle.
- Press an orange pom-pom just below the eyes for the nose.
- Place a red pom-pom beneath the nose for a mouth and add two short chenille stem pieces as arms.
3. Snowman Handprint Wreath
Moderate
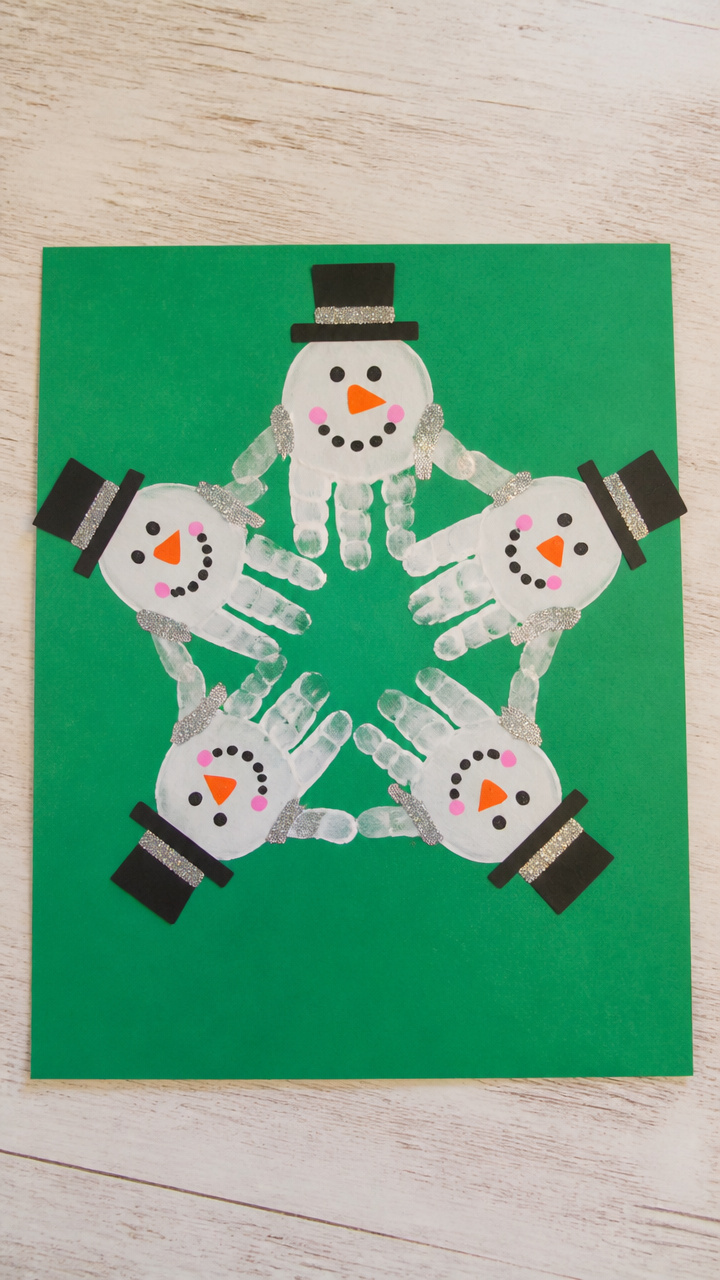
Five handprints curl around like snowballs forming a ring on green cardstock. This keepsake craft captures tiny hand sizes in a festive display.
Materials Needed
- A3 green cardstock sheet
- White washable paint
- Paint tray with grid sections
- Black, orange, and pink acrylic paint
- Fine-tip black marker
- Glitter glue (silver)
- Hole punch
- Ribbon (12-inch piece)
How to Make It
- Press one palm into white paint, then stamp five handprints in a circle on the green paper, fingertips pointing inward.
- Let the prints dry completely, about 15 minutes under a fan or 30 minutes at room temperature.
- Paint two black dots for eyes and a small orange triangle nose on each handprint using the acrylics.
- Draw a smile with the pink paint below each nose.
- Outline each handprint with silver glitter glue and let dry overnight.
- Punch a hole at the top and thread ribbon through for hanging.
4. Toilet Paper Roll Snowmen
Moderate
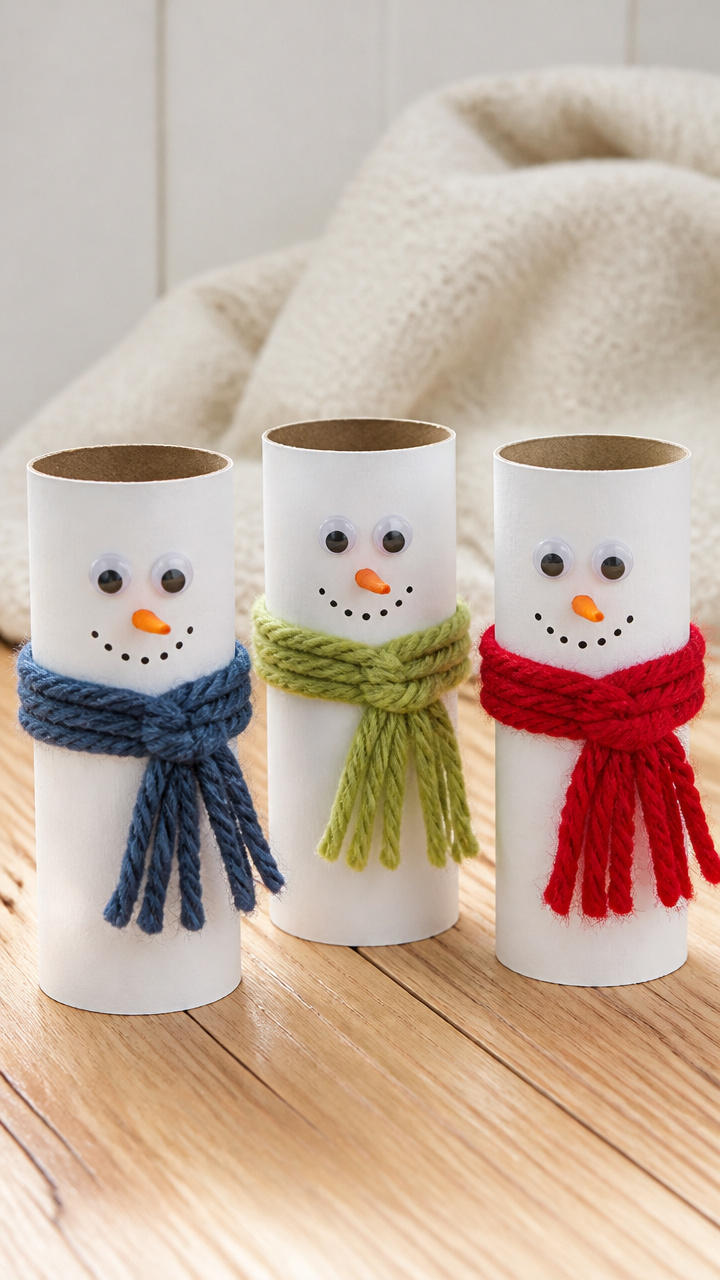
Cardboard tubes wear painted scarves and yarn scarves like real winter gear. These stand-up figures double as toy friends after crafting.
Materials Needed
- Empty toilet paper rolls, 3 per child
- White acrylic paint
- Paintbrush (medium flat)
- Craft glue
- Colorful yarn scraps (at least 3 colors), 6-inch lengths
- Wiggle eyes (8mm), 2 per roll
- Orange felt squares (1×1 inch), 1 per roll
- Black pipe cleaner, cut into 1-inch pieces, 2 per roll
How to Make It
- Paint the entire toilet paper roll white and let dry on a paper towel for 20 minutes.
- Glue a wiggle eye on each side near the top of the roll.
- Cut a small triangle from the orange felt and glue it pointing downward between the eyes for the nose.
- Glue a 6-inch piece of yarn horizontally around the lower third of the roll for a scarf.
- Push one pipe cleaner end into each side of the roll at mid-height to form arms.
5. Shaving Cream Snow Dough
Easy
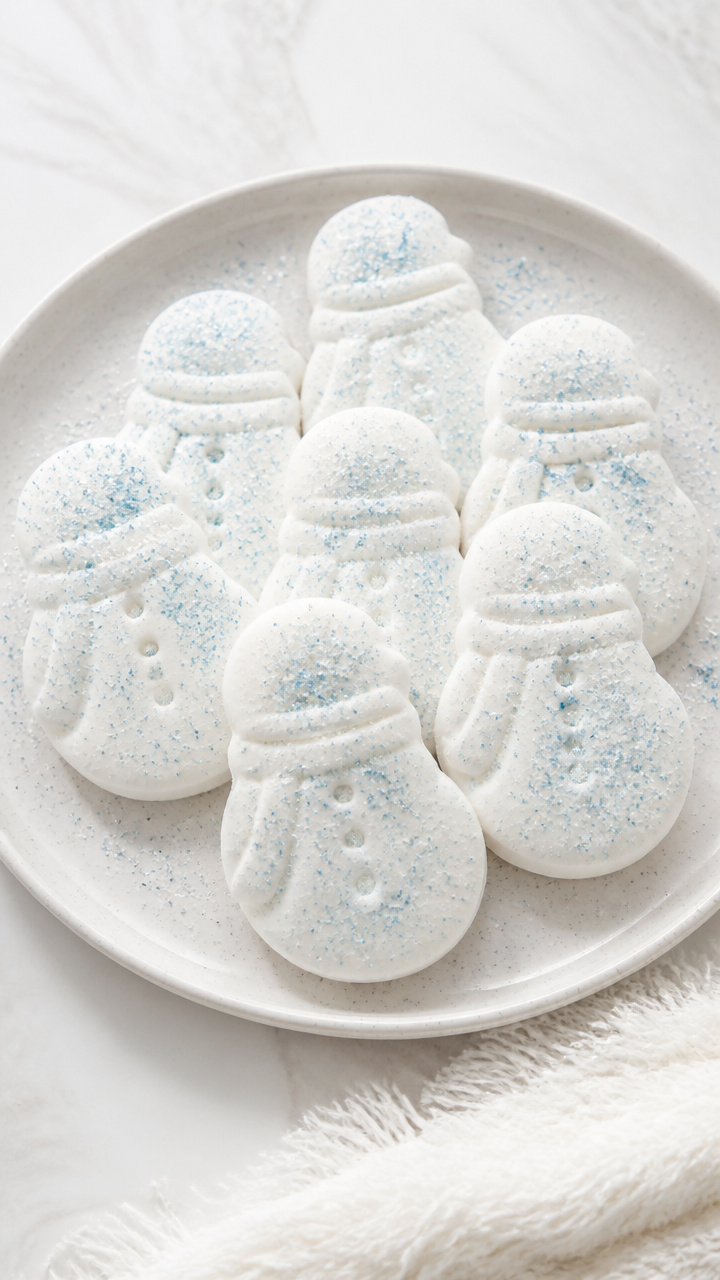
A moldable, cloud-like dough holds snowman shapes without drying out. Kids press cookie cutters into it and sprinkle details on top.
Materials Needed
- 2 cups canned shaving cream
- 1 cup cornstarch
- Mixing bowl
- Silicone spatula
- Snowman-shaped cookie cutter
- Glitter (blue and white), 1 teaspoon each
- Mini pom-poms (black, orange), 10 total
How to Make It
- Pour shaving cream into the bowl and add cornstarch gradually while stirring with the spatula.
- Mix until the dough pulls away from the bowl and forms a soft, moldable ball.
- Press the snowman cookie cutter into the dough and lift to release the shape.
- Sprinkle blue and white glitter over the top for icy sparkle.
- Press two black pom-poms for eyes and one orange pom-pom below for the nose.
6. Q-Tip Tree Backdrop
Moderate
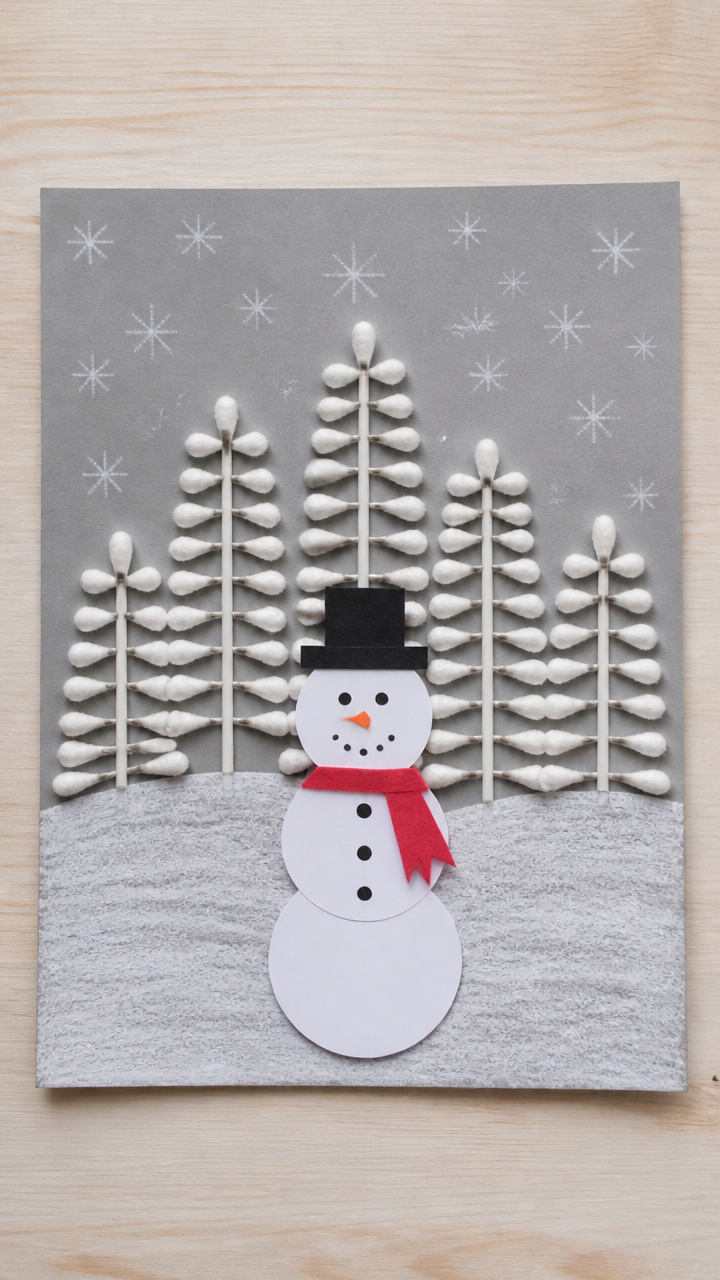
Rows of cotton-tipped sticks form a snowy forest behind a paper snowman. This diorama teaches depth and layering with simple tools.
Materials Needed
- 9×12 inch gray construction paper
- White school glue
- Full-size Q-tips, 20 per child
- Scissors
- White crayon
- Black marker
- 3-inch white paper circle (pre-cut)
How to Make It
- Draw a slight curve near the bottom of the gray paper with the white crayon to mark the ground line.
- Apply a thin line of glue along the curve and press the rounded ends of 10 Q-tips into it, standing upright.
- Space the Q-tips evenly and add 10 more behind them, slightly taller, to create depth.
- Let the glue dry for 10 minutes.
- Glue the white circle above the trees for the snowman head and use the marker to add eyes, nose, and mouth.
7. Button Mitten Snowmen
Easy
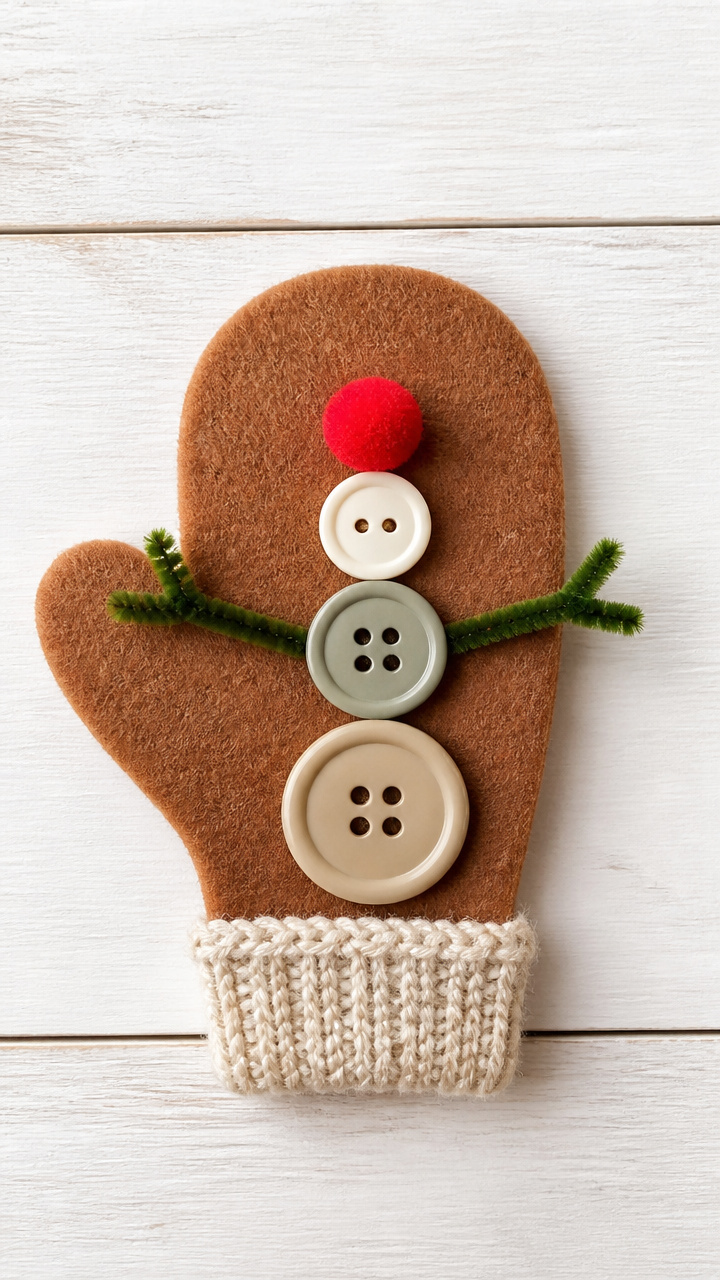
Three mismatched buttons stack into a snowman body on a felt mitten. This craft repurposes old clothing into cozy art.
Materials Needed
- Felt mitten shape (5 inches tall), 1 per child
- Assorted buttons (1 large, 1 medium, 1 small), 3 per child
- Fabric glue
- Chenille stem (green or brown), 2-inch piece
- Mini pom-pom (red), 1
- Tacky glue applicator tip
How to Make It
- Squeeze a small dot of fabric glue on the center of the mitten and press the largest button down to form the base.
- Add a dot of glue on top of the first button and stack the medium button above it.
- Glue the smallest button at the top for the head.
- Press the chenille stem piece into the side of the middle button for an arm.
- Glue the red pom-pom just below the top button for a nose.
8. Salt Dough Ornaments
Advanced
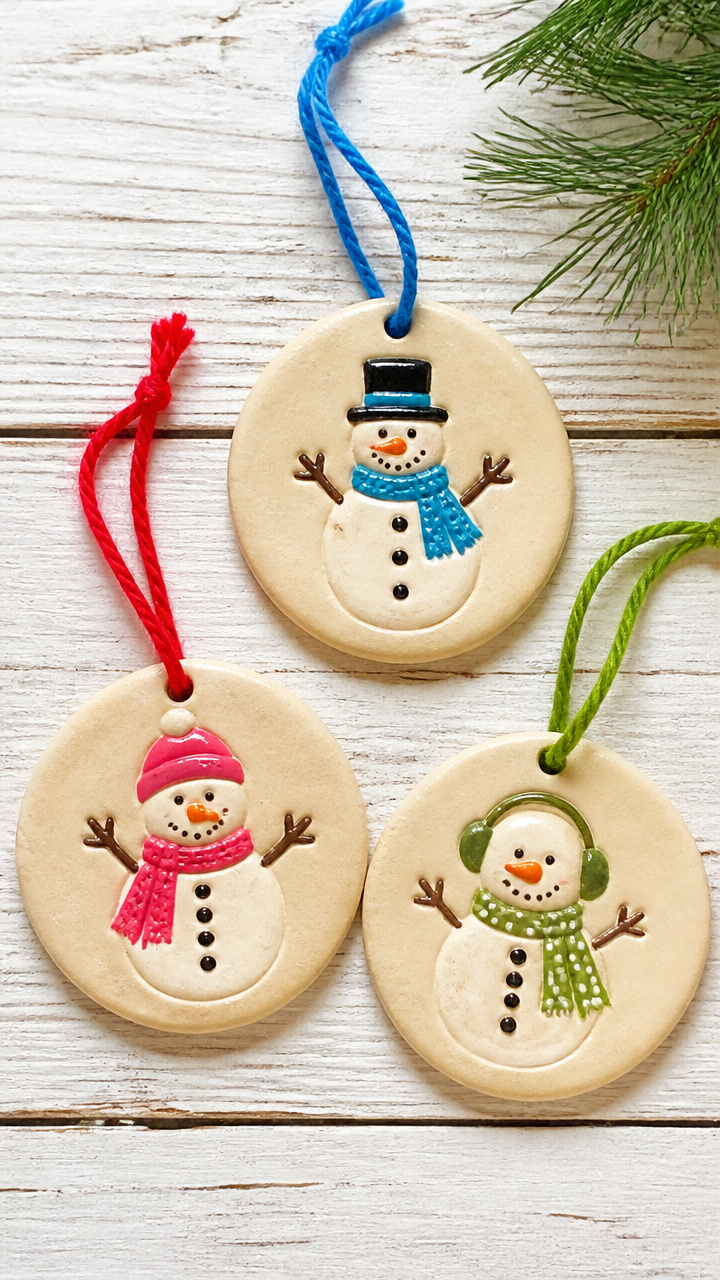
Hand-rolled shapes bake into hard keepsakes that hang by colorful strings. These snowmen carry memories long past winter break.
Materials Needed
- 2 cups all-purpose flour
- 1 cup table salt
- 3/4 cup warm water
- Mixing bowl
- Rolling pin
- Circular cookie cutter (3 inch)
- Straw (regular size)
- Baking sheet
- Parchment paper
- Oven
- Acrylic paints (black, orange, red)
- Paintbrush (small round)
- Ribbon (10-inch length, red)
How to Make It
- Mix flour, salt, and warm water in the bowl until a smooth dough forms, kneading by hand for 3 minutes.
- Roll the dough to 1/4 inch thickness on a floured surface.
- Cut out three circles per ornament using the cookie cutter.
- Stack the circles vertically on a parchment-lined baking sheet, pressing gently to adhere.
- Use the straw to poke a hole at the top of the largest circle.
- Bake at 250°F for 2 hours, turning once halfway through.
- Let cool completely, then paint on faces and details with acrylics.
- Thread ribbon through the hole for hanging.
9. Paper Plate Snowman Mobile
Moderate
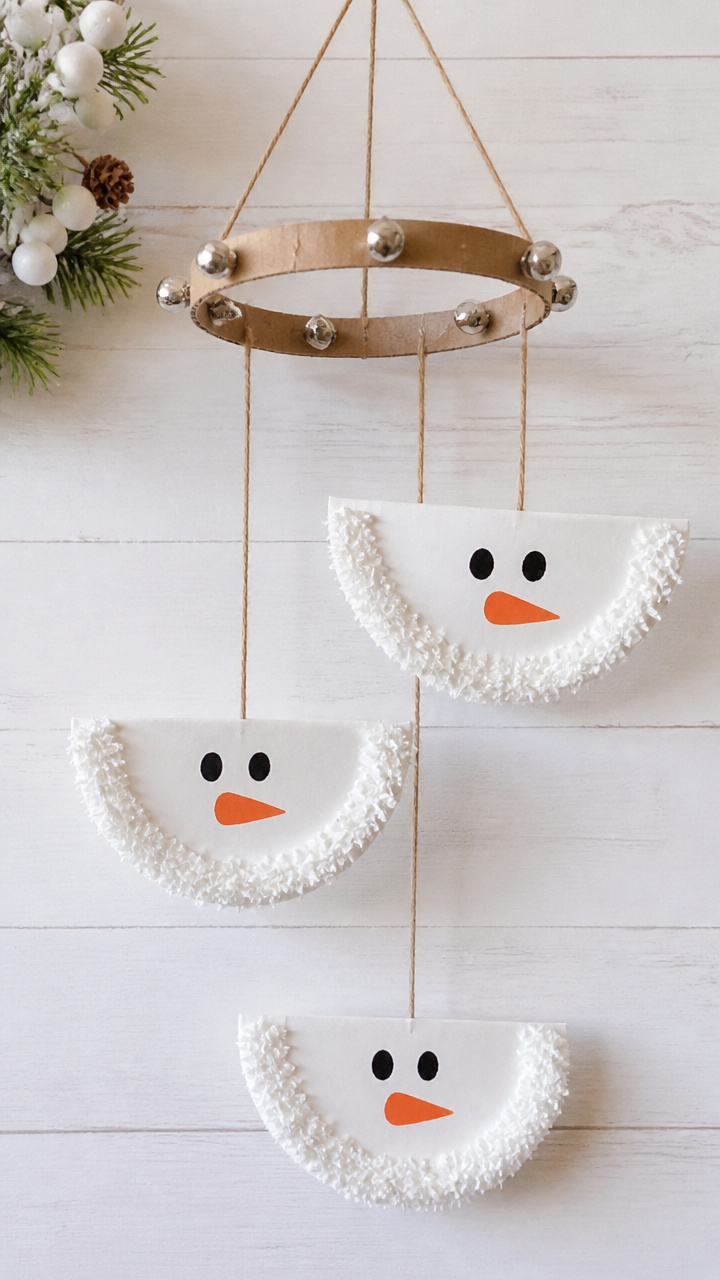
Half-plates dangle with string and jingle bells from a cardboard ring. The gentle clink adds sound to the winter scene.
Materials Needed
- White paper plates, 3 per child
- Scissors
- Hole punch
- Cardboard circle (6 inch diameter)
- Jute string (36 inches total)
- Acrylic paint (black, orange)
- Paintbrush
- Mini jingle bell, 1 per plate
- Glue
- Ruler
How to Make It
- Cut each paper plate in half with scissors to make six semicircles.
- Paint two black dots and an orange triangle on each semicircle for facial features.
- Let the paint dry for 15 minutes.
- Punch two holes at the curved edge of each piece.
- Tie a 6-inch string to each hole and attach a jingle bell to one string end before knotting.
- Punch three evenly spaced holes around the edge of the cardboard ring.
- Tie a 10-inch string to each hole on the ring and attach one snowman piece to each string pair.
10. Snowman Snack Stick
Easy
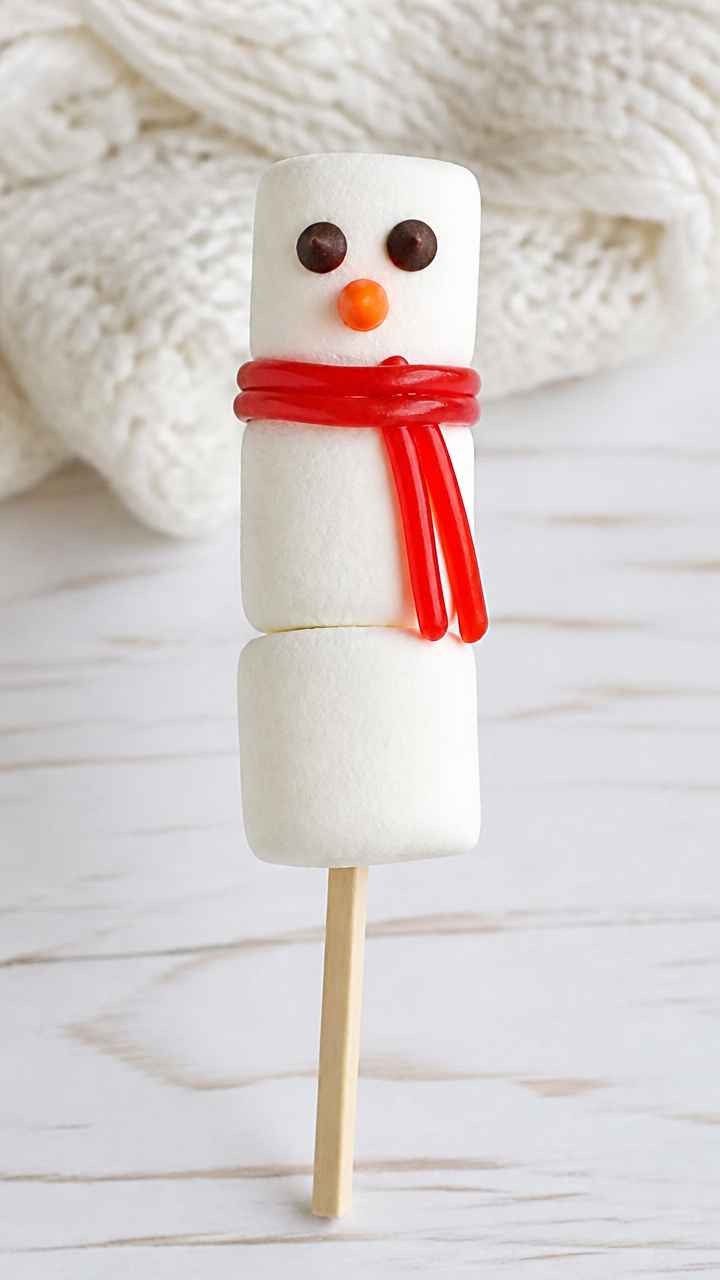
Edible marshmallow stacks balance on wooden sticks with candy details. This tasty craft doubles as a sweet treat after playtime.
Materials Needed
- Large white marshmallows, 3 per child
- Wooden craft sticks (6 inch)
- Mini chocolate chips, 6 per child
- Orange candy melts, 1 piece per child
- Red licorice laces, 2-inch piece
- Butter knife
- Microwave-safe bowl
How to Make It
- Push a craft stick carefully through the center of three marshmallows stacked vertically.
- Press two mini chocolate chips into the top marshmallow for eyes.
- Melt one piece of orange candy melt in the microwave for 20 seconds, stir, then dip the tip of the knife in and draw a small triangle below the eyes.
- Wrap the red licorice piece around the middle marshmallow for a scarf.
11. Tissue Paper Window Cling
Moderate
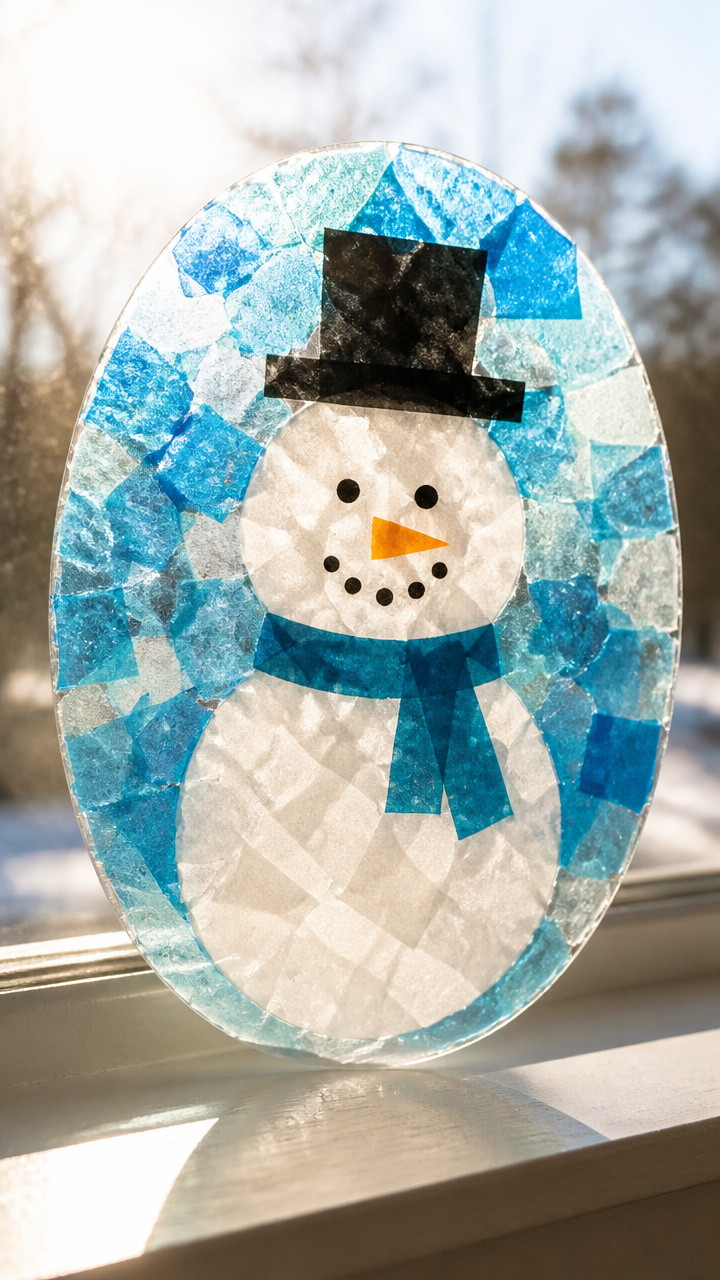
Layered squares of tissue create a stained-glass effect on clear contact paper. Sunlight turns these snowmen into glowing wall displays.
Materials Needed
- Clear adhesive contact paper, 9×12 inch sheet
- Blue and white tissue paper, 6×6 inch squares (3 each)
- Scissors
- Pencil
- White crayon
- Yardstick
- Laminating scissors
How to Make It
- Cut the contact paper into a 6×8 inch rectangle using the yardstick and laminating scissors.
- Peel the backing halfway and lay it sticky-side up on the table.
- Crumple one blue and two white tissue squares and place them on the sticky surface within a drawn snowman outline.
- Peel the rest of the backing and fold the top half over to seal the tissue inside.
- Use the white crayon to draw a hat, eyes, nose, and buttons on the front.
12. Clothespin Figure Friends
Easy
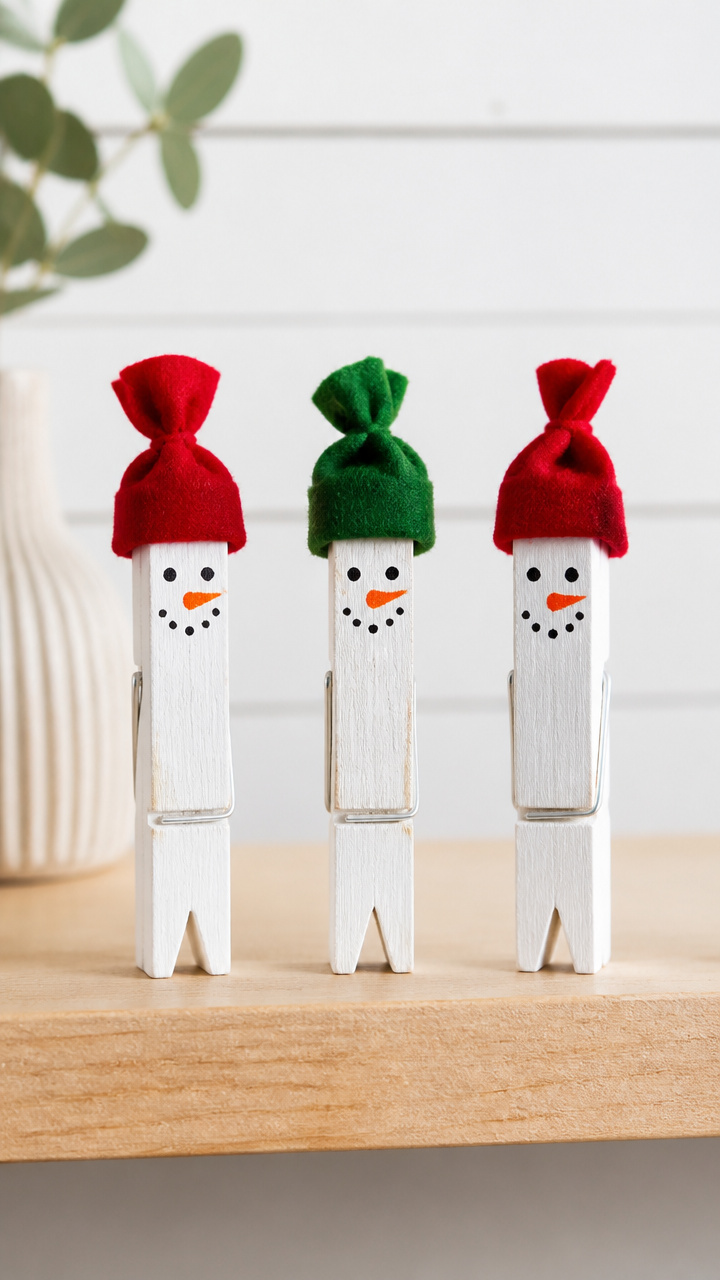
Wooden clips gain snowman faces and tiny hats on their heads. These wobbling characters stand on shelves or clip onto edges.
Materials Needed
- Wooden clothespins, 3 per child
- White acrylic paint
- Paintbrush (small flat)
- Black and orange permanent markers
- Mini felt hat shapes (2 inch), 3 per child
- Glue stick
How to Make It
- Paint the entire clothespin white and let dry for 15 minutes.
- Draw two black dots for eyes and a small orange triangle nose with the markers.
- Add three black dots down the center for buttons.
- Glue a felt hat to the top of the pin where the two arms meet.
13. Cereal Loop Scarf Craft
Easy
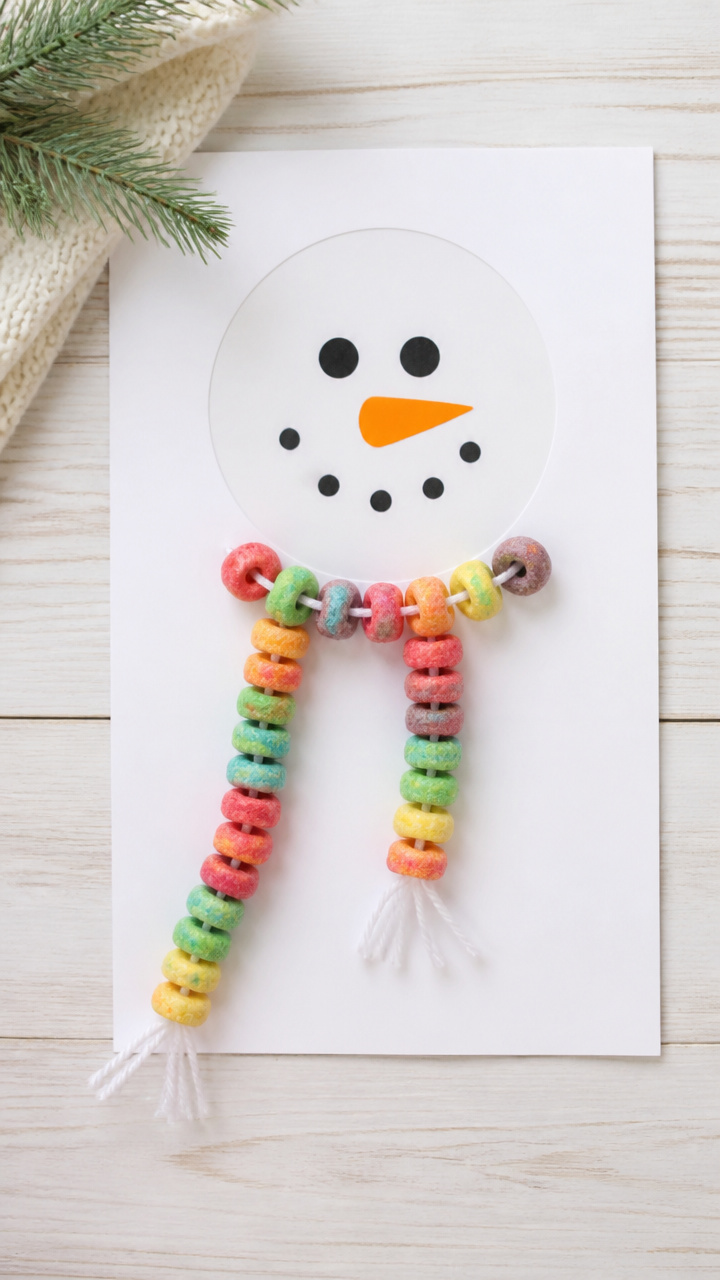
Rainbow-colored O-shaped cereal threads onto yarn necklines. This playful detail brings bright contrast to snowy designs.
Materials Needed
- White poster board (8×10 inch)
- Colored cereal loops (e.g., Fruit Loops), 15 per child
- Yarn (white, 12 inch)
- Glue
- Black and orange markers
- Circle stencil (3 inch)
How to Make It
- Trace and cut a large circle from the poster board using the stencil for the snowman head.
- Draw eyes, nose, and mouth with the markers.
- Glue one end of the yarn to the back of the head, loop it around the neck area, and glue the other end down.
- Thread 15 cereal loops onto the visible part of the yarn to form a scarf.
- Let dry for 10 minutes before displaying.
14. Ice Tray Snowman Garden
Moderate
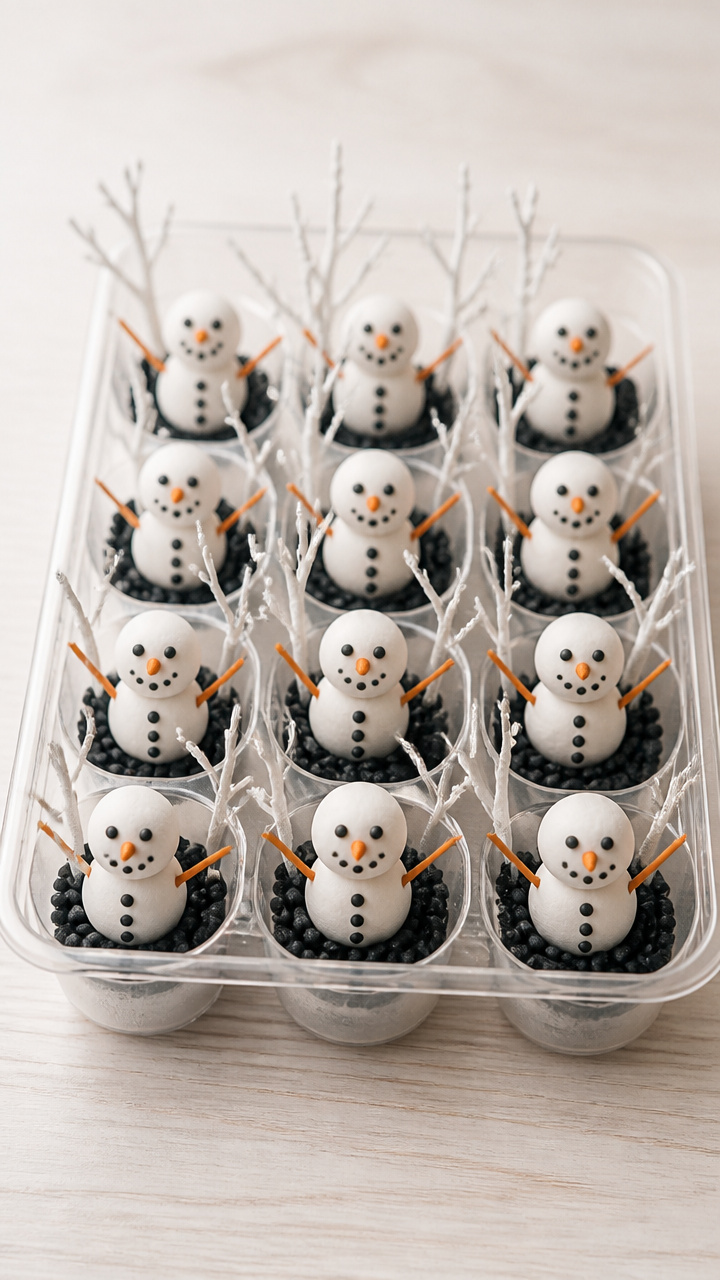
Mini snowmen rise from each cup of a repurposed ice tray. This group display works well on windowsills or tables.
Materials Needed
- Clean plastic ice tray (12-cup)
- Modeling clay (white), 1/4 cup
- Mini twigs (from outdoors, dried), 24 pieces
- Small pebbles (black), 36
- Orange toothpicks, cut in half, 12
- Glue
How to Make It
- Roll 12 small white clay balls and press one into each ice tray cup.
- Press two black pebbles into each ball for eyes and one half-toothpick for a nose.
- Insert two twigs into the sides of each ball for arms.
- Add three more pebbles down the center for buttons.
- Let sit undisturbed for 1 hour to firm up before moving.
15. Bubble Wrap Print Scene
Easy
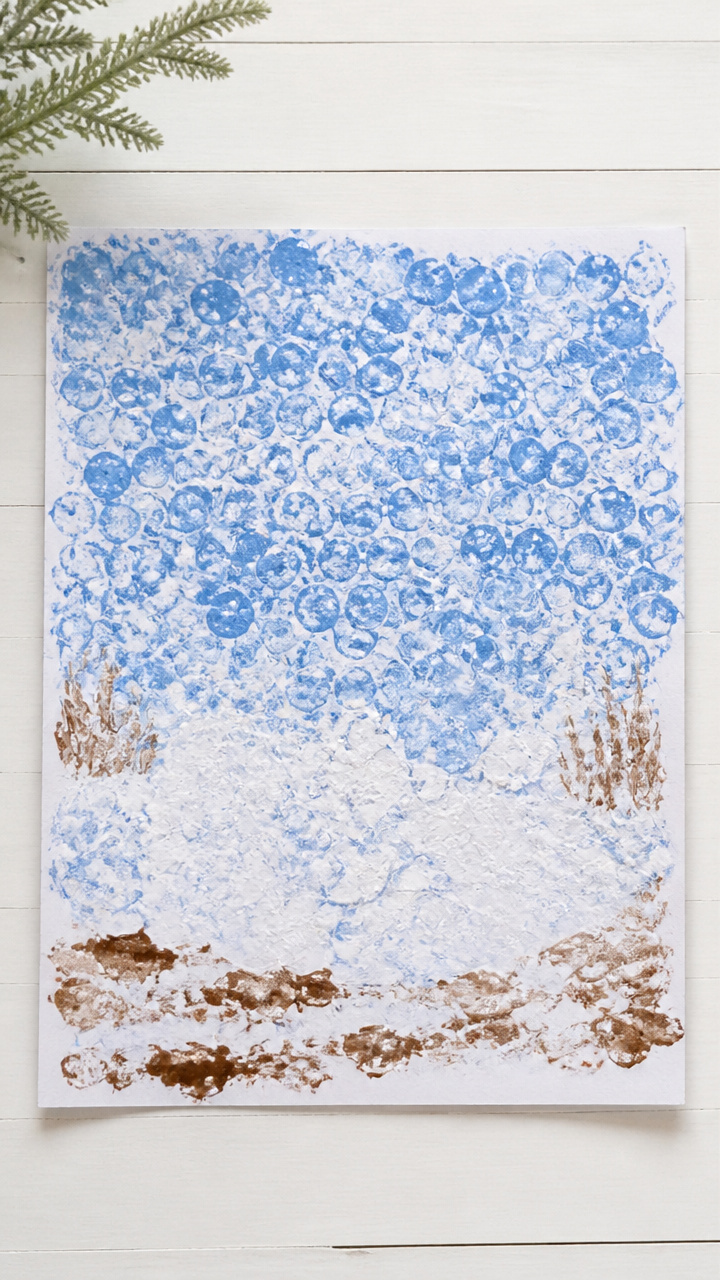
Stomped bubble wrap creates a snowy field under a painted sky. This process-focused craft celebrates mess and motion.
Materials Needed
- A3 white drawing paper
- Blue tempera paint
- Roller brush (4 inch)
- Sheet of bubble wrap (12×12 inch)
- Brown paint
- Foam brush
- Black marker
- White crayon
How to Make It
- Roll blue paint across the top two-thirds of the paper with the roller brush.
- Lay the bubble wrap on the lower third and step on it firmly with bare feet to transfer texture.
- Rinse feet and let the print dry for 10 minutes.
- Use the foam brush to paint two thin brown lines rising from the textured ground for tree trunks.
- Draw a snowman face and buttons with the black marker on the white space between sky and snow.
- Trace mittens and boots around the snowman with the white crayon.
16. Sock Puppet Snowman
Advanced
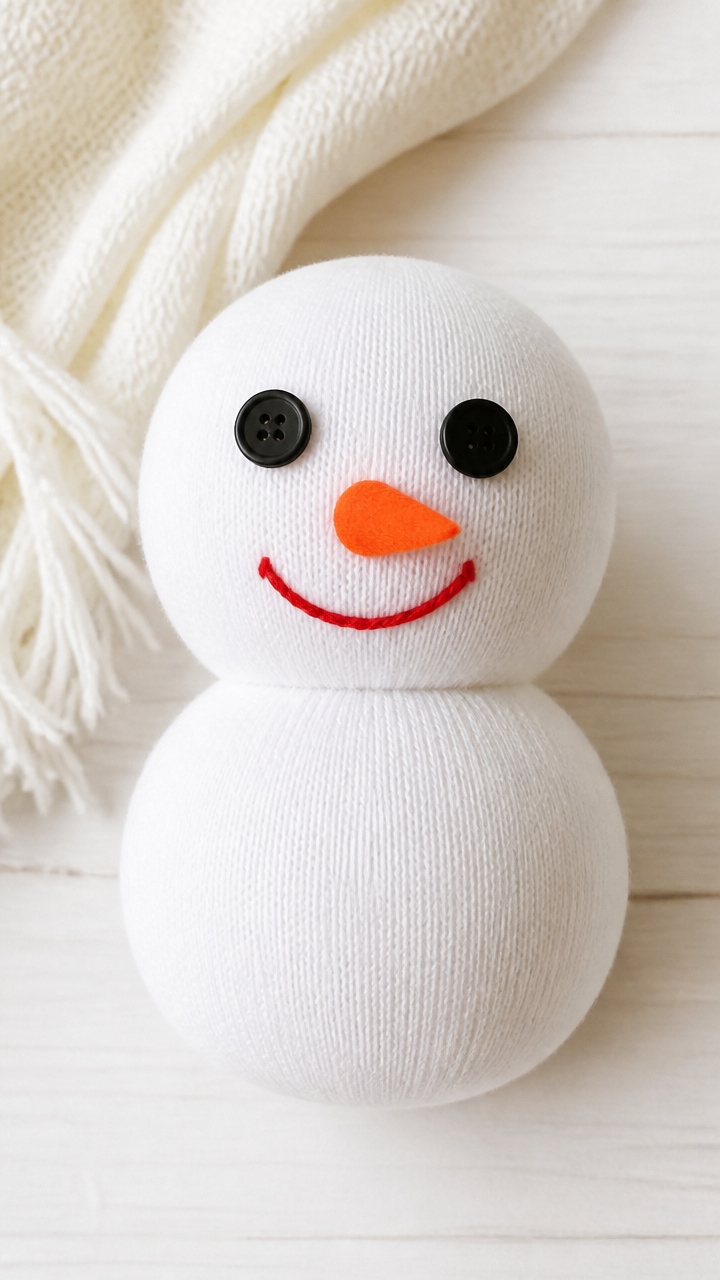
An old crew sock becomes a wiggling friend with stitched-on features. This wearable craft sparks imaginative play after creation.
Materials Needed
- White cotton crew sock
- Embroidery floss (black, orange, red)
- Needle (blunt tip, large eye)
- Polyester stuffing
- Orange felt (1×1 inch)
- Two black buttons (1/2 inch)
- Hot glue gun and glue stick
How to Make It
- Thread the needle with black floss and stitch two eyes just below the toe seam.
- Cut a small triangle from the orange felt and glue it centered below the eyes with hot glue.
- Stitch a red curved line for the mouth beneath the nose.
- Sew three black buttons down the center of the foot area.
- Stuff a small amount of polyester filling into the toe to shape the head.
- Slide your hand inside—the heel becomes the body, the toes hold the head.
17. Nature Collage Snowman
Moderate
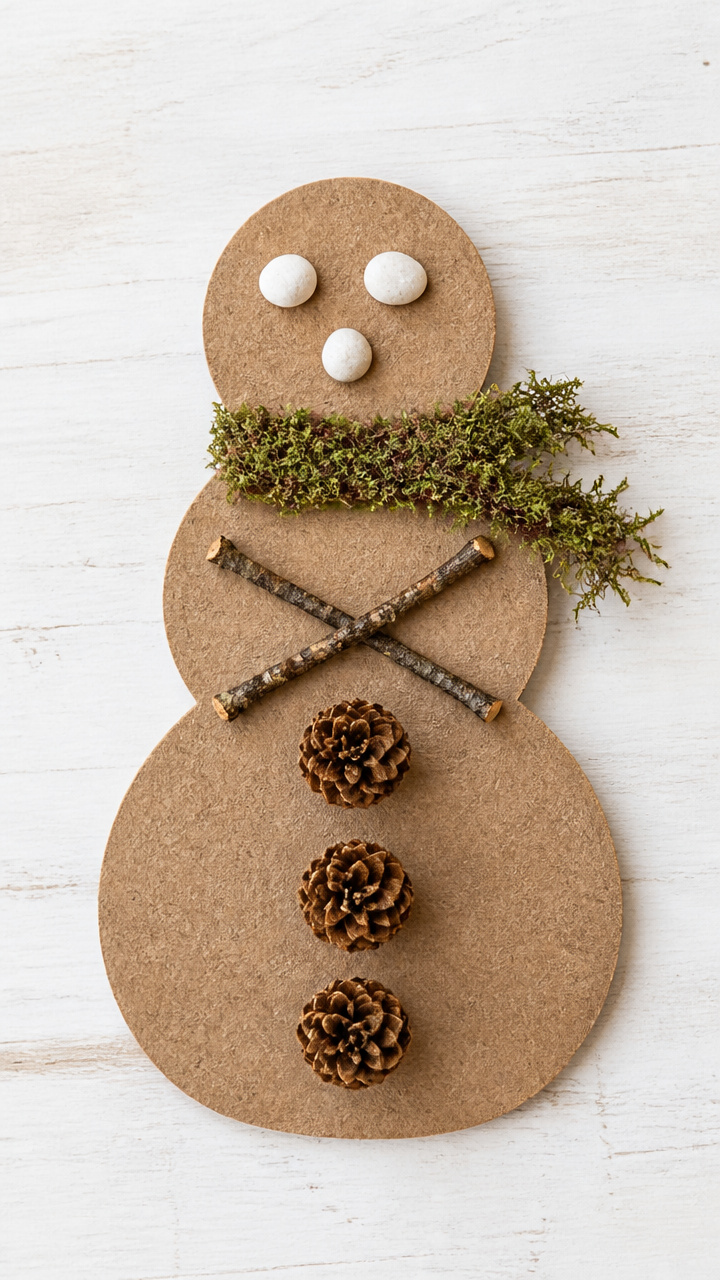
Twigs, pinecones, and stones arrange into a rustic outdoor figure. This craft connects little ones to seasonal finds from walks.
Materials Needed
- Sturdy cardboard base (6×8 inch)
- Pinecones (small, 3 per child)
- Twigs (3-inch lengths, 2 per child)
- Smooth stones (white, 3 per child)
- Moss (dried, 1 small clump)
- Craft glue
- Glue brush
How to Make It
- Arrange the largest pinecone at the bottom of the cardboard, then stack a medium and small one above to form the body.
- Glue each piece in place using the glue brush to spread adhesive evenly.
- Press two twigs into the sides of the middle pinecone for arms.
- Glue three stones vertically down the center for buttons.
- Place a small moss clump on top of the upper pinecone for a hat base and tuck real twigs around it to resemble branches.
Each snowman you make carries a spark of joy, shaped by small hands and big ideas. Gather your supplies and let the frosty fun begin.