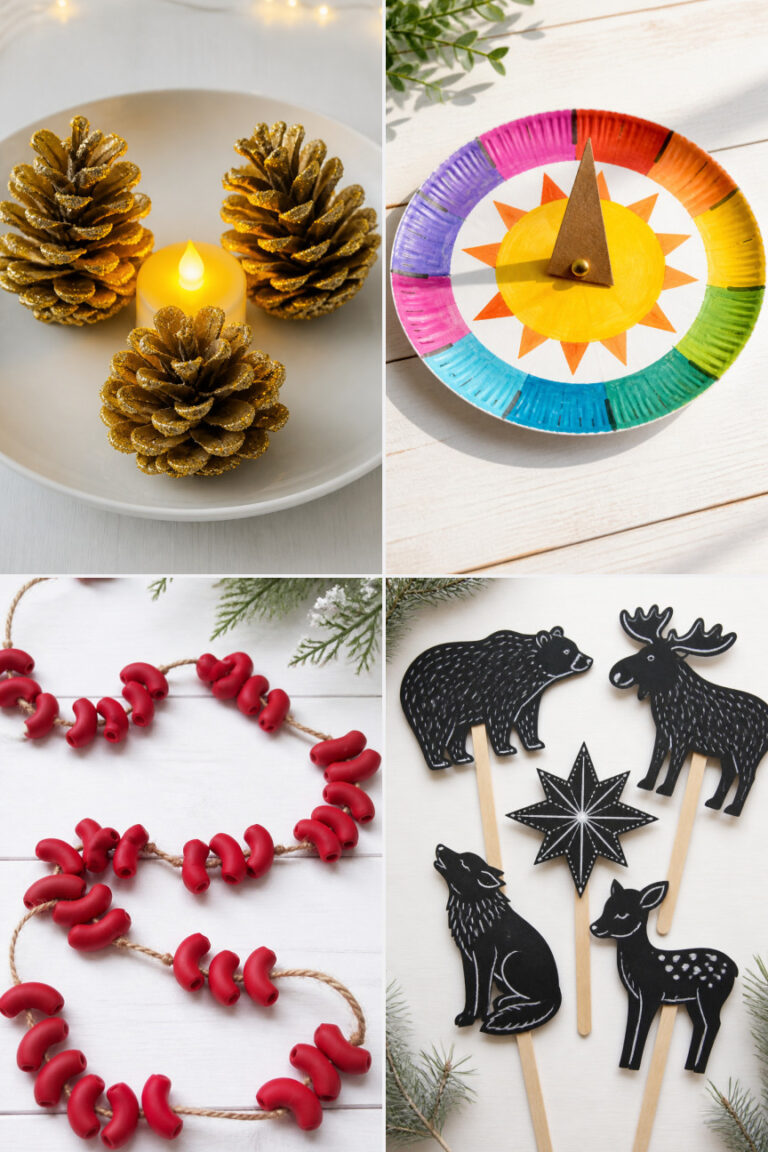
21 Winter Crafts for Preschool Kids That Build Fine Motor Skills

Tiny mittens dotting the windowsill, glitter catching the low winter light, sticky fingers shaping snowmen from cotton balls—these moments are golden. When little hands squeeze, pinch, thread, and tear, they're not just playing. They're building strength and control in ways that help with writing, dressing, and so much more.
Each of these crafts uses simple materials to create something joyful while quietly strengthening pincer grasp, hand-eye coordination, and bilateral control. No fancy setups, no long prep—just real activities you can start today with things you likely already have.
1. Cotton Ball Snowmen
Easy
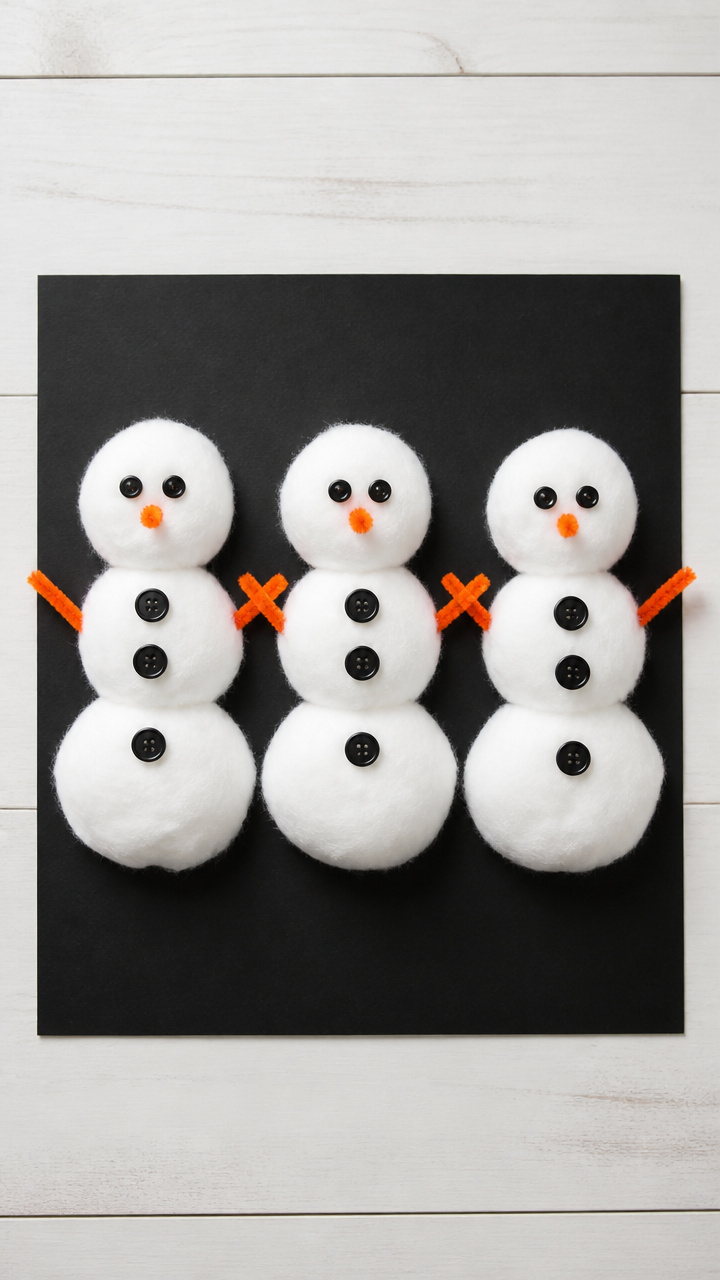
Round, fluffy snowmen with button eyes and pipe cleaner arms stand proudly on construction paper bases. This tactile build encourages gentle pinching and precise placement.
Materials Needed
- 5-inch white cotton balls, 3 per snowman
- 9×12 inch black construction paper, 1 sheet per child
- Googly eyes, 8mm, 2 per snowman
- Orange chenille stems, 1 per snowman
- Black buttons, 6mm, 3 per snowman
- White school glue in bottles, 1
- Glue brush, 1
How to Make It
- Place one large cotton ball at the bottom of the black paper and squeeze a small puddle of glue underneath it using the glue bottle.
- Press the cotton ball into the glue and hold for 5 seconds to secure it as the base.
- Repeat with a medium cotton ball on top for the body, then a small one for the head, gluing each layer in place.
- Use the glue brush to dab tiny dots of glue on the face area and press on two googly eyes and three black buttons down the center.
- Cut the orange chenille stem in half and bend one piece into an arm shape, then glue each end into the sides of the middle cotton ball.
2. Pom-Pom Ice Skaters
Easy
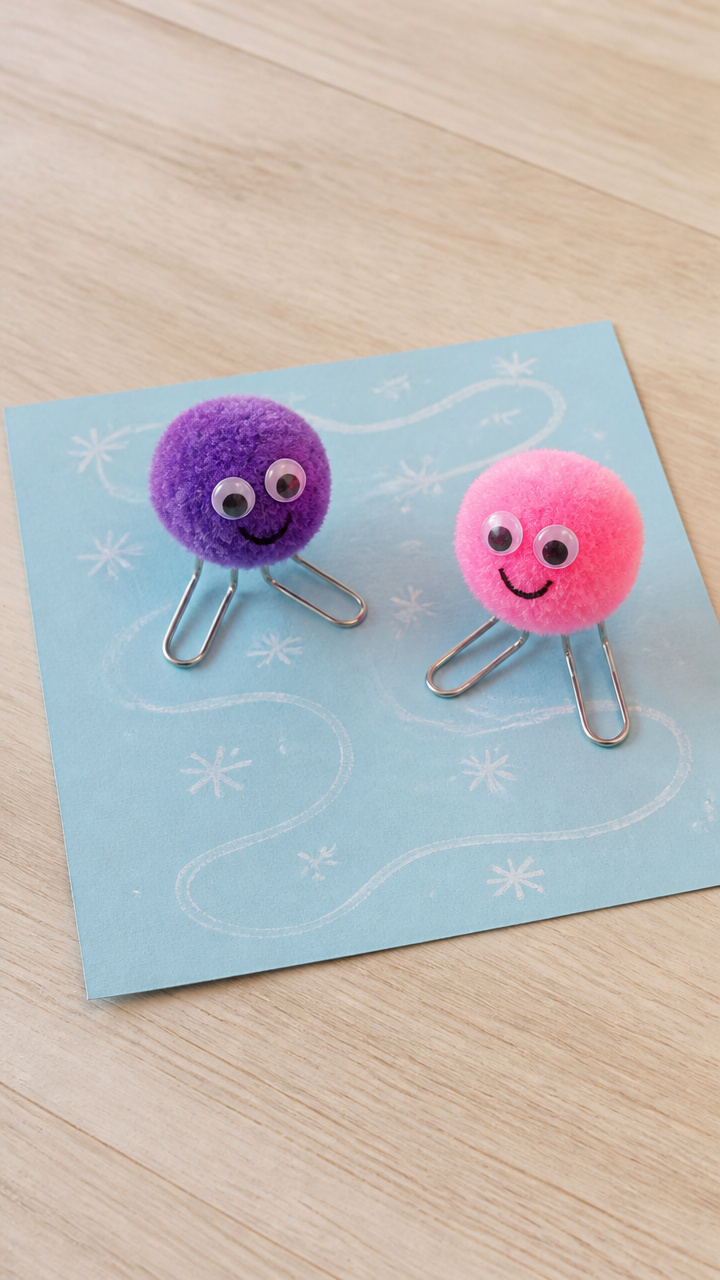
Bright pom-poms glide across icy blue paper rinks on bent paperclip blades. Sliding and bending actions boost finger dexterity and wrist control.
Materials Needed
- 1-inch craft pom-poms, 1 per skater
- Colored cardstock, 6×6 inch squares, 1 per child
- Jumbo paperclips, 1 per skater
- Fine-tip black marker
- White school glue
- Mini wiggle eyes, 6mm, 2 per skater
- Scissors
How to Make It
- Bend one jumbo paperclip into an L-shape by folding one end 90 degrees to form a skate blade.
- Lay the bent paperclip flat on the cardstock and place the pom-pom on top where the foot meets the leg.
- Use white school glue to attach the pom-pom to the upright part of the paperclip, holding it for 10 seconds.
- Draw a face on the pom-pom with the black marker and add two mini wiggle eyes with a dot of glue.
- Let dry completely before sliding the skater across the paper.
3. Yarn-Wrapped Snowflake Cards
Moderate
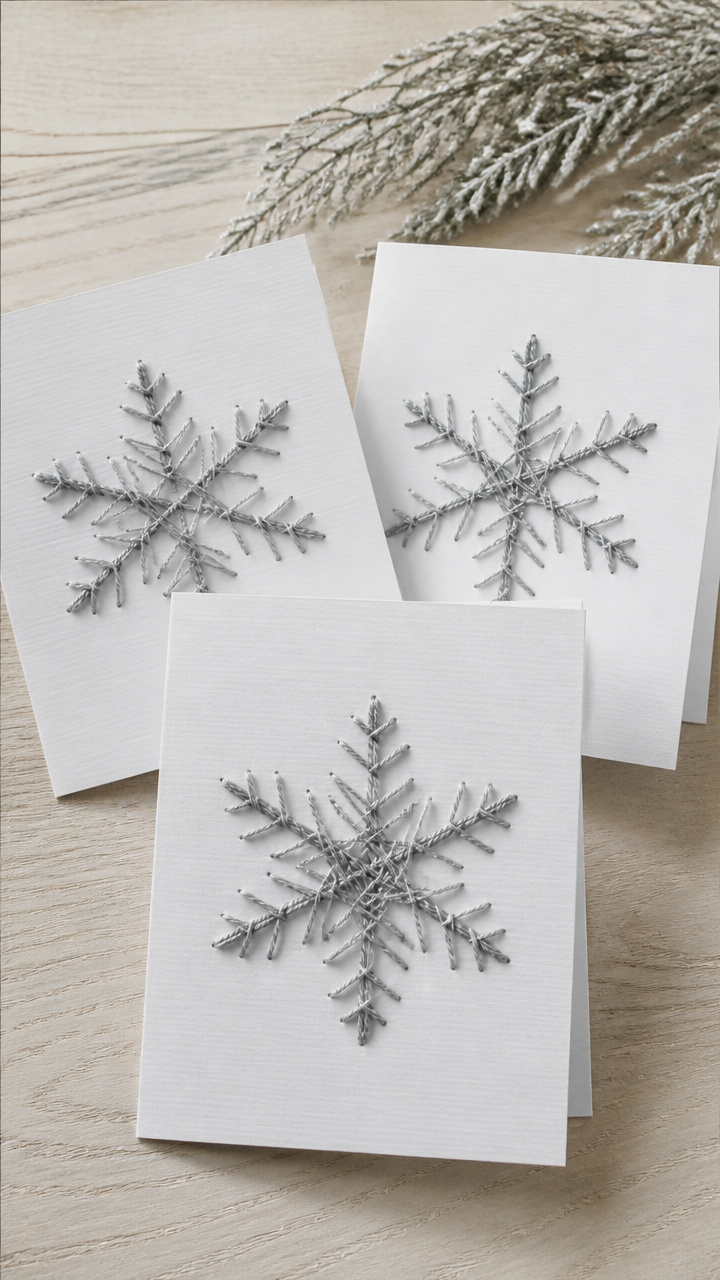
Delicate snowflakes bloom from tightly wound silver yarn on thick cardstock. Wrapping builds grip strength and focus.
Materials Needed
- A4 white cardstock, folded to 5.5×8.5 inches, 1 per child
- Silver embroidery floss, 1 skein
- Pencil with eraser
- Scissors
- Clear tape, 1/4 inch wide
- Ruler
How to Make It
- Use the ruler and pencil to draw a six-pointed snowflake outline lightly in the center of the front card panel.
- Tear off 12 inches of clear tape and lay it sticky-side-up on the table.
- Wrap the silver embroidery floss tightly over the tape, covering its entire length without gaps.
- Carefully lift the yarn-covered tape and press it along one snowflake arm drawn on the card, smoothing as you go.
- Repeat for all six arms, then trim excess tape at the tips with scissors.
4. Button Mitten Match
Easy
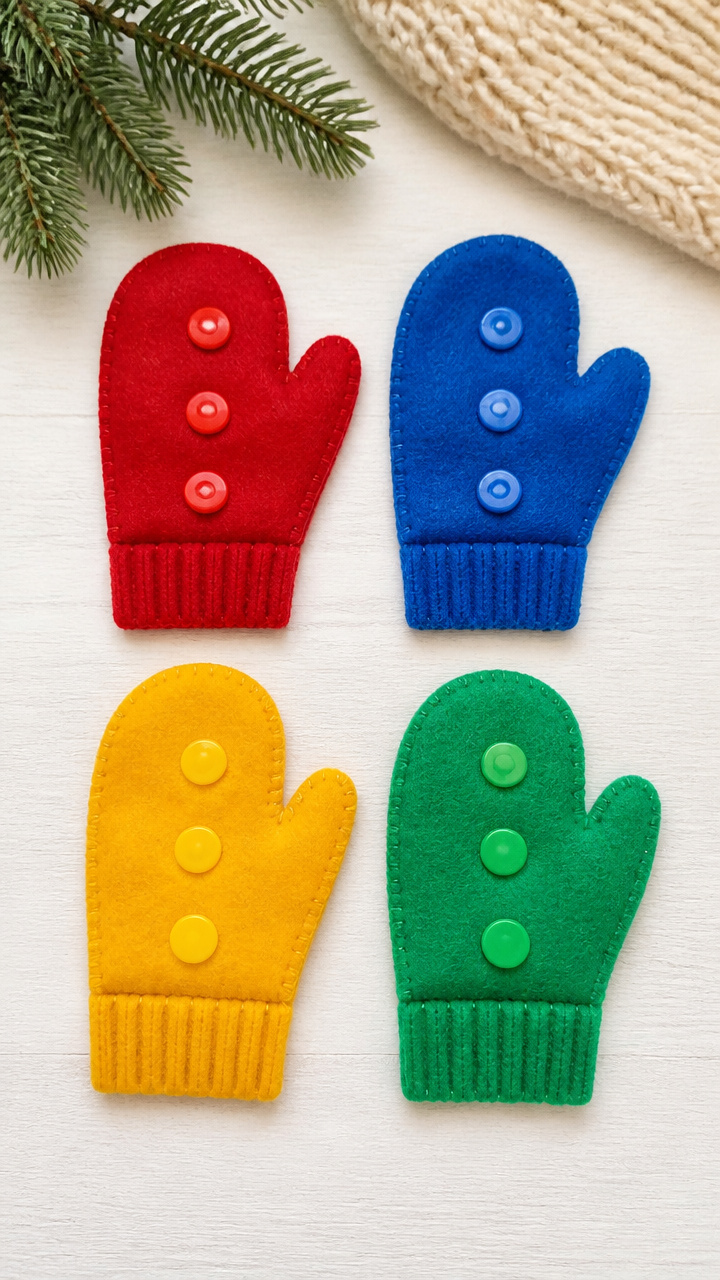
Colorful mittens with matching button pairs invite sorting and snapping. This quiet game sharpens visual discrimination and thumb opposition.
Materials Needed
- Felt sheets, red, blue, yellow, green, 1 8.5×11 sheet each
- Snap fasteners, 2-part, 12 pairs
- Fabric scissors
- Pencil
- Ruler
- Self-healing cutting mat
How to Make It
- Use the ruler and pencil to draw six mitten shapes, 3 inches tall, on each felt color, totaling 24 mittens.
- Cut out all mittens with fabric scissors on the cutting mat.
- Press one side of a snap onto the palm of a red mitten and the mating piece on another red mitten.
- Repeat with matching colors for blue, yellow, and green, using three pairs per color.
- Mix up the mittens and let children find and snap together matching pairs.
5. Pipe Cleaner Reindeer Ornaments
Moderate
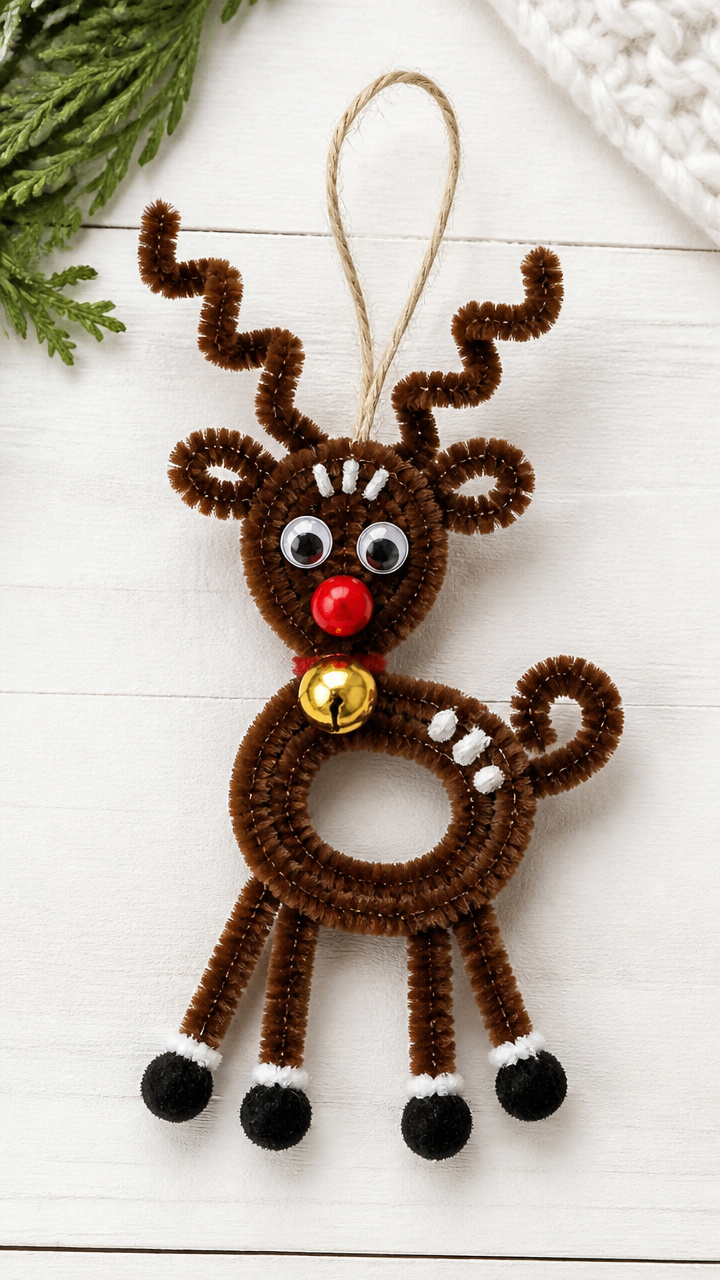
Twisted antlers and curly tails give reindeer charm and fine motor challenge. Bending wire strengthens hand muscles.
Materials Needed
- Brown chenille stems, 12 inches long, 3 per reindeer
- Red pony beads, 8mm, 1 per reindeer
- Googly eyes, 6mm, 2 per reindeer
- Gold jingle bell, 15mm, 1 per reindeer
- Scissors
- White school glue
How to Make It
- Take one brown chenille stem and fold it in half, twisting the top 2 inches tightly to form antlers.
- Slide one red pony bead onto the lower end to make the nose and bend both legs down at 90 degrees.
- Attach googly eyes just above the bead with a dab of white school glue.
- Wrap a second chenille stem around the neck area and twist the ends behind to secure as the body.
- Bend the third chenille stem into a curl for the tail and glue it to the back near the legs, then thread the bell onto the neck twist.
6. Crumpled Paper Snowy Trees
Easy
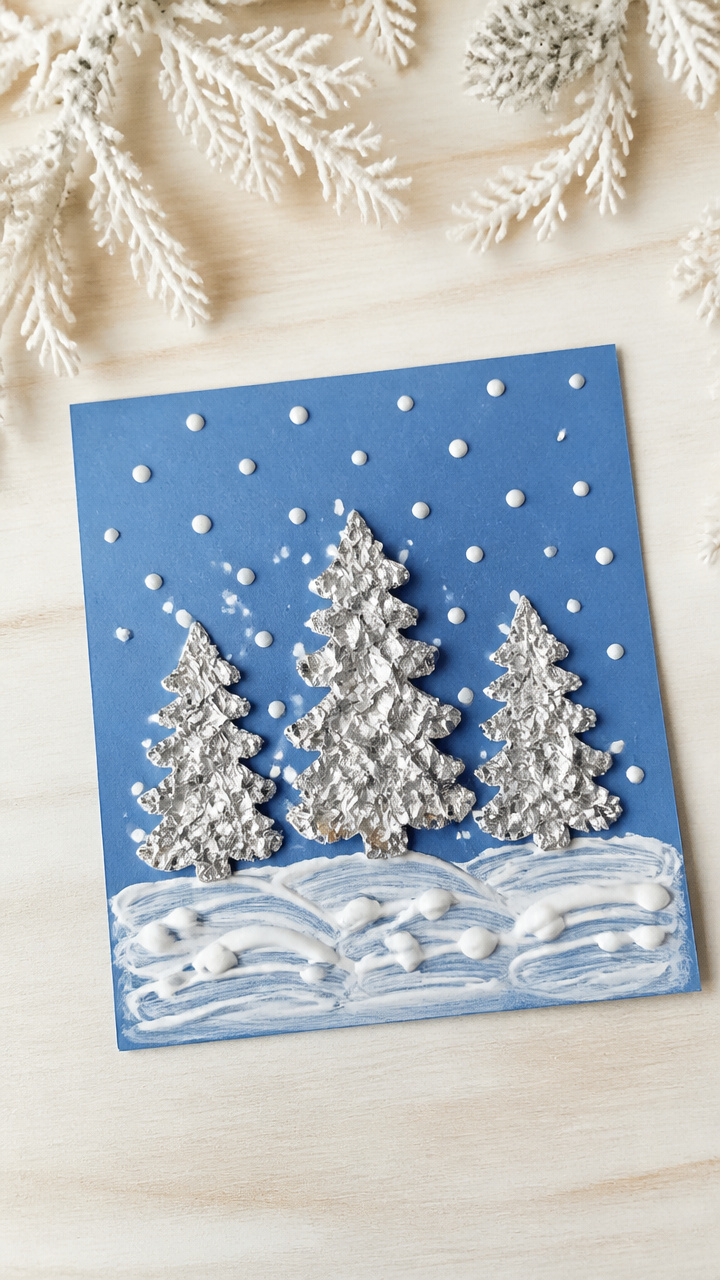
Silvery trees rise from crumpled foil backgrounds, shaped with fingertips and glue. Crumpling boosts hand strength and sensory awareness.
Materials Needed
- Silver aluminum foil, 9×12 inch sheets, 1 per child
- Blue construction paper, 9×12 inch, 1 per child
- White school glue
- Paintbrush, 1/2 inch flat
- Cotton swabs, 1 per tree
How to Make It
- Crumple the silver foil into a tight ball, then slowly flatten it slightly to keep texture.
- Glue the foil piece centered on the blue construction paper using the paintbrush to spread a thin layer of white school glue.
- Dip one end of a cotton swab into white school glue and dot along the top edge of the foil to form treetop snow.
- Press small bits of leftover foil onto the glue dots to create snowy peaks.
- Let dry flat for 20 minutes before displaying.
7. Clothespin Penguin Families
Easy
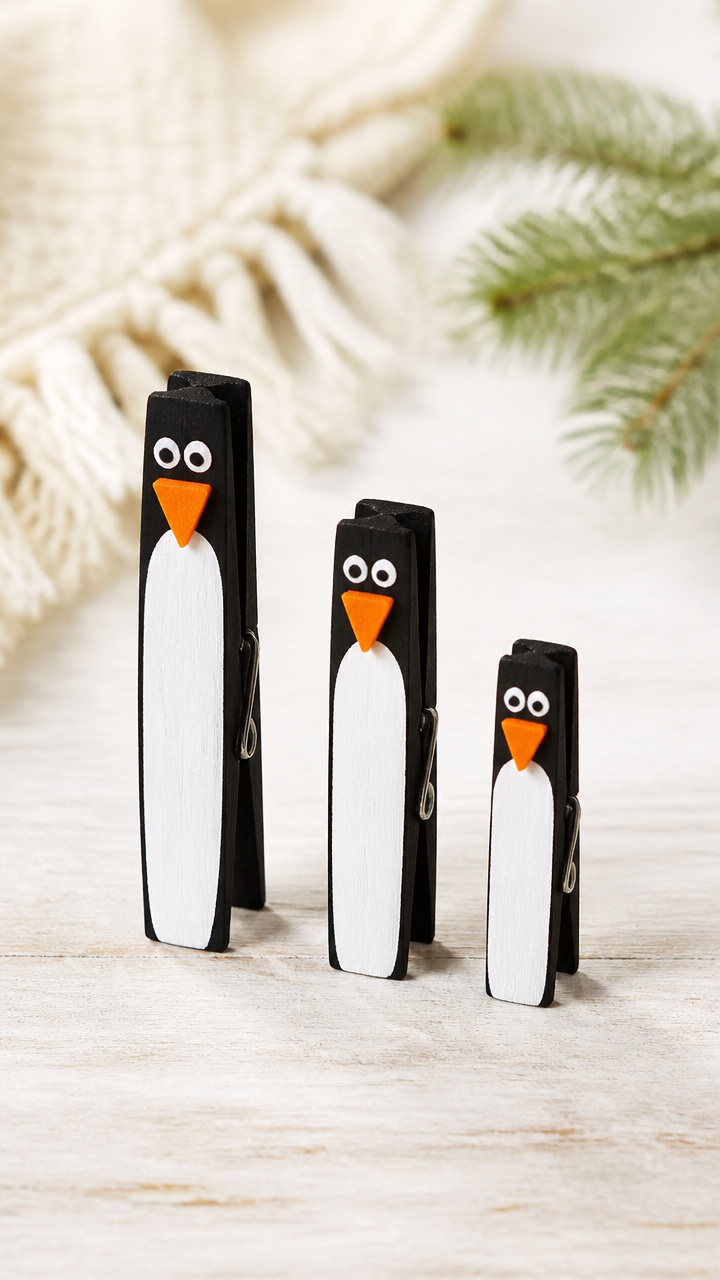
Wooden clothespins waddle with flappy wings and bright beaks. Clipping and decorating improve tripod grasp.
Materials Needed
- Plain wooden clothespins, 3 per family
- Black acrylic paint
- Paintbrush, #4 round
- Orange craft foam, 1 sheet
- White school glue
- Scissors
- Small googly eyes, 4mm, 6 total
How to Make It
- Paint the entire clothespin black except for the clamping end and let dry for 15 minutes.
- Cut three small triangles from orange craft foam for beaks and three tiny feet.
- Glue one beak to the front of each clothespin tip and two feet to the bottom.
- Add two googly eyes above each beak with a dot of white school glue.
- Let dry completely before letting the penguins 'walk' by opening and closing the clips.
8. Sticker Snowflake Windows
Easy
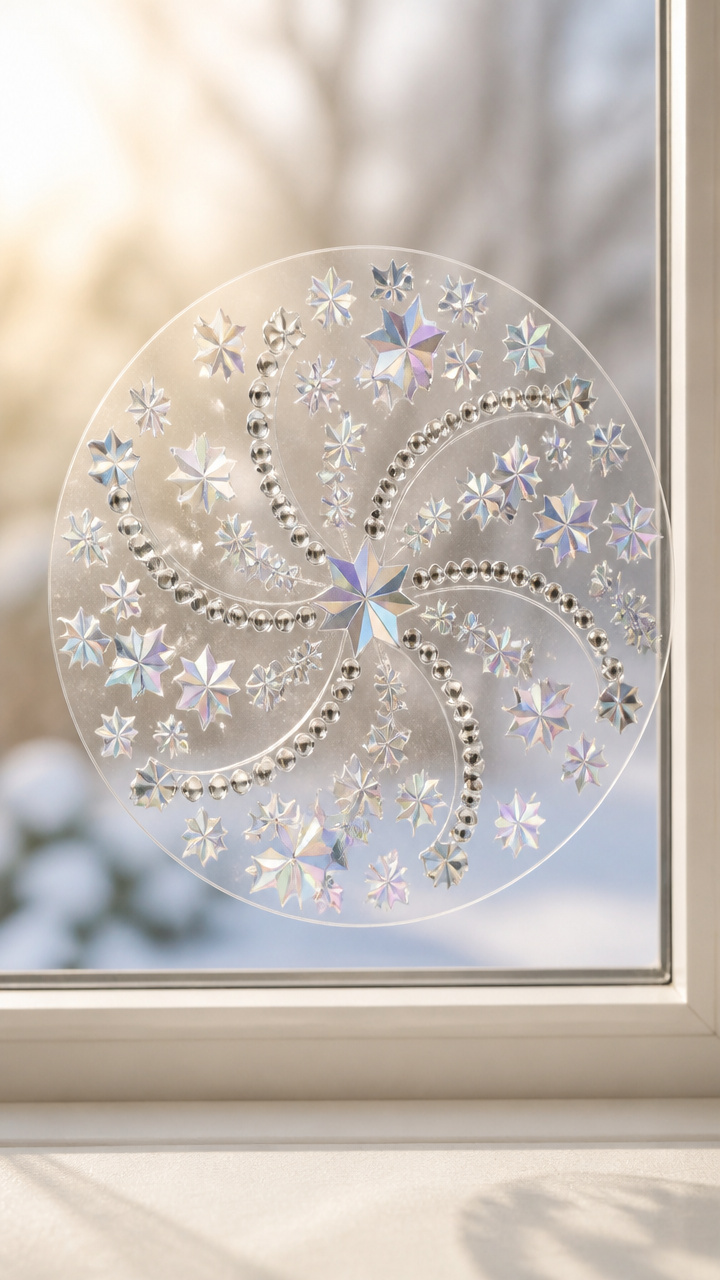
Iridescent stickers spiral into frosty designs on clear contact paper. Peeling and placing stickers refine fingertip control.
Materials Needed
- Clear adhesive shelf liner, 12×18 inch sheet per child
- Iridescent star stickers, 1/2 inch, 20 per child
- Silver dot stickers, 1/4 inch, 15 per child
- Scissors
- Roll of masking tape
How to Make It
- Cut a 12×18 inch rectangle of clear adhesive shelf liner and peel off the backing carefully.
- Stick the liner, sticky side up, to a flat table using small pieces of masking tape at each corner.
- Peel one iridescent star sticker at a time and place it near the center of the sheet.
- Build outward in a radial pattern using silver dot stickers to connect stars like a snowflake.
- Continue until the design fills the sheet, then hang in a window to catch the light.
9. Q-Tip Igloo
Moderate
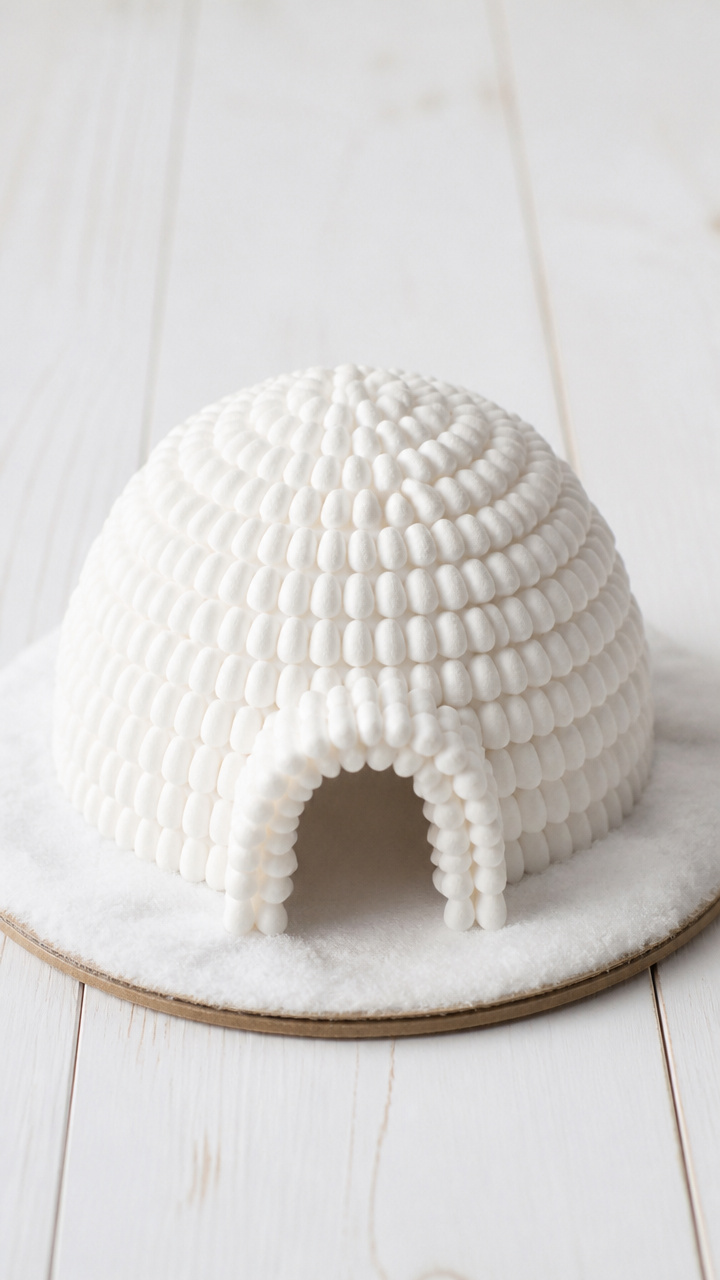
A domed igloo made of cotton-tipped sticks stands sturdy with careful gluing. Aligning and spacing teaches precision.
Materials Needed
- Regular-size Q-Tips, 25 per igloo
- White school glue
- Cardboard base, 6×6 inch, 1 per child
- Pencil
- Scissors
- Plastic bowl, 6 inch diameter
How to Make It
- Trace a half-circle igloo shape on the cardboard base using the plastic bowl and pencil.
- Apply a small dot of white school glue at the base line and place the first row of Q-Tips side by side horizontally.
- Let the first row dry for 10 minutes before adding the next row, staggering the joints like bricks.
- Angle each new row slightly inward to form a dome, using only the cotton end to touch the row below.
- Stop when the arch closes at the top and let dry fully for 1 hour.
10. Glitter Glue Sleds
Easy
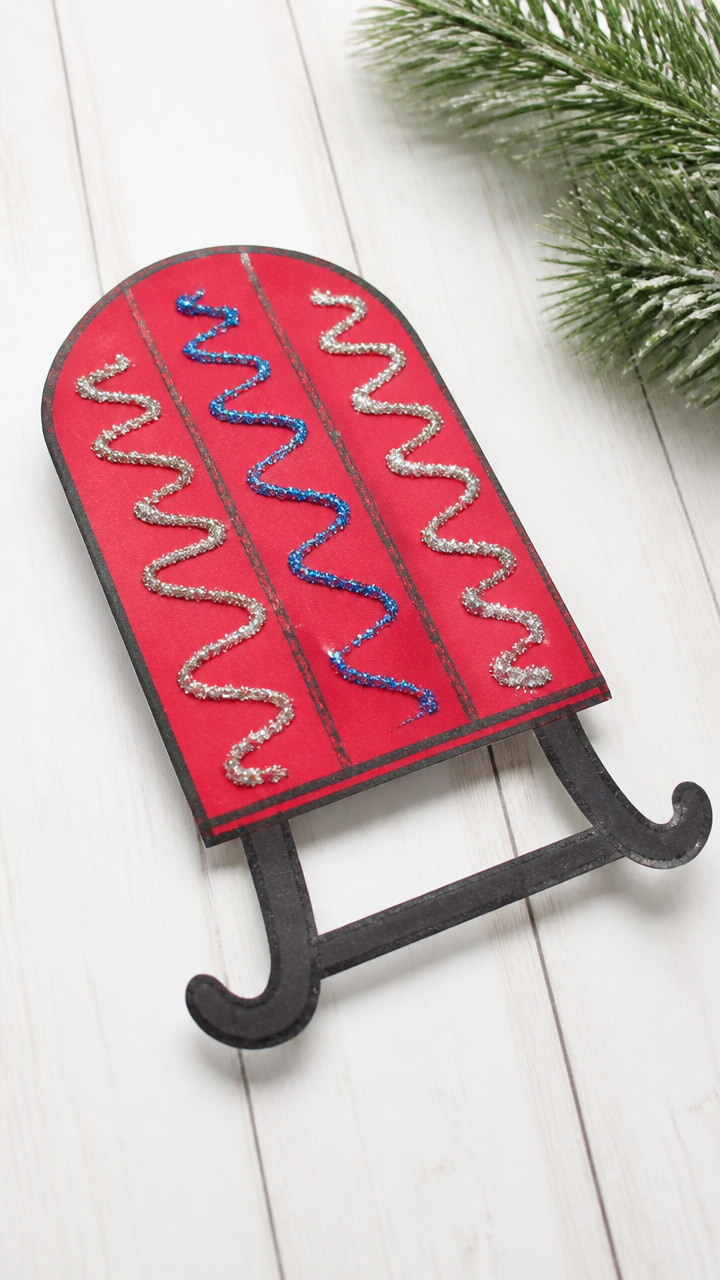
Sleek sleds shine with zigzag trails of glitter glue. Squeezing bottles builds hand endurance.
Materials Needed
- Red construction paper, 6×9 inch, 1 per child
- Glitter glue, blue, 1 bottle
- Glitter glue, silver, 1 bottle
- Black crayon
- Ruler
How to Make It
- Use the ruler and black crayon to draw a simple sled shape with two runners and a seat back on the red paper.
- Squeeze blue glitter glue along both runner lines in a steady, thin bead, guiding the bottle slowly with your dominant hand.
- Run silver glitter glue along the seat back and handlebar in a wavy pattern.
- Keep the paper flat and let dry for 30 minutes until glue is no longer tacky.
11. Pinecone Penguins
Moderate
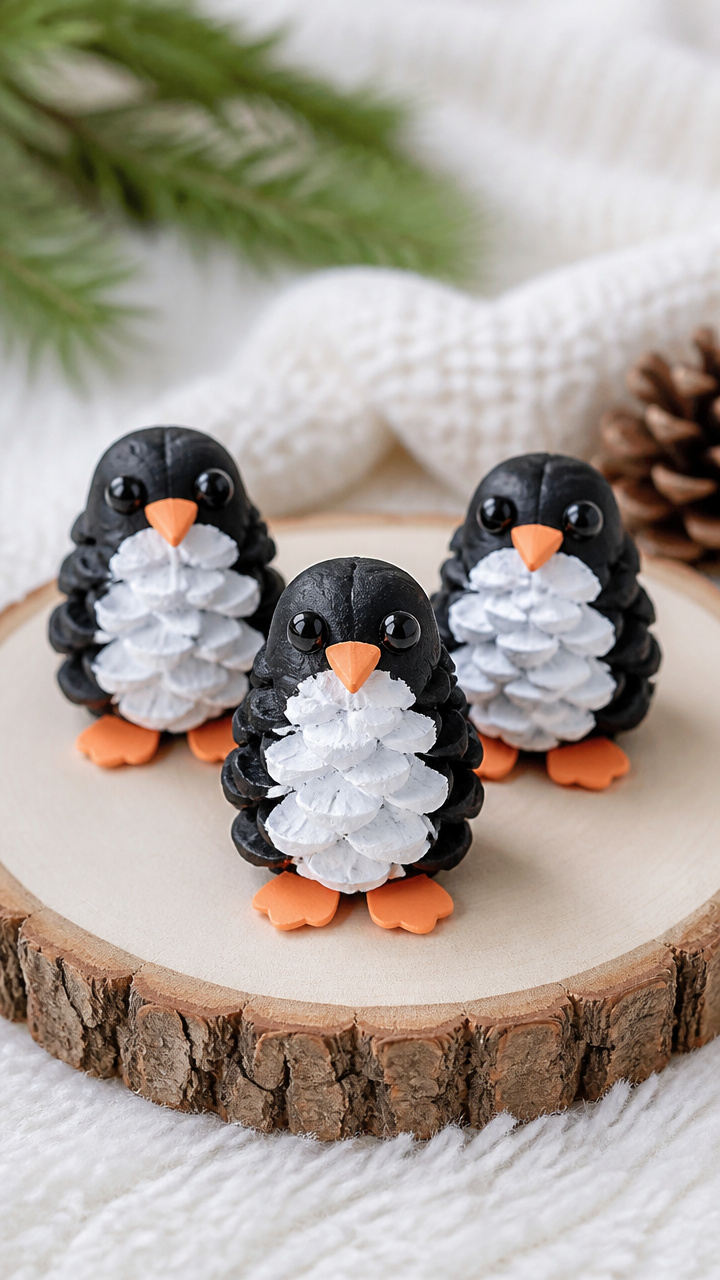
Real pinecones become plump penguins with soft feather tufts and glossy eyes. Handling natural shapes improves grip variety.
Materials Needed
- Small pinecones, 2-3 inches tall, 1 per child
- Black craft paint
- Foam brush, 1 inch
- White craft paint
- Orange craft foam, 1 sheet
- White school glue
- Scissors
- Large googly eyes, 10mm, 2 per penguin
How to Make It
- Paint the entire pinecone black using the foam brush and let dry for 20 minutes on a flat surface.
- Paint the bottom third white to form the belly and let dry another 15 minutes.
- Cut a small triangle from orange craft foam for the beak and two tiny feet.
- Glue the beak between the top scales and the feet beneath the base.
- Add googly eyes just above the beak with a dab of white school glue and let dry.
12. Torn Paper Snowbanks
Easy
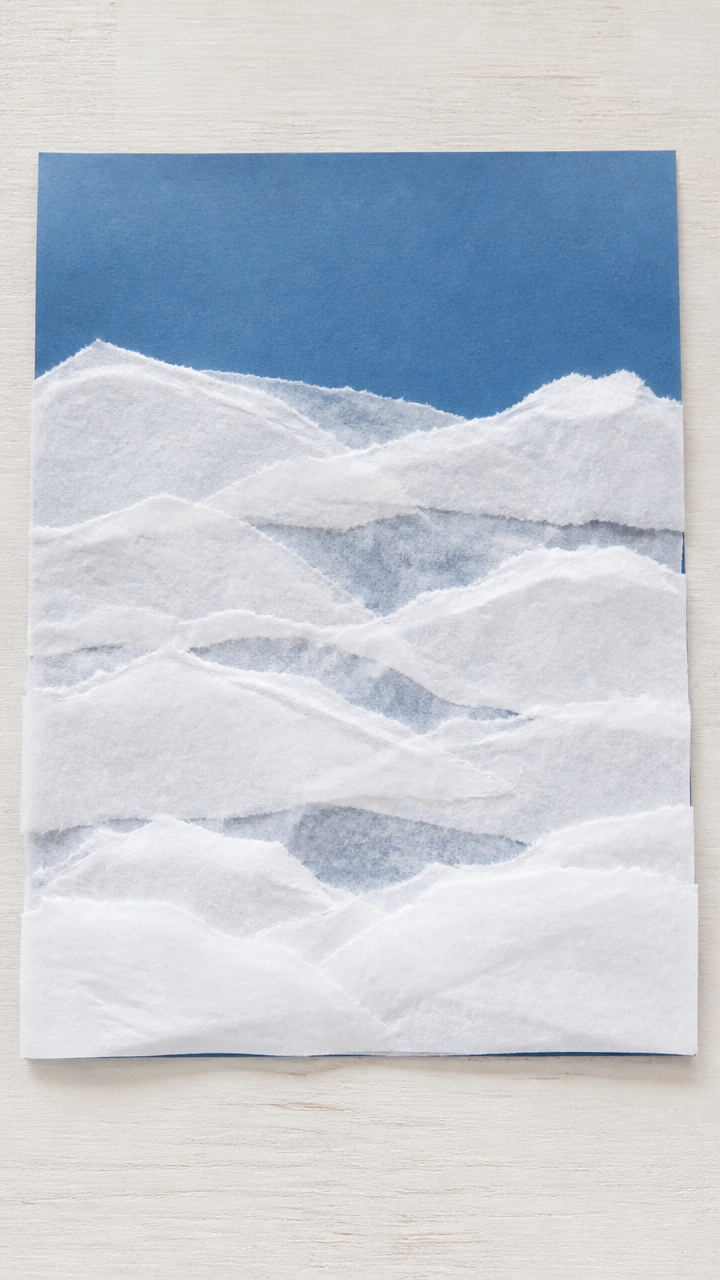
Layered tissue paper drifts mimic real snow with soft edges and depth. Tearing strengthens pinch and release.
Materials Needed
- White tissue paper, 10×10 inch sheets, 3 per child
- Blue construction paper, 9×12 inch, 1 per child
- White school glue
- Paintbrush, 1 inch flat
How to Make It
- Tear one tissue paper sheet into irregular 1-2 inch pieces using both hands to pull.
- Brush a thin layer of white school glue on the lower third of the blue paper.
- Place torn pieces side by side on the glue to form a snowy bank, overlapping slightly.
- Repeat with a second layer, tearing smaller pieces and gluing over the first.
- Top with a final thin layer of larger pieces and let dry flat for 20 minutes.
13. Beaded Snowflake Wind Chimes
Moderate
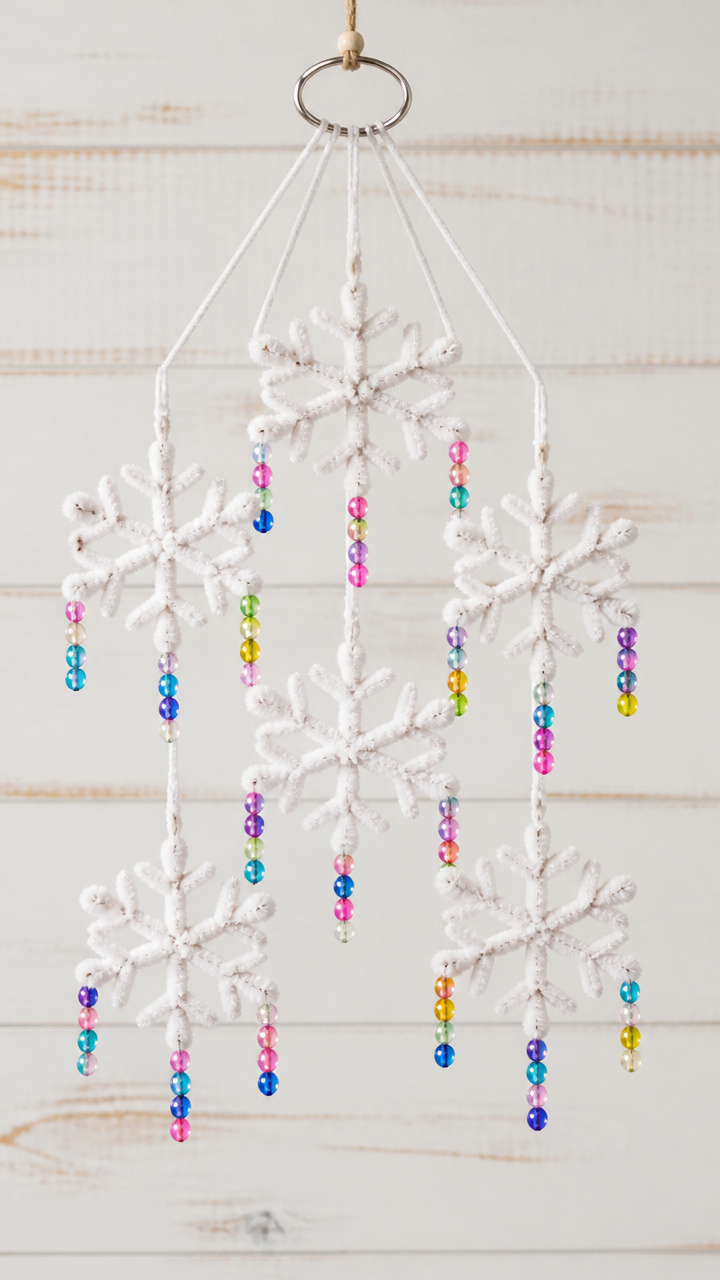
Chiming snowflakes swing with colorful beads strung on wire. Threading develops eye-hand coordination.
Materials Needed
- White chenille stems, 12 inches, 6 per chime
- Plastic beads, 6mm, assorted winter colors, 12 per chime
- Metal jump ring, 15mm, 1 per chime
- Pliers, chain-nose
- Scissors
How to Make It
- Bend one chenille stem into a six-pointed snowflake shape and twist the ends together at the center to secure.
- Thread two beads onto five separate chenille stems and bend each into a dangling strand.
- Twist one end of each beaded strand around a snowflake point, securing with fingers.
- Slide the jump ring onto the top loop of the snowflake and close it with chain-nose pliers.
- Trim any loose wire ends with scissors.
14. Salt Painting Winter Scenes
Moderate
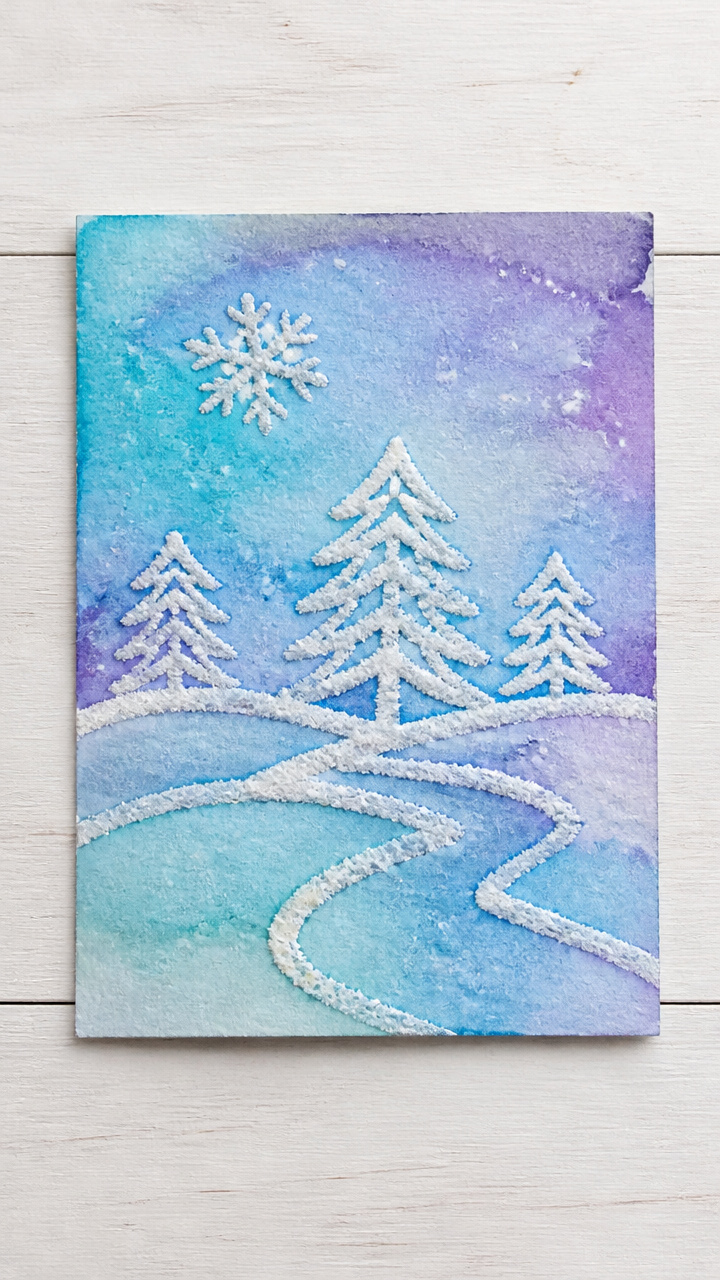
Paint dances across coarse salt lines, creating frosted landscapes. Pouring and brushing blend science and art.
Materials Needed
- Cardboard, 5×7 inch, 1 per child
- White school glue
- Table salt, 1/4 cup per child
- Small paintbrush, #2 round
- Watercolor paints, cool tones
- Cup of water
- Paper plate
How to Make It
- Draw a simple winter scene like a tree or house on the cardboard with white school glue and let sit for 1 minute.
- Pour table salt over the glued lines, covering every wet part.
- Shake off excess salt onto the paper plate and let the drawing dry for 10 minutes.
- Dip the paintbrush in water and swirl in a cool-toned watercolor cake.
- Gently touch the painted brush to the salt lines and watch color travel along the grains.
15. Popsicle Stick Snow Shovels
Easy
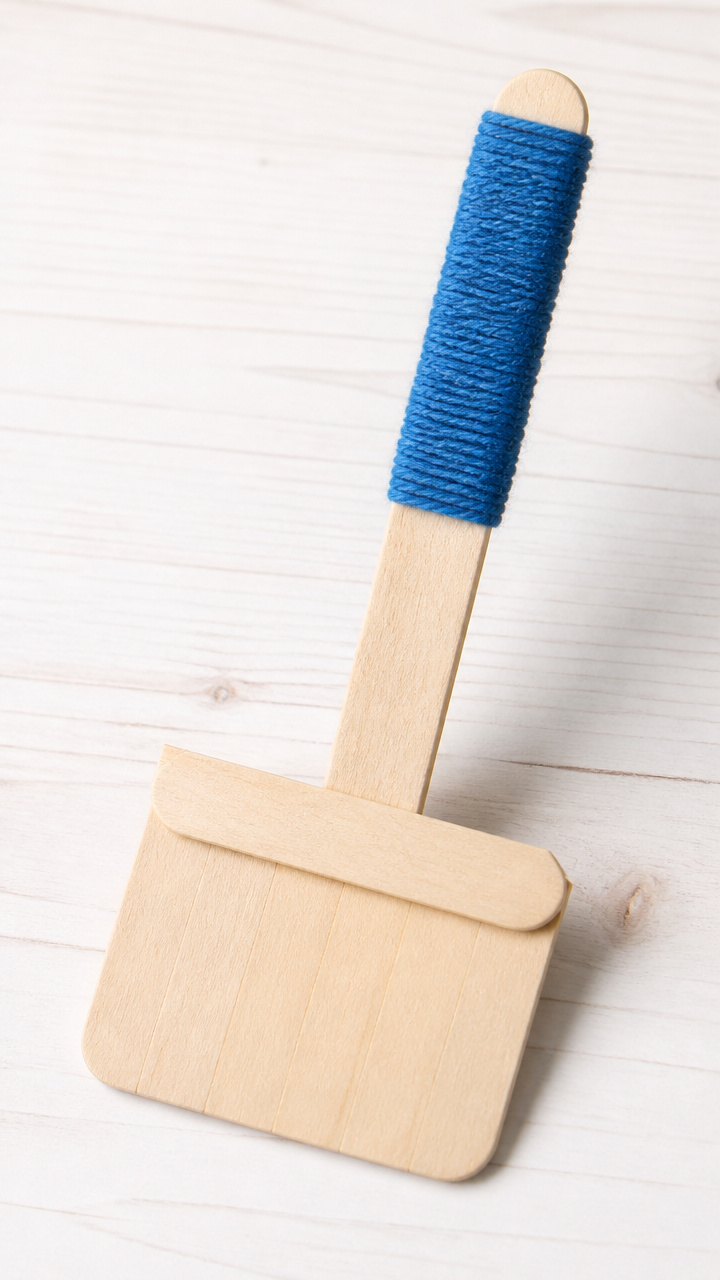
Mini shovels with yarn handles stand ready for pretend play. Gluing and wrapping build hand strength.
Materials Needed
- Jumbo craft sticks, 6 inches, 2 per shovel
- White school glue
- Blue yarn, 12 inches per shovel
- Scissors
- Glue brush
How to Make It
- Lay one craft stick flat and apply a vertical line of glue down the center of one end using the glue brush.
- Place the second stick perpendicular on top to form a T, pressing gently for 10 seconds.
- Cut 12 inches of blue yarn and wrap it tightly around the intersection five times.
- Tie a double knot at the back to secure the yarn handle.
- Let the glue dry for 20 minutes before use.
16. Feather Snow Owls
Easy
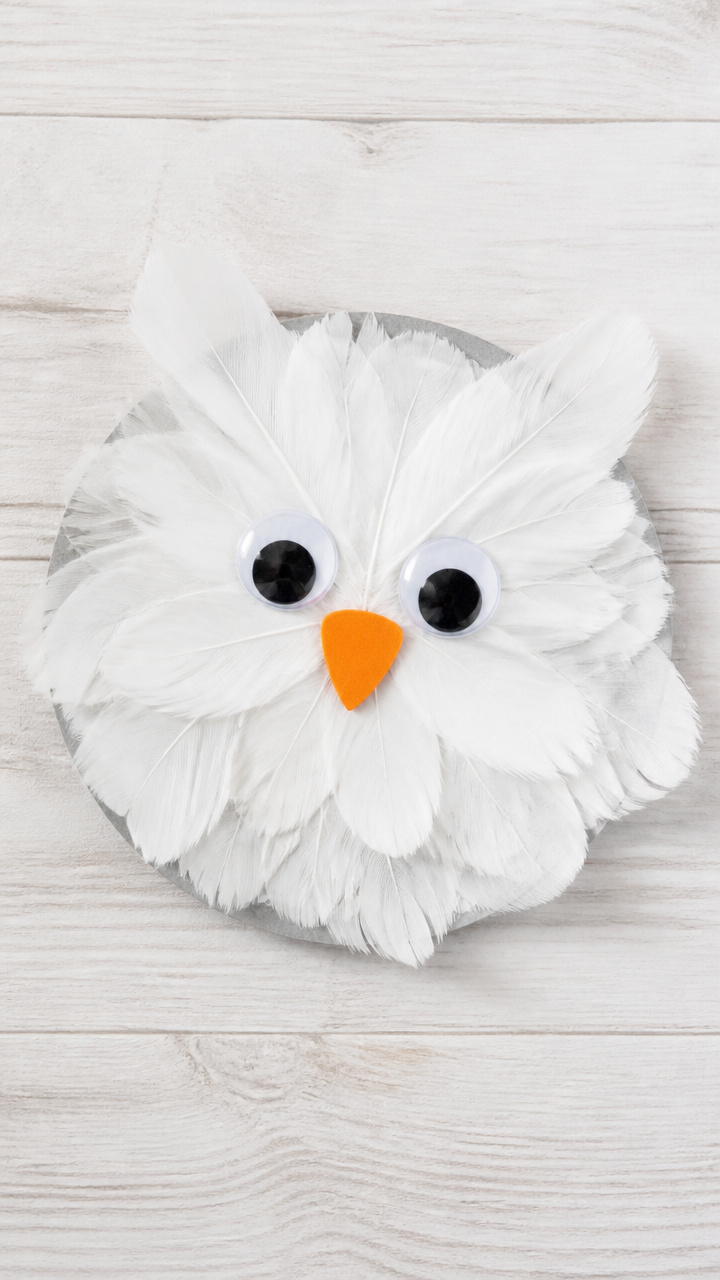
Soft dyed feathers form feathery faces with bold eyes. Layering textures refines gentle handling.
Materials Needed
- White craft feathers, 3 inches, 5 per owl
- Googly eyes, 12mm, 1 per owl
- Orange craft foam, 1 sheet
- White school glue
- Scissors
- 6×6 inch gray construction paper
How to Make It
- Arrange three feathers standing upright in a fan on the gray paper to form the body.
- Glue the quill ends down with small dabs of white school glue.
- Place two feathers side by side above for ear tufts and glue at the base.
- Cut a small triangle from orange craft foam and glue below as the beak.
- Add one large googly eye above the beak and let dry.
17. Sticker Road Snow Plows
Easy
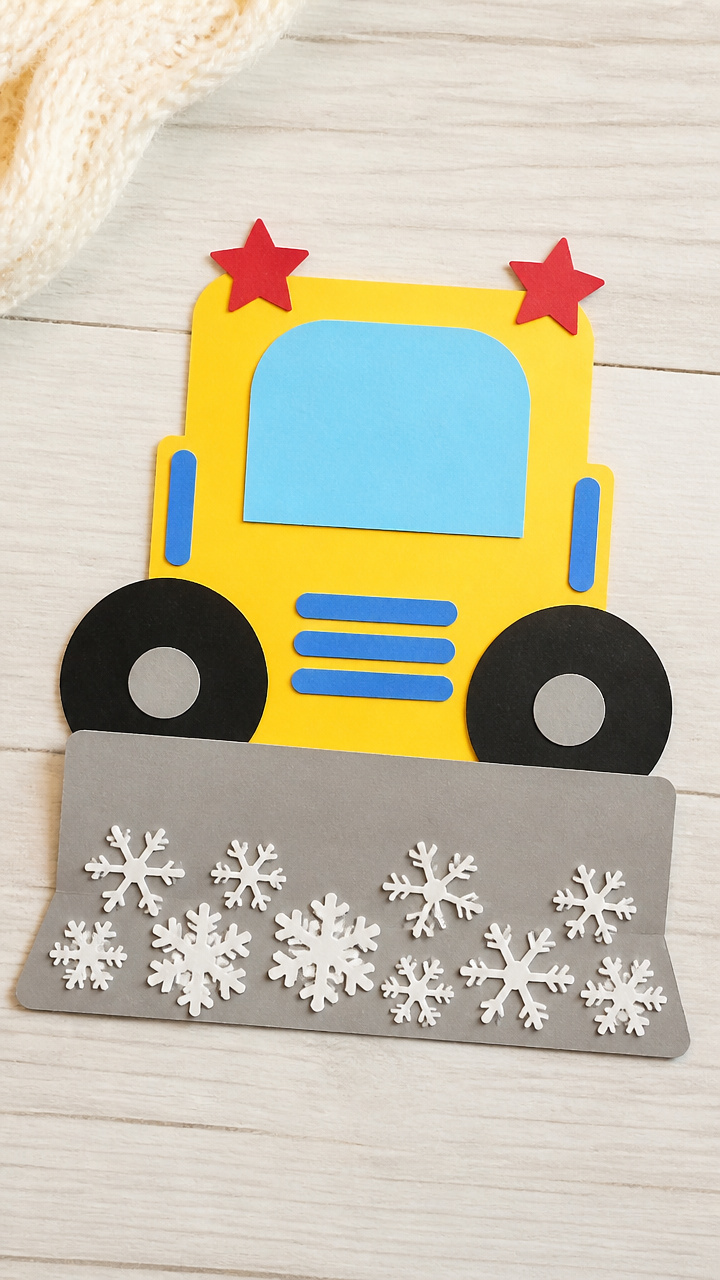
Big wheels and flashing lights come alive with layered stickers on cardstock. Peeling and aligning boost control.
Materials Needed
- Yellow construction paper, 9×12 inch, 1 per child
- Black circle stickers, 1 inch, 4 per plow
- Red star stickers, 1/2 inch, 2 per plow
- Gray rectangle stickers, 2×1 inch, 1 per plow
- Blue marker
- White crayon
How to Make It
- Place one gray rectangle sticker near the bottom center of the yellow paper for the plow blade.
- Stick two black circle stickers below for front wheels and two above for rear.
- Draw a cab with the blue marker above the front wheels using straight lines.
- Add a windshield with the white crayon and press firmly to leave a waxy patch.
- Place one red star on each side of the cab for lights.
18. Playdough Snowball Targets
Easy
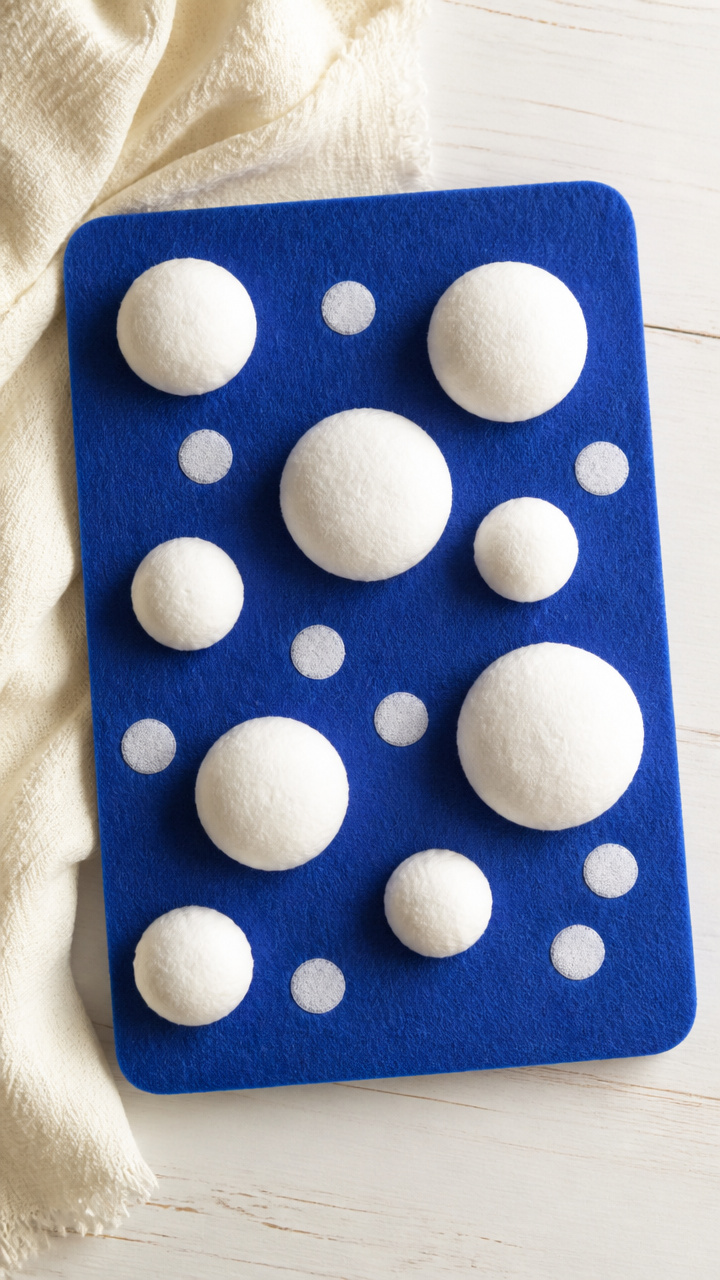
Rolled snowballs land on sticky felt boards with satisfying thuds. Rolling builds palm arch development.
Materials Needed
- Homemade salt dough or store-bought playdough, white, 1 cup per child
- Felt board, 12×12 inch, blue
- Velcro dots, hook and loop, 5 pairs
- Rolling pin, child-sized
How to Make It
- Knead the white dough until smooth and roll into a 1-inch ball using palms in a circular motion.
- Press one half of a Velcro dot into the top of the snowball.
- Roll four more snowballs the same size.
- Attach the mating Velcro dots spaced apart on the blue felt board.
- Toss each snowball gently to stick on a target dot.
19. Tissue Paper Lanterns
Moderate
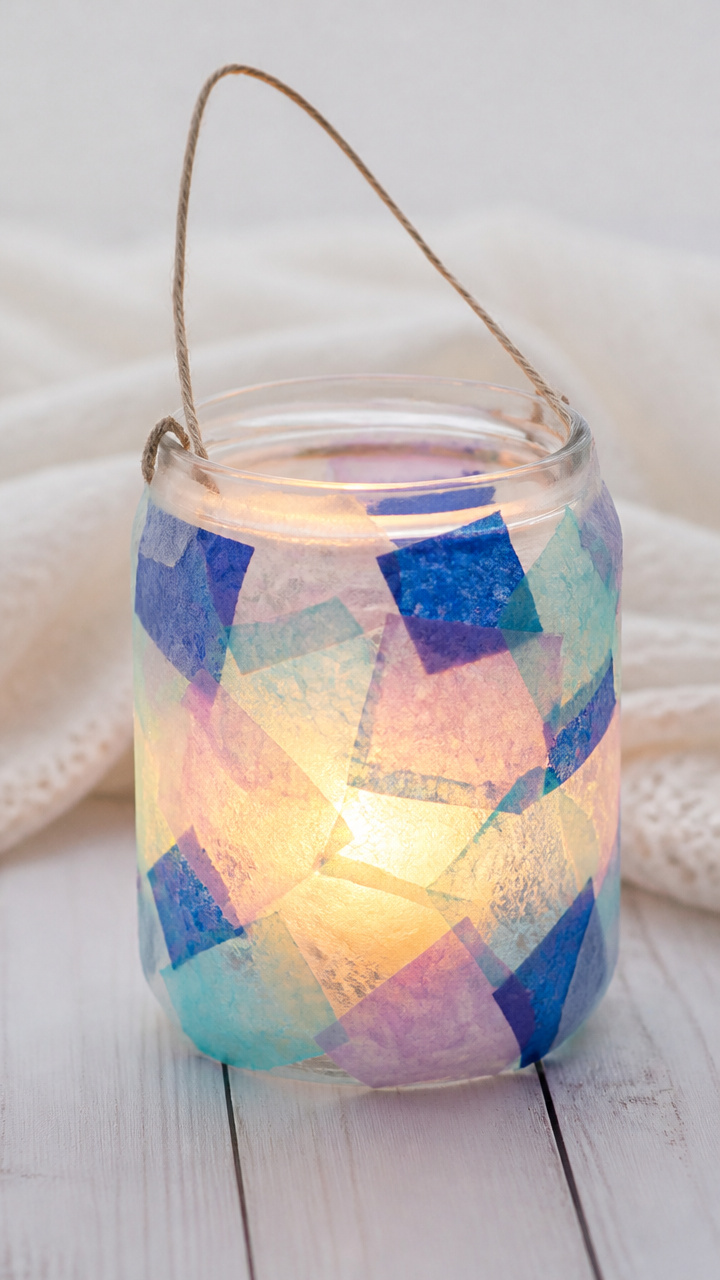
Glowing lanterns bloom with translucent colored layers. Stretching and smoothing teach delicate touch.
Materials Needed
- Clear glass jar, 8 oz, 1 per child
- Tissue paper, winter colors, 4 sheets per child
- White school glue
- Foam brush, 1 inch
- String, 12 inches, 1 per lantern
- Hole punch
How to Make It
- Cut tissue paper into 2×3 inch rectangles, 12 total.
- Brush a thin layer of white school glue on a small section of the jar.
- Smooth one tissue piece onto the glue, stretching gently to remove wrinkles.
- Overlap new pieces slightly, continuing until the jar is covered.
- Punch two holes under the rim, thread string through, and tie for a hanger.
20. Dot Marker Mittens
Easy
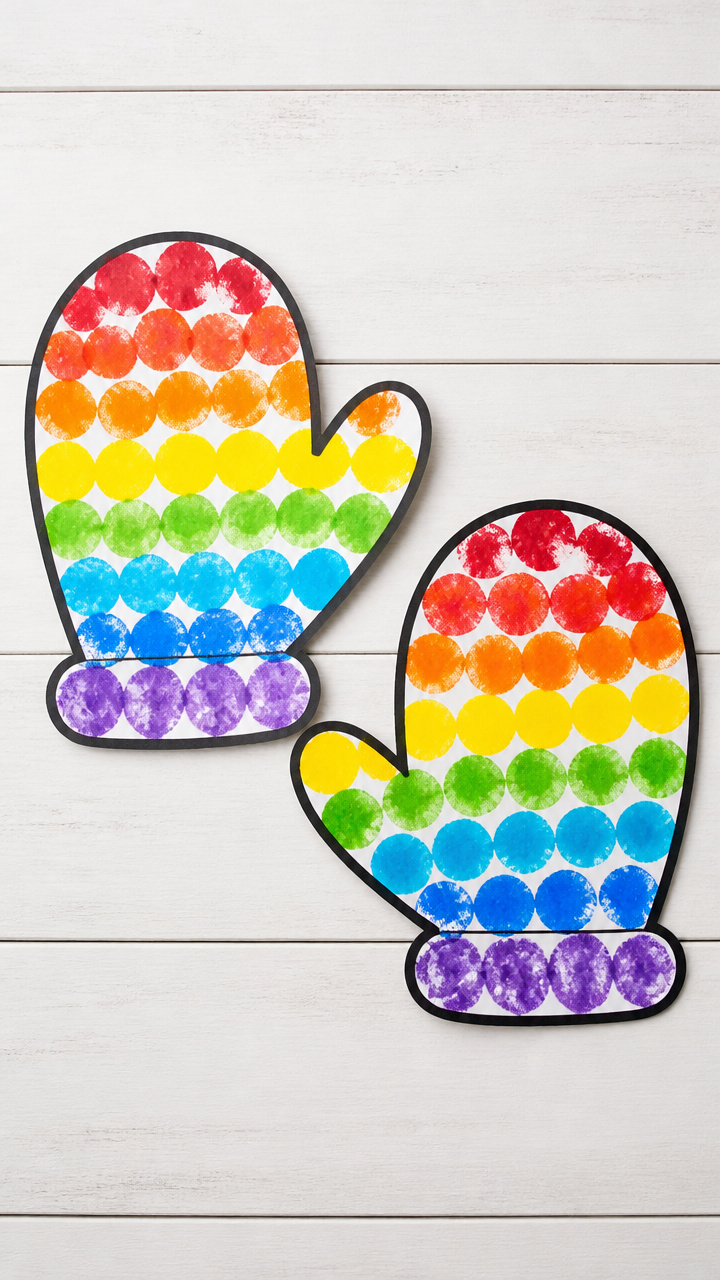
Bold mitten shapes fill with rainbow dot patterns. Pressing markers strengthens finger pads.
Materials Needed
- Dot markers, assorted colors, 6 per child
- White printer paper, 8.5×11 inch, 1 per child
- Black washable marker
- Mitten stencil, 3×4 inch
How to Make It
- Place the mitten stencil on the paper and trace around it with the black washable marker.
- Remove the stencil and set one dot marker on the chosen color pad.
- Press the marker straight down inside the mitten shape to make a solid dot.
- Lift and move to a new spot, filling the mitten with colorful dots without going outside the line.
- Switch colors as desired and continue until full.
21. Washi Tape Snowboards
Easy
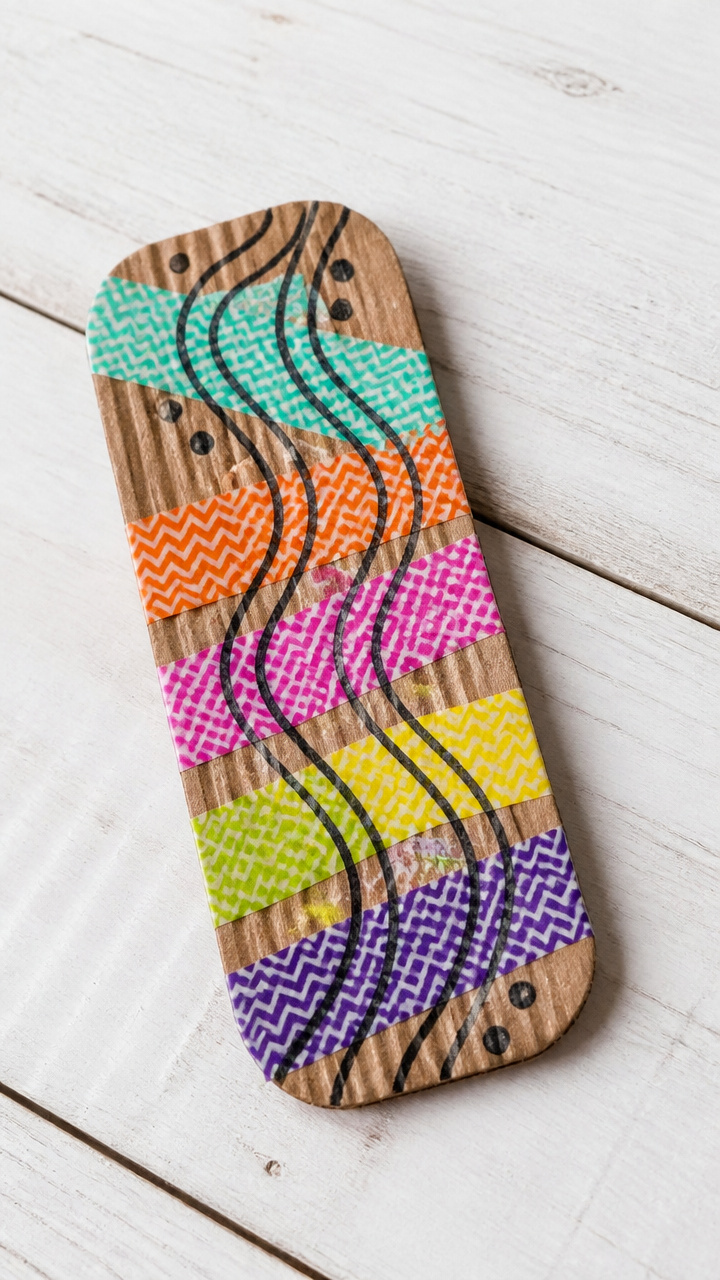
Zigzag tapes race down slopes drawn on cardboard. Tearing and sticking build precision and rhythm.
Materials Needed
- Corrugated cardboard scraps, 6×8 inch, 1 per child
- Assorted washi tape, 3 rolls per child
- Black crayon
- Scissors
How to Make It
- Draw a winding snowboard slope on the cardboard with the black crayon from top to bottom.
- Tear 6-inch lengths of washi tape from different rolls.
- Press the first piece at the top of the slope, aligning one edge with the line.
- Continue adding pieces end to end, following the path down.
- Overlap seams slightly and press firmly with a fingertip to stick.
You’ve got everything you need right there on the shelf or in the drawer. Pick one, gather the kids, and let their hands do the talking.