19 Neutral Winter Decor Crafts That Stay Up Until March

Soft linen, warm wood tones, and quiet whites settle into a home like snowfall on bare branches. These colors don’t shout, but they hold space with calm and intention, perfect for the long stretch between December and spring.
You don’t need glitter or bright lights to make your space feel cared for. Each of these crafts uses neutral shades and natural textures to create pieces that blend in beautifully and last through the season without feeling stale.
1. Linen-Covered Storage Boxes
Easy
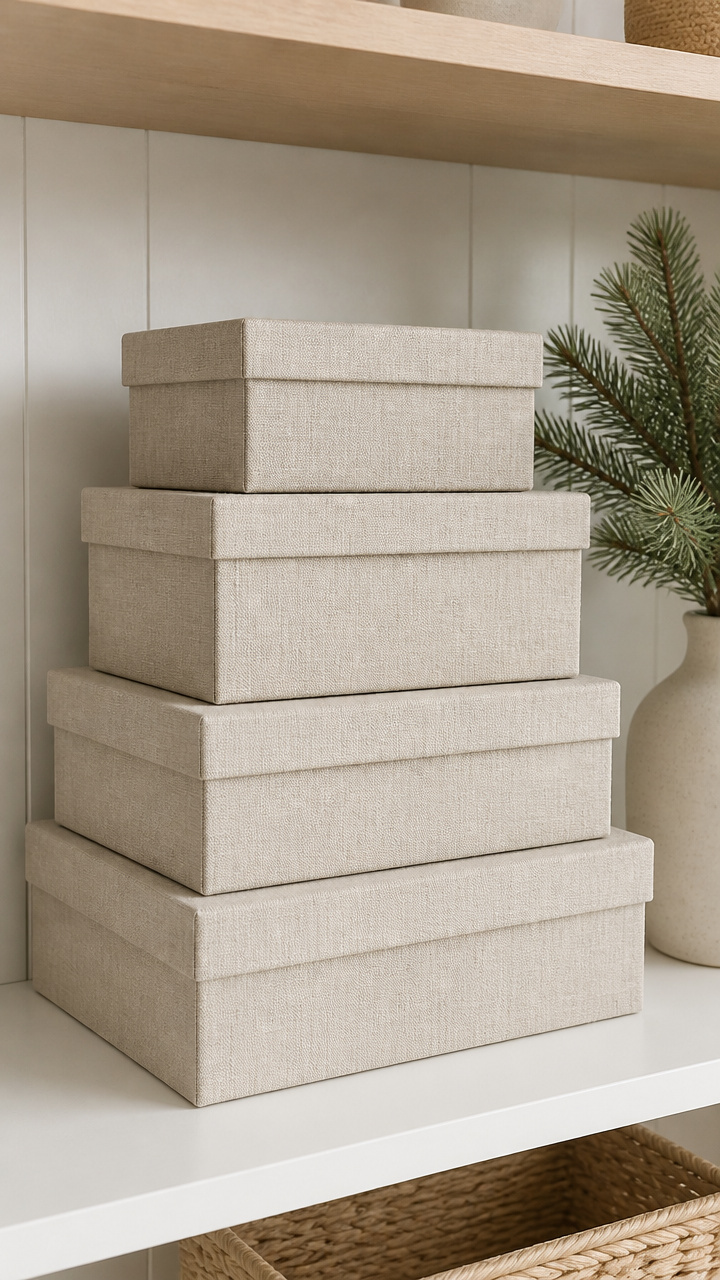
Smooth fabric-wrapped boxes tuck clutter out of sight while adding soft texture to shelves or benches. They look custom-made but come together quickly with basic supplies.
Materials Needed
- 4 cardboard storage boxes (8 inch x 6 inch x 4 inch)
- 1 yard unbleached linen fabric
- PVA craft glue
- Foam brush (1 inch wide)
- Scissors
- Ruler
How to Make It
- Cut the linen fabric into four rectangles, each 2 inches wider and taller than the box dimensions on all sides.
- Brush a thin, even layer of PVA glue onto one side of a box using the foam brush.
- Center the fabric over the glued side and press down smoothly from the center outward to remove wrinkles.
- Fold the excess fabric over the edges and glue it to the inside walls of the box, trimming corners neatly.
- Repeat for all sides and let dry flat for 1 hour before setting upright.


2. Twine-Wrapped Votive Holders
Easy
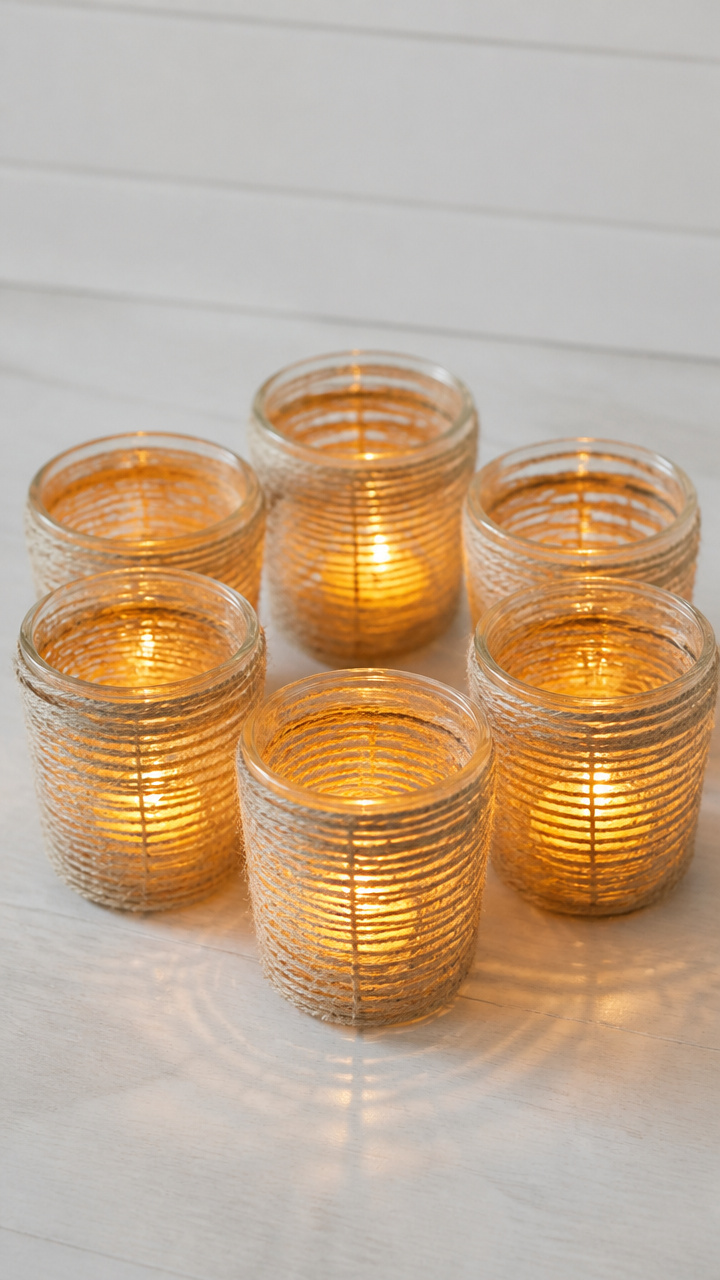
Glass votives wrapped tightly in natural twine glow warmly when lit, casting soft shadows through the fiber weave. The rustic detail elevates any mantel or dining table.
Materials Needed
- 6 clear glass votive holders (3 inch height)
- Natural jute twine (size 3, 50 yards)
- Hot glue gun with glue sticks
- Scissors
How to Make It
- Apply a small dot of hot glue to the bottom edge of a votive holder and press the end of the twine into it.
- Wrap the twine tightly around the glass, overlapping slightly with each turn, adding a dab of glue every inch to secure.
- Continue wrapping until the entire surface is covered up to 1/4 inch below the rim.
- Trim the end and glue it down firmly, letting the holder cool completely before use.
3. Pressed Fern Wall Art
Moderate
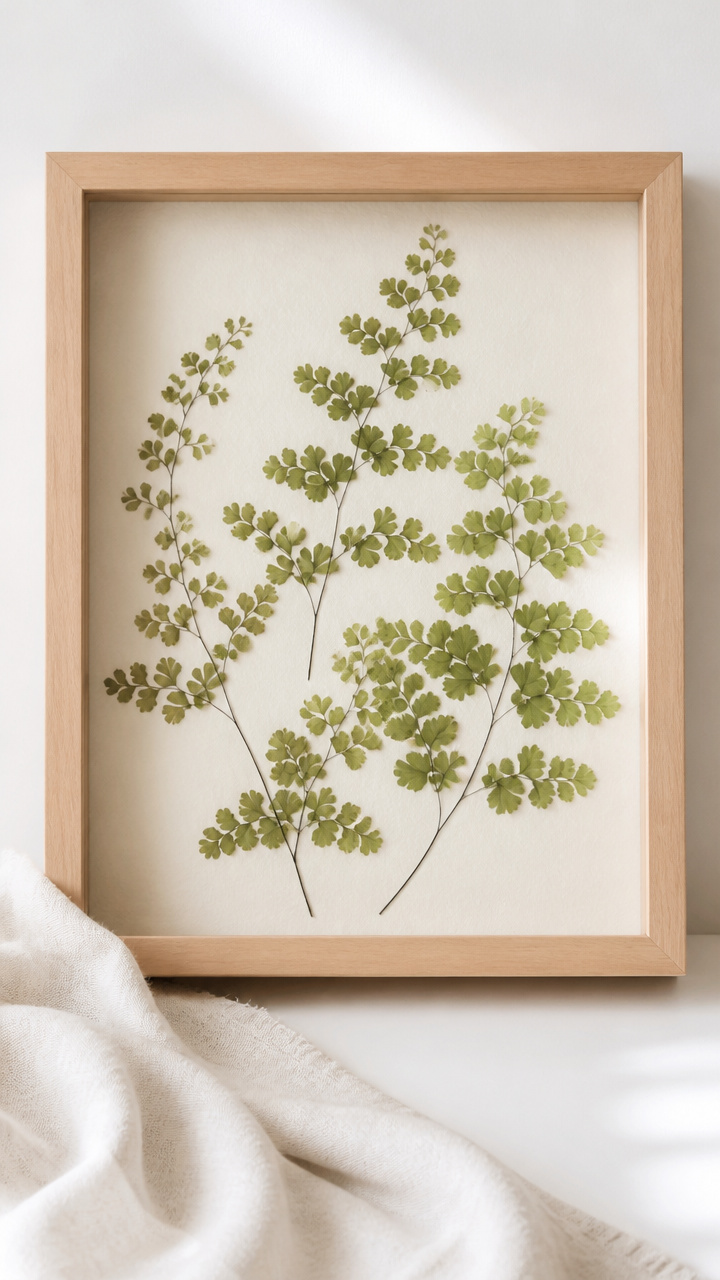
Delicate preserved ferns mounted on cream paper bring forest quiet indoors. Each frame holds a moment of stillness, ideal for hallways or reading nooks.
Materials Needed
- 12 fresh maidenhair fern fronds
- Heavy books or a plant press
- A4 cream cotton paper (acid-free)
- Matte spray fixative
- Double-sided tape squares (1/2 inch)
- Wooden shadow box frame (12×12 inch, unfinished)
How to Make It
- Place fern fronds between two sheets of blotting paper and stack inside a heavy book, pressing for 7 days until fully flat and dry.
- Spray both sides of each pressed fern lightly with matte fixative in a well-ventilated area, letting dry 20 minutes.
- Arrange three ferns diagonally across the cream paper and attach each tip with a double-sided tape square.
- Insert the paper into the shadow box and secure the backing.

4. Concrete Candle Pedestals
Moderate
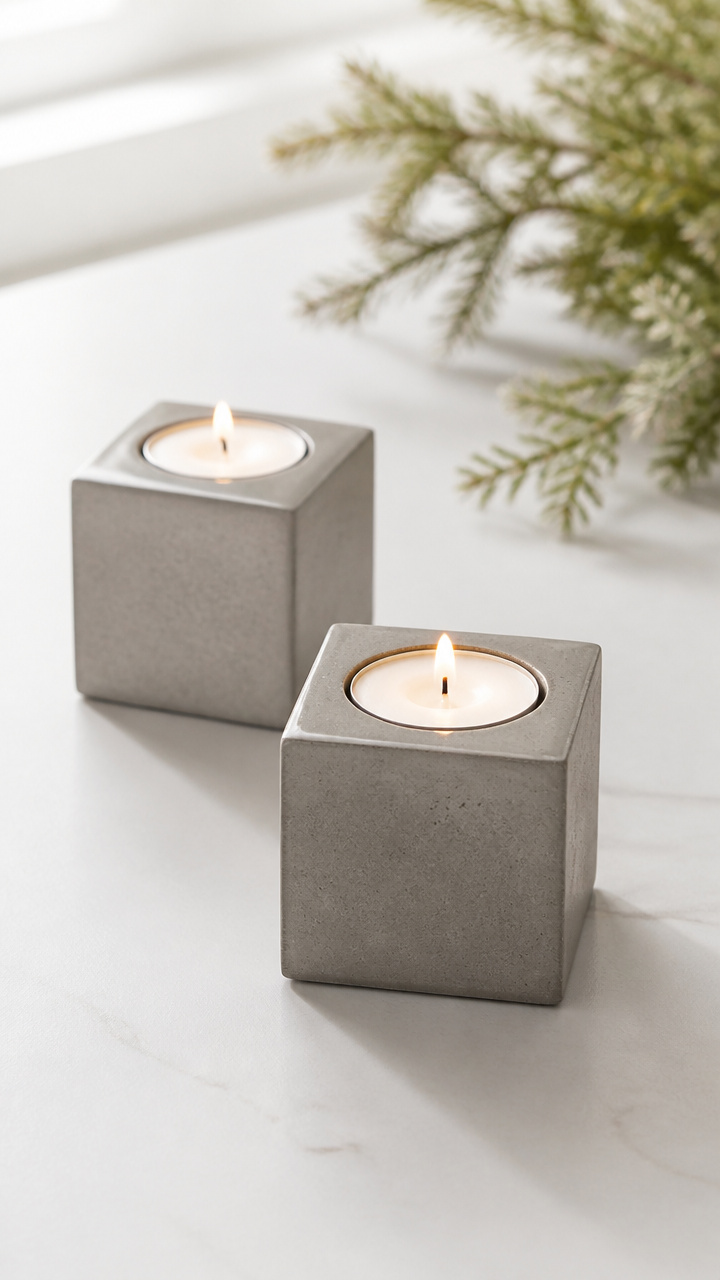
Small geometric concrete bases lift pillar candles off surfaces, adding weight and modern simplicity. Their cool gray tone pairs perfectly with wool throws and wood floors.
Materials Needed
- Quick-set concrete mix (5 lb bag)
- Silicone ice cube mold (cube shape, 2 inch)
- Disposable mixing bowl
- Stir stick
- Mineral oil
- Fine-grit sandpaper (220 grit)
How to Make It
- Lightly coat the inside of each mold cavity with mineral oil using a paper towel.
- Mix concrete according to package directions in the bowl, stirring until smooth and lump-free.
- Pour the mixture into each mold, tapping gently to release air bubbles, and let cure 24 hours.
- Pop out the cubes and smooth any rough edges with sandpaper for 30 seconds per side.


5. Felted Wool Ball Garland
Moderate
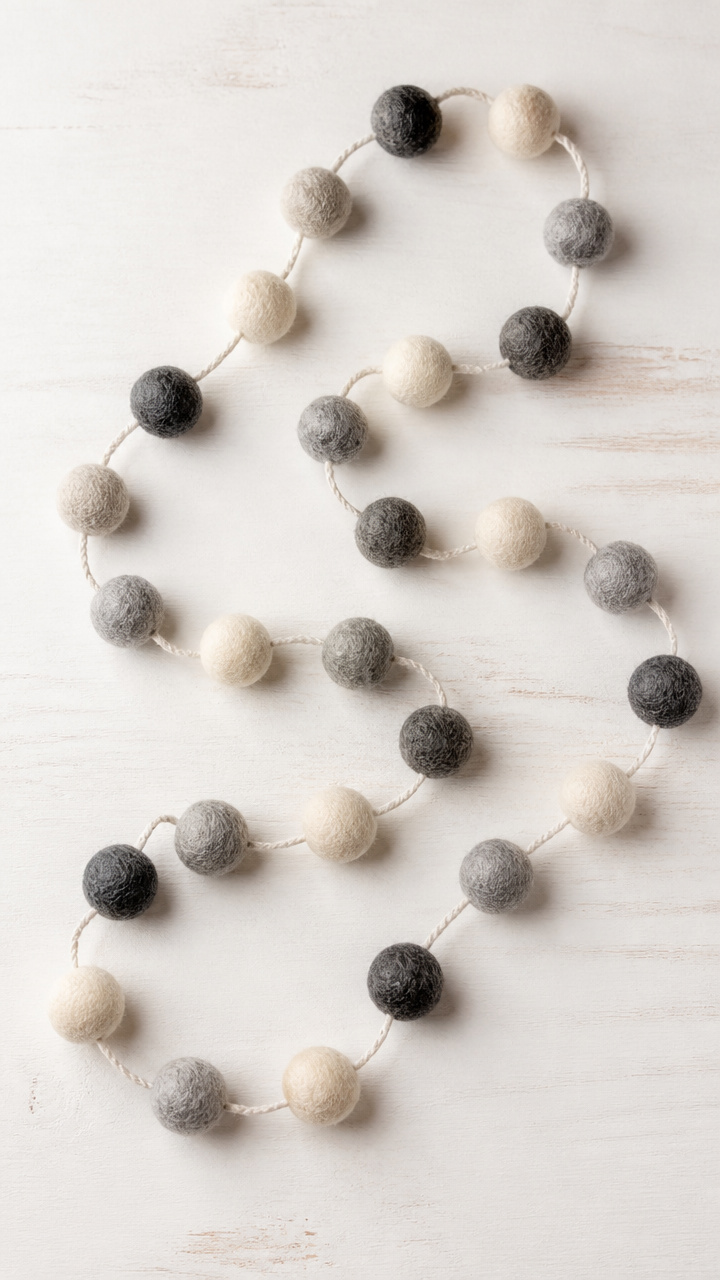
Hand-felted balls in oatmeal and stone gray drape softly across windows or bookshelves. Their slight irregularity makes each garland feel handmade and personal.
Materials Needed
- Raw merino wool roving (1 oz each in oatmeal, light gray, charcoal)
- Large felting needle
- Foam felting pad (6×4 inch)
- Waxed linen thread (gray, 10 yard spool)
- Tapestry needle
- Scissors
How to Make It
- Pull off a golf ball-sized piece of roving, roll loosely into a ball, and place on the foam pad.
- Repeatedly poke the ball with the felting needle, rotating often, until firm and spherical (about 5 minutes per ball). Make 15 total.
- Cut a 6-foot length of waxed linen thread and thread the tapestry needle.
- String the balls in alternating colors and knot the thread securely between each to prevent sliding.


6. Driftwood and Linen Mobile
Moderate
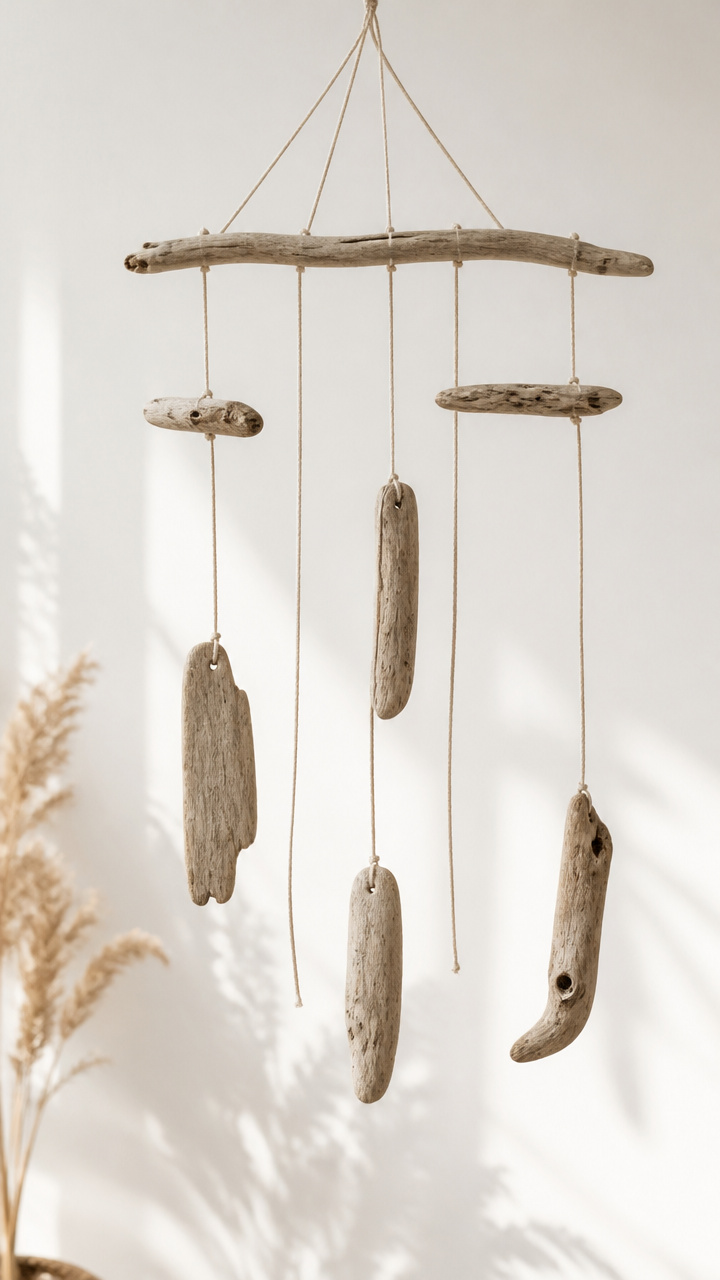
Asymmetrical pieces of weathered wood hang at different lengths beneath a loop of raw linen cord. It catches faint breezes near a window with gentle motion.
Materials Needed
- 3 pieces driftwood (2–4 inch length, varied thickness)
- Linen macramé cord (3 mm, natural, 15 feet)
- Drill with 1/8 inch bit
- Measuring tape
- Scissors
How to Make It
- Mark the center point on each piece of driftwood and drill a small hole straight through.
- Cut one 12-inch piece and two 18-inch pieces of cord for hanging strands.
- Thread each strand through a driftwood piece and tie a knot below to secure, spacing them unevenly along the top.
- Gather all three strands at the top, twist together, and tie a large loop knot to hang.


7. Salt-Dough Ornament Wreath
Easy

Simple salt-dough shapes baked until hard form a subtle wreath that smells faintly of the oven. Hang it on an interior door for a welcoming scent and texture.
Materials Needed
- 2 cups all-purpose flour
- 1 cup table salt
- 3/4 cup water
- Mixing bowl
- Wooden rolling pin
- Round cookie cutter (3 inch diameter)
- Baking sheet
- Parchment paper
- Hole punch (small)
- Jute ribbon (1/4 inch, 3 feet)
How to Make It
- Mix flour, salt, and water in the bowl until a smooth dough forms, kneading briefly on a floured surface.
- Roll dough to 1/4 inch thickness and cut out 12 circles using the cookie cutter, punching a hole near the edge of each.
- Place on a parchment-lined baking sheet and bake at 200°F for 3 hours until hard and dry.
- Cool completely, then string onto the jute ribbon through the holes, tying ends to form a loop.


8. Woven Bark Coasters
Advanced
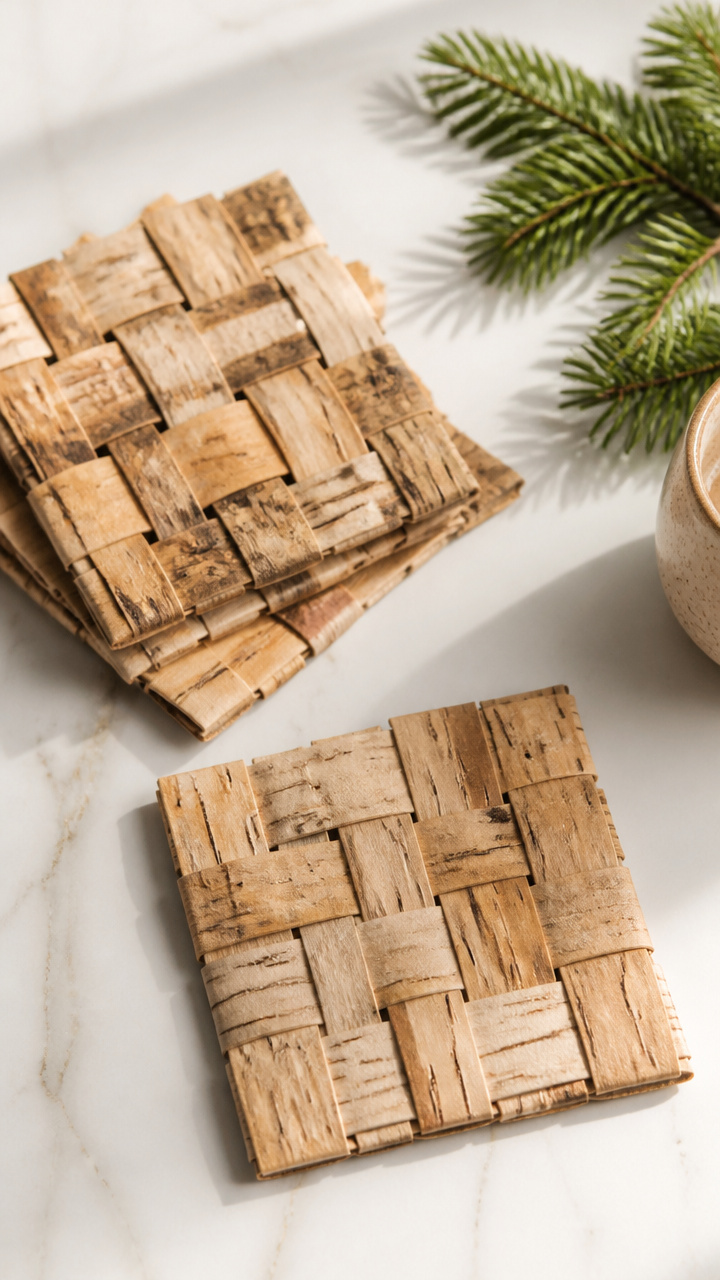
Strips of birch bark interlace into sturdy, water-resistant coasters that feel alive with natural grain. They’re durable enough for daily use and add organic warmth.
Materials Needed
- Birch bark sheets (6×6 inch, 4 pieces)
- Utility knife
- Cutting mat
- Ruler
- Bone folder
- Beeswax block
- Soft cloth
How to Make It
- Cut each bark sheet into six 1-inch-wide strips using the utility knife and ruler on the cutting mat.
- Weave three strips vertically and three horizontally in a simple over-under pattern, flattening seams with the bone folder.
- Trim edges evenly to form a 4×4 inch square coaster, repeating for three more.
- Rub beeswax over each surface and buff with a cloth to seal and add slight sheen.


9. Clay Air-Dry Twig Frames
Moderate
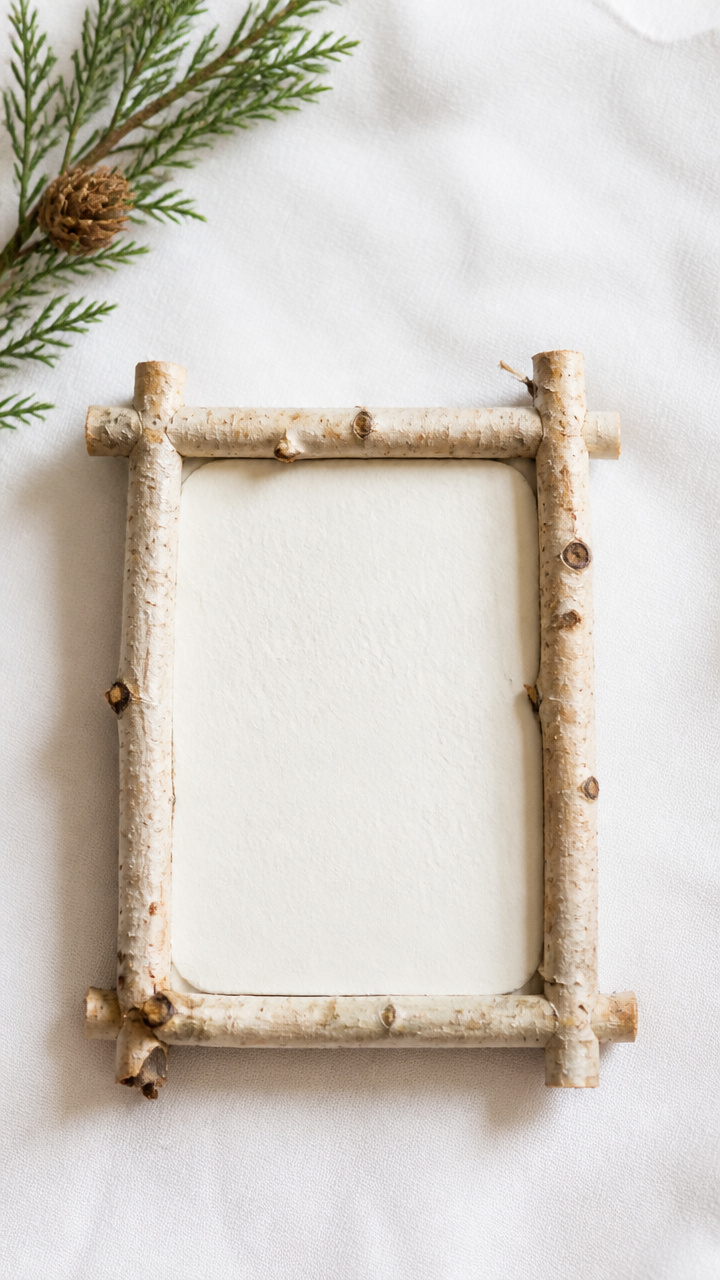
Slender twigs encase small rectangles of air-dry clay, creating frames that look like they grew from the wall. They hold tiny photos or single dried leaves.
Materials Needed
- Air-dry clay slab (white, 1/4 inch thick, 5×7 inch)
- 4 straight birch twigs (6 inch length, pencil thickness)
- PVA craft glue
- Craft knife
- Sandpaper (fine grit)
- Small paintbrush
- Photo or paper insert (2×3 inch)
How to Make It
- Use the craft knife to cut a centered 2×3 inch window in the clay slab, smoothing edges with fingers.
- Let the clay dry completely upright for 48 hours, turning once after 24 hours.
- Sand any rough spots lightly and wipe clean with a dry brush.
- Glue one twig to each edge of the clay, mitering corners slightly, and let bond for 2 hours.


10. Knotted Knit Pillow Cover
Easy
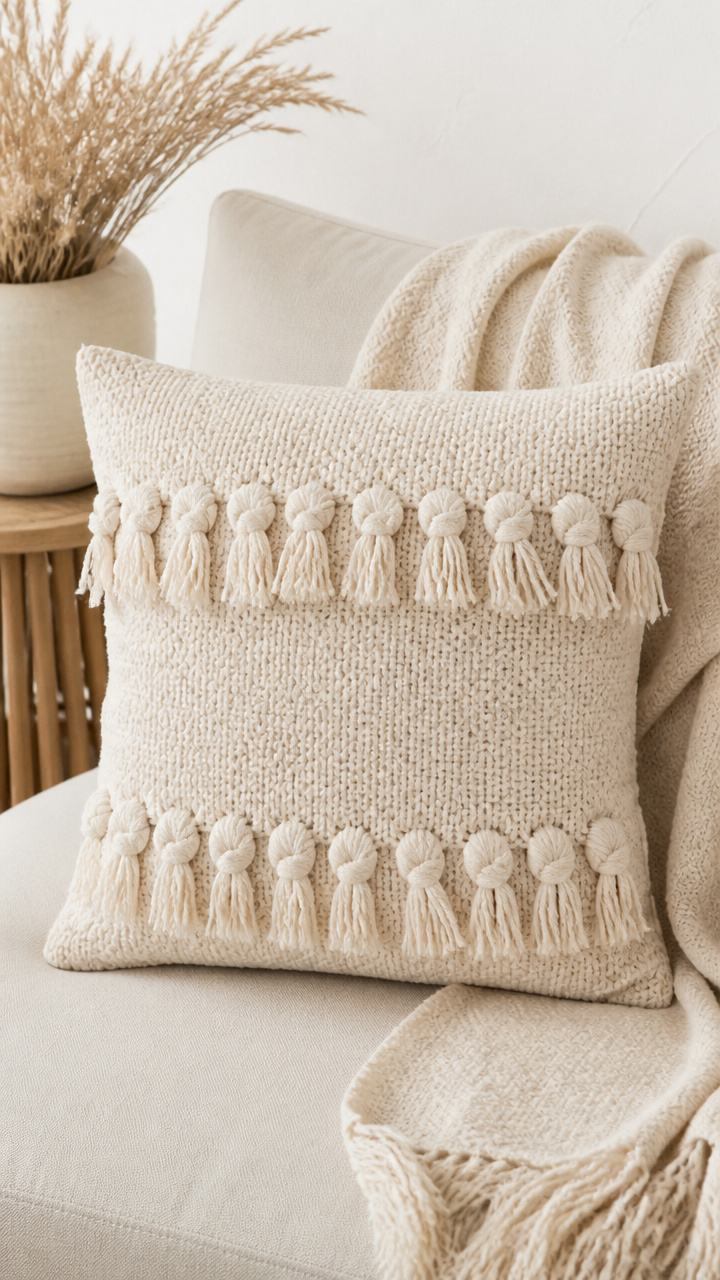
An oversized knit blanket gets repurposed into a pillow cover with knotted fringe for casual elegance. No sewing required—just folding and tying.
Materials Needed
- Oversized cream knit blanket (100% acrylic, 50×60 inch)
- Pillow insert (18×18 inch)
- Fabric scissors
- Ruler
- Chalk marker (light gray)
How to Make It
- Lay the blanket flat and mark a 20×20 inch square with the chalk marker, cutting carefully with scissors.
- Fold the square in half with right sides together and cut 1-inch slits every 2 inches along the open edges.
- Knot each pair of opposite slits tightly to close the back, leaving one side open.
- Insert the pillow and knot the final side closed.


11. Ash Wood Slice Trays
Advanced
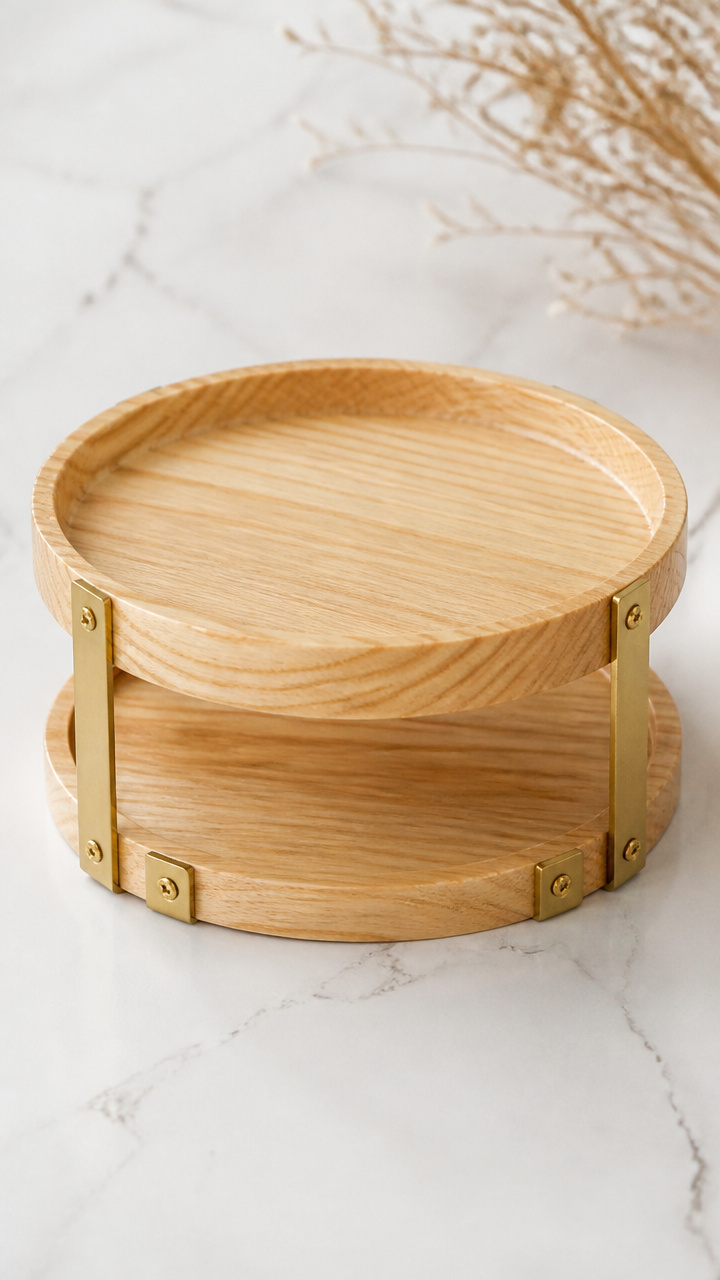
Sanded rounds of ash wood become small trays when joined with brass brackets. They cradle keys or perfume bottles with quiet dignity.
Materials Needed
- 2 ash wood slices (6 inch diameter, 3/4 inch thick)
- 2 L-shaped brass corner brackets (2 inch arms)
- Brass screws (6 mm, 4 pieces)
- Electric drill with 1/16 inch bit
- Medium and fine sandpaper
- Linseed oil
- Lint-free cloth
How to Make It
- Sand each wood slice with medium paper, then fine paper, until smooth, rounding edges slightly.
- Wipe away dust and apply linseed oil with a cloth, letting soak 15 minutes before buffing.
- Position one bracket under the edge where the two slices will meet at a right angle.
- Pre-drill pilot holes through bracket arms and screw into wood securely, repeating for the second bracket.

12. Paper Quilled Snowflakes
Moderate
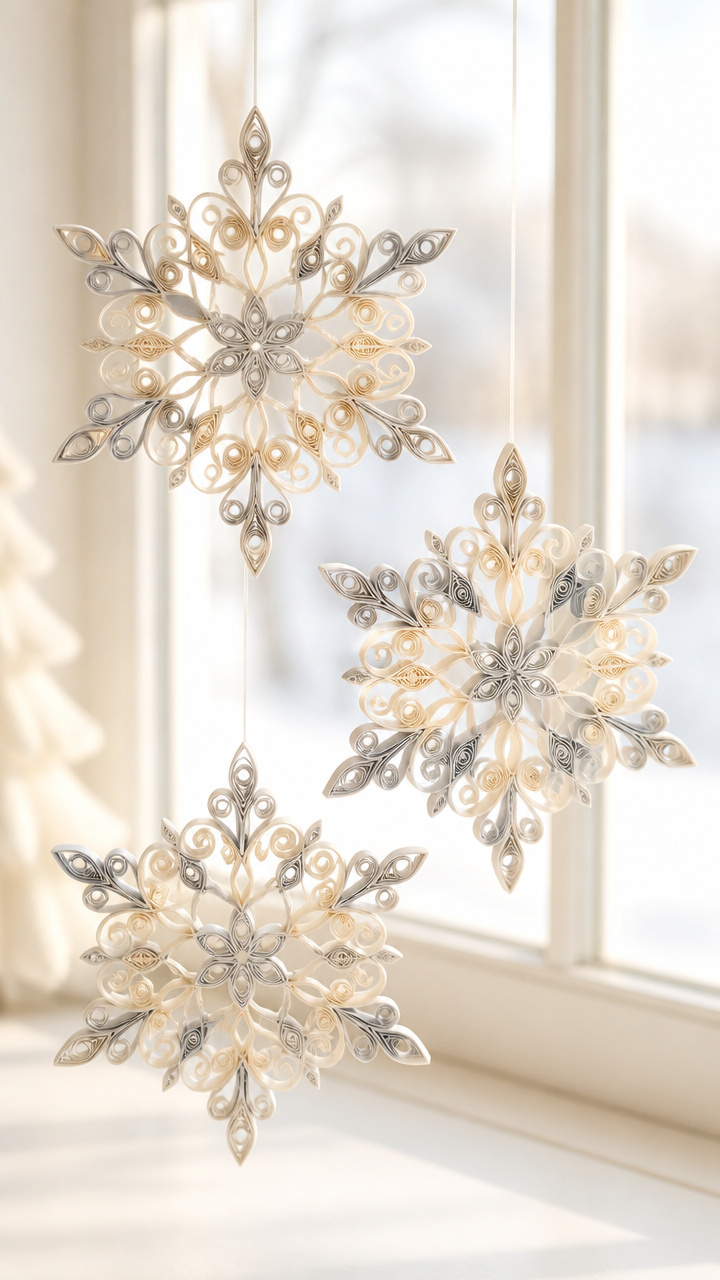
Tightly coiled strips of heavyweight paper form intricate snowflake designs that float in front of a window. Light dances through their open centers.
Materials Needed
- Quilling paper strips (1/4 inch width, 24 inch length, 12 in ivory, 12 in light gray)
- Quilling tool (slotted type)
- White craft glue
- Tweezers
- Corkboard
- Straight pins
- Clear fishing line (6 lb test, 2 feet)
How to Make It
- Insert one end of a paper strip into the quilling tool and roll tightly, then release slightly to form a loose coil.
- Glue the end and pinch the coil into a teardrop shape using tweezers, pinning it to the corkboard.
- Build six identical teardrops and arrange them in a star pattern, gluing tips together at the center.
- Attach a loop of fishing line to the back for hanging once fully dry.


13. Milk Paint Wooden Spoons
Easy
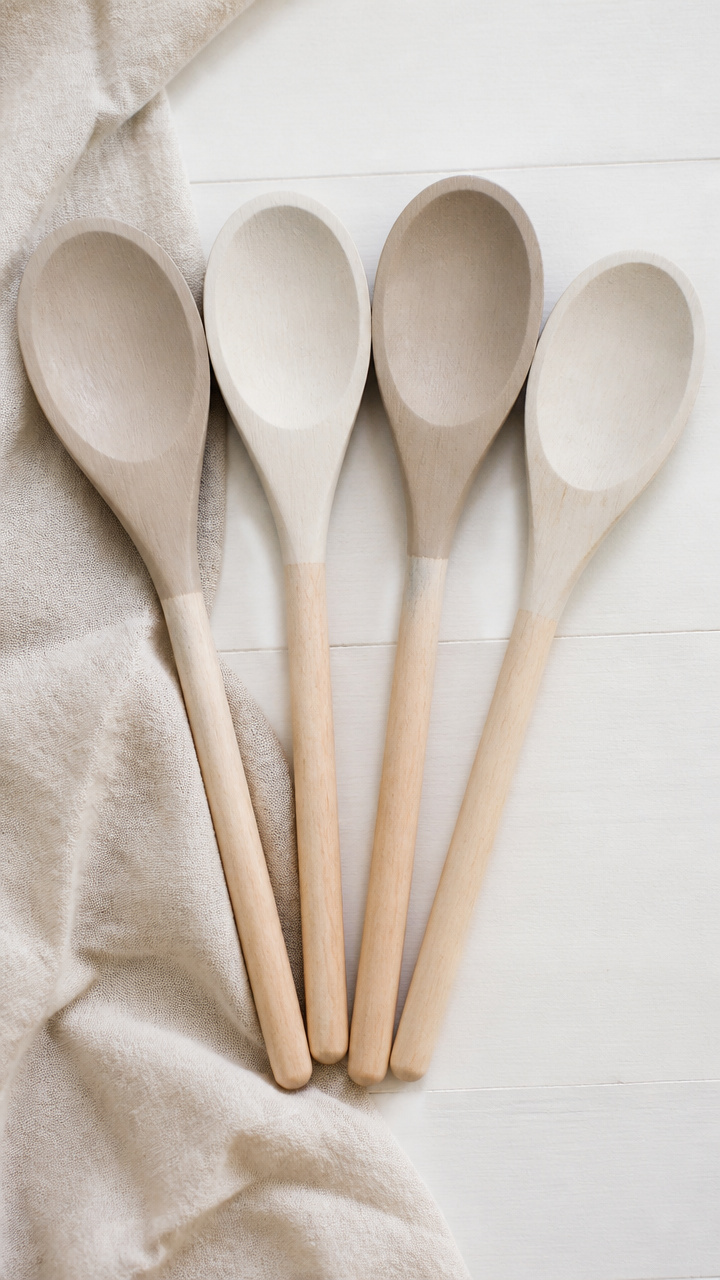
Plain wooden spoons take on depth with hand-brushed milk paint in warm putty and greige. They become display pieces beside a sink or in a jar.
Materials Needed
- 4 unfinished maple spoons (10 inch length)
- Milk paint powder (putty beige, 2 oz)
- Milk paint powder (greige, 2 oz)
- Mixing container
- Water
- Small foam brush
- Paper towel
How to Make It
- Mix 1 tablespoon of putty beige paint powder with 2 tablespoons of water, stirring until smooth.
- Brush a thin coat onto the bowl and handle of one spoon, working with the grain.
- Let dry 20 minutes, then apply a second coat if needed, alternating colors on different spoons.
- Wipe lightly with a paper towel after final dry to soften shine.


14. Loom-Woven Mini Tapestries
Advanced
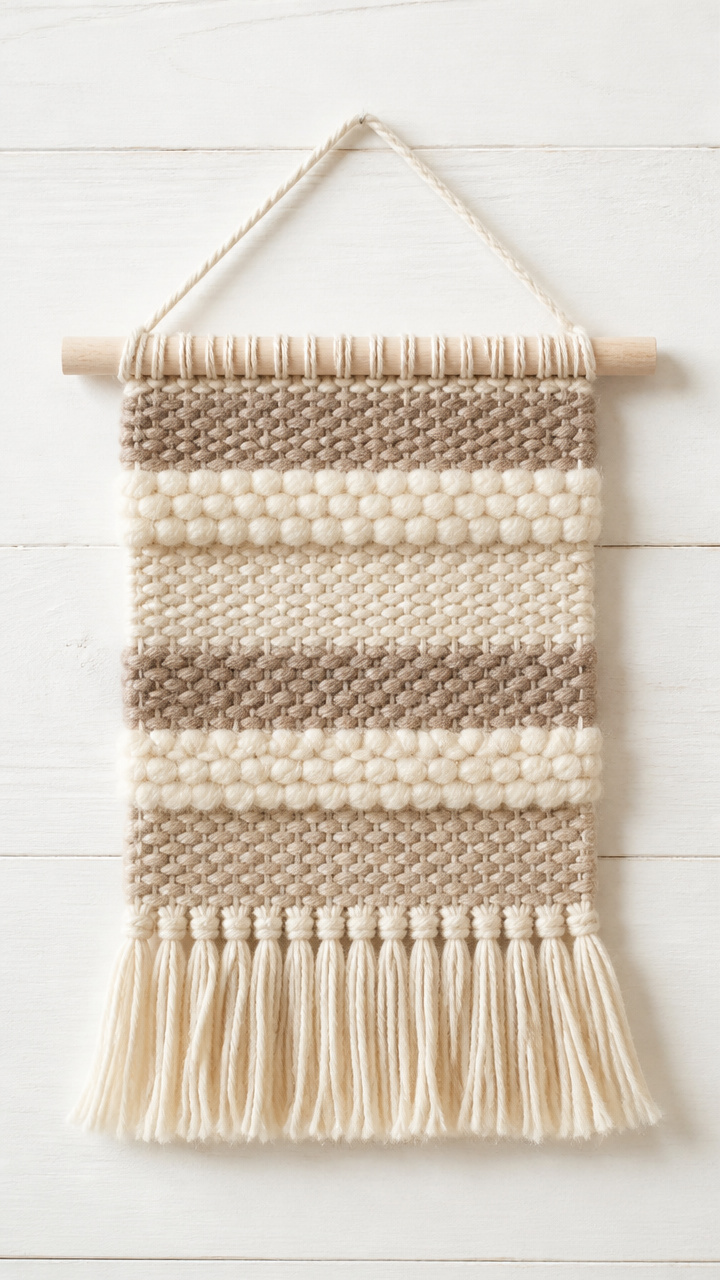
Tiny handwoven pieces on a pocket loom combine wool and linen yarn in soft stripes. Hang them singly or in a row above a desk.
Materials Needed
- Pocket weaving loom (6 inch width)
- Warp thread (cotton, 10 yard)
- Shuttle stick
- Linen yarn (taupe, 20 yard)
- Wool yarn (oatmeal, 20 yard)
- Scissors
- Comb tool
How to Make It
- Wrap warp thread vertically around the loom pegs, keeping tension even, then lock ends in notches.
- Thread the shuttle with linen yarn and weave across, using the comb to pack each row tightly.
- Alternate 1-inch stripes of linen and wool, changing yarn as needed.
- Once complete, cut warp threads free, tie knots in pairs, and trim ends to 1 inch.


15. Stone Rubbing Art Prints
Easy
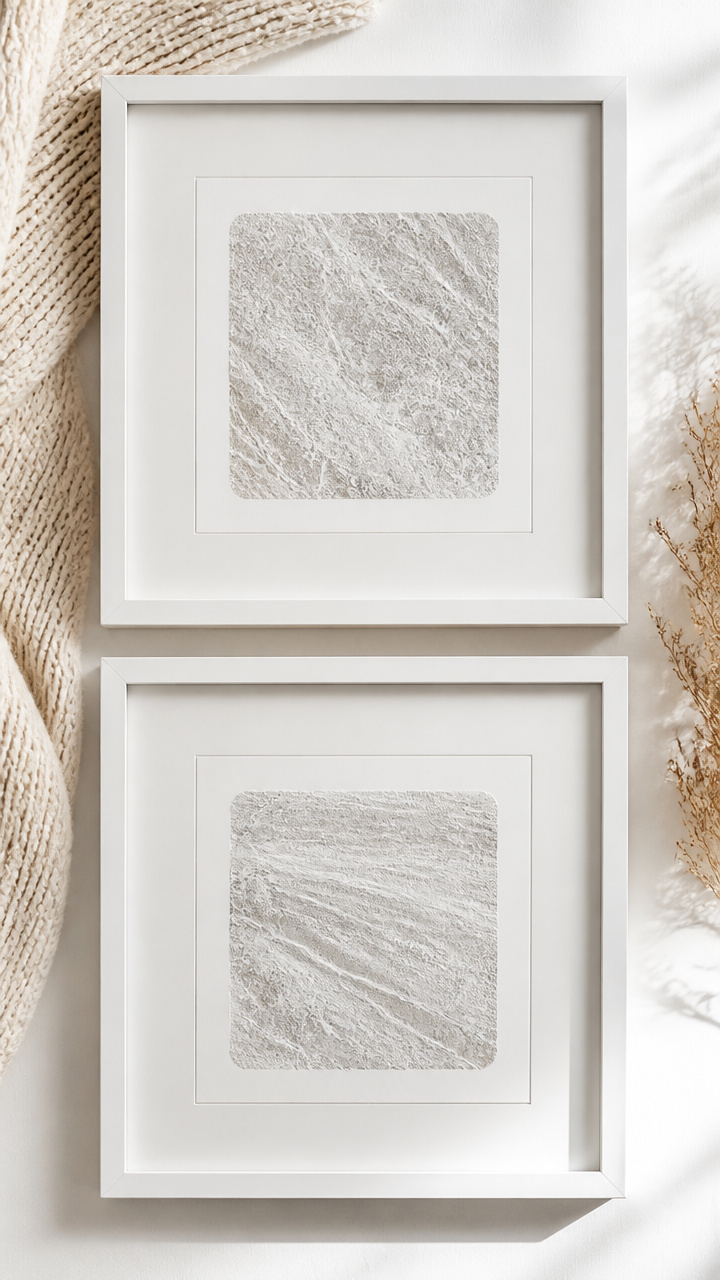
Textured limestone rubbings capture natural patterns on heavyweight paper, framed simply under glass. Each print feels like a fossil record.
Materials Needed
- Limestone tile (6×6 inch, 2 pieces)
- Heavyweight drawing paper (9×9 inch, 2 sheets)
- White carpenter's chalk
- Pencil
- Picture frame (8×8 inch, white mat included)
How to Make It
- Place a sheet of paper over the limestone tile and secure edges with tape.
- Hold the chalk sideways and rub firmly over the surface to reveal texture, covering the full area.
- Repeat with the second tile and paper, varying pressure for contrast.
- Insert each rubbing into a frame with the mat and close the backing.


16. Crocheted Cable Scarf Display
Easy
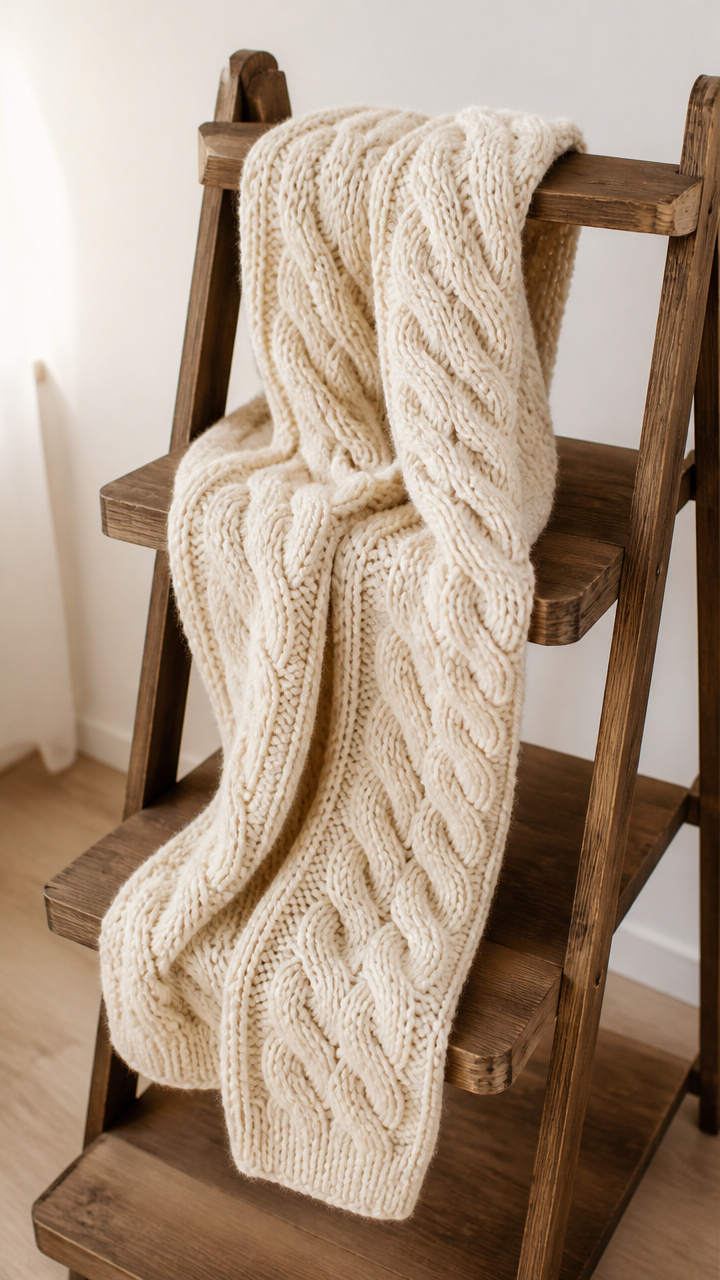
A thick cable-knit scarf drapes over a ladder shelf like winter itself has settled in. Its folds catch light and shadow throughout the day.
Materials Needed
- Chunky cream wool-blend yarn (300 yards)
- Size 10mm crochet hook
- Scissors
- Tapestry needle
- Wooden ladder shelf (3-tier, 24 inch wide)
How to Make It
- Chain 24 stitches, then work double crochet in each stitch across for 60 rows.
- Switch to cable stitch pattern: cross 4 stitches over 4 every 6 rows for 3 repeats.
- Fasten off and weave in ends with the tapestry needle.
- Drape the finished scarf over the middle rung of the ladder shelf, adjusting folds by hand.


17. Beeswax-Coated Citrus Slices
Moderate
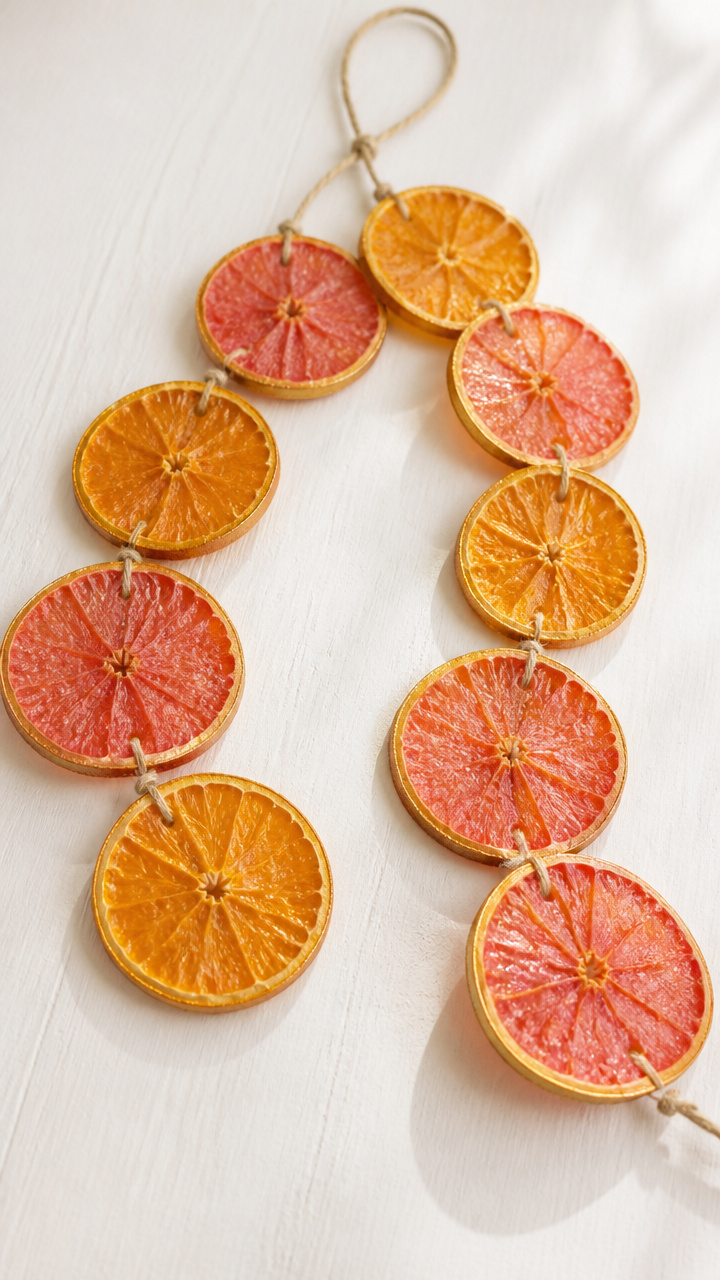
Thin orange and grapefruit slices stiffen in the oven and gain a soft luster from beeswax. String them into a garland that smells faintly of sunlit skin.
Materials Needed
- 2 oranges
- 1 grapefruit
- Baking sheet
- Parchment paper
- Oven
- Beeswax block
- Paintbrush
- Jute thread (1/8 inch, 4 feet)
- Needle (large eye)
How to Make It
- Slice each fruit into 1/4 inch rounds and place on a parchment-lined baking sheet.
- Bake at 200°F for 3 hours, flipping halfway, until leathery and dry.
- Melt a small amount of beeswax and brush a thin coat on both sides of each slice, letting dry 30 minutes.
- Thread slices alternately with small wooden beads using the needle and jute thread.


18. Plaster Relief Wall Panels
Advanced
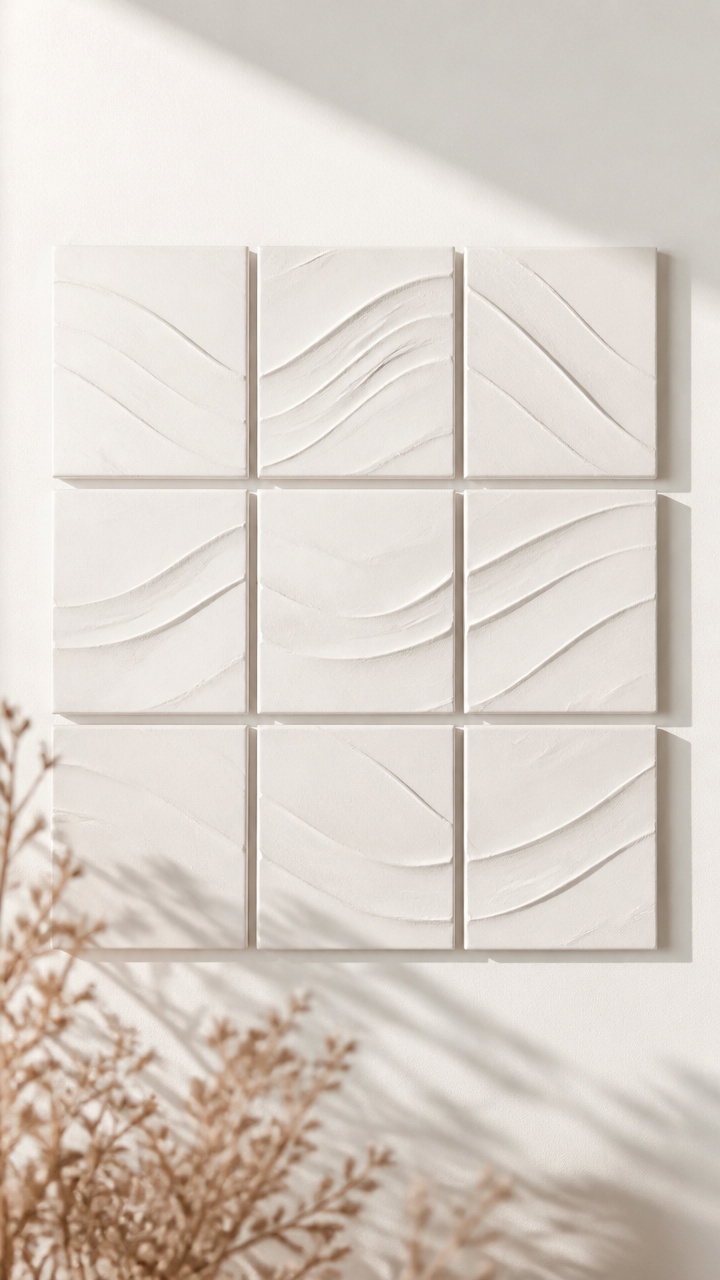
Subtle wave patterns rise from flat plaster squares set in a grid. The play of light across their curves changes with the hour.
Materials Needed
- Plaster of Paris (1 lb)
- Silicone mold (wave texture, 6×6 inch)
- Mixing bowl
- Stir stick
- Spreader knife (1 inch)
- Sandpaper (320 grit)
- White emulsion paint
- Paintbrush
How to Make It
- Mix plaster with water to a pancake batter consistency, stirring thoroughly to eliminate lumps.
- Pour slowly into the mold, tapping sides to release air bubbles, and let set 1 hour.
- Flex the mold gently to release the panel, then sand any sharp edges lightly.
- Paint the surface with one coat of white emulsion and let dry overnight before mounting.


19. Sheepskin Rug Layering
Easy
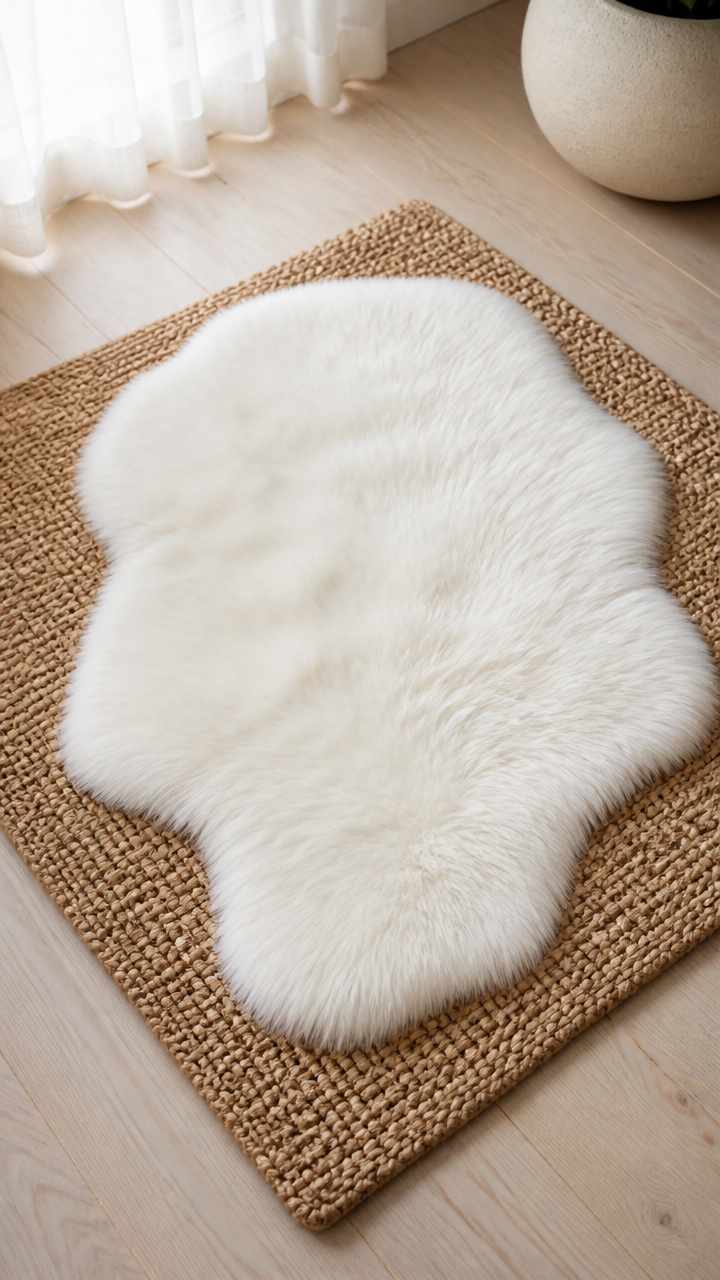
A plush sheepskin rug rests atop a flat-woven jute mat, creating a tactile island by the bed or chair. The contrast of textures invites bare feet.
Materials Needed
- Rectangular sheepskin rug (24×36 inch, natural white)
- Flat-woven jute rug (30×40 inch)
- Rug gripper pad (28×38 inch)
- Vacuum cleaner
How to Make It
- Place the jute rug flat on the floor and center the rug gripper pad on top, smoothing out wrinkles.
- Set the sheepskin rug in the center, aligning edges evenly and fluffing fibers by hand.
- Vacuum the jute border weekly with a low-suction setting to keep clean.
- Shake out the sheepskin monthly to maintain loft.


Each of these crafts brings a little more calm and texture into your space, growing more familiar as the weeks pass. Pick one that calls to you and let it settle in.