15 Easy Halloween Crafts for Kids You Can Make in an Afternoon

Halloween is the perfect time to gather your kids and dive into some hands-on fun. With simple supplies and a little creativity, you can make spooky and sweet decorations that bring the season to life. These crafts are designed to be finished in just a few hours, using materials you likely already have at home.
Each project offers something different, from painting and cutting to gluing and decorating. They’re ideal for keeping little hands busy and imaginations glowing with seasonal spirit.
1. Glitter Ghost Jars
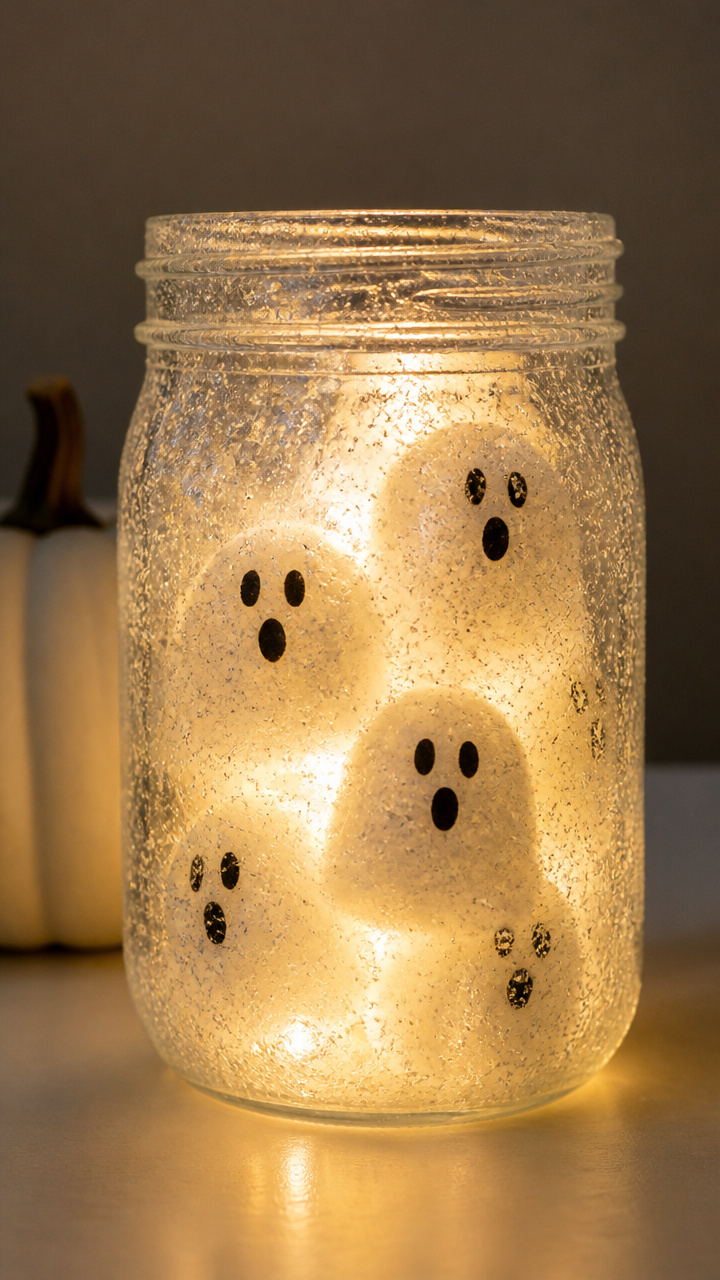
Soft glowing ghosts in mason jars create gentle nightlight magic on Halloween night. These shimmering jars use minimal supplies and stay spooky without being scary.
Materials Needed
- 4-ounce mason jars with lids, 6
- White school glue, 1 cup
- Water, 1 cup
- White glitter, 1/2 cup
- Cotton balls, 12
- Small LED tea lights, 6
- Black permanent marker, 1
How to Make It
- Mix equal parts white school glue and water in a bowl to make a runny paste.
- Dip cotton balls into the glue mixture, coat them evenly, then press onto the outside of each jar.
- Sprinkle white glitter over the wet cotton balls before they dry, covering all sides.
- Let jars dry completely for at least 2 hours, then draw simple ghost faces with the black marker.
- Place an LED tea light inside each jar and screw the lid on for a safe glow.


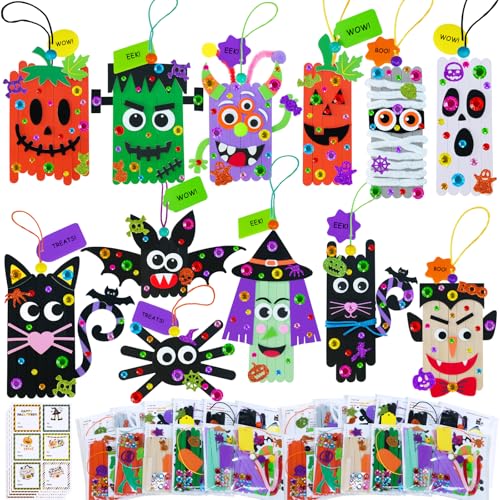
2. Popsicle Stick Bats
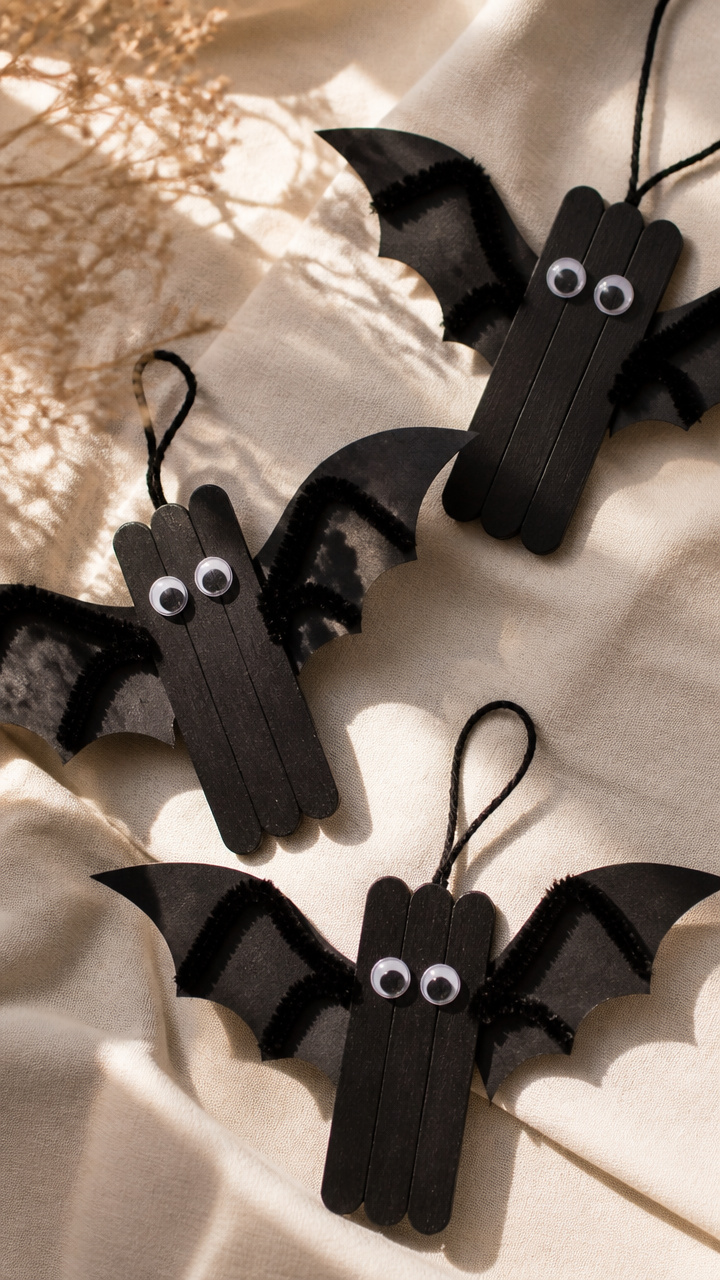
Crisp black bats made from craft sticks flutter beautifully when hung near a window. These lightweight decorations let kids practice fine motor control with cutting and gluing.
Materials Needed
- Flat wooden popsicle sticks, 10
- Black construction paper, 1 sheet
- White school glue, 1 bottle
- Googly eyes, 10 mm, 20
- Black pipe cleaners, 5
- Scissors
- Hole punch
How to Make It
- Cut bat wing shapes from the black construction paper using scissors, making 10 pairs.
- Glue a pair of wings to each popsicle stick, one on each side at the center.
- Glue two googly eyes near the top of the stick for the bat's face.
- Cut each pipe cleaner in half and twist one end of a half around the bottom of the stick to make legs.
- Punch a hole at the top of the stick and thread string through to hang.
![Popsicle Stick Cottage Model Kit – 350+ Pre-Cut Wooden Pieces – Rustic DIY House Craft for Kids and Adults – Complete Kit [Everything Included] by POPSI KITS](https://m.media-amazon.com/images/I/41ipWx9Y9CL._SL500_.jpg)

3. Paper Plate Owls
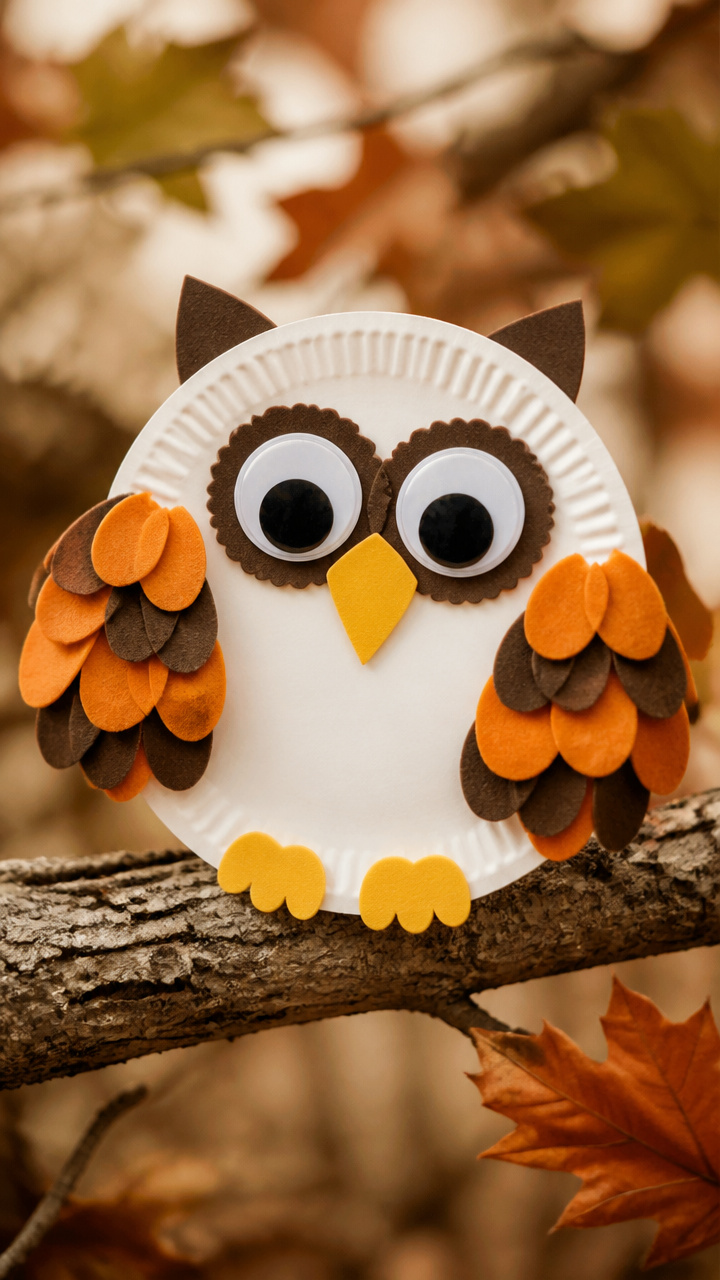
Brightly colored owls with wide eyes bring a cheerful woodland vibe to Halloween. Using paper plates as the base keeps the structure sturdy and easy to decorate.
Materials Needed
- White paper plates, 6
- Orange, brown, and yellow craft foam sheets, 1 each
- Googly eyes, 25 mm, 12
- White school glue, 1 bottle
- Scissors
- Black marker
How to Make It
- Cut a circle from the center of each paper plate to make a ring, then set aside the center disc.
- Cut feather shapes from the craft foam and glue them around the outer edge of the ring.
- Glue a googly eye to the center disc, then draw a beak with the black marker.
- Glue the center disc to the middle of the feathered ring.
- Let dry for 30 minutes before hanging with string.

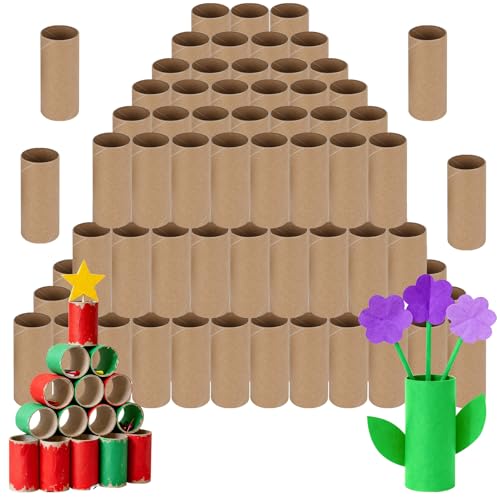
4. Toilet Paper Roll Mummies
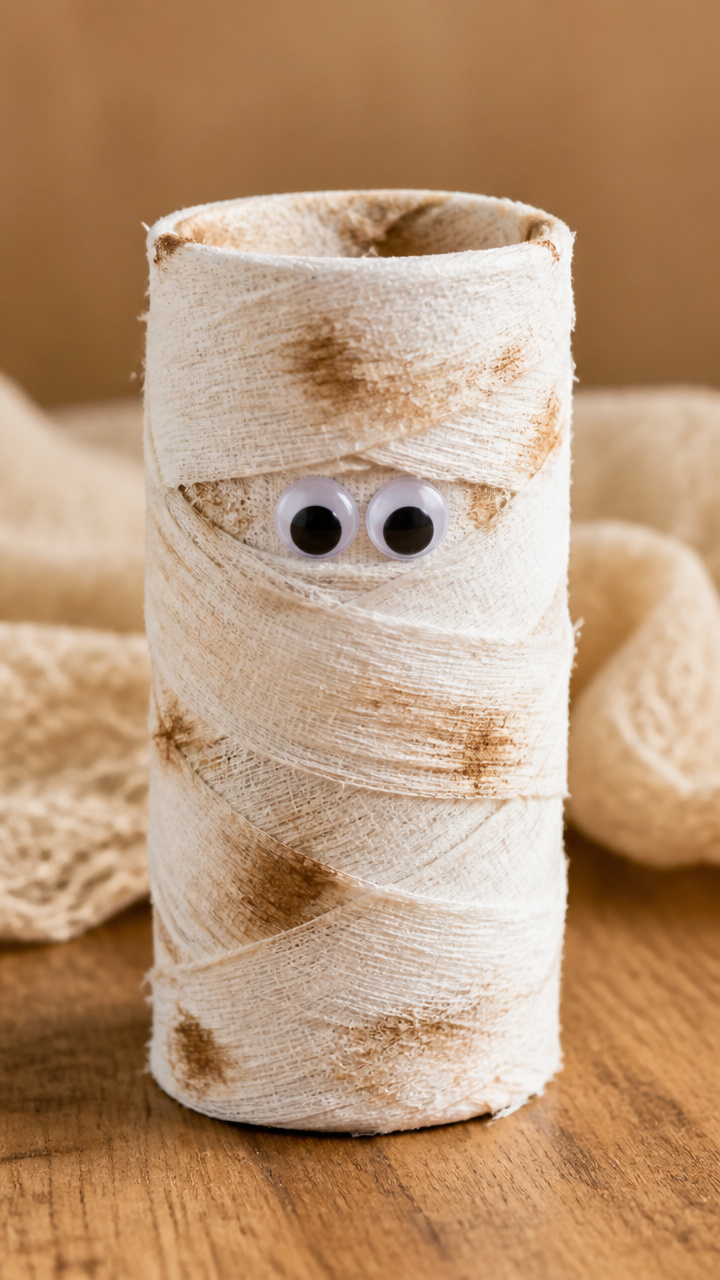
Fuzzy mummies wrapped in gauze-like tissue paper are silly and soft. These little figures stand on their own and make great table decorations.
Materials Needed
- Empty toilet paper rolls, 8
- White tissue paper, 1 roll
- White school glue, 1 bottle
- Googly eyes, 8 mm, 16
- Scissors
- Brown acrylic paint, 2 oz
- Paintbrush, 1
How to Make It
- Cut white tissue paper into 1-inch wide strips about 6 inches long, 50 strips total.
- Dilute white glue with a few drops of water to make it spreadable.
- Brush glue onto a toilet paper roll, then wrap tissue strips around it, overlapping slightly.
- Glue two googly eyes near the top once the wrapping is done.
- Let dry for 1 hour, then add tiny paint dots for dirt smudges with the brown paint.


5. Handprint Bats
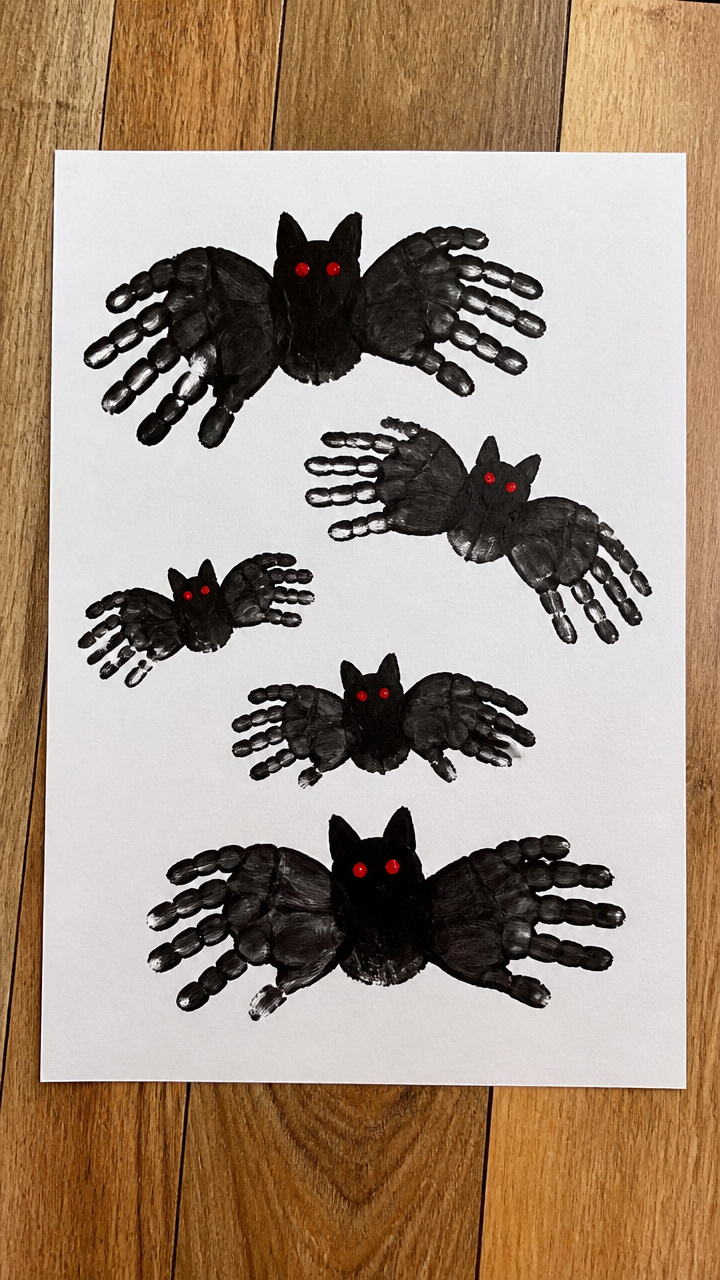
Silhouetted bat wings shaped from painted handprints make a personal keepsake. Each child’s hand size creates a unique flying creature.
Materials Needed
- Black tempera paint, 1/2 cup
- White drawing paper, 8.5 x 11 inches, 6 sheets
- Red finger paint, 2 tablespoons
- Cotton swabs, 6
- Paint tray or plate
How to Make It
- Press both hands into black tempera paint, palms down, fingers spread wide.
- Press both painted hands onto the paper so thumbs touch at the center bottom, forming wings.
- Let the paint dry for 20 minutes.
- Use a cotton swab dipped in red paint to dot two eyes near the thumb base.
- Let dry completely before displaying on the fridge or wall.


6. Candy Corn String Lights
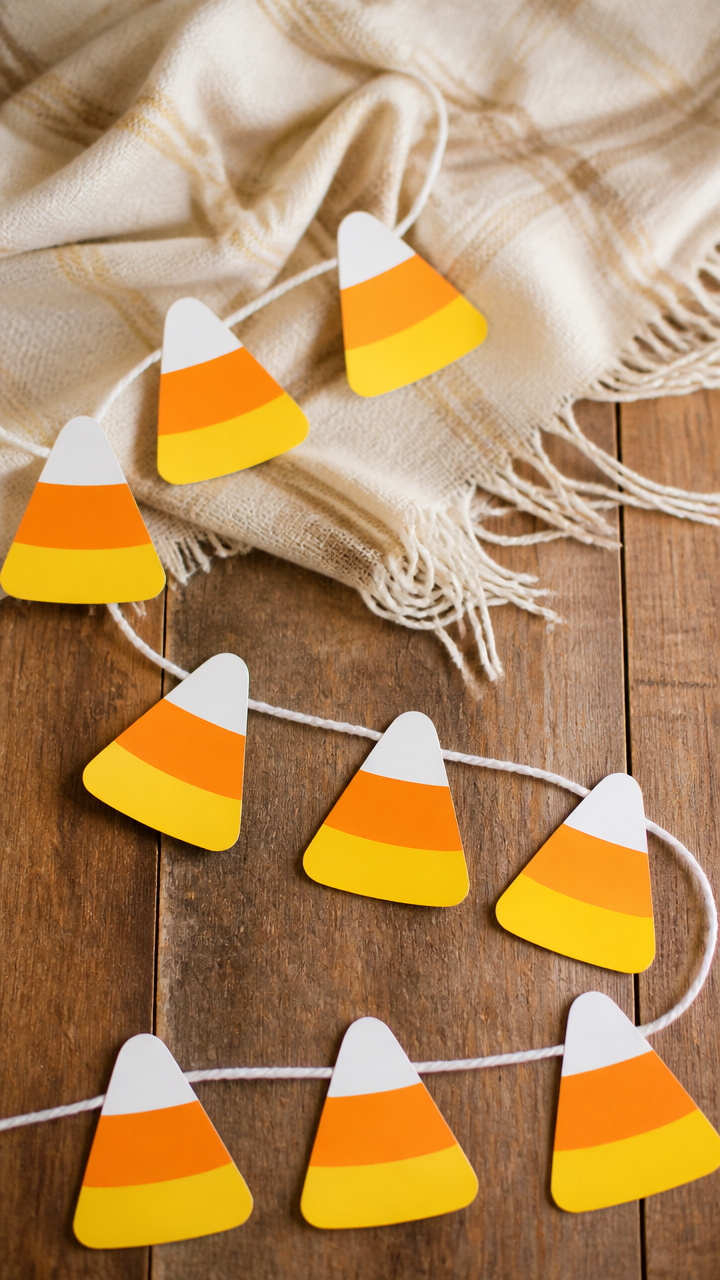
Bright paper triangles mimic candy corn and drape like festive bunting. This garland adds a pop of color to any doorway or shelf.
Materials Needed
- Orange, yellow, and white construction paper, 1 sheet each
- Scissors
- Hole punch
- White yarn, 6 feet
- Glue stick
How to Make It
- Cut 15 triangles from each color paper, all the same size, about 3 inches tall.
- Stack one orange, one yellow, and one white triangle to form a candy corn shape, then glue together.
- Repeat for all 15 sets.
- Punch a hole at the top of each candy corn and thread the yarn through, spacing them 3 inches apart.
- Tie knots at each end of the yarn to keep them from sliding off.


7. Pumpkin Rock Paintings
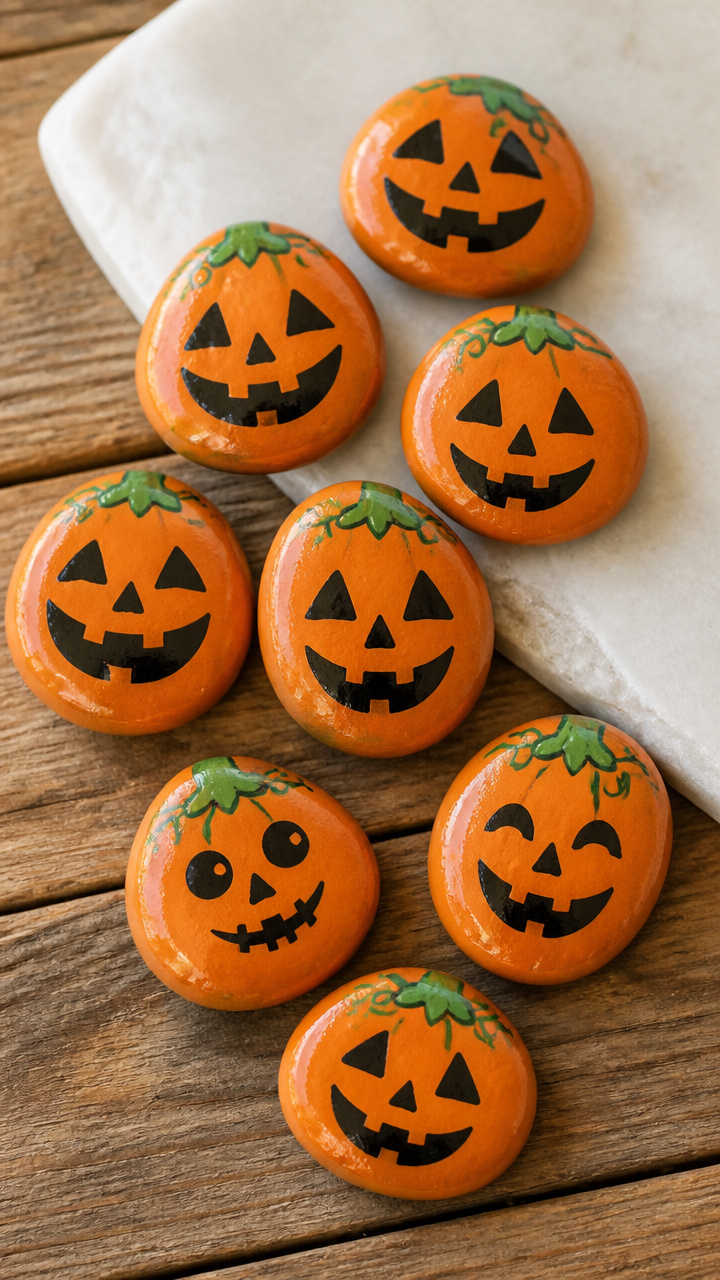
Smooth river rocks become tiny smiling jack-o'-lanterns with bold paint lines. These little stones are perfect for decorating window sills or gifting.
Materials Needed
- Smooth river rocks, 1.5 to 2 inches, 10
- Orange acrylic paint, 1/4 cup
- Green acrylic paint, 2 tablespoons
- Black acrylic paint, 2 tablespoons
- Paintbrush, size 2 round
- Clear acrylic sealer spray, 1 can
How to Make It
- Paint each rock solid orange and let dry for 30 minutes on a paper towel.
- Paint a small green stem at the top of each rock.
- Use the black paint to draw triangle eyes, a nose, and a jagged mouth on each rock.
- Let dry for 1 hour, then spray lightly with sealer in a well-ventilated area.
- Wait 10 minutes between coats and apply two light coats total.


8. Spooky Tree Silhouettes
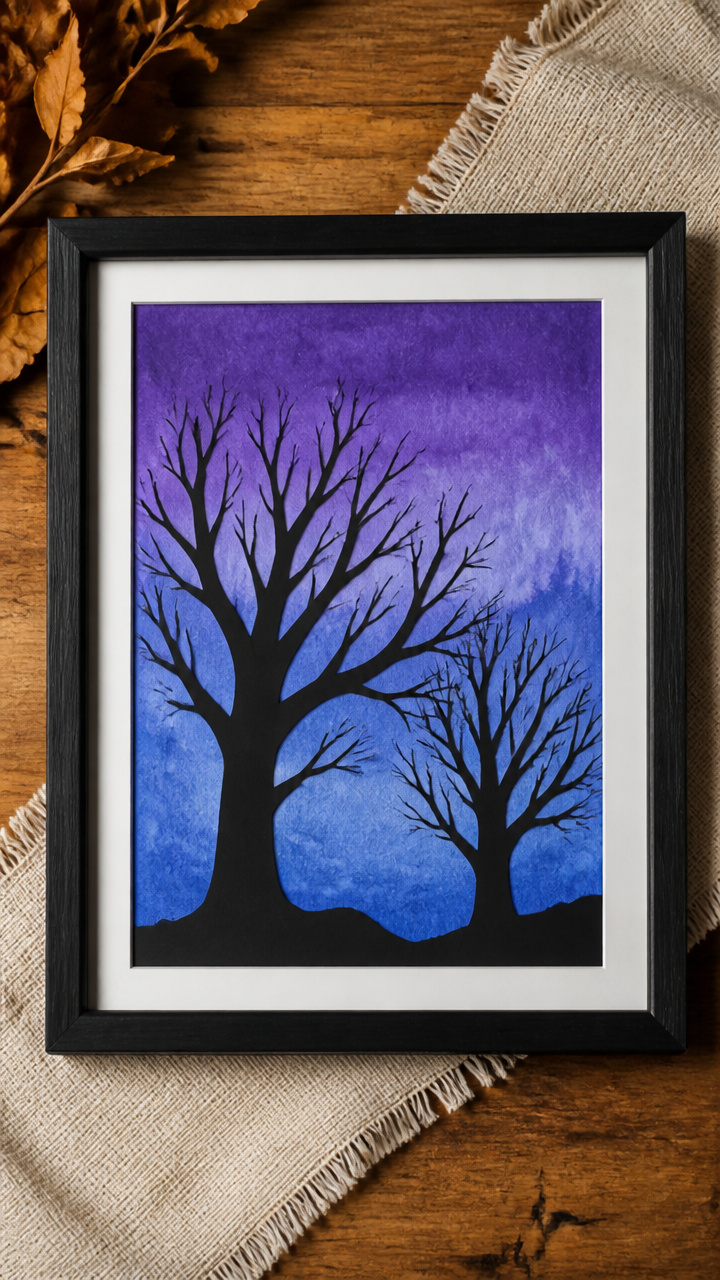
Black paper trees with twig branches cast eerie shadows against a painted sky. This framed art doubles as a decoration.
Materials Needed
- Black construction paper, 9 x 12 inches, 6 sheets
- Blue and purple watercolor paint, 1 tablespoon each
- Watercolor paper, 9 x 12 inches, 6 sheets
- Paintbrush, 1
- Scissors
- Glue stick
- Twigs, 6, about 4 inches long
How to Make It
- Use the paintbrush to blend blue and purple watercolor across the watercolor paper to make a twilight sky. Let dry.
- Cut jagged tree shapes from the black construction paper, each about 6 inches tall.
- Glue the trees to the bottom of the painted paper.
- Glue a twig vertically to the top of each tree trunk to act as a bare branch.
- Let dry flat for 1 hour before displaying in a frame or on the wall.


9. Witch Hat Clothespins
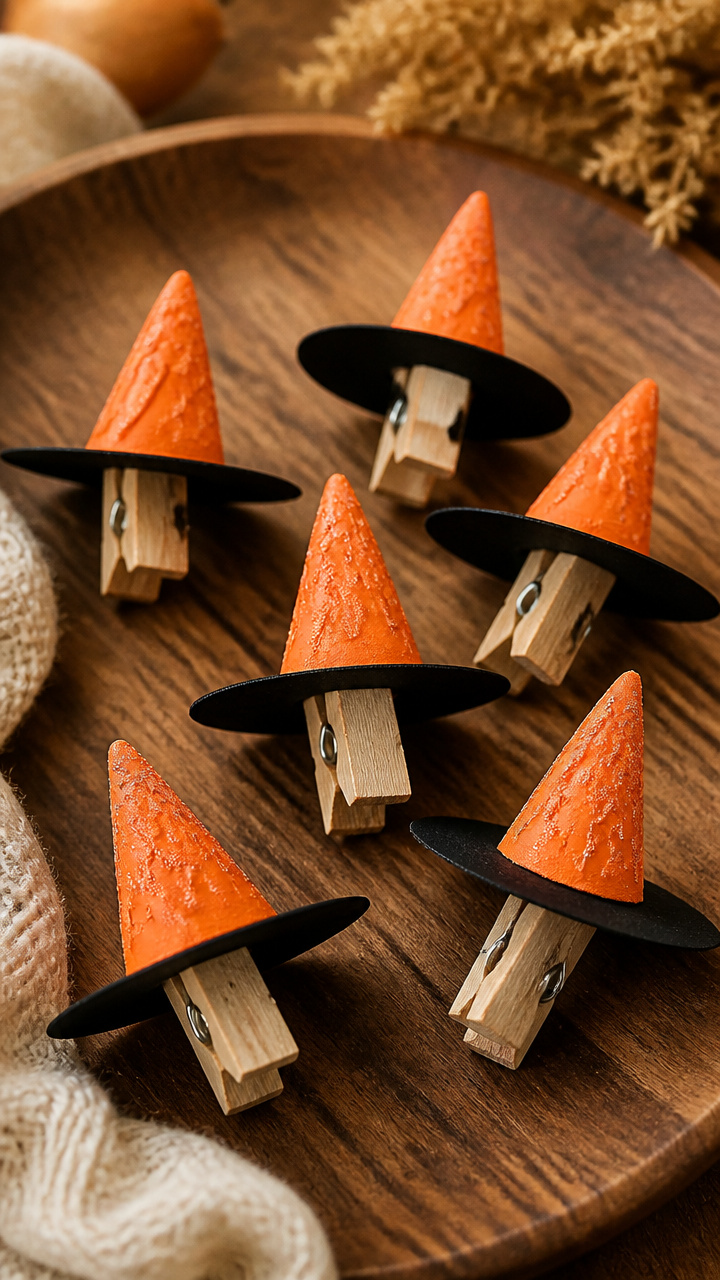
Mini witch hats clipped to photos or notes add a playful seasonal touch. These tiny hats are quick to assemble and full of charm.
Materials Needed
- Wooden clothespins, 10
- Black construction paper, 1 sheet
- Orange craft foam, 1 sheet
- White school glue, 1 bottle
- Scissors
- Glue stick
How to Make It
- Cut 10 small circles and 10 wide brim circles from the black construction paper.
- Cut 10 tiny pumpkins from the orange craft foam, about 1 inch tall.
- Glue a black circle on top of a brim, then glue the stack to the top of a clothespin.
- Glue an orange pumpkin to the front of each hat near the base.
- Let dry for 30 minutes before using to clip up drawings or cards.


10. Ghost Puppets
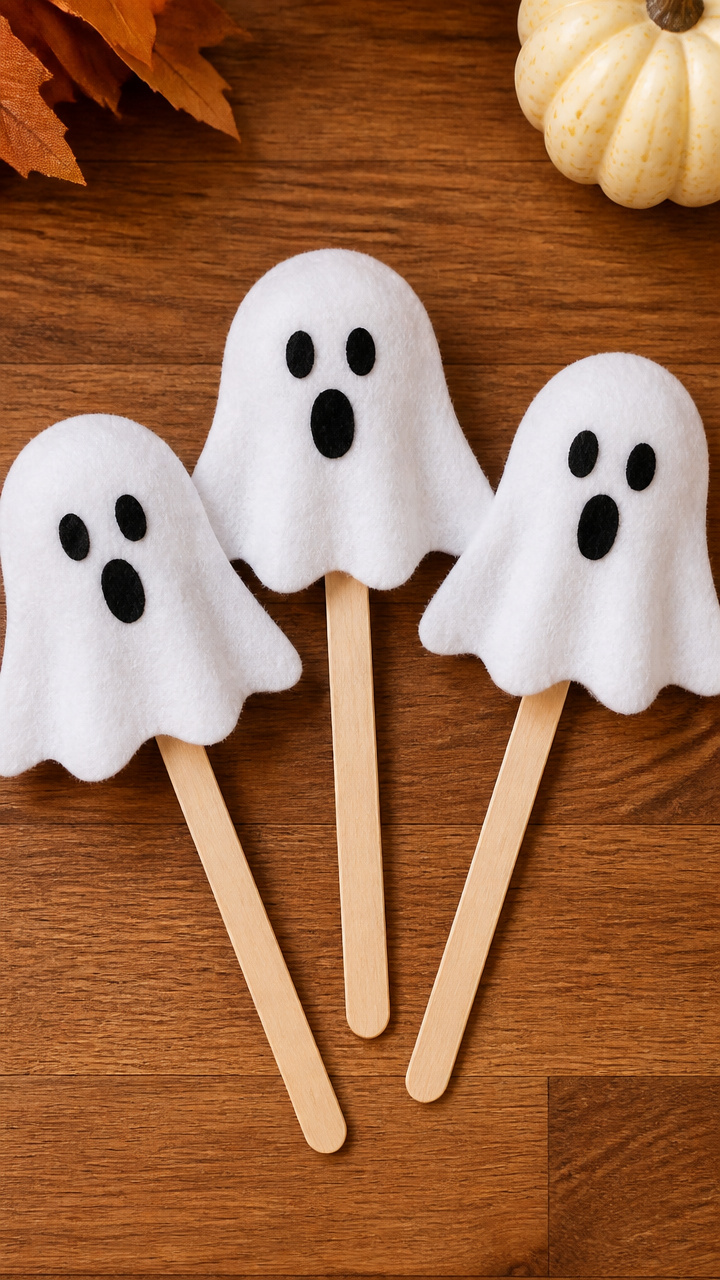
Wiggly ghosts on craft sticks bob and wave during spooky storytelling. These simple puppets let kids act out their own ghost tales.
Materials Needed
- White felt sheets, 2
- Wooden craft sticks, 6
- Black permanent marker, 1
- White school glue, 1 bottle
- Scissors
How to Make It
- Cut six ghost shapes from the white felt, each about 5 inches tall with wavy edges.
- Draw simple faces on each ghost with the black marker.
- Glue a craft stick to the back of each ghost, centered at the bottom.
- Press firmly and let dry for 45 minutes.
- Use them for play once dry, or make a whole ghost family.


11. Spooky Spider Webs
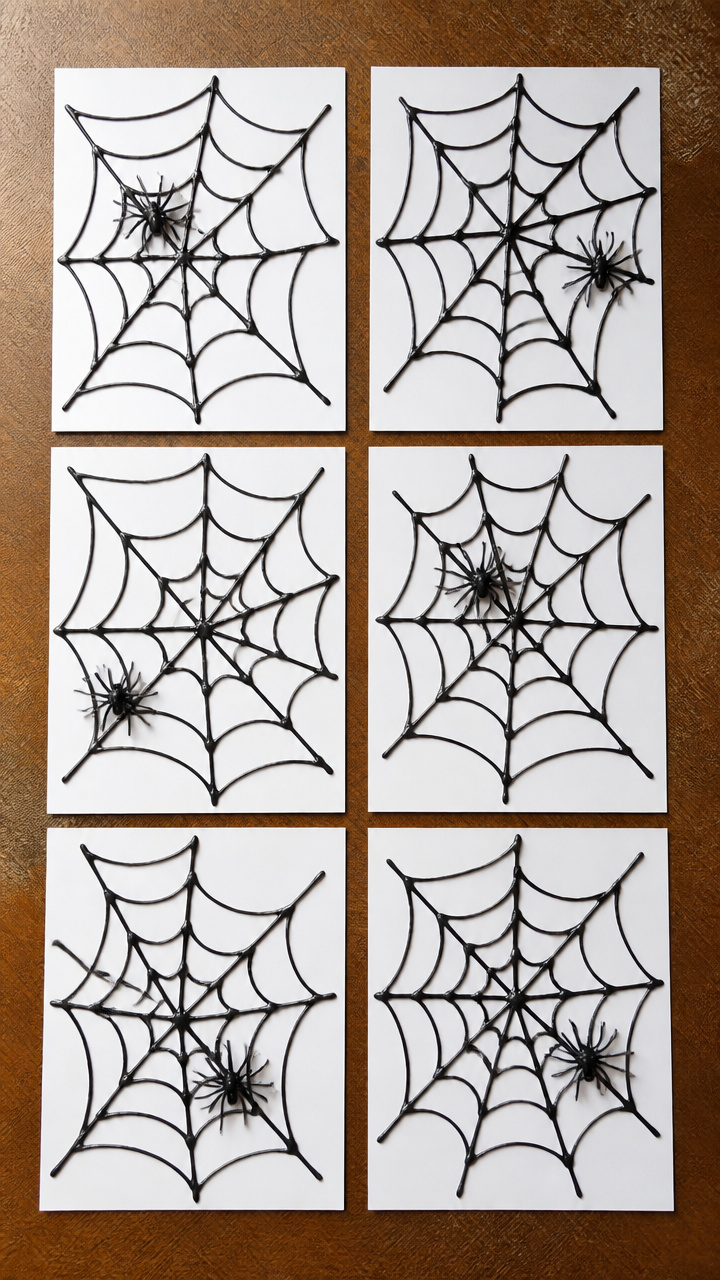
Cobweb art made with glue and black paint creates a raised, textured effect. These webs look intricate but are easy for young kids to make.
Materials Needed
- White drawing paper, 8.5 x 11 inches, 6 sheets
- White school glue, 1 bottle
- Black acrylic paint, 1/4 cup
- Paintbrush, size 4
- Plastic spider stickers, 6
How to Make It
- Squeeze glue in a spiral from the center of the paper outward, then drag lines from the center to the edges like a web.
- Let the glue dry completely for 2 hours, until it’s clear and raised.
- Mix black paint with a few drops of water to make it thin, then brush it over the dried glue lines.
- Blot excess paint with a paper towel to keep the web crisp.
- Add a spider sticker to one corner once the paint is dry.


12. Paper Bag Jack-o'-Lanterns
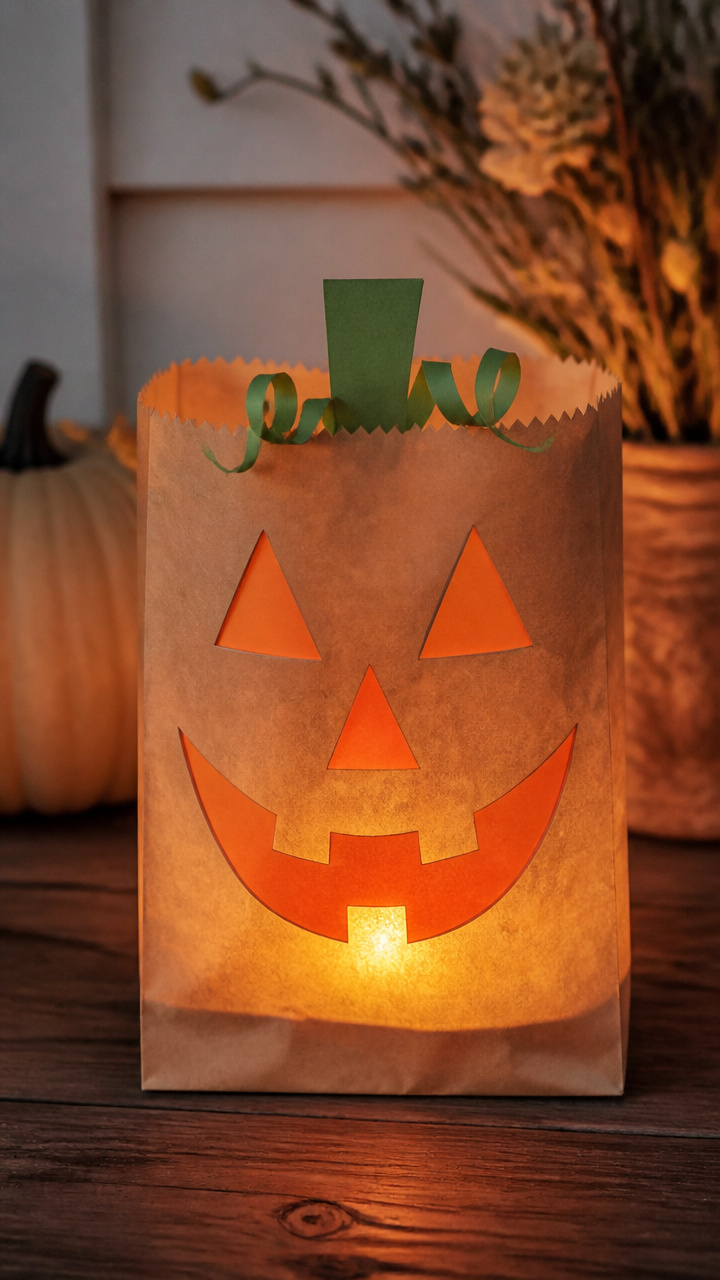
Lidded paper bags hold battery tea lights and glow with carved faces. These are safe indoor or outdoor lanterns.
Materials Needed
- Brown paper lunch bags, 6
- Orange construction paper, 1 sheet
- Green construction paper, 1 sheet
- White school glue, 1 bottle
- Scissors
- Black permanent marker, 1
- LED tea lights, 6
How to Make It
- Cut jack-o'-lantern faces from the orange paper using the marker to draw triangles and a mouth first.
- Glue the orange face to the front of each paper bag.
- Cut small leaf shapes from the green paper and glue one above each face.
- Fold the top of each bag over once to make a lid and press flat.
- Place an LED tea light inside and open the lid slightly to let the light shine.


13. Wiggly Eyeball Monsters
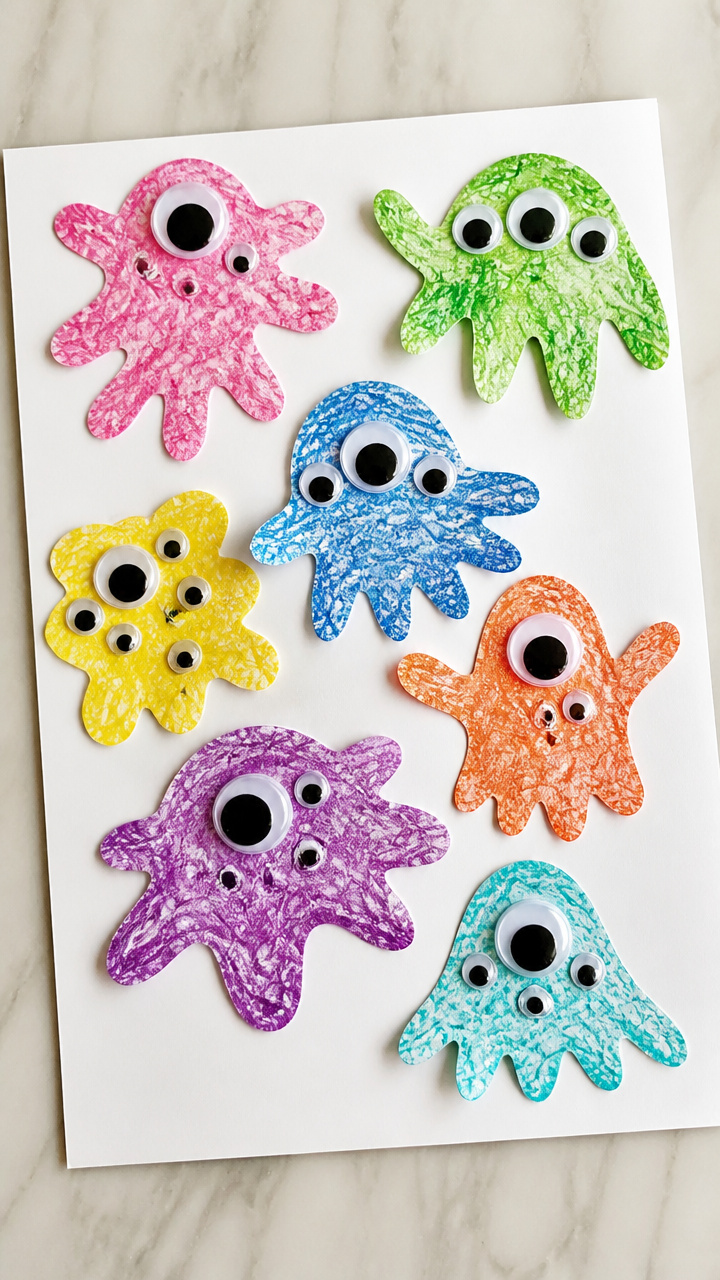
Googly eyes of all sizes crawl over paper monsters with crayon scribbles. These silly creatures spark endless imaginative play.
Materials Needed
- White drawing paper, 6 sheets
- Assorted googly eyes, 30 total
- Washable crayons, assorted colors
- White school glue, 1 bottle
- Black marker, 1
How to Make It
- Draw a large blob shape on each paper with crayons, using bold, scribbly lines.
- Outline the blob with the black marker to make it stand out.
- Glue googly eyes all over the blob, varying sizes for fun.
- Draw wiggly legs or arms with the marker if desired.
- Let glue dry for 20 minutes before displaying on the wall.


14. Tissue Paper Windows
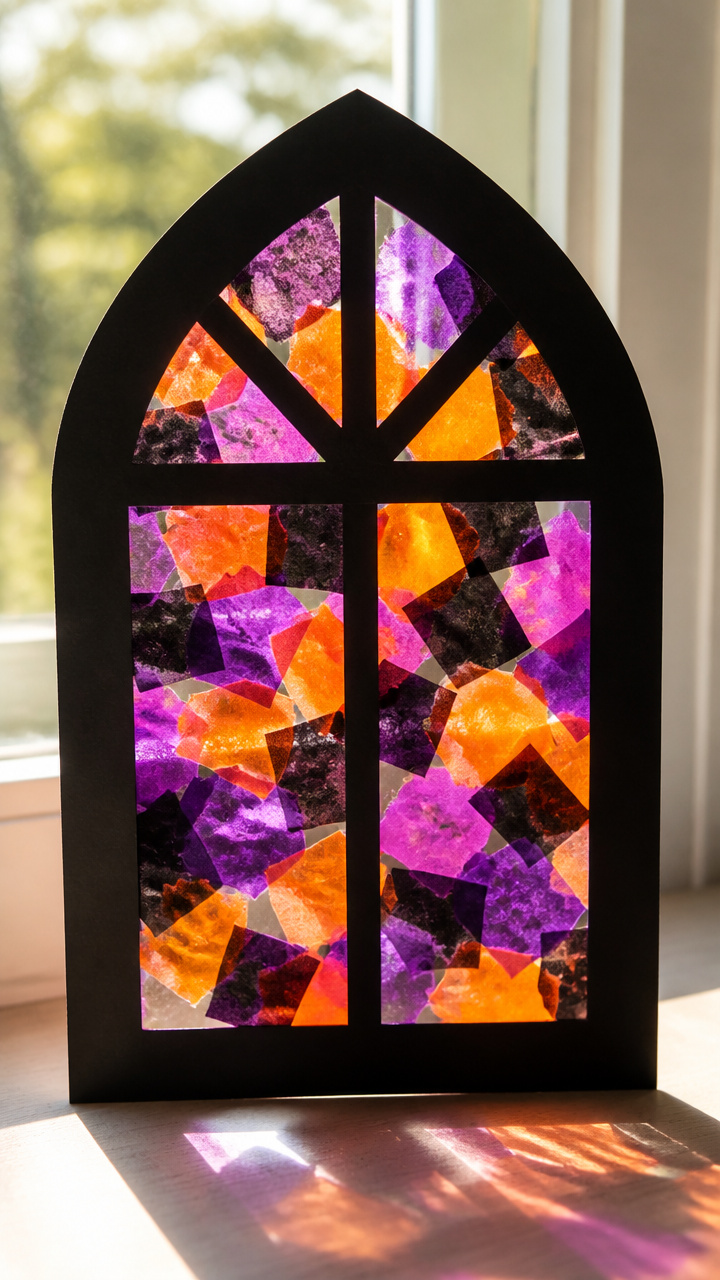
Stained glass effect windows glow when taped to sunny panes. The torn tissue squares make a mosaic of Halloween colors.
Materials Needed
- Black construction paper, 6 sheets
- Orange, purple, and black tissue paper, 1/2 sheet each
- Scissors
- Glue stick
- Clear tape
How to Make It
- Cut a window frame from each black sheet by cutting a rectangle out of the center, leaving a 1-inch border.
- Tear tissue paper into 1-inch squares in all three colors.
- Glue the squares inside the window opening, overlapping them to fill the space.
- Let the glue dry for 30 minutes.
- Tape the finished window to a sunny glass surface to see the light shine through.


15. Pumpkin Paper Fans
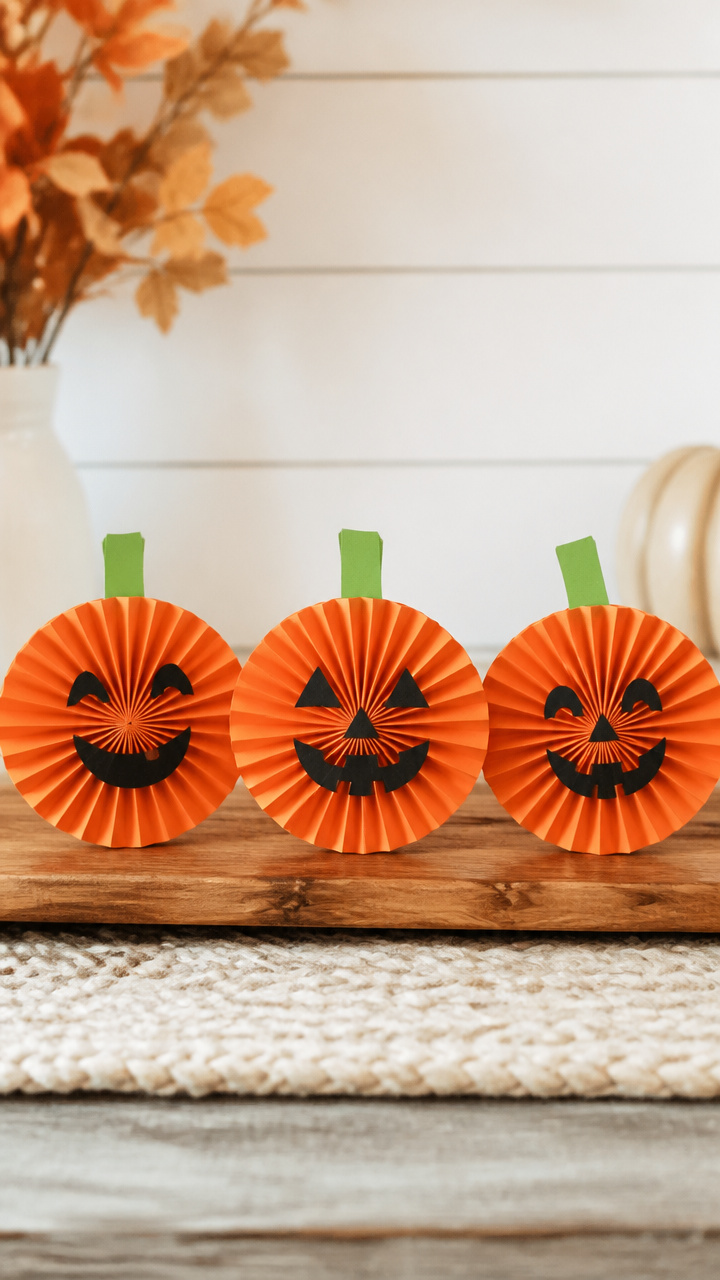
Folded paper fans with pumpkin faces stand up like mini decorations. The accordion fold gives them spring and motion.
Materials Needed
- Orange construction paper, 6 sheets
- Green construction paper, 1 sheet
- Black marker, 1
- Glue stick
- Ruler
How to Make It
- Use the ruler to draw 1-inch parallel lines across each orange sheet, from top to bottom.
- Fold each sheet back and forth along the lines to make an accordion fan.
- Pinch the center and staple it once to hold the fan shape.
- Draw a pumpkin face on one side with the black marker.
- Cut small green leaf shapes and glue one to the top edge of the fan.


You’ve got everything you need to fill an afternoon with laughter and handmade Halloween magic. Grab your supplies, invite the kids in, and start creating memories that last well beyond the last piece of candy.