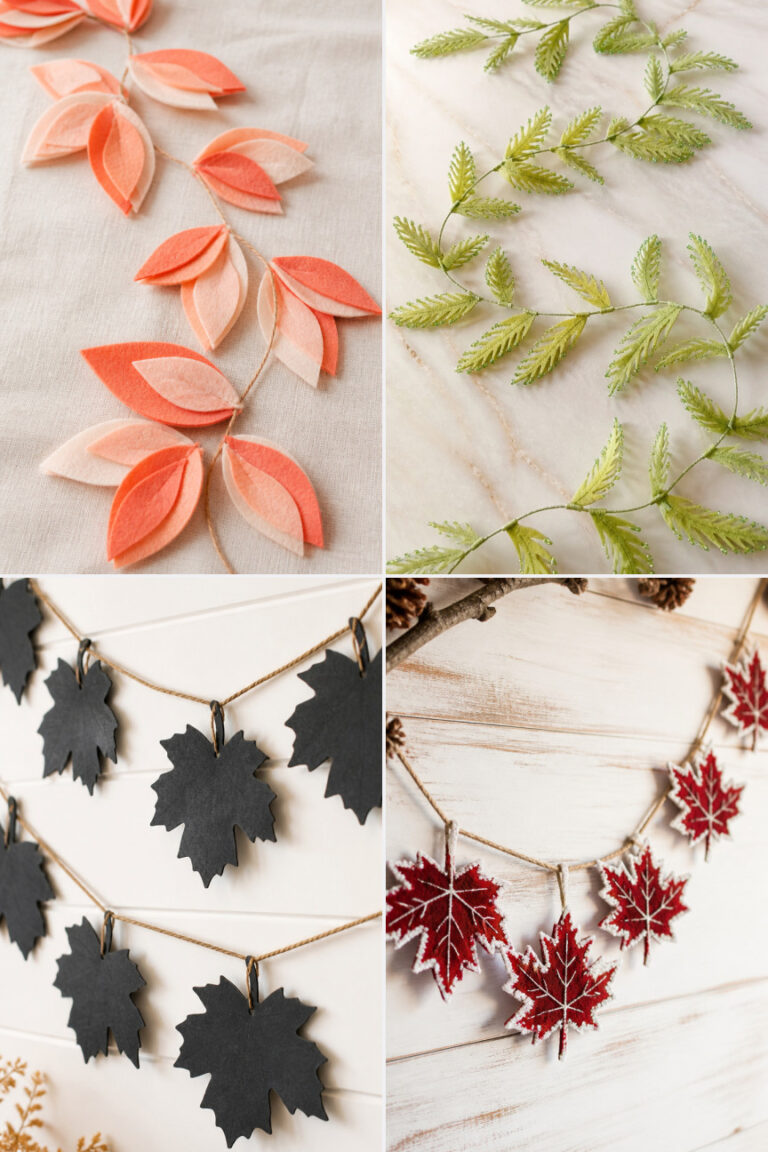
25 DIY Fall Wreath Ideas

The air turns crisp and the trees begin to glow with warm hues. This is the season to welcome change with handmade charm, and a fall wreath on your door does just that. Each of these wreaths brings something different to your home, from cozy textures to unexpected materials you can gather or already have on hand.
You don’t need fancy tools or years of crafting experience. Just a little time, some simple supplies, and the desire to make something beautiful. These ideas are chosen for their clarity, charm, and ease so you can enjoy the making as much as the finished piece.
1. Burlap Ribbon Leaf Wreath
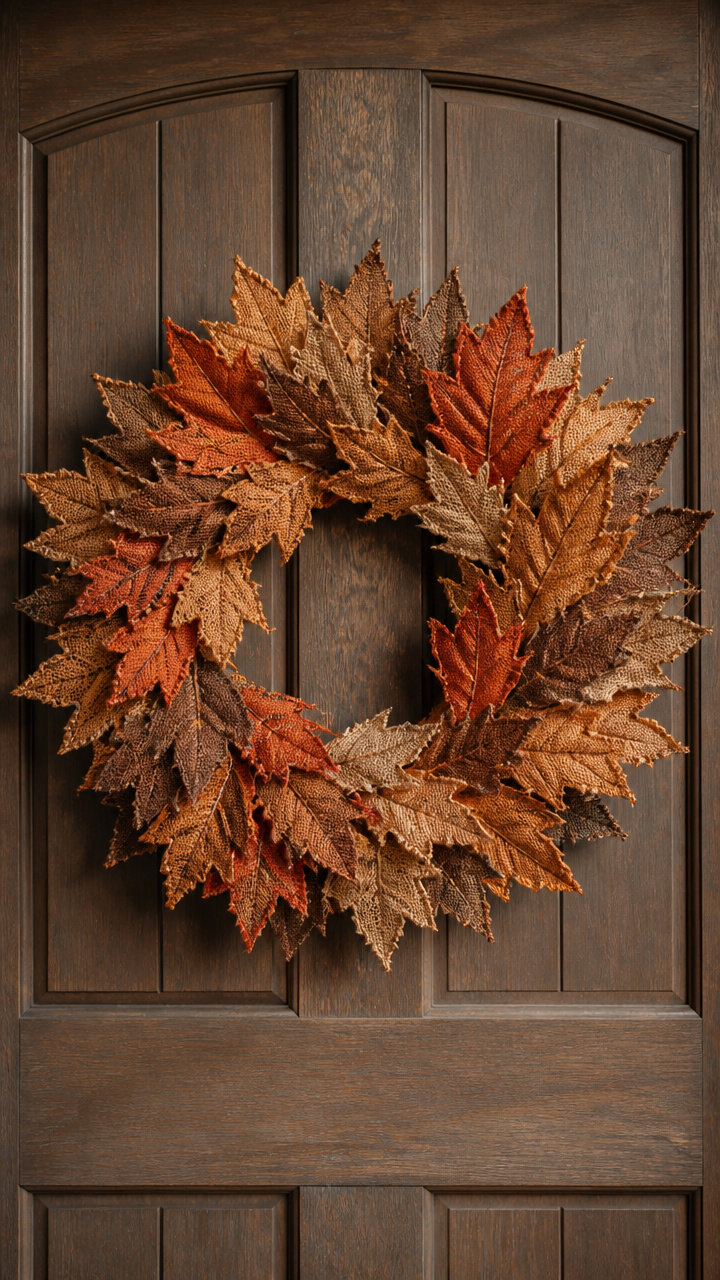
Soft folds of burlap shaped into autumn leaves give this wreath a homespun warmth. It holds up well outdoors and adds texture without overwhelming your entryway.
Materials Needed
- 18-inch wire wreath frame
- 3 rolls orange burlap ribbon 2.5 inches wide
- 1 roll brown wired edge ribbon 1.5 inches wide
- Floral wire spool
- Scissors
- Hot glue gun with glue sticks
How to Make It
- Cut the orange burlap ribbon into 40 strips each 6 inches long.
- Fold each strip in half and twist the center with floral wire to form a leaf shape, then bend the wire stem slightly.
- Attach each leaf to the wire frame using hot glue, overlapping stems and pointing outward in concentric circles.
- Wrap the brown ribbon around the outer ring of the frame, securing every few inches with hot glue to cover raw edges.
- Trim any loose threads and let the glue set for 10 minutes before hanging.


2. Mini Pumpkin Vine Wreath
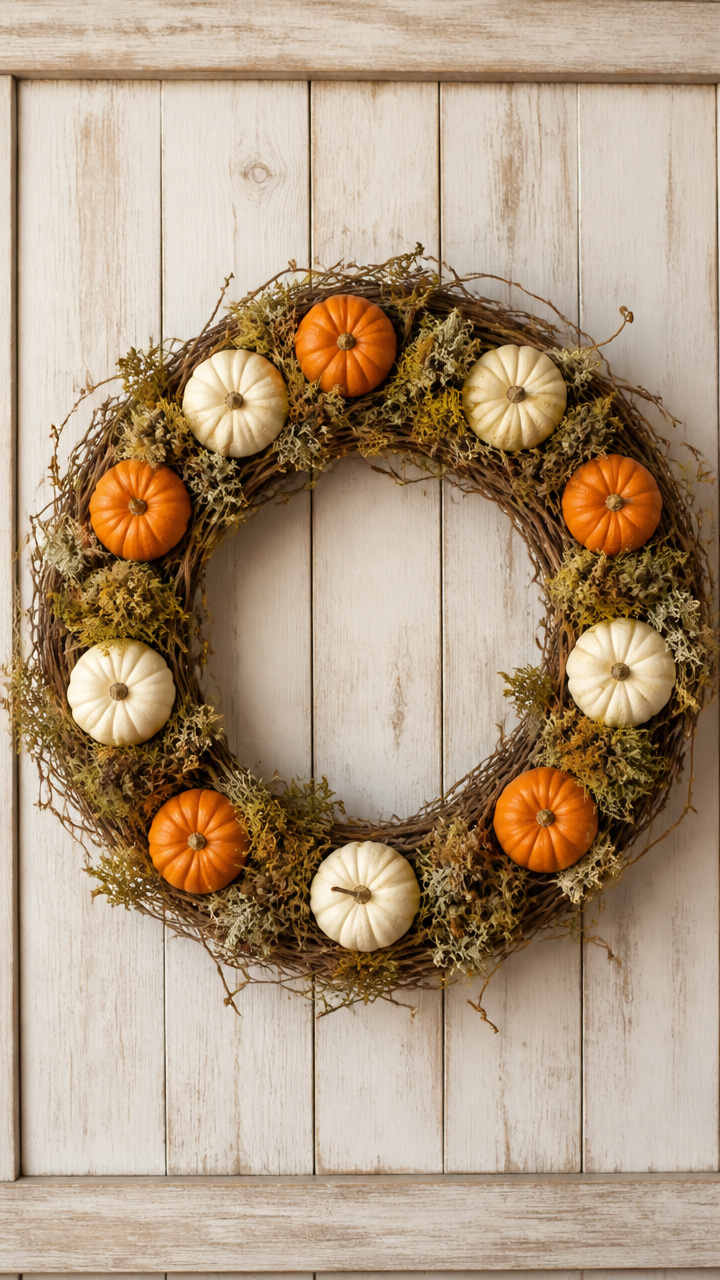
Tiny faux pumpkins nestle among flexible vine stems for a full, natural look. This wreath feels abundant and festive without being overly structured.
Materials Needed
- 14-inch grapevine wreath base
- 18 mini faux white pumpkins 1.5 inches tall
- 12 mini faux orange pumpkins 1.75 inches tall
- Floral wire 22 gauge
- Wire cutters
- Tinted craft moss 1/2 cup
How to Make It
- Use wire cutters to trim small sections of vine from the outer edge of the base, creating space for pumpkins.
- Slide two or three pumpkins onto a 4-inch piece of floral wire and twist the ends together at the back.
- Push the wire through the moss and into the wreath base, spacing clusters every 2 to 3 inches.
- Tuck moss around the base of each cluster to hide wire and add depth.
- Let sit overnight to settle before placing on your door.


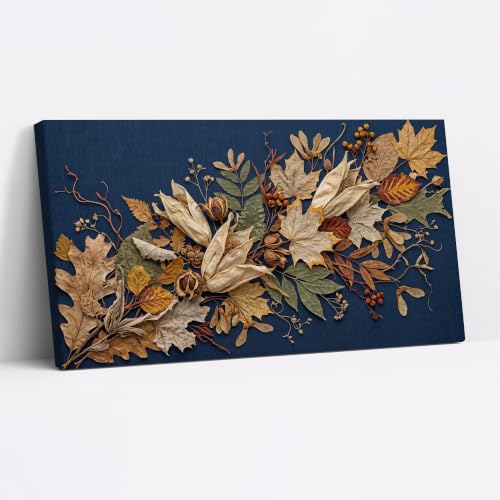
3. Maple Seed Pod Mobile Wreath
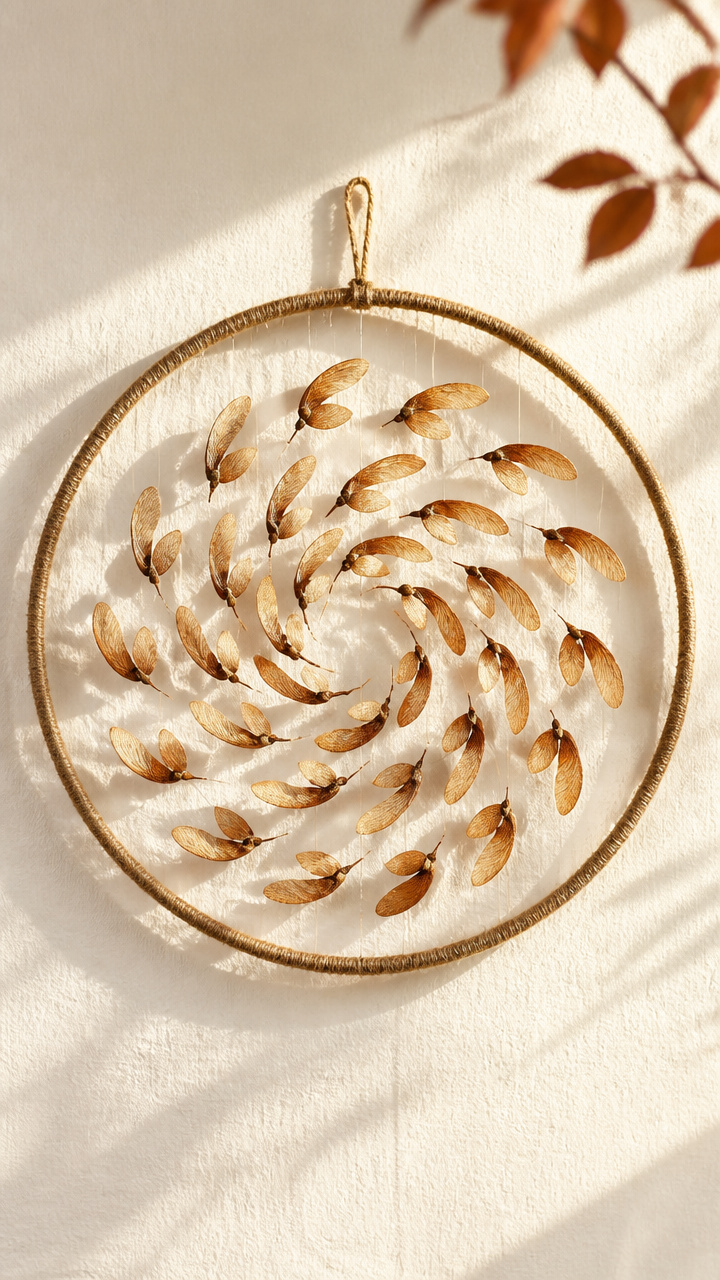
Real maple seed pods spiral like nature’s windmills around a round base. Their delicate movement catches light and breeze beautifully.
Materials Needed
- 12-inch embroidery hoop
- 40 dried maple seed pods
- Natural jute twine 10 yards
- Craft knife
- Small clothespins
- Clear-drying craft glue
How to Make It
- Remove the inner screw of the embroidery hoop and use only the outer ring.
- Tie a 10-inch length of twine to each seed pod near its thicker end using a double knot.
- Evenly space the pods around the hoop by tying their free ends to the ring, adjusting height with small clothespins.
- Secure each knot with a dab of glue and let dry for 2 hours.
- Hang using a 12-inch loop of twine tied to the top of the hoop.

4. Felt Acorn Cluster Wreath
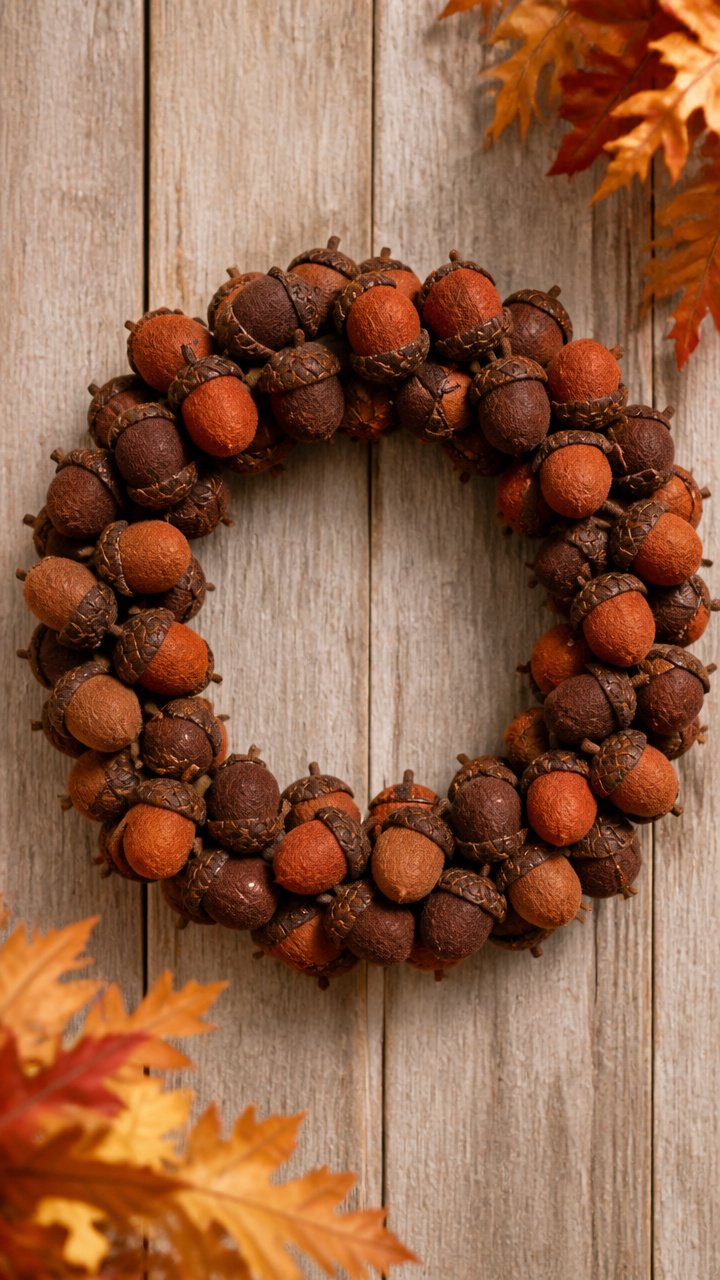
Hand-stitched felt acorns in deep rust and chocolate brown create a soft, dimensional focal point. This wreath works equally well indoors or under a covered porch.
Materials Needed
- 16-inch foam wreath base
- Rust felt sheet 9×12 inches
- Chocolate brown felt sheet 9×12 inches
- Embroidery floss in dark brown
- Needle
- Hot glue gun with glue sticks
- Acorn mold set (cap and base)
How to Make It
- Trace and cut 12 acorn caps from chocolate felt and 12 bases from rust felt using the mold.
- Stitch each cap shut along the curved edge with a whipstitch using dark brown floss.
- Fill each base with a small pinch of polyester fiberfill before gluing the cap closed with hot glue.
- Glue each acorn to the bottom third of the foam base, clustering them tightly.
- Let dry completely for 1 hour before handling.


5. Cinnamon Stick Fan Wreath
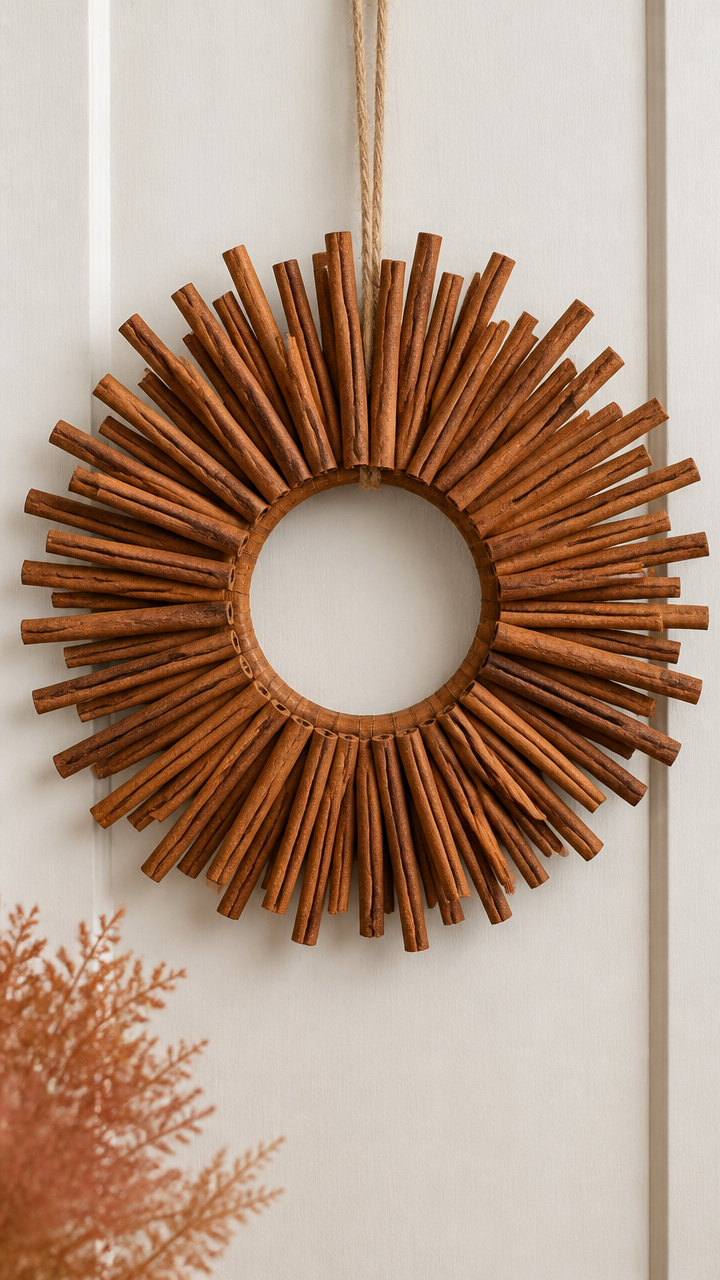
Tightly bound cinnamon sticks radiate from the center like a sunburst. The scent gently rises when touched, adding sensory warmth.
Materials Needed
- 80 whole cinnamon sticks 6 inches long
- 10-inch wooden embroidery circle
- Strong craft glue
- String brush
- Ruler
- Rubber bands (2)
How to Make It
- Lay 10 cinnamon sticks side by side and glue them flat to the wood circle, evenly spaced in a star pattern.
- Add a second layer between the gaps, offsetting the sticks and gluing them perpendicular to the first layer.
- Wrap rubber bands around both sides to hold until dry, letting cure for 3 hours.
- Remove bands and touch up weak spots with extra glue.
- Brush off dust with the string brush before displaying.


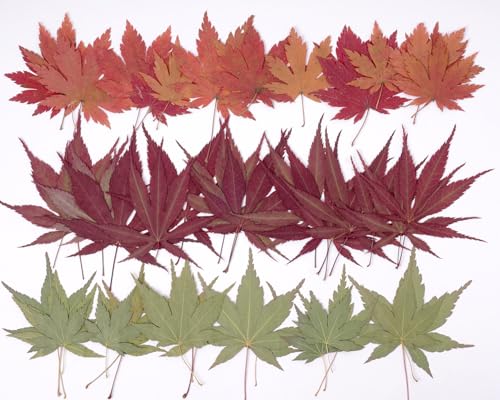
6. Pressed Maple Leaf Frame Wreath
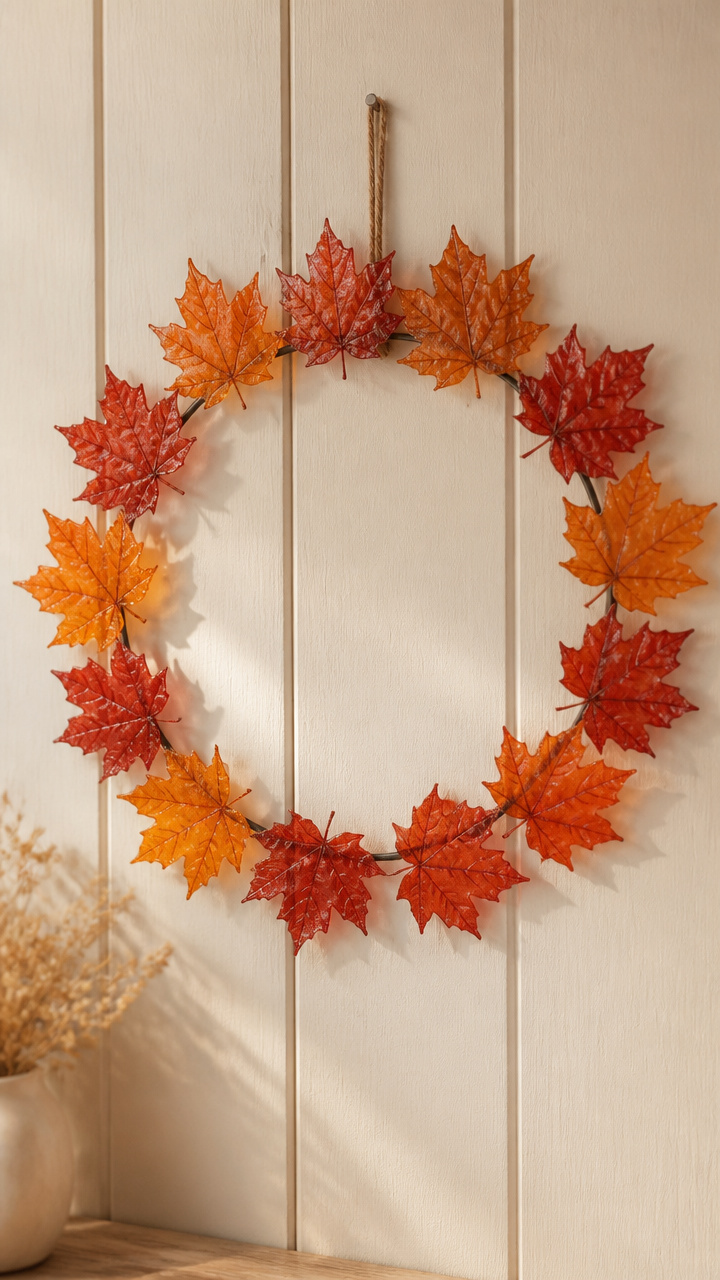
Real maple leaves preserved between clear sheets encircle a simple metal ring. The colors stay vibrant for years if kept out of direct rain.
Materials Needed
- 12-inch steel ring
- 10 fresh red and orange maple leaves
- Heavy books (2)
- Contact paper 12×18 inches
- Scissors
- Double-sided tape
How to Make It
- Place leaves between two sheets of parchment and press inside heavy books for 48 hours.
- Cut contact paper into 3-inch wide strips long enough to wrap each leaf.
- Sandwich each leaf between two strips, sealing all edges with fingers to remove bubbles.
- Cut slits in one end of each laminated leaf and thread onto the ring from the back.
- Secure with double-sided tape where leaves overlap, spacing evenly.

7. Woven Wheat Stalk Circle
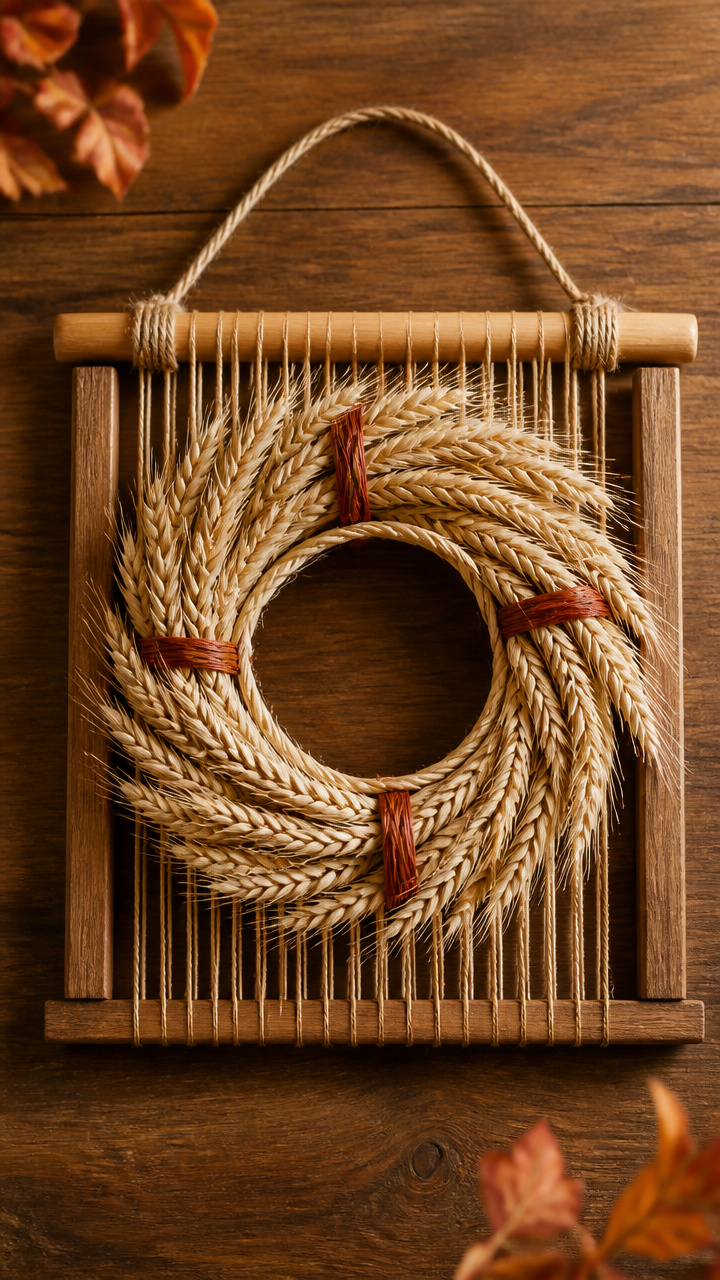
Golden wheat stalks woven through a grid base create a harvest-inspired design. The natural grain contrasts softly with dyed accents.
Materials Needed
- Square wooden weaving loom 8×8 inches
- 30 golden wheat stalks
- Red-dyed raffia 1 yard
- Craft scissors
- Wooden dowel 1/8 inch thick, 12 inches long
- Twine 2 feet
How to Make It
- Weave vertical warp threads across the loom using raffia, tying ends securely at top and bottom.
- Pass wheat stalks horizontally over and under the raffia threads, packing them tightly.
- Use the dowel to push each row down firmly against the last.
- Leave 1 inch unweaved at the center, then cut stalks flush and tie twine around the bundle to form a circle.
- Remove from loom and hang using the twine loop.


8. Pinecone Scale Mosaic Wreath
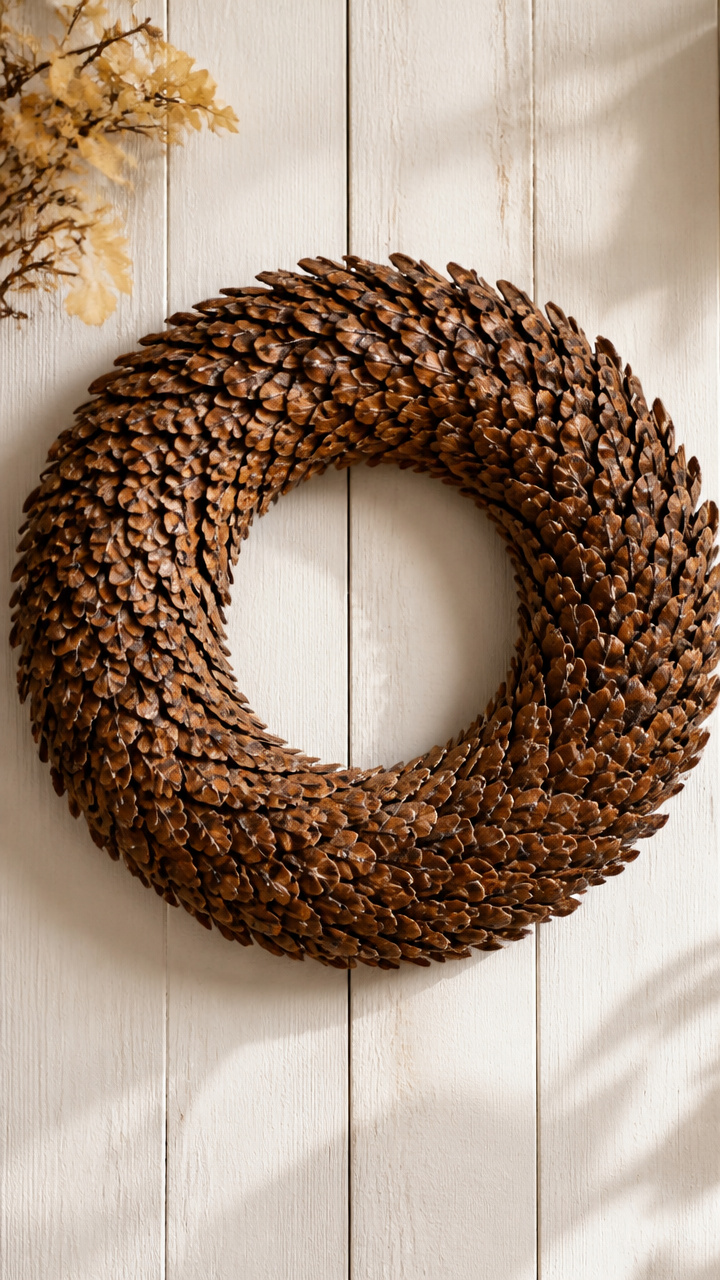
Individual pinecone scales layered like shingles give this wreath a rich, textured surface. They catch light differently depending on the angle.
Materials Needed
- 14-inch foam wreath base
- 120 pinecone scales collected from large cones
- Hot glue gun with glue sticks
- Tweezers
- Brown acrylic paint
- Paintbrush
How to Make It
- Sort scales by size and lightly paint the underside of each with brown paint to enrich color.
- Let paint dry for 20 minutes on wax paper.
- Starting at the outer edge, glue the largest scales flat-side down, overlapping like roof tiles.
- Work inward in rows, using tweezers to position smaller scales toward the center.
- Let dry for 2 hours before moving.


9. Dried Apple Slice Garland Wreath
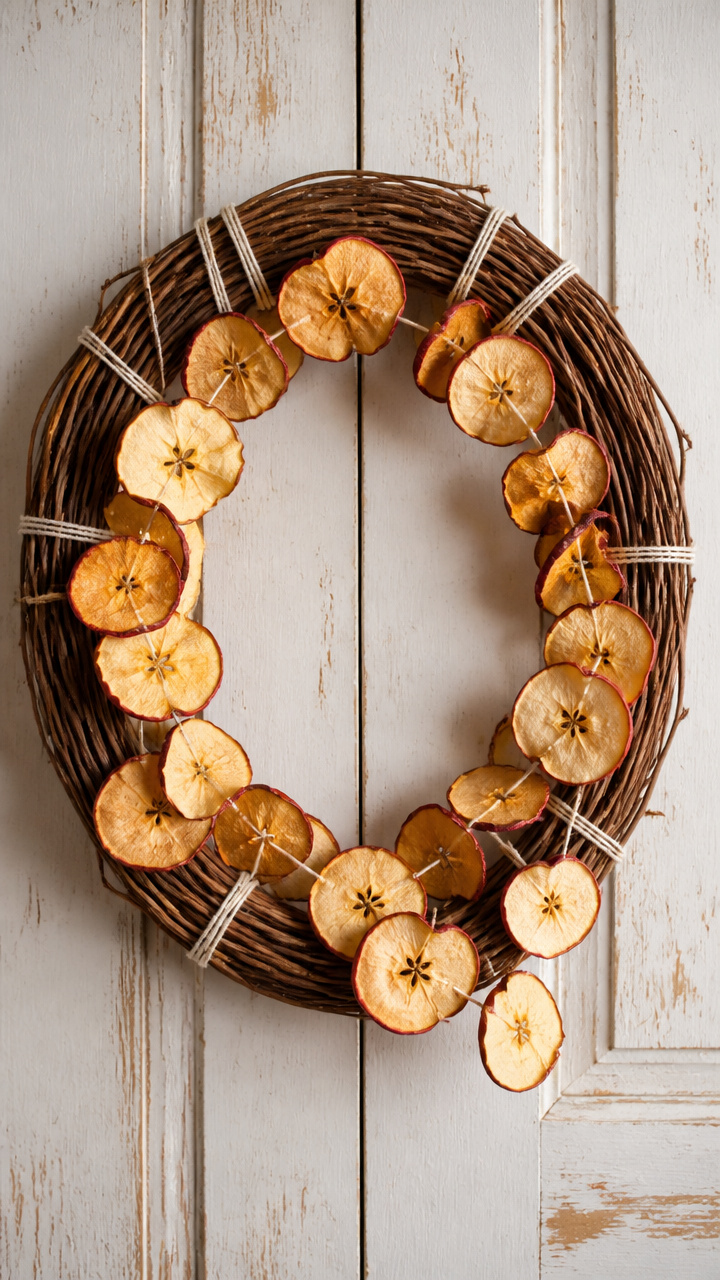
Thin apple slices dried until crisp drape in loose loops around a vine base. They retain a faint sweet scent for weeks.
Materials Needed
- 12-inch willow wreath base
- 20 apples (Granny Smith or Honeycrisp)
- Chef’s knife
- Dehydrator or oven
- White thread 3 yards
- Needle
- Cinnamon stick (optional)
How to Make It
- Slice apples crosswise into 1/4-inch rounds using the chef’s knife.
- Dry slices in a dehydrator at 135°F for 8 hours or in an oven at lowest setting for 6 hours, flipping halfway.
- Thread 10 slices per strand using the needle, leaving 6 inches of thread at each end.
- Tie each garland loosely around the base every 3 inches, varying lengths slightly.
- Add a cinnamon stick tied at the bottom with thread if desired.


10. Plaid Flannel Bow Wreath
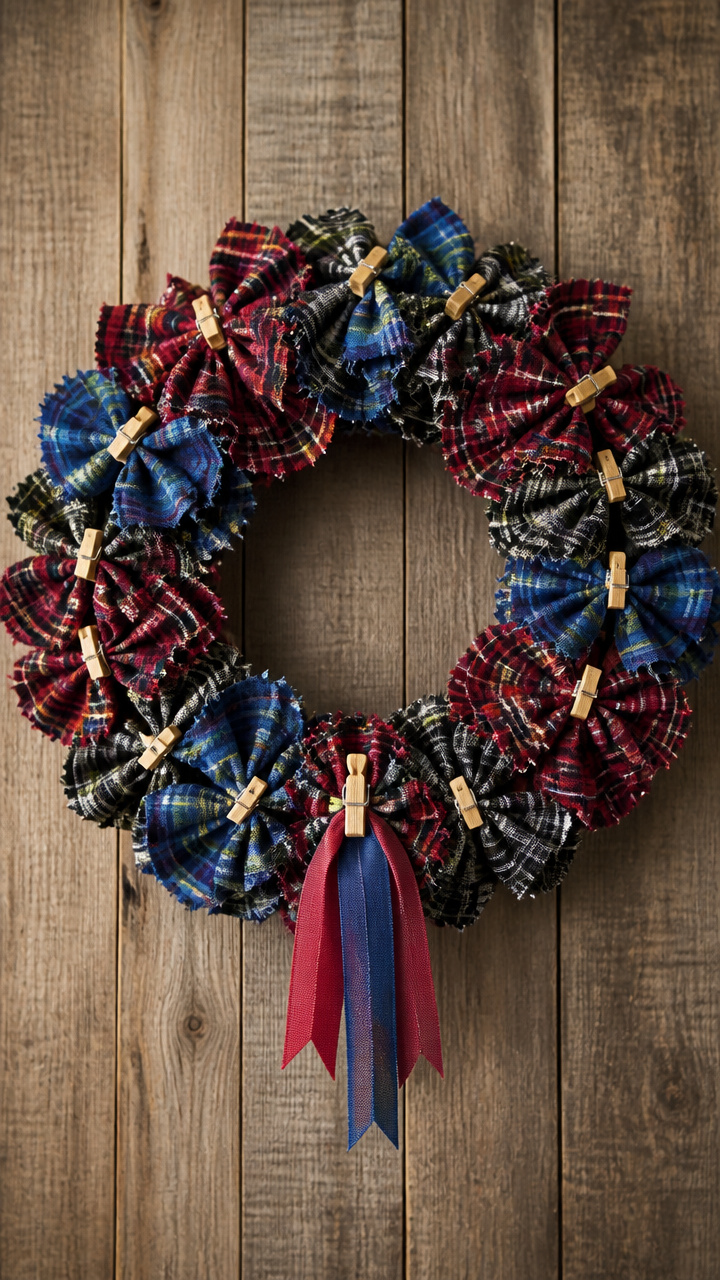
Upcycled flannel shirts become chunky bows that evoke cabin weekends and cool mornings. The fabric resists fading and fraying.
Materials Needed
- 16-inch Styrofoam wreath
- Old plaid flannel shirt (cotton blend)
- Fabric scissors
- Hot glue gun with glue sticks
- 1-inch wooden clothespin
- Ribbon 1/4 inch wide, 1 yard
How to Make It
- Cut eight 6×18 inch strips from the flannel shirt, avoiding seams.
- Fold each strip in half lengthwise and tie the center with a short ribbon piece to form a bow.
- Fluff the loops and adjust tails to be uneven for a relaxed look.
- Glue each bow to the foam base with hot glue, placing four near the bottom and four spaced above.
- Clip the clothespin to the back for hanging.


11. Twig Lattice Door Wreath
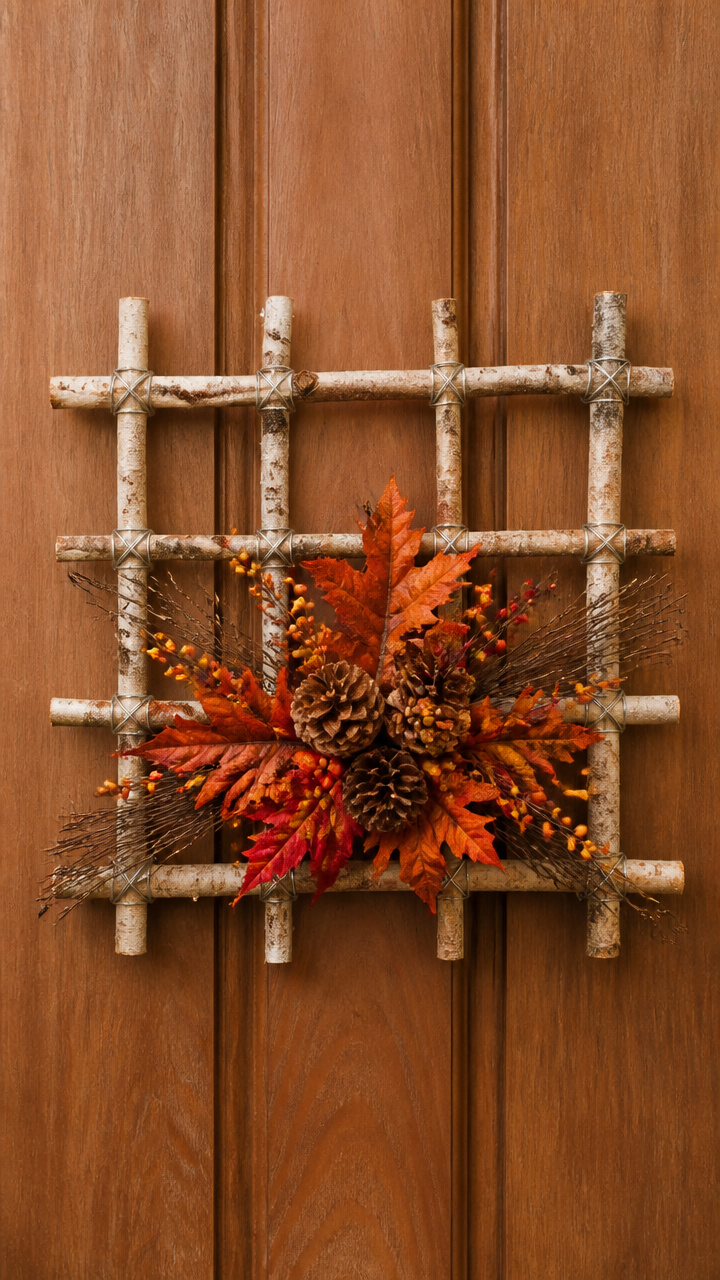
Straight twigs lashed into a square lattice leave room for seasonal clips. This open structure invites change throughout the season.
Materials Needed
- 16 straight birch twigs 1/4 inch thick, 12 inches long
- Craft wire 20 gauge, 5 feet
- Wire cutters
- Ruler
- Pliers
- Masking tape
How to Make It
- Lay eight twigs parallel on a flat surface, spaced 1 inch apart.
- Lay the remaining eight perpendicularly over them to form a grid.
- Use wire cutters to snip 4-inch pieces of wire and twist them tightly at each intersection.
- Reinforce the outer four corners with masking tape to prevent snagging.
- Bend the entire square gently into a shallow curve and display on a hook.


12. Vintage Book Page Flowers
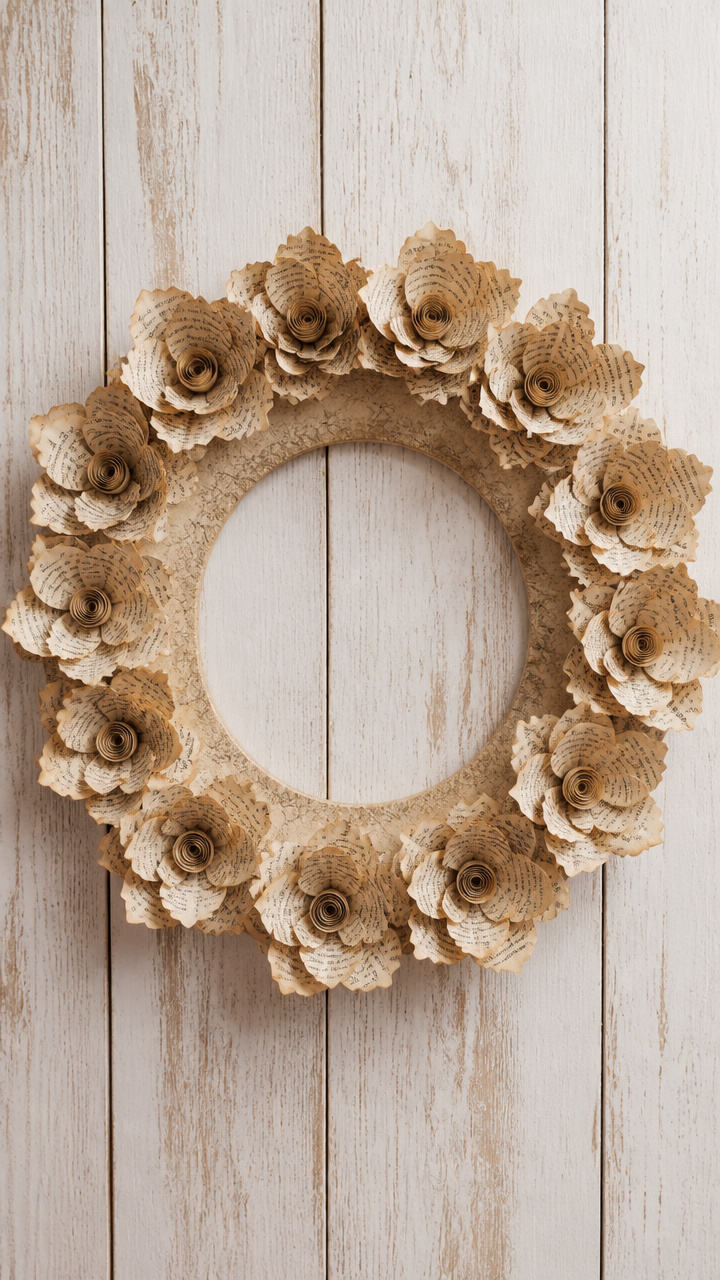
Pages from old novels curl into rosettes that bloom in soft sepia tones. The inked text peeks through like hidden stories.
Materials Needed
- 15 pages from a discarded book
- 12-inch cardboard ring
- Pencil
- Scissors
- Glue stick
- Tea bag
- Shallow bowl
How to Make It
- Steep the tea bag in hot water for 5 minutes, then dip each page and lay flat to dry for 1 hour.
- Draw six 3-inch spirals on the pages and cut along the lines.
- Roll each spiral from the outside in, applying glue to the center tip to secure.
- Glue each flower to the cardboard ring, overlapping slightly and angling outward.
- Let dry for 30 minutes before hanging near sheltered areas.


13. Gourd Slice Accent Wreath
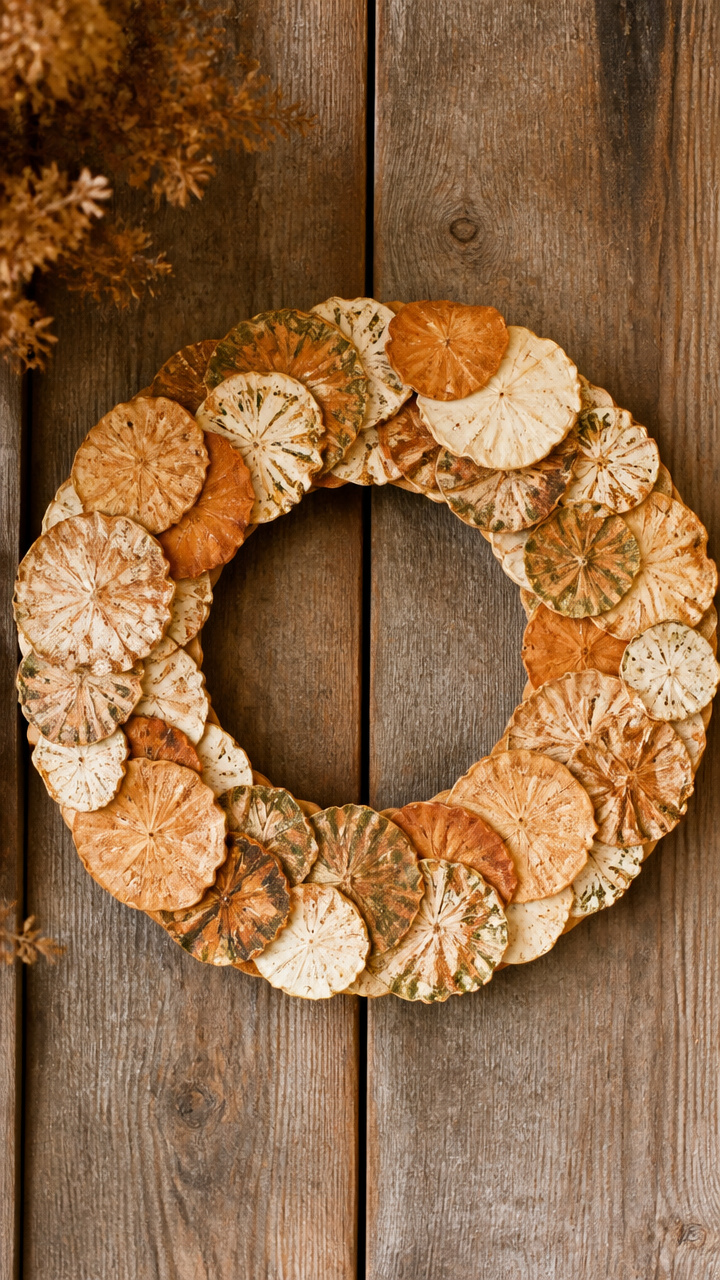
Thin slices of dried ornamental gourds show intricate marbling and earthy tones. Their lightweight form suits indoor spaces.
Materials Needed
- 10-inch foam wreath
- 6 dried bottle gourds
- Hand saw
- Sandpaper 220 grit
- Acrylic sealer spray
- Hot glue gun with glue sticks
How to Make It
- Cut each gourd into 1/2-inch thick slices using the hand saw.
- Sand both sides lightly to remove rough edges.
- Spray both sides with sealer and let dry for 15 minutes.
- Arrange slices in overlapping layers on the foam base, starting from the outer edge.
- Glue each slice in place and allow 1 hour for full adhesion.


14. Knit Scrap Yarn Wrap

Odd ends of wool yarn wrap a plain base into something cozy and tactile. The mix of colors mimics a patchwork quilt.
Materials Needed
- 14-inch straw wreath base
- Assorted wool yarn scraps (at least 5 colors)
- Yarn needle
- Scissors
- Ruler
How to Make It
- Tie the end of one yarn to the base with a double knot.
- Wrap tightly around the entire base, covering all straw, switching colors every 2 inches by knotting underneath.
- Weave in loose ends with the yarn needle as you go.
- Overlap knots to hide them and maintain even thickness.
- Finish with a final knot and trim to 1/2 inch.


15. Pressed Flower Mason Jar Ring
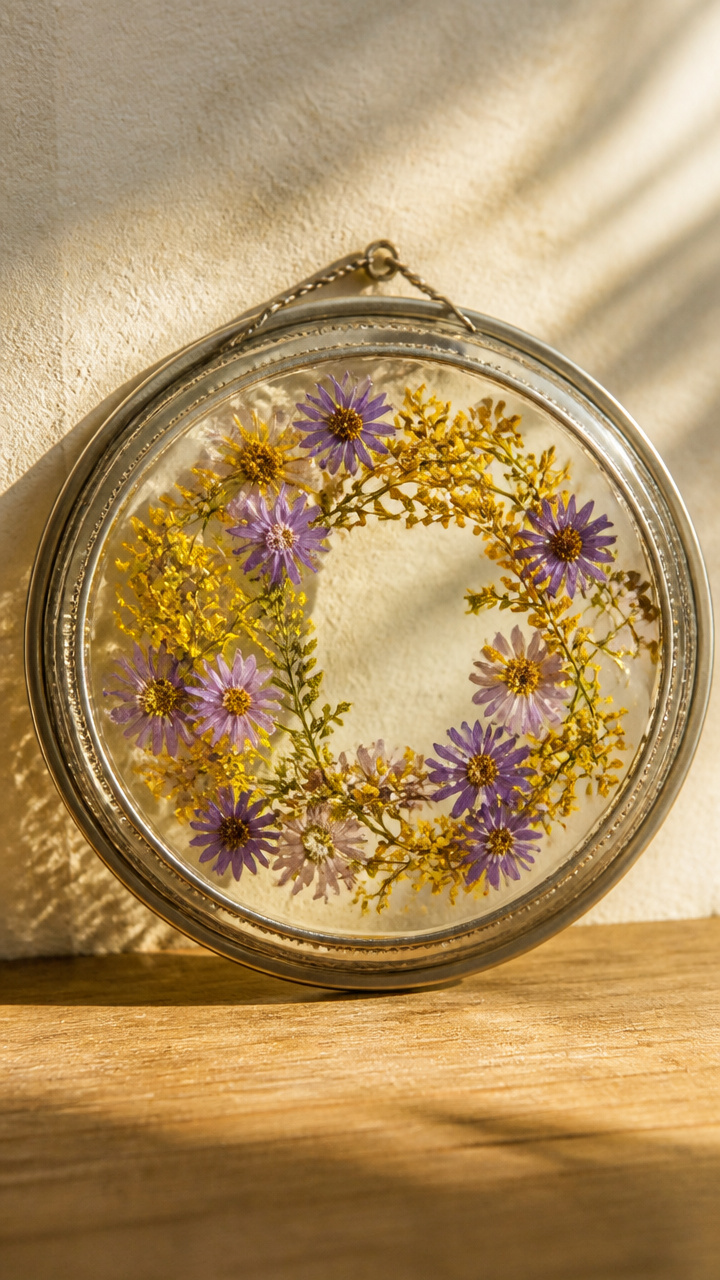
Delicate goldenrod and aster blooms encased in a repurposed jar lid frame. Light passes through, casting soft shadows.
Materials Needed
- One 6-inch mason jar lid ring
- One glass mason jar lid insert
- 12 small fall flowers (goldenrod, aster, or black-eyed Susan)
- Parchment paper
- Heavy book
- Clear epoxy resin (2 oz)
- Mixing cup and stir stick
How to Make It
- Place flowers face down between parchment sheets and press under a book for 48 hours.
- Set the insert into the ring and arrange flowers face up on the glass.
- Mix epoxy according to package and pour slowly over the flowers to fill the chamber.
- Let cure for 24 hours in a dust-free area.
- Hang with a leather cord threaded through two holes drilled opposite each other.


16. Leather Strip Tassel Wreath
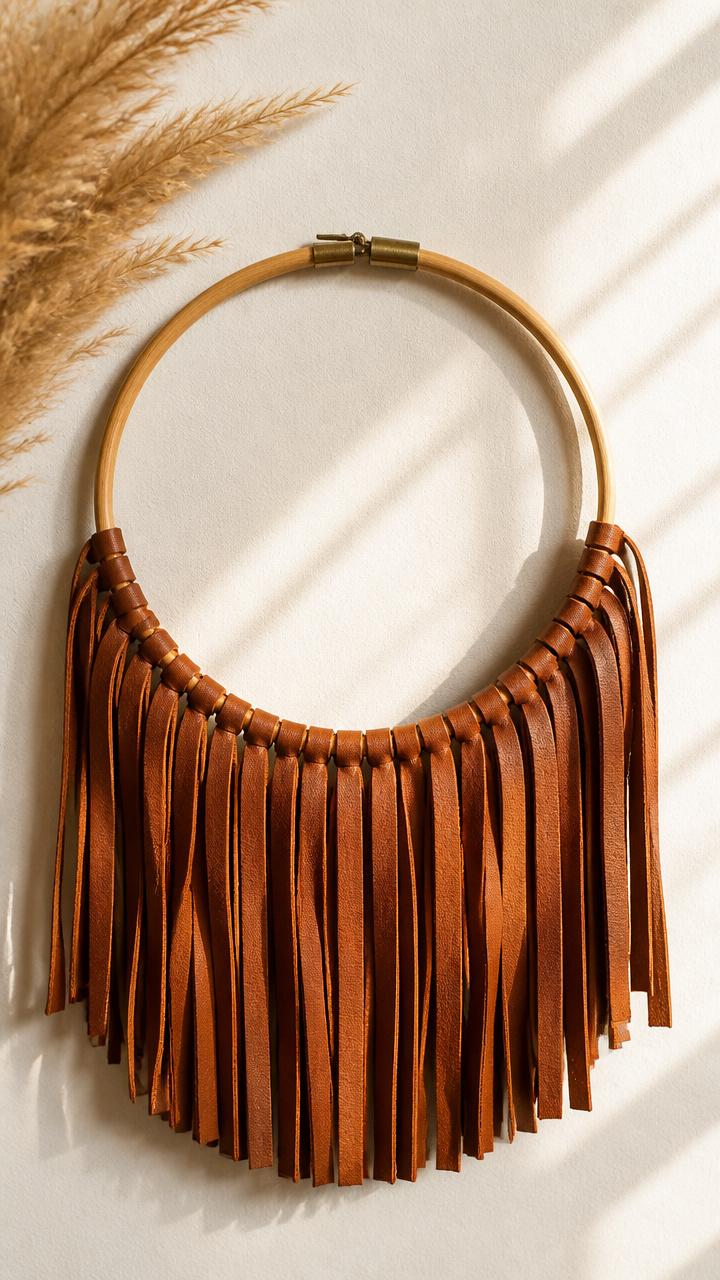
Narrow strips of russet leather dangle from a solid base like fringe. They sway gently and develop a richer tone over time.
Materials Needed
- 12-inch wooden hoop
- Russet leather strips 1/2 inch wide, 10 feet total
- Hole punch
- Utility knife
- Metal clasp
- Awl
How to Make It
- Use the hole punch to make evenly spaced holes around the outer edge of the hoop, 1 inch apart.
- Cut leather into 20 strips each 6 inches long.
- Fold each strip in half and use the awl to pull the loop through a hole, then thread the ends through and pull tight.
- Repeat around the entire hoop, letting tassels hang freely.
- Attach the clasp to the top for easy hanging.

17. Autumn Button Medallion Wreath
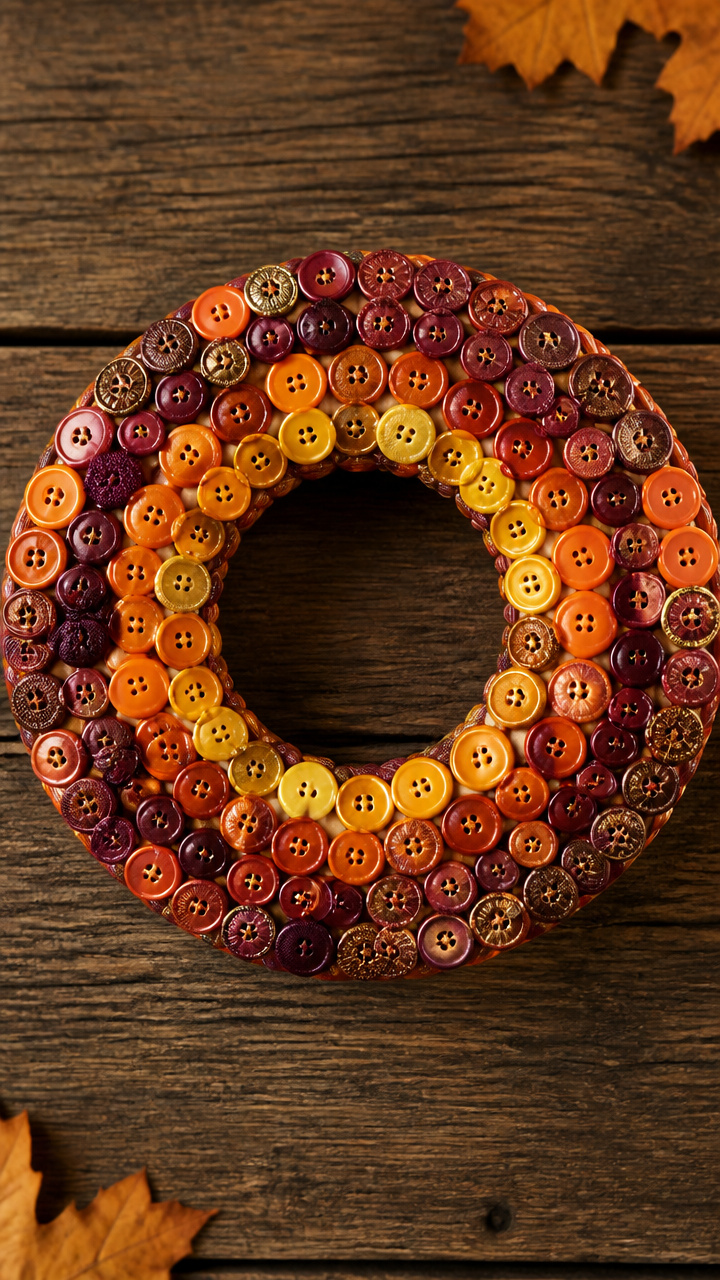
Buttons in burnt orange, mustard, and plum build concentric circles with subtle shine. Each has a different texture, from shell to metal.
Materials Needed
- 10-inch foam wreath
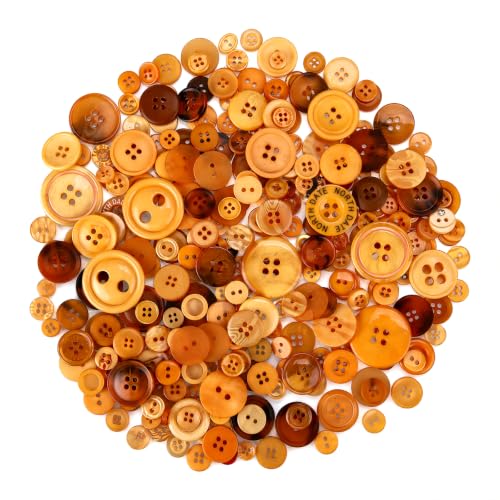
- 150 assorted fall-colored buttons
- Needle
- Strong thread
- Scissors
- Fabric marker
How to Make It
- Use the fabric marker to draw three concentric circles on the foam base.
- Thread the needle with double thread and knot the end.
- Sew each button along the lines, spacing them just apart enough to see the next row.
- Alternate sizes and shapes as you move inward, finishing with a single large button in the center.
- Trim thread close and let sit for 10 minutes before display.


18. Haystack Base Mini Wreath
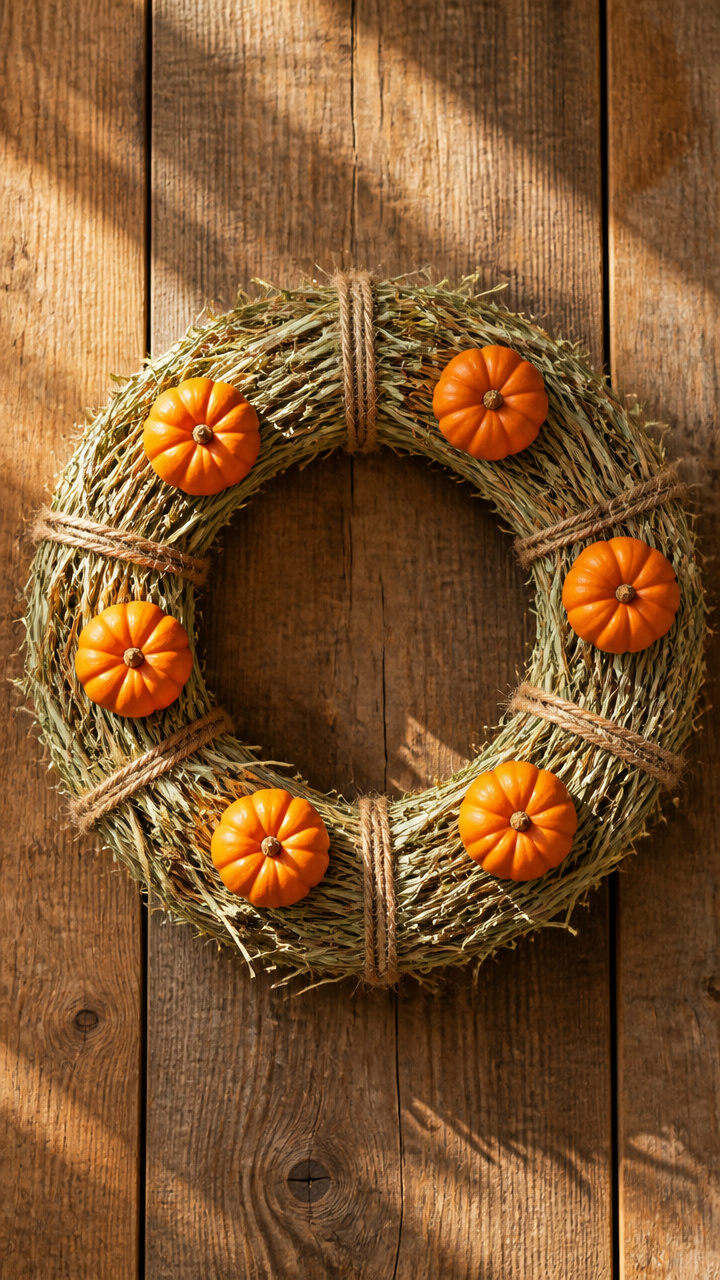
Tightly packed hay forms a rustic foundation for tiny accents. It smells like a barnyard and looks right at home on a farmhouse door.
Materials Needed
- 8-inch metal wreath frame
- Dried timothy hay 2 cups
- Jute string 3 yards
- Clothespins
- Floral picks with miniature pumpkins (6)
- Needle-nose pliers
How to Make It
- Bundle hay into a sausage shape and tie tightly in three places with jute string.
- Pinch the middle and bend into a circle, overlapping the ends.
- Wrap jute around the entire circle, securing every inch with clothespins until dry.
- Insert floral picks into the base at even intervals.
- Remove clothespins after 1 hour and fluff the hay gently.


19. Chalk Paint Grapevine Wreath
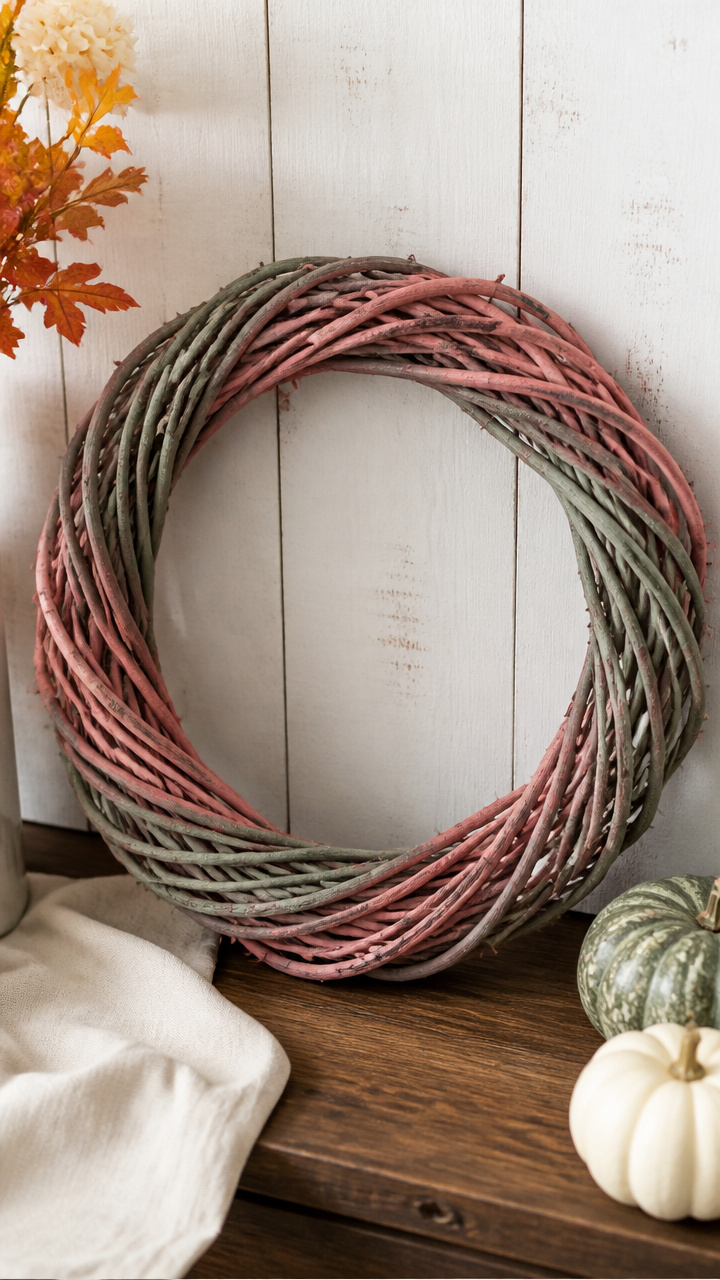
A classic grapevine base gets a soft update with matte chalk paint in dusty rose and sage. The finish highlights every twist and turn.
Materials Needed
- 14-inch natural grapevine wreath
- Chalk paint in dusty rose
- Chalk paint in sage green
- Foam brush 1 inch wide
- Paper plate
- Clear wax sealant
- Lint-free cloth
How to Make It
- Pour a dime-sized amount of each paint onto the paper plate.
- Dip the brush into rose paint and apply lightly along one half of the wreath, letting some vines stay bare.
- Repeat with sage on the other half, blending slightly at the center.
- Let dry for 45 minutes, then rub clear wax over the entire surface with the cloth.
- Buff gently after 10 minutes to reveal a soft sheen.


20. Feather and Twig Assemblage
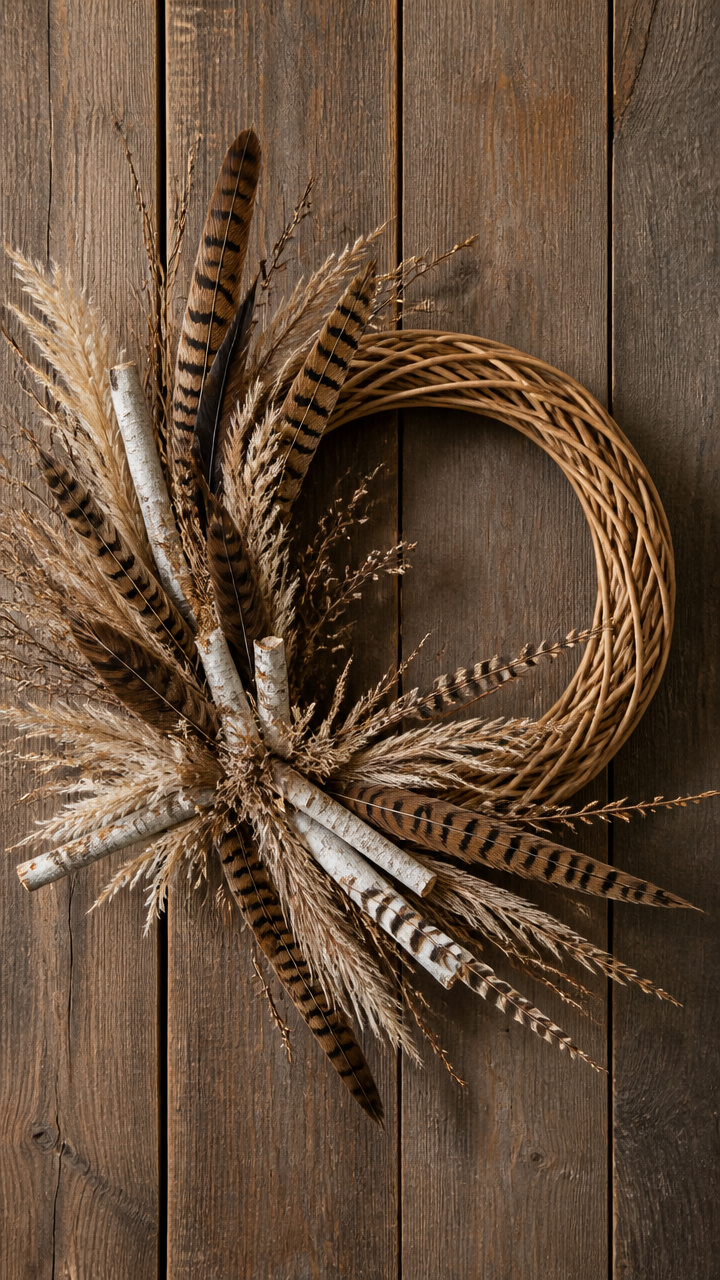
Long turkey feathers anchor clusters of birch twigs and dried grass. The contrast of soft and stiff elements feels wild yet balanced.
Materials Needed
- 10-inch rattan wreath
- 6 long brown turkey feathers
- 10 birch twigs 6 inches long
- Dried pampas grass sprigs (3)
- Floral wire 22 gauge
- Wire cutters
- Hot glue
How to Make It
- Group two twigs and one grass sprig together and wrap the base with floral wire.
- Repeat to make three bundles.
- Glue each feather upright to the back of the wreath, spaced evenly.
- Wire each bundle to the front, positioning them between feathers.
- Let glue dry for 20 minutes before hanging.


21. Crayon Drip Color Wheel
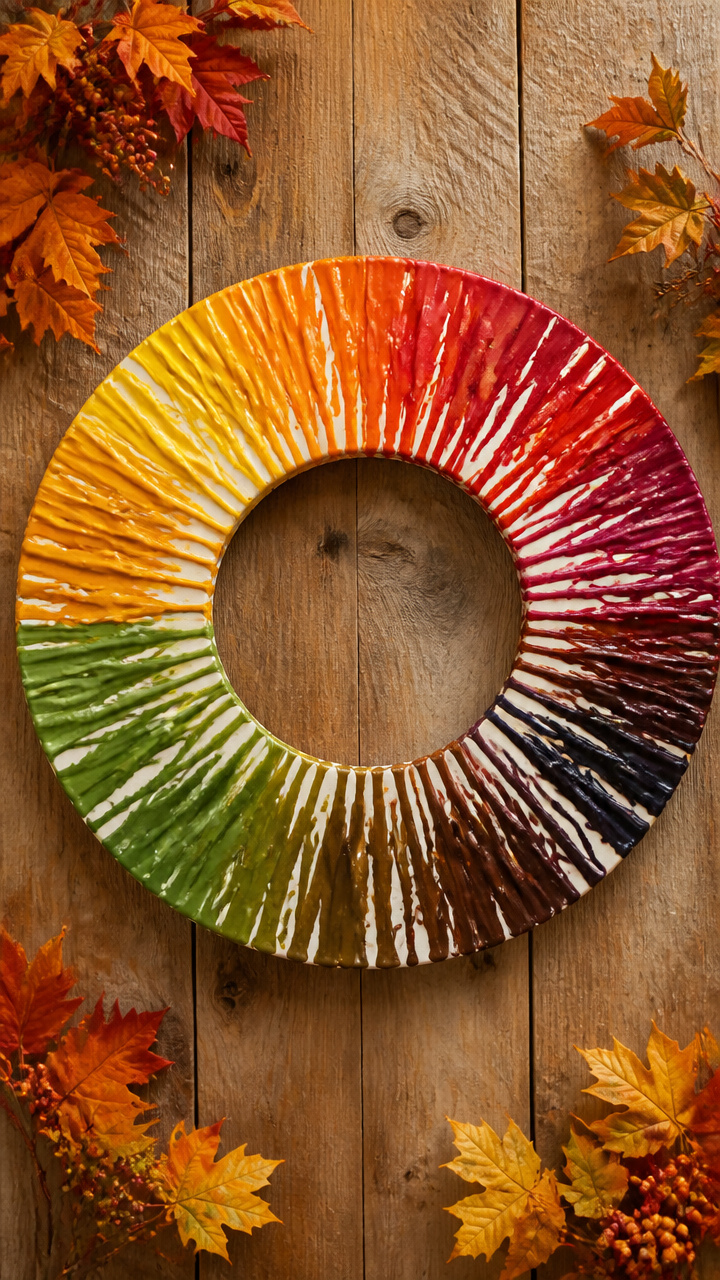
Old crayons melt into colorful drips down a circular canvas. The waxy trails mimic falling leaves in motion.
Materials Needed
- 12-inch canvas embroidery ring
- 20 used crayons in fall colors
- Toothpicks
- Oven-safe wire rack
- Aluminum foil
- Baking sheet
- Hairdryer
How to Make It
- Peel paper off crayons and arrange them standing upright around the inner edge of the baking sheet, touching the ring.
- Cover with foil and bake at 275°F for 8 minutes until tips soften.
- Quickly lift foil and use toothpicks to guide wax down the ring in streaks.
- Let cool for 30 minutes, then use hairdryer on low to smooth any clumps.
- Hang with a ribbon tied through the top.


22. Salt Dough Ornament Wreath
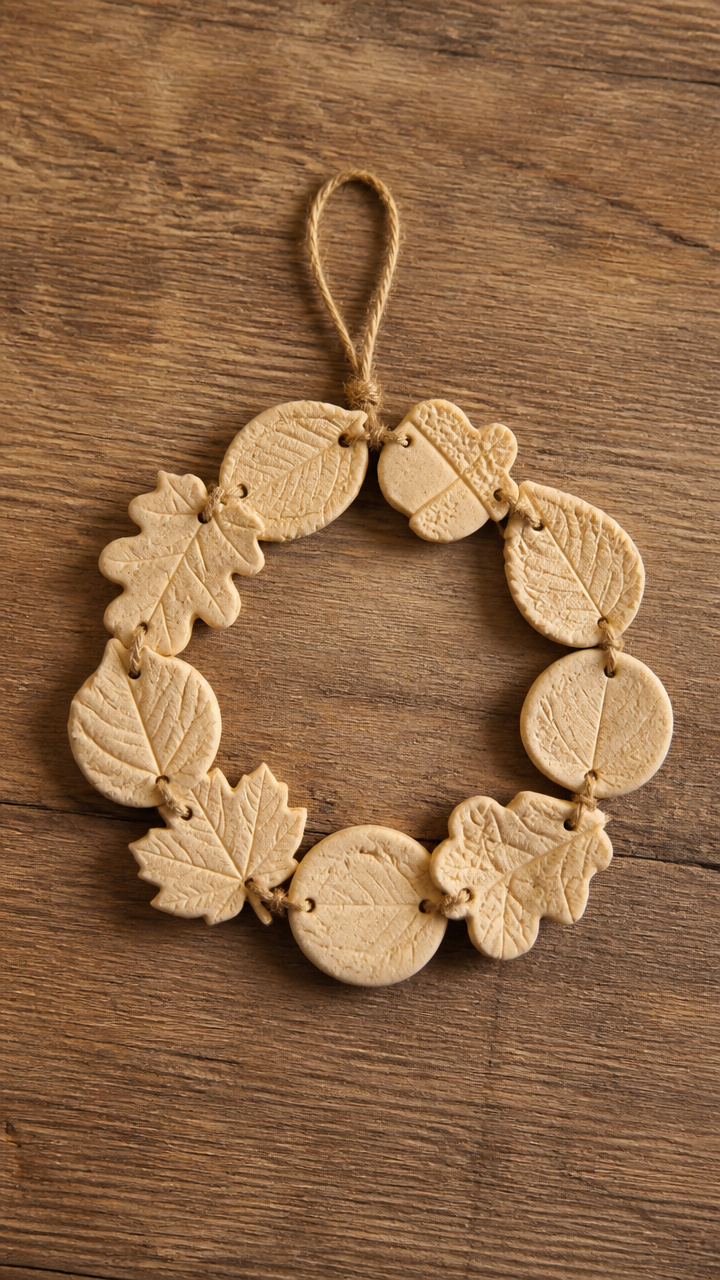
Hand-rolled salt dough shapes bake into keepsake tokens stamped with leaves or initials. They dangle from a simple loop.
Materials Needed
- 2 cups flour
- 1 cup salt
- 1 cup water
- Mixing bowl
- Rolling pin
- Leaf-shaped cookie cutter
- Straw
- Baking sheet
- Acrylic paint in terracotta
- Clear varnish
- Red cotton string 2 yards
How to Make It
- Mix flour, salt, and water in the bowl until a smooth dough forms, then roll to 1/4 inch thickness.
- Cut 15 leaf shapes and poke a hole at the top with the straw.
- Bake on a parchment-lined sheet at 200°F for 3 hours until hard.
- Cool completely, then paint one side and seal with varnish.
- Thread each onto the string, knotting between, and tie ends to form a loop.


23. Copper Wire Leaf Catcher
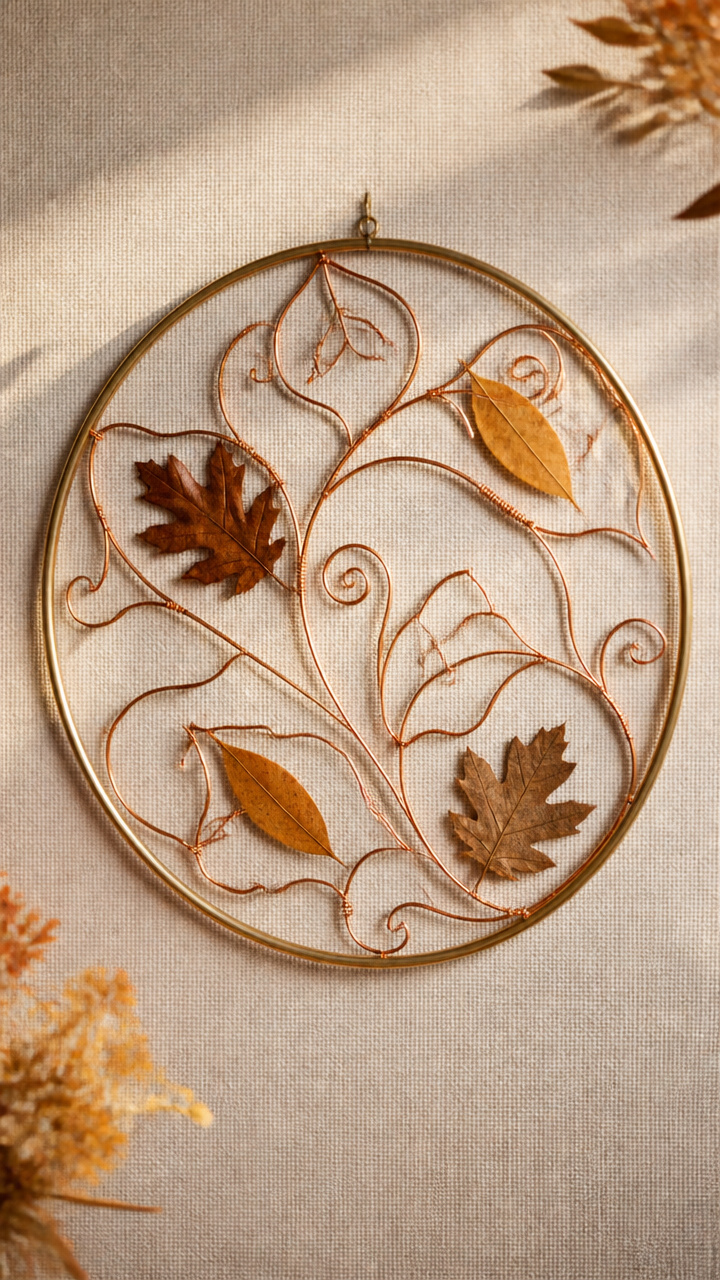
Fine copper wire twists into abstract leaf forms that catch real fallen leaves as they drift by. It changes daily.
Materials Needed
- 10-inch brass ring
- Copper wire 20 gauge, 15 feet
- Round-nose pliers
- Flat-nose pliers
- Wire cutters
- Small funnel
How to Make It
- Use pliers to bend 6-inch lengths of wire into teardrop shapes with a twisted stem.
- Make 12 leaves total, varying sizes slightly.
- Wrap the stem of each leaf around the brass ring, spacing them evenly.
- Angle some forward, some back to create depth.
- Place under a tree or eave where falling leaves can land inside.


24. Quilt Square Patchwork Wreath
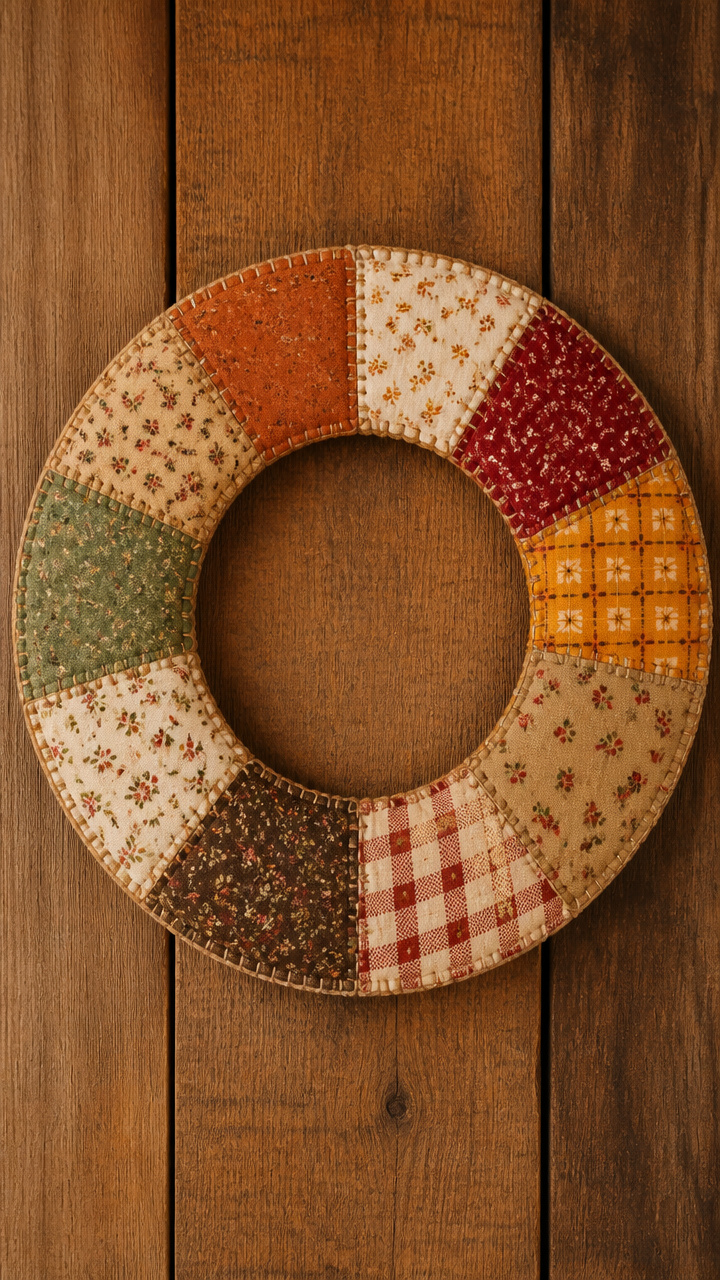
Scraps of vintage quilting cotton form patchwork blocks mounted on a ring. Each fabric tells a quiet story of past seasons.
Materials Needed
- 12-inch plastic embroidery hoop
- Assorted cotton fabric squares 3×3 inches (12 pieces)
- Fusible webbing sheet 12×12 inches
- Iron
- Scissors
- Thread and needle
- Bias tape 1/2 inch wide, 1 yard
How to Make It
- Cut fusible webbing into 12 squares and iron one to the back of each fabric piece.
- Arrange the squares in a diamond pattern on the outer ring, pressing each in place with the iron.
- Stitch around each square with a running stitch using contrasting thread.
- Wrap bias tape around the outer edge of the hoop, mitering corners neatly.
- Hang using the original hoop screw as a hanger.


25. Moss and Acorn Cap Wreath
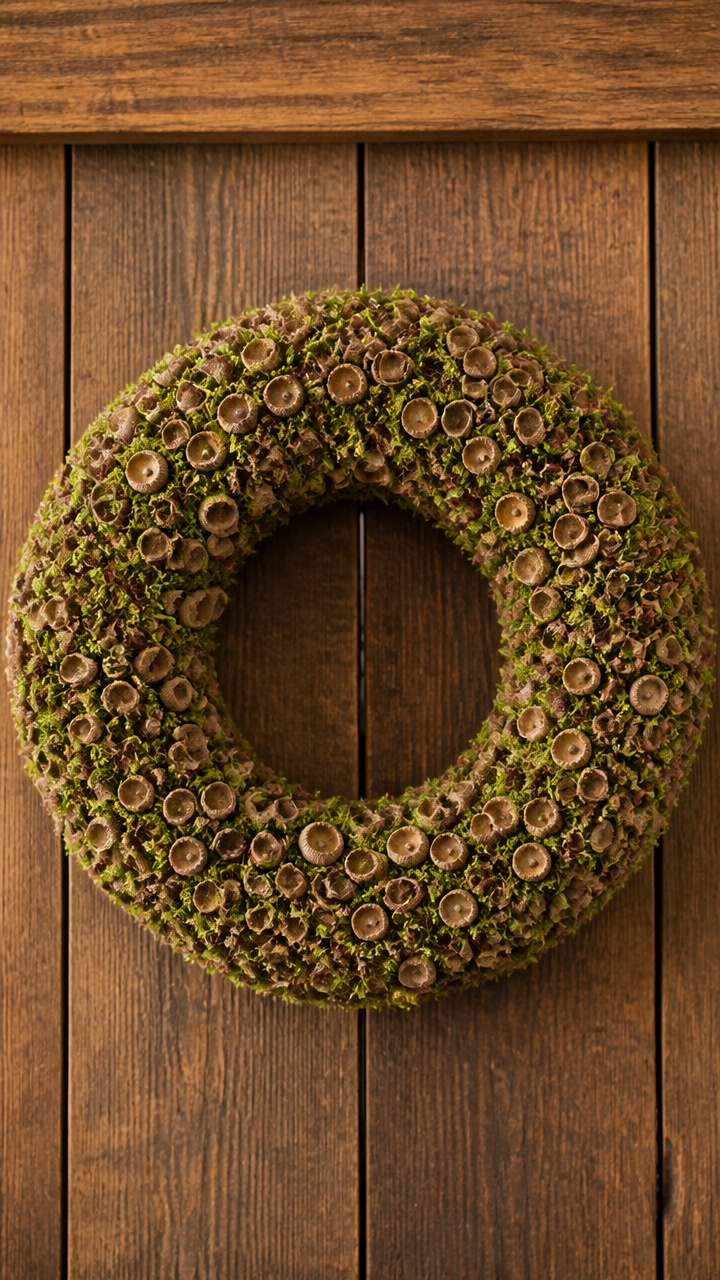
Forest floor finds come together with velvety moss and hundreds of acorn caps. This wreath feels quietly magical.
Materials Needed
- 10-inch foam wreath
- Dried sheet moss 1/2 pack
- 200 acorn caps
- Hot glue gun with glue sticks
- Tweezers
- Spray bottle with water
How to Make It
- Lightly mist the foam base with water from the spray bottle.
- Press moss onto the base, covering completely and trimming edges neatly.
- Let dry for 30 minutes.
- Glue acorn caps upside down in tight rows, starting from the outer edge and working inward.
- Use tweezers to place the smallest caps near the center, letting the glue set for 2 hours.


Each of these wreaths carries the spirit of fall in its own way. You’ve got everything you need to start — now choose one that calls to you and begin.