20 Autumn Leaf Garland Ideas

The air turns crisp, and trees blaze with color. This season, bring the quiet beauty of autumn indoors with handmade garlands that honor falling leaves in all their forms. Each idea here uses real or crafted foliage to create something warm, personal, and full of texture.
You don’t need fancy tools or years of experience. Just simple materials, clear steps, and a little time. These garlands celebrate imperfection, change, and the gentle rhythm of the year winding down.
1. Pressed Maple Leaf String
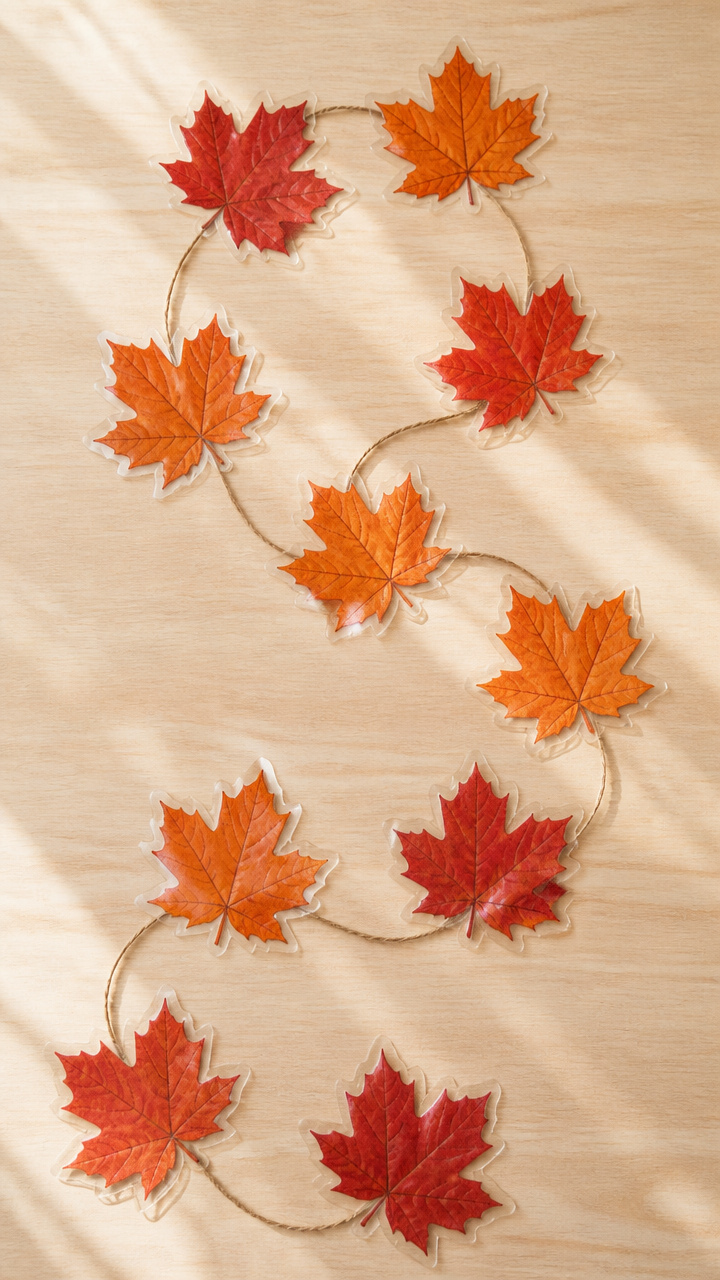
Delicate maple leaves flattened and sealed between sheets of contact paper form a translucent ribbon of fall color. This garland captures real leaves at their peak without fading or crumbling over time.
Materials Needed
- 12 fresh red or orange maple leaves, undamaged
- 1 roll clear adhesive contact paper, 18 inches wide
- Scissors
- Hole punch
- 5 feet of cotton twine
How to Make It
- Lay each leaf flat on a clean surface and let them dry under heavy books for 48 hours.
- Cut two pieces of contact paper each 12 inches long and place one sticky side up on a table.
- Arrange 6 leaves on the sticky side, leaving 1 inch between them, then press the second sheet on top to seal.
- Trim around each leaf, leaving a 0.5-inch border, then punch a hole in the top edge of each.
- Thread the twine through the holes, spacing leaves 3 inches apart, and knot between each to secure.


2. Felt Oak Leaf Bunting
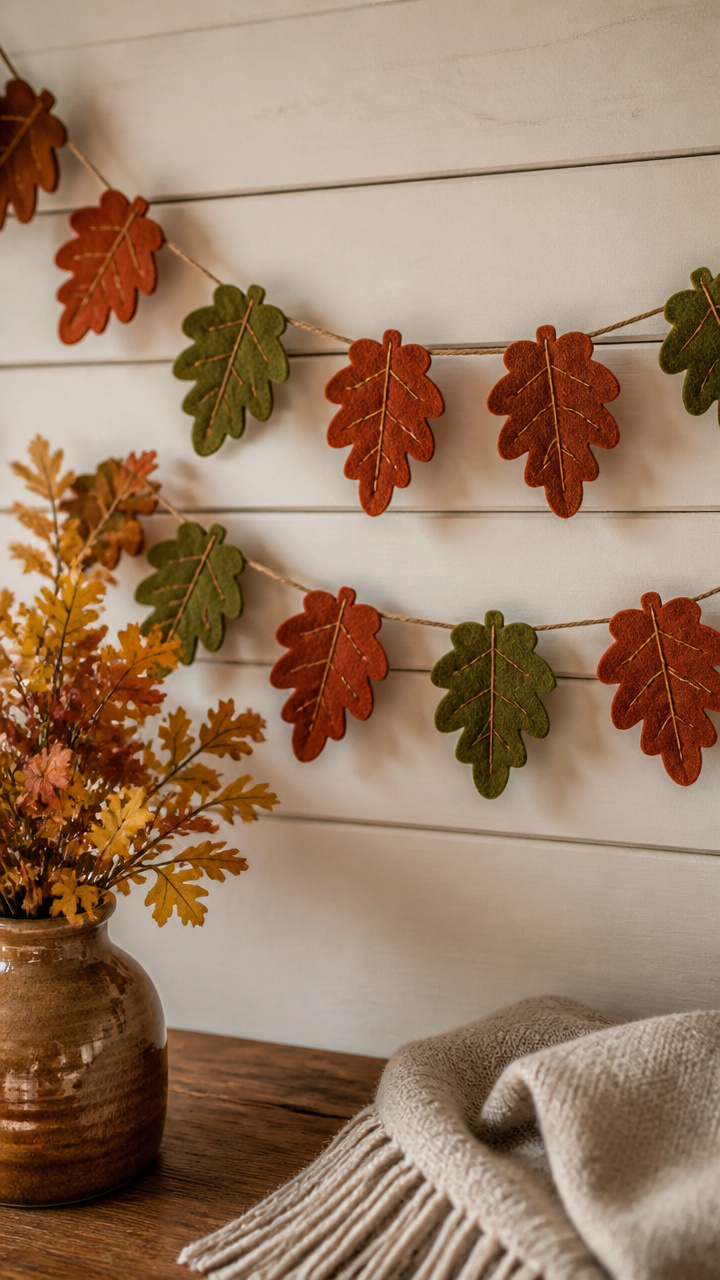
Soft olive and rust felt oak leaves drape gently along a string, perfect for nurseries or cozy reading nooks. These fabric leaves hold their shape and color year after year.
Materials Needed
- 1 sheet olive green wool-blend felt
- 1 sheet rust orange wool-blend felt
- Scissors
- Oak leaf template (draw freehand or print 3-inch size)
- Embroidery needle
- Brown embroidery floss
- 6 feet of linen tape
- Fabric glue
How to Make It
- Trace the oak leaf template onto both felt colors, 7 times each, then cut out all 14 shapes.
- Stack one olive and one rust leaf together and sew around the edge with a whipstitch using brown floss.
- Leave the stem end open, then apply a small dot of fabric glue inside to reinforce the seam.
- Repeat for all pairs, then space them 4 inches apart along the linen tape, gluing each at the base.
- Let dry completely for 2 hours before hanging.


3. Salt Dough Leaf Imprints
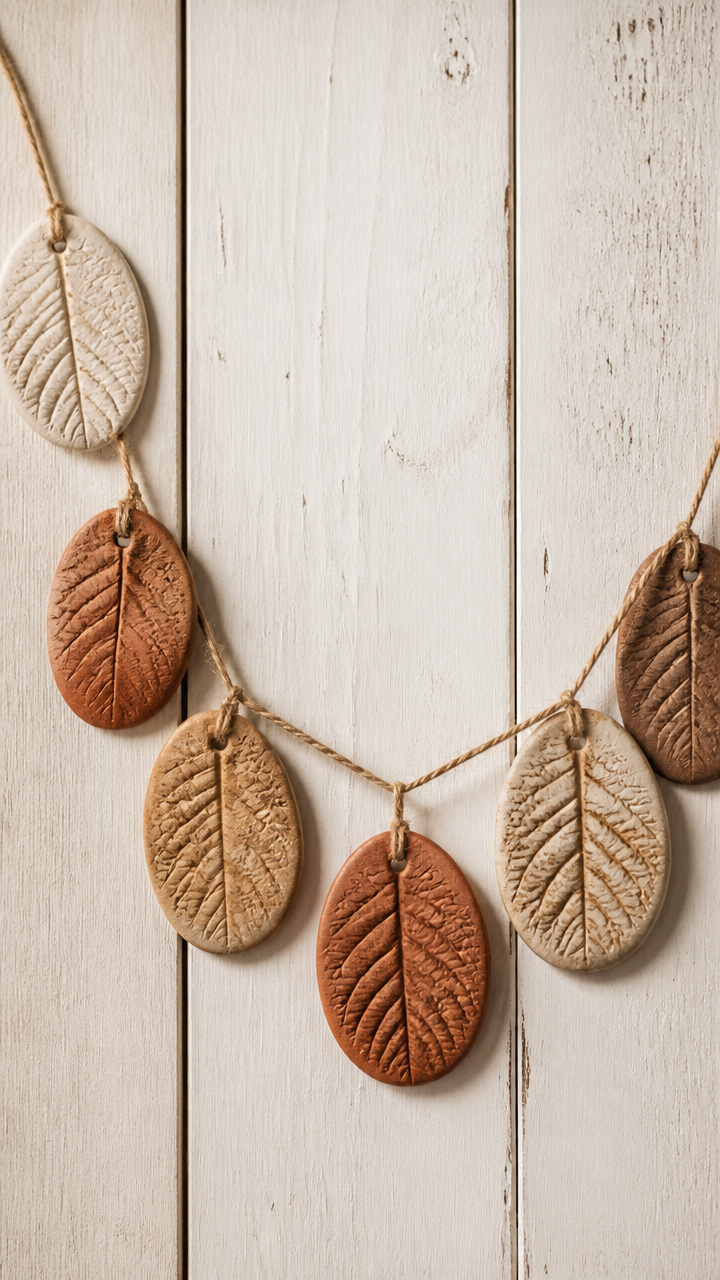
Real leaf textures pressed into salt dough become rustic, matte ornaments that catch light softly. These keep their natural veining and make a garland that feels earthy and handmade.
Materials Needed
- 2 cups flour
- 1 cup salt
- 1 cup water
- Mixing bowl
- Rolling pin
- Assorted real leaves with defined veins (e.g., sycamore, birch)
- Straw or skewer
- Baking sheet
- Parchment paper
- Acrylic paint in mustard yellow, burnt sienna, deep brown
- Paintbrush
- 3 feet of suede cord
How to Make It
- Mix flour, salt, and water in a bowl until a smooth dough forms, then knead for 2 minutes.
- Roll the dough to 0.25-inch thickness on a floured surface.
- Press 10 different leaves firmly into the dough, then carefully lift to reveal imprints.
- Use a straw to poke a hole near the top edge of each imprint, then transfer to a parchment-lined baking sheet.
- Bake at 200°F for 3 hours until hard, then cool completely.
- Paint each ornament with one shade of acrylic, let dry 30 minutes, then thread onto suede cord with knots between.
4. Watercolor Leaf Flags
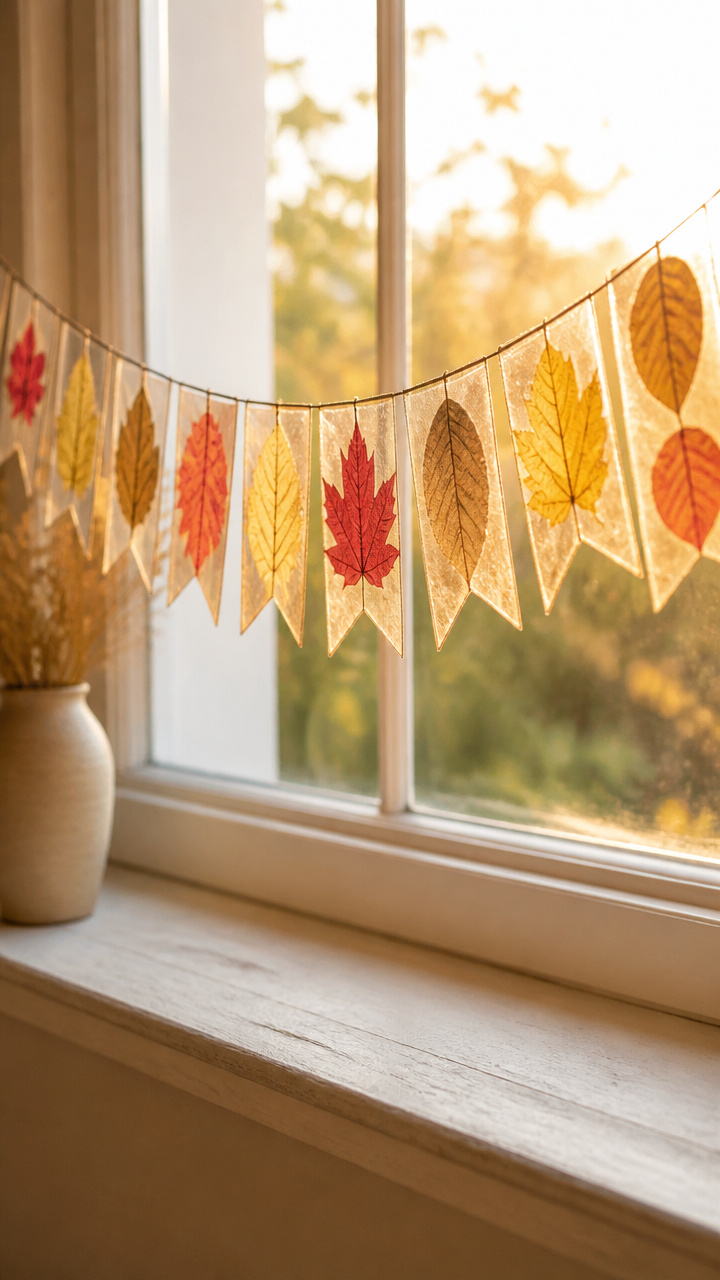
Sheets of rice paper painted with soft washes of fall color flutter like banners on a thin wire. The transparency creates a stained-glass effect when hung near windows.
Materials Needed
- 10 sheets A6 rice paper
- Watercolor set with yellow ochre, cadmium red, raw umber
- Small watercolor brush
- Cup of water
- White glue
- Clothespin
- 6-foot bendable floral wire
- Ruler
- Pencil
How to Make It
- Dampen the brush and apply loose washes of color to each rice paper sheet, blending two tones per sheet.
- Let dry flat for 45 minutes, using a clothespin to clip edges if curling occurs.
- Mark a point 1 inch from the top left corner of each sheet with pencil.
- Run a thin line of white glue along the marked edge and wrap it around the wire at even 5-inch intervals.
- Hold each flag in place for 10 seconds until the glue grips, then let the entire garland dry for 2 hours.


5. Leaf Skeleton Lace Garland
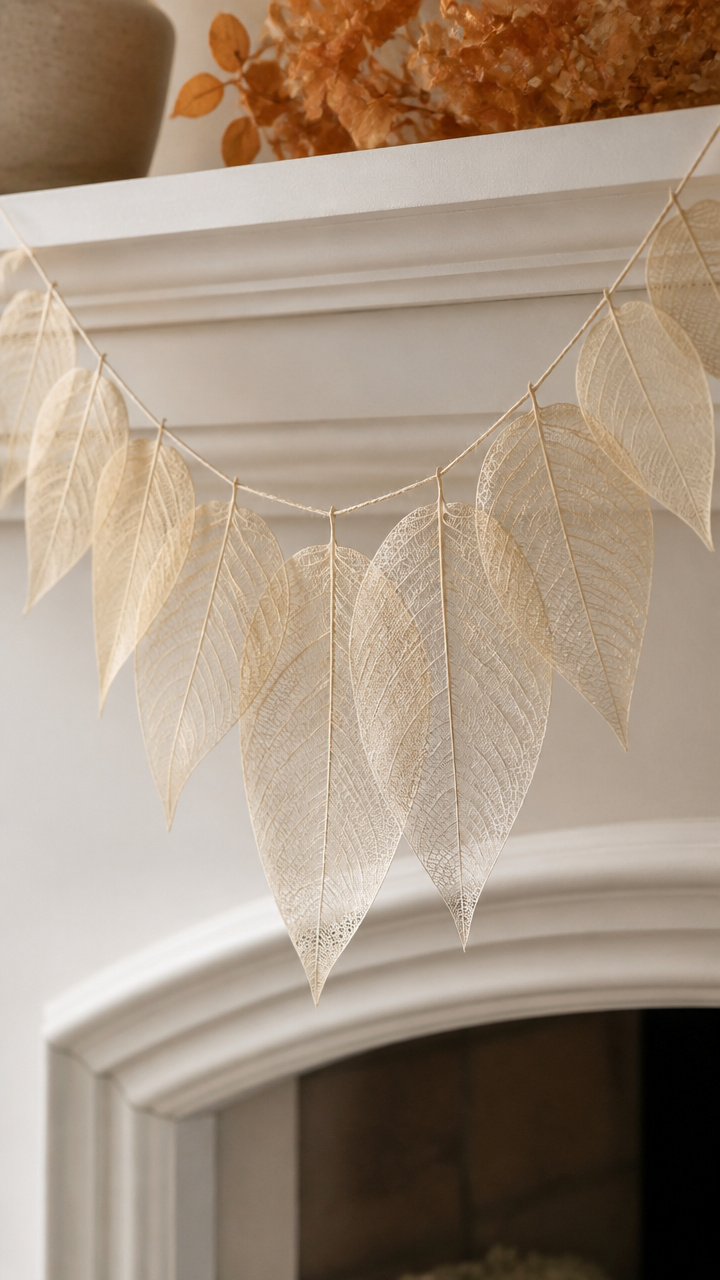
The delicate vein structures of bleached leaf skeletons dangle like nature’s lace. These fragile forms add intricate detail and a ghostly elegance to mantels or bookshelves.
Materials Needed
- 15 intact sycamore or beech leaves with strong veins
- 1 gallon water
- 1 cup baking soda
- Large pot
- Stove
- Tongs
- Soft toothbrush
- Paper towels
- Fine clear fishing line
- Needle
- Small paintbrush
How to Make It
- Simmer leaves in water and baking soda for 48 hours, checking every 12 hours.
- Remove one leaf at a time with tongs and gently scrub away the soft tissue with a toothbrush under running water.
- Lay cleaned skeletons on paper towels and let dry for 24 hours.
- Thread the needle with 6 feet of fishing line and pierce near the stem base of each leaf.
- Knot below each to suspend them 3 inches apart, letting them rotate freely.


6. Crayon Leaf Rubbing Chain
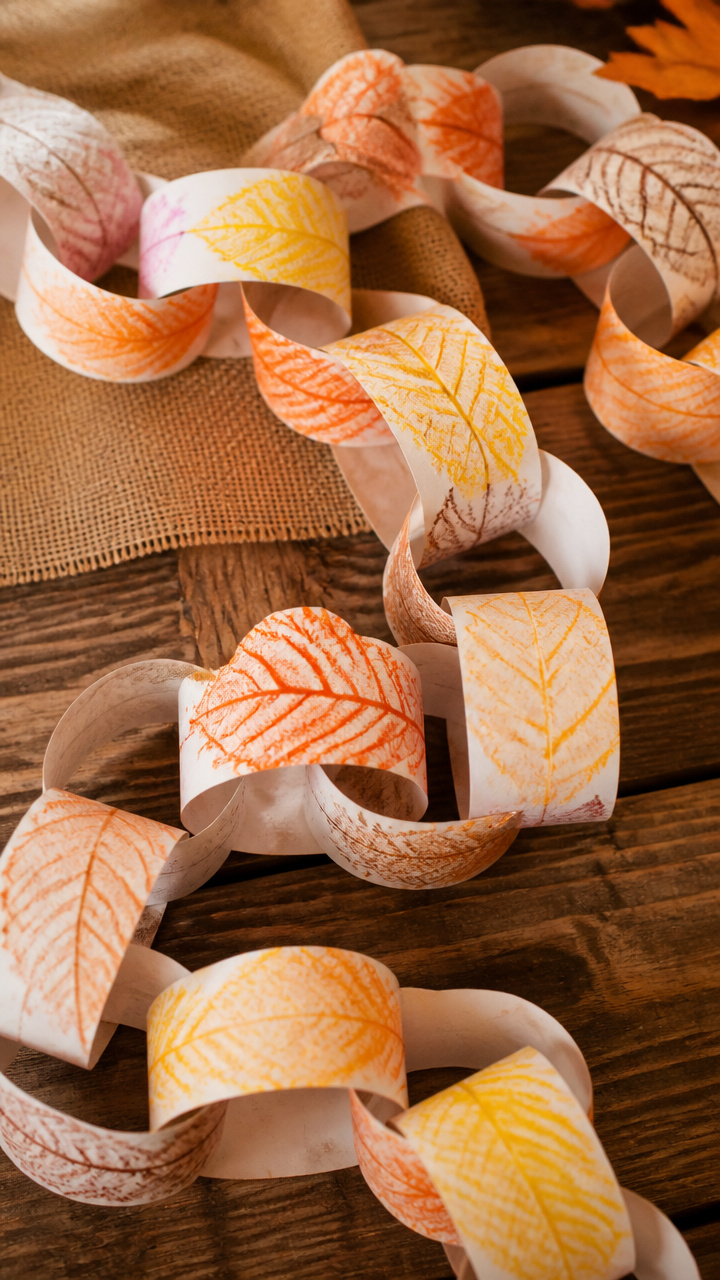
Wax rubbings of real leaves form a continuous paper chain with bold textures and streaks of autumn color. This project works well with children and uses basic art supplies.
Materials Needed
- 10 sheets 9×12 white drawing paper
- Crayons with paper removed: yellow, orange, brown
- Real leaves with textured surfaces (e.g., chestnut, magnolia)
- Scissors
- Glue stick
- Ruler
- Pencil
How to Make It
- Place a leaf under a sheet of paper and rub firmly with the side of a crayon to reveal the pattern.
- Repeat with different leaves and colors across all sheets until fully covered.
- Cut each sheet into 3-inch-wide strips, then form loops by overlapping ends 0.5 inches.
- Glue each overlap with a thin line from the glue stick.
- Link each loop by threading the next through the previous, creating a chain of 30 links.


7. Wire-Frame Leaf Outline
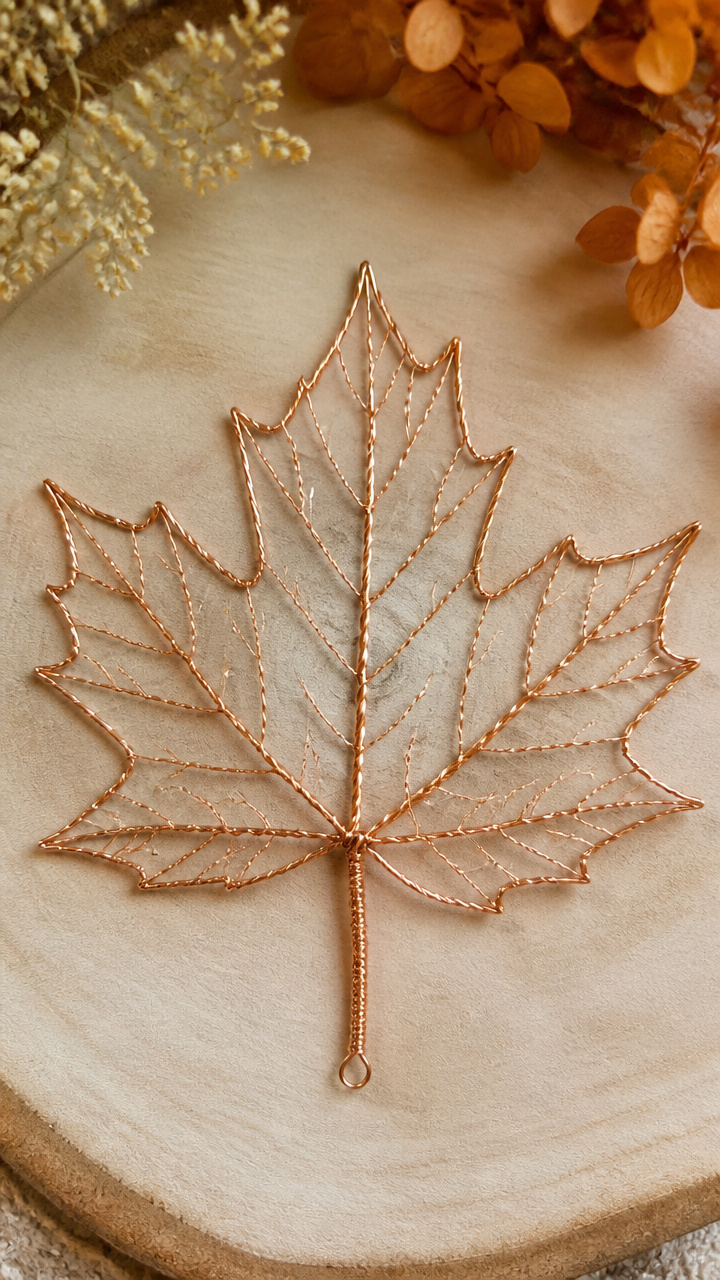
Twisted copper wire traces the silhouette of a sugar maple, forming shimmering negative-space leaves. These lightweight outlines catch breezes and cast fine shadows.
Materials Needed
- 15 feet of 20-gauge copper wire
- Wire cutters
- Round-nose pliers
- Sugar maple leaf (real or printed template)
- Workbench or firm surface
How to Make It
- Trace the outline of the leaf onto cardboard and use it as a guide.
- Cut 10 lengths of wire, each 15 inches long.
- Using pliers, bend each piece to follow the leaf shape, twisting the ends together at the stem to close the loop.
- Make a small loop at the top tip of each for hanging.
- String a nylon thread through each top loop, spacing them 4 inches apart, and tie knots beneath each.


8. Leaf Print Fabric Strips
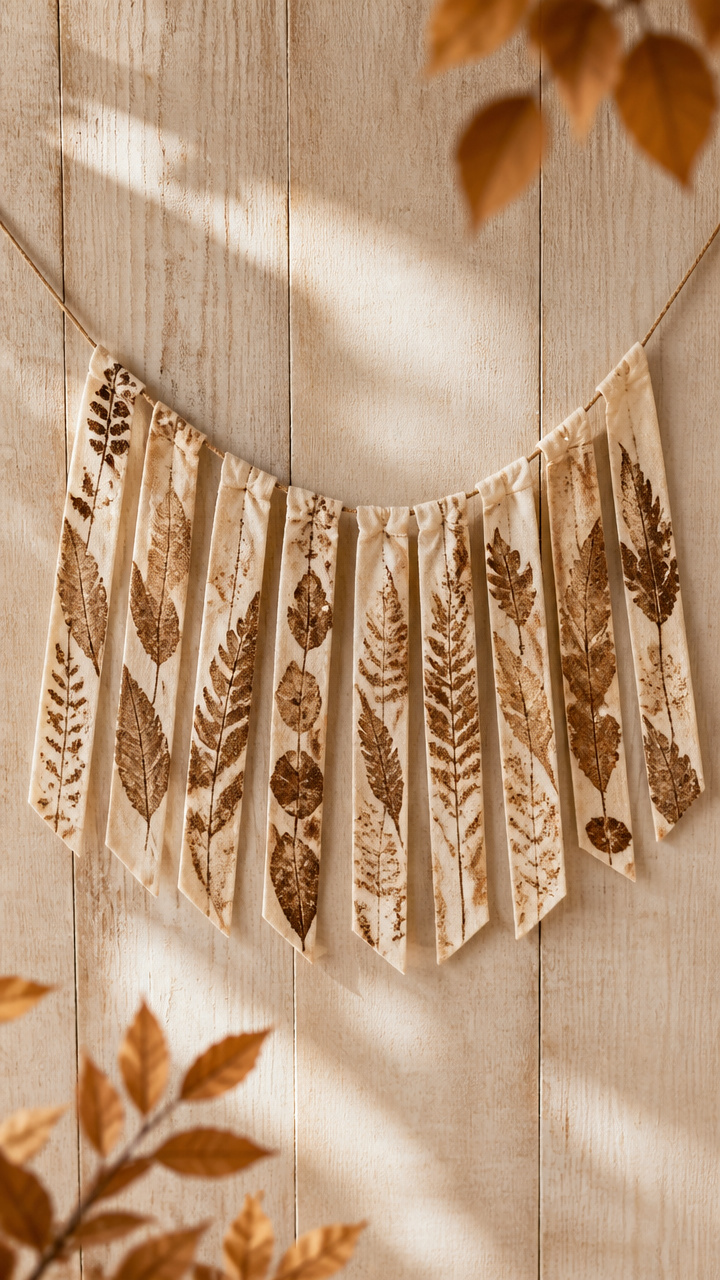
Cotton strips stamped with homemade leaf prints carry a casual, folk-art charm. Natural dye made from walnut hulls gives an earthy tone that won’t fade quickly.
Materials Needed
- 10 strips cotton fabric, 2×10 inches each
- 10 walnut hulls
- Small saucepan
- Water
- Wooden spoon
- Glass jar
- Fresh oak leaves
- Rubber bands
- Plastic gloves
- Drying rack
How to Make It
- Boil walnut hulls in 4 cups water for 30 minutes, strain into a jar, and let cool.
- Soak fabric strips in the dye for 1 hour, then lay flat to dry overnight.
- Place a leaf on a dyed strip and secure edges with rubber bands.
- Tap gently with a wooden spoon for 2 minutes to transfer the shape, then remove the leaf.
- Repeat for all strips, then string them onto jute twine with knots between each.


9. Beaded Birch Leaf Garland
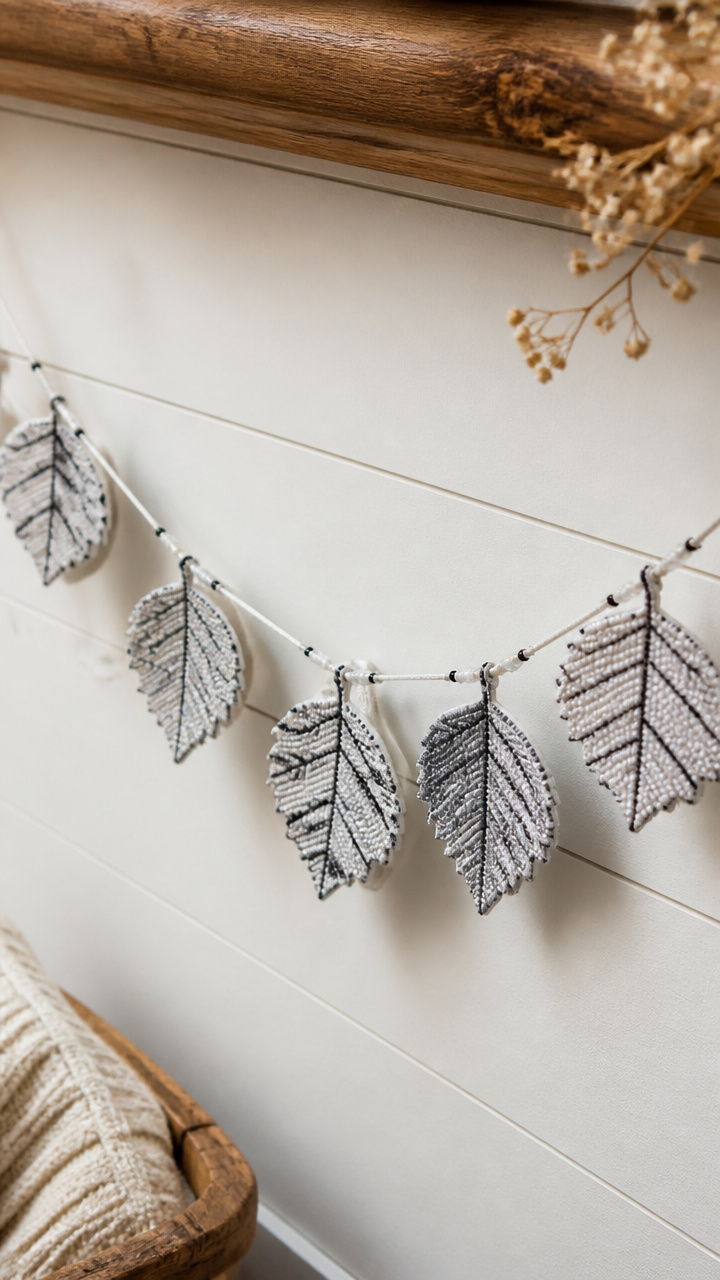
Tiny seed beads mimic the speckled bark of birch trees on miniature embroidered leaves. These detailed pieces sparkle subtly when light hits the beads.
Materials Needed
- White Aida cloth, 6×8 inches
- Size 10 seed beads in white, gray, black
- Bead embroidery needle
- Beige embroidery floss
- Birch leaf stencil (3 inches long)
- Scissors
- Cardboard backing
- Hot glue gun
- 4 feet of silk ribbon
How to Make It
- Trace 8 birch leaf shapes onto Aida cloth and cut out.
- Thread the needle with floss and sew beads onto each leaf to resemble bark patterns, focusing on black dots and gray patches.
- Let each sit on cardboard while working to prevent puckering.
- Once complete, apply a dot of hot glue to the base of each and attach to the silk ribbon.
- Space them 5 inches apart and let the glue set for 20 minutes.


10. Leaf Mold Clay Impressions
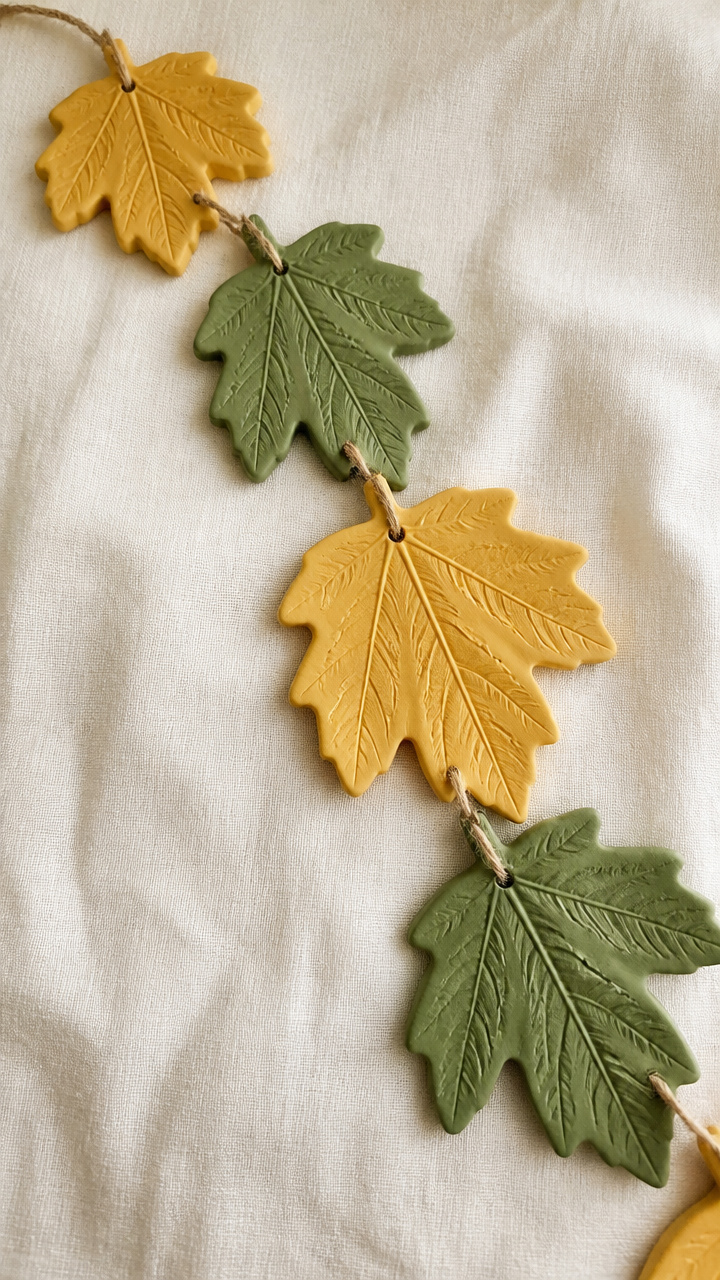
Air-dry clay pressed into silicone molds retains every ridge and curve of a ginkgo leaf. These durable impressions can be painted or left natural.
Materials Needed
- Silicone ginkgo leaf mold (single cavity)
- White air-dry clay, 1 pound
- Rolling pin
- Cornstarch
- Palette knife
- Acrylic paint: golden yellow, forest green
- Brush
- Drill with 1/16-inch bit
- Nylon thread
How to Make It
- Dust the mold with cornstarch, then press a small ball of clay firmly into it.
- Use the palette knife to trim excess clay flush with the mold’s surface.
- Wait 10 minutes, then gently pop out the impression and place on a tray to dry for 24 hours.
- Drill a small hole near the stem end of each piece.
- Paint the front with golden yellow, let dry, then thread onto nylon cord with knots between.


11. Tissue Paper Puff Leaves
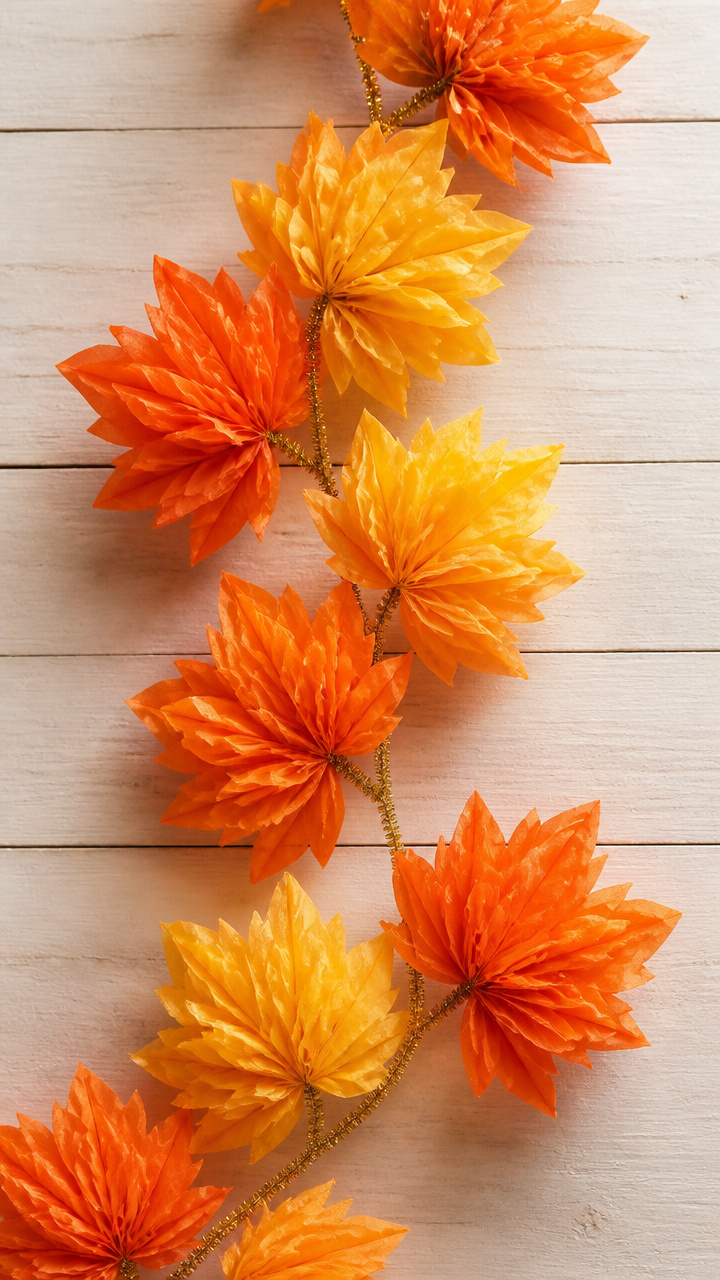
Layered squares of tissue paper gathered at the center form soft, puffy leaves that look like fallen petals. These lightweight blooms add volume without weight.
Materials Needed
- 10 sheets orange tissue paper, 20×20 inches
- 10 sheets yellow tissue paper, 20×20 inches
- Scissors
- Gold pipe cleaner, 12 gauge
- Ruler
- Pencil
How to Make It
- Stack one orange and one yellow sheet and cut into eight 5×5 inch squares.
- Fan-fold each stack of squares accordion-style with 0.5-inch folds.
- Pinch the center and twist a pipe cleaner tightly around it to form the stem.
- Gently pull each layer upward and outward from the center to create a rounded leaf shape.
- Attach 8 puff leaves to a 4-foot satin cord by wrapping the pipe cleaner ends around it every 6 inches.


12. Ink-Stamped Paper Leaves
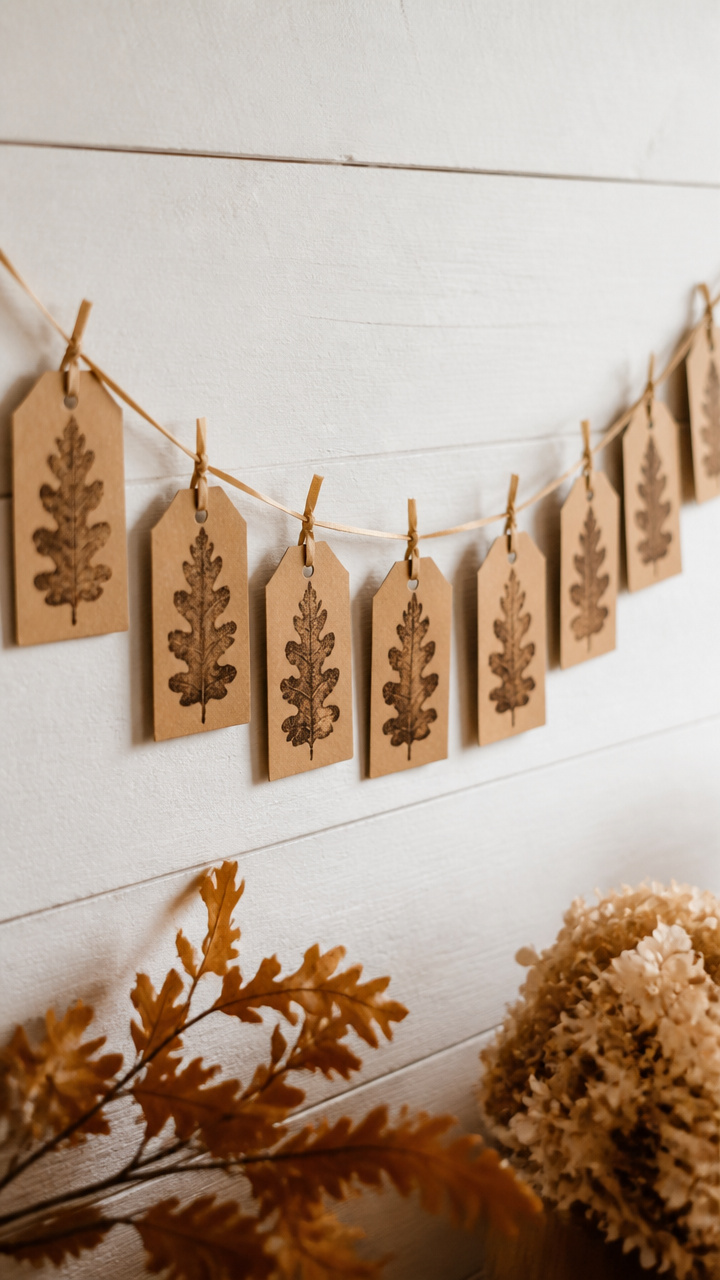
Pre-carved linoleum blocks stamp repeating leaf patterns onto kraft paper tags. This method ensures consistency and saves time over hand-drawing.
Materials Needed
- Linoleum block carved with oak leaf design
- Ink pad with sepia ink
- Blank kraft paper tags, 2×3 inches, 12 pieces
- Ribbon, 1/8 inch wide, 6 feet
- Hole punch
How to Make It
- Press the inked lino block firmly onto each tag, re-inking between two uses.
- Let the ink dry for 10 minutes to prevent smudging.
- Punch a hole in the top corner of each tag.
- Thread the ribbon through the holes, tying a knot between each tag to hold spacing.
- Hang with the printed side facing forward.


13. Leaf Vein Embroidery Hoop
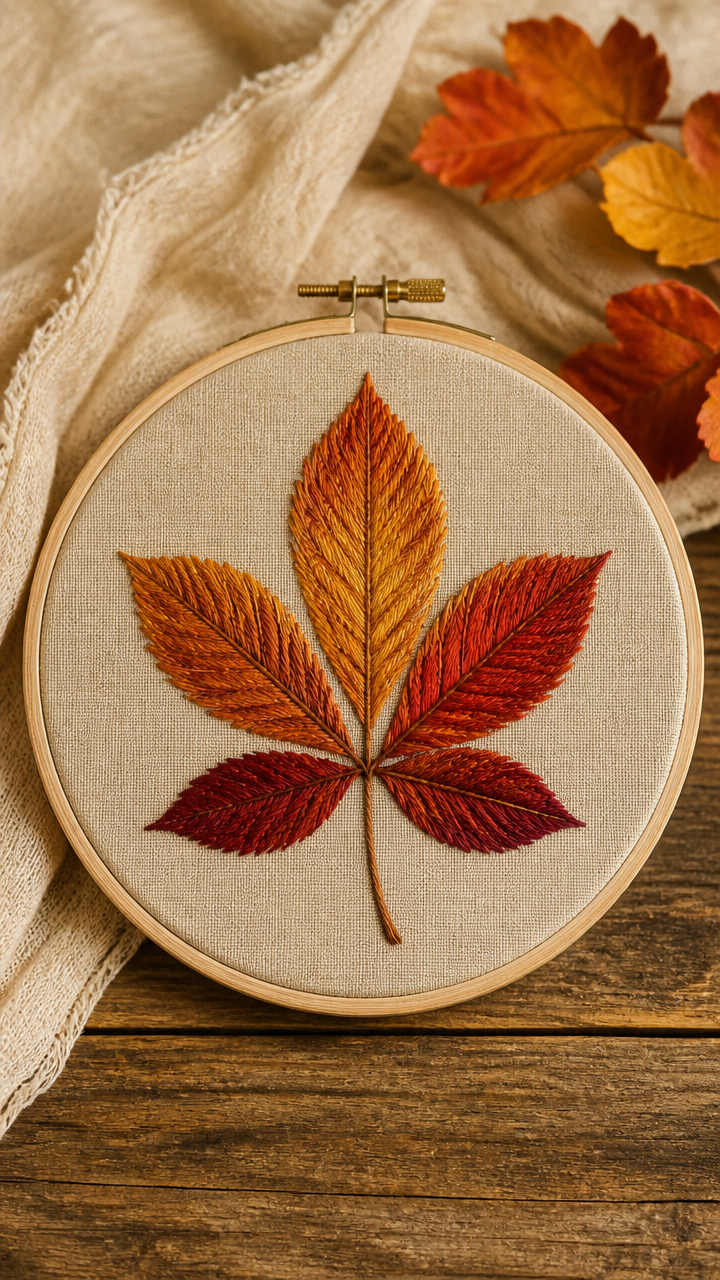
A single large-scale leaf is stitched onto linen with variegated floss that shifts from gold to maroon. This hoop becomes the centerpiece of a longer garland.
Materials Needed
- 6-inch embroidery hoop
- Natural linen fabric
- Embroidery needle
- Variegated floss in autumn tones
- Leaf pattern (print 4-inch hickory leaf)
- Transfer paper
- Scissors
- 3 feet of braided hemp cord
How to Make It
- Place transfer paper under the leaf pattern on the linen and trace firmly to mark the outline.
- Secure the fabric in the hoop and stitch within the lines using a satin stitch.
- Keep tension even to avoid puckering, working from the center outward.
- Trim excess fabric to 1 inch beyond the hoop, then wrap the edge with green floss.
- Tie the hemp cord to the top of the hoop and add six smaller felt leaves along the cord below.


14. Maple Seed Helicopter String
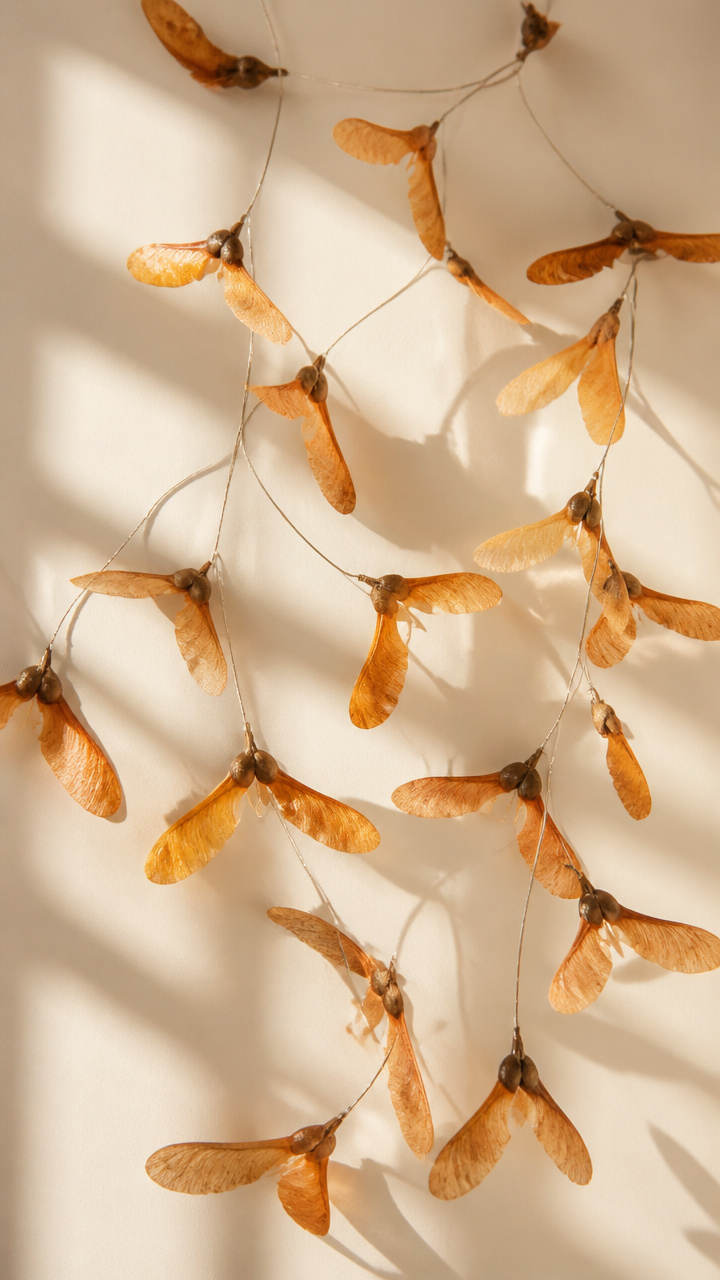
Real maple samaras are wired individually to spin slowly in drafts. Their natural aerodynamic shape makes this garland move with subtle life.
Materials Needed
- 20 intact maple samaras (helicopters)
- Thin aluminum wire, 24 gauge, 10 feet
- Wire cutters
- Ruler
- Clear nail polish
How to Make It
- Cut 20 pieces of wire, each 6 inches long.
- Wrap one end of each wire around the base of a samara and twist tight.
- Coat the twist with a dab of clear nail polish to secure and prevent unraveling.
- Let dry for 15 minutes.
- String the wires onto a 5-foot cotton cord by looping the free end, spacing them 4 inches apart.


15. Leaf Shadow Box Frame
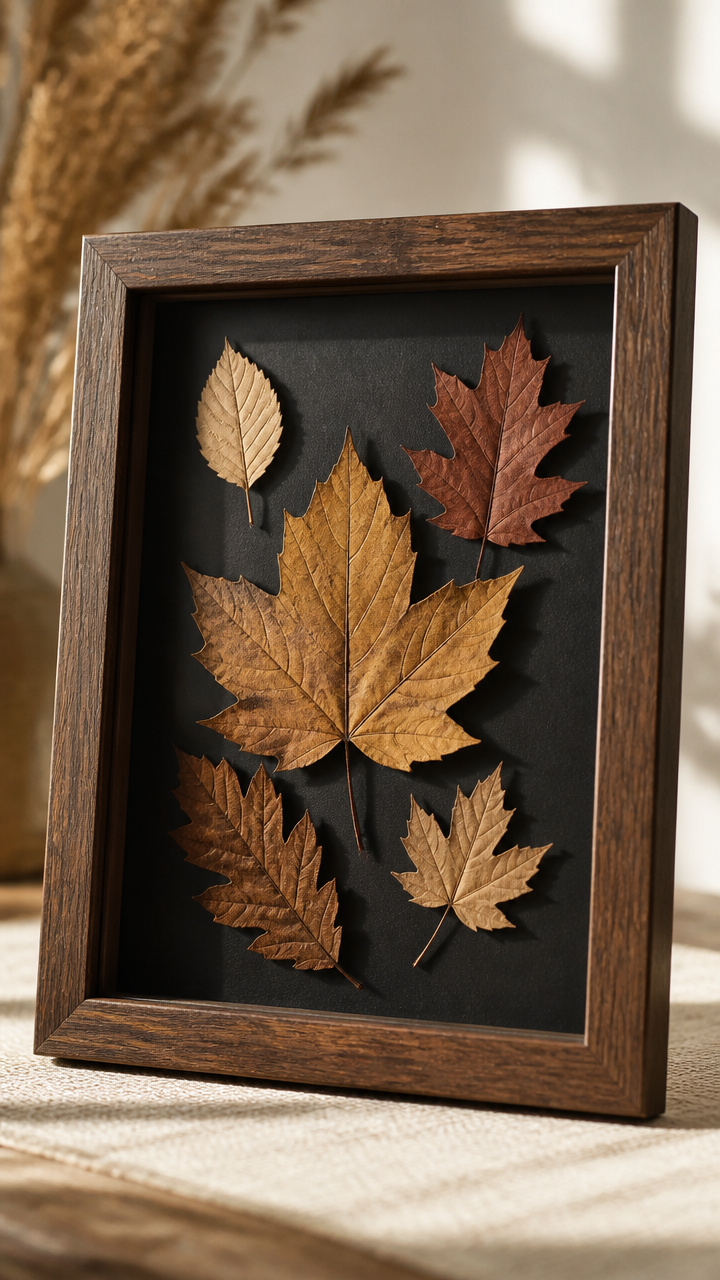
Three-dimensional leaves mounted at varying depths create shifting shadows on a backlit panel. This framed garland works as wall art with seasonal depth.
Materials Needed
- Shadow box frame, 8×10 inches, with glass front
- Pressed leaves: 5 sizes from small to large
- Black construction paper
- Foam adhesive squares, 0.5 inch
- Craft knife
- Ruler
- LED tea light
How to Make It
- Cut the black paper to fit the back panel of the frame.
- Arrange the leaves diagonally across the panel, tallest at bottom left, smallest at top right.
- Attach each leaf with 1 to 3 foam squares depending on desired depth.
- Place the panel into the frame, add the glass, and close the back.
- Set the LED tea light beside it on a shelf to cast long evening shadows.


16. Yarn-Wrapped Twig Sprigs
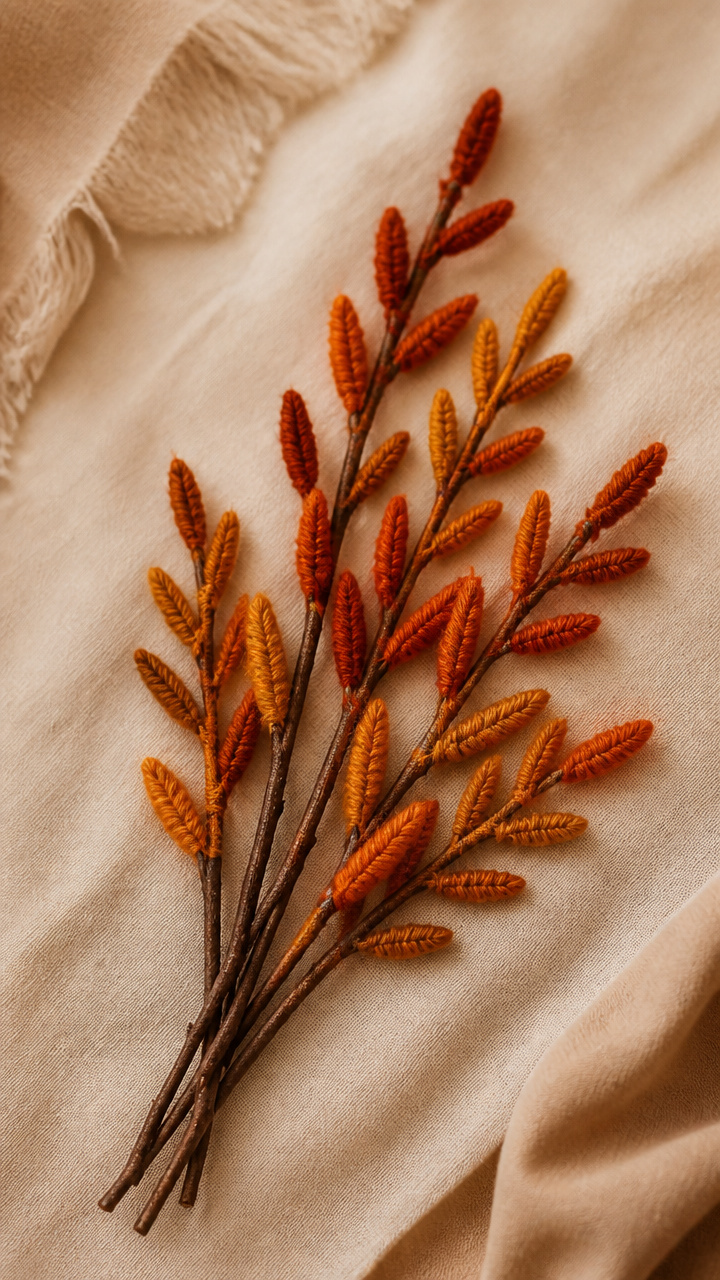
Short twig segments wrapped densely with russet and ochre yarn become fuzzy leaf-like clusters. These sprigs add warmth and texture above a bed or doorway.
Materials Needed
- 10 straight twigs, 4 inches long, 0.25 inch diameter
- Ochre yarn, worsted weight, 50 yards
- Russet yarn, worsted weight, 50 yards
- Scissors
- Fabric glue
- Jute twine, 4 feet
How to Make It
- Start at one end of a twig and apply a dot of fabric glue.
- Wrap ochre yarn tightly around the glue spot and continue wrapping to cover half the twig.
- Switch to russet yarn, overlapping slightly, and wrap the remaining half.
- Secure the end with another dot of glue and let dry 10 minutes.
- Tie each twig to jute twine every 5 inches using a double knot at the base.
17. Leaf Foil Transfer Band
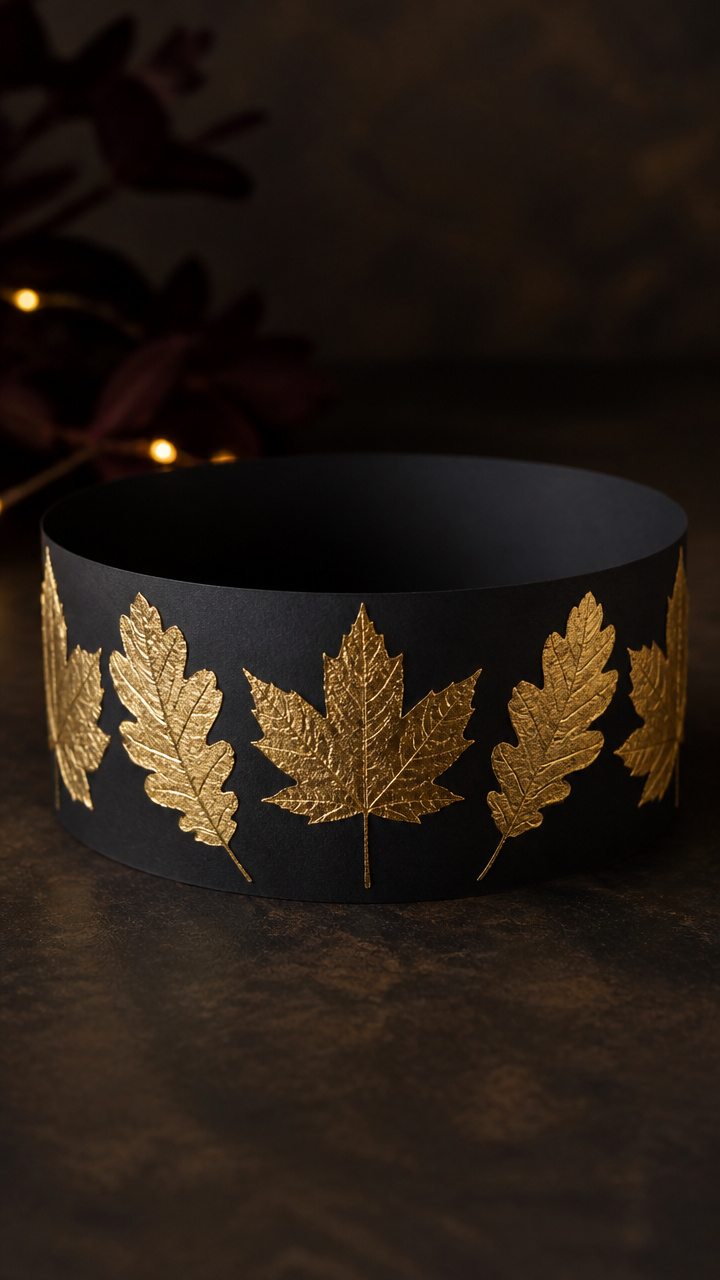
Golden foil adheres only to raised leaf shapes on dark cardstock, creating a luxurious metallic trail. The heat-transfer method gives a professional finish with minimal tools.
Materials Needed
- Black A4 cardstock
- Heat-activated gold foil sheets, 8.5×11 inches
- Printed leaf transfer sheets (laser printed only)
- Iron
- Parchment paper
- Craft stick
- Hole punch
- Satin cord, 5 feet
How to Make It
- Place a transfer sheet face down on cardstock where you want the first leaf.
- Cover with parchment paper and press with a dry iron at medium heat for 15 seconds.
- Peel off the backing to reveal the foiled leaf.
- Repeat for 8 leaves in a staggered line down the cardstock strip.
- Cut into individual rectangles, punch holes at the top, and thread onto satin cord.


18. Cinnamon-Scented Leaf Cutouts
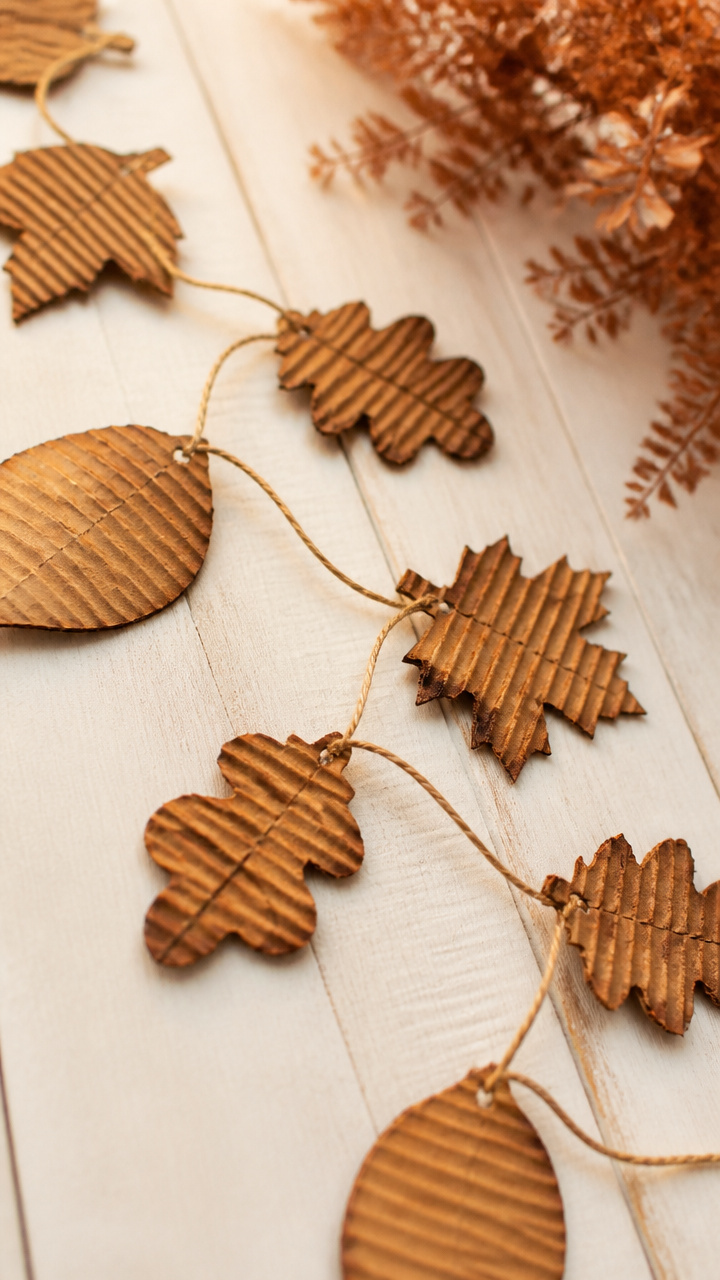
Cardboard leaves infused with cinnamon oil release a warm scent when touched. These double as decorations and natural air fresheners.
Materials Needed
- Corrugated cardboard sheet
- Leaf stencil, 3 inches
- Pencil
- Scissors
- Cinnamon essential oil, 10 ml
- Cotton swabs
- Raffia, 6 feet
- Hole punch
How to Make It
- Trace 12 leaf shapes onto cardboard and cut out with scissors.
- Use a cotton swab dipped in cinnamon oil to coat each leaf completely.
- Let dry for 3 hours on a rack to absorb the oil and reduce stickiness.
- Punch a hole at the stem end of each.
- Thread raffia through the holes, knotting between each leaf every 4 inches.


19. Leaf Canopy with Clips
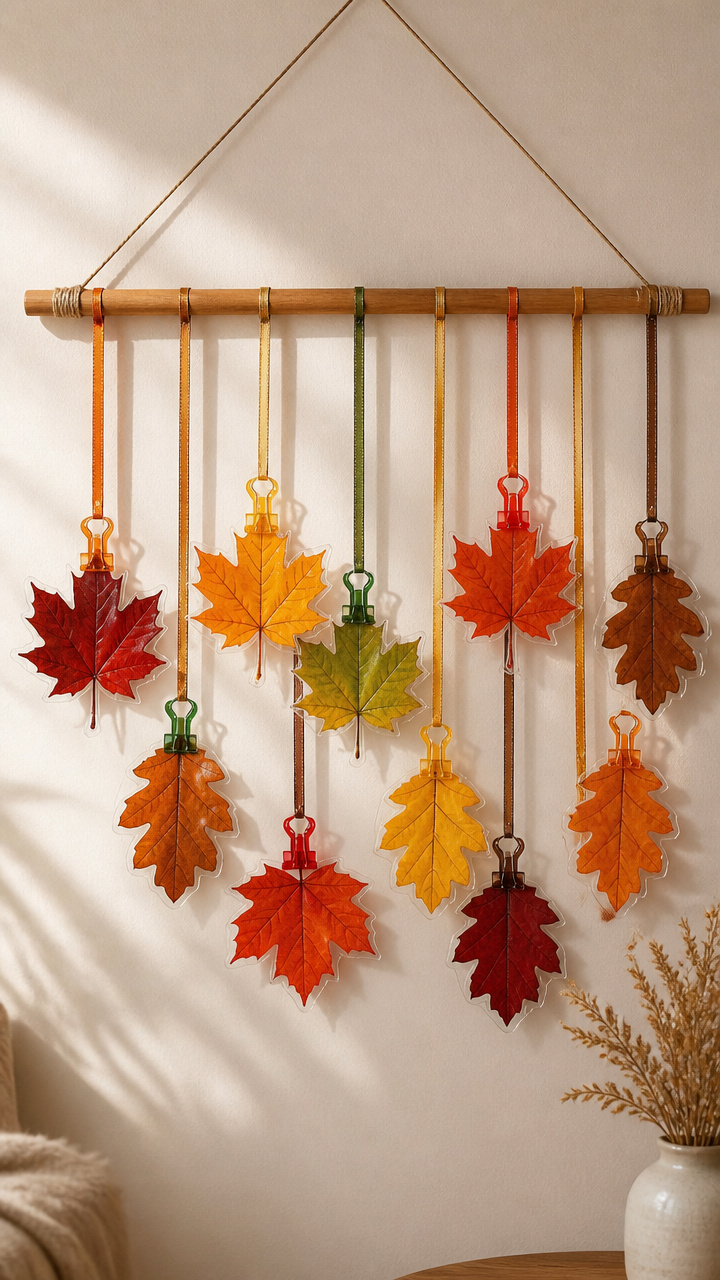
Lightweight laminated leaves hang from adjustable clips on a decorative rod. This system lets you rearrange or swap leaves easily throughout the season.
Materials Needed
- Decorative wooden curtain rod, 24 inches
- 10 plastic binder clips, 0.75 inch
- Assorted real leaves, laminated
- Laminator and pouches
- Hole punch
- Ribbon, 3 feet
How to Make It
- Laminate each leaf in a pouch using the laminator on high heat.
- Trim close to the edge with scissors, then punch a hole near the stem.
- Slide each laminated leaf onto a binder clip by the hole.
- Clip the binders onto the rod at varied heights and positions.
- Tie ribbon to each end of the rod for hanging.


20. Knitted Mini Leaf Garlands
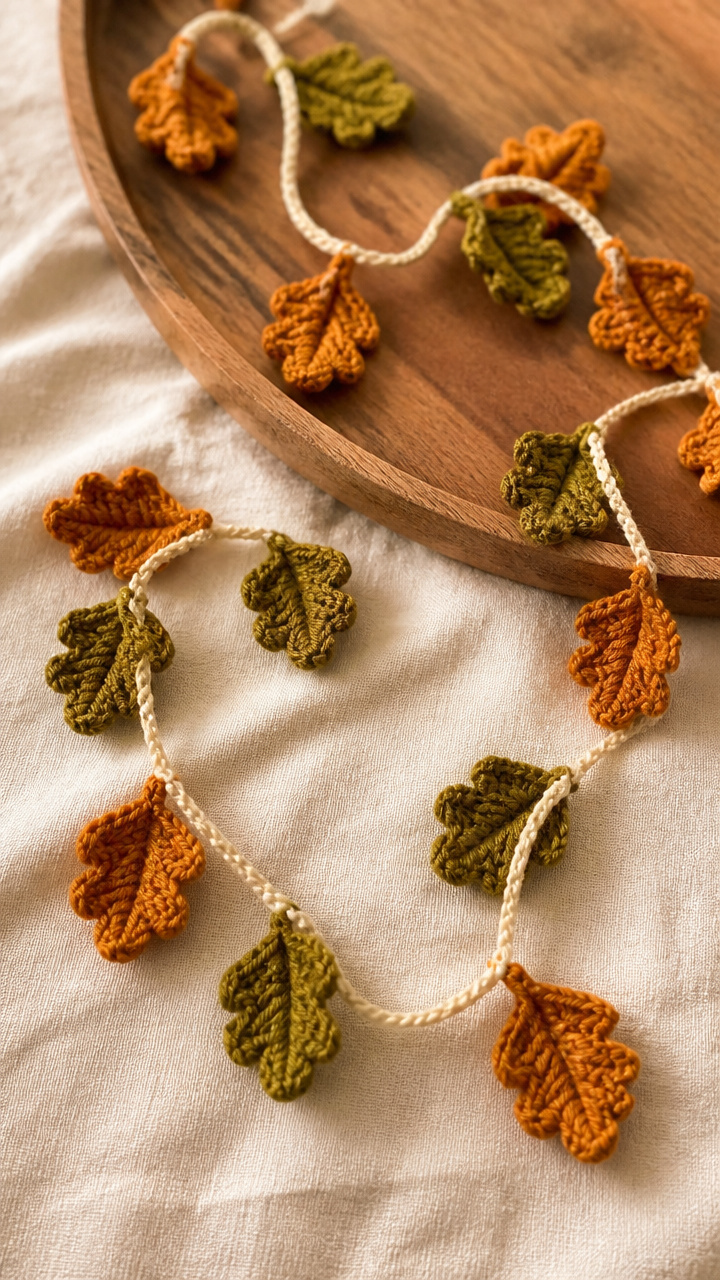
Tiny knitted leaves in moss and amber yarn cluster along a central cord. These soft stitches mimic curled foliage and feel lovely to touch.
Materials Needed
- Moss green fingering yarn, 25 yards
- Amber fingering yarn, 25 yards
- Pair of US 4 knitting needles
- Tapestry needle
- Scissors
- 4 feet of cotton cord
How to Make It
- Cast on 3 stitches with moss yarn and knit 10 rows in garter stitch.
- Increase 1 stitch at each end every 2 rows until 7 stitches wide, then decrease to shape the top.
- Bind off and weave in ends with the tapestry needle.
- Repeat to make 6 moss and 6 amber leaves.
- Sew each leaf to the cotton cord at 3-inch intervals, hiding the knot behind the base.

Each of these garlands carries a piece of autumn’s quiet magic. Pick one that matches your mood, your space, and the materials you love to work with. Your hands will remember the rhythm, and your home will hold the season a little longer.