15 Valentine’s Day Dollar Tree Crafts on a Budget

Soft pink tissue paper, glittery heart stickers, and satin ribbons in cherry red fill shopping baskets at Dollar Tree this season, waiting to become something heartfelt. With just a few added basics from your craft drawer, you can turn these simple finds into meaningful gifts and decor that feel anything but cheap.
Each project here uses only what you can source for under a few dollars, most costing less than a cup of coffee. You’ll find ideas perfect for kids, couples, teachers, and even last-minute surprises tucked into lunchboxes.
1. Felt Heart Garland
Easy

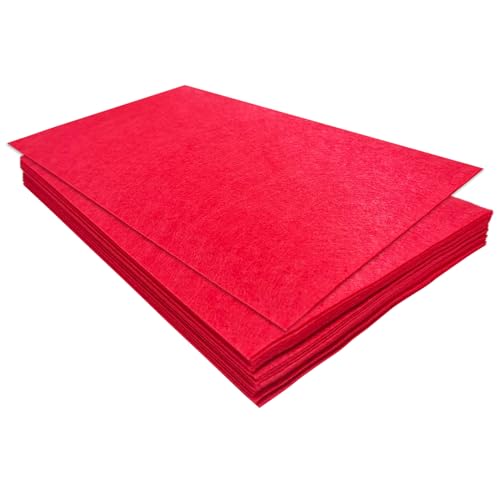
Fluffy red hearts dangle from a cotton twine string, creating a cozy banner for mantels or bedrooms. This soft decoration adds warmth without overwhelming a space.
Materials Needed
- 6 sheets red felt (9×12 inches)
- scissors
- ruler
- pencil
- cotton twine (3 yards)
- hot glue gun
- glue sticks
How to Make It
- Draw a heart shape 4 inches tall onto one sheet of felt using the pencil and ruler for symmetry, then cut it out with scissors to use as a template.
- Trace the heart template onto the remaining felt sheets and cut out 12 total hearts.
- Cut the cotton twine into 3 equal lengths of 1 yard each.
- Lay a heart flat, apply a small dot of hot glue near the top center, and press one end of a twine piece into the glue. Hold for 10 seconds until set.
- Repeat gluing hearts along each twine strand, spacing them 3 inches apart, until all hearts are used.


2. Painted Mason Jar Vases
Moderate
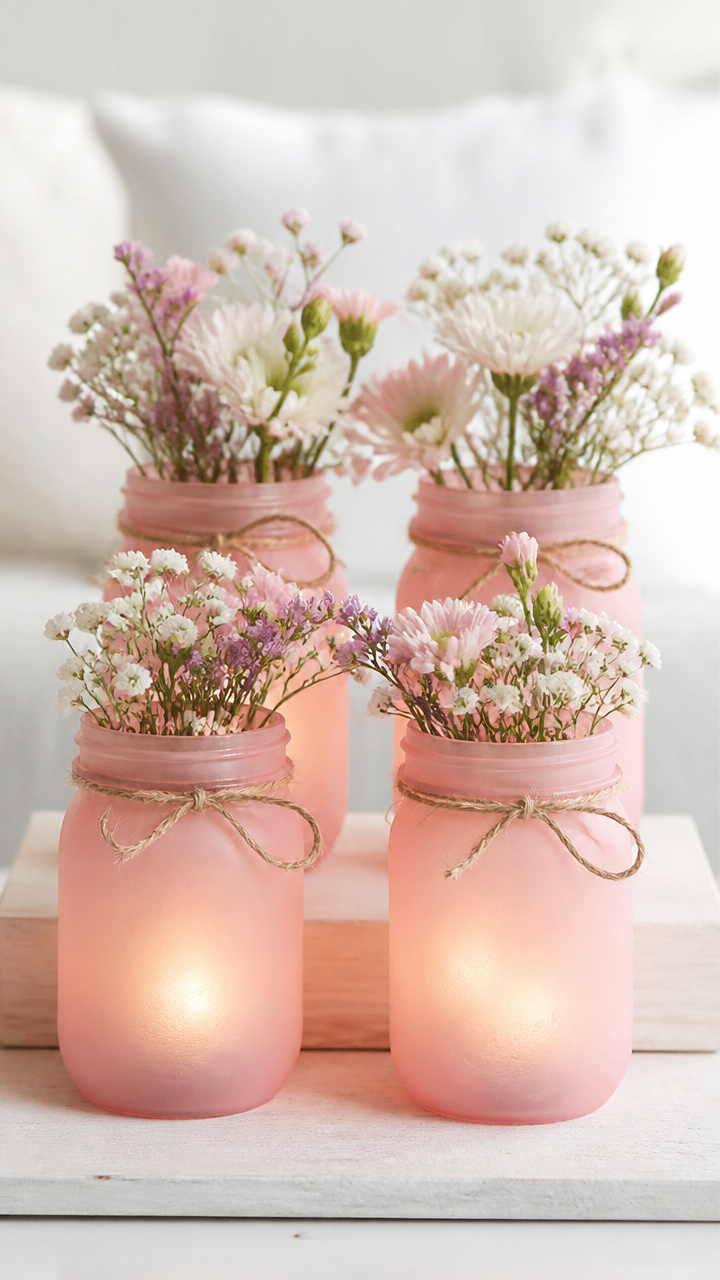
Clear glass mason jars become rosy-hued vases glowing with candlelight or fresh wildflowers. The paint gives them a dreamy, frosted finish.
Materials Needed
- 4 glass mason jars (8 oz)
- pink acrylic paint
- foam brush (1 inch wide)
- paper plate
- rubber bands (4)
- waxed paper
- q-tips
How to Make It
- Pour a dime-sized amount of pink acrylic paint onto the paper plate.
- Dip the foam brush into the paint and apply a thin, even coat over the outside of one jar, covering the surface completely.
- Set the jar aside on waxed paper to dry for 20 minutes.
- Once dry, repeat the process for a second coat to ensure opacity.
- Use a q-tip wrapped in a rubber band to clean any paint smudges from the rim or inside edge.


3. Pom-Pom Love Bugs
Easy
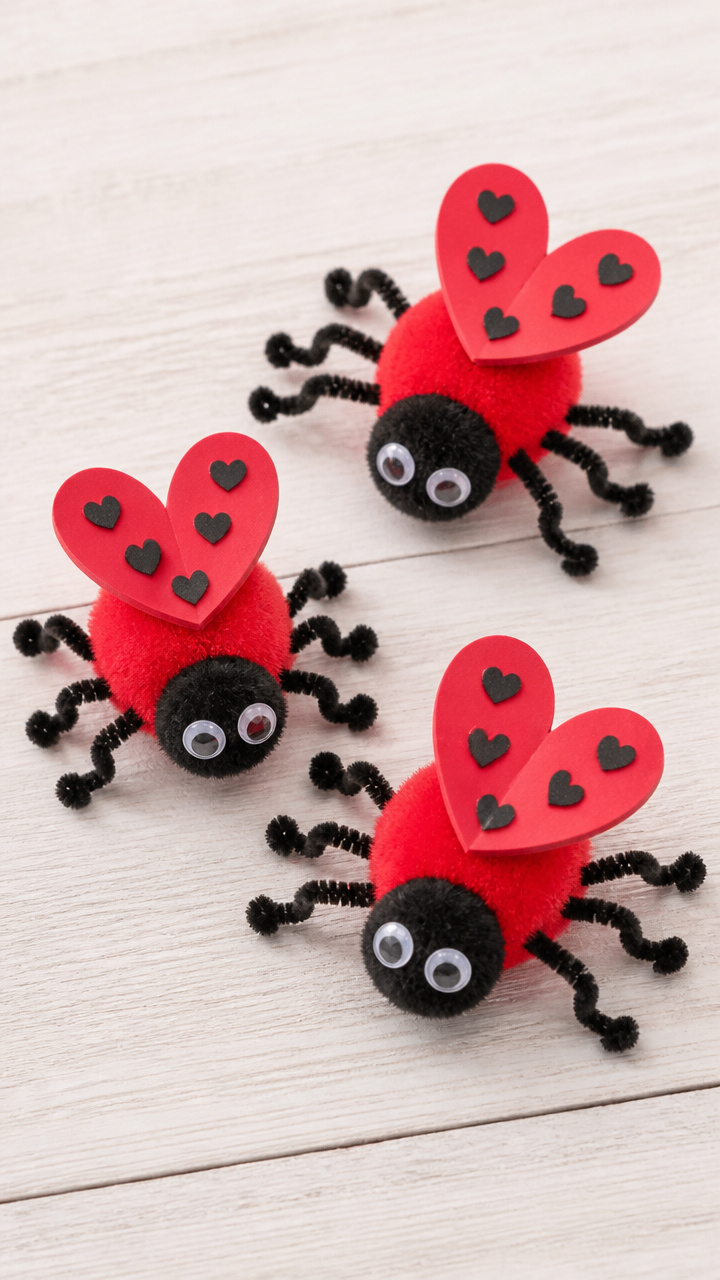
Tiny ladybugs with heart-shaped wings wiggle on pipe cleaner legs, made entirely from fuzzy craft pom-poms. These sweet bugs perch on bookshelves or gift tags.
Materials Needed
- 6 red craft pom-poms (1 inch diameter)
- 6 black craft pom-poms (0.5 inch diameter)
- 12 black pipe cleaners
- black fine-tip permanent marker
- scissors
- hot glue gun
- glue sticks
How to Make It
- Cut each pipe cleaner into 3 equal pieces using scissors.
- Glue one black pom-pom to the top of a red pom-pom using hot glue, pressing gently to adhere. Let dry for 15 seconds.
- Insert two pipe cleaner pieces into each side of the red pom-pom for legs, bending slightly outward.
- Use the black marker to draw two small antennae and two eyes on the black pom-pom head.
- Draw a heart shape down the center of the red pom-pom to mimic wing division.


4. Heart-Shaped Bath Bombs
Moderate
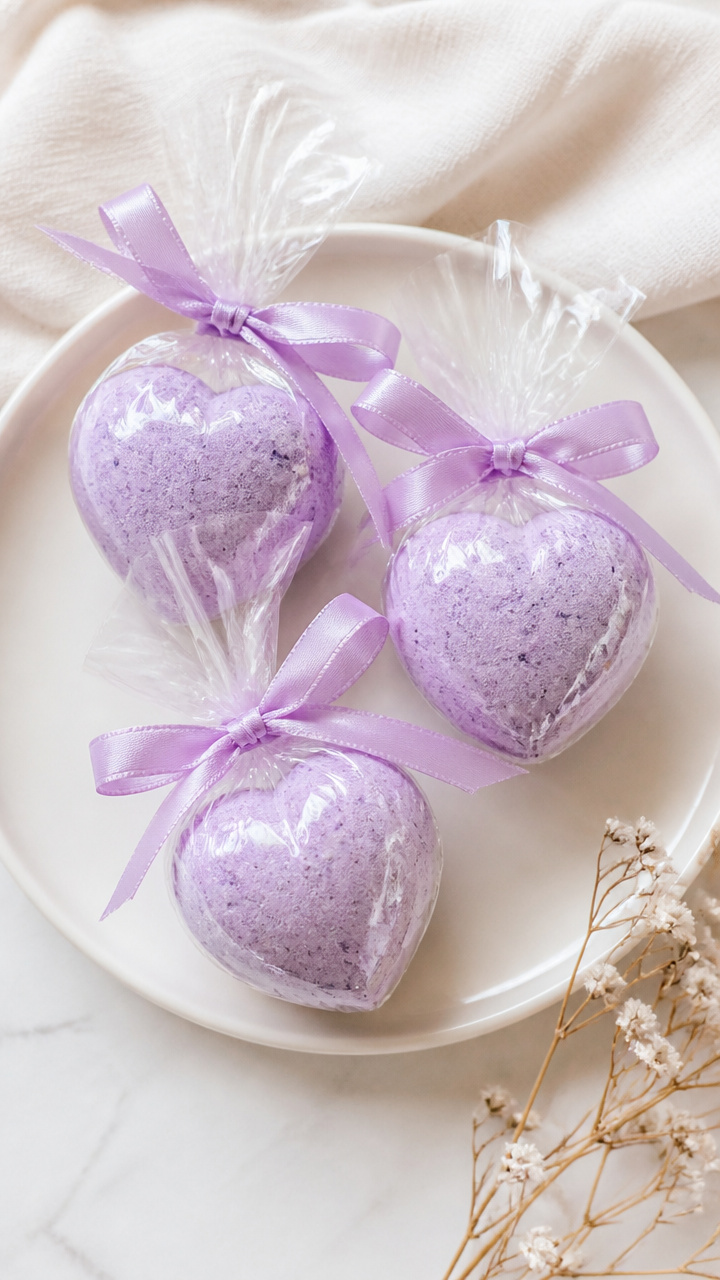
Fizzy bath treats in romantic rose scent dissolve into lavender-colored water, wrapped in cellophane with a ribbon. These make thoughtful handmade gifts.
Materials Needed
- 1 cup baking soda
- ½ cup citric acid
- ½ cup cornstarch
- ¼ cup Epsom salt
- 2 tablespoons coconut oil (melted)
- 10 drops lavender essential oil
- red food coloring (3 drops)
- heart-shaped silicone mold (6 cavity)
- spray bottle with water
How to Make It
- In a large bowl, mix baking soda, citric acid, cornstarch, and Epsom salt until uniform.
- In a separate container, blend melted coconut oil, lavender essential oil, and red food coloring.
- Slowly drizzle the liquid mixture into the dry ingredients while stirring continuously to avoid early fizzing.
- Mist the mixture lightly with water from the spray bottle until it holds shape when squeezed in your hand.
- Press the mixture firmly into each cavity of the heart mold and let sit undisturbed for 4 hours before unmolding.


5. Photo Frame String Art
Advanced
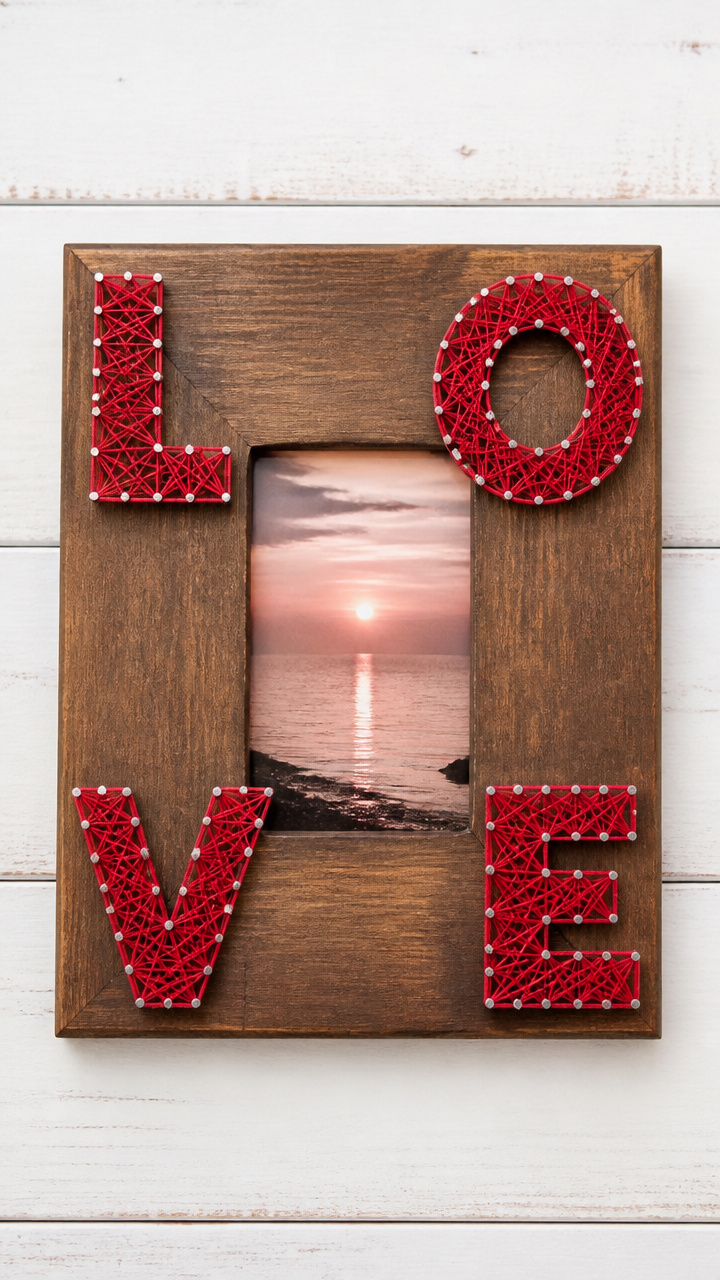
A wooden photo frame becomes a canvas for delicate nail-and-thread design spelling 'LOVE' around a cherished picture. The contrast of rustic wood and soft thread charms guests.
Materials Needed
- 1 unfinished wooden photo frame (5×7 inches)
- 24 small finishing nails (0.5 inch)
- red embroidery floss (2 yards)
- needle (tapestry tip)
- small hammer
- pencil
- printed word template: 'LOVE'
How to Make It
- Place the 'LOVE' template centered on the front of the frame and trace the outer edges lightly with pencil.
- Remove the template and position a nail at each curve and corner of the letters, spacing them about 0.3 inches apart.
- Tap each nail halfway into the wood with the hammer, then push the rest in by hand to avoid breaking the head.
- Tie the end of the embroidery floss securely to one nail and thread it through the needle.
- Weave the floss tightly around the nails following the traced letter shapes, crisscrossing to fill the center densely, then knot and trim the end.


6. Candy Box Pop-Up Card
Moderate
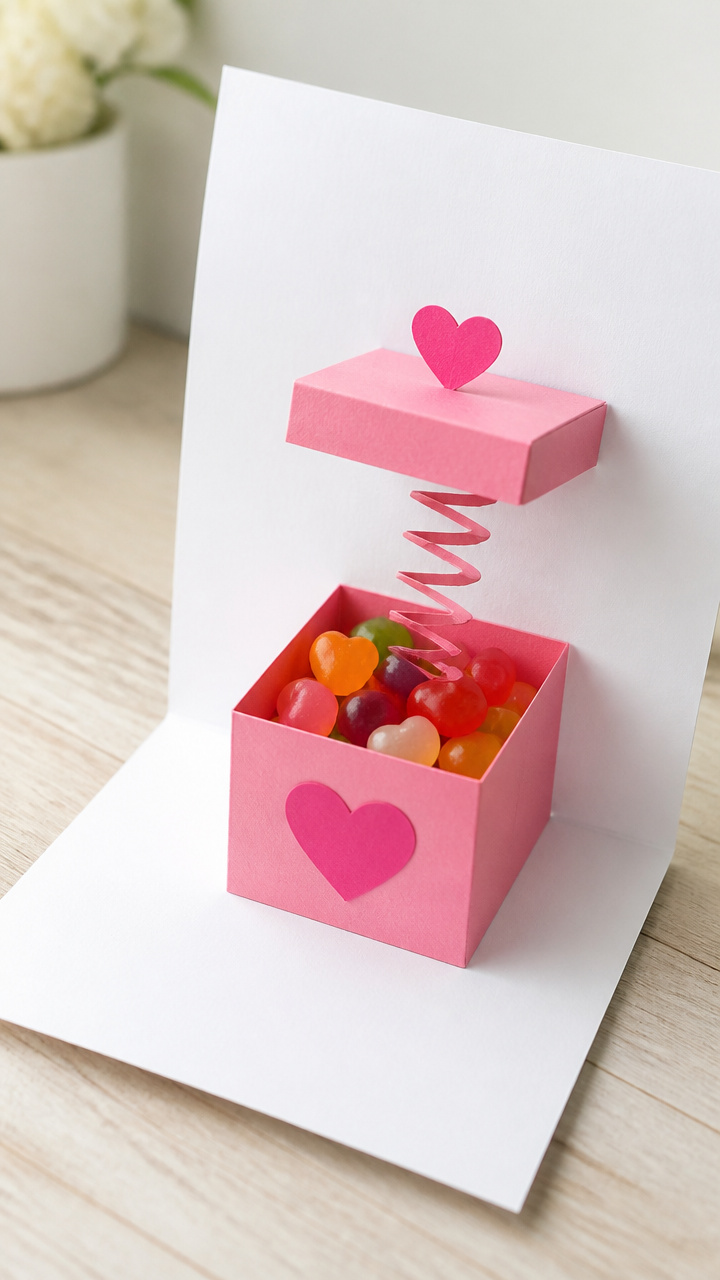
Open the handmade card to reveal a miniature box filled with jelly hearts that rise on a paper spring. It doubles as both greeting and treat.
Materials Needed
- A4 white cardstock
- scissors
- ruler
- craft knife
- pink gel pen
- double-sided tape
- assorted candy conversation hearts (6 pieces)
How to Make It
- Fold the A4 cardstock in half horizontally to create a 5.5 x 8.5 inch card.
- Measure and mark a rectangle 2 x 1.5 inches on the inside fold, centered vertically.
- Use the craft knife to cut three sides of the rectangle, leaving the top edge uncut to form a flap.
- Score a diagonal crease across the back of the flap and fold it forward to act as a pop-up base.
- Attach the jelly hearts to the flap with double-sided tape, then write a message on the front with the pink gel pen.


7. Yarn-Wrapped Heart Ornament
Easy
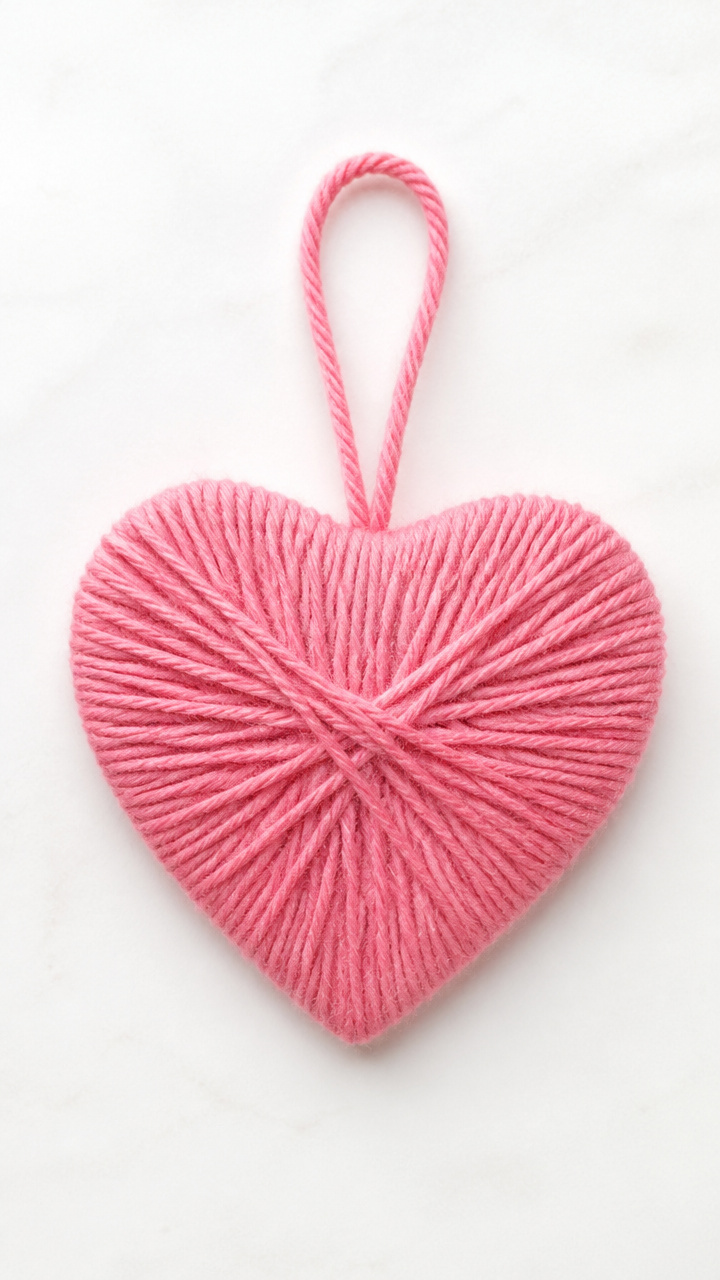
Stiff cardboard hearts glow with loops of bright pink yarn, finished with a loop for hanging. Hang them on doors, walls, or trees.
Materials Needed
- cardboard sheet (from packaging)
- scissors
- pencil
- pink yarn (15 feet)
- white school glue
- paintbrush (0.5 inch)
- ribbon (1 foot)
How to Make It
- Draw a 5-inch heart shape on the cardboard and cut it out with scissors.
- Apply a thin line of white glue along the edge of the heart using the paintbrush.
- Start wrapping the yarn around the heart from the glued edge, pressing each loop into the glue as you go.
- Continue wrapping tightly until the entire surface is covered, adding more glue if needed.
- Glue one end of the ribbon to the top back of the heart to create a hanger, letting it dry for 10 minutes.


8. Mini Chalkboard Love Notes
Easy
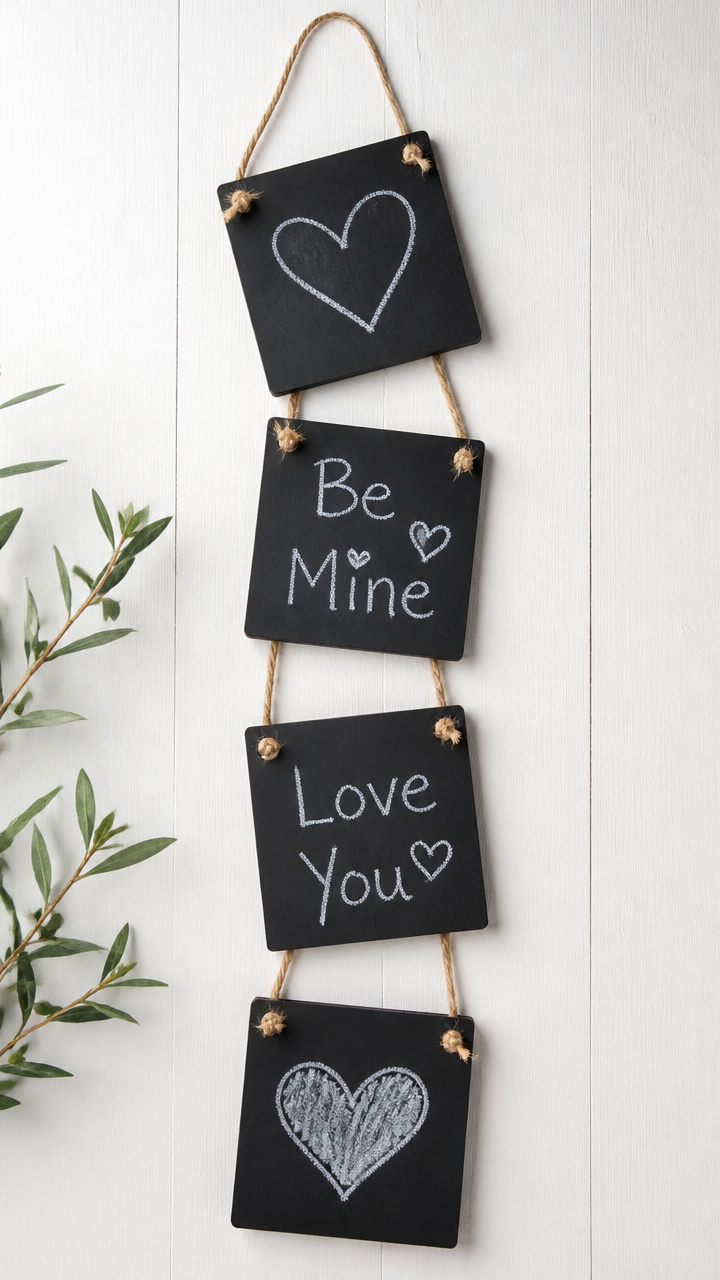
Small wooden boards with chalk-written messages sit on desks or clip to mirrors, delivering daily affection. Change the words whenever you like.
Materials Needed
- 4 wooden squares (4×4 inches)
- black chalkboard paint (2 oz)
- foam brush (1 inch)
- white chalk stick
- chalk eraser cloth
- twine (1 yard)
- mini clothespins (4)
How to Make It
- Shake the chalkboard paint well and pour a small amount onto a disposable surface.
- Use the foam brush to apply one even coat of paint over the face of each wooden square.
- Let dry for 30 minutes, then apply a second coat.
- After 1 hour, cure the surface by rubbing the side of a chalk stick over the entire board, then wipe clean with the cloth.
- Write a short message like 'You're Sweet' with the white chalk and hang using twine and clothespins.


9. Scented Drawer Sachets
Easy
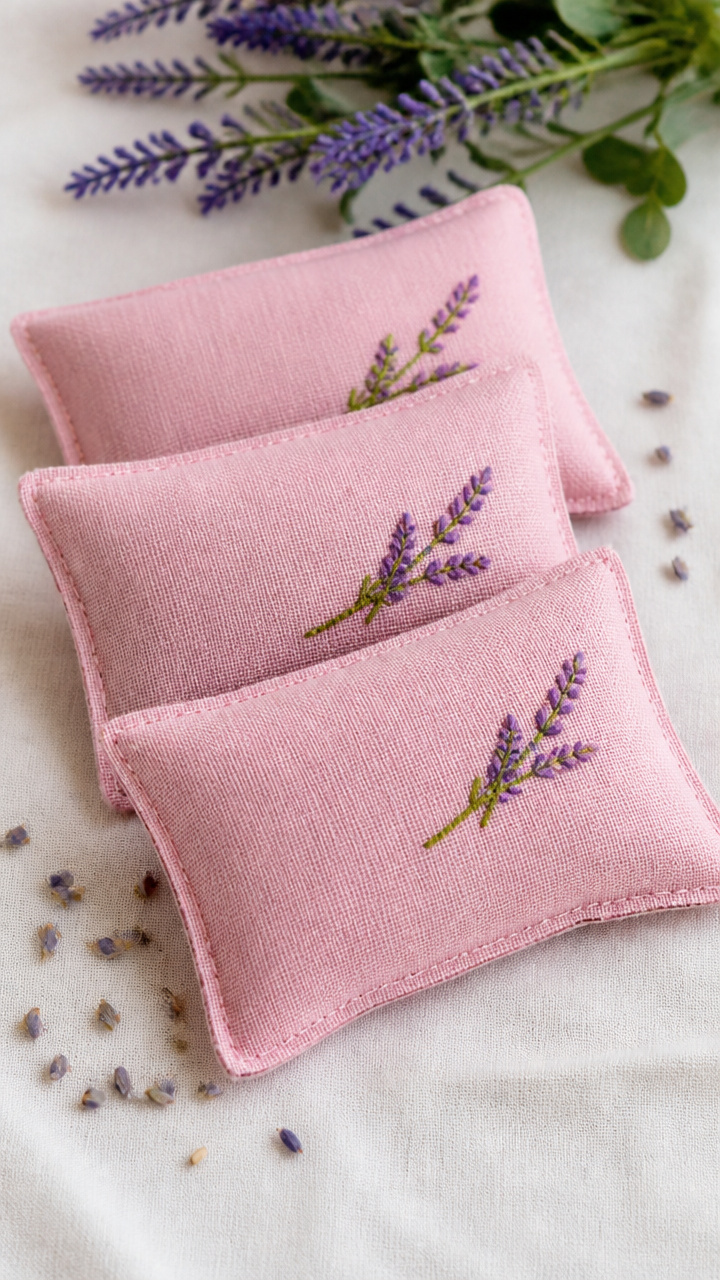
Lavender-scented fabric pouches slide into drawers or tuck into gift boxes, releasing a soft floral note with every opening. They’re quick and useful.
Materials Needed
- pink cotton fabric (8×10 inches)
- dried lavender buds (¼ cup)
- needle
- thread (matching pink)
- scissors
- ruler
- straight pins
How to Make It
- Cut the fabric into two 4×5 inch rectangles using the ruler and scissors.
- Place the pieces together with the right sides facing, pin the edges to secure.
- Thread the needle and sew along three sides using a running stitch, leaving a 0.25 inch seam allowance.
- Turn the pouch right side out through the open side.
- Fill the pouch with dried lavender buds, then fold the raw edge inward and hand-stitch the opening closed.


10. Button Flower Bouquet
Moderate
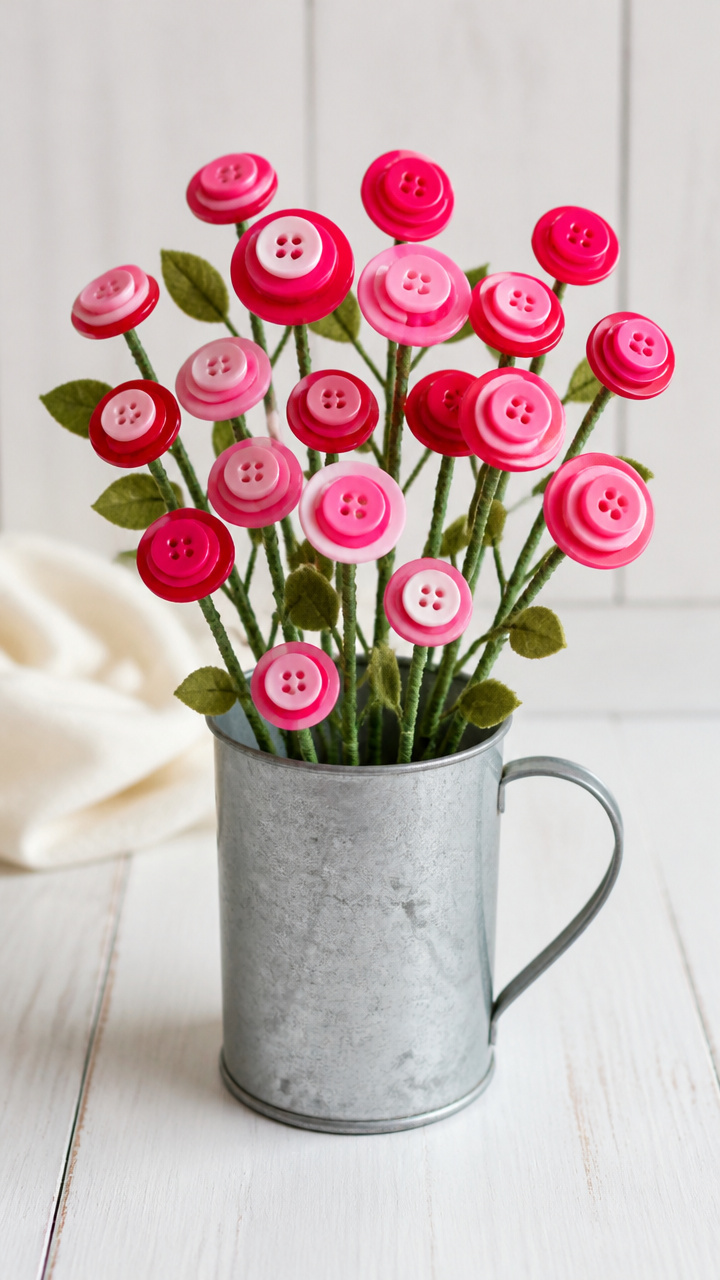
Colorful buttons bloom on wire stems bundled into a cheerful no-wilt bouquet. Display it in a mug or wrap it with kraft paper.
Materials Needed
- 12 assorted buttons (various pinks and reds, 0.5 to 1 inch)
- 6 green pipe cleaners
- floral tape (green, 5 yards)
- wire cutters
- scissors
- small vase or tin mug
How to Make It
- Cut each pipe cleaner in half with wire cutters to make 12 stems.
- Slide one button onto the end of a stem and twist the wire 3 times behind the button to secure it in place.
- Repeat for all buttons to create individual flower stems.
- Group 4 stems together and wrap the base with floral tape, stretching slightly as you spiral down 2 inches.
- Arrange the 3 clusters in the vase, adjusting stems for fullness.


11. Paper Quilled Heart Wall Art
Advanced
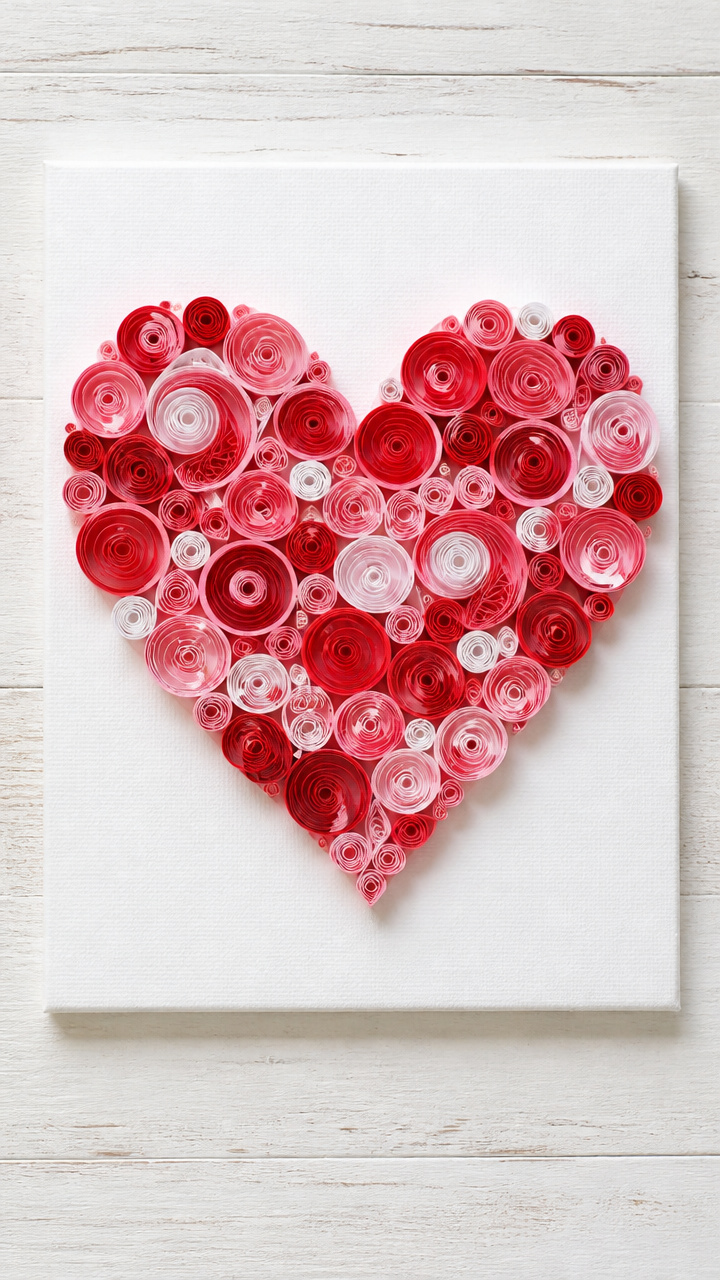
Tightly coiled strips of paper form a heart mosaic mounted on sturdy cardstock. The texture catches light beautifully on blank walls.
Materials Needed
- quilling paper strips (red, pink, white – 1/4 inch wide, 12 inches long, 15 total)
- quilling tool (slotted type)
- tweezers
- white A4 cardstock
- PVA glue
- paintbrush (small)
- pencil
- heart stencil (3 inches)
How to Make It
- Trace the heart stencil onto the cardstock with pencil and set it aside.
- Roll one paper strip around the slotted quilling tool, squeeze into a teardrop shape, and glue the end with a dab of PVA using the brush.
- Repeat to make 15 teardrop coils in mixed colors.
- Use tweezers to arrange the coils edge-to-edge within the pencil outline, filling the heart completely.
- Glue each coil in place with a drop of PVA under the base, letting the artwork dry flat for 30 minutes.


12. Cookie Mix in a Jar
Easy
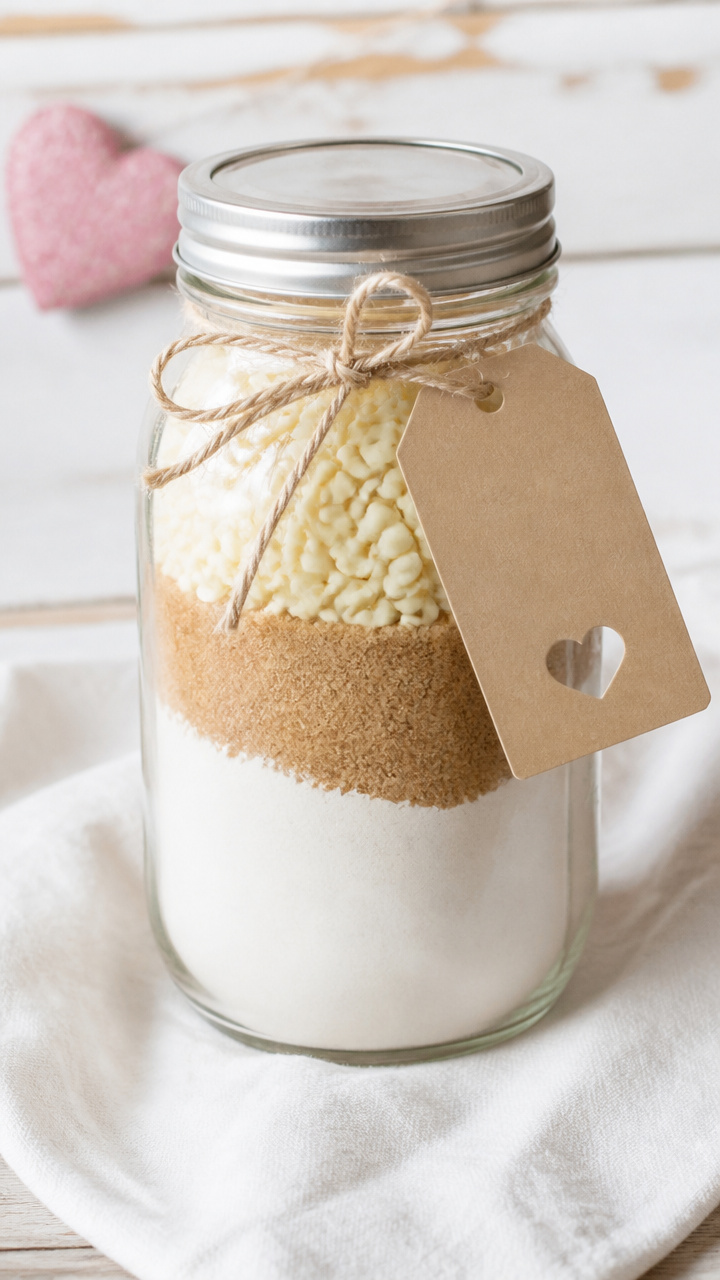
Layered sugar cookie mix sits in a decorated jar, tied with a recipe tag. Bake it later for warm, buttery hearts.
Materials Needed
- quart mason jar
- 2 cups all-purpose flour
- 1/3 cup granulated sugar
- 1/4 teaspoon salt
- dehydrated egg whites (1 tablespoon)
- brown paper lunch bag (for drying eggs)
- label sticker (2×3 inches)
- red ribbon (18 inches)
How to Make It
- Spread dehydrated egg whites on a brown paper bag and let air-dry overnight to ensure no moisture remains.
- Layer flour, sugar, salt, and dried egg whites in the jar in that order, tapping gently between layers to settle.
- Print or write a tag with instructions: 'Add 1/2 cup softened butter, 1 tsp vanilla. Mix, roll, cut hearts, bake at 350°F for 8–10 min.'
- Secure the tag to the lid with the red ribbon, tying a bow at the top.


13. Glitter Dipped Candles
Moderate
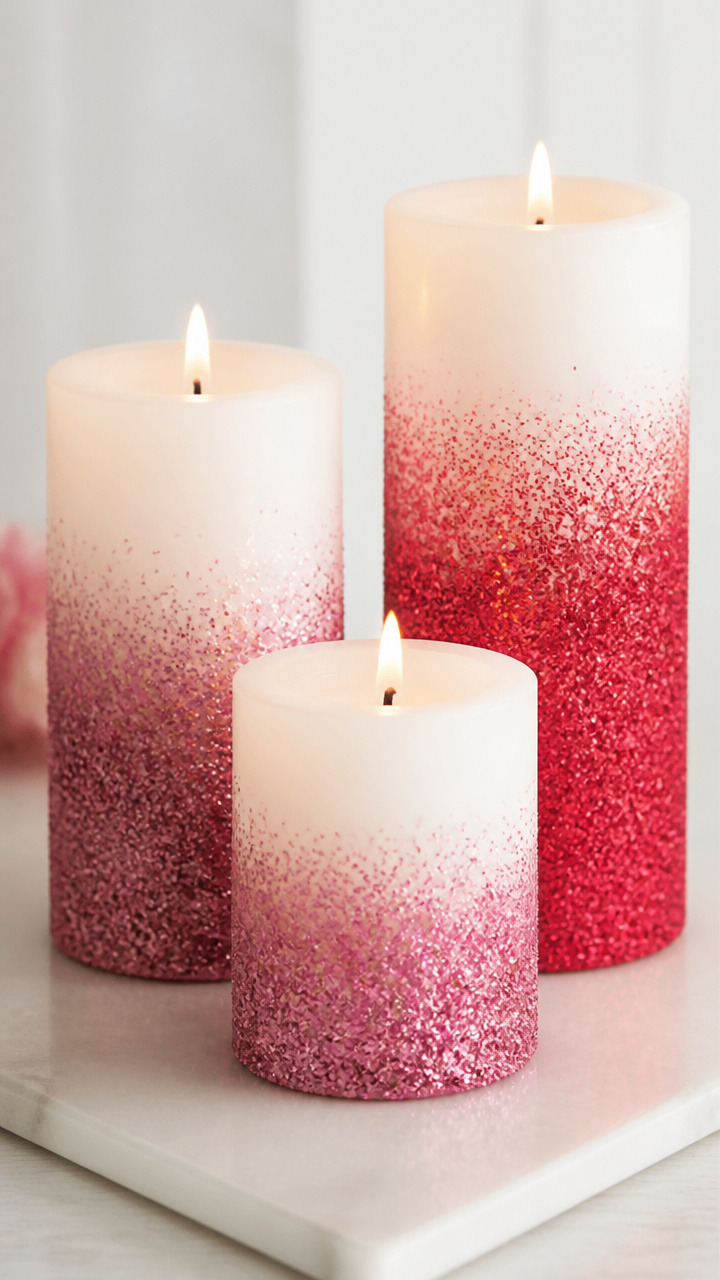
Plain pillar candles gleam with a gradient dip of red and pink glitter, catching firelight with every flicker. They cast romantic shadows on walls.
Materials Needed
- 4 white unscented pillar candles (3 inches tall)
- clear craft glue (4 oz)
- fine red glitter
- fine pink glitter
- shallow bowls (2)
- paintbrush (1 inch)
- wax paper
- toothpicks
How to Make It
- Pour red glitter into one shallow bowl and pink into another.
- Lay wax paper on your work surface and place the candles on top.
- Use the paintbrush to coat the bottom 1.5 inches of a candle with an even layer of clear glue.
- Dip the glued section into red glitter, rotating to cover completely, then tap gently to remove excess.
- Repeat with the middle 1 inch using pink glitter, blending slightly into the red, and use a toothpick to shift glitter if needed.


14. Embroidered Handkerchief
Advanced
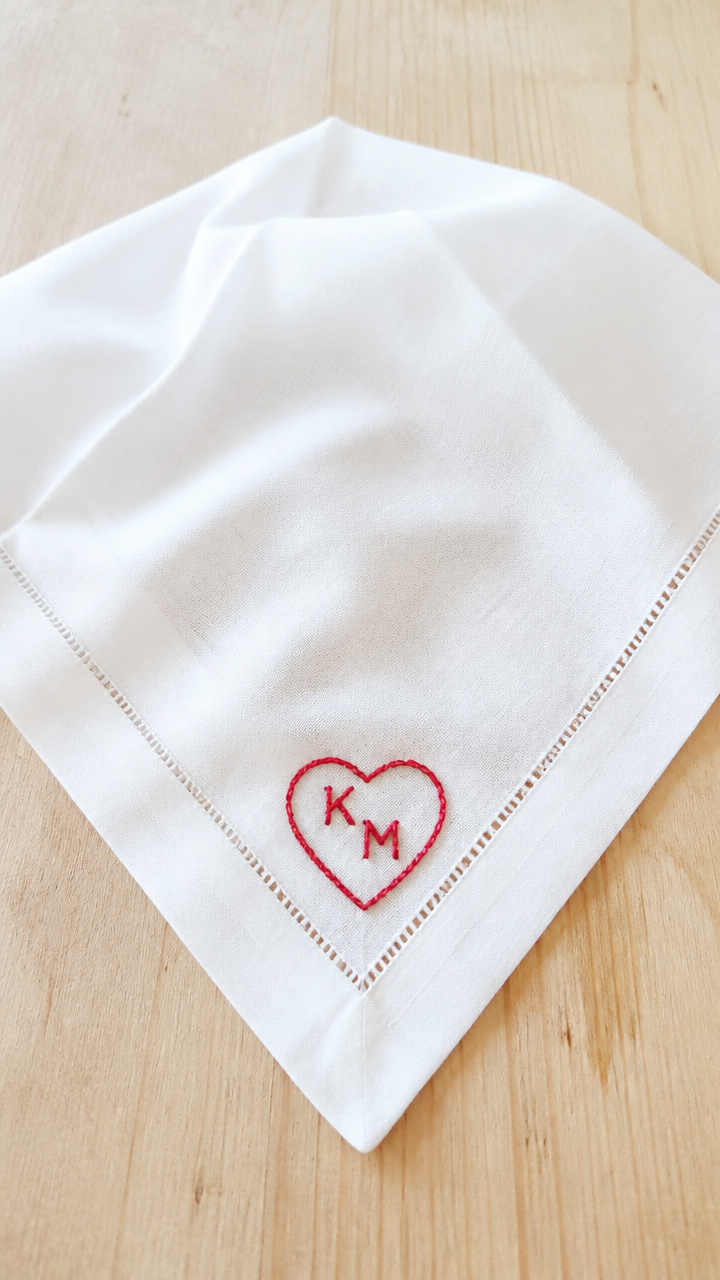
A plain cotton handkerchief gains a tiny stitched heart near the corner, personalized with initials. It’s practical and sentimental.
Materials Needed
- white cotton handkerchief (12×12 inches)
- embroidery floss (red, 18 inches)
- embroidery needle
- embroidery hoop (6 inch)
- water-soluble fabric marker
- scissors
How to Make It
- Stretch the handkerchief in the embroidery hoop, tightening the screw to hold the fabric taut.
- Use the fabric marker to draw a 1-inch heart with two initials inside, positioned 2 inches from one corner.
- Thread the needle with a single strand of red floss and knot the end.
- Stitch around the heart outline using backstitch, keeping stitches even and close together.
- Remove the hoop, rinse the marker lines under cold water until gone, and let the fabric air dry.


15. Crayon Heart Suncatcher
Moderate
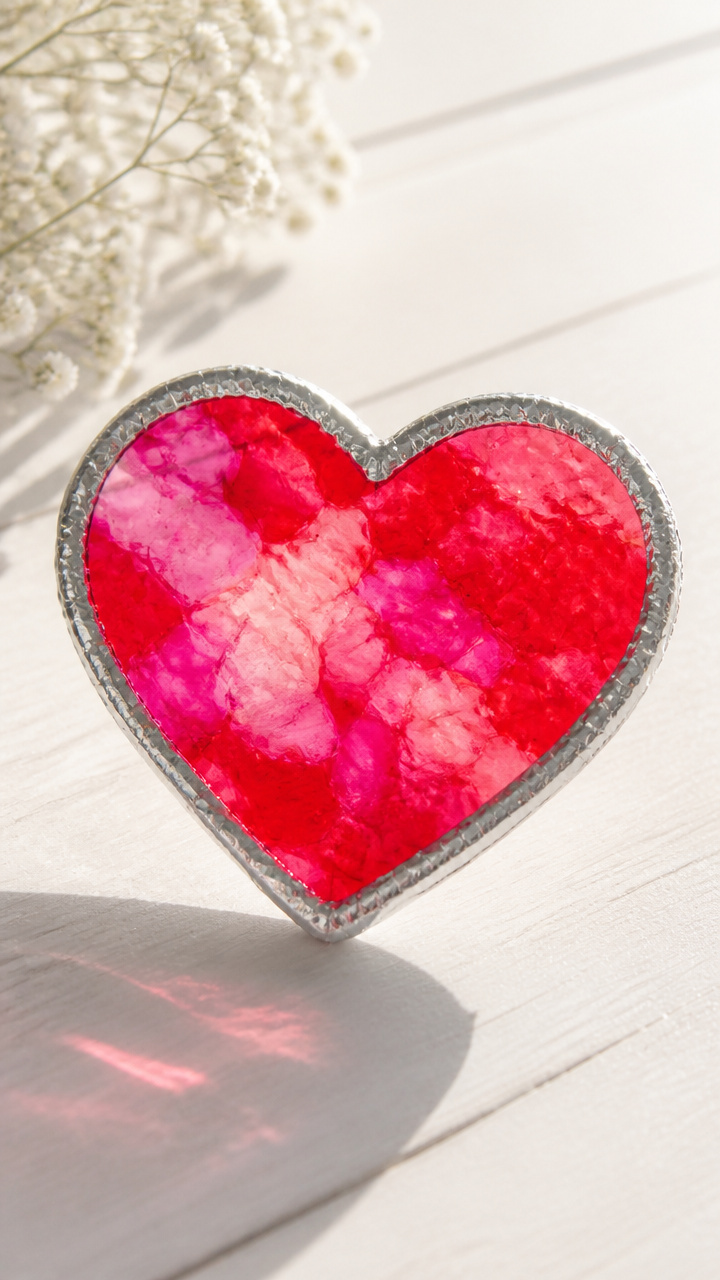
Broken crayon pieces melt inside a heart-shaped frame, creating a stained-glass effect when sunlight hits. Kids love watching the colors blend.
Materials Needed
- broken red and pink crayons (peeled, 20 pieces)
- aluminum foil
- heart-shaped cookie cutter (4 inch)
- baking sheet
- oven mitts
- oven
- knife (butter type)
How to Make It
- Line the baking sheet with aluminum foil and place the cookie cutter in the center.
- Fill the cutter with broken crayon pieces, packing them tightly to the top.
- Place the baking sheet in a cold oven, then set the temperature to 250°F.
- Bake for 12–15 minutes until crayons are fully melted and flat across the top.
- Use oven mitts to remove the tray, let cool for 30 minutes, then pop out the suncatcher and trim edges with the knife.


Grab your basket and head to the store with confidence. You’ve got everything you need to make something lovely without spending a fortune.