15 Simple Valentine’s Day Crafts for Beginners

Red paper hearts flutter on windowsills, hand-painted mugs steam with morning coffee, and tiny envelopes hide sweet notes between book pages. These small handmade gestures carry big meaning, especially when they come from you.
You don’t need years of crafting experience to make something beautiful. With everyday supplies and clear steps, you can create heartfelt gifts and decorations that celebrate love in a personal way.
1. Fingerprint Heart Magnets
Easy
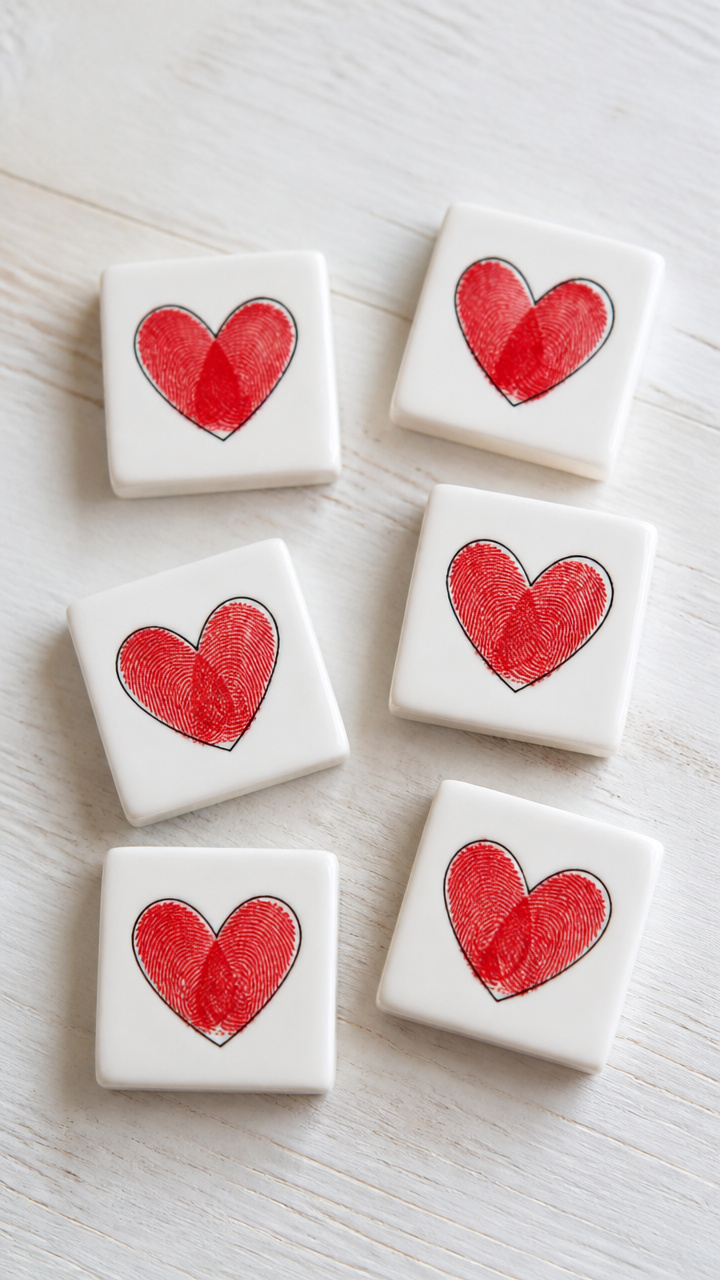
Tiny keepsakes made with your own touch stick cheerfully to fridges and lockers. Each one holds the warmth of your hand in a playful, lasting form.
Materials Needed
- White ceramic tile magnets (1 inch square), 6 pieces
- Red acrylic paint
- Fine black permanent marker
- Small paintbrush
- Paper plate
How to Make It
- Pour a dime-sized amount of red acrylic paint onto the paper plate.
- Press your clean fingertip into the paint and gently press it onto the center of each tile to make two overlapping heart-shaped prints.
- Let the paint dry completely for 20 minutes.
- Use the fine black marker to draw tiny smiling faces or names inside each fingerprint heart.
2. Tissue Paper Window Decor
Easy
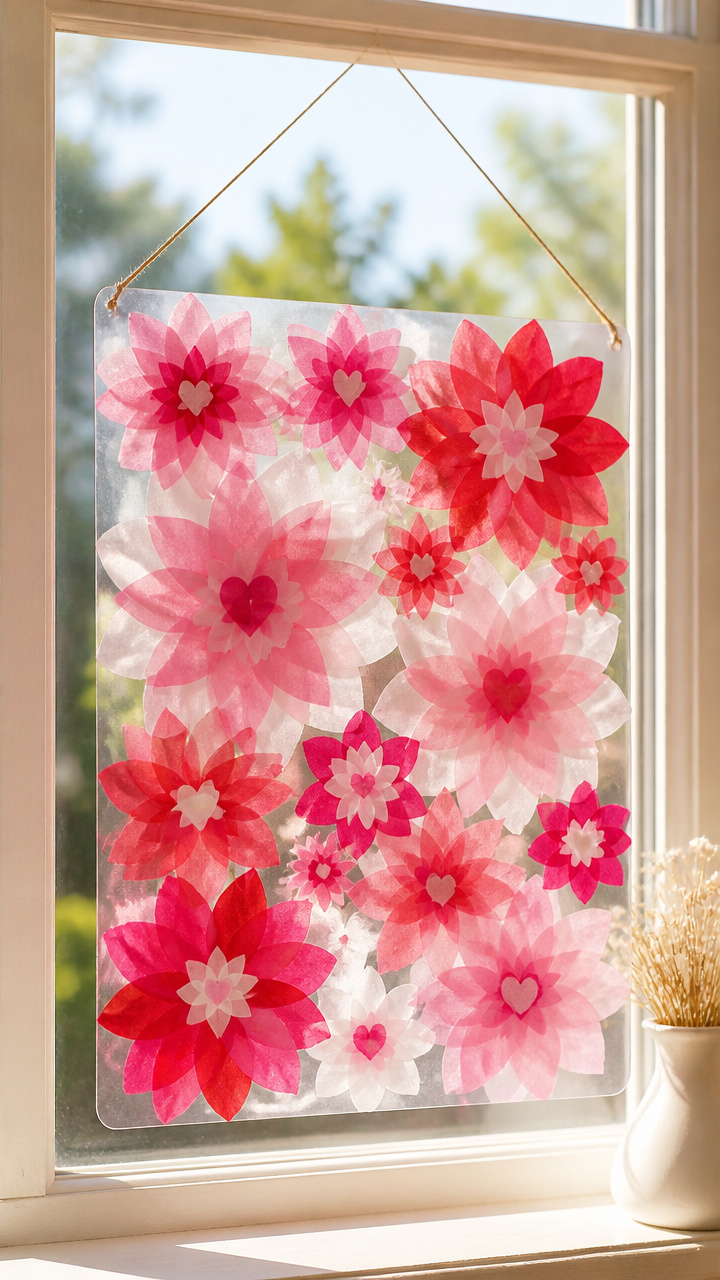
Sheer layers of color glow like stained glass when sunlight hits them. Hang these near any window for a soft burst of romantic light.
Materials Needed
- Pink, red, and white tissue paper sheets, 3 of each color
- Scotch tape
- Scissors
- Letter-sized clear contact paper, 1 sheet
- Pencil
How to Make It
- Cut the tissue paper into 2-inch squares using scissors.
- Peel the backing off the contact paper and lay it sticky side up on a flat surface.
- Arrange the tissue paper squares in overlapping layers to fill the contact paper, creating a mosaic effect.
- Place a second sheet of contact paper on top, sticky sides together, and smooth out air bubbles with your palm.
- Trim the edges with scissors and use tape to hang it on a sunny window.
3. Heart-Shaped Book Page Garland
Easy
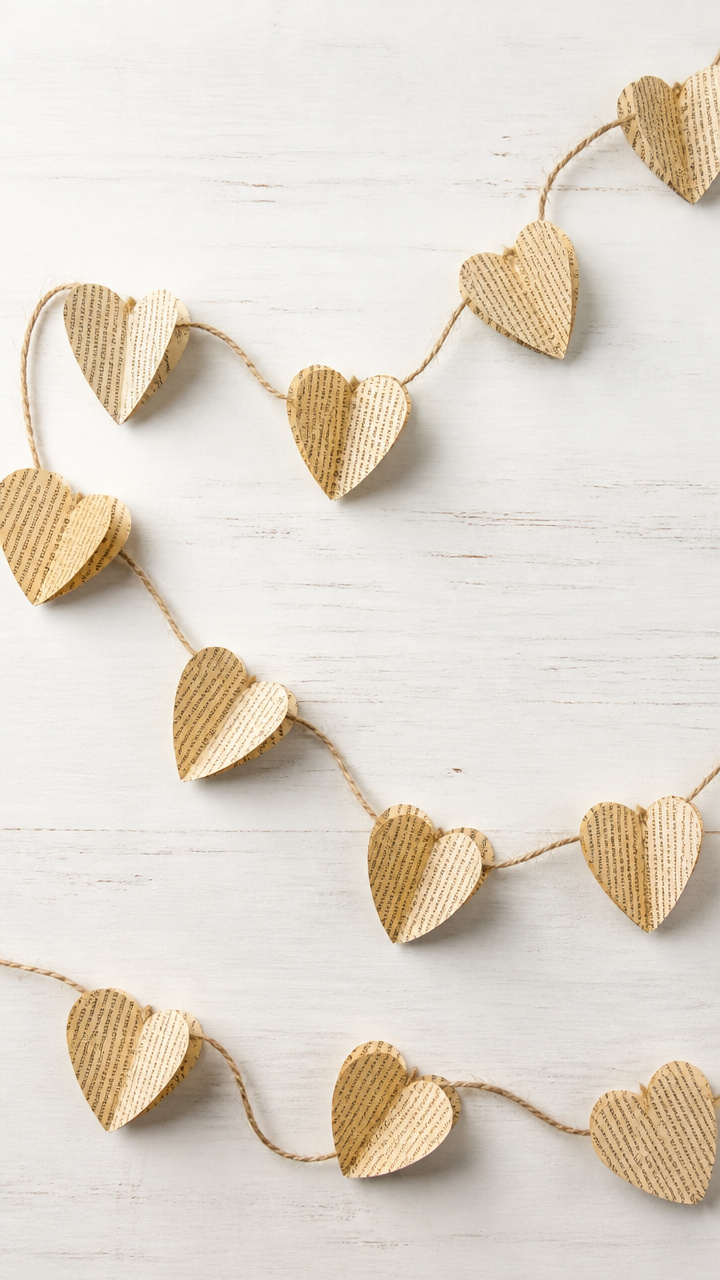
Pages from an old novel curl into delicate hearts strung across a shelf. This craft turns forgotten words into a sweet declaration.
Materials Needed
- Used paperback book, 1
- Craft glue
- Twine, 3 feet
- Heart-shaped paper punch, 2-inch size
- Clothespin
How to Make It
- Flip through the book and select 12 thin pages with no large images.
- Use the heart-shaped paper punch to cut out 12 hearts from the pages.
- Apply a dot of craft glue to the back of each heart and press it onto the twine, spacing them 3 inches apart.
- Let the glue dry for 15 minutes, then clip one end of the garland to a shelf or wall with the clothespin.
4. Painted Rock Love Stones
Easy
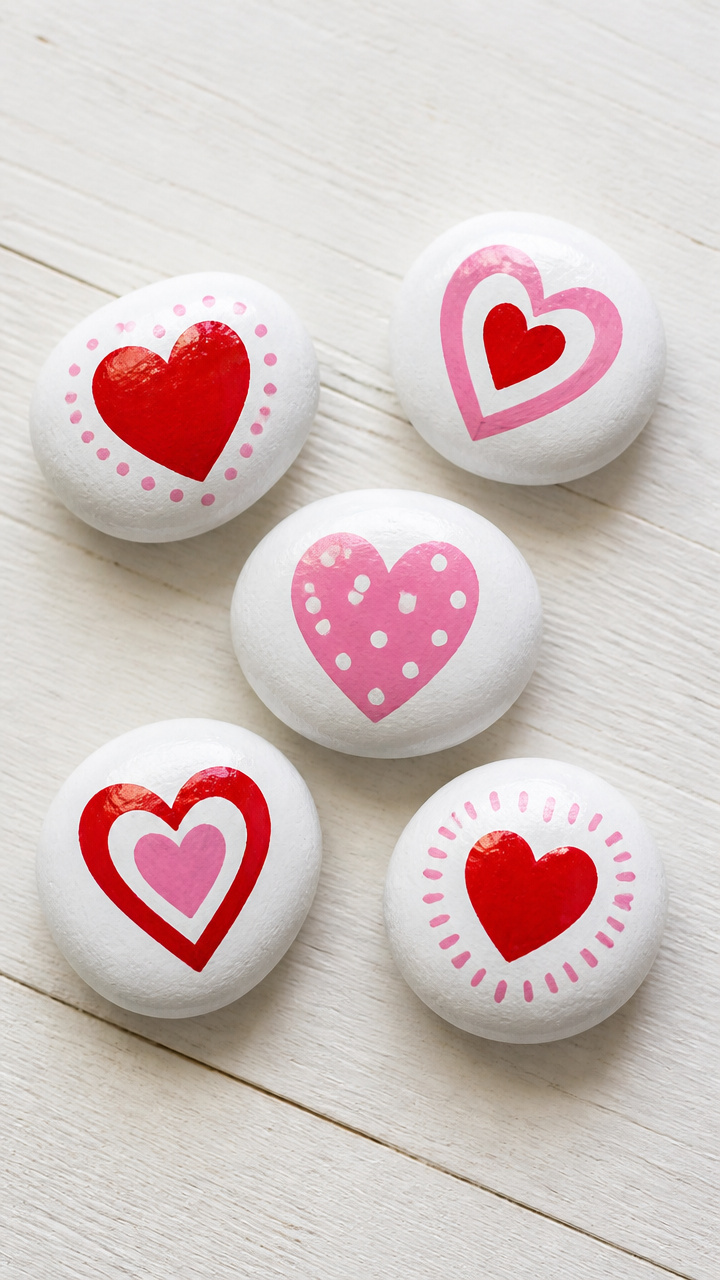
Smooth river rocks become pocket-sized tokens of affection. Tuck one into a lunchbox or coat pocket for a quiet surprise.
Materials Needed
- Flat river rocks, 5 pieces (about 1.5 inches wide)
- White acrylic paint
- Red and pink acrylic paint
- Fine-tipped paintbrush
- Clear sealant spray
How to Make It
- Paint a base coat of white acrylic paint on one flat side of each rock using the paintbrush, and let dry for 15 minutes.
- Use red and pink paint to write short words like 'Joy', 'Love', 'You', 'Me', 'Us' on each rock.
- Allow the paint to dry completely for 20 minutes.
- Spray the painted sides lightly with clear sealant in a well-ventilated area and let dry for 30 minutes.
5. Cinnamon Stick Bouquet
Easy
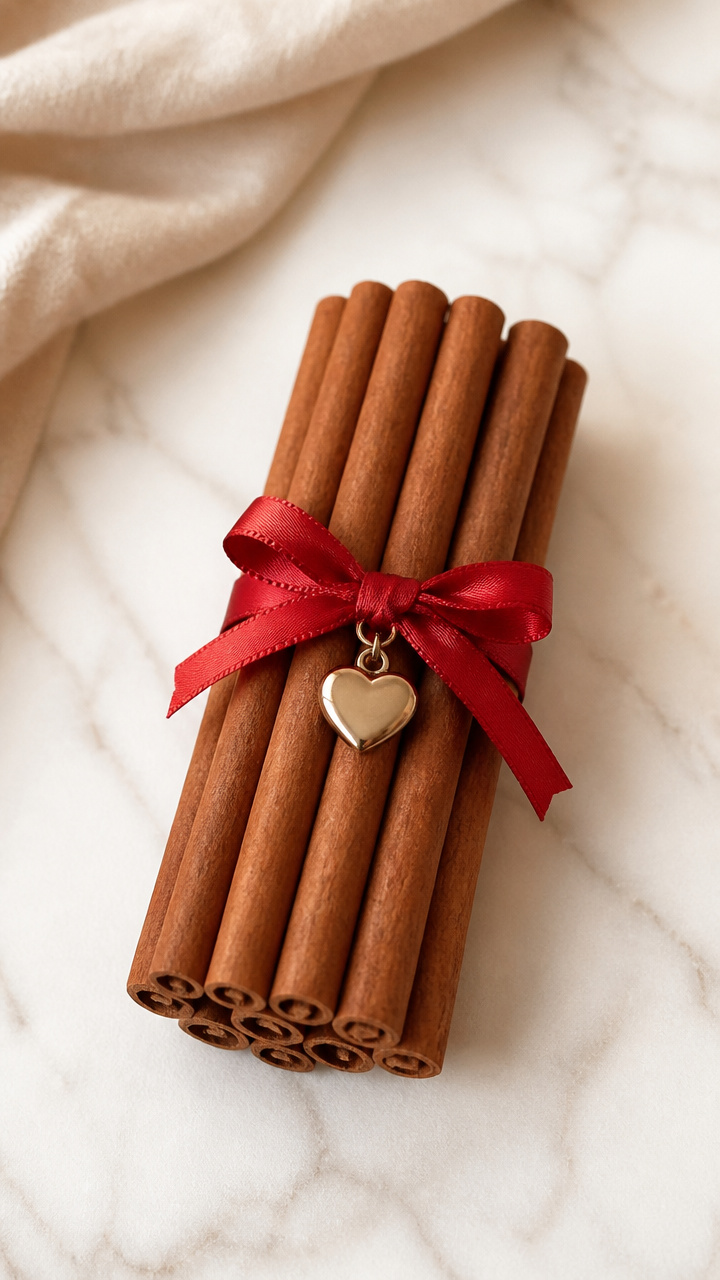
Spicy-sweet bundles wrapped in ribbon smell like warmth and care. These make charming hostess gifts or desk decor.
Materials Needed
- Cinnamon sticks, 9 pieces (6 inches long)
- Red satin ribbon, 1/4 inch wide, 2 yards
- Hot glue gun
- Hot glue sticks
- Small heart charm, 1
How to Make It
- Gather three cinnamon sticks together to form a small bundle and wrap the middle with hot glue to hold them in place.
- Repeat to make three identical bundles.
- Arrange the three bundles side by side and wrap red satin ribbon around the glued centers, tying a secure knot.
- Tie the heart charm to the ribbon bow using a short loop of extra ribbon.
6. Lace-Dipped Paper Hearts
Moderate
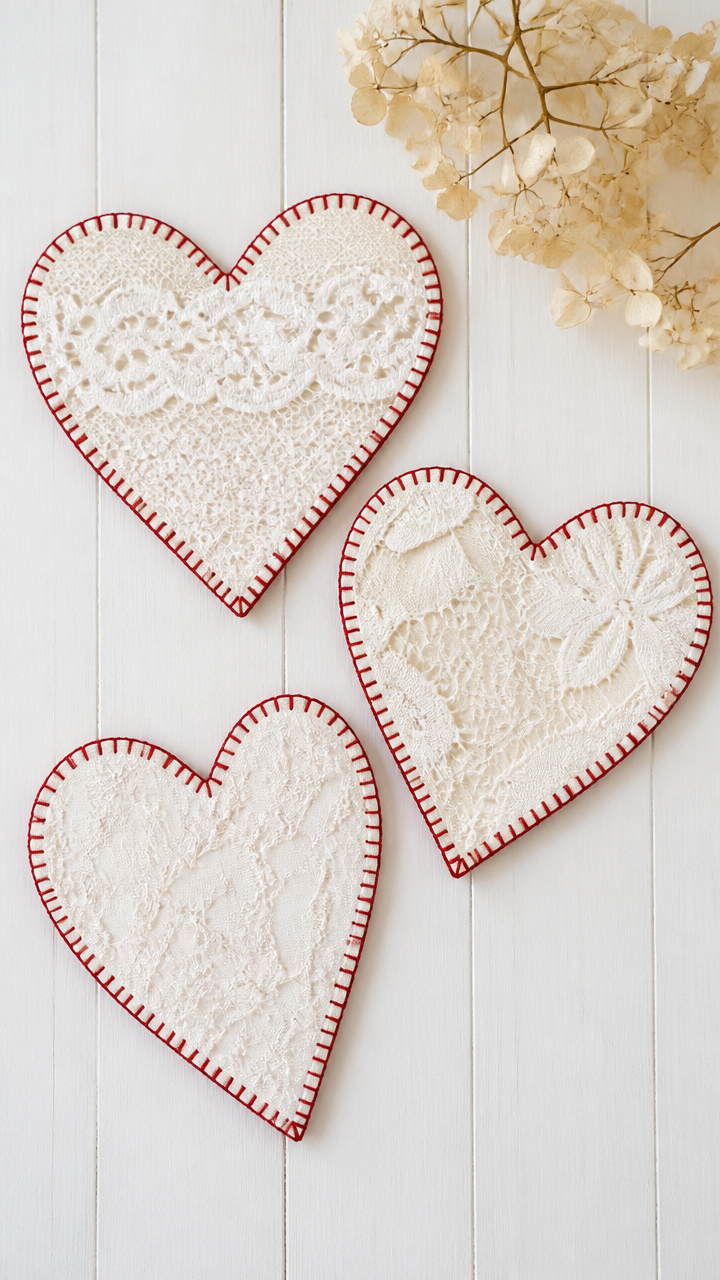
Delicate lace patterns transfer onto cardstock with simple glue. The result feels vintage and elegant, perfect for framing or gifting.
Materials Needed
- A4 white cardstock, 3 sheets
- Lace doily, 6 inches in diameter, 3 pieces
- Matte Mod Podge
- Foam brush, 1 inch wide
- Hole punch
- Red embroidery floss, 12 inches
How to Make It
- Cut each cardstock sheet into a 5-inch heart using scissors and a printed template.
- Brush a thin, even layer of Mod Podge over one side of a heart.
- Press a lace doily firmly onto the glued side and smooth out wrinkles with your fingertips.
- Let dry for 45 minutes, then carefully peel the lace away to reveal the imprint.
- Punch a hole at the top and thread red embroidery floss through to hang.
7. Button Heart Coasters
Moderate
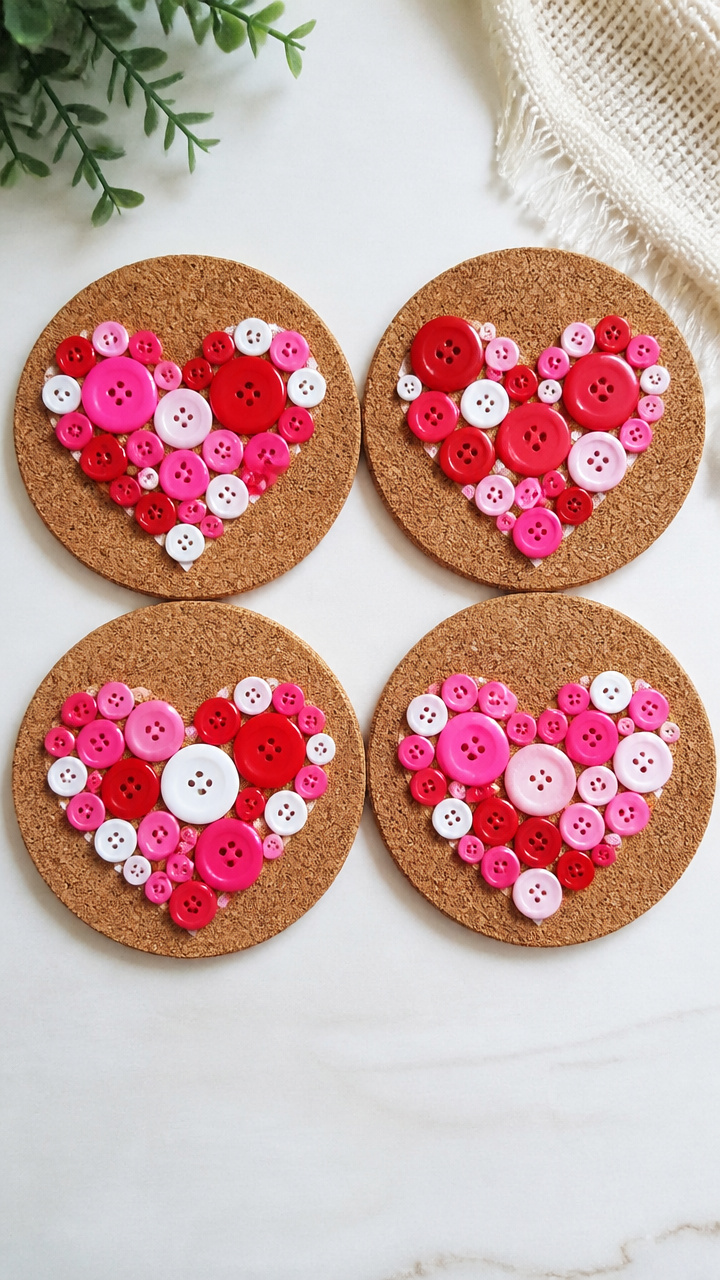
Colorful mismatched buttons form cheerful hearts on cork bases. These add whimsy to any coffee table and protect surfaces too.
Materials Needed
- Round cork trivets, 4 inches diameter, 4 pieces
- Assorted red, pink, and white buttons (various sizes), 36 total
- Strong craft glue
- Tweezers
- Pencil
How to Make It
- Draw a heart shape in the center of one cork trivet using a pencil, about 3 inches tall.
- Apply a small dot of craft glue to the back of each button using tweezers to place them edge-to-edge within the heart outline.
- Fill the entire heart with buttons, starting with larger ones in the center and smaller ones near the edges.
- Let the glue dry completely for 2 hours before repeating on the remaining three coasters.
8. Yarn-Wrapped Gift Tags
Easy
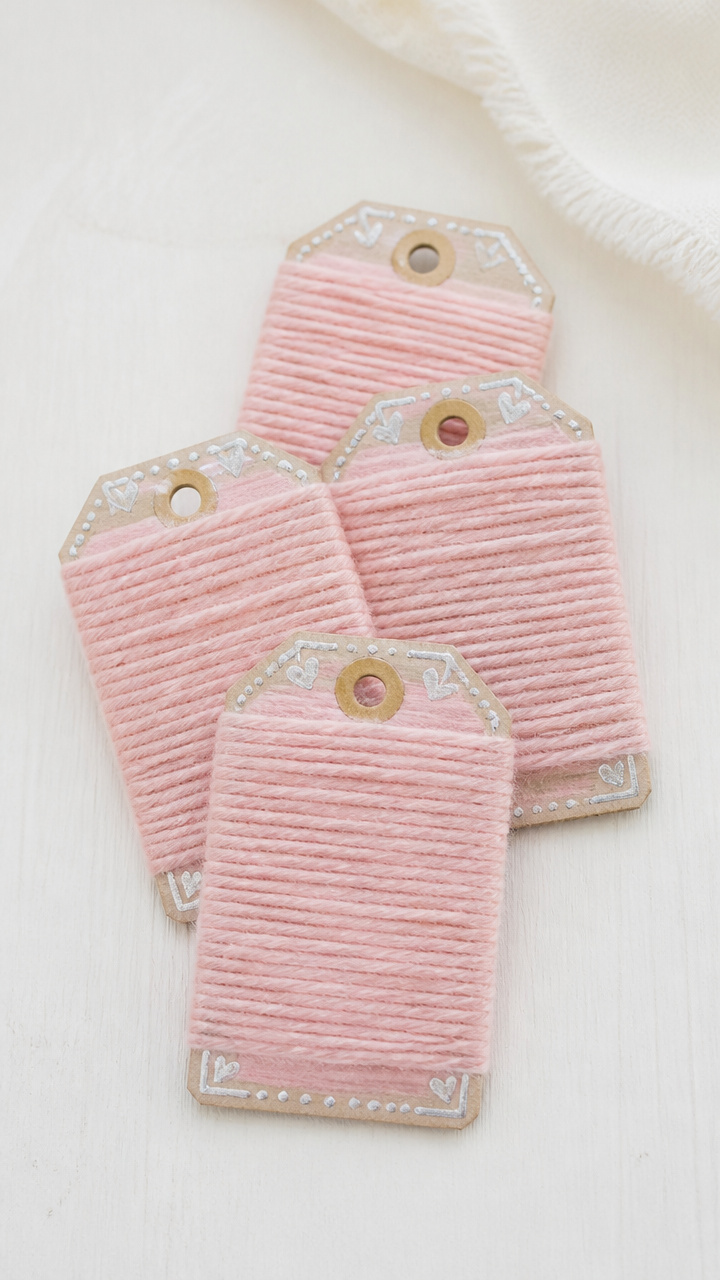
Soft pink yarn wraps tightly around cardboard tags for a cozy handmade look. Attach one to any present for instant charm.
Materials Needed
- Cardboard gift tags, 2×3 inches, 8 pieces
- Pink yarn, 20 yards
- Glue dot
- Scissors
- Silver gel pen
How to Make It
- Place a glue dot on the back of a tag and press the end of the yarn onto it to secure.
- Wrap the yarn tightly around the tag from top to bottom, covering the surface completely.
- Press another glue dot on the back and secure the end of the yarn.
- Use the silver gel pen to write a name or message like 'To My Love' on the front.
9. Salt Dough Heart Ornaments
Moderate
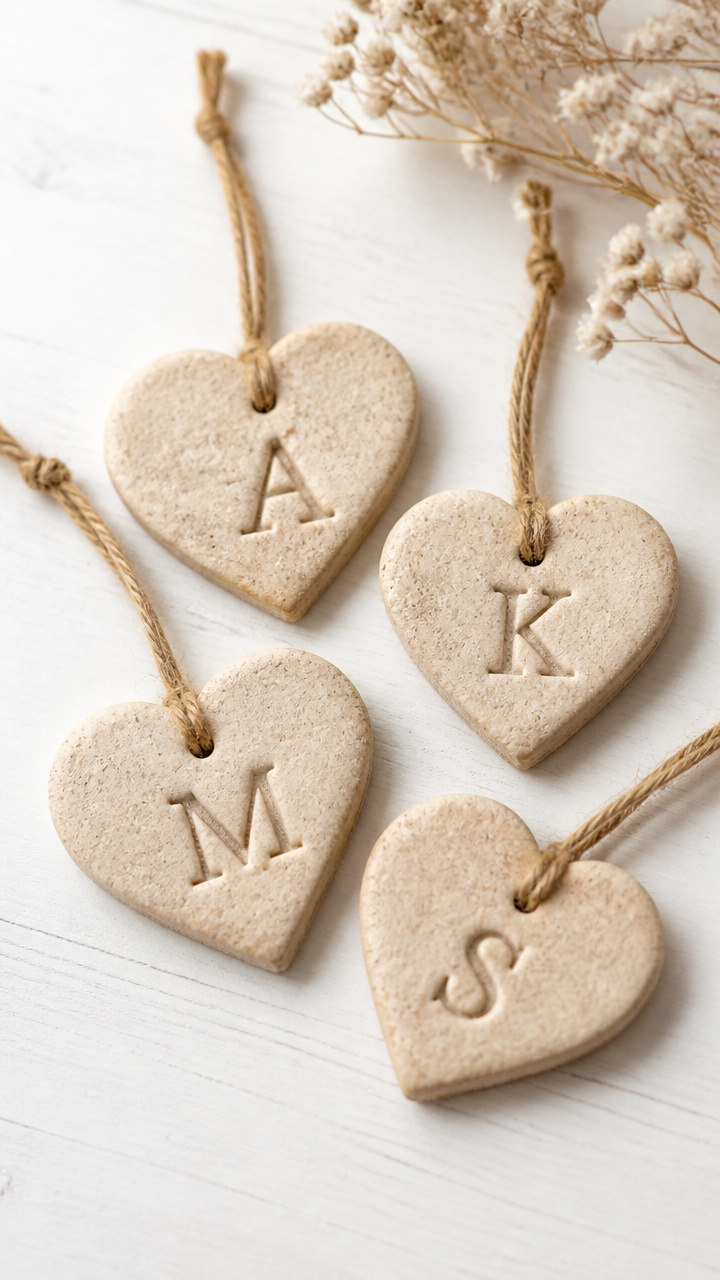
Simple dough shaped by hand bakes into rustic keepsakes. Personalize each with initials and hang them on a tree or shelf.
Materials Needed
- All-purpose flour, 1 cup
- Table salt, 1/2 cup
- Water, 1/2 cup
- Mixing bowl
- Wooden spoon
- Heart-shaped cookie cutter, 2 inches
- Bamboo skewer
- Oven
- Red ribbon, 8 inches per ornament
How to Make It
- Mix flour, salt, and water in a bowl with the wooden spoon until a smooth dough forms.
- Roll the dough to 1/4 inch thickness on a floured surface and cut out 6 hearts using the cookie cutter.
- Use the bamboo skewer to poke a hole near the top edge of each heart.
- Bake the hearts on a parchment-lined tray at 250°F for 2 hours until hard and dry.
- Thread red ribbon through each hole and tie a loop for hanging.
10. Pressed Flower Bookmark
Moderate
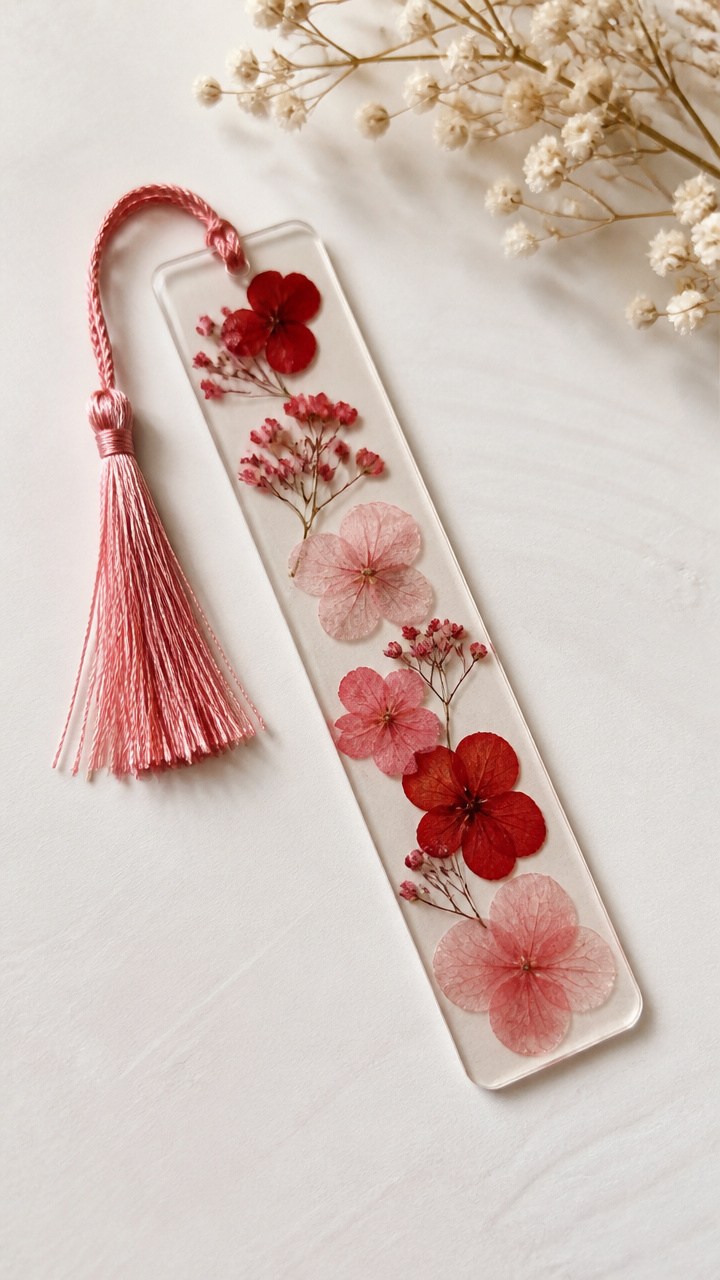
Tiny dried blooms float between clear sheets on a slim strip of card. This delicate piece marks your place with quiet beauty.
Materials Needed
- A4 clear laminating pouch, 1 piece
- Pressed red and pink flowers (like pansies or violets), 5 pieces
- Ruler
- Craft knife
- Laminator
- Hole punch
- Satin ribbon, 10 inches
How to Make It
- Cut the laminating pouch to a bookmark size of 2 inches by 6 inches using the ruler and craft knife.
- Arrange the pressed flowers inside the pouch, leaving a quarter-inch border around the edges.
- Run the pouch through the laminator according to machine instructions.
- Once cooled, punch a hole at the top and thread satin ribbon through to finish.
11. Crayon Heart Suncatcher
Moderate
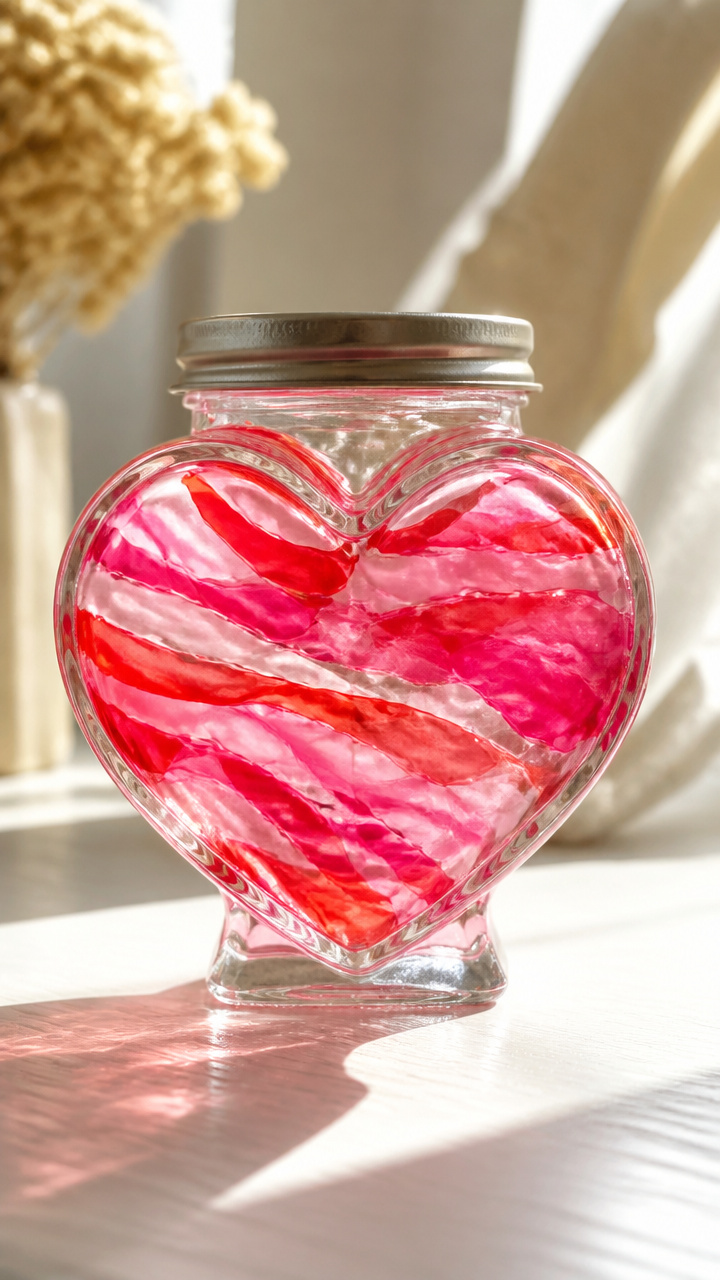
Melted crayon shavings bloom into colorful swirls behind glass. Sunlight turns this into a radiant wall piece.
Materials Needed
- Clean baby food jars, 3 ounces, 1 piece
- Red, pink, and white crayons, 6 total
- Oven-safe glass pie dish, 8 inches
- Vegetable oil, 1 teaspoon
- Paring knife
- Oven
- Paper towel
How to Make It
- Peel the paper off the crayons and use the paring knife to shave thin curls into a pile.
- Lightly rub vegetable oil on the inside of the jar lid with a paper towel.
- Press the colored shavings into the oiled lid, filling it completely.
- Place the lid upside down on the pie dish and bake at 275°F for 10 minutes until melted.
- Let cool for 1 hour, then pop out the heart-shaped suncatcher and hang with fishing line.
12. Straw-Printed Napkins
Easy
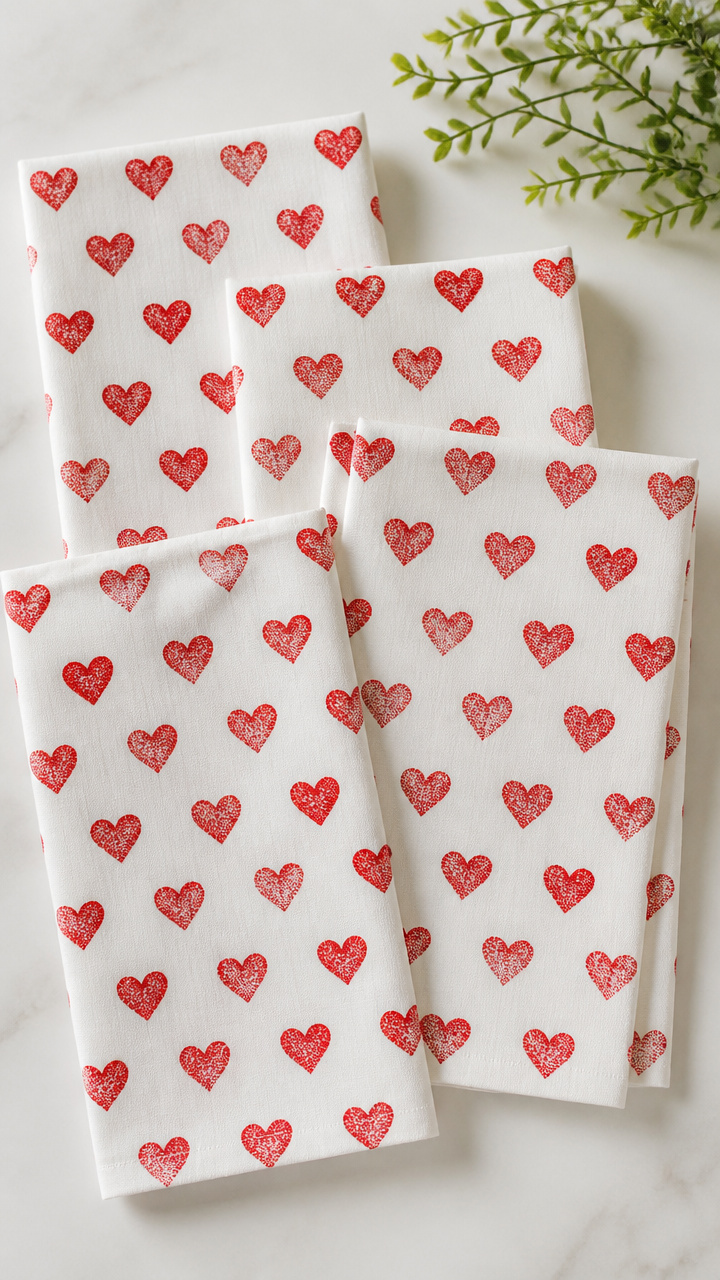
Drinking straws stamp repeating heart patterns onto plain fabric. Customize a set for a dinner table full of love.
Materials Needed
- Plain cotton napkins, 4 pieces
- Red fabric paint
- Plastic drinking straws, 4 pieces
- Scissors
- Paper plate
- Painter’s tape
How to Make It
- Cut each straw in half with scissors to make 8 short tubes.
- Pour a tablespoon of red fabric paint onto the paper plate.
- Dip one cut end of a straw into the paint and stamp it diagonally on the napkin to form a heart shape.
- Repeat to create a pattern, using painter’s tape to hold the napkin flat if needed.
- Let the paint dry for 2 hours, then heat-set with an iron on cotton setting for 3 minutes.
13. Mini Clothespin Wreath
Moderate
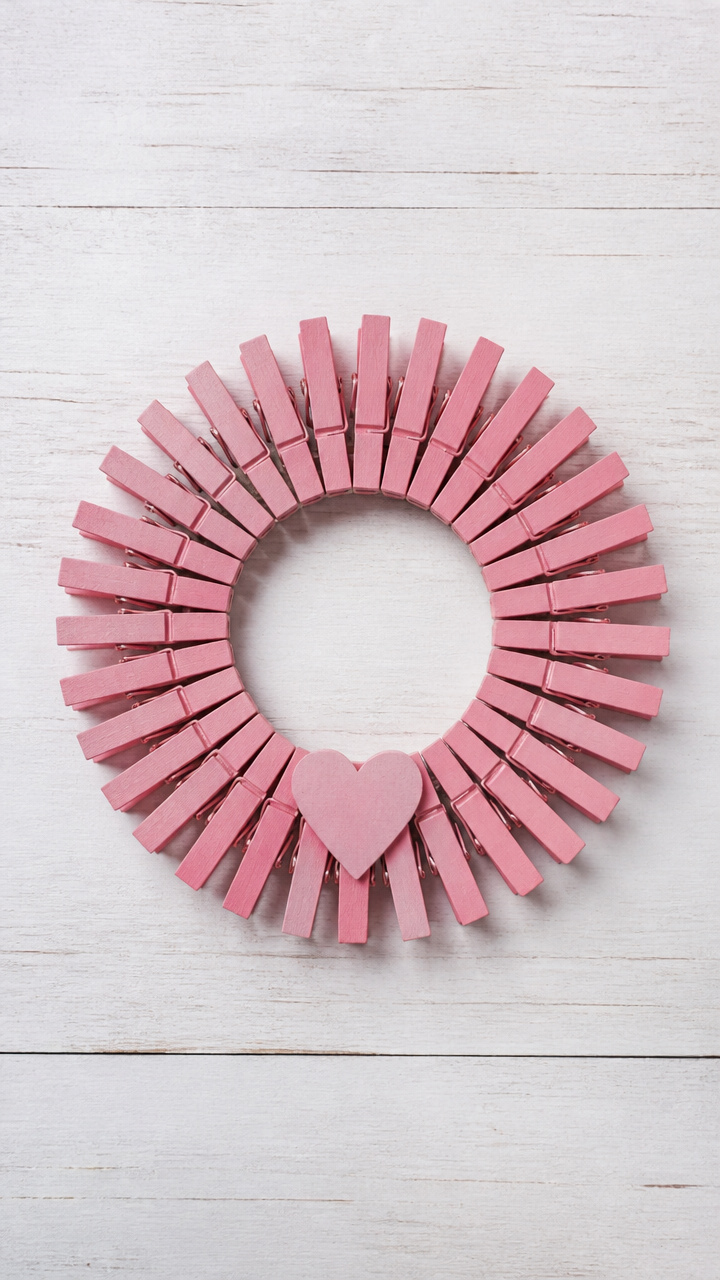
Tiny wooden clothespins bend into a rosy circle that hugs a photo. Display it on a mirror or nightstand.
Materials Needed
- Mini wooden clothespins, 18 pieces
- Hot glue gun
- Hot glue sticks
- Round foam wreath base, 4 inches
- Red spray paint
- Small clothespin heart decoration, 1
How to Make It
- Spray the foam wreath base with red paint in a ventilated area and let dry for 1 hour.
- Open each clothespin and use hot glue to attach it vertically around the foam ring, tips facing outward.
- Overlap each clothespin slightly so they form a tight, continuous bloom.
- Glue the heart decoration to the bottom of the wreath once all clothespins are in place.
14. Washi Tape Candles
Easy
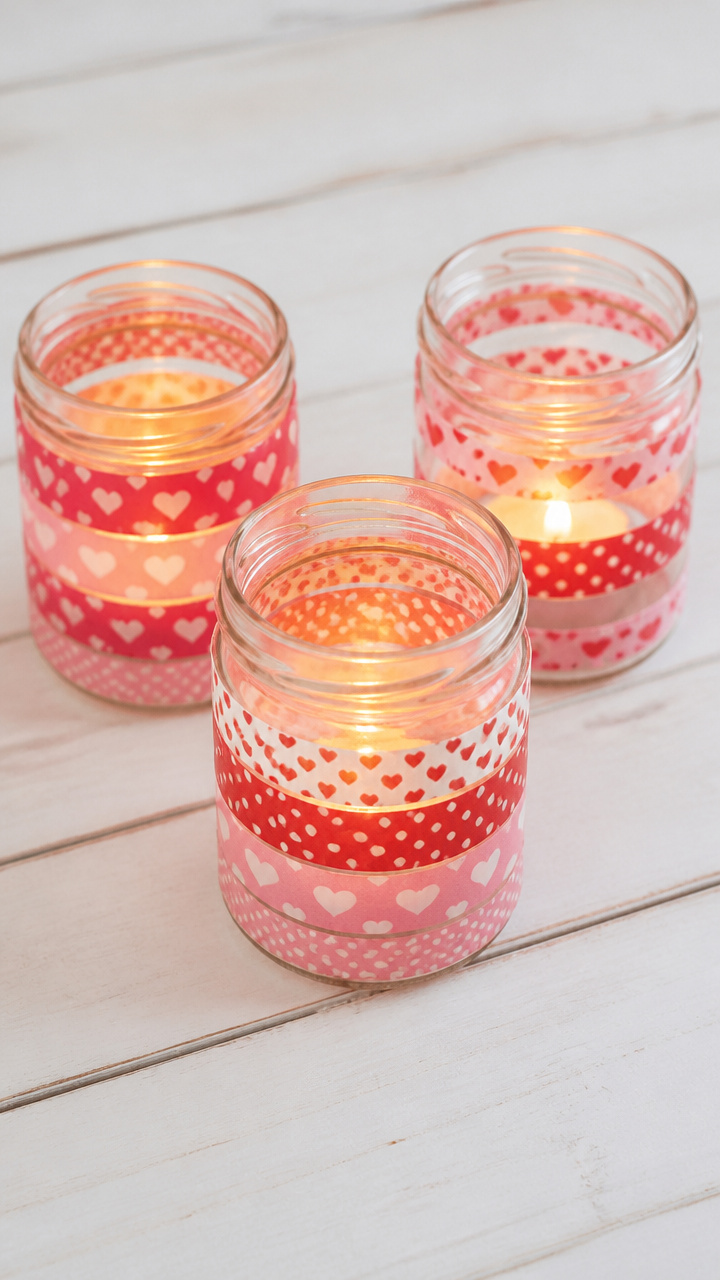
Sticky patterned tape wraps smoothly around glass jars to dress up tea lights. Light one for a cozy evening moment.
Materials Needed
- Glass mason jars, 4 oz, 3 pieces
- Red and pink washi tape (with hearts or dots), 3 rolls
- Scissors
- Tealight candles, 3
How to Make It
- Cut strips of washi tape long enough to wrap around the lower third of a jar.
- Starting at the bottom, press the tape smoothly around the jar, slightly overlapping each new strip.
- Continue until the band is 2 inches tall, then trim the final edge with scissors.
- Place a tealight candle inside each decorated jar.
15. Paper Chain Love Banner
Easy

Interlocking strips of colored paper drape across a wall with a sweet message. Spell out 'LOVE' in bold, cheerful letters.
Materials Needed
- Red, pink, and white construction paper, 8.5×11 inches, 2 sheets each
- Scissors
- Glue stick
- Twine, 4 feet
- Black marker
How to Make It
- Cut each sheet into 1-inch wide strips, 11 inches long, making 66 strips total.
- Write one letter of 'LOVE' in bold on four separate strips using the black marker.
- Glue the ends of a strip together to form a loop, then thread a second loop through the first and glue it shut.
- Repeat to link all strips into a chain, placing the lettered loops evenly throughout.
- Tie each end of the twine to the first and last loop and hang the banner across a wall.
Each of these crafts carries your thoughtfulness in every cut, brushstroke, and glued seam. Pick one that speaks to you and start creating something lovely today.