15 New Year Crafts That Double as Decor

Glitter catches the light just right when the clock strikes midnight, and handmade touches make the celebration feel truly yours. There’s something special about crafting decorations that carry both meaning and sparkle into the fresh start of a new year.
These projects blend festive cheer with practical charm. Each one becomes part of your celebration and stays on display as a joyful reminder of new beginnings.
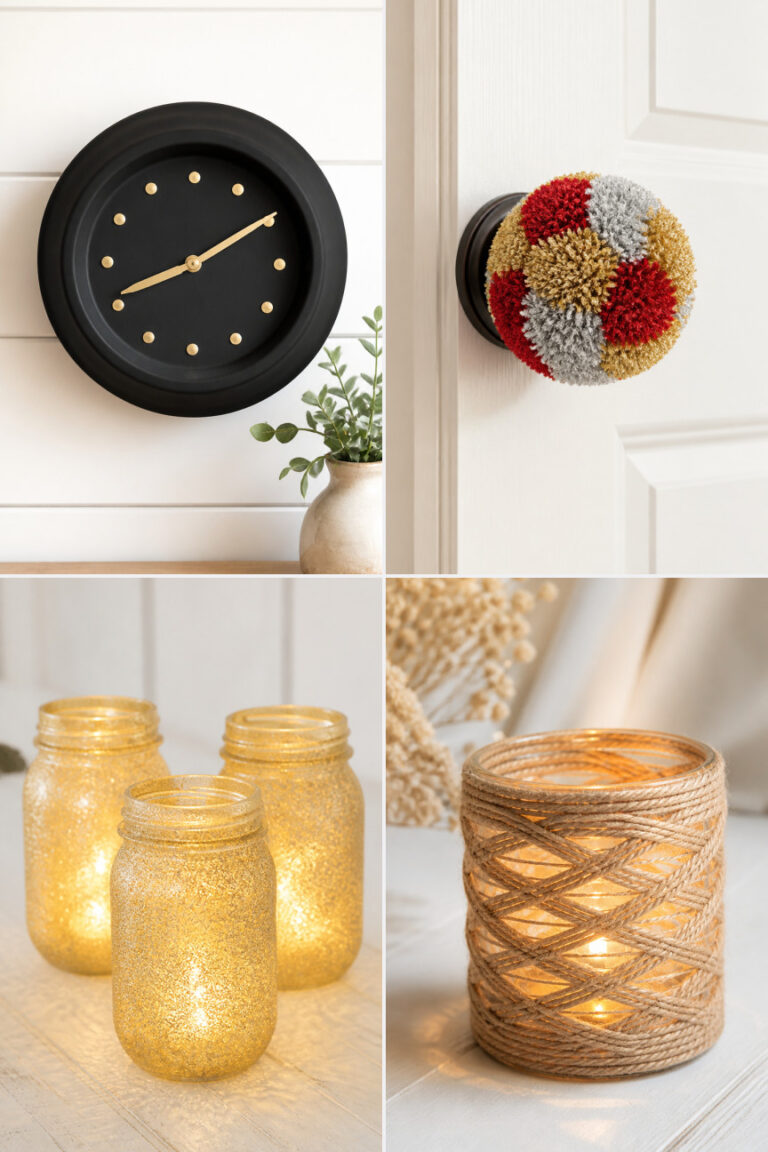
1. Glittered Mason Jar Luminaries
Easy
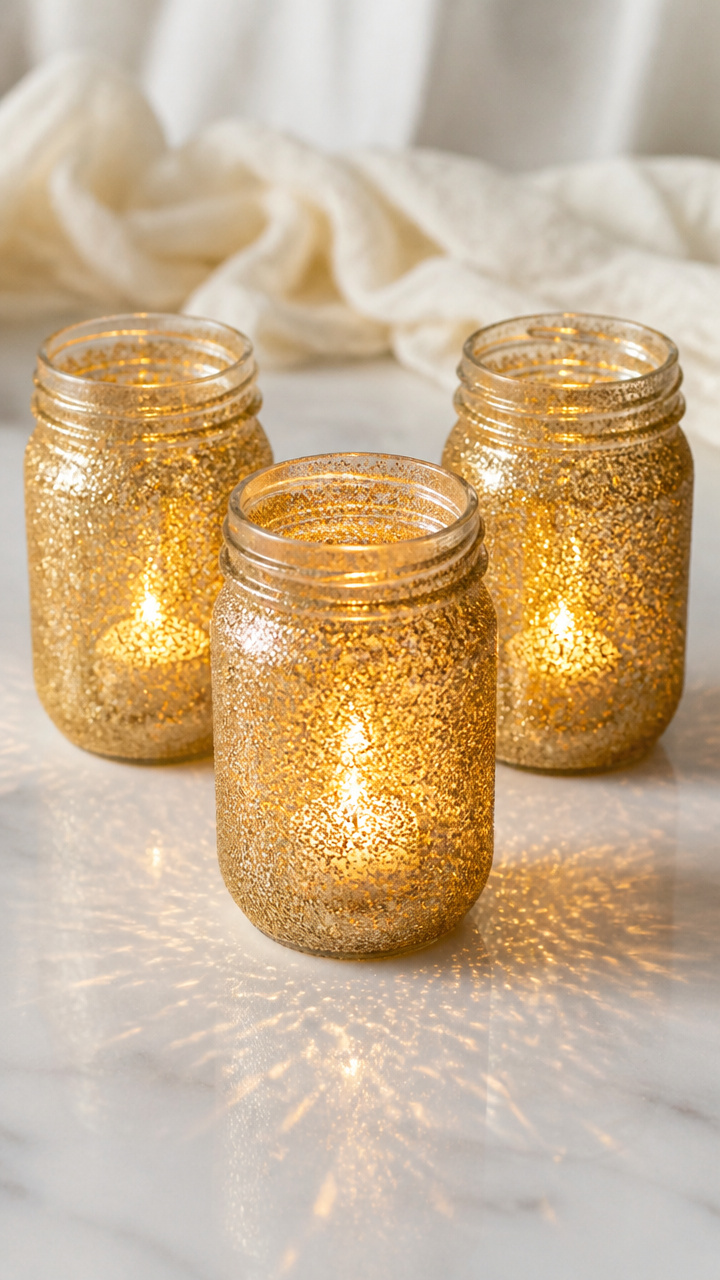
Soft golden light glows through shimmering glass, casting festive reflections across your tabletop. These luminaries combine rustic charm with celebratory sparkle and take minutes to make.
Materials Needed
- 3 clean 16 oz mason jars
- gold glitter glue (2 oz)
- white glue (4 oz)
- fine gold glitter (1/4 cup)
- tea light LED candles (3)
- paintbrush (1/2 inch flat)
How to Make It
- Pour white glue into a small bowl and mix in the fine gold glitter until fully combined.
- Use the paintbrush to coat the outside of each mason jar with the glitter mixture, covering evenly.
- Let the jars dry flat for 2 hours, then turn them over and repeat on the other side.
- Once fully dry, place one LED tea light inside each jar and turn them on for a warm glow.


2. Felt Number Wall Hangings
Easy
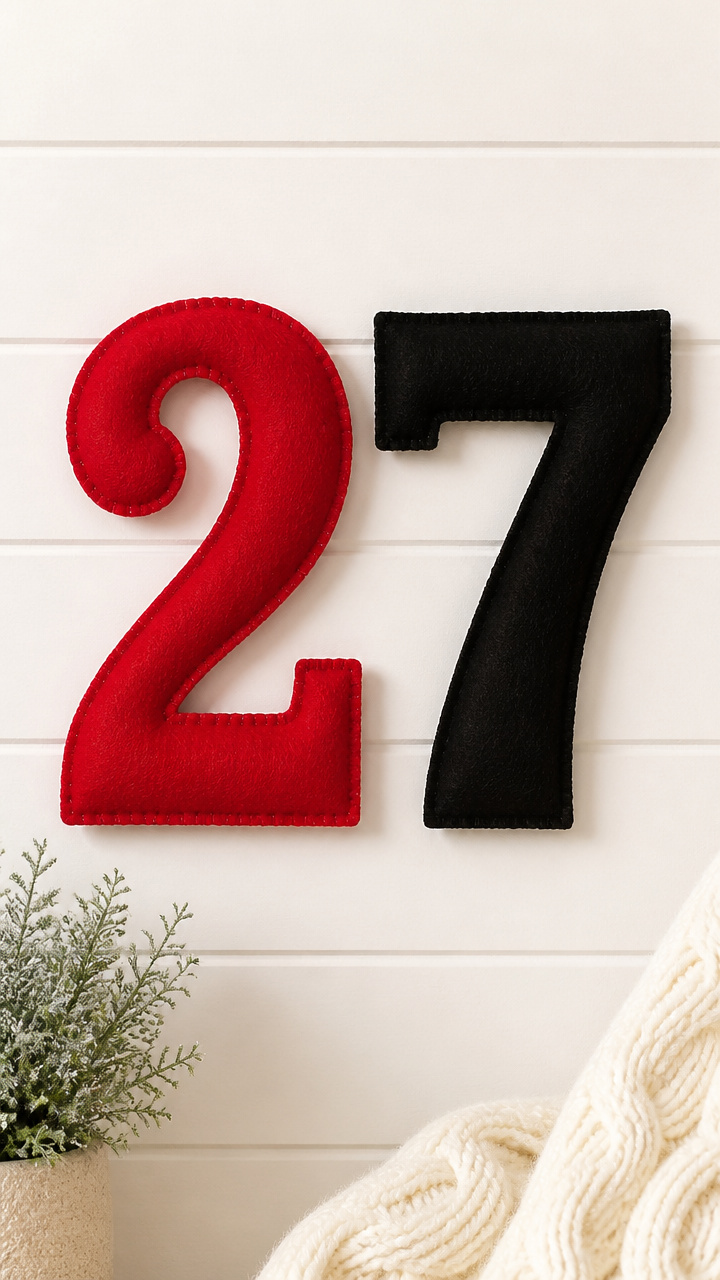
Bold numerals in soft felt stand proudly on your wall, marking the new year with cozy texture. These are lightweight, safe for rental spaces, and easy to customize.
Materials Needed
- 2 sheets red wool-blend felt (9×12 inches)
- 1 sheet black wool-blend felt (9×12 inches)
- fabric scissors
- fabric glue (2 oz)
- pencil
- ruler
- wooden dowel (1/4 inch diameter, 12 inches long)
- twine (24 inches)
How to Make It
- Use the pencil and ruler to draw the two digits of the current year onto the red felt, making each number 6 inches tall.
- Cut out the numbers carefully with fabric scissors, then cut thin black rectangles for shadow borders.
- Glue the black shadow pieces slightly offset behind each red number and let dry for 30 minutes.
- Glue the top of each number to the wooden dowel, spacing them evenly, and tie twine to each end for hanging.


3. Painted Wine Bottle Votives
Moderate

Empty wine bottles become elegant candle holders with a sleek coat of metallic paint. The smooth finish catches candlelight and adds sophistication to any mantel.
Materials Needed
- 3 empty wine bottles, cleaned and labels removed
- silver spray paint (1 can, matte finish)
- painter's tape (1 roll)
- paper plate
- rubbing alcohol (2 oz)
- cotton ball
- votive tea light candles (3)
How to Make It
- Wipe each bottle with a cotton ball dipped in rubbing alcohol to remove oils and let dry completely.
- Place the bottles upside down on a paper plate and spray a light, even coat of silver paint over the surface.
- Let dry for 15 minutes, then rotate and apply a second coat. Let cure for 24 hours.
- Place one votive candle inside each bottle and light for a reflective glow.


4. Paper Fan Countdown Streamers
Moderate
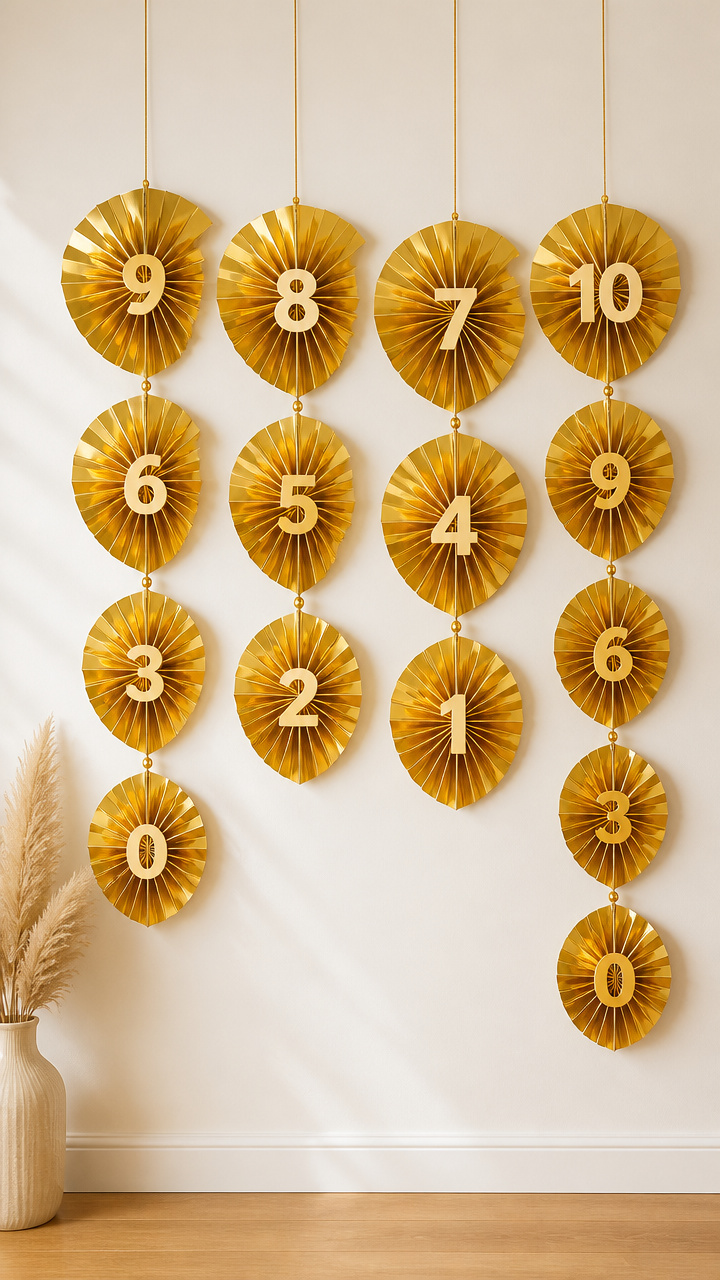
A cascade of folded paper fans unfurls from the ceiling, each marked with a number counting down to zero. This dynamic decoration builds excitement as the night progresses.
Materials Needed
- 10 sheets A4 metallic gold cardstock
- ruler
- bone folder
- craft knife
- cutting mat
- double-sided tape (small roll)
- fishing line (3 yards)
- paper clips (10)
How to Make It
- Fold each sheet of cardstock in half lengthwise, then use the bone folder to crease sharply.
- Accordion fold each sheet into 1 inch panels, using the ruler and bone folder for precision.
- Unfold each sheet slightly and tape the two short ends together to form a fan.
- Write numbers 10 to 1 on the front of each fan with a fine pen, attach a paper clip to the top, and hang from fishing line in descending order.


5. Pom-Pom Year Banner
Easy

A fluffy garland of colorful pom-poms spells out the new year in cheerful texture. This soft decoration is perfect for kids' spaces or playful gatherings.
Materials Needed
- 12 multicolor yarn pom-poms (1.5 inch diameter)
- embroidery floss (6 yards, gold)
- tapestry needle (size 18)
- scissors
- number stencil (4 inch height)
How to Make It
- Lay out the pom-poms and arrange them into the shape of the current year using the stencil as a guide.
- Thread the tapestry needle with gold embroidery floss and tie a knot at the end.
- Sew through the center of each pom-pom in number order, leaving 6 inches of floss at each end for hanging.
- Trim excess floss and hang the banner with small nails or adhesive hooks.


6. Marbled Clay Ornament Set
Advanced
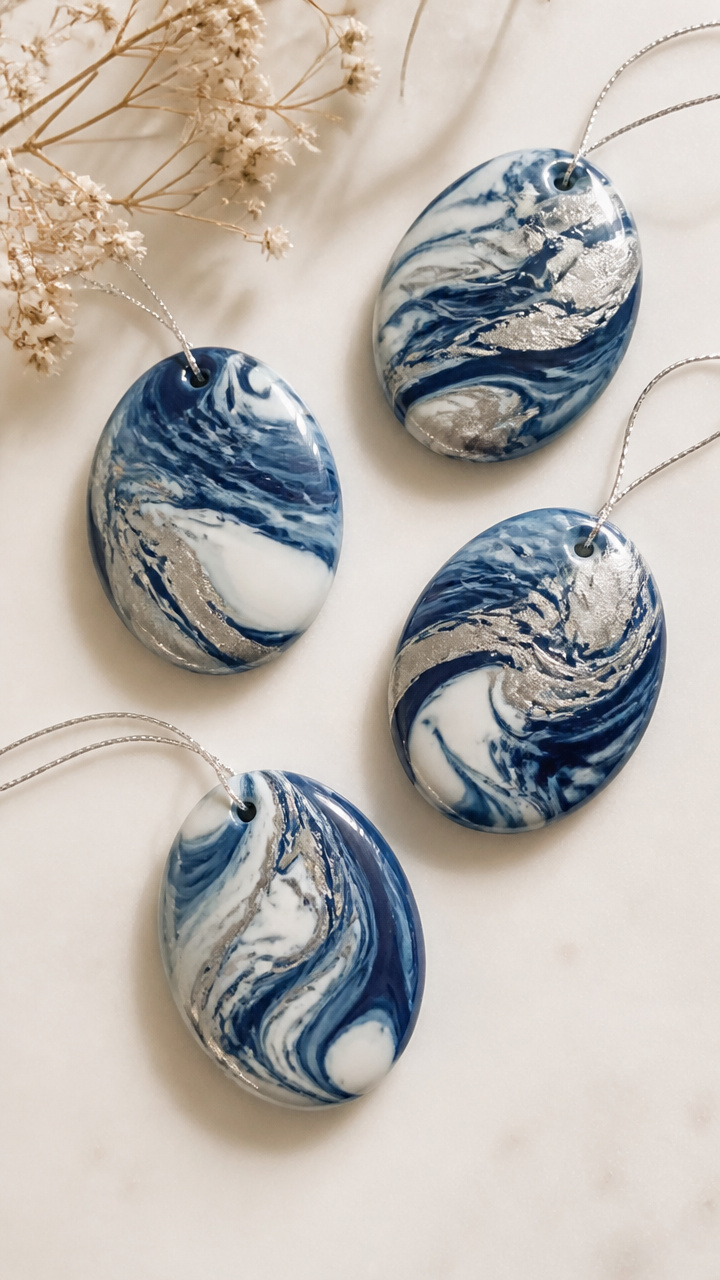
Smooth polymer clay ornaments swirl with deep blue and silver veins, resembling midnight skies. These durable keepsakes can be reused every year.
Materials Needed
- 1 block white polymer clay (2 oz)
- 1 block navy blue polymer clay (2 oz)
- silver mica powder (1/2 tsp)
- clay roller
- craft knife
- ornament hole punch
- baking sheet
- parchment paper
- clear glaze (1 oz)
How to Make It
- Condition both clay blocks by hand until soft, then layer small pieces of each color together.
- Roll the stack through the clay roller multiple times, folding and rerolling to create a marbled effect.
- Roll the marbled clay to 1/8 inch thickness and cut into 2 inch circles using the craft knife.
- Punch a hole at the top of each circle, place on a parchment-lined baking sheet, and bake at 275°F for 15 minutes.
- Let cool completely, then brush with clear glaze and let dry for 2 hours.


7. Twine-Wrapped Letter Centerpiece
Moderate
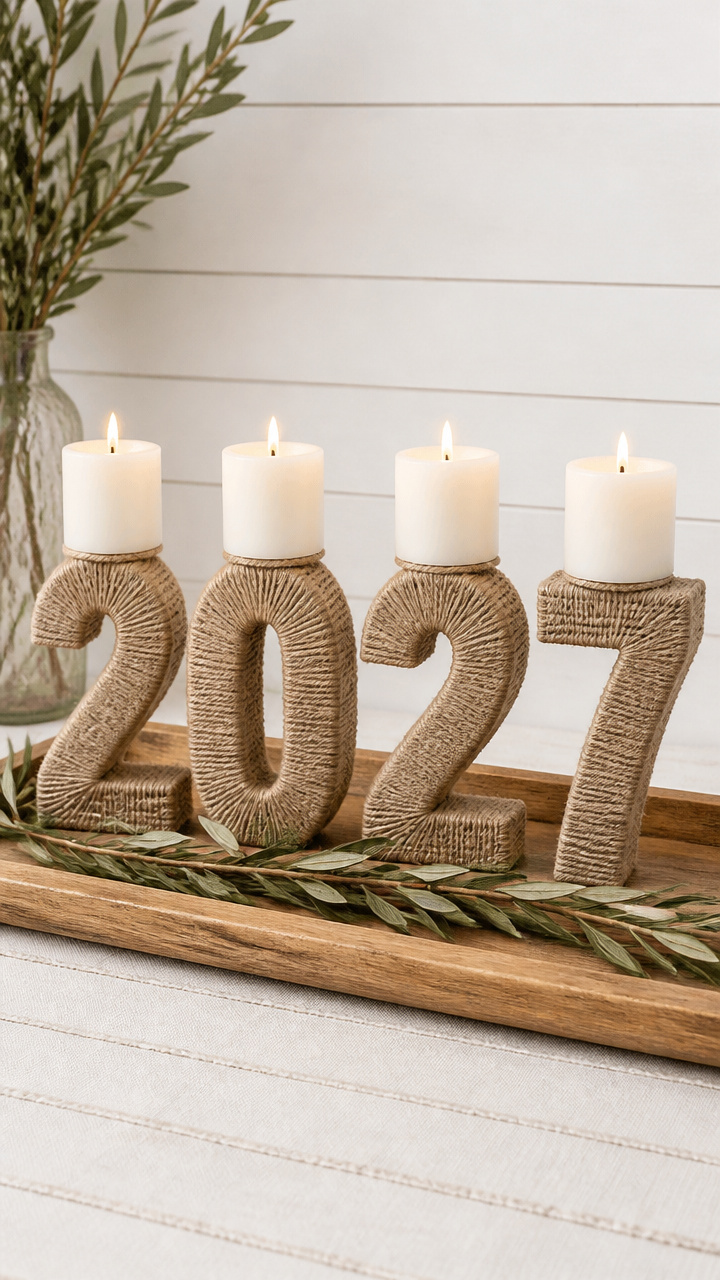
Tall wooden letters spelling the new year sit wrapped in natural jute and hold flickering candles. This centerpiece grounds your table with earthy warmth.
Materials Needed
- 4 wooden letters (6 inch tall, unfinished pine, spelling the current year)
- jute twine (50 yards)
- hot glue gun
- glue sticks (3)
- 4 pillar candles (3 inch tall, white)
- sandpaper (1 sheet, 120 grit)
How to Make It
- Lightly sand each wooden letter with sandpaper to smooth rough edges.
- Apply a small dot of hot glue to the back of the bottom corner of one letter and press the end of the twine into it.
- Wrap the twine tightly around the letter, adding a dot of glue every inch to secure, and continue until fully covered.
- Repeat for all letters, then arrange them in order and place one candle on top of each letter.


8. Confetti-Filled Glass Orbs
Easy
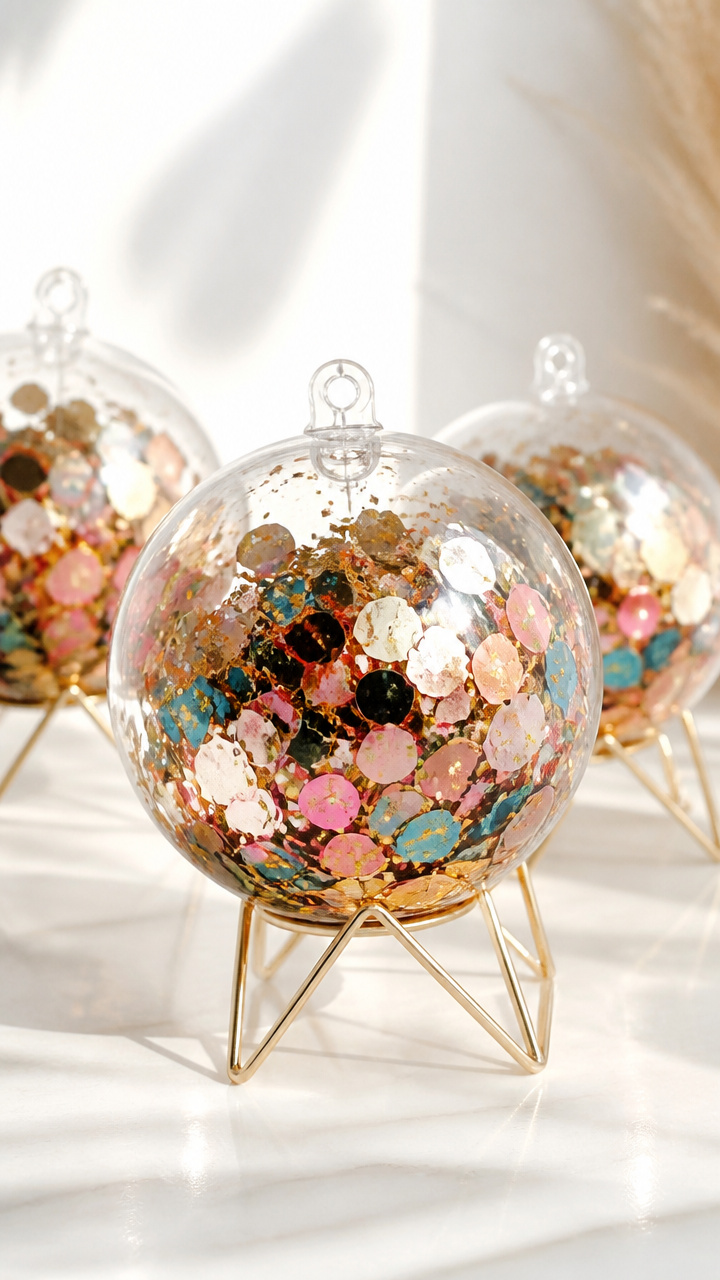
Clear plastic ornaments burst with colorful confetti that dances when touched. These kinetic decorations bring motion and joy to your tree or centerpiece.
Materials Needed
- 6 clear plastic ornament halves (3 inch diameter)
- assorted metallic confetti (3 tbsp)
- glitter glue pen (gold)
- small funnel
- tweezers
- ornament stand (6)
How to Make It
- Use tweezers to place a pinch of confetti into the small funnel, then pour into one half of each ornament.
- Fill each half about one-third full with confetti, using tweezers to adjust the mix of colors and shapes.
- Squeeze a thin line of glitter glue around the inner rim of each half and press the two halves together.
- Let dry for 30 minutes, then place each finished orb in an ornament stand for display.


9. Calligraphy Countdown Clock
Moderate
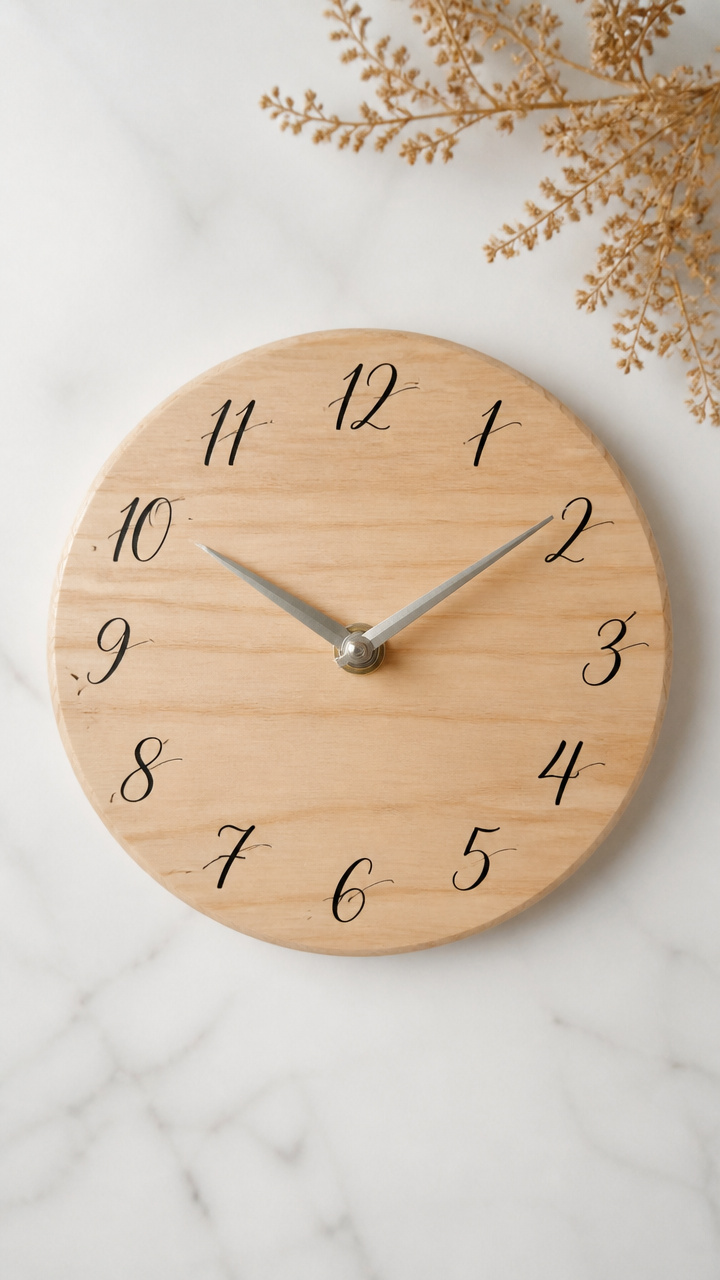
A blank clock face becomes a custom countdown with hand-lettered hour markers. This functional piece keeps the celebration on track with artistic flair.
Materials Needed
- 1 blank wooden clock face (8 inch diameter)
- black calligraphy marker (brush tip)
- ruler
- pencil
- clock mechanism kit (with hands and hardware)
- drill with 1/4 inch bit
- sandpaper (1 sheet, 220 grit)
How to Make It
- Sand the clock face lightly with sandpaper to remove splinters and wipe clean.
- Use the ruler and pencil to mark the 12 positions evenly around the edge.
- Write the numbers 10 to 1 and 'Happy New Year' at the 12 o'clock position using the brush marker, applying even pressure for consistent strokes.
- Drill a hole in the center, insert the clock mechanism, and attach the hands according to the kit instructions.


10. Mini Firework Pinwheels
Easy
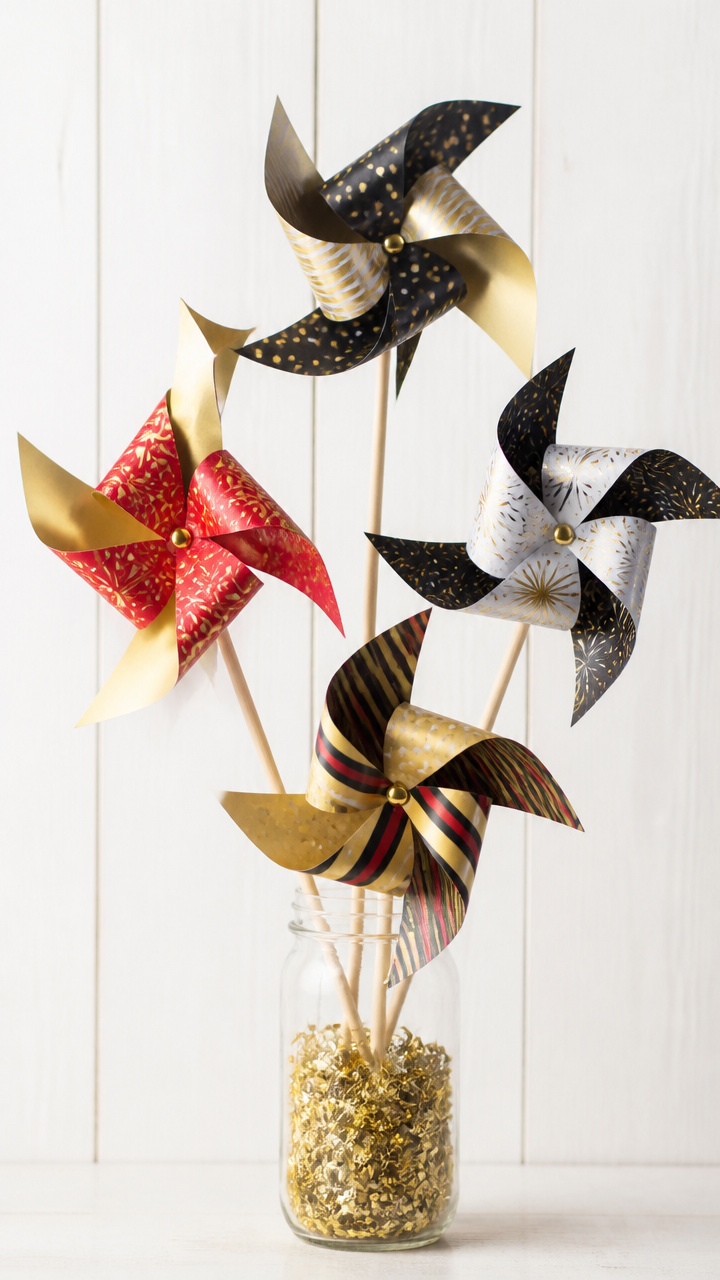
Bright pinwheels spin gently in the breeze, mimicking fireworks with their bold patterns. These outdoor-safe decorations add motion to railings or gardens.
Materials Needed
- 4 sheets 6×6 inch scrapbook paper (red, gold, black, silver)
- brass fasteners (4, 1 inch)
- pencil
- ruler
- scissors
- wooden dowels (4, 1/8 inch diameter, 12 inches long)
How to Make It
- Cut each paper sheet into a 6 inch square, then draw diagonal lines from corner to corner with pencil.
- Cut along each line from the corner toward the center, stopping 1 inch from the middle.
- Fold every other corner to the center and secure with a brass fastener through all layers.
- Attach each pinwheel to a wooden dowel by tightening the fastener around the top end.



11. Salt Dough Star Garlands
Easy
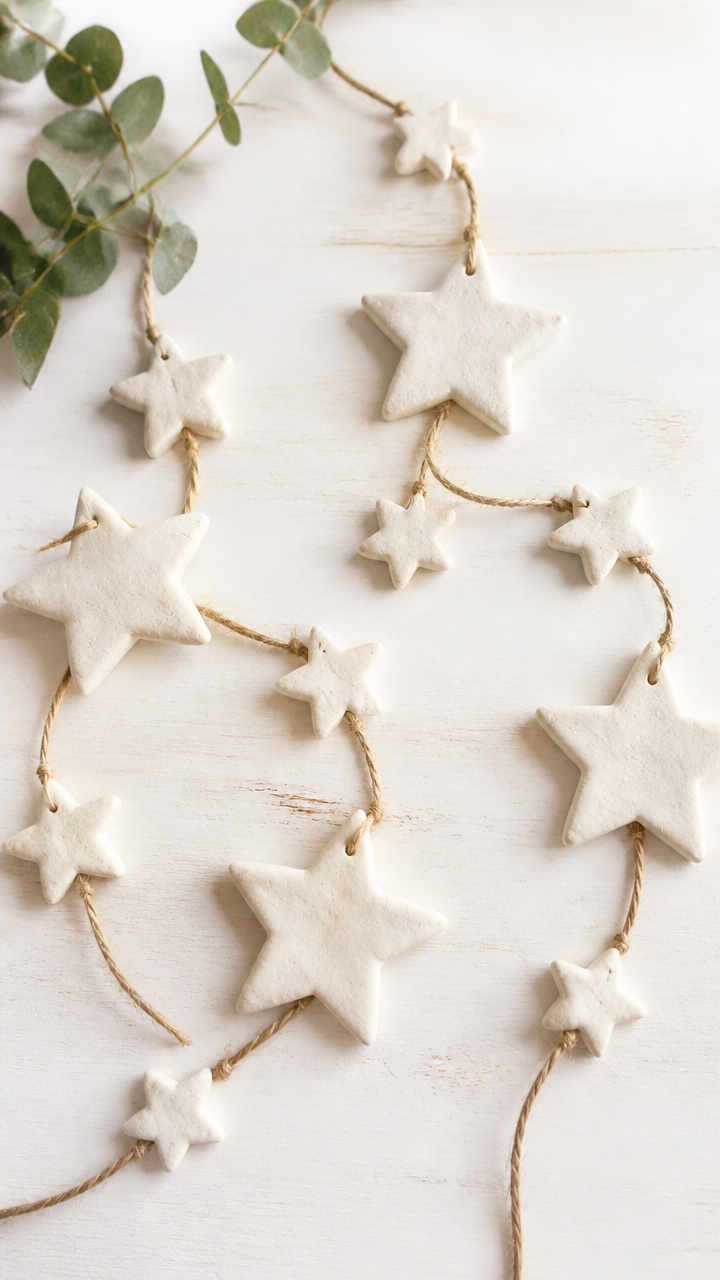
Hand-shaped stars made from simple dough dry crisp and hang in a delicate row. These natural ornaments bring rustic charm to windows or shelves.
Materials Needed
- 2 cups all-purpose flour
- 1 cup table salt
- 3/4 cup warm water
- star cookie cutters (3 sizes)
- baking sheet
- parchment paper
- pencil
- twine (3 yards)
- clear varnish (2 oz)
How to Make It
- Mix flour, salt, and warm water in a bowl until a smooth dough forms, adding water by teaspoon if too dry.
- Roll the dough to 1/4 inch thickness and cut out stars using the cookie cutters.
- Use a pencil to poke a small hole near the top of each star for threading.
- Place stars on a parchment-lined baking sheet and bake at 200°F for 2 hours, turning once.
- Let cool, then brush with varnish and thread onto twine with a needle.


12. Metallic Drip Candle Holders
Advanced
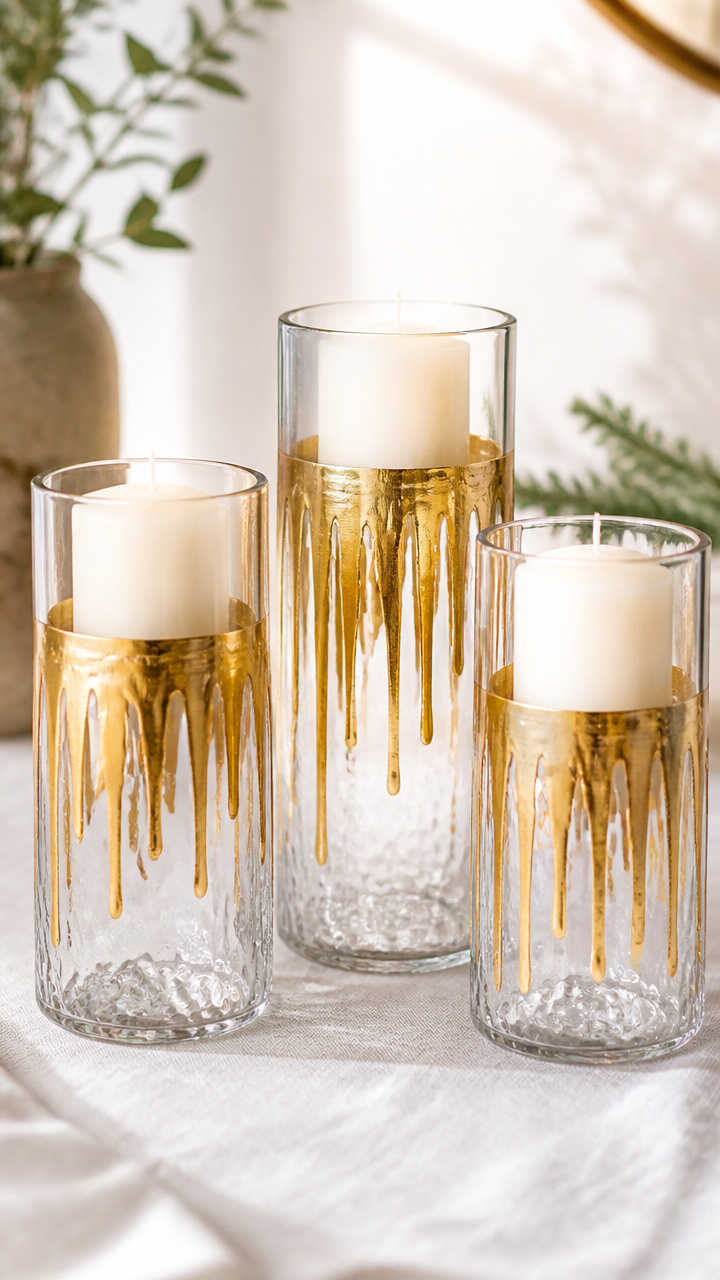
Candles stand in a pool of frozen metallic wax, creating a dramatic ombre effect. These bold holders become instant focal points on any surface.
Materials Needed
- 3 glass hurricane vases (6 inch tall)
- 3 white pillar candles (4 inch tall)
- gold wax melts (200g)
- double boiler
- candy thermometer
- silicone brush (1/2 inch)
How to Make It
- Place a candle in the center of each vase and set aside.
- Melt the gold wax in a double boiler over medium heat, monitoring with the thermometer until it reaches 185°F.
- Slowly pour the melted wax around the base of each candle, letting it pool and drip down the inside of the vase.
- Let cool completely for 3 hours, then touch up any bare spots with a second thin layer using the silicone brush.


13. Tissue Paper Tassel Wreath
Moderate

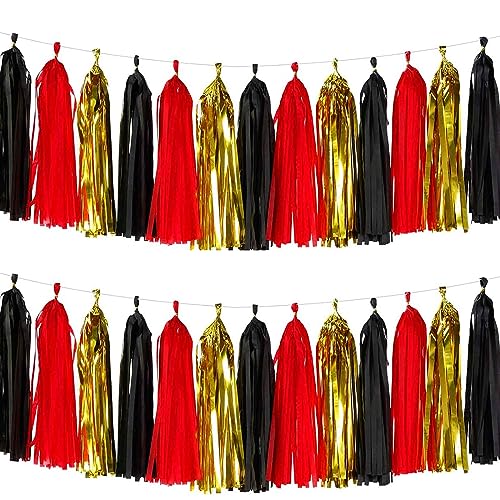
A full wreath of soft tissue tassels sways gently by the door, welcoming the new year with color. This lightweight piece is safe for any surface.
Materials Needed
- 1 foam wreath base (12 inch diameter)
- 10 sheets red tissue paper
- 10 sheets gold tissue paper
- scissors
- floral wire (12 inches)
- glue stick
How to Make It
- Stack 5 sheets of tissue paper together and fold in 1 inch accordion pleats across the short edge.
- Cut the folded stack in half widthwise, then fan open each stack and pinch the center.
- Wrap floral wire around the center of each fan and twist tightly to secure.
- Open each tassel fully, then glue the wire base to the foam wreath, overlapping tassels to cover completely.


14. Chalkboard Countdown Tray
Easy

A wooden tray holds party supplies and displays the hour-by-hour schedule in neat chalk script. This practical piece keeps the night organized and stylish.
Materials Needed
- 1 wooden serving tray (10×6 inches)
- black chalkboard paint (2 oz)
- foam brush (1 inch)
- chalk (white)
- ruler
- pencil
- sandpaper (1 sheet, 150 grit)
How to Make It
- Lightly sand the tray surface with sandpaper and wipe clean.
- Apply one even coat of chalkboard paint with the foam brush and let dry for 2 hours.
- Apply a second coat and let cure for 24 hours.
- Use the ruler and pencil to mark 12 even lines, then write hourly countdown events in white chalk.


15. Beaded Ring Chimes
Advanced
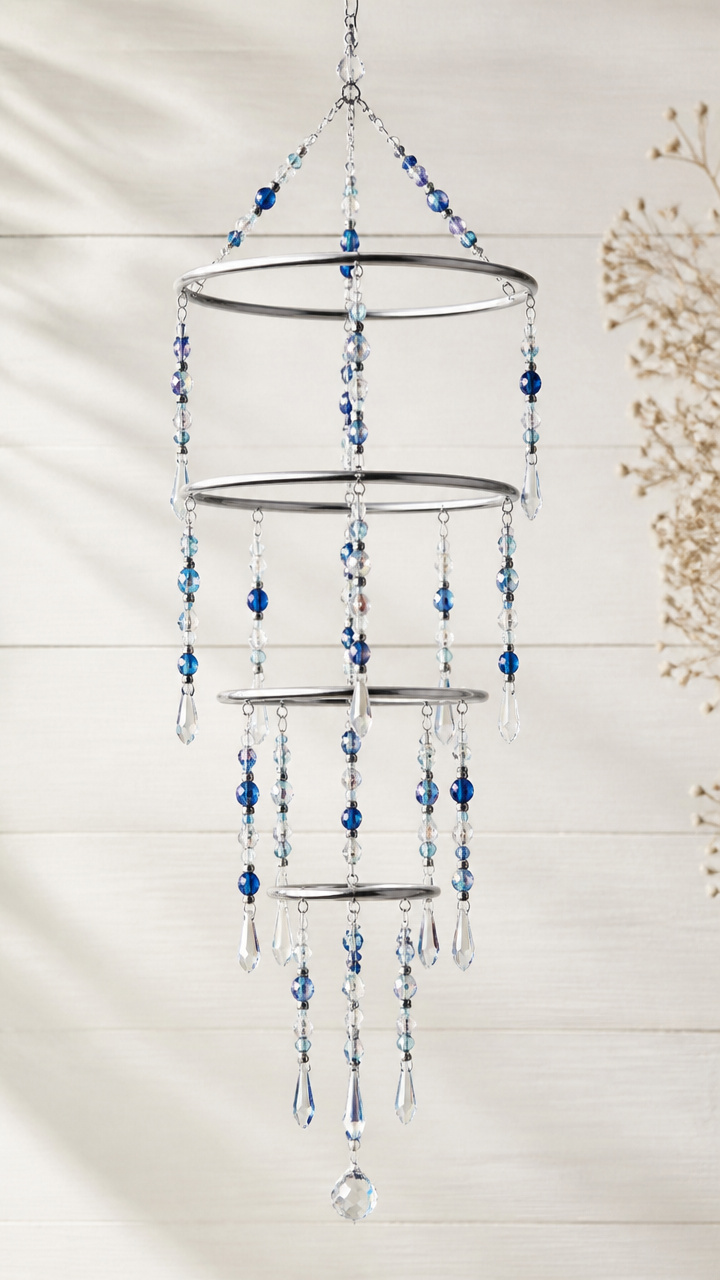
Delicate wire rings strung with tiny beads tinkle softly with every movement. These wind-activated charms bring sound and sparkle to your entryway.
Materials Needed
- 4 metal embroidery hoops (6 inch diameter)
- silver craft wire (24 gauge, 10 yards)
- assorted glass seed beads (50g, silver, clear, blue)
- wire cutters
- round-nose pliers
- ceiling hook
- fishing line (1 yard)
How to Make It
- Separate each hoop into inner and outer rings and use the pliers to bend the inner ring into a teardrop shape.
- Cut 8-inch lengths of craft wire and thread beads onto each, leaving 1 inch bare at each end.
- Wrap one bare end around the top of a teardrop ring and twist to secure, then repeat with 5 more strands per ring.
- Attach fishing line to the top of each ring and hang from a ceiling hook at varying heights.


Each of these crafts brings a little sparkle and a lot of heart to your celebration. Pick one that speaks to your style and start creating your own traditions.