15 Fun Valentine’s Day Crafts for Kindergarten

Tiny hands shaping hearts out of clay, sticky fingers pressing paper together, giggles filling the air as glue bottles tip and glitter spills—Valentine’s Day in kindergarten is pure magic. These crafts turn simple moments into keepsakes, blending creativity with fine motor practice and a whole lot of love.
Each project uses safe, accessible materials and builds confidence through doable steps. You’ll find no two ideas alike, just joyful making that ends with something to wear, gift, or display with pride.
1. Heart-Shaped Handprint Cards
Easy
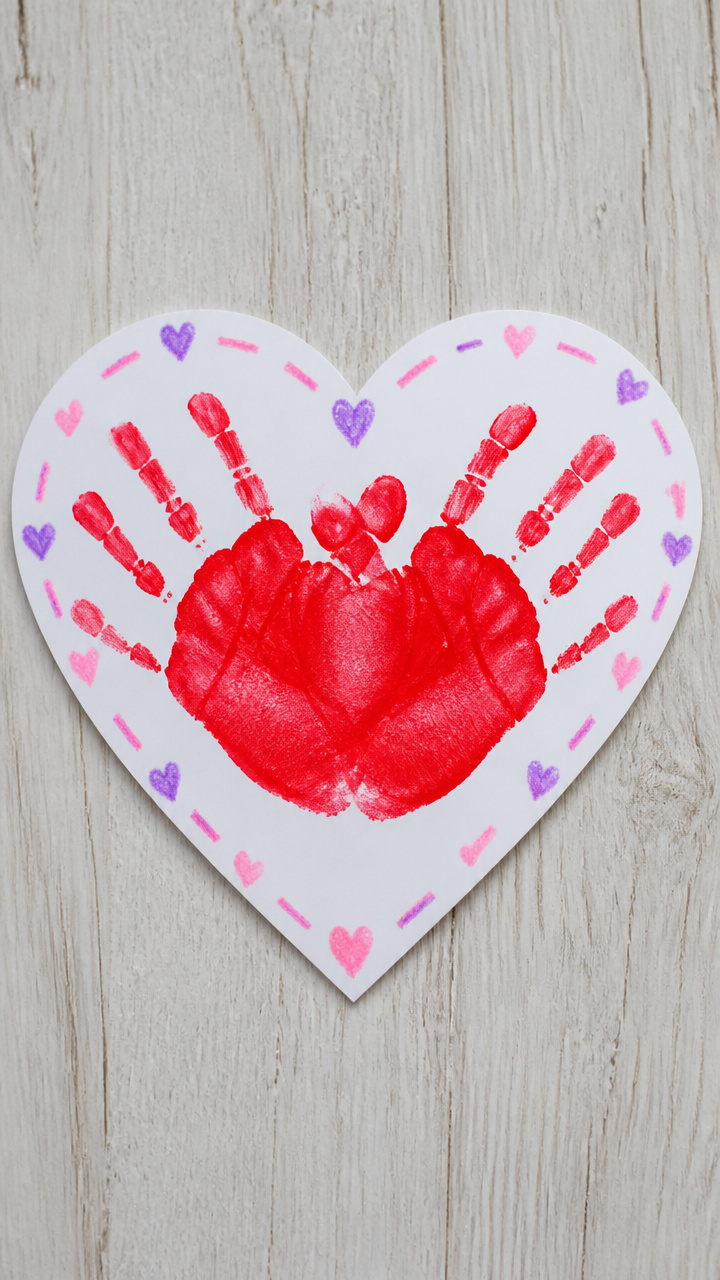
A child’s hand becomes a heart, painted and pressed onto paper to create a sweet, personal card. Parents will treasure this one long after the holiday passes.
Materials Needed
- Red non-toxic paint
- 8.5 x 11 inch white construction paper
- Crayons
- Scissors
- Glue stick
How to Make It
- Fold the construction paper in half horizontally to make a card.
- Have the child spread red paint evenly over one palm and all fingers.
- Press the painted hand firmly onto the front of the card, fingers pointing down, so the spread fingers form the top lobes of the heart.
- Let the paint dry completely, about 10 minutes.
- Use crayons to draw a stem and leaves beneath the handprint, turning it into a flower, or write 'Love You This Much' above it.
- Cut out the dried handprint and glue it onto a new folded card if needed for neatness.


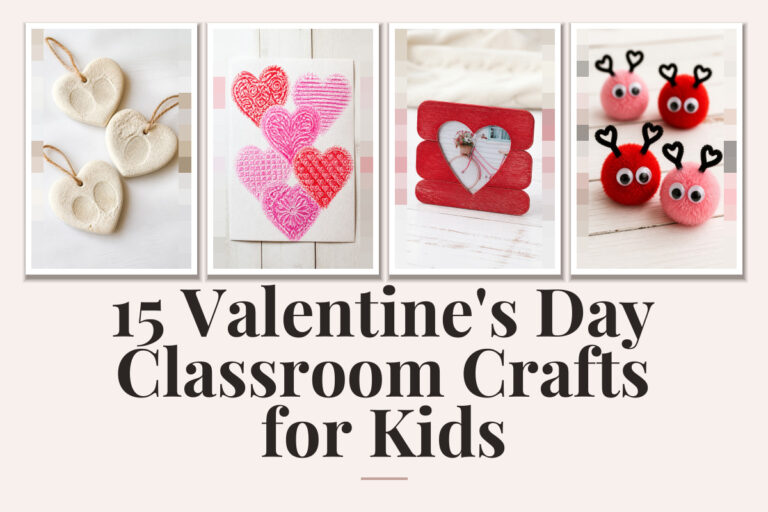
2. Pom-Pom Love Bugs
Easy
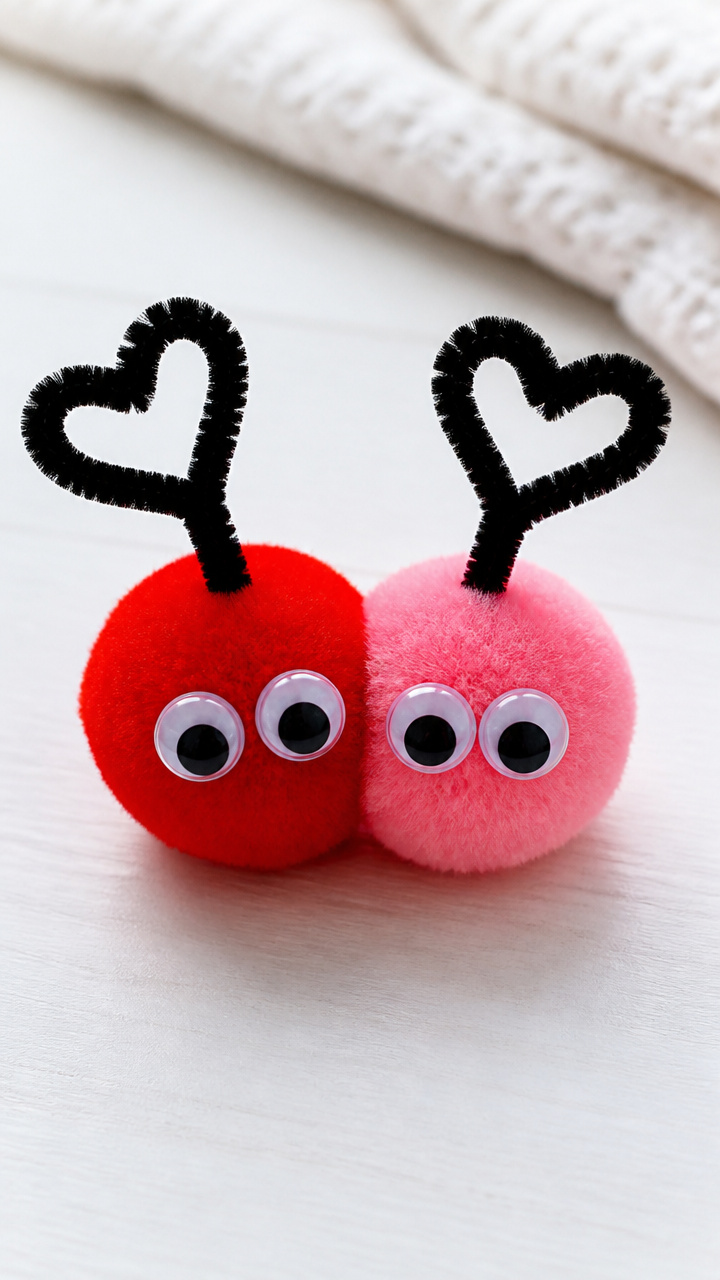
Fluffy pom-poms sprout pipe cleaner antennae and googly eyes to become cheerful little bugs that say I love you. These fit perfectly in small hands and make adorable desk pals.
Materials Needed
- 1 inch red and pink pom-poms, 2 per bug
- Black chenille stems (pipe cleaners), 1 per bug
- Googly eyes, 2 per bug
- Hot glue gun
- Glue dots
How to Make It
- Plug in the hot glue gun and let it heat up.
- Apply a small dot of hot glue to the top of one pom-pom and press the second pom-pom on its side to form a T shape.
- Cut the chenille stem in half and bend one piece into an antenna shape with a small loop at the end.
- Press both ends of the antenna into the top pom-pom to secure.
- Stick one googly eye on each side of the front pom-pom using a glue dot.


3. Paper Plate Wreath Hearts
Moderate
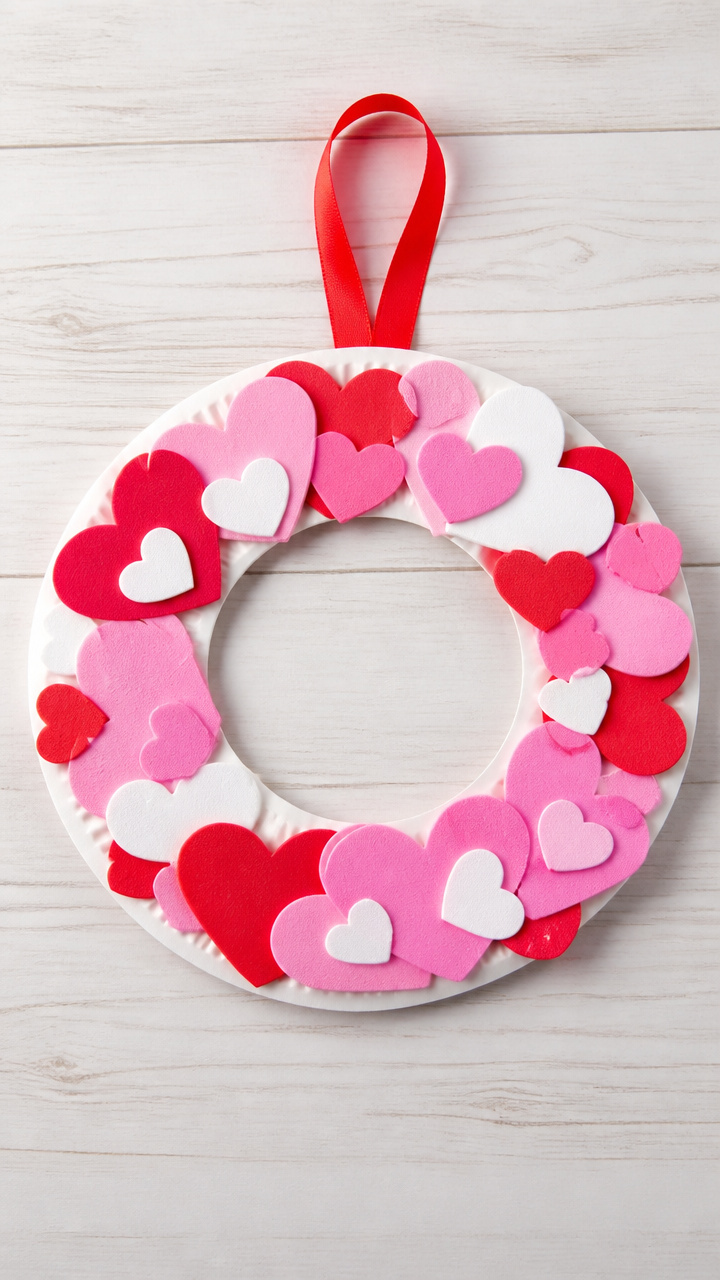
A circular base gets filled with overlapping heart cutouts to make a bold, textured wall decoration. The repeating pattern helps kids practice scissor control while building something bright.
Materials Needed
- 9 inch white paper plate, 1 per child
- Red, pink, and white craft foam sheets, 1 of each color
- Scissors
- Glue stick
- Hole punch
- Ribbon, 12 inches per wreath
How to Make It
- Cut out ten 1.5 inch hearts from each foam sheet, giving 30 hearts total per child.
- Starting at the outer edge of the paper plate, glue one heart so its point faces outward.
- Continue gluing hearts in a circle around the rim, overlapping each slightly with the previous one until the ring is full.
- Flip the plate over and punch a hole at the top back edge.
- Thread a 12 inch piece of ribbon through the hole and tie it into a loop for hanging.


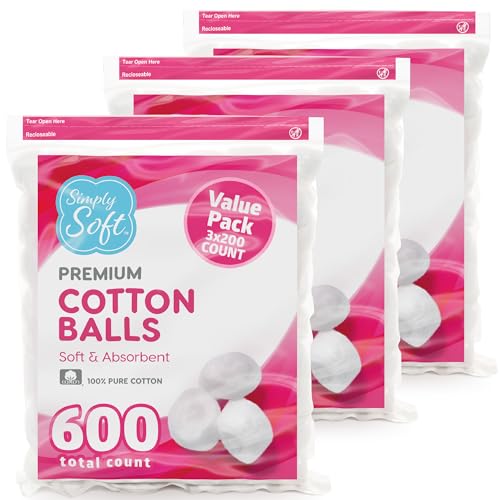
4. Cotton Ball Heart Collage
Easy
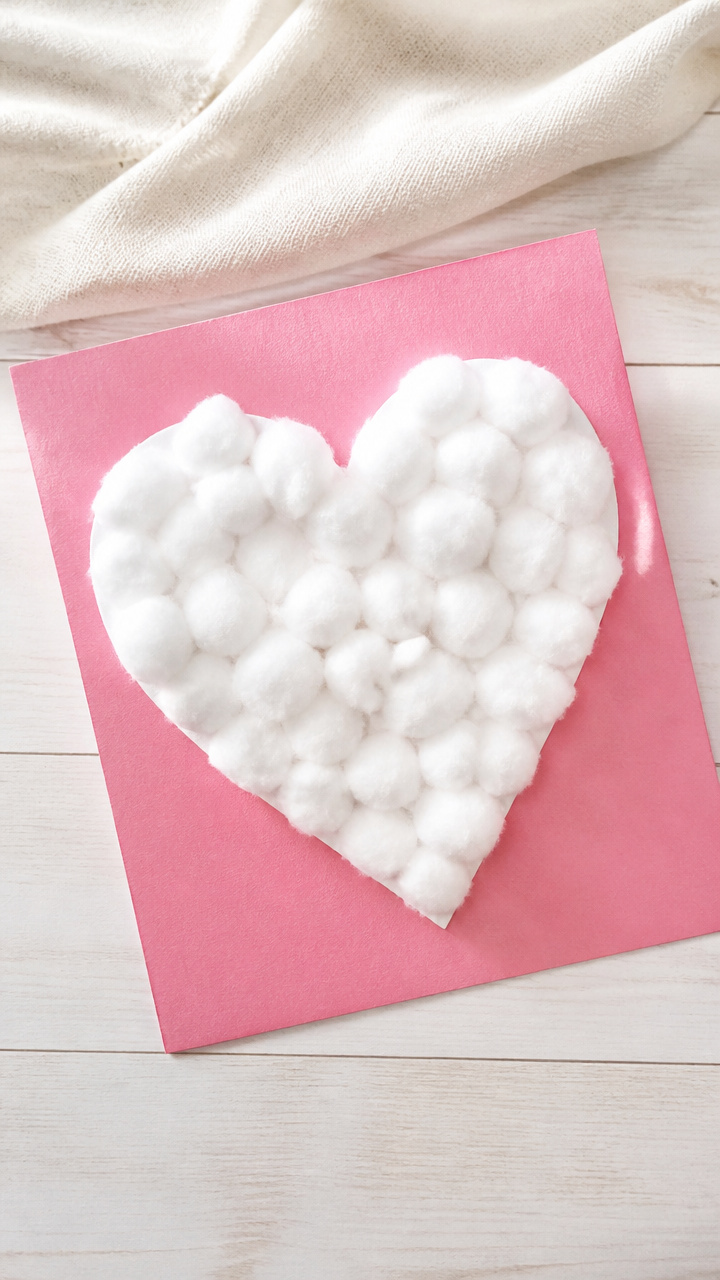
Soft white cotton balls are glued inside a drawn heart outline to create a puffy, cloud-like design. This sensory-rich craft feels cozy to touch and looks warm on a bulletin board.
Materials Needed
- 8.5 x 11 inch colored construction paper, 1 sheet per child
- White school glue
- Cotton balls, about 30 per child
- Heart stencil, 5 inch size
- Pencil
How to Make It
- Place the heart stencil in the center of the paper and trace it lightly with a pencil.
- Squeeze a small drop of white school glue inside the heart outline.
- Press cotton balls into the glue, covering the entire shape without gaps.
- Add more glue as needed and continue until the heart is fully filled with layered cotton balls.
- Set aside to dry for 15 minutes before displaying.

5. Button Heart Magnets
Moderate
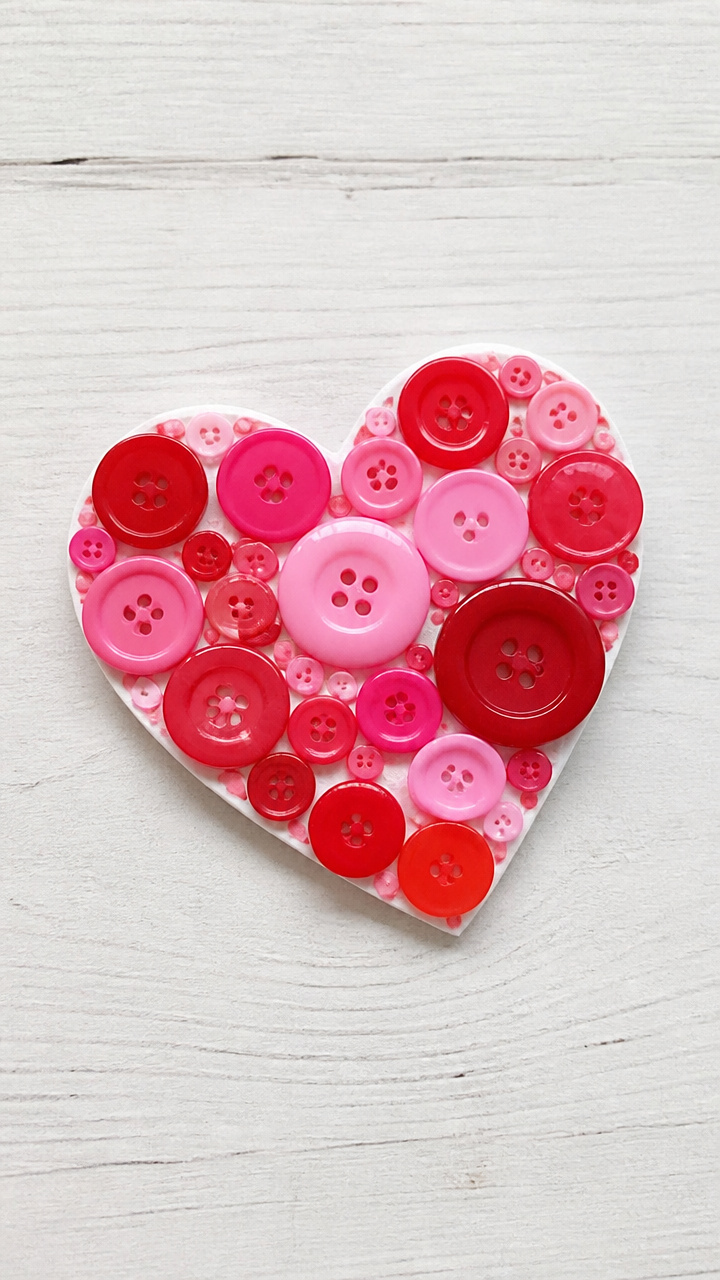
Colorful buttons nestle into a glued heart shape and get a magnet backing for fridge display. This teaches sorting and patterning while making functional art.
Materials Needed
- Red and pink buttons, assorted sizes, 15 per child
- Magnetic strips, 1 x 0.5 inch self-adhesive piece per child
- White cardstock, 5 x 7 inch piece per child
- Pencil
- White school glue
- Paintbrush
How to Make It
- Draw a large heart in the center of the cardstock with a pencil.
- Apply a thin line of white school glue along the inside edge of the heart outline using a paintbrush.
- Press buttons into the glue, starting from the bottom and working upward, filling the shape completely.
- Let the glue dry for 20 minutes.
- Glue the magnetic strip to the back center of the cardstock and allow to dry another 10 minutes.


6. Straw-Blown Heart Art
Easy
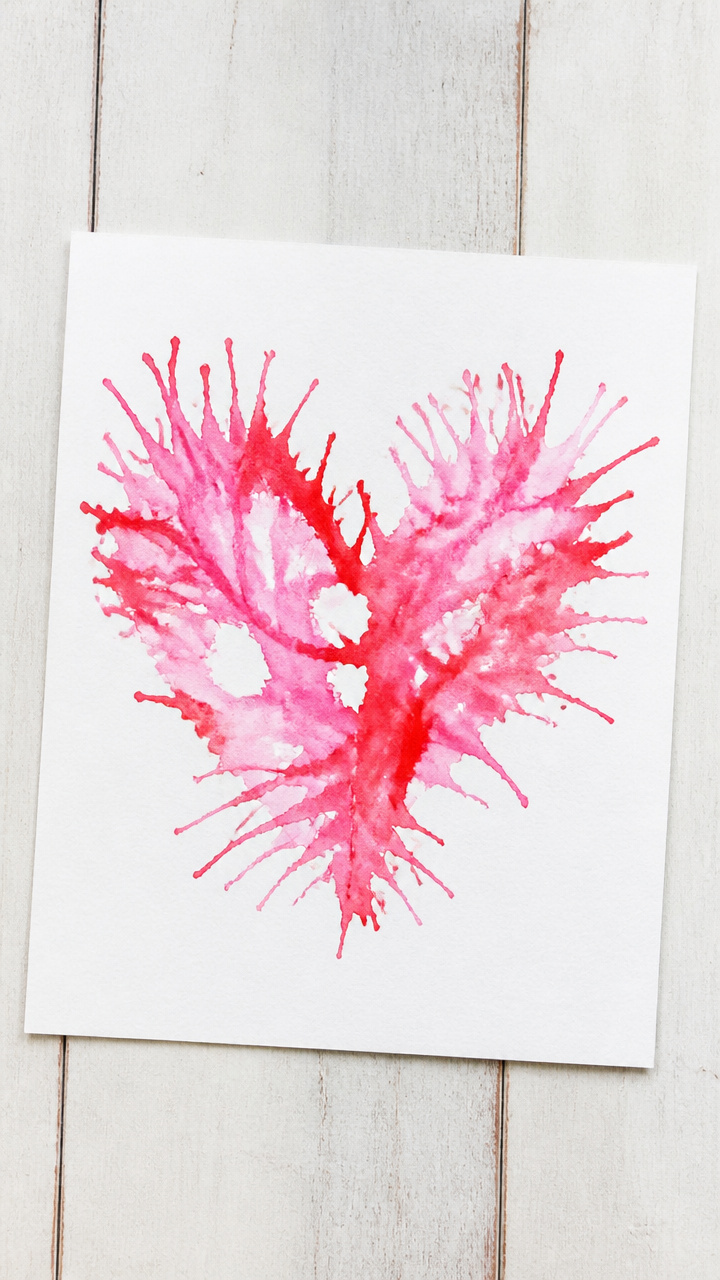
A single drop of paint turns into a heart-shaped burst when blown through a straw. Kids love the surprise of how the colors move and spread.
Materials Needed
- Red and pink liquid watercolors
- 8.5 x 11 inch heavy white drawing paper
- Plastic drinking straws, 1 per child
- Eye dropper
- Smock or apron
How to Make It
- Lay the paper flat on a tray or protected surface and put on a smock.
- Use the eye dropper to place one red drop near the bottom center of the paper.
- Dip the straw into pink watercolor and gently blow a stream of air through it onto the red drop, pushing the paint upward and outward into a heart shape.
- Let the artwork dry flat for 15 minutes before handling.


7. Yarn-Wrapped Heart Frames
Moderate

Stiff cardboard hearts become loom-like bases for crisscrossed yarn, forming colorful woven keepsakes. The wrapping motion builds hand strength and focus.
Materials Needed
- Cardboard, 1/8 inch thick, pre-cut into 6 inch hearts, 1 per child
- Pink and red yarn, 3 feet of each color per child
- Scissors
- Tape
How to Make It
- Cut a small notch at the top point of the cardboard heart.
- Tape one end of the pink yarn to the back of the heart and bring it to the front at the notch.
- Wrap the yarn down to the left bottom curve, around the edge, and up to the right side, crossing over the center.
- Continue weaving diagonally across the heart, alternating sides until the center is full.
- Switch to red yarn, taping the end on the back, and weave perpendicularly over the first layer to create a crosshatch.
- Tie off the yarn on the back and trim excess.


8. Popsicle Stick Love Birds
Moderate
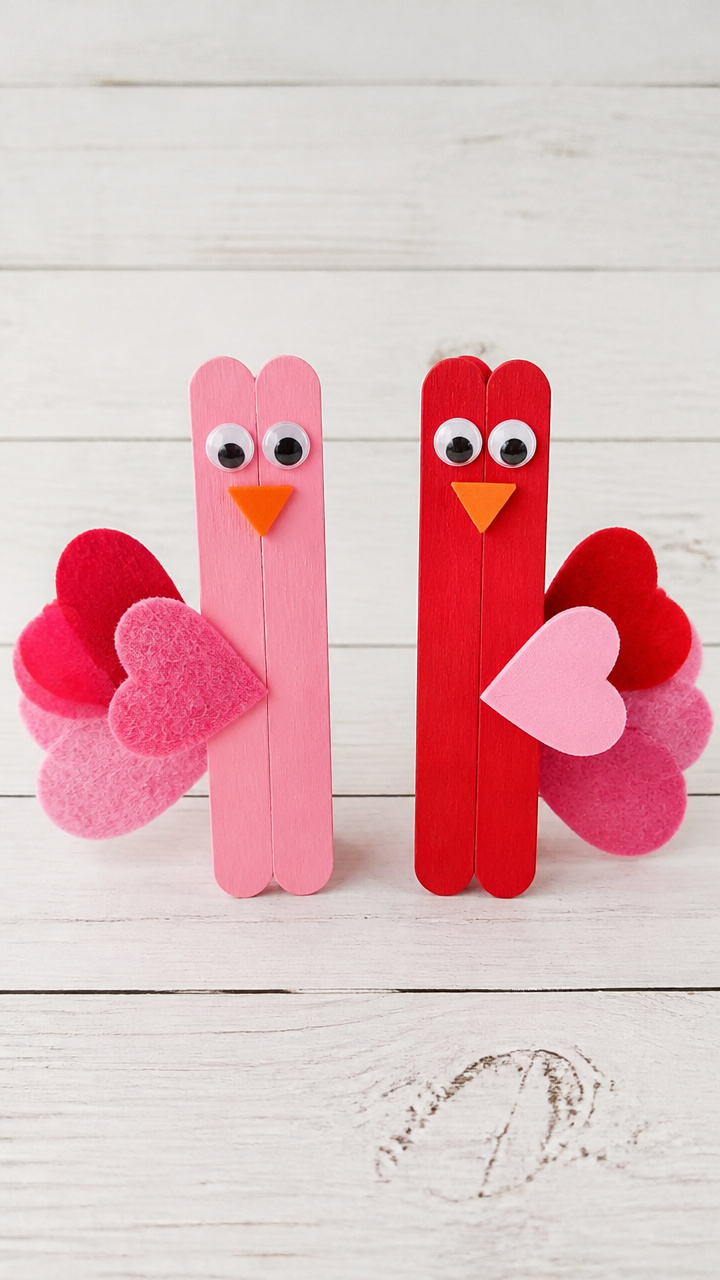
Mini wooden sticks join to form a bird shape adorned with heart tails and googly eyes. These lightweight figures stand proudly on shelves or desks.
Materials Needed
- 4 jumbo craft sticks per bird
- Red and pink felt scraps
- Googly eyes, 2 mm, 2 per bird
- White school glue
- Glue gun
- Scissors
- Black fine-tip marker
How to Make It
- Lay two craft sticks vertically side by side to form the body.
- Glue a third stick horizontally across the top to make wings.
- Glue the fourth stick diagonally from the bottom center to create a tail support.
- Cut a small heart from pink felt and glue it to the end of the tail stick.
- Glue googly eyes near the top front of the body.
- Use a black marker to draw a beak on the front top stick.


9. Glitter Slime Hearts
Advanced
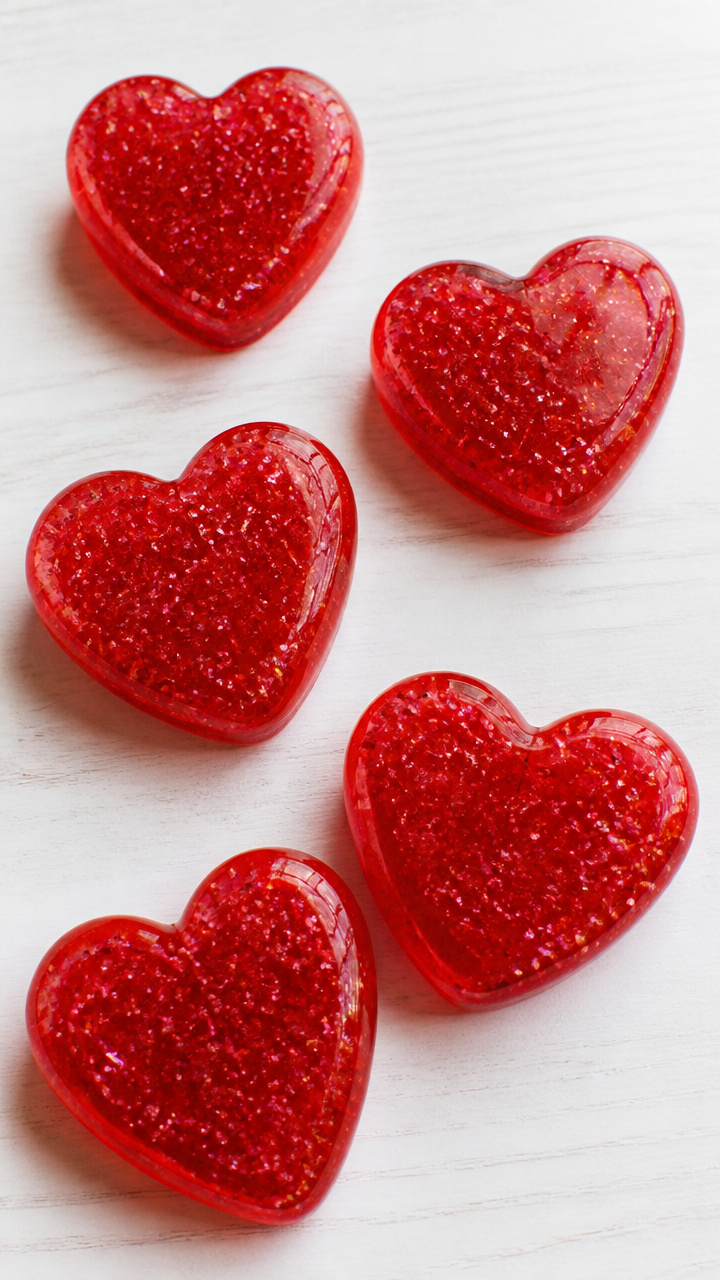
Stretchy, sparkly slime gets shaped into heart molds for a sensory toy that doubles as a gift. The mixing process feels like science and art combined.
Materials Needed
- Clear school glue, 4 oz bottle
- Liquid starch, 2 oz
- Red glitter, 1 tablespoon
- Silicone heart molds, 3 per child
- Mixing bowl
- Plastic spoon
How to Make It
- Pour the entire 4 oz bottle of clear school glue into a mixing bowl.
- Add 1 tablespoon of red glitter and stir with the plastic spoon until evenly distributed.
- Slowly pour in 2 oz of liquid starch and begin mixing with the spoon, then switch to hands once it starts clumping.
- Knead the slime for 2 minutes until it pulls away from the bowl and feels stretchy.
- Press the slime into silicone heart molds and let sit for 5 minutes to hold shape.
- Pop out the hearts and store in sealed bags for gifting.


10. Fingerprint Flower Pots
Easy
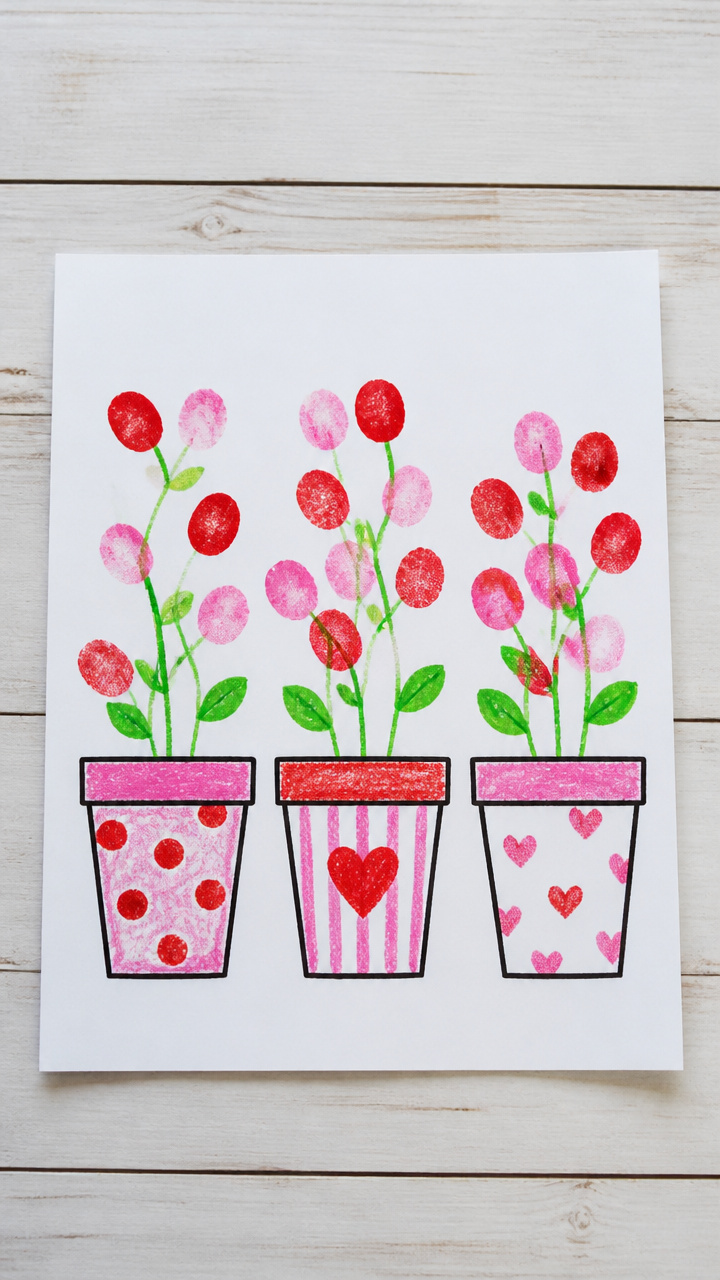
Inky thumbprints bloom into tiny flowers above a hand-drawn pot, creating a garden of love. Each print is unique, making a classroom display extra special.
Materials Needed
- Pink and red washable ink pads
- 8.5 x 11 inch white cardstock
- Green washable ink pad
- Black fine-tip marker
- Crayons
How to Make It
- Press the child’s thumb into the pink ink pad and stamp five prints in a loose arc at the top of the page to form flower centers.
- Repeat with the red ink pad to add more blooms nearby.
- Press the index finger into the green ink pad and lay it sideways beneath each flower to make leaves.
- Use the black marker to draw a wavy line beneath the flowers and connect them into a shared pot.
- Let the ink dry for 5 minutes, then color the pot with crayons.


11. Pipe Cleaner Heart Bracelets
Easy
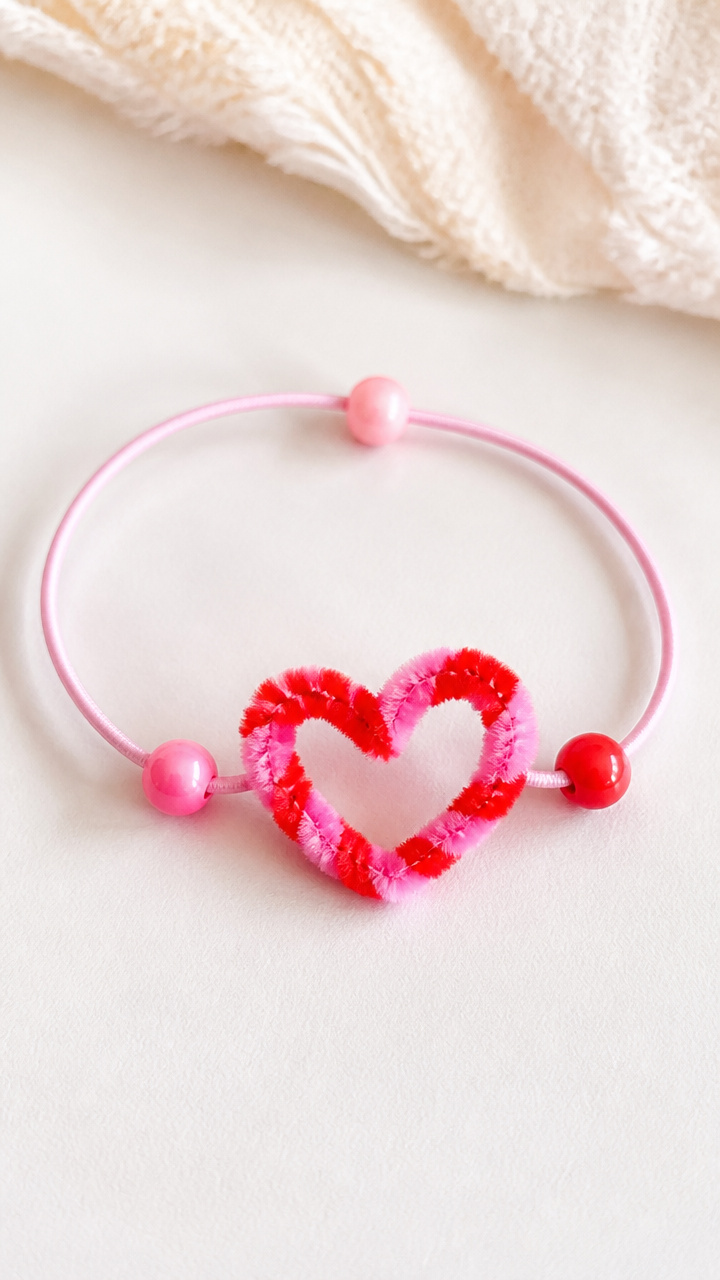
Twisted wire forms a dainty heart charm on an elastic loop that fits any wrist. These take minutes to make but feel like real jewelry.
Materials Needed
- Red and pink chenille stems, 1 of each per bracelet
- Elastic cord, 8 inches per bracelet
- Scissors
- Beads with 4 mm holes, 3 per bracelet
How to Make It
- Bend one chenille stem in half and twist the top into a small loop to form the heart’s top curve.
- Bring both wires down and cross them at the bottom to form the heart’s point, then twist together for 1 inch.
- Cut the remaining wires to 1 inch and fold them inward to close the bottom.
- Thread 3 beads onto the elastic cord, then tie the ends together in a double knot to make a loop.
- Tie the knotted ends securely to the twisted base of the heart charm.


12. Tissue Paper Heart Windows
Easy
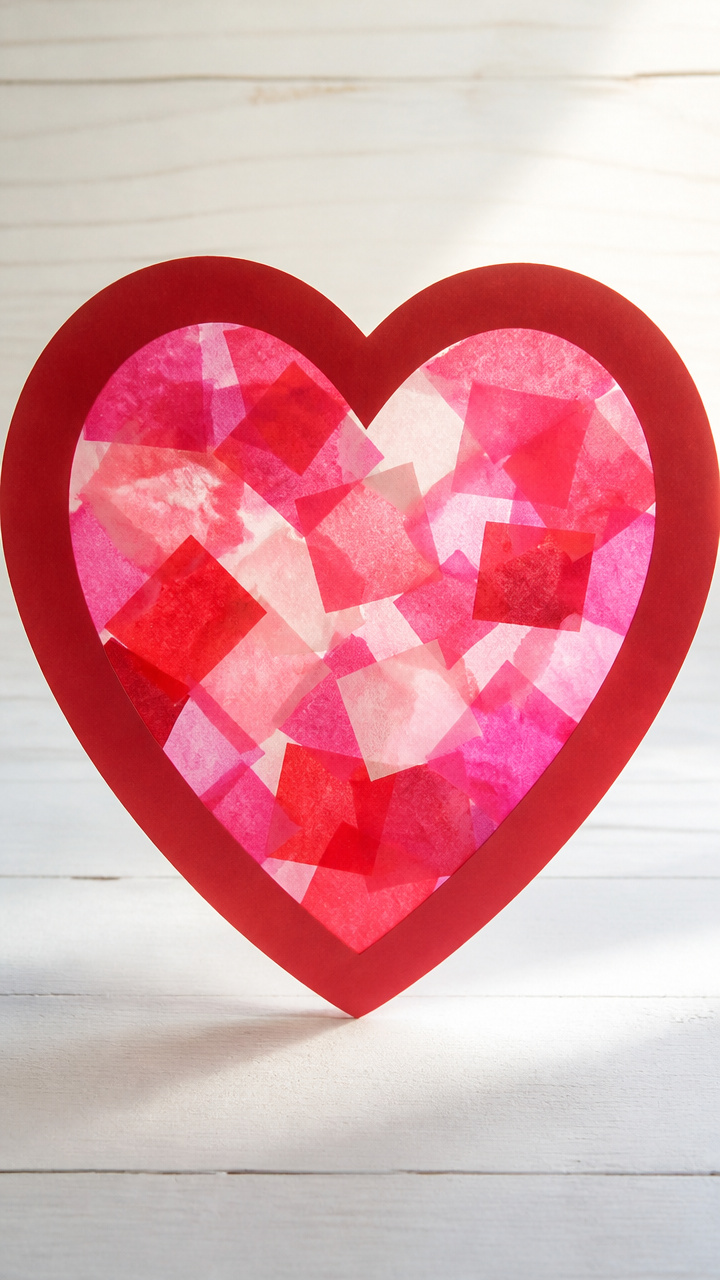
Layered squares of colored tissue create stained glass effects when taped to windows. Sunlight turns these into glowing classroom decorations.
Materials Needed
- Red, pink, and white tissue paper, 6 x 6 inch squares, 3 of each color
- Clear contact paper, 9 x 12 inch sheet per child
- Scissors
- Construction paper frame, 9 x 12 inch with 5 x 7 inch center cutout
How to Make It
- Peel the backing off the contact paper and lay it sticky side up on the table.
- Tear the tissue paper into 2 inch pieces and arrange them on the sticky surface, covering the area completely with overlapping colors.
- Place the construction paper frame over the back of the contact paper to create a border.
- Press gently to adhere and hang near a sunny window using tape.


13. Cereal Heart Necklaces
Easy
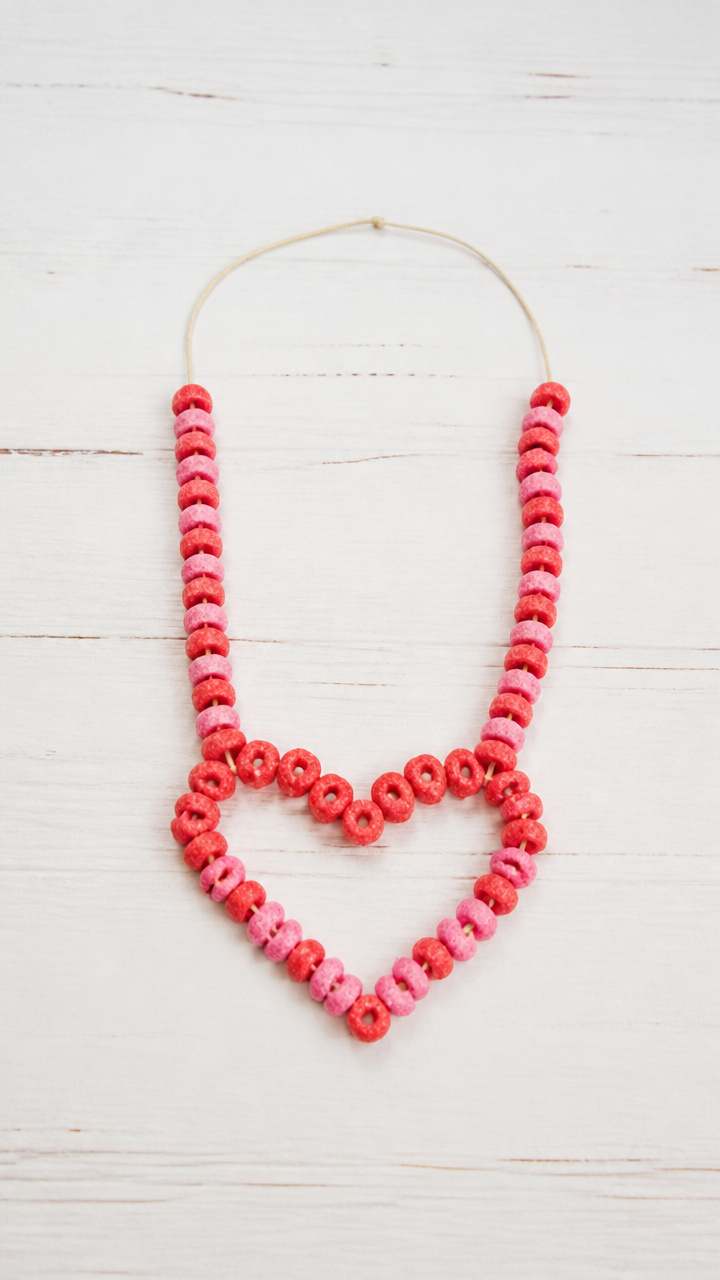
Rosy-hued O-shaped cereal gets strung into wearable hearts that celebrate love—and snack time. Threading builds coordination and patience.
Materials Needed
- Colored oat cereal rings, red and pink, 20 per necklace
- Waxed string, 24 inches per child
- Scissors
- Plastic needle, blunt tip
How to Make It
- Cut the waxed string to 24 inches and thread one end through the eye of the plastic needle.
- String red and pink cereal rings onto the waxed string, alternating colors if desired.
- Continue until 18 rings are on the string.
- Bring the ends together and tie a double knot to form a loop necklace.


14. Salt Dough Heart Ornaments
Advanced
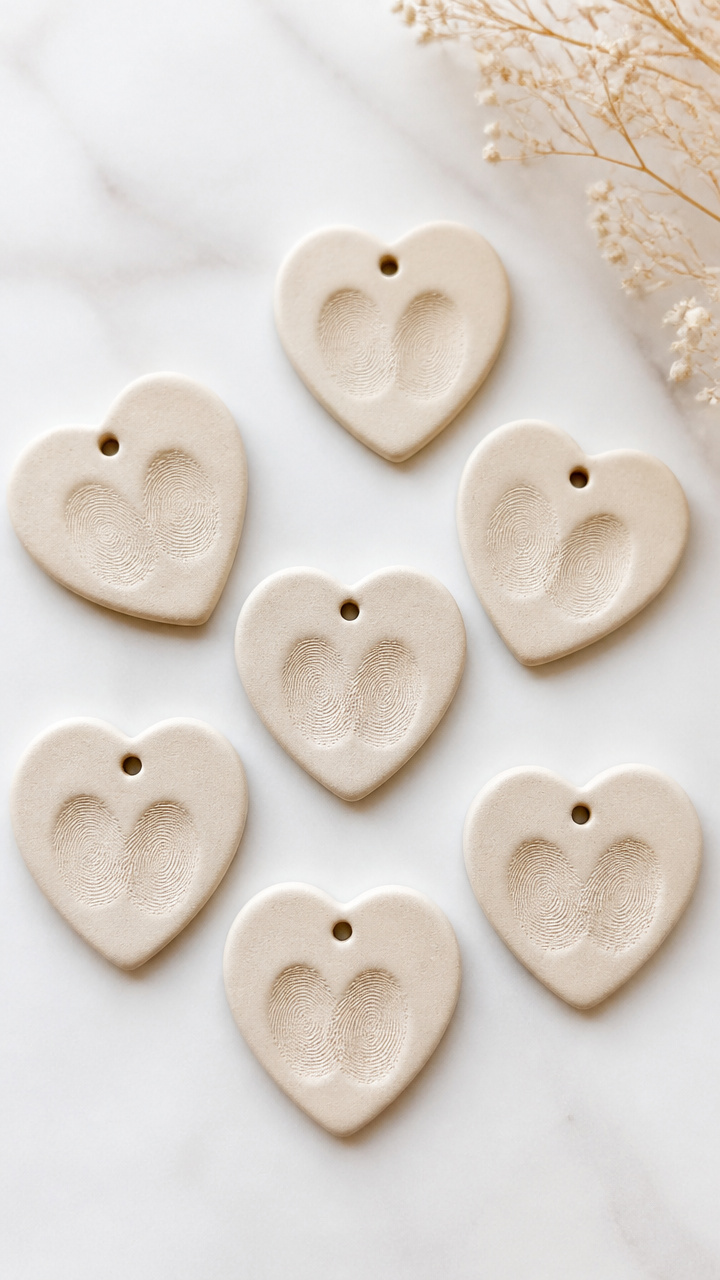
A kitchen-made dough rolls out, cuts into hearts, and bakes hard for lasting keepsakes. Kids can press fingerprints or initials into the soft surface.
Materials Needed
- 1 cup all-purpose flour
- 1/2 cup table salt
- 1/2 cup warm water
- Rolling pin
- Heart-shaped cookie cutter, 3 inch
- Straw
- Oven
- Baking sheet
- Parchment paper
- Acrylic paint, red and pink
- Paintbrush
- Ribbon, 8 inch length
How to Make It
- Mix flour, salt, and warm water in a bowl until a smooth dough forms, adding a few drops more water if too dry.
- Roll the dough to 1/4 inch thickness on a floured surface.
- Cut out hearts using the cookie cutter.
- Press a straw just above the top curve of each heart to make a hanging hole.
- Place hearts on a parchment-lined baking sheet and bake at 250°F for 2 hours until hard.
- Let cool completely, then paint with red and pink acrylics and let dry 30 minutes.
- Thread ribbon through the hole and tie into a loop.


15. Doily Heart Suncatchers
Easy
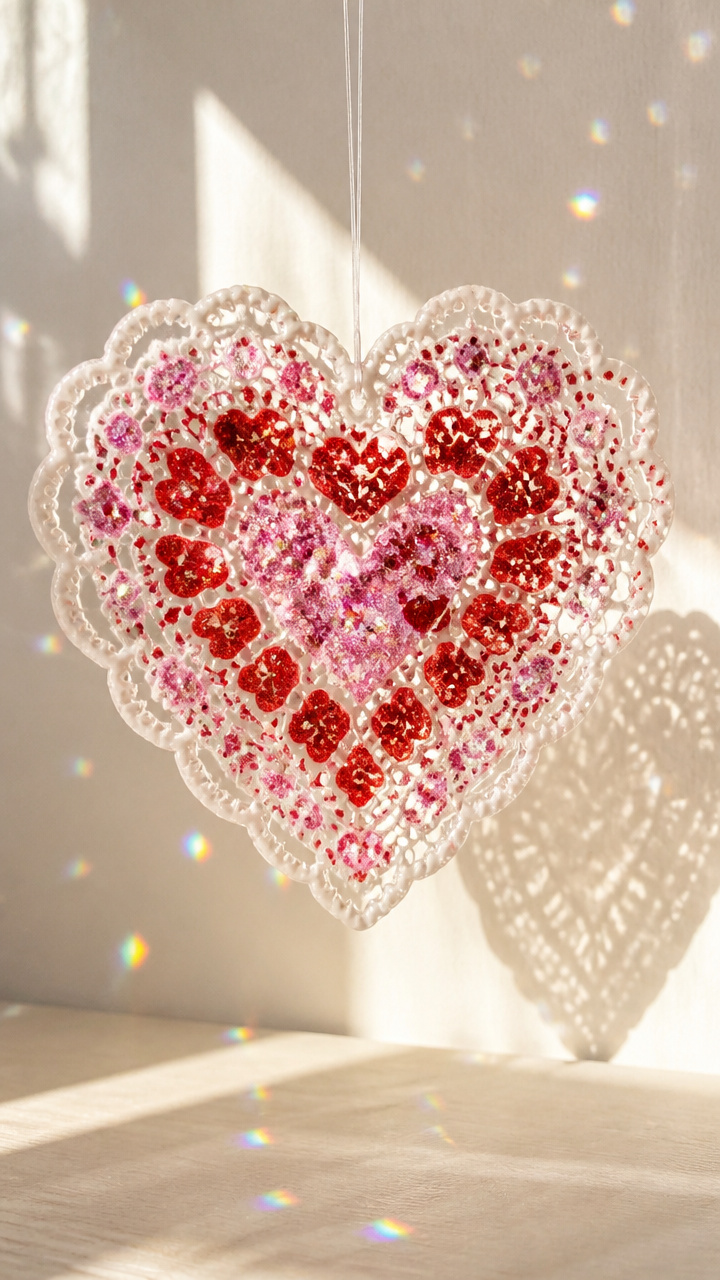
Delicate paper doilies gain color and shine when painted with glue and glitter. Hung in windows, they scatter sparkles like confetti.
Materials Needed
- White paper doilies, 6 inch round, 1 per child
- White school glue
- Paintbrush
- Red and pink glitter
- Clear fishing line, 10 inches
- Clothespin
How to Make It
- Lay the doily flat on a tray or wax paper.
- Use a paintbrush to spread white school glue over half the doily, focusing on the outer edges.
- Sprinkle red glitter over the glued areas and shake off excess.
- Repeat with pink glitter on the other half for a two-tone effect.
- Clip a clothespin to the top and hang to dry for 20 minutes.
- Tie fishing line through the top for hanging.


You’ve got everything you need to fill your classroom or home with handmade warmth. Grab your supplies and start creating—each craft is a chance to connect, giggle, and leave love behind in every detail.