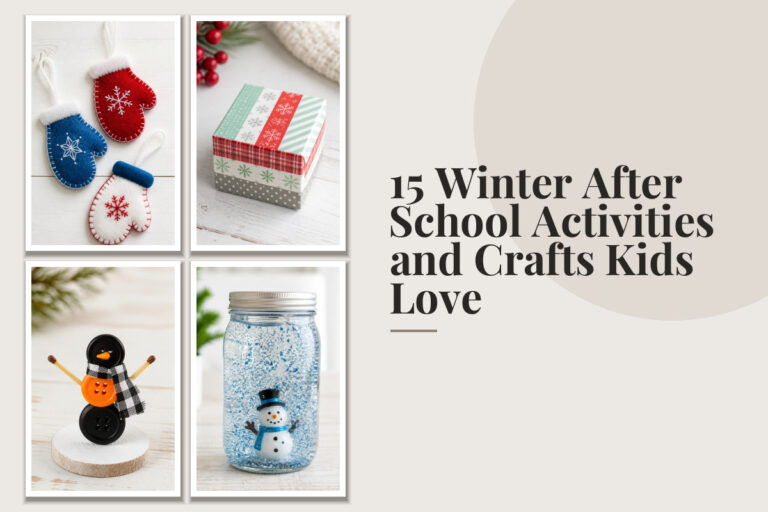
24 Felt Winter Crafts to Sew, Glue, and Gift

Soft felt in snowy whites, deep forest greens, and rich burgundies fills your hands like winter warmth. The quiet snip of scissors, the steady pull of thread through fabric, the gentle press of glue—each craft becomes a small act of care.
These handmade pieces are made to be given. Whether tucked into a coworker’s mailbox or placed under the tree for a niece who loves animals, they carry something no store-bought gift can: your time, your touch, your attention.
1. Mini Pinecone Ornaments
Easy
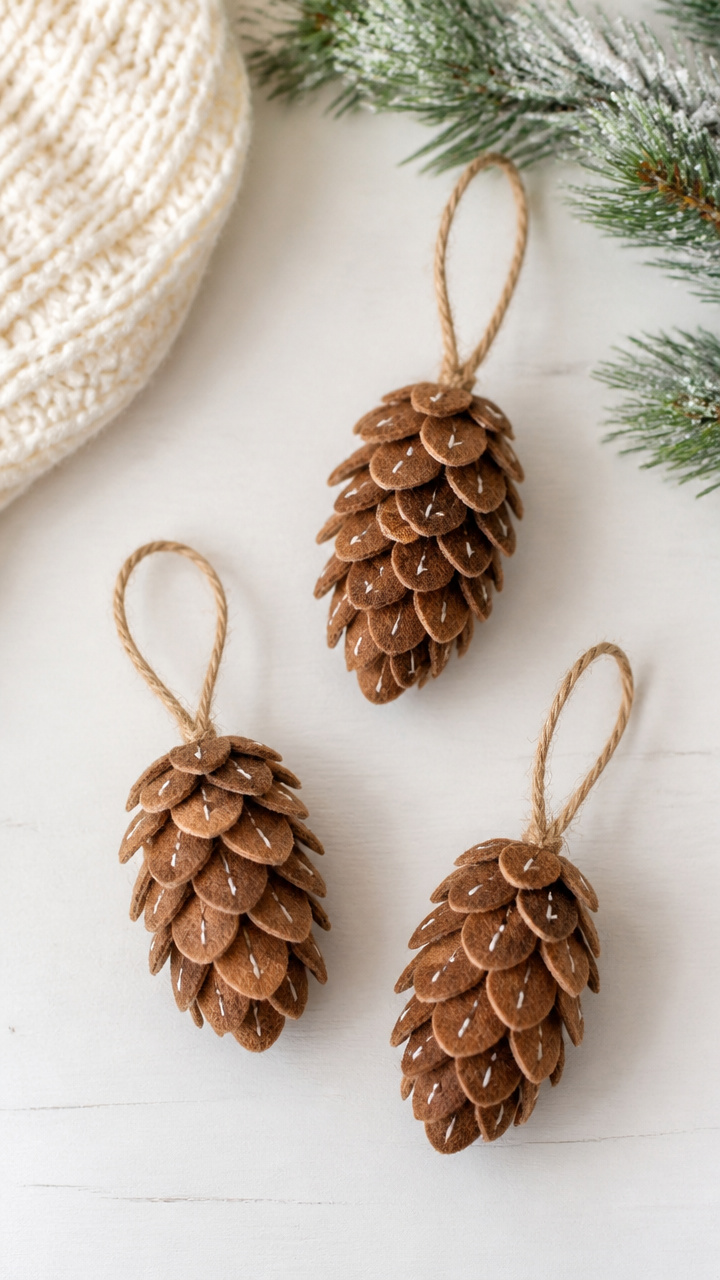
Tiny pinecone shapes wrapped in brown felt become rustic tree decorations with a soft, handmade charm. They’re light enough for delicate branches and simple enough to make in batches.
Materials Needed
- Brown craft felt sheet (9 x 12 inches)
- White embroidery floss
- Blunt-tipped sewing needle
- Scissors
- Ruler
- Pencil
How to Make It
- Draw six teardrop shapes, each 1.5 inches long, on the felt and cut them out.
- Stack three shapes together and thread the needle with 18 inches of floss.
- Sew through the top point of the stack using a running stitch, then pull tight to gather the layers into a pinecone shape.
- Tie a knot at the top and leave a 3-inch tail of floss to use as a hanger.
2. Felt Snow Globe Pendants
Moderate
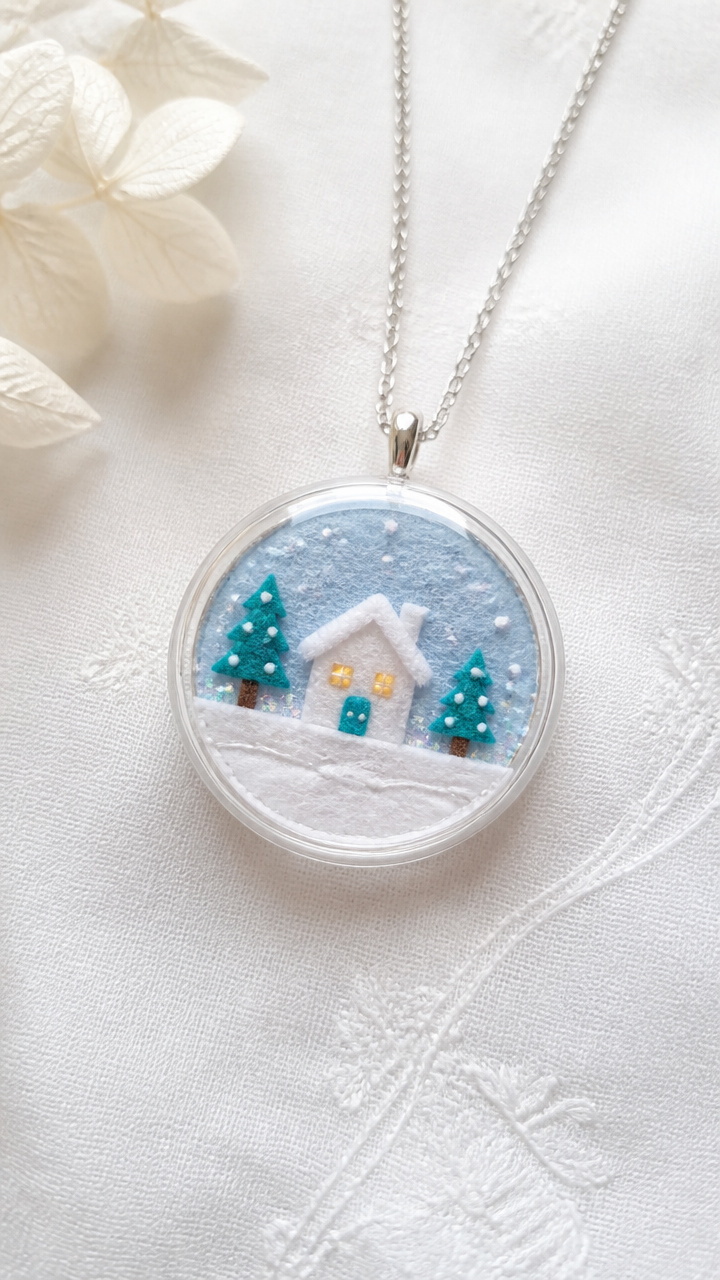
Delicate pendants hold tiny snow-covered scenes inside clear plastic discs. These wearable miniatures sparkle like bottled magic and make sweet gifts on a ribbon.
Materials Needed
- White and blue craft felt sheets (9 x 12 inches each)
- 25mm round clear plastic locket blanks (with front, back, and spacer) – 6 units
- Fine-tip white fabric paint
- Small paintbrush
- Tacky glue
- Scissors
- Jewelry bail with jump ring – 6 units
How to Make It
- Cut a 1-inch circle from blue felt and a 0.75-inch snow drift shape from white felt.
- Glue the snow drift onto the blue circle and let dry for 5 minutes.
- Use the fabric paint to add tiny snowflakes on the blue felt background and let it dry completely.
- Insert the scene into the locket spacer, seal with the front and back covers, then attach the bail with the jump ring.
3. Reindeer Napkin Rings
Easy
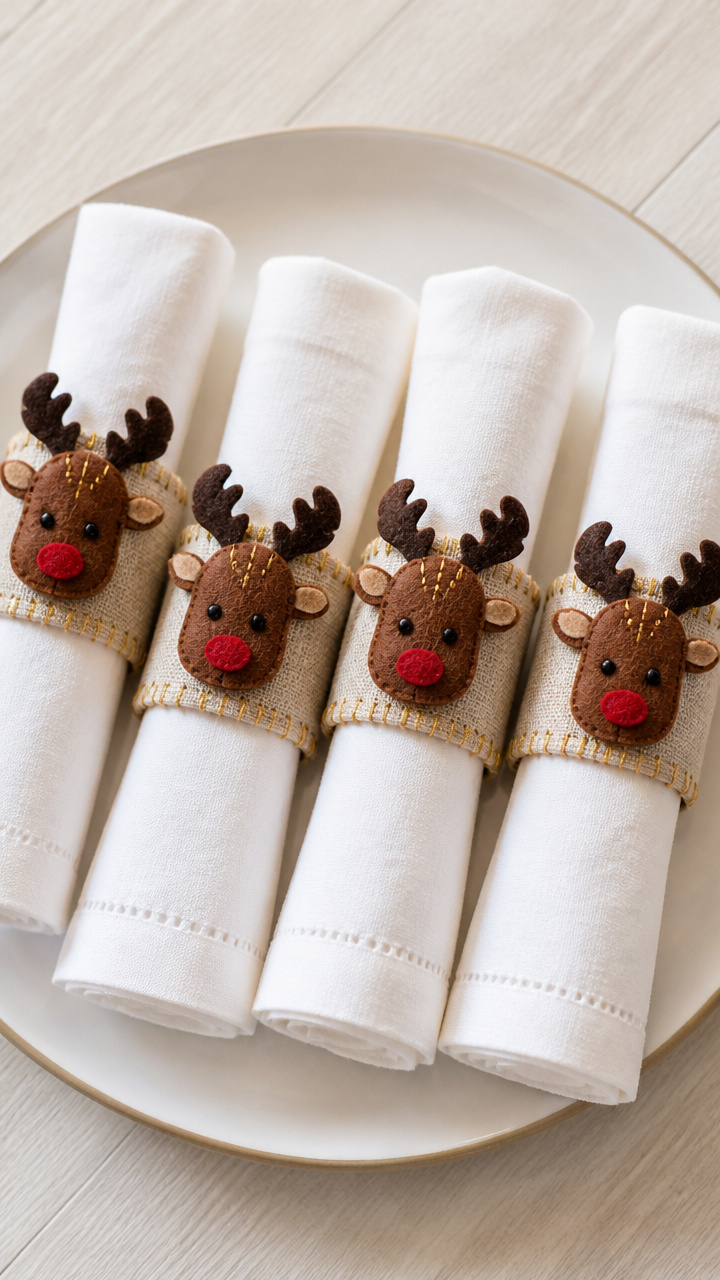
Sturdy felt reindeer heads perch atop linen napkins, antlers curving proudly above dinner plates. These bring whimsy to holiday tables and take under an hour to finish.
Materials Needed
- Brown craft felt sheet (9 x 12 inches)
- Red craft felt scrap
- Gold metallic embroidery floss
- Blunt-tipped sewing needle
- Scissors
- 2-inch wide linen napkin rings – 4 units
How to Make It
- Cut four reindeer head shapes, each 2.5 inches tall, from brown felt.
- Cut four tiny red nose circles, 0.25 inches wide, from red felt.
- Glue one red nose near the bottom of each head and let dry for 3 minutes.
- Stitch two gold floss eyes above the nose using a backstitch, then glue the back of each head to a napkin ring.
4. Hand-Sewn Mitten Garlands
Moderate
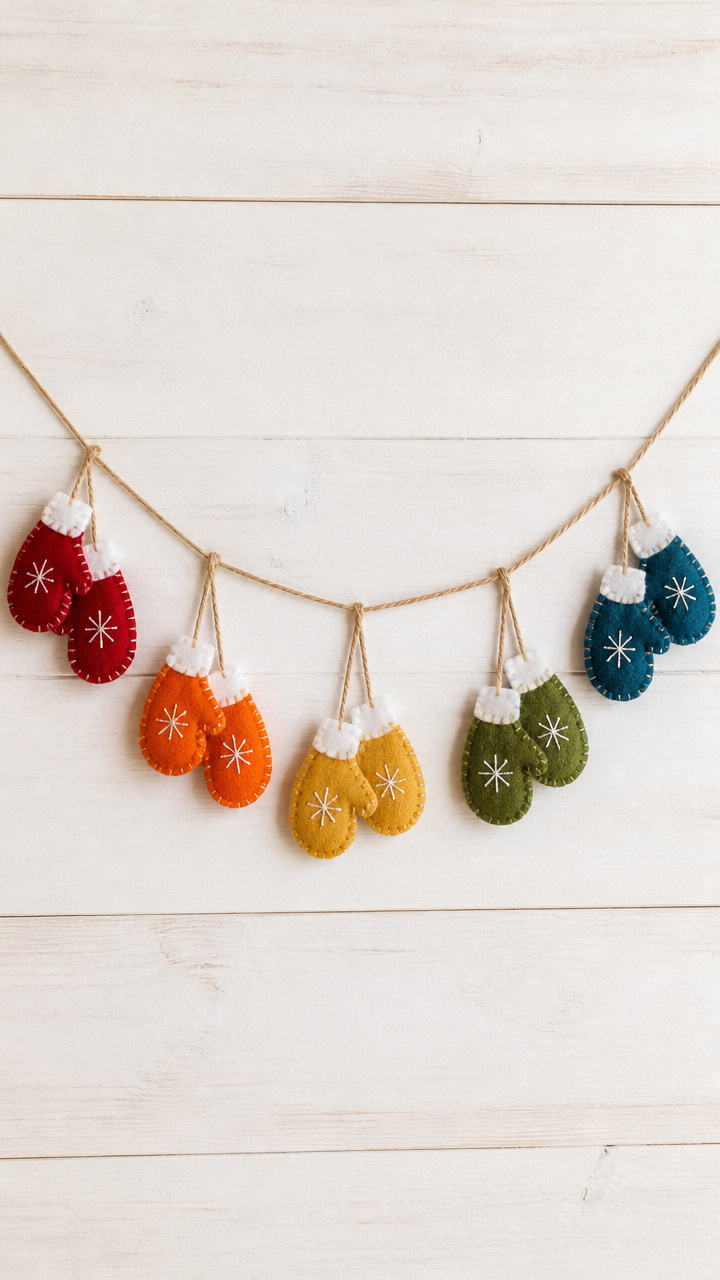
Colorful pairs of tiny mittens dangle from twine like laundry on a snowy line. Hang them above a mantel or window for instant cozy cheer.
Materials Needed
- Assorted colored craft felt sheets (9 x 12 inches, 4 colors)
- White embroidery floss
- Blunt-tipped sewing needle
- Scissors
- Twine – 6 feet
- Ruler
- Pencil
How to Make It
- Draw a mitten shape, 2 inches tall, on paper and trace it onto the back of each felt color, making 8 total mittens (4 pairs).
- Cut out all mitten shapes and pair them by color.
- Place two matching mittens right sides together and sew around the edge with a whipstitch, leaving the wrist open.
- Turn each mitten right side out, then space them evenly along the twine by tying the top of each pair with a 6-inch floss strand.
5. Felted Wool Snowmen
Advanced
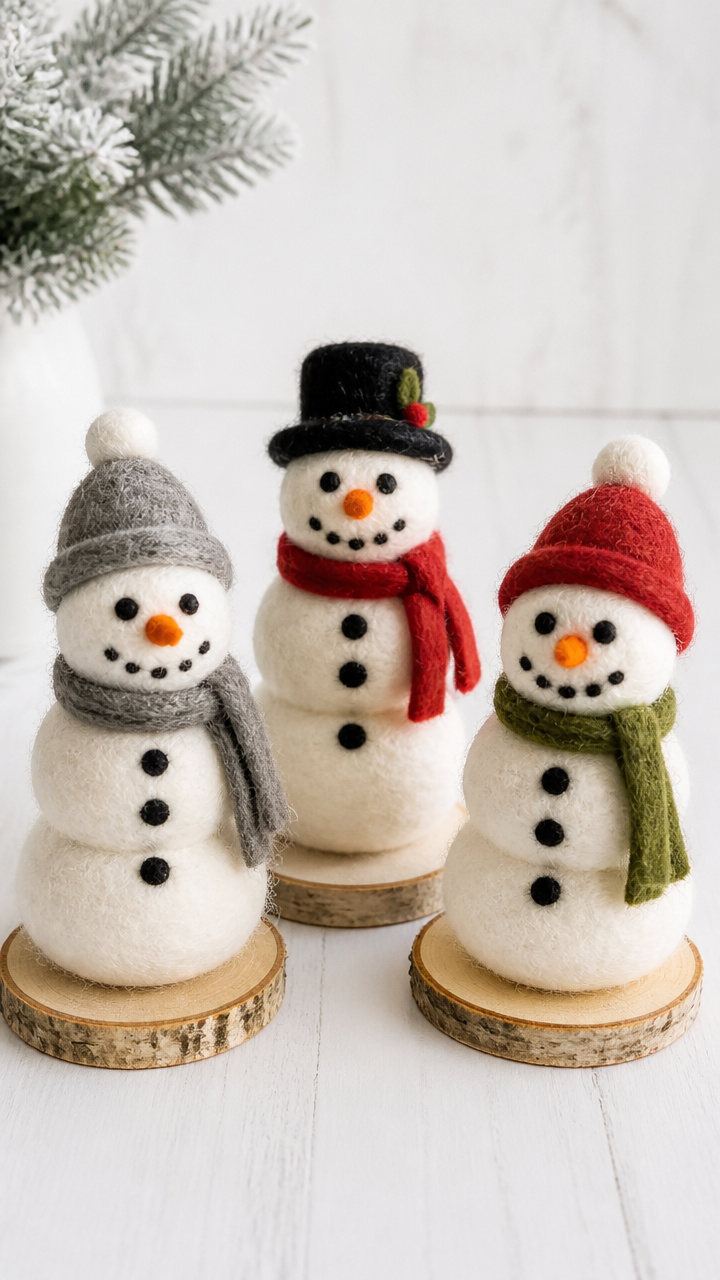
Needle-felted snowmen stand firm on little wooden bases, their wool puffing softly like real snow. This tactile craft rewards slow, focused poking.
Materials Needed
- White wool roving – 10 grams
- Orange wool roving – 2 grams
- Black wool roving – 2 grams
- Wooden disc base, 1.5 inches diameter – 3 units
- Felting needle size 38
- Foam pad
- Small twig pieces – 6 short lengths
How to Make It
- Pull off a golf ball-sized piece of white roving and roll it into a loose ball, then place it on the foam pad.
- Repeatedly poke the ball with the felting needle until it firms into a sphere, about 5 minutes.
- Repeat to make a slightly smaller second sphere and stack it on top, felting the two together.
- Add tiny black roving bits for eyes and a longer orange piece for the carrot nose, felting each in place, then insert twigs as arms and secure with wool.
6. Glitter-Flecked Snowflake Coasters
Easy
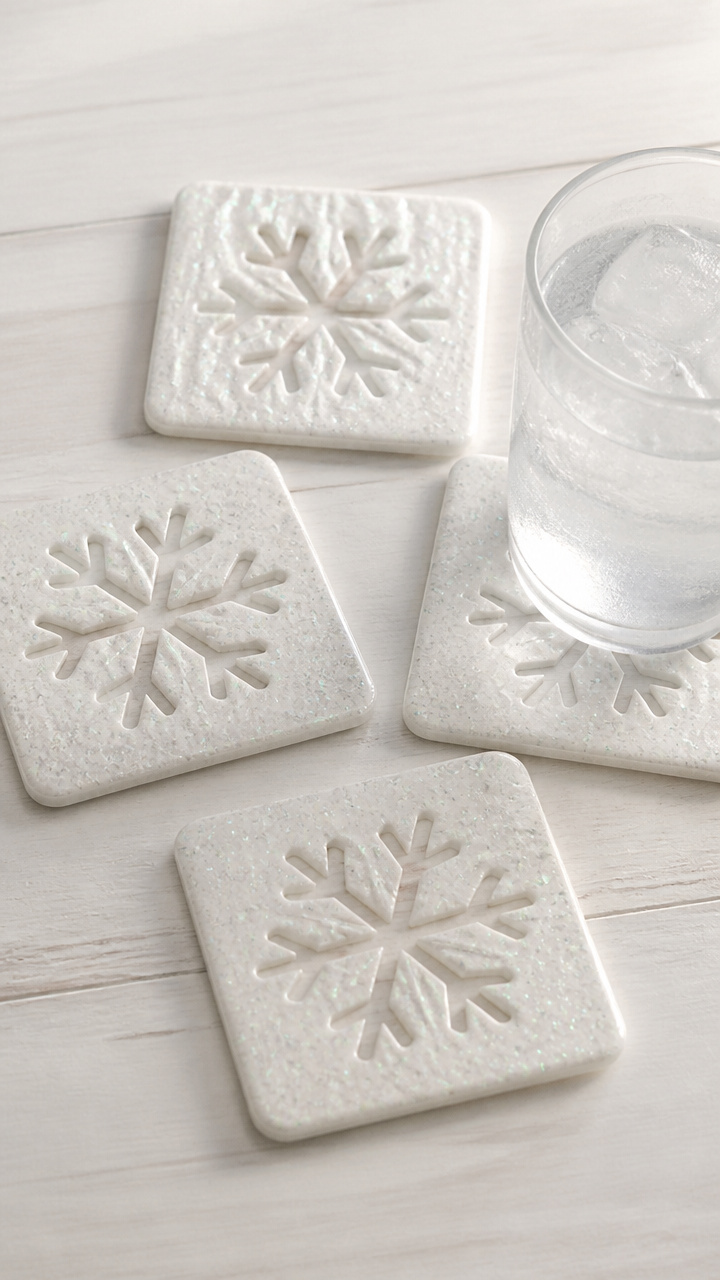
Stiff felt squares shimmer with embedded glitter and crisp snowflake silhouettes. These protect surfaces while adding a frost-kissed glow to any table.
Materials Needed
- White craft felt sheet (9 x 12 inches)
- Clear contact paper – 12 x 12 inch sheet
- Fine iridescent glitter
- Craft stick
- Scissors
- Snowflake-shaped hole punch
How to Make It
- Cut the felt into four 4×4 inch squares.
- Place one square on the sticky side of the contact paper and sprinkle glitter over it evenly.
- Press a second layer of contact paper on top, sandwiching the felt and glitter, then smooth with the craft stick.
- Use the snowflake punch to cut out one coaster from each corner of the laminated sheet and trim edges neatly.
7. No-Sew Fox Earmuffs
Easy

Fluffy fox ears rise from a stretchy headband, lined with soft fleece and trimmed in bright felt. Kids adore these and they require zero stitching.
Materials Needed
- Orange craft felt sheet (9 x 12 inches)
- Black craft felt scrap
- White craft felt scrap
- Fleece-lined elastic headband – 1 unit
- Fabric glue
- Scissors
- Fox ear template (printable)
How to Make It
- Print and cut out the fox ear template, then trace two ears onto orange felt and two small inner triangles onto black felt.
- Cut out all pieces and glue a black triangle inside each orange ear, letting dry for 5 minutes.
- Glue the flat base of each ear to the sides of the headband, positioning them to face forward.
- Cut two tiny white eye shapes and glue them just above the ears on the headband.
8. Layered Tree Wall Art
Moderate
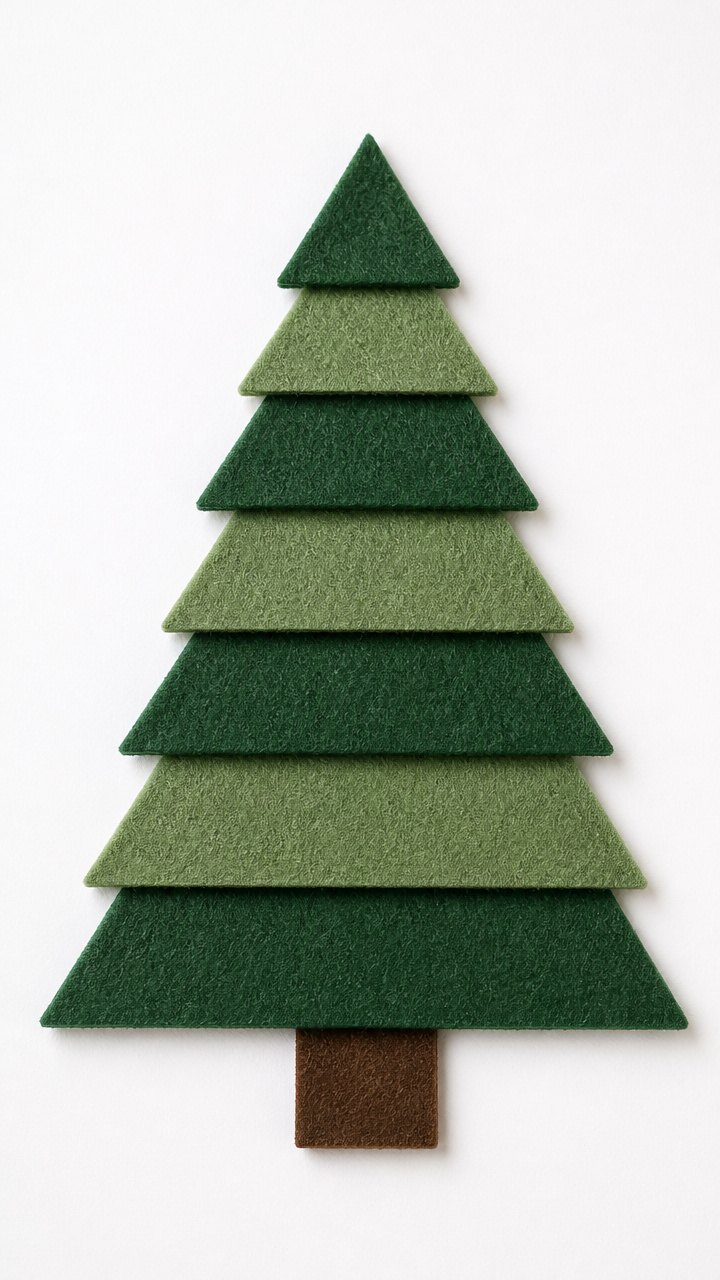
A symmetrical evergreen tree built from seven graduated felt triangles hangs boldly on a wall. The clean layers create depth without shadows.
Materials Needed
- Green craft felt sheet (9 x 12 inches)
- Brown craft felt scrap
- White cardstock – 8.5 x 11 inches
- Double-sided tape
- Scissors
- Ruler
- Pencil
How to Make It
- Draw seven isosceles triangles on the green felt, ranging from 2 inches to 6 inches tall, with consistent 1-inch bases.
- Cut out each triangle and arrange them vertically on the cardstock in a tree shape, largest at the bottom, smallest at the top.
- Glue each triangle in place with double-sided tape, centering them along a shared vertical axis.
- Cut a 1-inch tall rectangle from brown felt and glue it beneath the tree as the trunk.
9. Button-Embroidered Stockings
Moderate
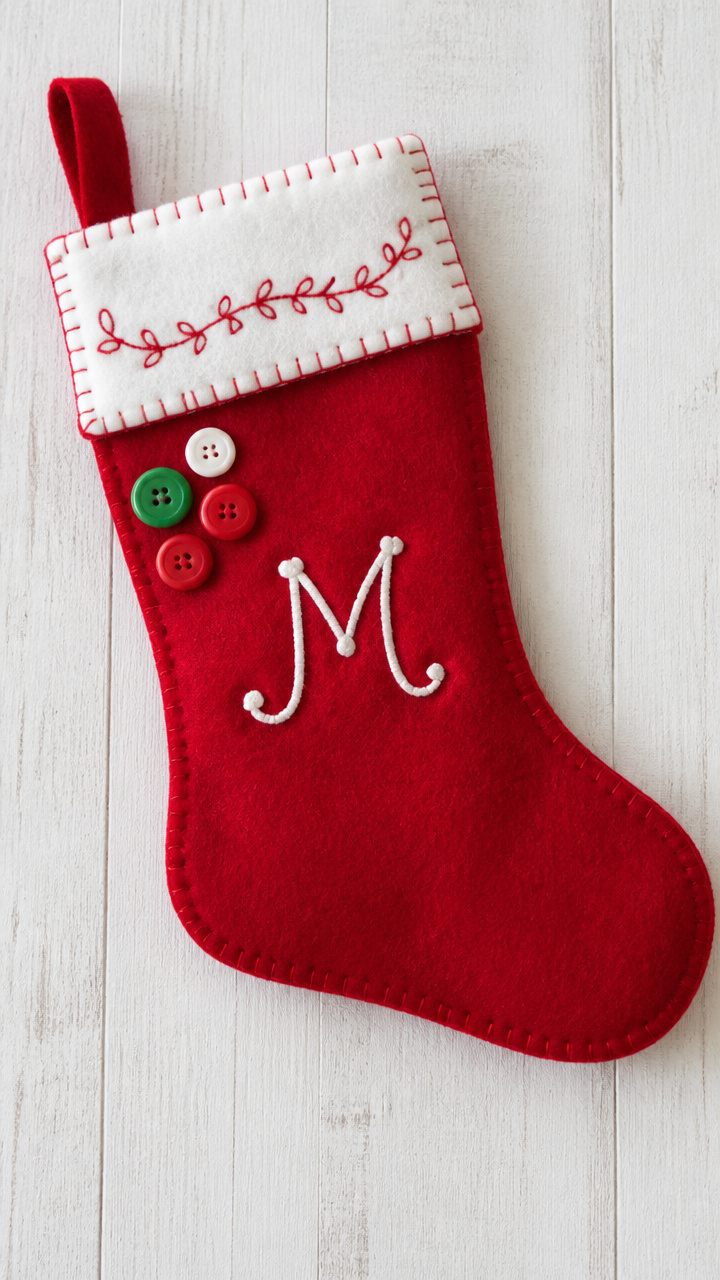
Simple felt stockings gain personality with embroidered cuffs and colorful button clusters. Each one feels personal when you add a name initial.
Materials Needed
- Red craft felt sheet (9 x 12 inches)
- White embroidery floss
- Blunt-tipped sewing needle
- Four 0.5-inch multicolored buttons
- Scissors
- Stocking template
- Pencil
How to Make It
- Trace the stocking template onto the felt and cut out two identical pieces.
- Place the pieces together and sew around the edge with a whipstitch, leaving the top open.
- Turn the stocking right side out, then embroider a zigzag border along the cuff using white floss.
- Sew one button near the toe and three more in a cluster below the cuff, spacing them evenly.
10. Felt Ice Skates Magnets
Moderate
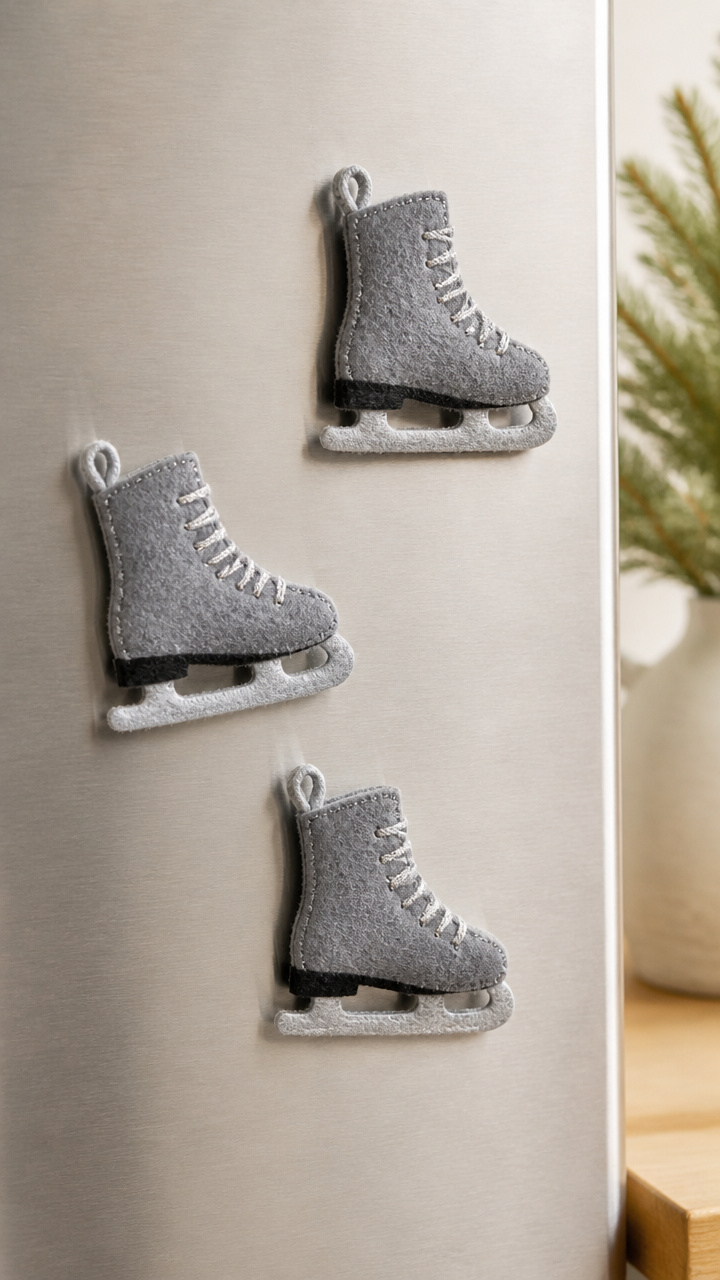
Tiny ice skates, stitched in gray felt with silver cord laces, cling to the fridge. These miniature keepsakes honor winter sports lovers.
Materials Needed
- Gray craft felt sheet (9 x 12 inches)
- Silver embroidery floss
- Blunt-tipped sewing needle
- Small magnet discs – 4 units
- Fabric glue
- Scissors
- Skate template
How to Make It
- Trace the skate template twice onto gray felt and cut out all pieces.
- Sew two sole pieces together with a whipstitch using gray thread, leaving the top open.
- Thread the needle with silver floss and crisscross it through pre-poked lace holes to create laces.
- Glue a magnet to the back of each skate and let dry for 10 minutes.
11. Quilted Hot Cocoa Pouches
Advanced
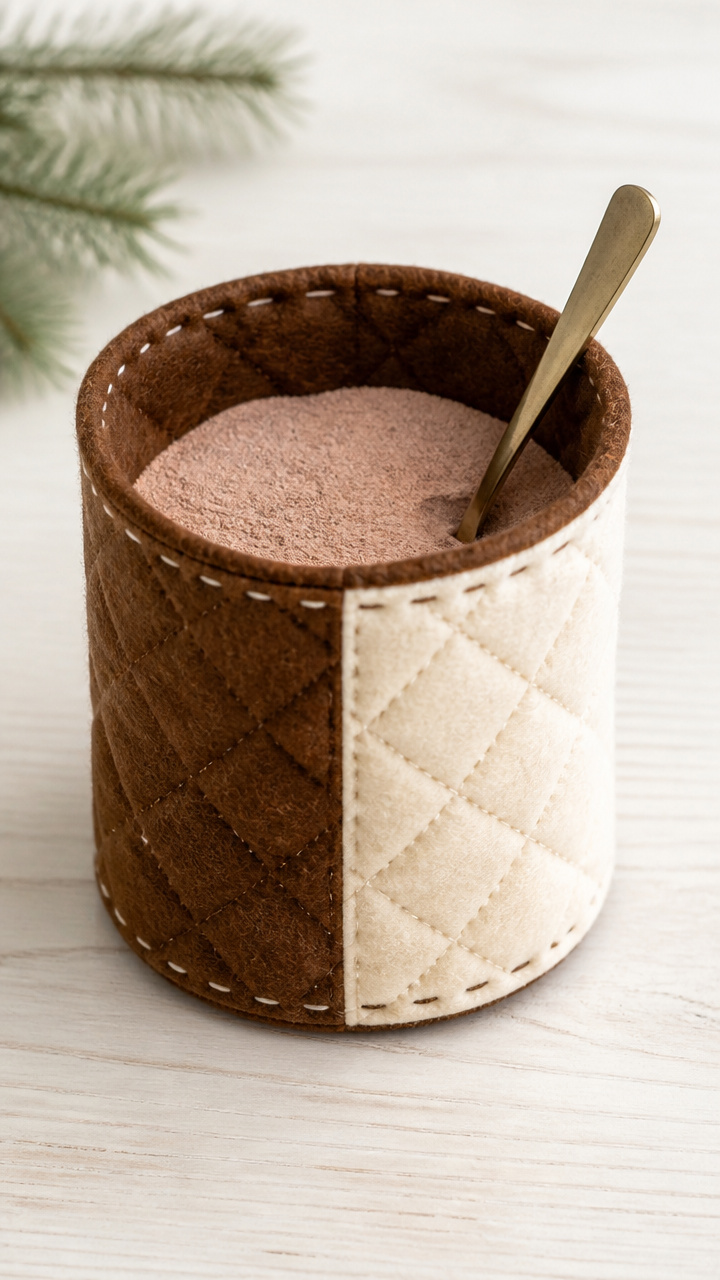
Insulated pouches wrap around mugs, their quilted felt panels trapping heat. Fill them with cocoa mix and a spoon for an edible gift.
Materials Needed
- Brown and cream craft felt sheets (9 x 12 inches each)
- Polyester batting – 6 x 8 inch piece
- Contrasting thread
- Sewing machine
- Pins
- Rotary cutter
- Self-healing cutting mat
- Ruler
How to Make It
- Cut two 4×6 inch rectangles from brown felt and one same-size piece from batting.
- Layer the batting between the brown felt pieces and pin around the edges.
- Using the sewing machine, stitch a 0.25-inch seam around the perimeter, leaving a 1.5-inch gap on one side.
- Turn the pouch right side out through the gap and press flat, then hand-stitch the opening closed with a ladder stitch.
12. Gingerbread House Ornaments
Easy
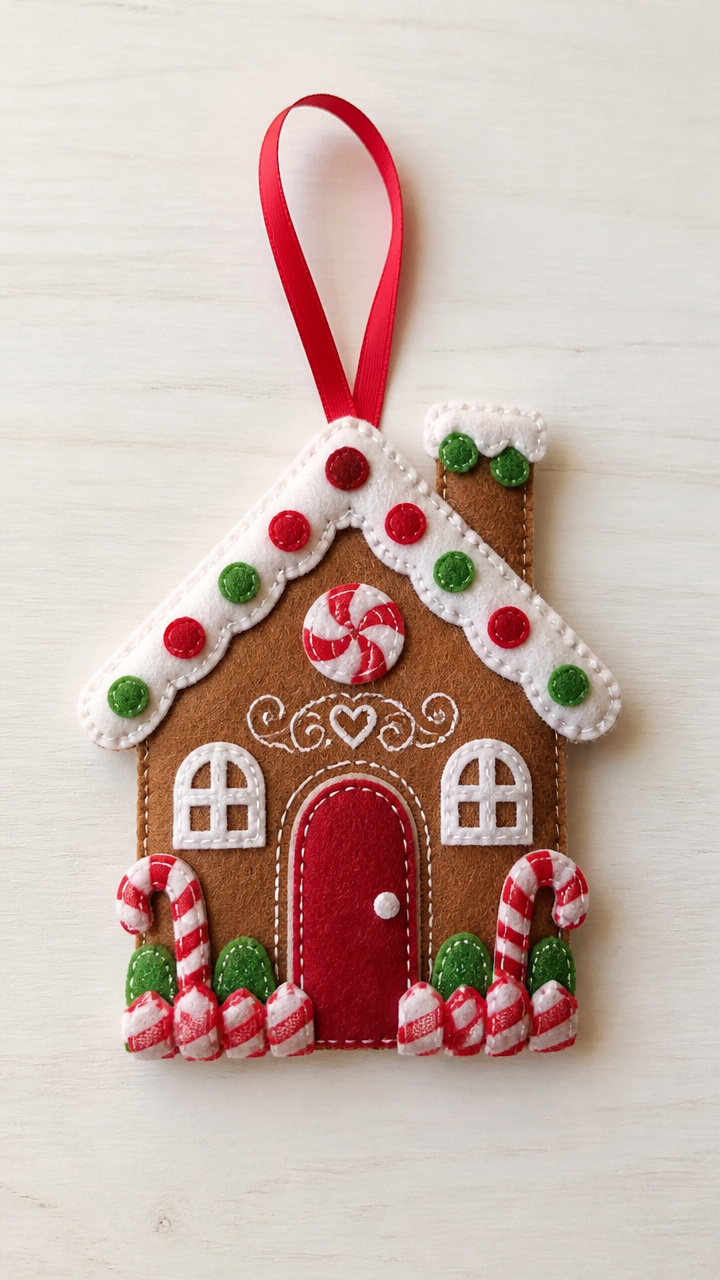
Flat gingerbread houses with candy cane fences and gumdrop details hang from ribbons. These nostalgic shapes spread sweetness on the tree.
Materials Needed
- Brown craft felt sheet (9 x 12 inches)
- Red, white, and green craft felt scraps
- Fabric glue
- Ribbon – 12 inches
- Scissors
- House template
How to Make It
- Trace the house template onto brown felt and cut out two pieces.
- Cut small red strips for peppermints, white dots for icing, and green ovals for gumdrops.
- Glue the decorations onto one house piece to mimic a frosted look.
- Glue the two house pieces together, sandwiching the ribbon end between the tops, and let dry for 10 minutes.
13. Snowy Owl Pin Cushions
Moderate
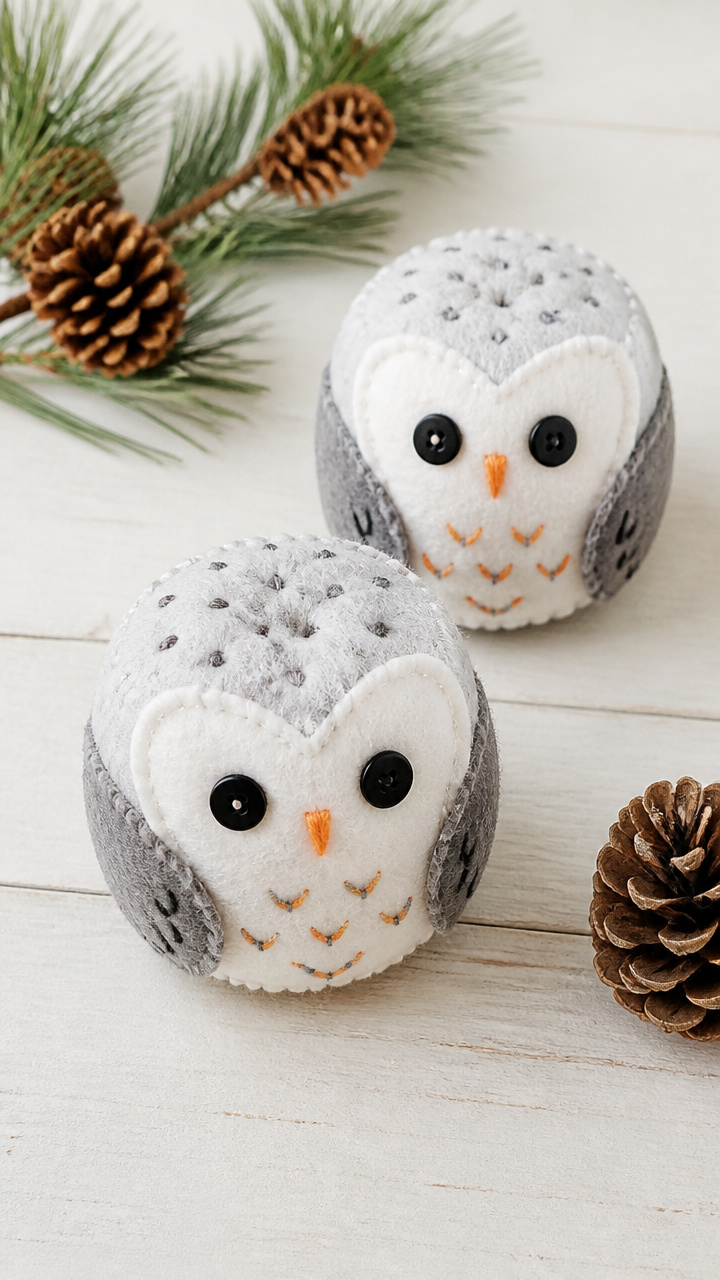
Round pin cushions shaped like owls have tufted feather tops and button eyes. They’re soft to the touch and useful on any sewing table.
Materials Needed
- White and gray craft felt sheets (9 x 12 inches each)
- Two 0.5-inch black buttons
- Polyester fiberfill – 1/4 cup
- Blunt-tipped sewing needle
- Embroidery floss (gray and orange)
- Scissors
- Circular lid (3-inch diameter) for tracing
How to Make It
- Trace the lid onto white felt and cut out two circles, then cut two wing shapes from gray felt.
- Sew the wings onto one white circle using gray floss and a backstitch.
- Sew the two white circles together around the edge with a running stitch, leaving a 2-inch gap.
- Turn right side out, stuff with fiberfill, then hand-sew the gap closed and add button eyes and an orange beak with floss.
14. Felt Icicle Window Clings
Easy

Long, tapered icicles in gradient blues stick to glass with static. Their cool tones catch the light and mimic frost patterns.
Materials Needed
- Light blue, medium blue, and dark blue craft felt sheets (9 x 12 inches each)
- Scissors
- Ruler
- Pencil
How to Make It
- Cut 12 strips from the felt, each 0.5 inches wide and 6 inches long, mixing the three blue shades.
- Taper each strip to a point at one end using diagonal cuts.
- Round the top edge of each strip slightly to soften the look.
- Press each icicle firmly against a clean window, starting from the top and smoothing downward.
15. Magnetic Sled Bookmarks
Moderate
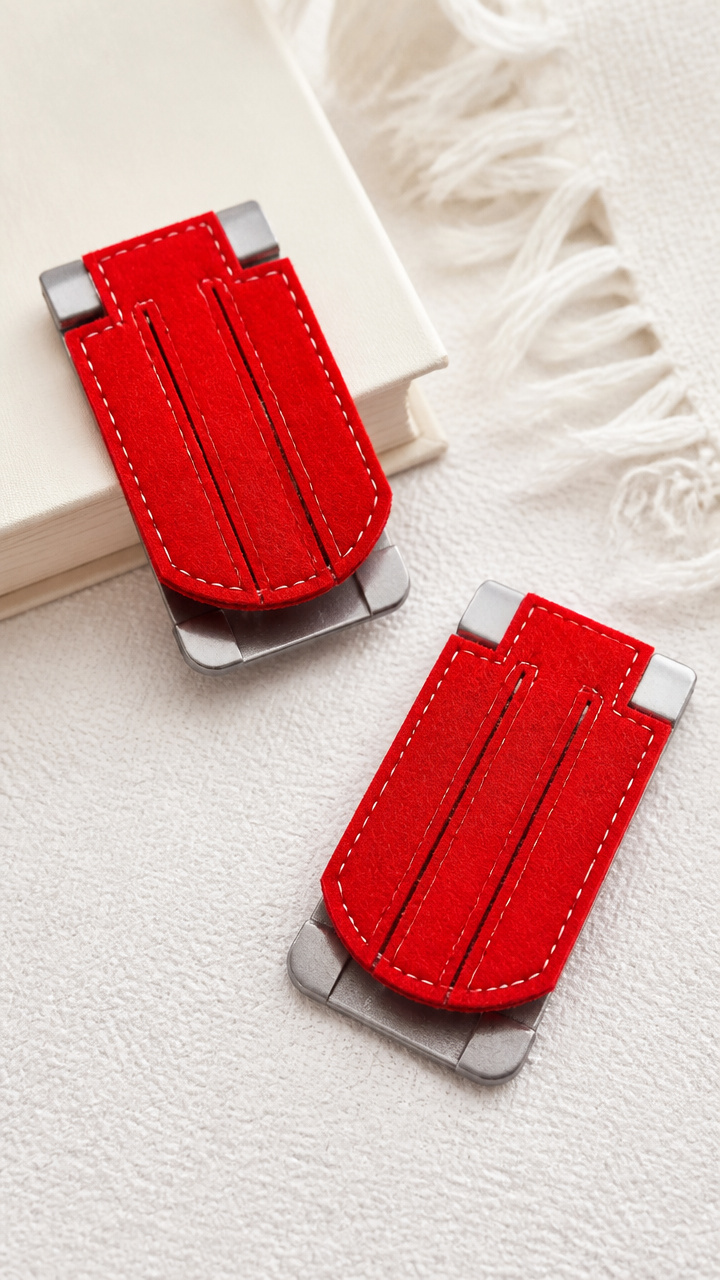
Mini sleds with runners that clip pages between metal strips double as art and utility. These slide smoothly and stay put.
Materials Needed
- Red craft felt sheet (9 x 12 inches)
- Two 1-inch magnetic strips
- Fabric glue
- Scissors
- Sled template
- Pencil
How to Make It
- Trace the sled template onto red felt and cut out two identical pieces.
- Glue one magnetic strip along the runner curve of one piece, ensuring full adhesion.
- Glue the second felt piece on top to sandwich the magnet, aligning edges exactly.
- Let dry under a light book for 15 minutes to prevent warping.
16. Felted Wool Wreath
Advanced
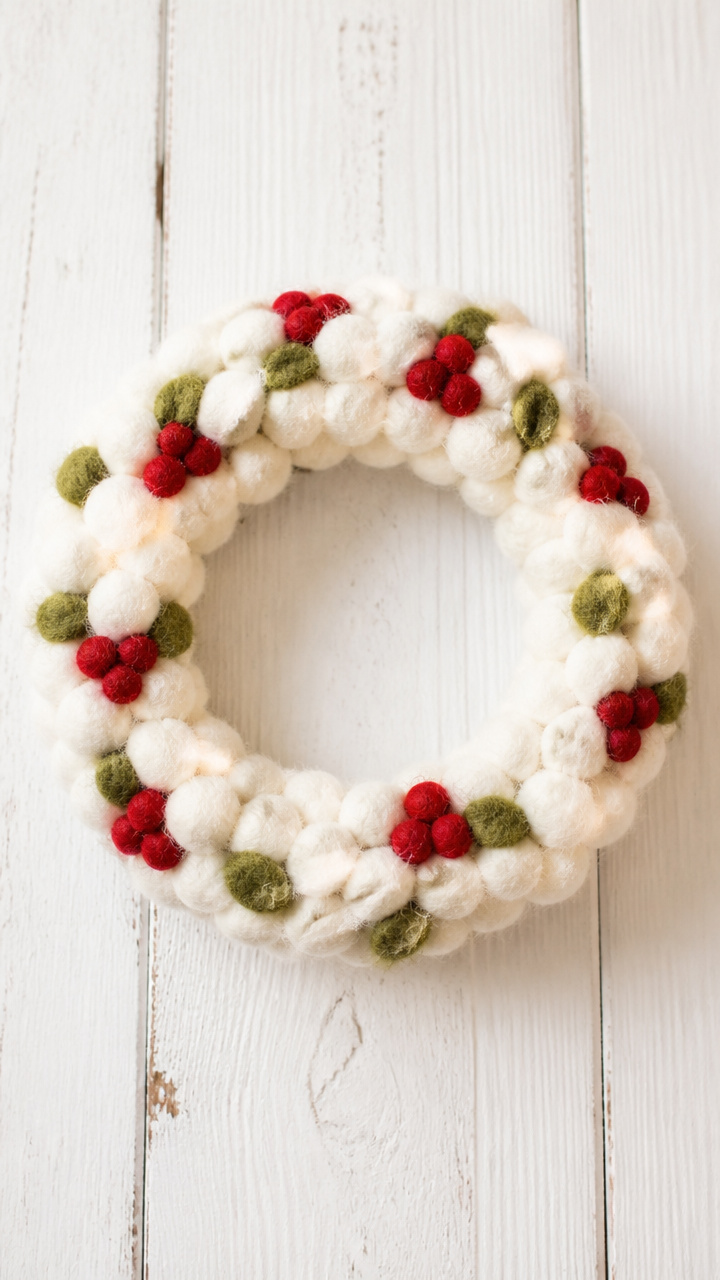
A dense ring of needle-felted white wool forms a wintry wreath base, adorned with tiny felt berries. It stays soft year after year.
Materials Needed
- White wool roving – 20 grams
- Green wool roving – 5 grams
- Red wool roving – 3 grams
- Wreath foam ring, 6 inches diameter
- Felting needle size 38
- Foam pad
How to Make It
- Wrap the white roving loosely around the foam ring to form a thick band.
- Place the ring on the foam pad and repeatedly poke the wool with the felting needle until it shrinks and firms into a solid ring.
- Roll small red roving balls and felt them into berry clusters, attaching them with extra wool strands.
- Felt small green leaves near each berry group to complete the decoration.
17. Penguin Paperclip Holders
Easy
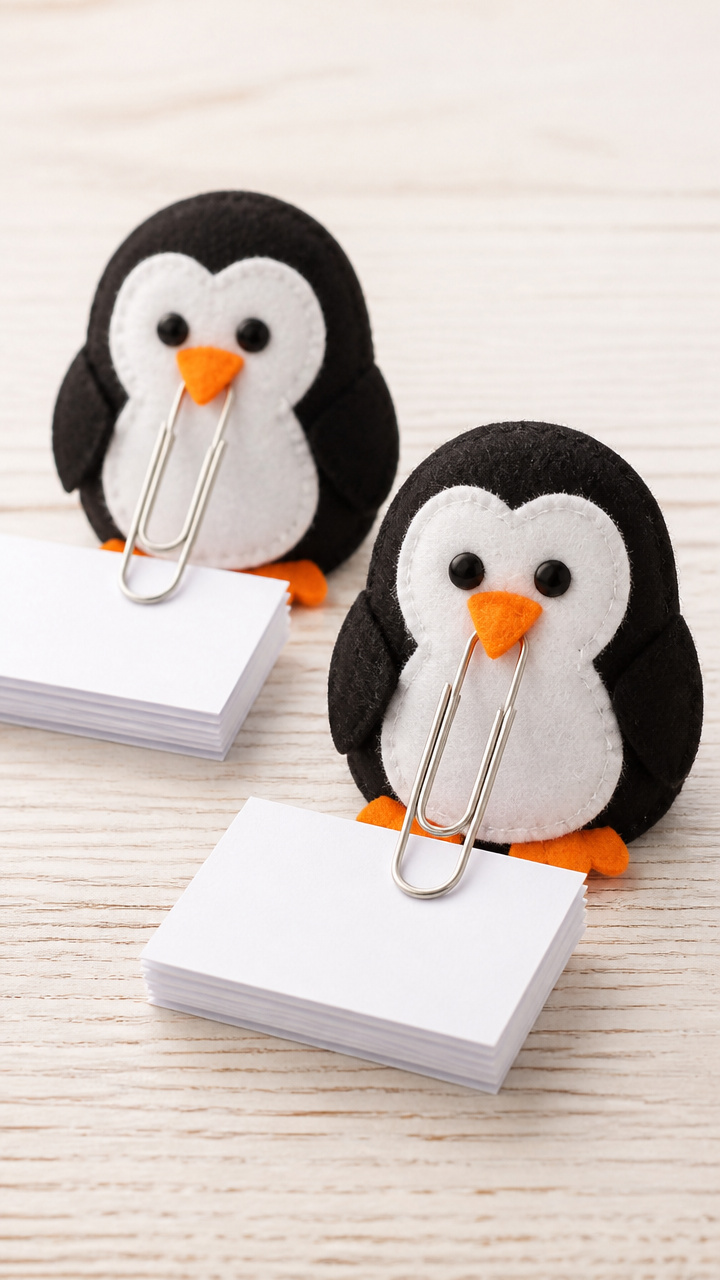
Chubby penguins with glossy eyes and orange feet grip stacks of paper. Their weight keeps notes secure and their look brings smiles.
Materials Needed
- Black and white craft felt sheets (9 x 12 inches each)
- Orange craft felt scrap
- Two 0.25-inch black buttons
- Strong craft glue
- Large metal paperclip – 4 units
- Scissors
- Penguin template
How to Make It
- Trace the penguin template onto black and white felt, cutting out two bodies and two belly patches.
- Glue the white belly onto the black body and let dry for 5 minutes.
- Glue on buttons for eyes and cut-out orange feet, then attach a paperclip to the back with strong glue.
- Let each holder cure flat for 30 minutes before use.
18. Felt Star Lanterns
Moderate
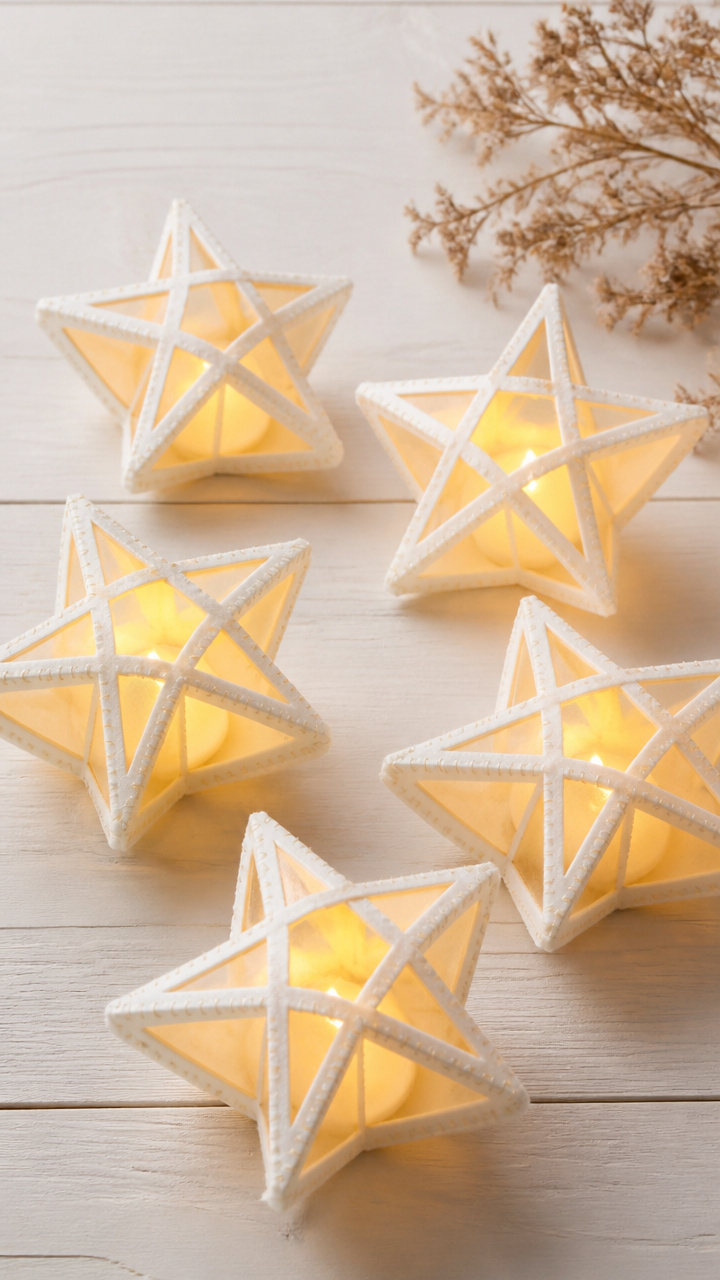
Five-pointed stars with translucent yellow centers glow when lit from within. Place tea lights inside for safe, flickering ambiance.
Materials Needed
- Yellow tissue paper – 6 x 6 inch square
- White craft felt sheet (9 x 12 inches)
- Mod Podge
- Foam brush
- Scissors
- Star template
- LED tea light – 3 units
How to Make It
- Trace the star template onto white felt and cut out two pieces.
- Cut the tissue paper into 1-inch squares and cover one felt star with Mod Podge.
- Apply tissue squares smoothly over the star, overlapping slightly, then seal with another coat of Mod Podge and let dry for 20 minutes.
- Glue the second felt star to the back, sandwiching the edges, and place an LED tea light inside.
19. Carved Felt Candle Wraps
Moderate
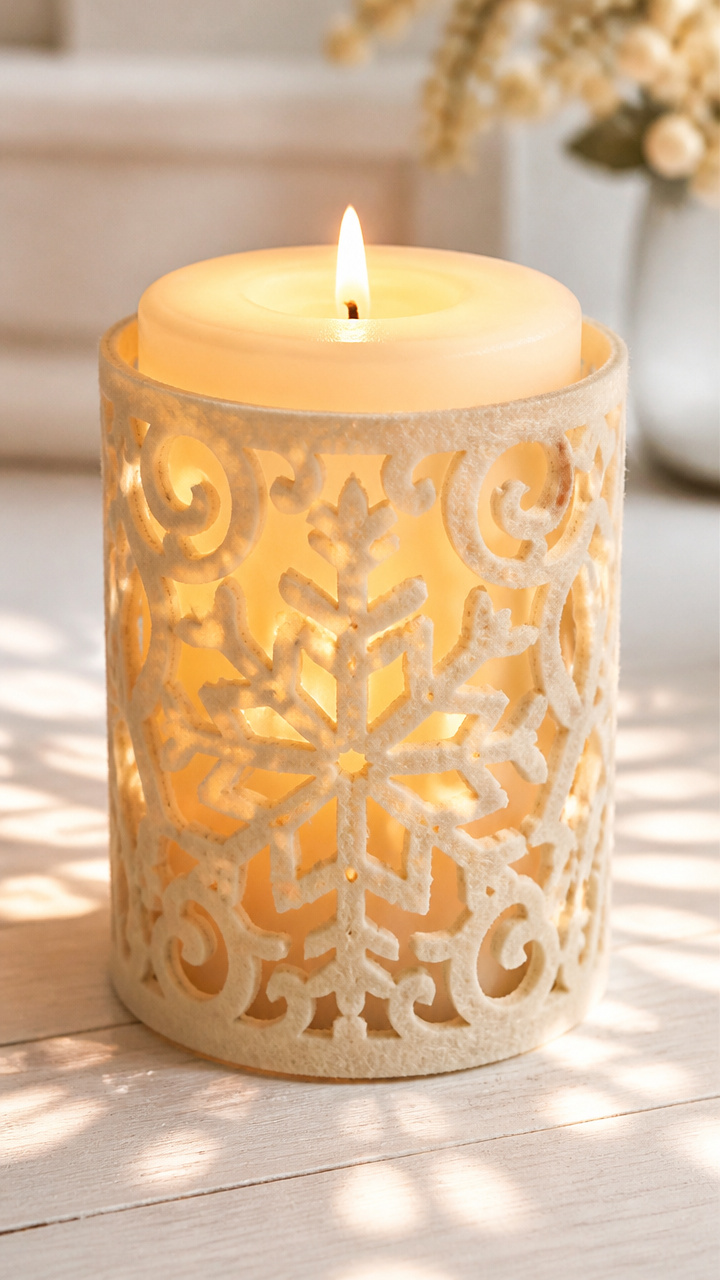
Cylindrical felt sleeves with laser-cut style patterns slide over pillar candles. When lit, the designs cast delicate shadows.
Materials Needed
- Cream craft felt sheet (9 x 12 inches)
- Craft knife
- Cutting mat
- Pencil
- Ruler
- Pillar candle, 3 inches diameter
How to Make It
- Measure the candle height and cut a felt rectangle 1 inch taller and long enough to wrap with 0.5 inch overlap.
- Draw a snowflake or geometric pattern lightly on the felt with pencil.
- Use the craft knife to carefully cut out the design, rotating the mat for control.
- Slide the sleeve over the candle, ensuring the cutouts face outward.
20. Felt Cardinal Ornaments
Moderate
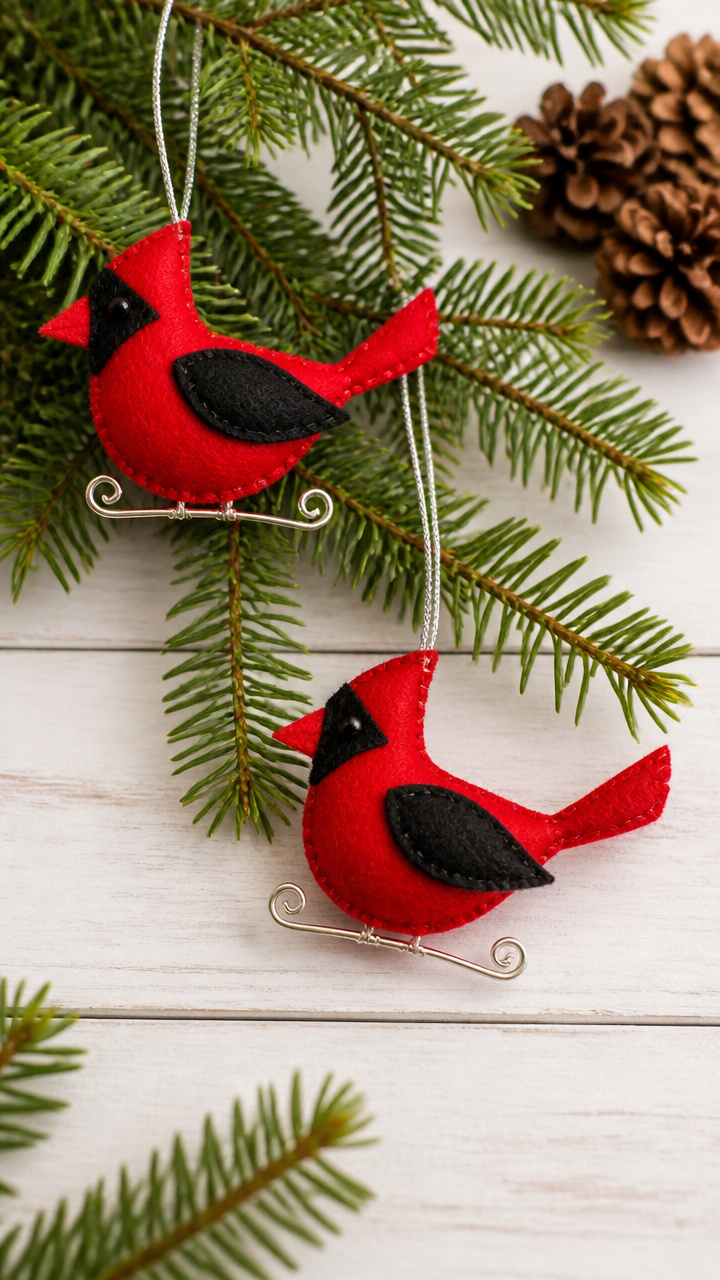
Bright red birds with black wings and wire perches hang at jaunty angles. Their vivid color stands out against evergreen boughs.
Materials Needed
- Red craft felt sheet (9 x 12 inches)
- Black craft felt scrap
- 22-gauge floral wire – 6 inches
- Fabric glue
- Scissors
- Bird template
How to Make It
- Trace the bird shape onto red felt and wing details onto black, then cut all pieces out.
- Glue the black wings onto the red body and let dry for 5 minutes.
- Bend the wire into a U-shape for a perch and glue both ends inside the bird’s lower body.
- Let cure for 10 minutes before hanging.
21. Snowglobe Keychains
Advanced
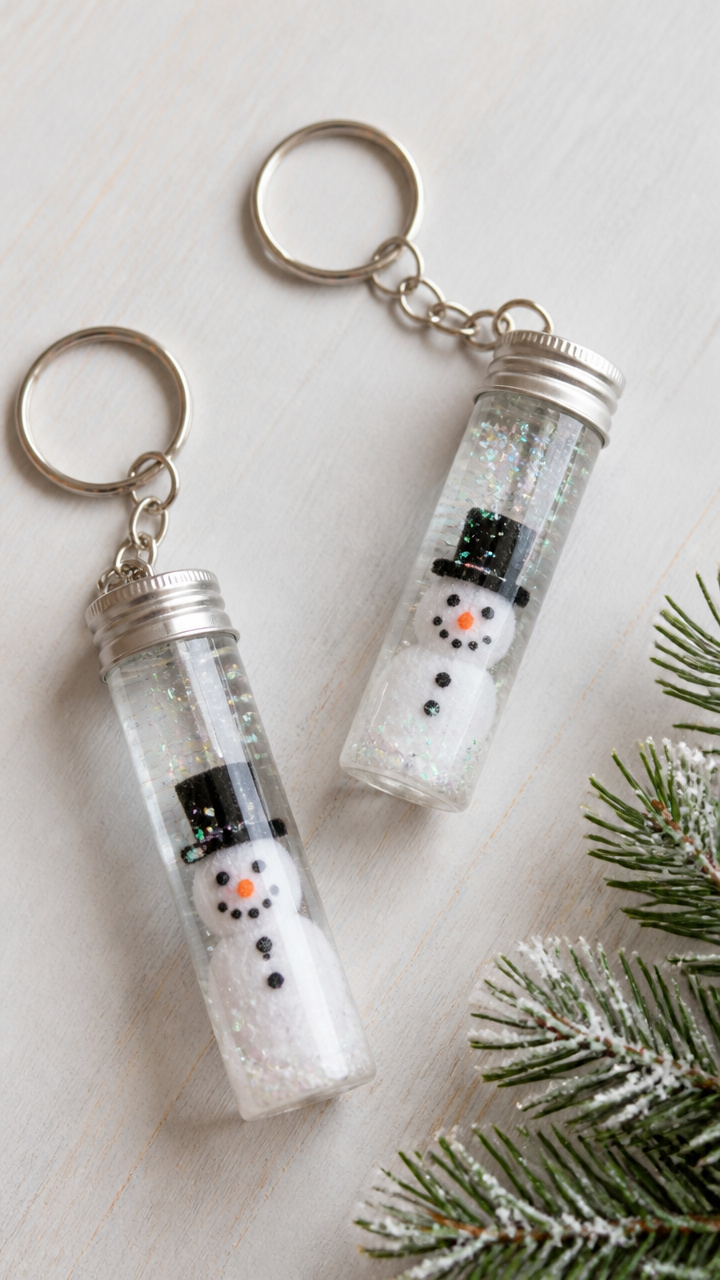
Tiny sealed bottles contain felt snowmen and glitter swirls. Shake them gently and watch the storm dance inside.
Materials Needed
- Clear plastic test tubes with caps – 3 units
- White and black felt scraps
- Iridescent glitter
- Distilled water – 2 tablespoons
- Glycerin – 1/2 teaspoon
- Hot glue gun and glue sticks
- Scissors
How to Make It
- Cut a tiny snowman shape from white felt and add black dot eyes and mouth.
- Fill each test tube halfway with distilled water and add glycerin to slow glitter movement.
- Drop the snowman and a pinch of glitter into the tube, then seal the cap tightly with hot glue.
- Let the glue cool completely before handling.
22. Felt Fireplace Garland
Easy
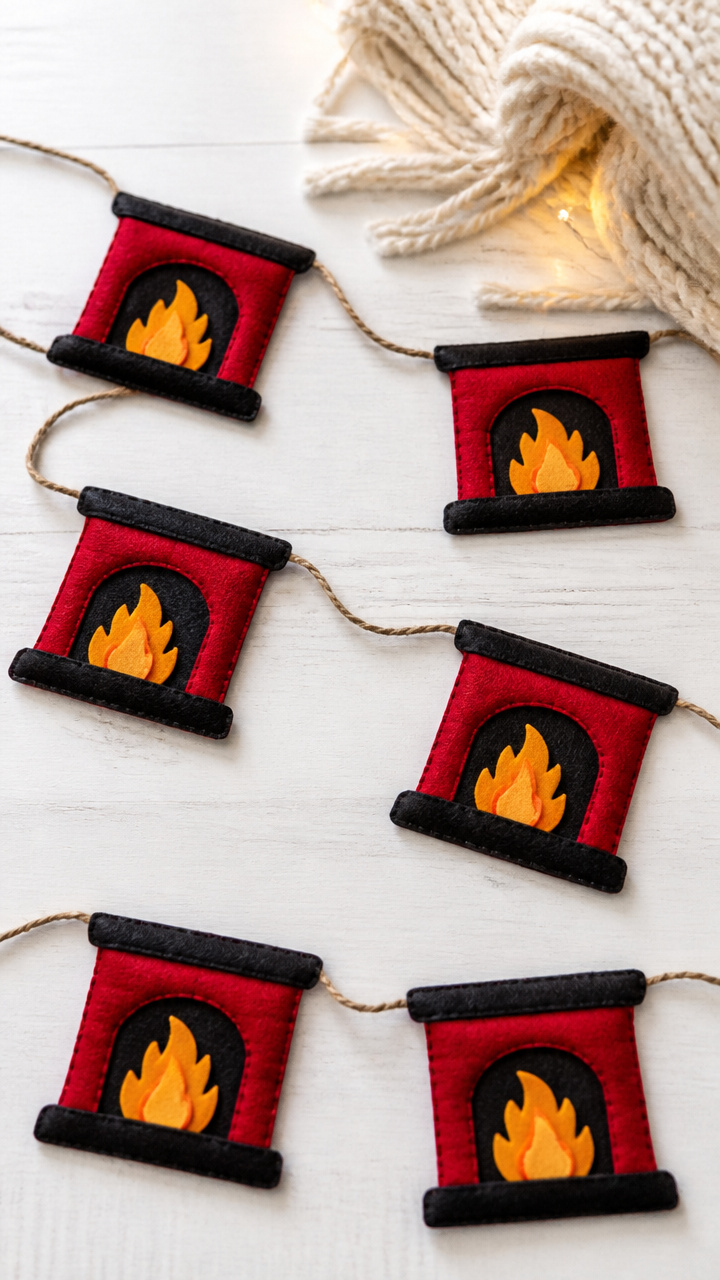
A row of miniature fireplaces with flickering felt flames warms any shelf. Each unit glows with layered red and yellow shapes.
Materials Needed
- Red, yellow, orange, and black craft felt sheets (9 x 12 inches each)
- Twine – 4 feet
- Fabric glue
- Scissors
- Fireplace template
How to Make It
- Trace and cut five fireplace shapes from black felt and five flame sets from red, yellow, and orange.
- Layer the flame colors from red at the base to yellow at the tip and glue them together.
- Glue each flame set into a fireplace opening and let dry for 5 minutes.
- Tie twine between the top corners of each fireplace and link them into a garland.
23. Knit-Look Felt Scarves
Easy
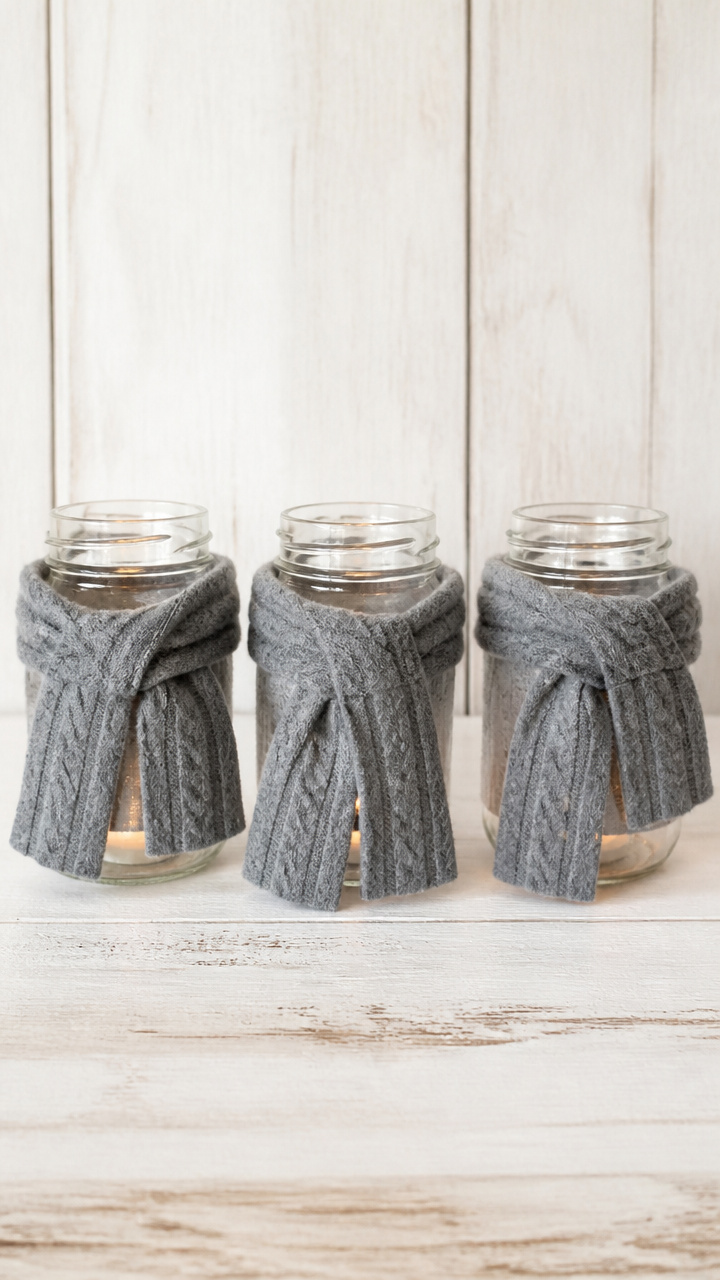
Faux-knit scarves wrapped around tiny bottles or jars suggest warmth and thoughtfulness. These take minutes but look intricately made.
Materials Needed
- Gray craft felt sheet (9 x 12 inches)
- Scissors
- Ruler
- Pencil
- Small glass spice jar – 3 units
How to Make It
- Cut a 1.5 x 8 inch rectangle from gray felt for each scarf.
- Draw parallel horizontal lines every 0.25 inches across the rectangle to mimic knitting.
- Wrap one scarf around the neck of a spice jar and tie the ends loosely.
- Repeat for remaining jars.
24. Felt Advent Calendar Pockets
Advanced

Twenty-four numbered pockets hang in a staggered row, each holding a tiny treat or note. The countdown becomes a daily ritual.
Materials Needed
- Red and green craft felt sheets (9 x 12 inches each)
- White fabric paint pen
- Twine – 5 feet
- Fabric glue
- Scissors
- Ruler
- Pencil
How to Make It
- Cut 24 pocket rectangles, each 2.5 x 3 inches, alternating red and green felt.
- Fold the top 0.5 inch of each pocket down to form a cuff and glue the sides and bottom to a backing piece of same color.
- Write numbers 1 to 24 on the cuffs using the fabric paint pen and let dry for 10 minutes.
- Space the pockets unevenly along the twine by gluing the backs in place and let cure for 20 minutes.
Your fingers already know what to do. Grab a needle, find your favorite color of felt, and start with the one that makes you smile first.