19 Winter Mason Jar Luminary Crafts for Dark Evenings

Soft light glowing through glass, snow-kissed textures, and the quiet charm of handmade decor—winter evenings call for warmth you can hold in your hands. Mason jars offer the perfect canvas, humble and clear, ready to be turned into little beacons for your windowsill, mantel, or garden path.
These luminaries blend craft and comfort, each one designed to bring stillness and sparkle to the longest nights. From frosted pinecone silhouettes to delicate tissue paper glows, every project uses precise materials and clear steps so you can create with confidence and joy.
1. Frosted Pinecone Path Lights
Easy
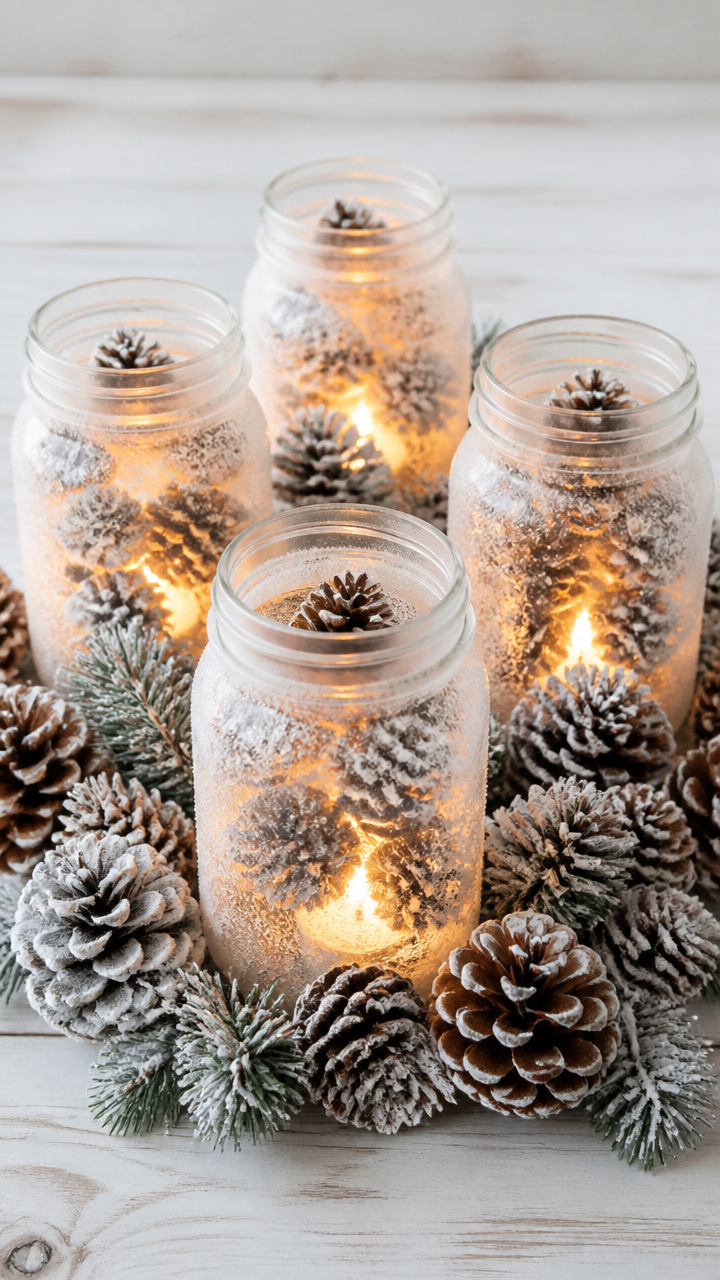
Natural pinecones clustered inside jars cast woodland shadows when lit, turning your porch into a snowy forest scene. The frost effect mimics fresh powder without melting.
Materials Needed
- 4 clean 16 oz mason jars with lids
- 12 small pinecones
- white craft glue
- kosher salt
- 4 battery-operated tea lights
- scissors
How to Make It
- Pour a 1/4 inch layer of white craft glue into the bottom of each jar.
- Sprinkle kosher salt over the glue until the base is fully coated, then let dry for 20 minutes.
- Arrange 3 pinecones inside each jar, standing them upright on the salted base.
- Place one battery-operated tea light in the center of each jar and close the lid.
2. Knit Sweater Jar Cozies
Moderate
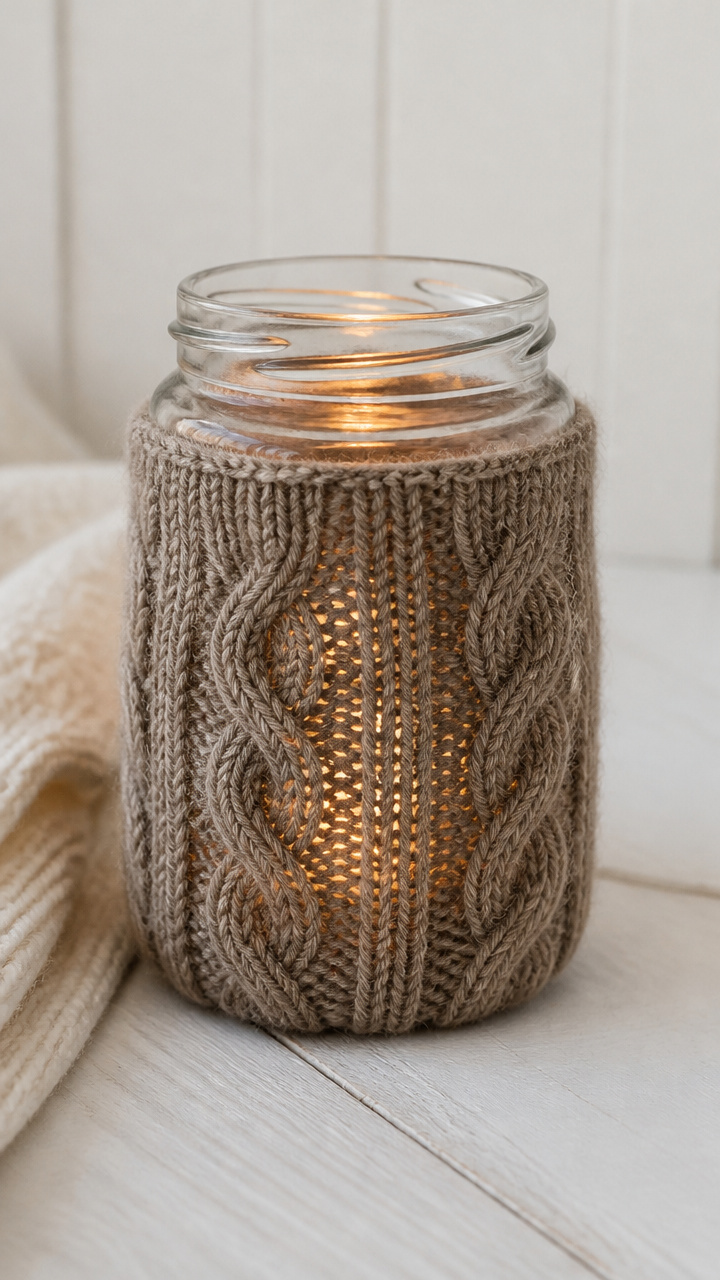
Repurposed wool sweater sleeves hug mason jars like winter scarves, diffusing light with a cozy, textured warmth perfect for rustic farmhouse tables.
Materials Needed
- 2 used wool blend sweaters, felted
- 2 12 oz mason jars
- fabric scissors
- polyester stuffing
- hot glue gun with glue sticks
- ruler
How to Make It
- Wash the sweaters in hot water and dry on high to felt the wool, then let cool completely.
- Cut two rectangles from the sweater fabric, each 4 inches wide and 8 inches long.
- Wrap each rectangle around a jar, overlapping the edges slightly, and glue the seam with hot glue.
- Stuff a small amount of polyester stuffing between the jar and fabric at the top to create a puffy collar effect.
3. Cinnamon Stick & Citrus Rings
Easy
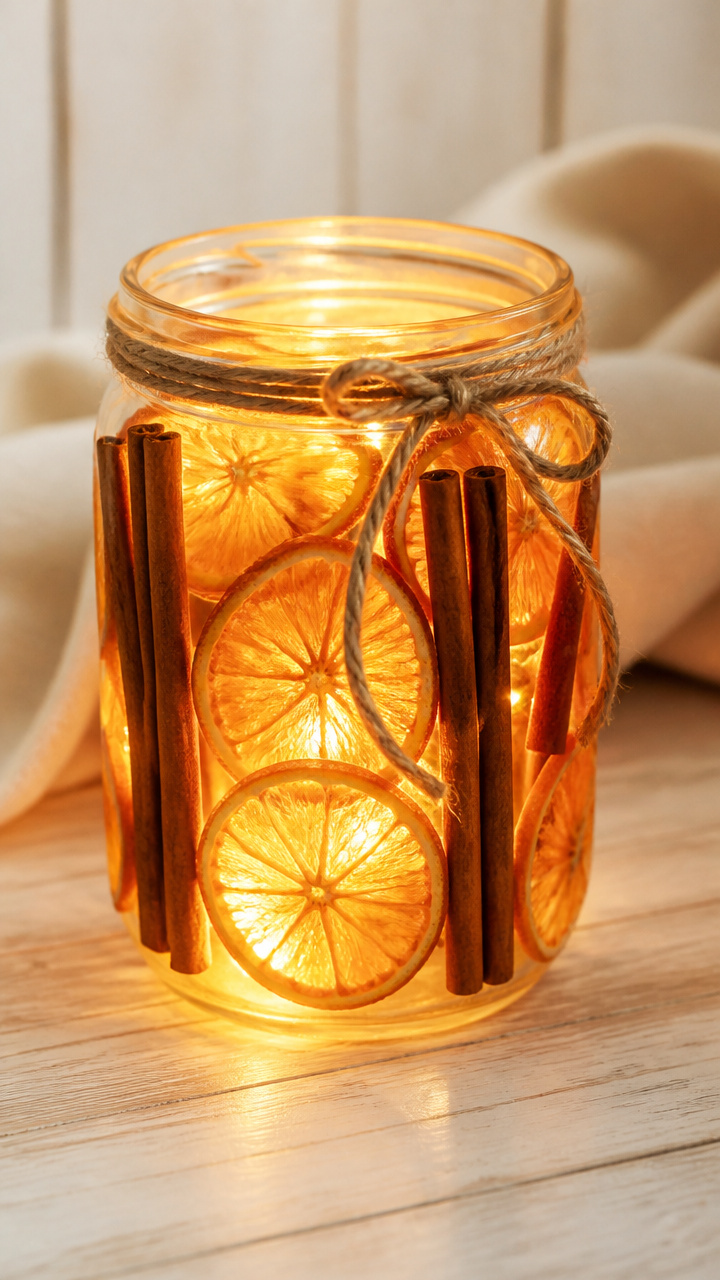
Spiced light glows through dried orange slices and cinnamon bundles, filling your space with the scent of mulled wine and crackling fires.
Materials Needed
- 3 wide-mouth 16 oz mason jars
- 9 dried orange slices
- 12 cinnamon sticks
- jute twine
- 3 battery-operated fairy light strands (20 lights each)
- hot glue gun with glue sticks
How to Make It
- Glue 3 cinnamon sticks together into a triangle shape using hot glue, repeat for all three jars.
- Place one dried orange slice at the bottom of each jar, then stand the cinnamon triangle in the center.
- Wrap jute twine around the jar neck twice and tie in a bow.
- Place a fairy light strand inside each jar, draping the battery pack over the side.
4. Snow Globe Shaker Jars
Moderate
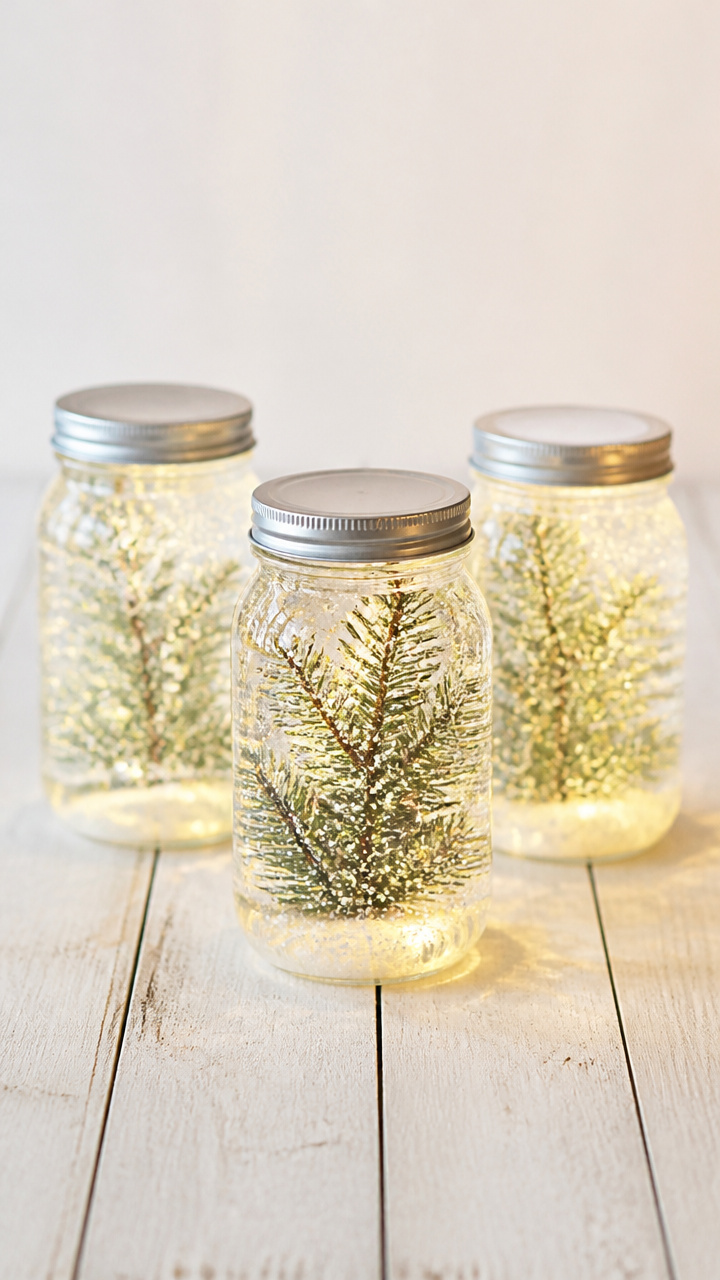
Glitter and mini evergreens swirl inside sealed jars, catching the light like a blizzard caught mid-dance. These double as gentle nightlights.
Materials Needed
- 3 8 oz mason jars with airtight lids
- distilled water
- clear craft glue
- white glitter
- 3 miniature evergreen sprigs
- rubber gloves
- measuring spoons
How to Make It
- Fill each jar 3/4 full with distilled water, then add 1 tablespoon of clear craft glue.
- Sprinkle 1 teaspoon of white glitter into each jar and drop in one evergreen sprig.
- Screw the lid on tightly, then shake to mix. Wipe any residue from the glass with a damp cloth.
- Let sit upright for 1 hour so bubbles rise before lighting from below with an LED puck light.
5. Lace-Embellished Frosted Jars
Moderate
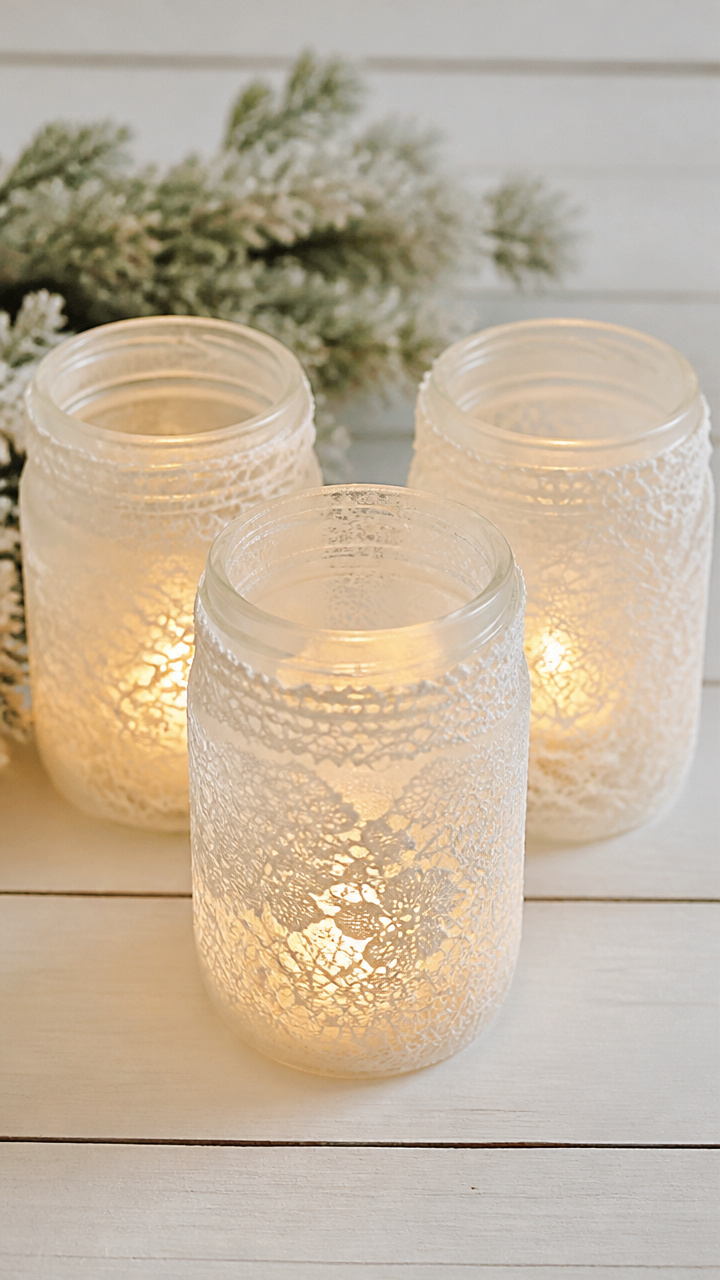
Delicate lace patterns pressed against frosted glass create cathedral-like light patterns, ideal for elegant dining tables or quiet reading corners.
Materials Needed
- 4 12 oz mason jars
- self-adhesive lace trim (1/2 inch wide, 10 feet total)
- mod podge frost finish
- foam brush
- 4 LED tea lights
- scissors
How to Make It
- Apply mod podge frost finish evenly over the outside of each jar with the foam brush, covering from base to shoulder.
- While the mod podge is still wet, press 6-inch lengths of lace trim onto the glass, spacing them evenly around the jar.
- Let dry for 1 hour, then gently peel off the lace to reveal the pattern.
- Place one LED tea light inside each jar before display.
6. Mini Evergreen Forest Luminaries
Easy
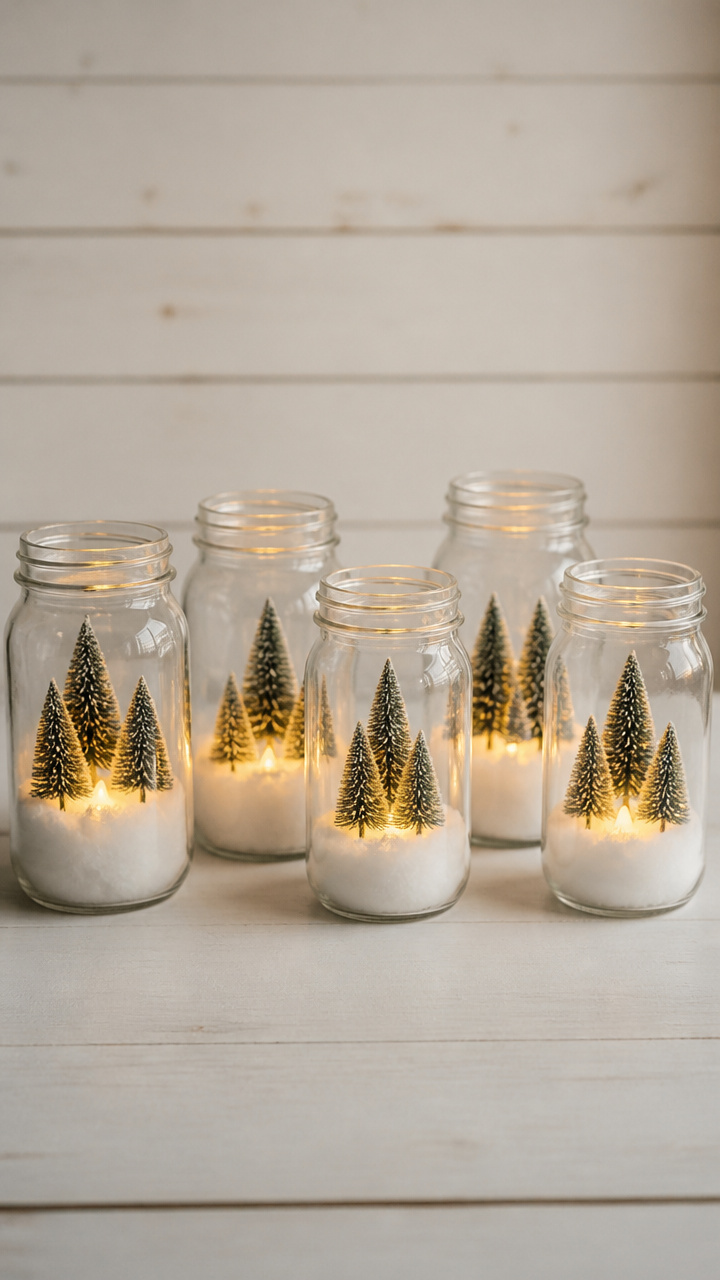
Tiny pine trees stand in snowy jars, glowing softly like a village tucked between mountain peaks. These suit mantels or holiday centerpieces.
Materials Needed
- 5 6 oz mason jars
- 5 small artificial evergreen trees (2-3 inches tall)
- cotton batting
- 4 battery-operated tea lights
- tweezers
How to Make It
- Pull apart cotton batting into small tufts and layer 1/2 inch deep into the bottom of each jar.
- Press one evergreen tree into the cotton in each jar, centering it upright.
- Add more cotton around the base to look like snowdrifts.
- Place a tea light inside each jar and turn on when ready to display.
7. Watercolor Washed Glass Jars
Moderate
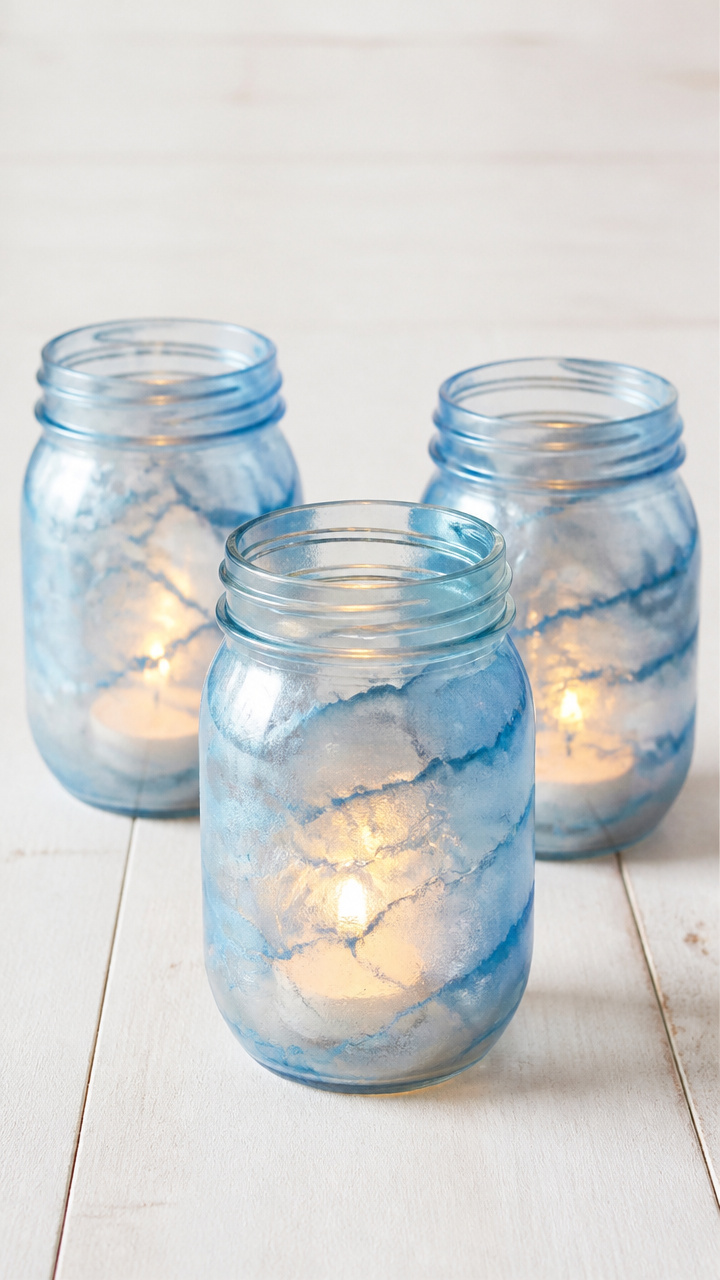
Pale blue and silver watercolor blends on glass mimic winter twilight, letting light pass through in soft, painterly ripples.
Materials Needed
- 3 clear 12 oz mason jars
- liquid watercolor paints (cerulean blue, silver mica)
- small paintbrush
- paper towels
- 3 LED tea lights
- spray bottle with water
How to Make It
- Spritz the outside of each jar lightly with water from the spray bottle.
- Dip the brush in cerulean blue watercolor and paint vertical streaks down the jar, then add silver mica between them.
- Blot excess paint with a paper towel to prevent dripping.
- Let dry completely for 2 hours, then place one tea light inside each jar.
8. Birch Bark Wrapped Jars
Advanced
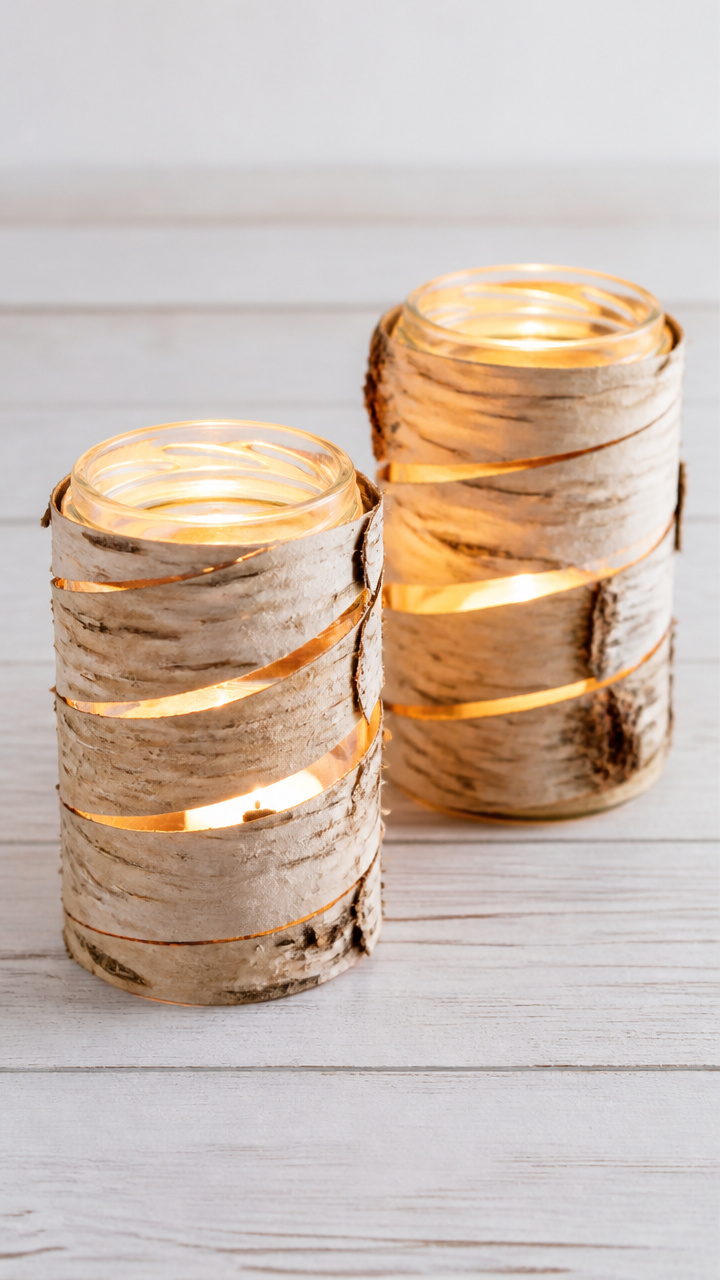
Real birch bark spirals around jars like tree trunks in a snowy wood, casting bark-textured shadows when lit from within.
Materials Needed
- 2 16 oz mason jars
- natural birch bark sheets (6 x 8 inches each)
- craft knife
- ruler
- clear-drying PVA glue
- small paintbrush
- 2 battery-operated tea lights
How to Make It
- Measure and cut each birch bark sheet to 6 inches high and 8 inches wide.
- Brush a thin layer of PVA glue on the back of each sheet.
- Wrap the bark around a jar, starting at the base and overlapping the top edge slightly, then press firmly.
- Let dry for 3 hours, then place a tea light inside each jar.
9. Glittered Snowflake Silhouettes
Moderate
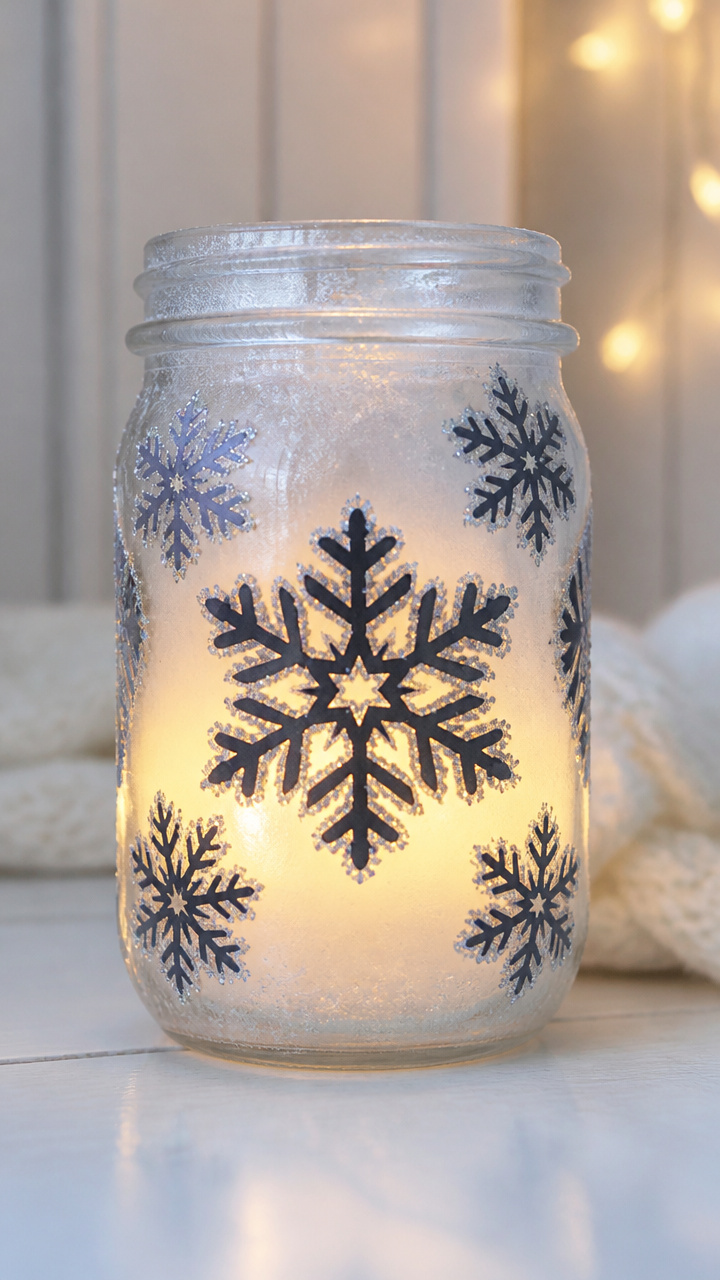
Hand-cut snowflakes painted with glue and dusted in glitter glow like frozen stars when backlit. These shine best on frosty windows.
Materials Needed
- 4 8 oz mason jars
- black construction paper
- scissors
- white school glue
- fine blue glitter
- small paintbrush
- 4 LED tea lights
How to Make It
- Cut 4 snowflake shapes from black construction paper, each slightly smaller than the jar height.
- Paint white school glue over each snowflake with the brush, covering all lines evenly.
- Sprinkle blue glitter over the glue, then tap off excess.
- Let dry for 45 minutes, then place one snowflake inside each jar and add a tea light.
10. Yarn-Wrapped Ombre Jars
Easy
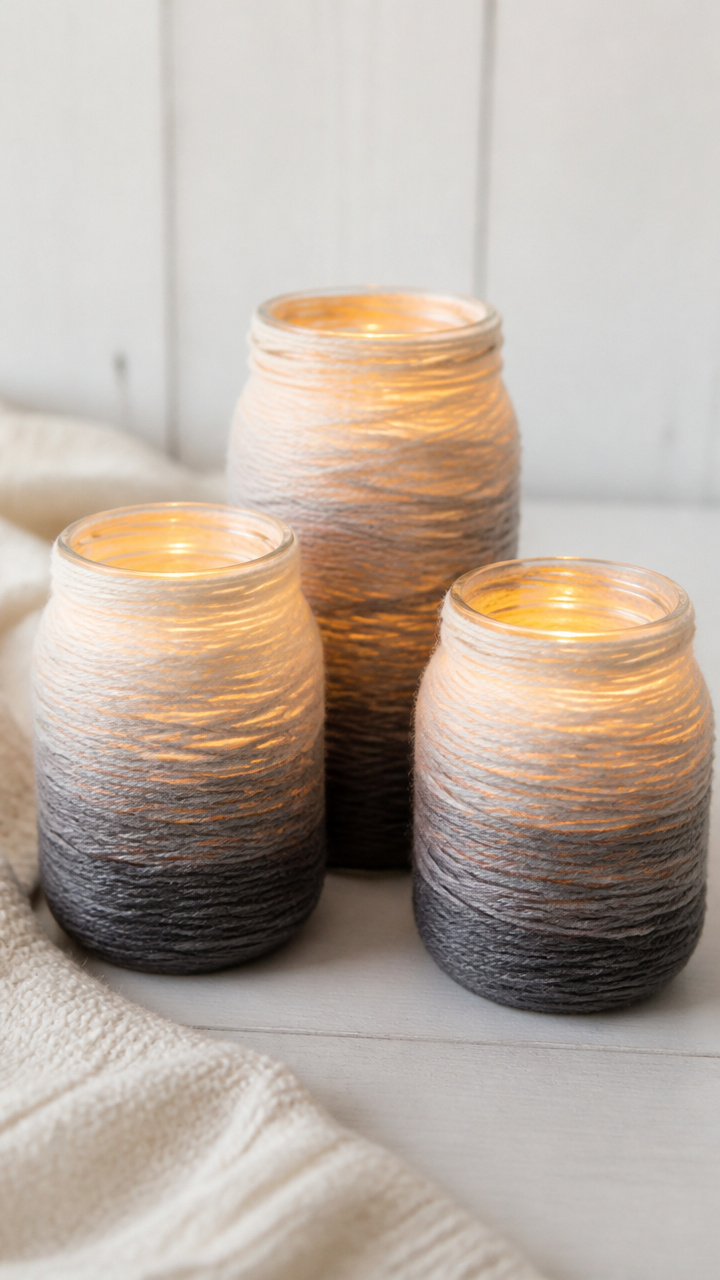
Soft gray yarn spirals from dark to light around glass, mimicking storm clouds parting to reveal moonlight. These bring calm to any shelf.
Materials Needed
- 3 12 oz mason jars
- gray acrylic yarn (light, medium, dark shades, 10 yards each)
- fabric glue
- small paintbrush
- 3 LED tea lights
How to Make It
- Brush a 1/2 inch band of fabric glue near the base of each jar.
- Start wrapping dark gray yarn around the base, pressing into the glue as you go.
- Switch to medium gray at mid-jar, then light gray near the top, adding glue before each color change.
- Let dry for 30 minutes, then place a tea light inside each jar.
11. Pressed Winter Fern Luminaries
Moderate
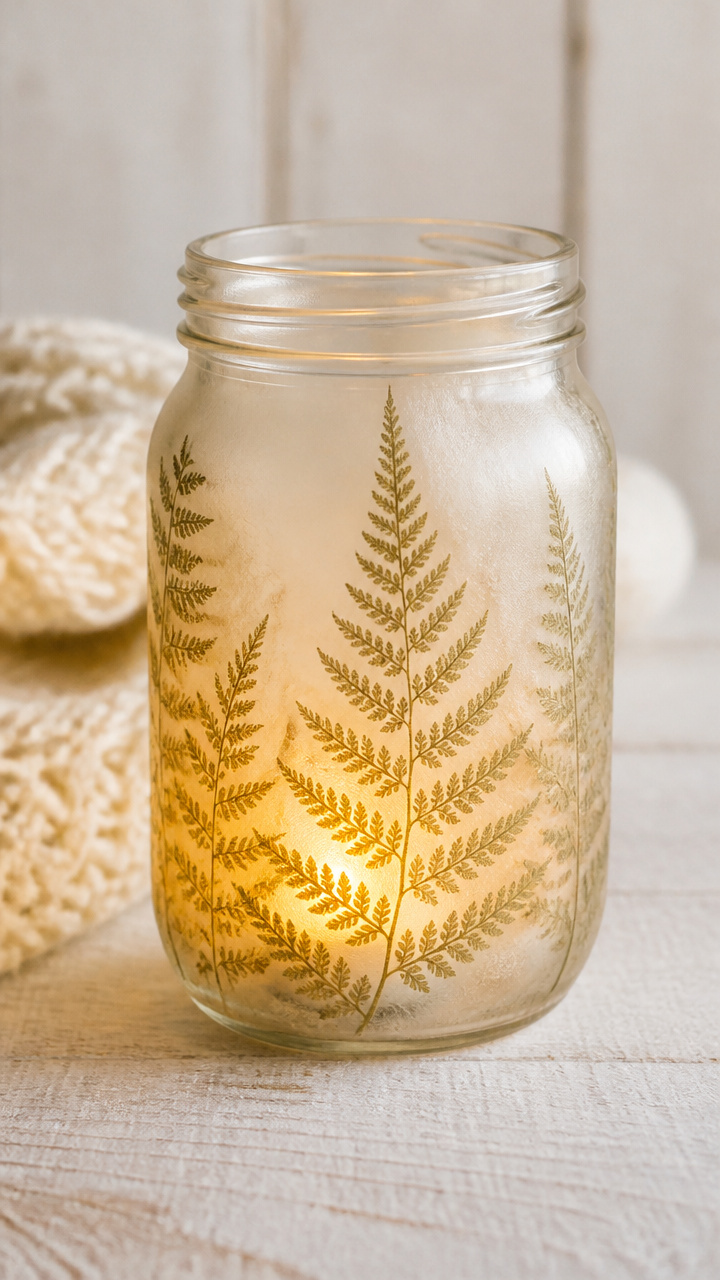
Real dried fern fronds adhere to glass like frost patterns, their delicate veins glowing when lit from within. These suit nature-inspired spaces.
Materials Needed
- 2 16 oz mason jars
- 4 pressed winter fern fronds
- mod podge matte finish
- foam brush
- 2 LED tea lights
- paper towels
How to Make It
- Wipe the outside of each jar with a damp cloth and let dry completely.
- Brush a thin layer of mod podge on the back of one fern frond.
- Press the frond onto the jar, placing it diagonally from base to shoulder, then repeat with a second frond opposite it.
- Seal with another layer of mod podge on top, then let dry for 2 hours before adding a tea light.
12. Crumpled Paper Snow Drifts
Easy
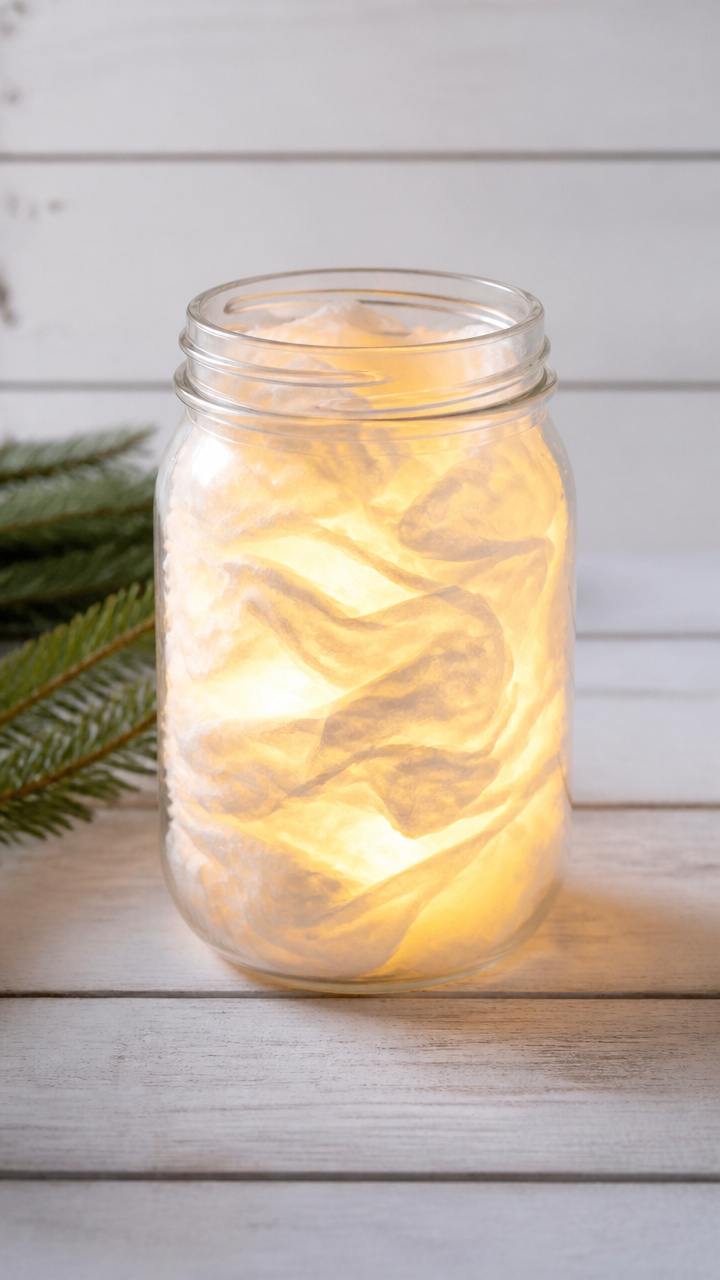
Tissue paper balled and layered inside jars mimics windblown snowdrifts, glowing softly like moonlit fields at night.
Materials Needed
- 4 10 oz mason jars
- white tissue paper (8 sheets)
- 4 battery-operated tea lights
- tweezers
How to Make It
- Crumple 2 sheets of tissue paper into loose balls, keeping them airy and not too tight.
- Use tweezers to place the balls inside each jar, filling to just below the shoulder.
- Fluff the tissue gently to create uneven peaks like snow drifts.
- Place one tea light on top of the tissue and turn on when displayed.
13. Maple Seed Helicopter Lights
Moderate
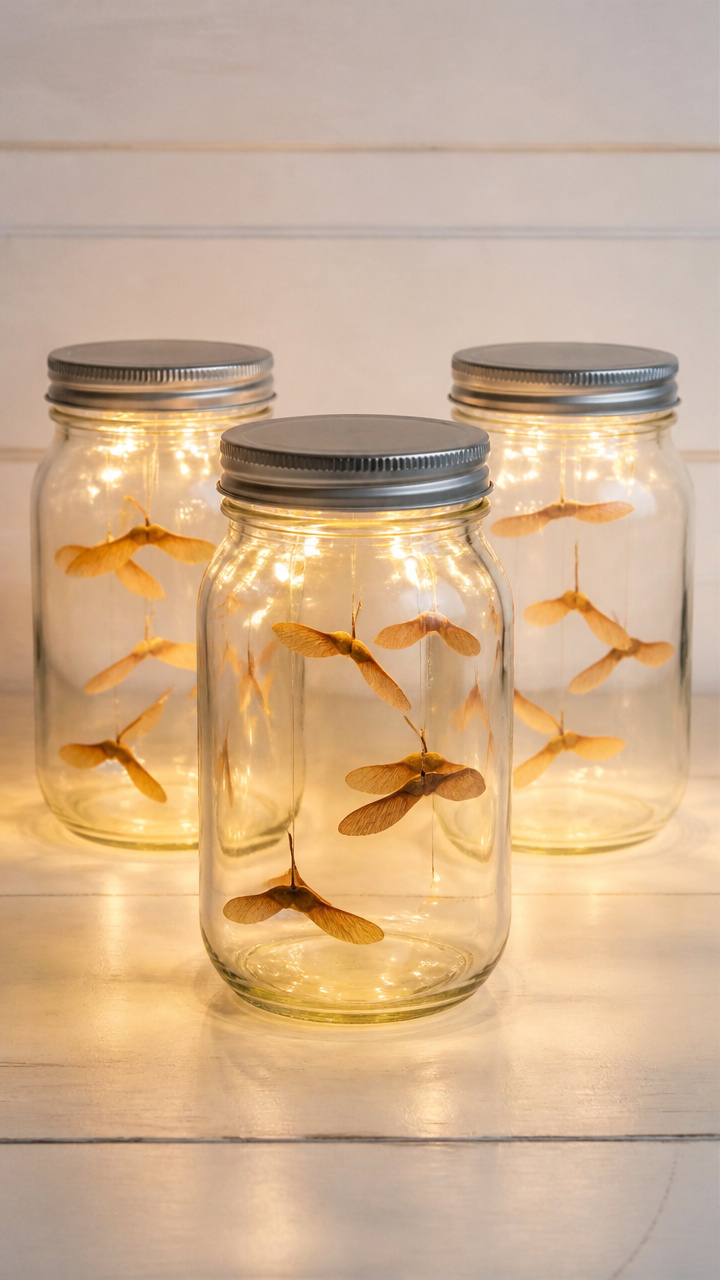
Twirling maple seeds suspended in jars catch the light like tiny winter windmills, spinning gently with air currents.
Materials Needed
- 3 12 oz mason jars with lids
- 9 dried maple seeds (samaras)
- clear fishing line (10 lb test)
- scissors
- hot glue gun
- 3 LED tea lights
How to Make It
- Cut three 6-inch lengths of fishing line for each jar.
- Tie one maple seed to the end of each line, then tie the other end to the center of the jar lid.
- Secure each knot with a dab of hot glue to prevent slipping.
- Screw the lid on, place a tea light inside, and hang the jar upside down to display.
14. Salt-Dough Star Ornaments on Jars
Moderate
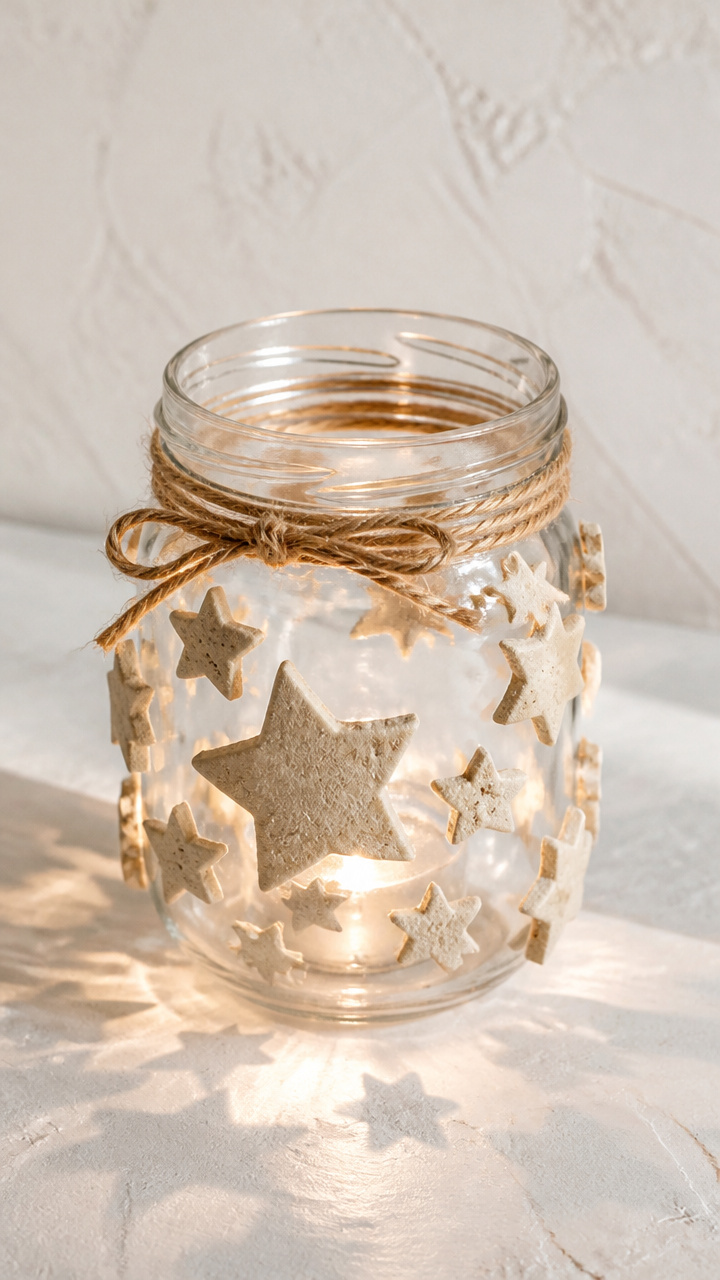
Hand-rolled salt dough stars press against jar glass, casting sharp, twinkling shadows like constellations in winter skies.
Materials Needed
- 2 8 oz mason jars
- 1 cup all-purpose flour
- 1/2 cup table salt
- 1/3 cup water
- star-shaped cookie cutter (1 inch)
- baking sheet
- parchment paper
- clear craft glue
- small paintbrush
- 2 LED tea lights
How to Make It
- Mix flour, salt, and water in a bowl until a smooth dough forms, then roll it to 1/4 inch thickness.
- Cut out 6 star shapes with the cookie cutter and place on a parchment-lined baking sheet.
- Bake at 200°F for 2 hours, then let cool completely.
- Glue 3 stars around the outside of each jar with craft glue, let dry 1 hour, then add a tea light inside.
15. Iced Vine Glass Luminaries
Moderate
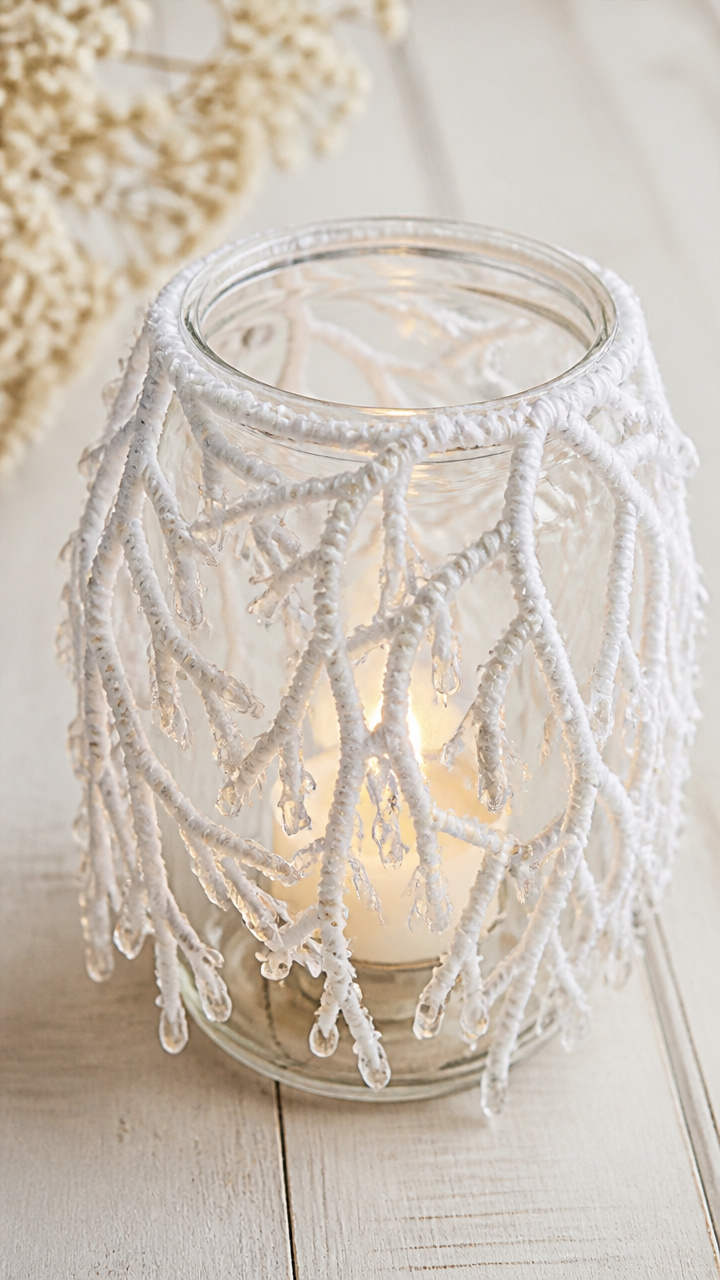
Flexible vine stems wrapped with white yarn and glue mimic frost-laced branches, draping elegantly over jar rims.
Materials Needed
- 3 16 oz mason jars
- 3 flexible grapevine wreath stems (12 inches each)
- white acrylic yarn
- white school glue
- small paintbrush
- scissors
- 3 LED tea lights
How to Make It
- Brush white school glue along one vine stem and wrap it tightly with white yarn, covering completely.
- Repeat for all three stems, then let dry for 45 minutes.
- Drape each yarn-wrapped vine over the rim of a jar, letting the ends trail down the sides.
- Secure the ends with a dab of glue on the glass, then place a tea light inside each jar.
16. Chalkboard Paint Winter Scenes
Advanced
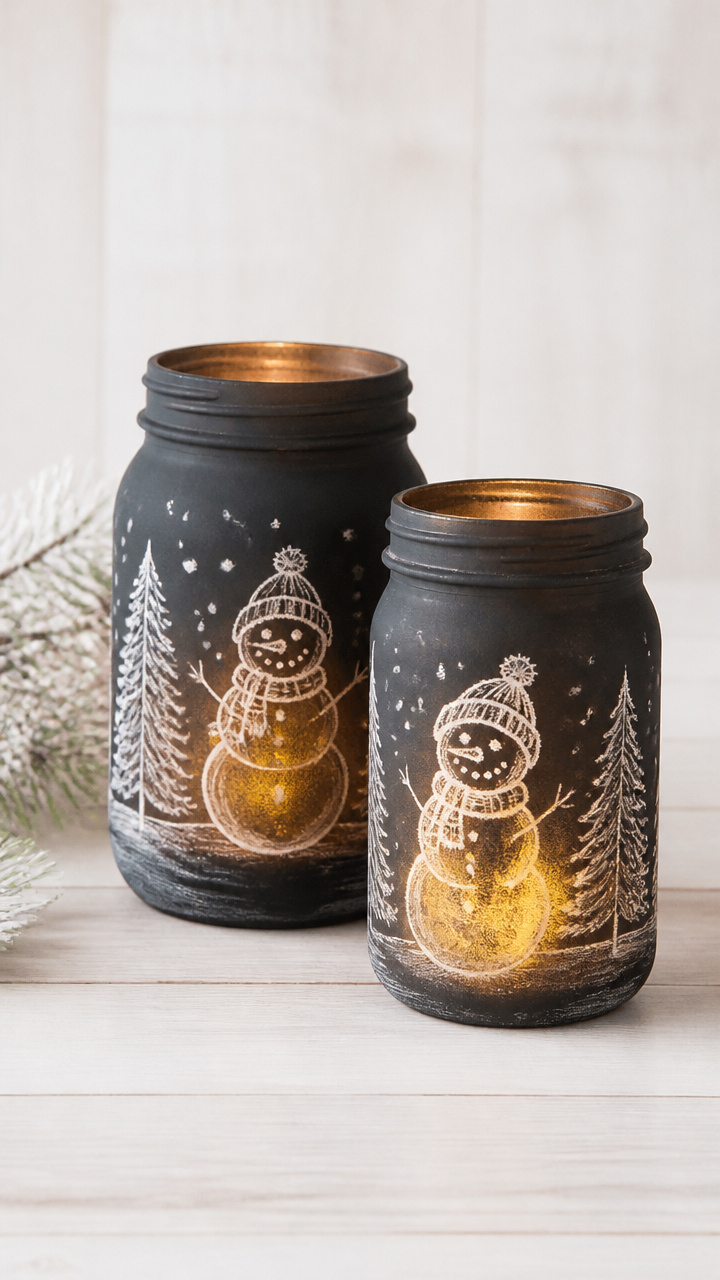
Hand-drawn snowmen and evergreens on blackened glass glow faintly when lit, like memories sketched in frost.
Materials Needed
- 2 12 oz mason jars
- black chalkboard paint
- small foam roller
- white chalk pen
- paper towel
- 2 LED tea lights
How to Make It
- Apply one even coat of black chalkboard paint to the outside of each jar using the foam roller.
- Let dry for 1 hour, then apply a second coat and let cure for 24 hours.
- Draw a small winter scene on each jar with the white chalk pen, such as a snowman or tree line.
- Wipe excess chalk dust with a dry paper towel, then place a tea light inside each jar.
17. Feather Frost Luminaries
Easy
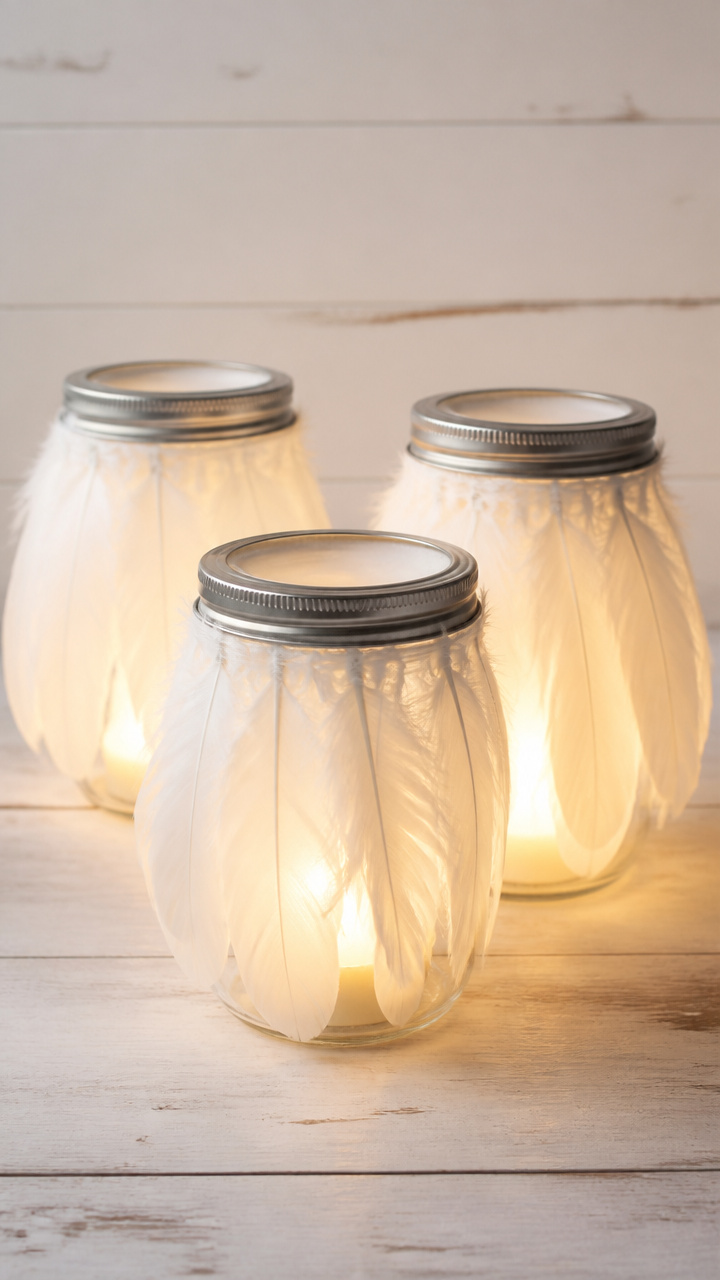
Soft white goose feathers glued to jar lids flutter with warmth from below, mimicking snow caught in a breeze.
Materials Needed
- 4 8 oz mason jar lids
- 8 white goose feathers
- hot glue gun with glue sticks
- 4 battery-operated tea lights
- 4 8 oz mason jars
How to Make It
- Place a small dot of hot glue in the center of each lid.
- Press one feather into the glue, then add another feather opposite it to balance.
- Let the glue set for 2 minutes before screwing each lid onto a jar.
- Place a tea light inside each jar and turn on to see the feathers gently lift.
18. Tissue Paper Northern Lights
Easy
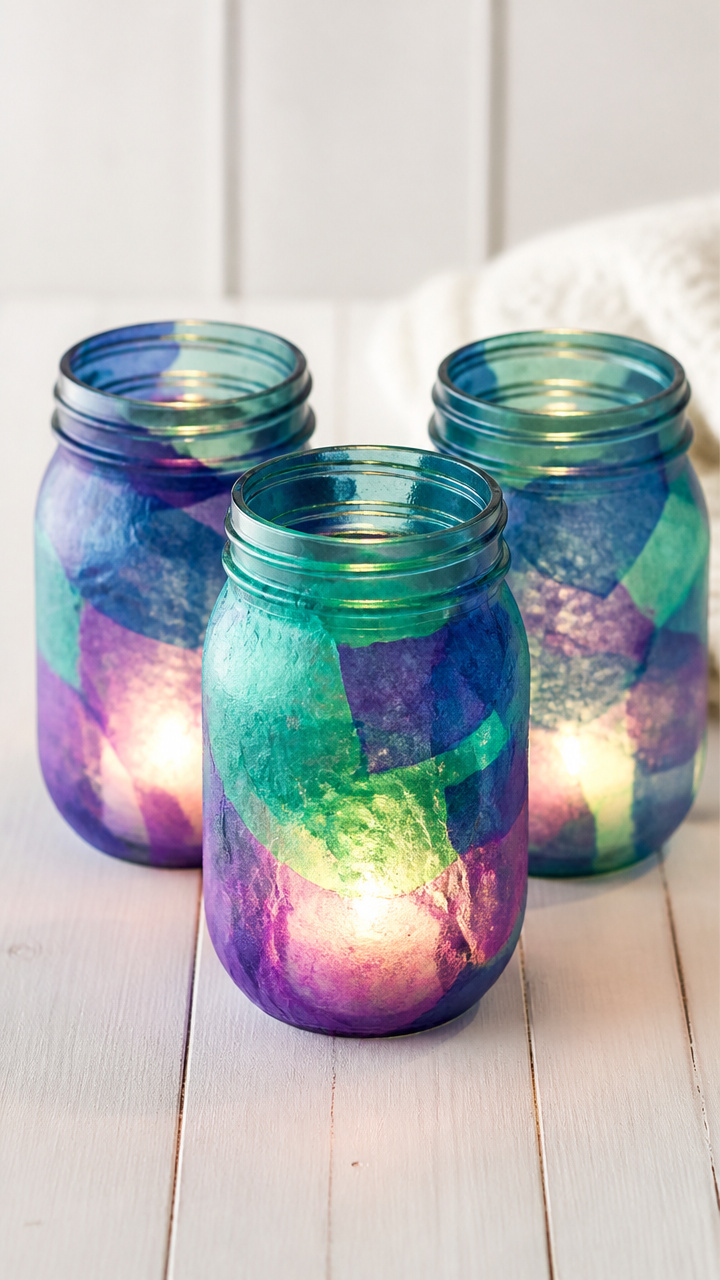
Overlapping layers of blue, green, and purple tissue create a shimmering aurora effect when lit, glowing like magic in a dark room.
Materials Needed
- 3 12 oz mason jars
- blue, green, and purple tissue paper (2 sheets each color)
- mod podge matte finish
- foam brush
- scissors
- 3 LED tea lights
How to Make It
- Cut tissue paper into 2 inch wide strips, about 6 inches long.
- Brush mod podge on the outside of a jar, then apply strips in overlapping layers, starting with blue at the base.
- Add green above blue, then purple at the top, blending edges slightly.
- Let dry for 1 hour, then place a tea light inside each jar.
19. Copper Wire Snowflakes
Advanced
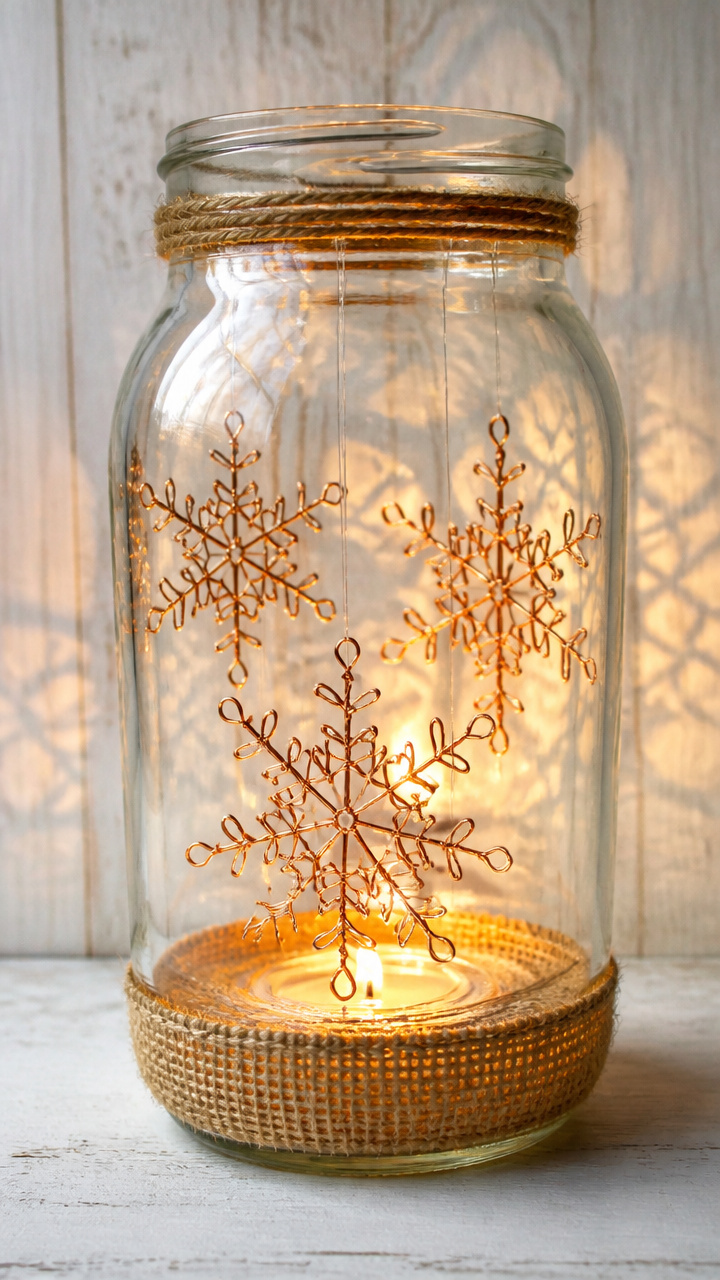
Hand-bent copper wire snowflakes dangle inside jars, casting intricate metallic shadows that shift with the flameless flicker.
Materials Needed
- 2 16 oz mason jars with lids
- 24 gauge copper wire (12 feet total)
- wire cutters
- round-nose pliers
- clear fishing line (6 inches)
- hot glue gun
- 2 LED tea lights
How to Make It
- Use round-nose pliers to bend 6-inch lengths of copper wire into snowflake shapes with 6 arms, repeat for both jars.
- Tie a 3-inch piece of fishing line to the top of each snowflake.
- Drill a small hole in the center of each lid, then thread the fishing line through and knot underneath.
- Seal the knot with hot glue, screw the lid on, add a tea light, and hang the jar to display.
Each of these luminaries holds a little piece of winter’s quiet magic. Pick one that calls to you and let the light guide your hands.