15 DIY Valentine’s Day Candle Crafts

Soft candlelight sets the perfect mood for love, and making your own candles adds a personal touch no store-bought gift can match. With just a few supplies and a little time, you can create glowing keepsakes that speak straight to the heart.
Each of these projects brings something unique to your celebration, from romantic scents to hand-decorated jars and custom shapes. These are thoughtful, heartfelt, and made with care—just like the love they’re meant to celebrate.
1. Rose Petal Mason Jar Candle
Easy
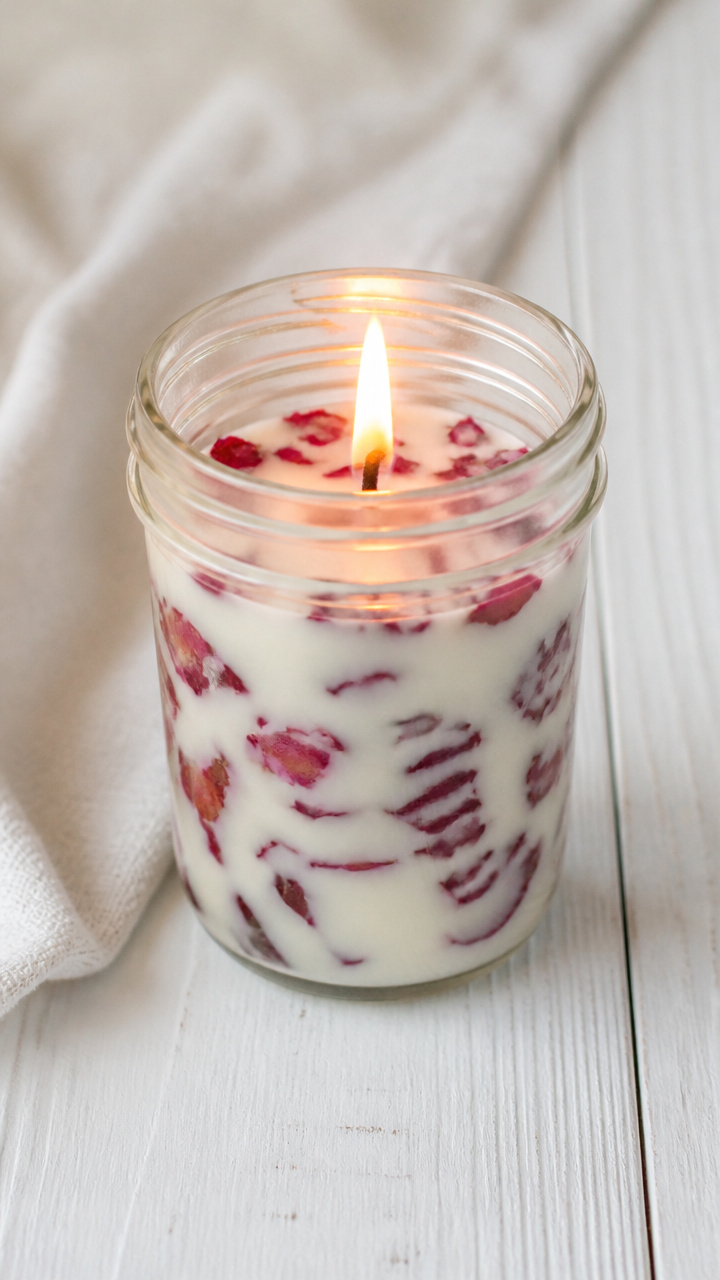
Delicate dried rose petals swirl inside a clear jar, catching the light with every flicker. This candle glows like captured twilight and makes a beautiful centerpiece or gift.
Materials Needed
- 1 clean 8 oz mason jar
- 1 soy wax melt block (4 oz)
- 1 pre-wicked cotton wick (2 inches tall)
- 10 dried red rose petals
- Double boiler setup (small saucepan and heatproof bowl)
- Chopstick or pencil
How to Make It
- Place the wax block in the heatproof bowl and set it over a saucepan with 1 inch of simmering water. Stir gently until fully melted, about 10 minutes.
- While wax melts, lay the rose petals flat inside the mason jar, pressing them lightly against the inner walls.
- Carefully pour the melted wax into the jar, stopping just below the rim. Avoid disturbing the petals.
- Center the wick using the chopstick by laying it across the jar’s mouth and wrapping the wick end around it. Let cool completely for 3 hours.


2. Heart-Shaped Gel Candles
Moderate
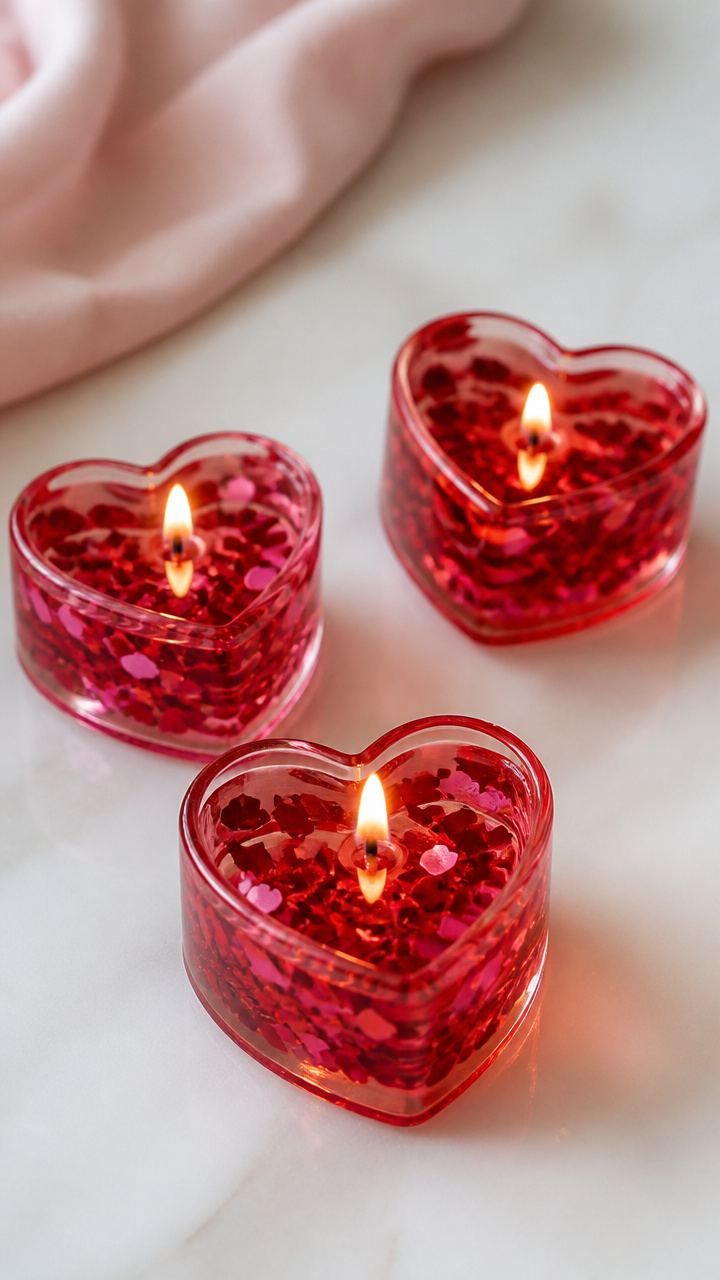
Translucent gel holds tiny floating hearts that shimmer when lit. These playful candles work well as party favors or table decorations.
Materials Needed
- Clear candle gel wax (16 oz)
- Red dye chips (2 small pieces)
- Mini plastic heart confetti (1 tablespoon)
- Silicone heart molds (3 cavities, 2 inches wide)
- Wicks with metal base tabs (3 pieces)
- Heat-safe container for melting
- Utility knife
How to Make It
- Melt the gel wax in a heat-safe container placed in a water bath over medium heat. Stir in two red dye chips once liquid begins to clear, about 15 minutes.
- Sprinkle one teaspoon of heart confetti into each silicone mold cavity.
- Pour the dyed gel slowly into each mold, filling to the top. Insert a wick into the center of each, pressing the metal tab to the bottom.
- Let cure undisturbed for 6 hours. Trim wick to 1/4 inch using a utility knife if needed.


3. Lavender & Cocoa-Scented Taper Candles
Advanced
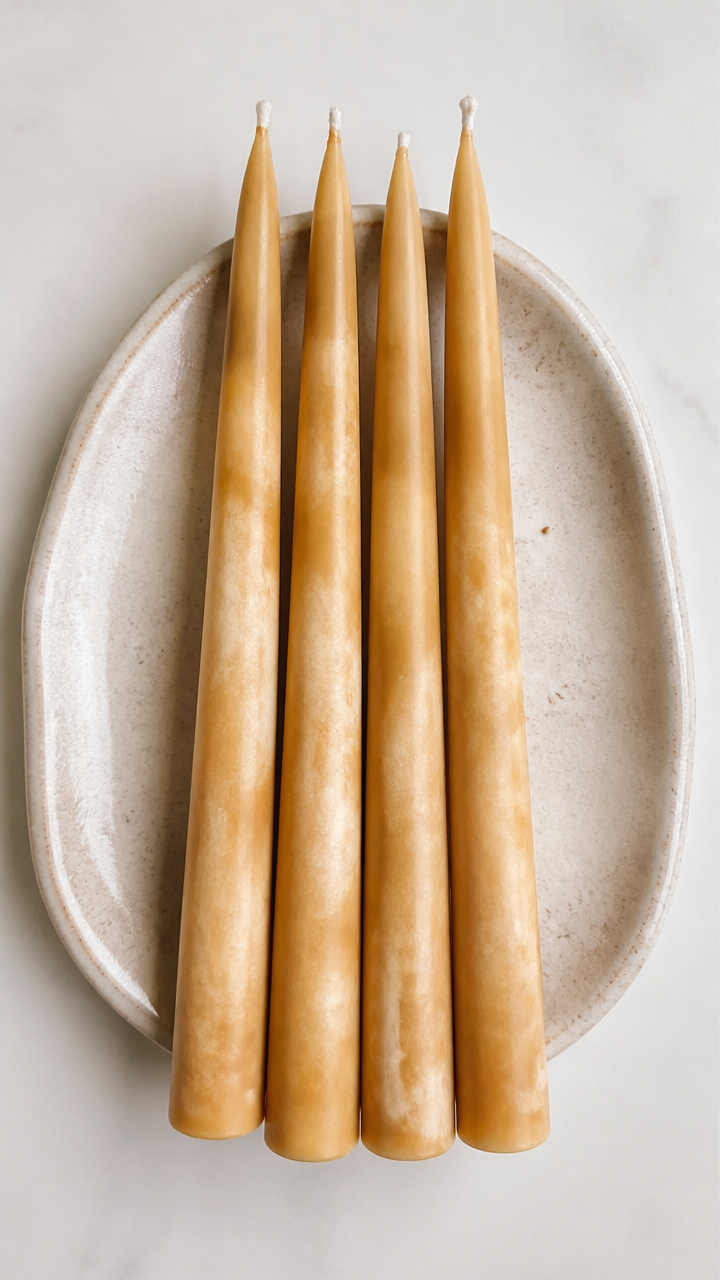
Rich cocoa butter blends with calming lavender essential oil in slender tapers that burn clean and slow. These elegant candles suit a quiet dinner for two.
Materials Needed
- Beeswax sheets (2 large, 6×12 inches)
- Candle-dipping wicks (2 strands, 12 inches long)
- Essential oil of lavender (10 drops)
- Cocoa butter (1 oz, shaved)
- Double boiler
- Clothespins
- Ruler
How to Make It
- Melt cocoa butter in the double boiler over low heat. Once fully liquid, remove from heat and stir in lavender essential oil.
- Brush the melted mixture evenly over one beeswax sheet. Let sit 2 minutes to absorb.
- Lay a wick along the long edge of the treated sheet. Roll tightly toward the opposite edge, keeping tension even.
- Clip the finished taper with clothespins and hang to dry for 2 hours before use.


4. Painted Wine Bottle Votive Holders
Moderate
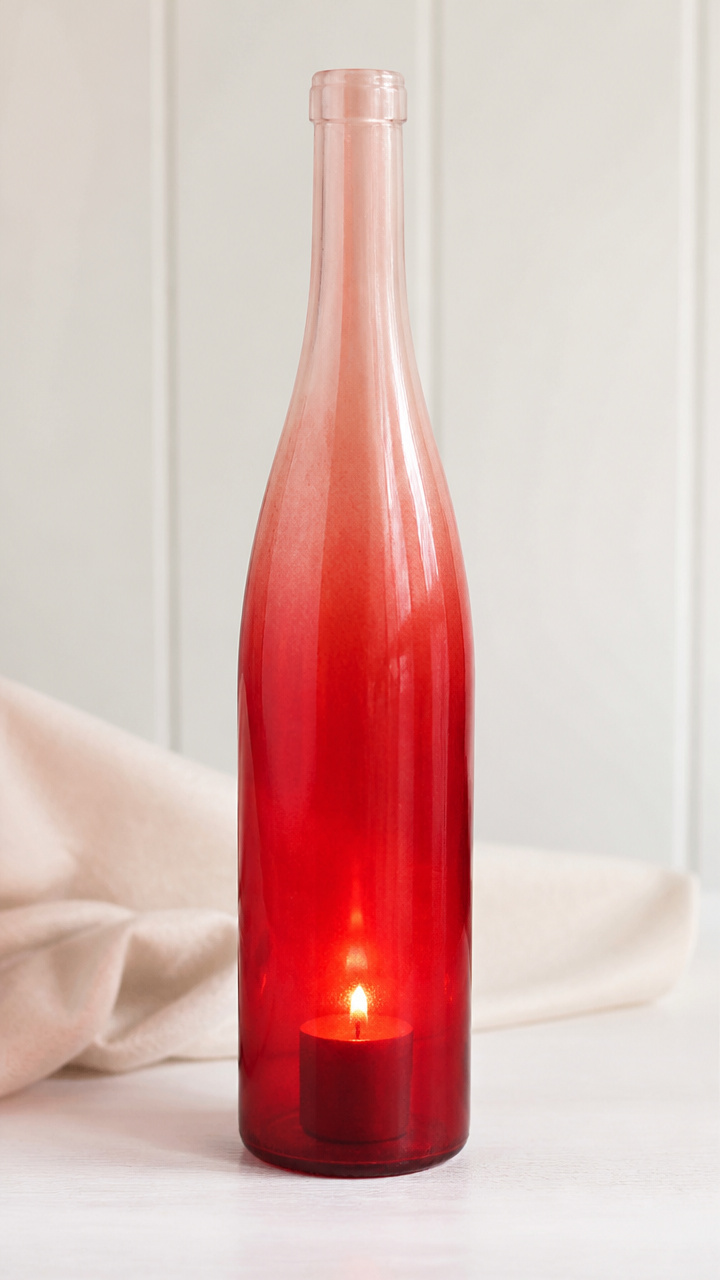
Empty wine bottles become moody, hand-painted vessels that glow warmly from within. The ombre red effect looks professional but only takes basic brushwork.
Materials Needed
- 1 empty wine bottle, cleaned and label removed
- Red glass paint (2 oz)
- Small soft-bristle paintbrush
- Paper towel
- Votive candle (1.5 inch diameter)
- Rubbing alcohol
- Cotton ball
How to Make It
- Wipe the outside of the bottle with a cotton ball dipped in rubbing alcohol. Let dry completely.
- Dip the brush in red glass paint and start at the base, applying thick horizontal strokes. Gradually use less paint as you move upward for an ombre fade.
- Allow the first coat to dry for 1 hour, then apply a second coat for richer color.
- After 24 hours of curing, place a votive candle inside and light safely on a heat-resistant surface.


5. Layered Red-Vanilla Container Candle
Easy
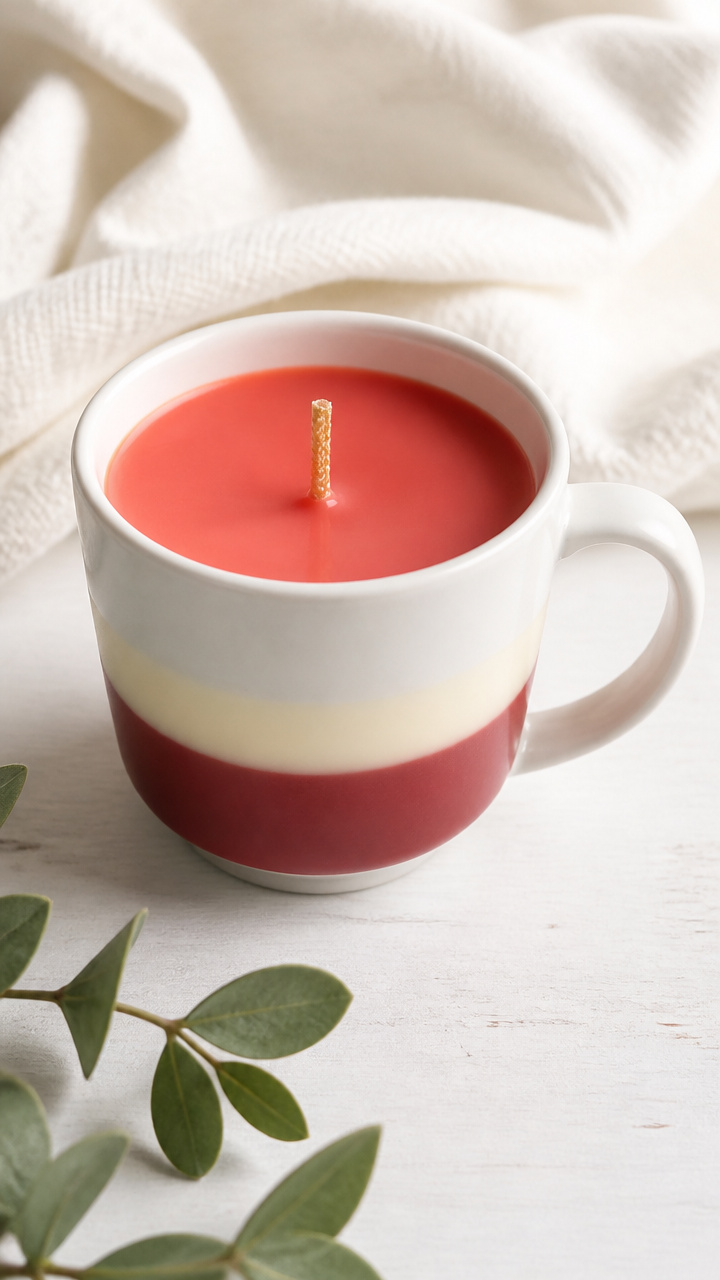
Creamy vanilla-scented wax meets bold crimson layers in a reusable ceramic mug. This candle smells like dessert and looks like love.
Materials Needed
- 1 plain white ceramic mug (12 oz)
- Soy wax flakes (6 oz)
- Vanilla fragrance oil (15 ml)
- Red liquid candle dye (5 drops)
- 1 pre-wicked cotton wick
- Double boiler
- Chopstick
How to Make It
- Melt the soy wax flakes in a double boiler over medium heat, stirring occasionally until clear, about 12 minutes.
- Remove from heat. Add vanilla fragrance oil and stir for 30 seconds. Pour half into the mug.
- To the remaining wax, add 5 drops of red dye. Stir well, then carefully pour on top of the vanilla layer.
- Hold the wick upright using the chopstick laid across the mug’s rim. Let harden for 4 hours.


6. Glitter-Dipped Pillar Candles
Easy
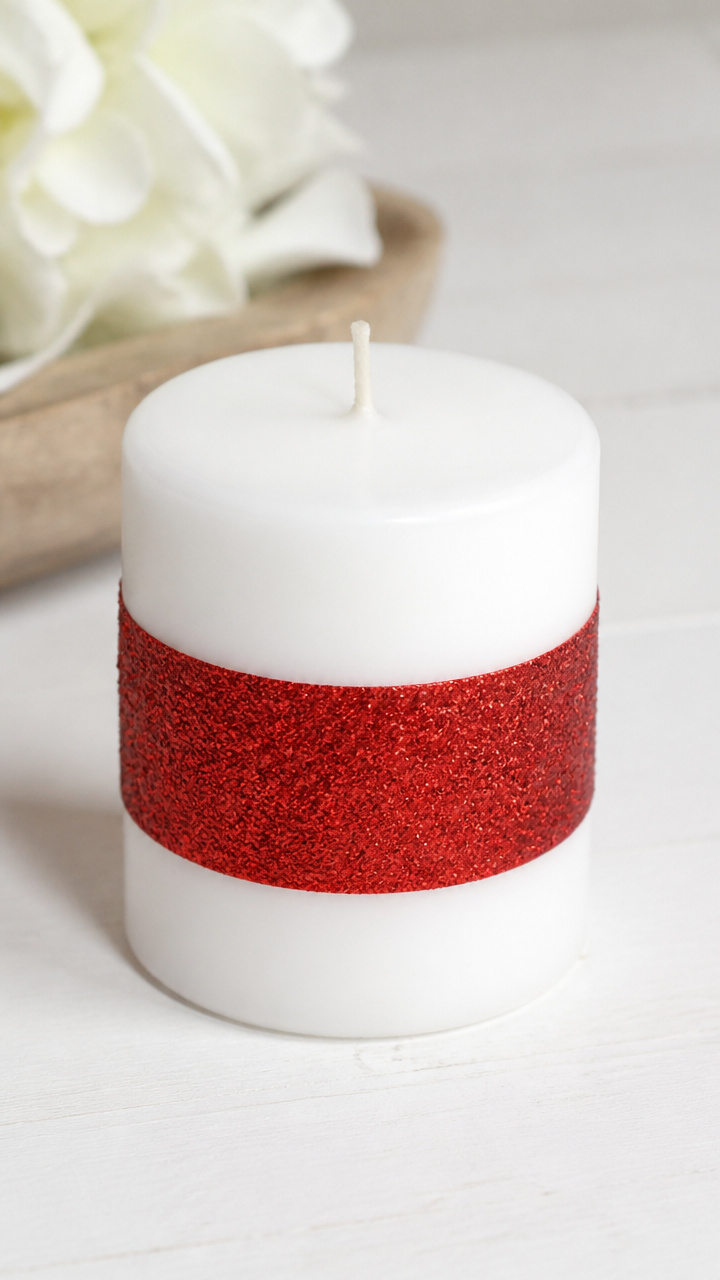
A band of fine red glitter wraps around a classic pillar like a satin ribbon. This subtle sparkle enhances any tablescape without overpowering it.
Materials Needed
- White unscented pillar candle (3 inches tall, 2 inches wide)
- Craft glue (1 oz)
- Fine red glitter (2 tablespoons)
- Small foam brush
- Parchment paper
- Disposable bowl
How to Make It
- Place the candle on parchment paper to catch drips. Use the foam brush to paint a 1-inch-wide horizontal band near the top.
- Immediately pour red glitter from the bowl over the glued area, covering completely.
- Gently shake off excess glitter into the bowl for reuse.
- Let dry for 30 minutes before moving or lighting.

7. Pressed Flower Tea Light Holders
Advanced
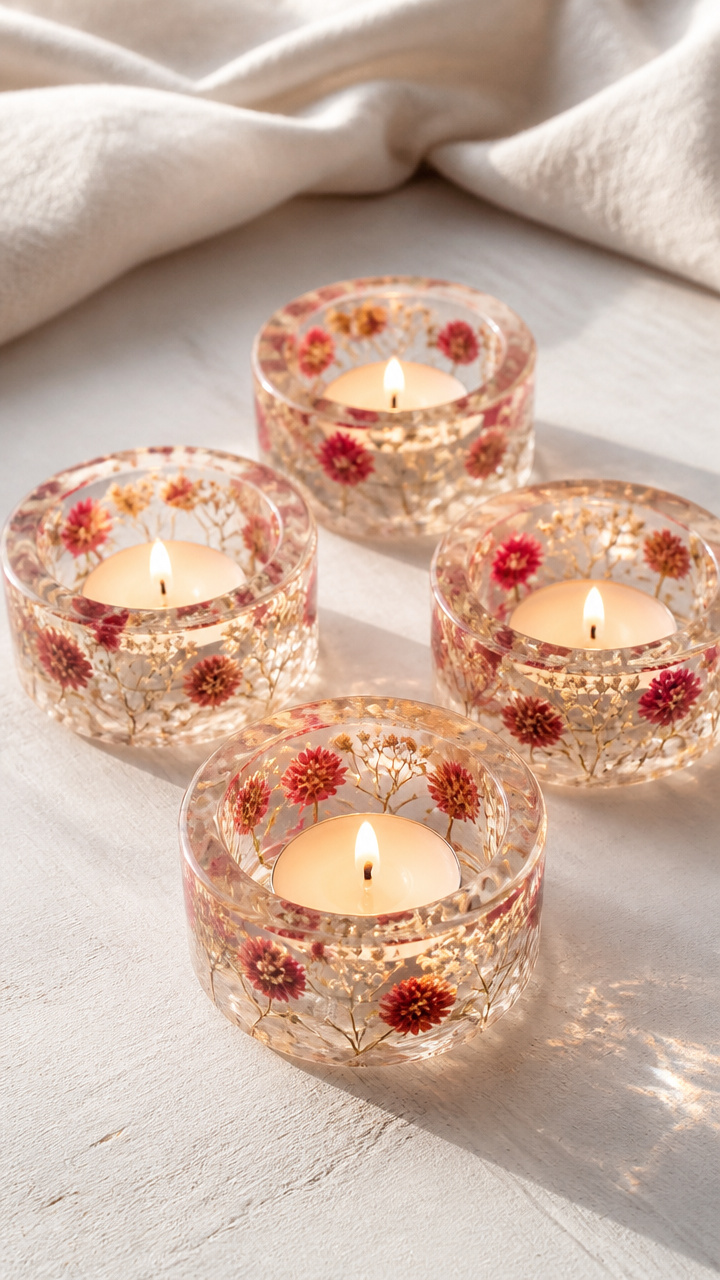
Tiny wildflowers bloom under glass even in winter, encased in clear resin cups around tea lights. These delicate holders cast floral shadows on walls.
Materials Needed
- Silicone tea light mold (4 cavities)
- Clear epoxy resin kit (8 oz total mix)
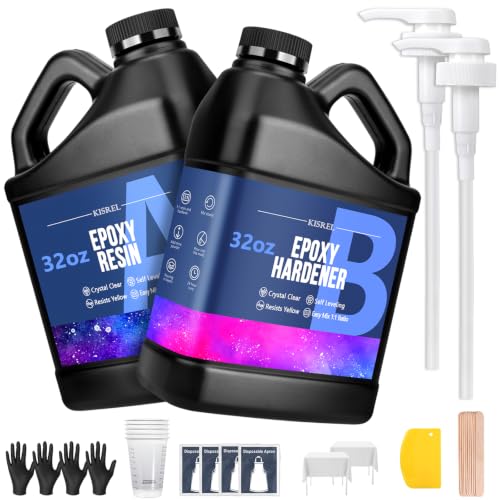
- Dried baby’s breath and red clover flowers (6 small stems)
- Toothpicks
- Disposable gloves
- Tea light candles (4)
How to Make It
- Arrange one flower cluster in each mold cavity using tweezers or toothpicks, facing blooms outward.
- Mix resin according to package instructions. Pour slowly into each cavity, covering flowers completely.
- Pop air bubbles with a toothpick. Let cure for 12 hours at room temperature.
- Flex the mold to release the resin cups. Place a tea light inside each before use.


8. Cinnamon Stick Scented Jar Candle
Moderate
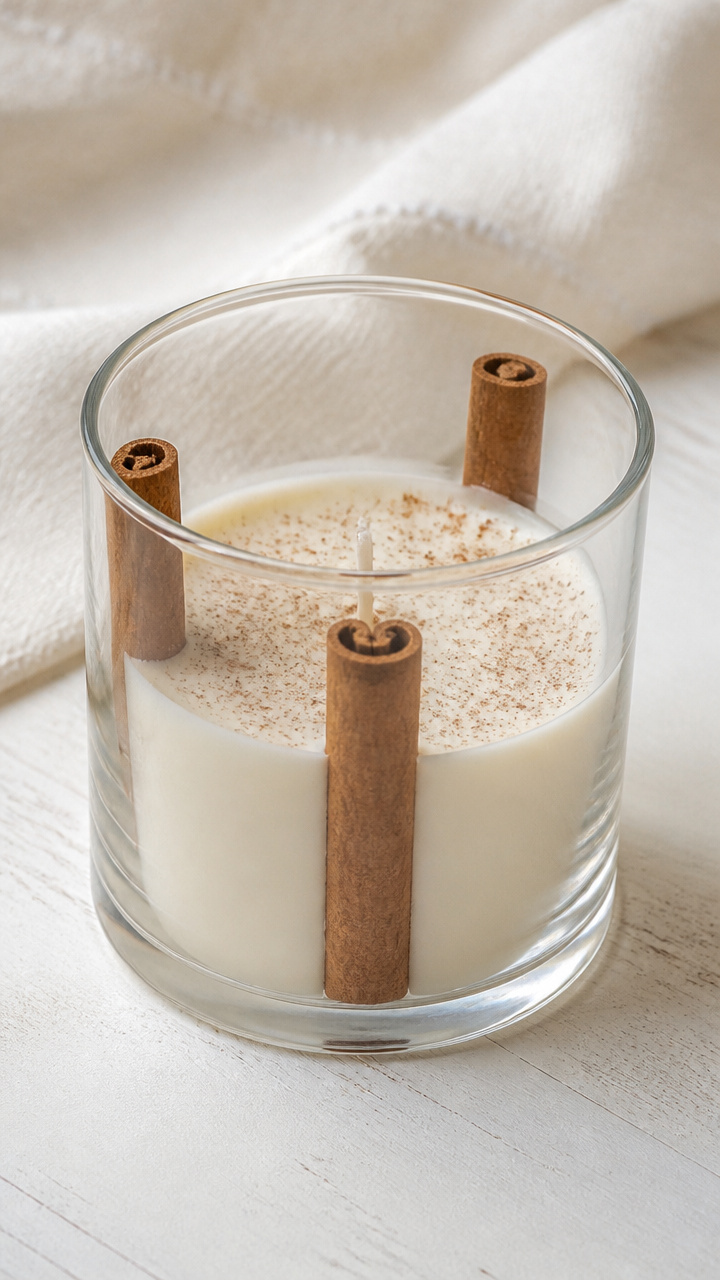
Real cinnamon sticks stand upright around the edge, releasing spice into warm vanilla air. This candle fills a room with cozy, inviting scent.
Materials Needed
- 4-inch wide glass hurricane jar
- Soy wax flakes (8 oz)
- Ground cinnamon (1 tablespoon)
- Cinnamon essential oil (10 ml)
- 3 cinnamon sticks (6 inches long)
- Hot glue gun and 1 glue stick
- Large wick with sustainer base
How to Make It
- Melt soy wax in a double boiler over medium heat. Stir in ground cinnamon and essential oil after removing from heat.
- Pour a thin layer of wax into the jar and immediately press the base of each cinnamon stick into the wax, spacing evenly around the edge.
- Let this layer set for 10 minutes. Then place the wick in the center and secure with a sustainer base.
- Fill the rest of the jar with remaining wax. Cool for 4 hours before lighting.
9. Love Letter Scroll Votive
Easy
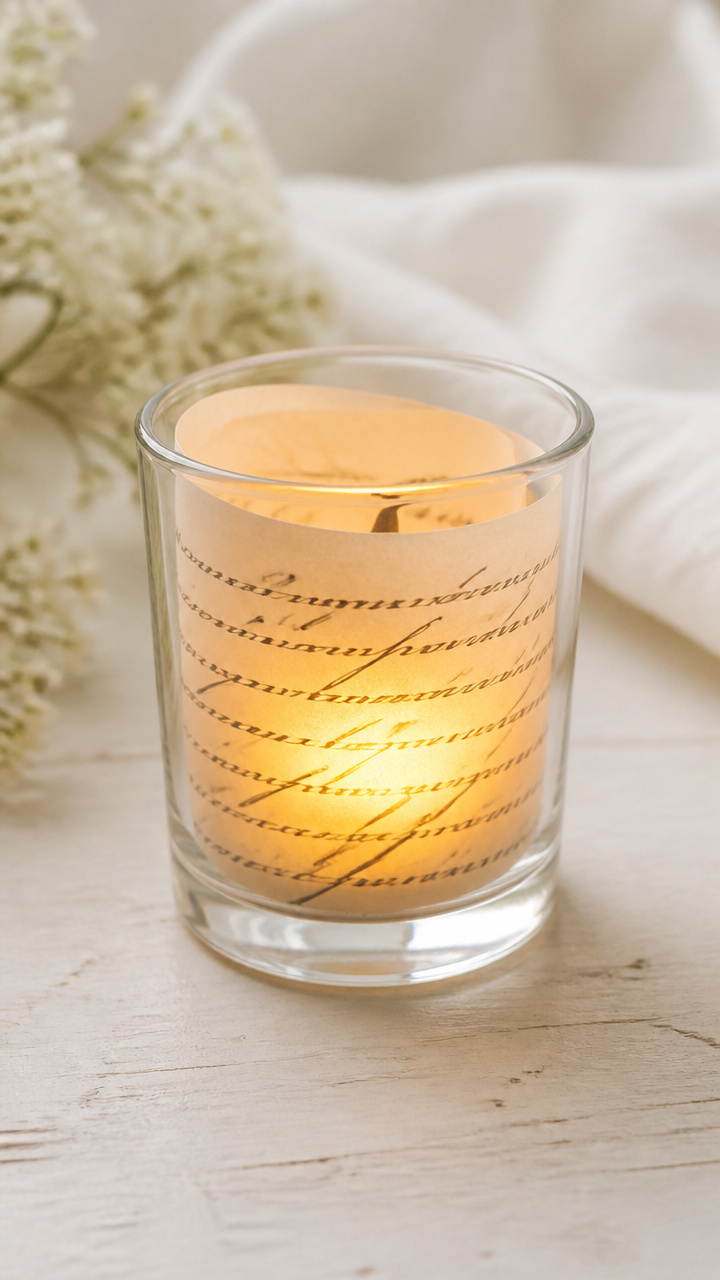
A handwritten note curls inside a glass cup, visible through flickering light. This intimate candle turns words into warmth.
Materials Needed
- Clear glass votive holder (3 inches tall)
- Sheets of rice paper (2 pieces, 3×3 inches)
- Black calligraphy ink pen
- Mod Podge matte finish (1 oz)
- Small foam brush
- LED tea light (flameless)
How to Make It
- Write a short love message on one rice paper square using the ink pen. Let dry for 5 minutes.
- Roll the paper into a loose scroll. Unroll slightly so it stands open.
- Brush Mod Podge lightly on the inside of the votive. Press the scroll against the glass, smoothing gently.
- Apply another coat over the paper. Let dry for 2 hours. Insert LED tea light before display.


10. Two-Tone Heart Molded Candles
Moderate
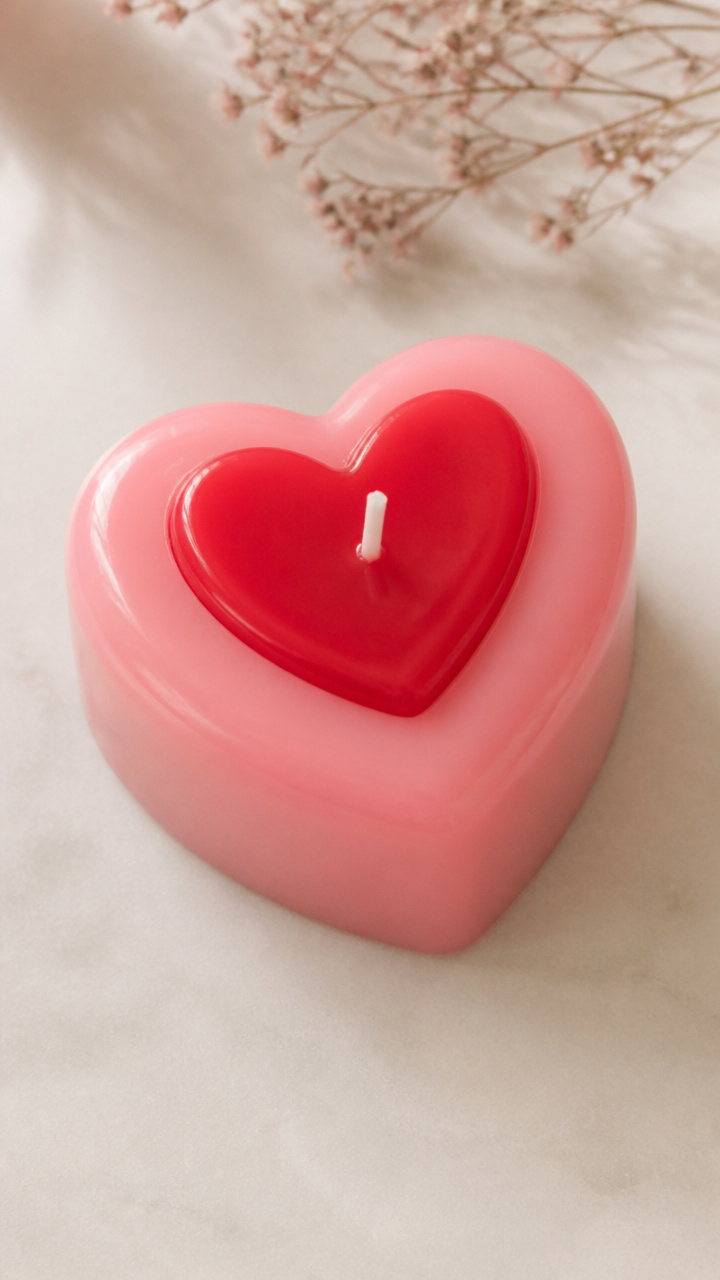
A smooth pink base supports a raised red heart that rises like a symbol from the wax. These molded candles look store-made but cost almost nothing.
Materials Needed
- Silicone heart mold (1 piece, 4×4 inches)
- Pink soy wax flakes (3 oz)
- Red soy wax flakes (2 oz)
- Two fragrance oils: strawberry (5 ml) and cherry (5 ml)
- Two wicks with tabs
- Double boiler
- Chopstick
How to Make It
- Melt pink wax in the double boiler. Stir in strawberry fragrance. Pour into the mold and insert one wick in the center. Let set for 1 hour.
- Melt red wax separately. Stir in cherry fragrance. Carefully ladle over the pink base, filling the heart shape only.
- Use the chopstick to steady the wick. Let cure for 4 hours.
- Flex the mold gently to release the finished candle.


11. Frosted Glass Apothecary Candle
Moderate
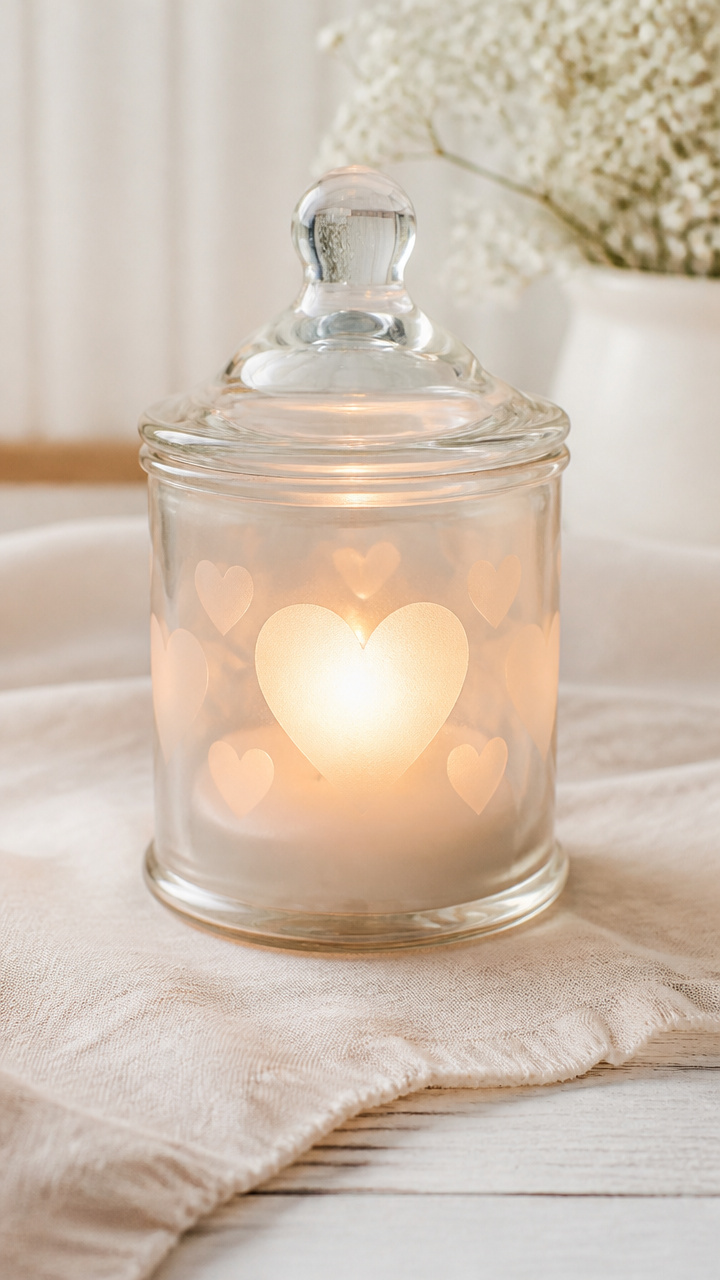
Etched glass looks like frosted windowpanes in winter, glowing softly from within. This elegant jar candle feels vintage and timeless.
Materials Needed
- Clear apothecary jar with lid (6 oz)
- Etching cream (2 oz)
- Stencil sheet with heart pattern
- Craft knife
- Plastic scraper
- Cotton gloves
- Soy wax and wick kit (for 6 oz container)
How to Make It
- Cut a heart from the stencil sheet using the craft knife. Apply it firmly to the outside of the jar.
- Wearing gloves, spread etching cream over the exposed glass area using the scraper. Wait 10 minutes.
- Rinse cream off with cool water and remove the stencil. Dry the jar completely.
- Make and pour the candle following kit instructions. Let wax set 3 hours before lighting.


12. Chocolate-Scented Cupcake Candles
Easy
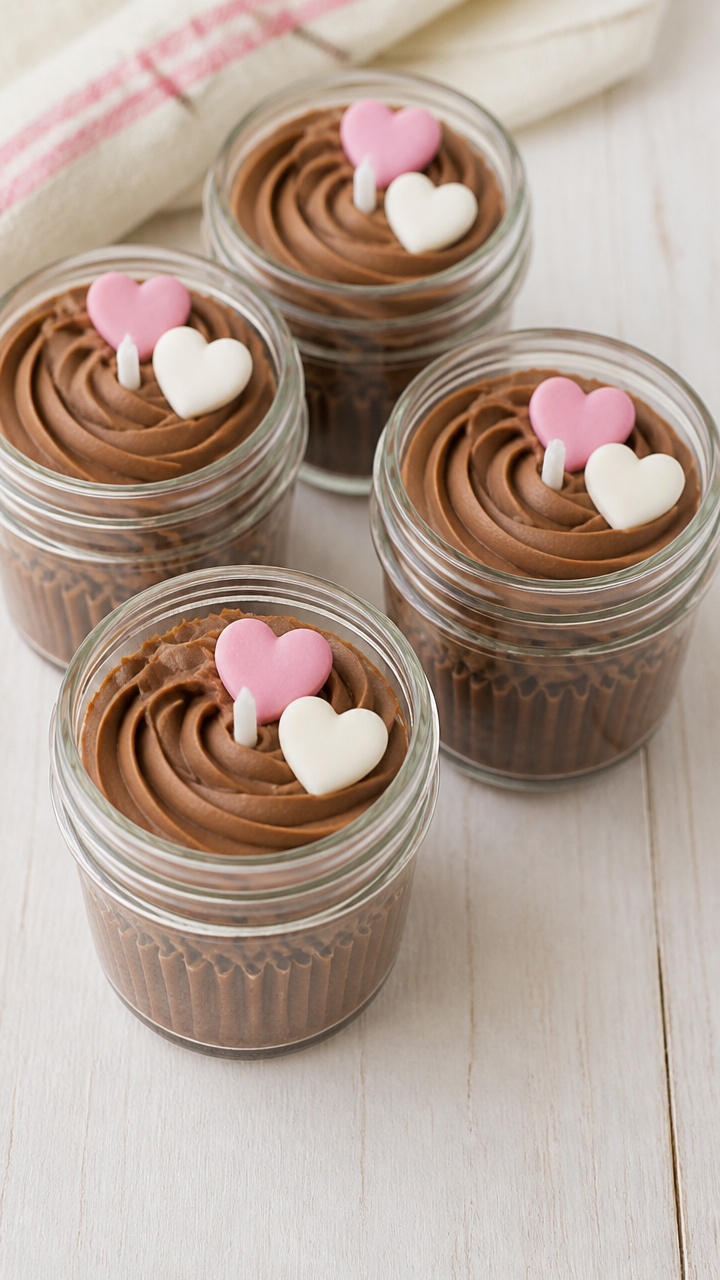
Mini mason jars wear swirls of brown-tinted wax like frosting, topped with a candy heart. These edible-looking candles delight all ages.
Materials Needed
- 4 oz brown paper cupcake liners (3 pieces)
- 3 small mason jars (4 oz each)
- Soy wax flakes (9 oz total)
- Chocolate fragrance oil (9 ml)
- Brown liquid dye (9 drops)
- Candy conversation hearts (3)
- Wicks (3 pre-tabbed)
How to Make It
- Melt wax in a double boiler. Remove from heat and stir in chocolate fragrance and brown dye.
- Pour wax into jars and set wicks with chopsticks. Cool 3 hours.
- Once set, crimp one cupcake liner around each jar’s rim like a wrapper.
- Place one candy heart on top of each wax surface.


13. Floating Photo Lantern Candles
Moderate
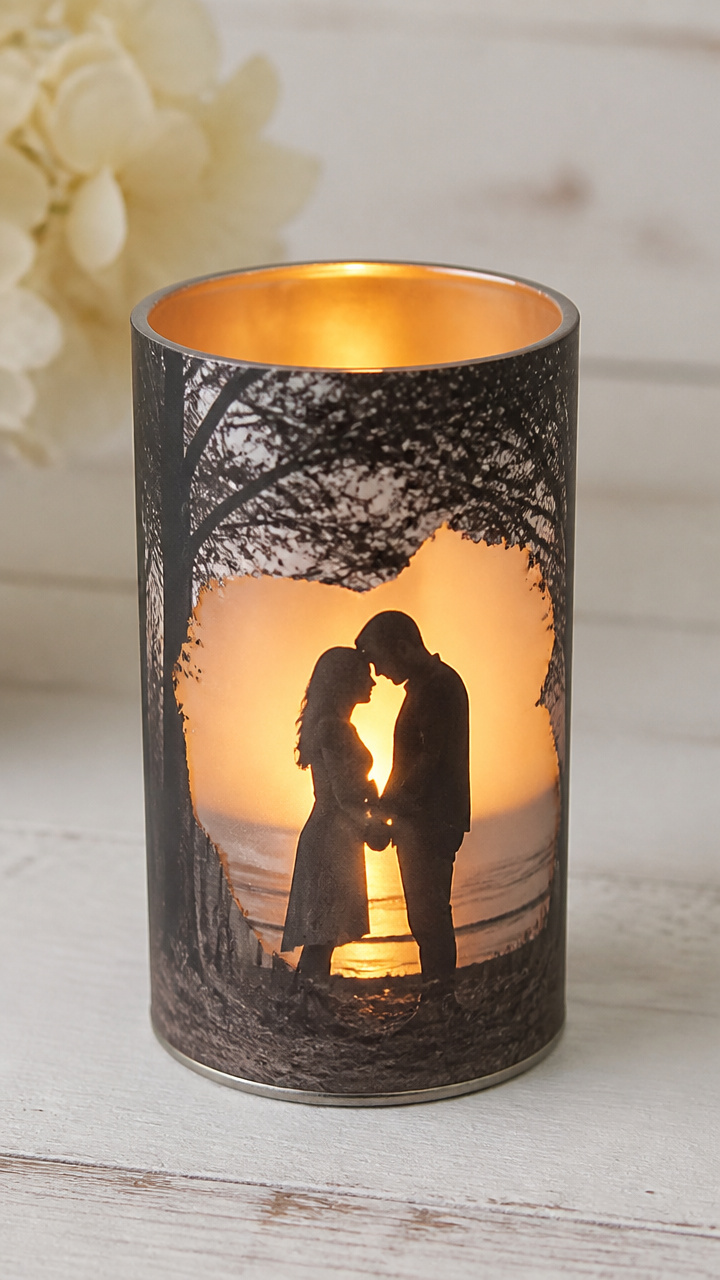
A favorite couple photo shows through cutout openings in a wrapped tin can. Light reveals your memory in silhouette.
Materials Needed
- Clean aluminum can (15 oz size)
- Printed photo (2×3 inches, black and white)
- Clear contact paper (6×6 inches)
- Craft knife
- Ruler
- Sandpaper (120 grit)
- Tea light candle (battery-operated)
How to Make It
- Cover the photo with contact paper, trimming edges. Cut into a rectangle 1 inch taller than the can.
- Sand the can’s surface lightly. Wrap the photo around it and secure with tape.
- Use ruler and craft knife to cut heart-shaped openings through photo and can wall. Work slowly to avoid jagged edges.
- Slide out photo, then insert tea light. Light shines through the cutouts onto the image.


14. Scented Pine Cone Fire Starters
Easy
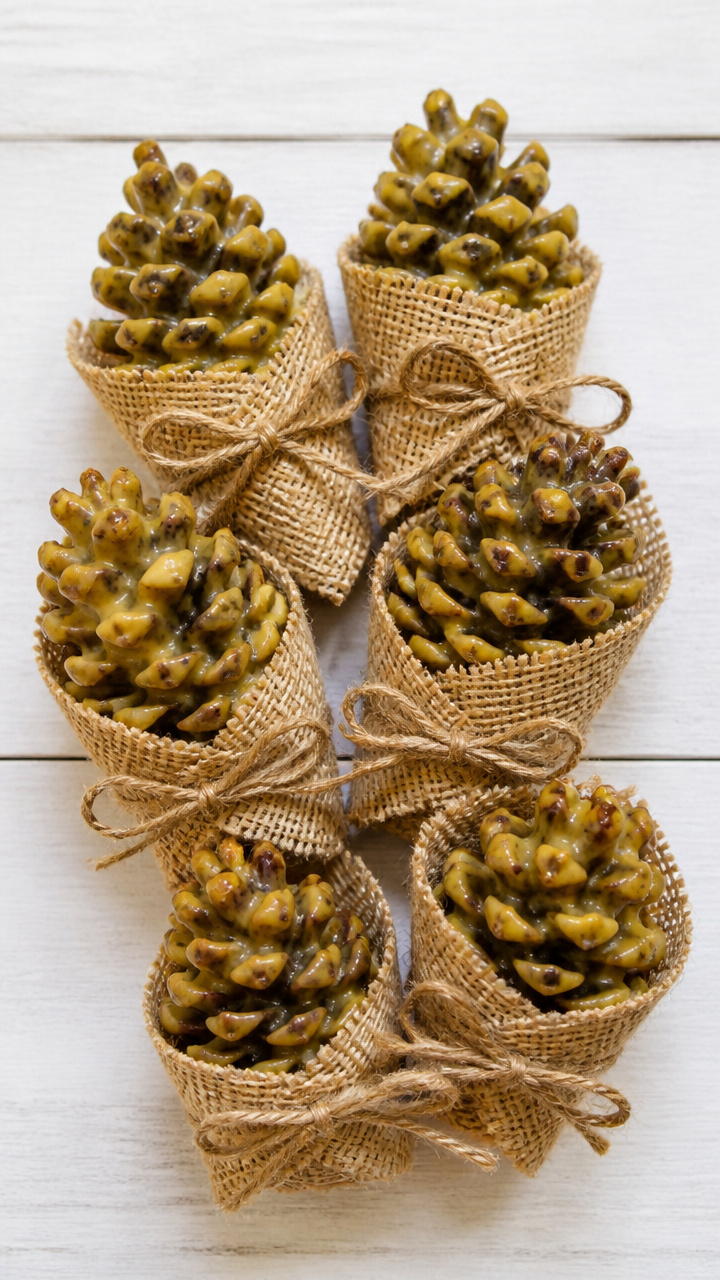
Perfect for outdoor dates or fireplaces, these rustic cones burn with cedar and clove. Each one is wrapped in burlap and tied with twine.
Materials Needed
- Dry pine cones (6 medium)
- Beeswax pellets (4 oz)
- Ground cloves (1 tablespoon)
- Double boiler
- Square burlap pieces (6, 5×5 inches)
- Jute twine (6 feet total)
- Baking sheet
How to Make It
- Melt beeswax in the double boiler over low heat. Stir in ground cloves once liquid.
- Dip each pine cone into wax, rotating to coat fully. Let excess drip off for 10 seconds.
- Place coated cones on a baking sheet to cool for 15 minutes.
- Wrap each in burlap and tie with twine. Store in a dry place until use.


15. Personalized Initial Wax Seal Candles
Advanced
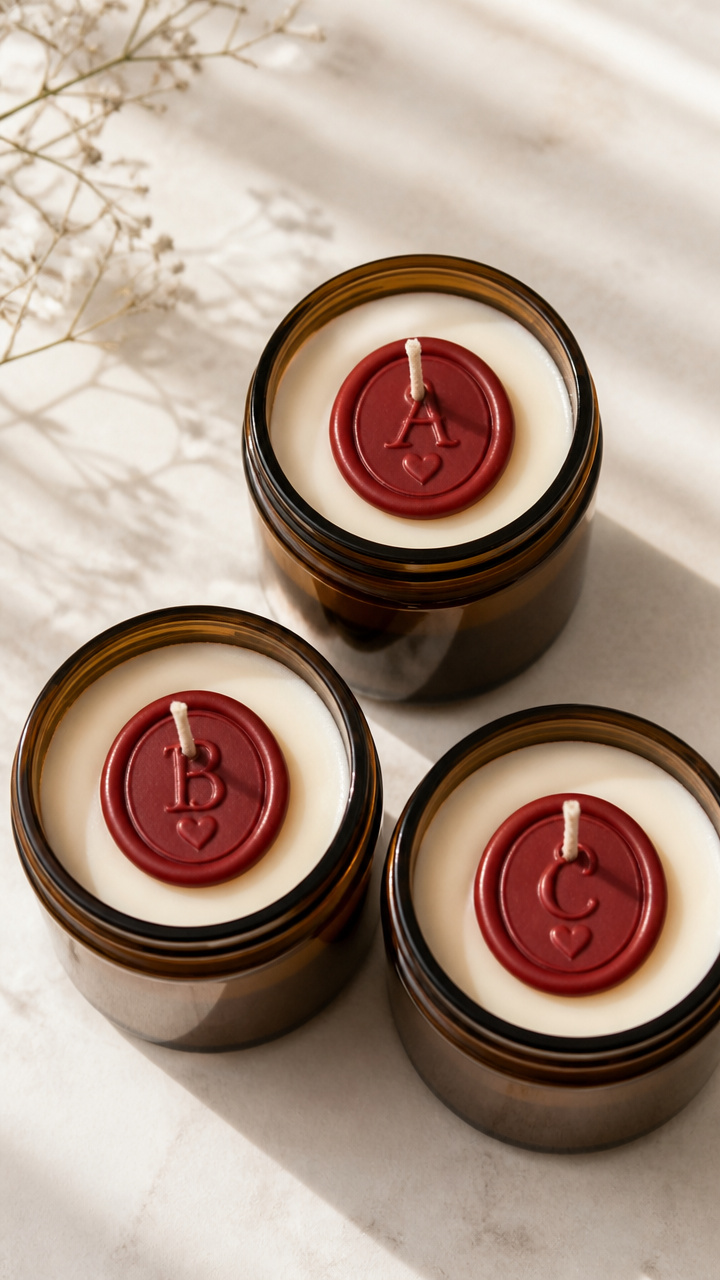
A vintage-style wax seal stamped with initials tops each creamy candle. These mini jars feel luxurious and deeply personal.
Materials Needed
- 3 oz amber glass jars (3 pieces)
- White soy wax (9 oz)
- Almond fragrance oil (9 ml)
- Wax seal stamp with heart and monogram design
- Sealing wax sticks (red, 3 inches long)
- Wicks (3 pre-tabbed)
- Lighter
How to Make It
- Melt soy wax in a double boiler. Stir in almond fragrance after removing from heat. Pour into jars with centered wicks. Set 4 hours.
- Trim wicks to 1/8 inch. Melt one sealing wax stick using a lighter, letting wax pool drop by drop onto each candle top.
- Press the stamp firmly into the wet wax for 5 seconds. Lift straight up.
- Let seals harden 10 minutes before packaging or gifting.


You’ve got everything you need to make something meaningful tonight. Light one up and let the warmth begin.