15 Last-Minute Valentine’s Day Crafts for Busy People

A handwritten note tucked into a lunchbox, a small handmade gift left on a pillow — these quiet gestures often speak the loudest. When time is tight but your heart is full, a simple craft can carry more meaning than anything store-bought.
You don’t need hours or a craft room to make something beautiful. With a few common supplies and clear steps, you can create heartfelt keepsakes that show someone they’re cherished.
1. Heartfelt Paper Clip Keychain
Easy
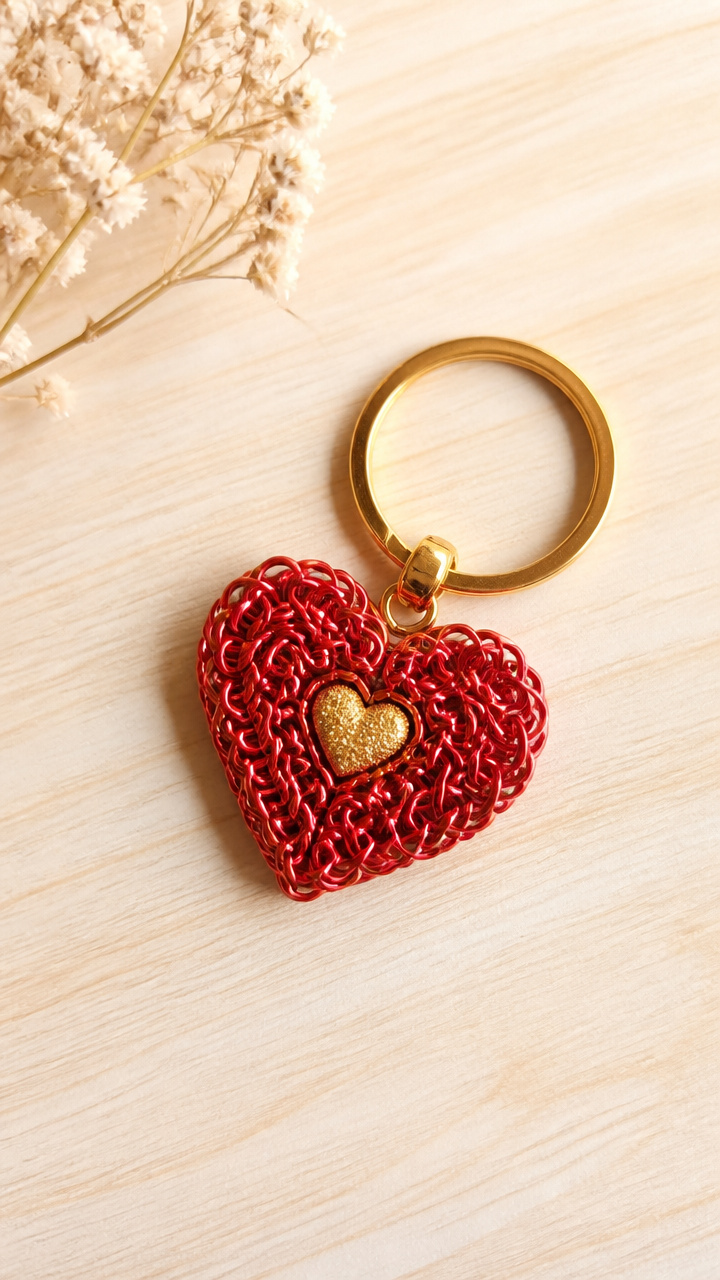
A tiny burst of color and care that clips onto a bag or set of keys. This bright little charm takes minutes and fits in your pocket until inspiration strikes.
Materials Needed
- 6 red paper clips
- Mini hot glue gun with glue sticks
- Small gold glitter heart sticker, 0.5 inch
- Keyring, 1 inch
How to Make It
- Straighten five paper clips halfway, leaving the ends curved. Leave one fully bent.
- Cross two straightened clips at the center to form an X. Wrap the fifth clip vertically around the intersection and twist to secure.
- Add a dab of hot glue where the wires meet to lock them in place.
- Glue the fully bent paper clip into a teardrop shape to form the top of the heart. Attach it above the X.
- Press the glitter heart sticker to the front center. Let dry for 1 minute.
- Slide the keyring through the top loop and close it.
2. Fingerprint Blossom Art
Easy
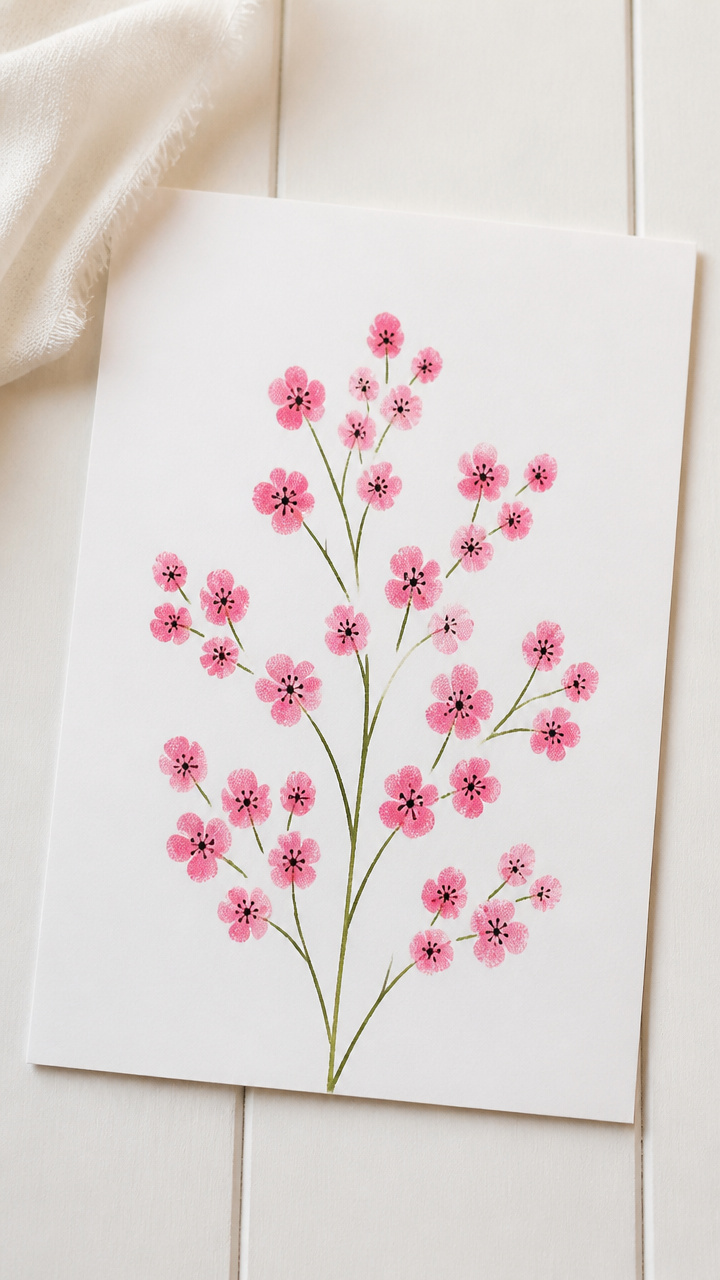
Soft pink flowers bloom from your actual fingertip prints on crisp white paper. This personal touch turns a quick afternoon into a lasting keepsake.
Materials Needed
- A4 white cardstock
- Pink washable stamp pad
- Fine black marker
- Green fine-tip marker
- Scissors
How to Make It
- Press your index fingertip firmly onto the stamp pad, covering the tip evenly.
- Press the inked fingertip straight down near the bottom right of the paper. Repeat four times, fanning outward slightly to form flower petals.
- Use the black marker to draw a small circle in the center of each flower.
- Draw a single wavy stem up from each cluster using the green marker.
- Add two short lines branching from each stem as leaves.
- Trim 0.5 inches off each side with scissors for a clean edge.
3. Cinnamon Heart Sachets
Moderate
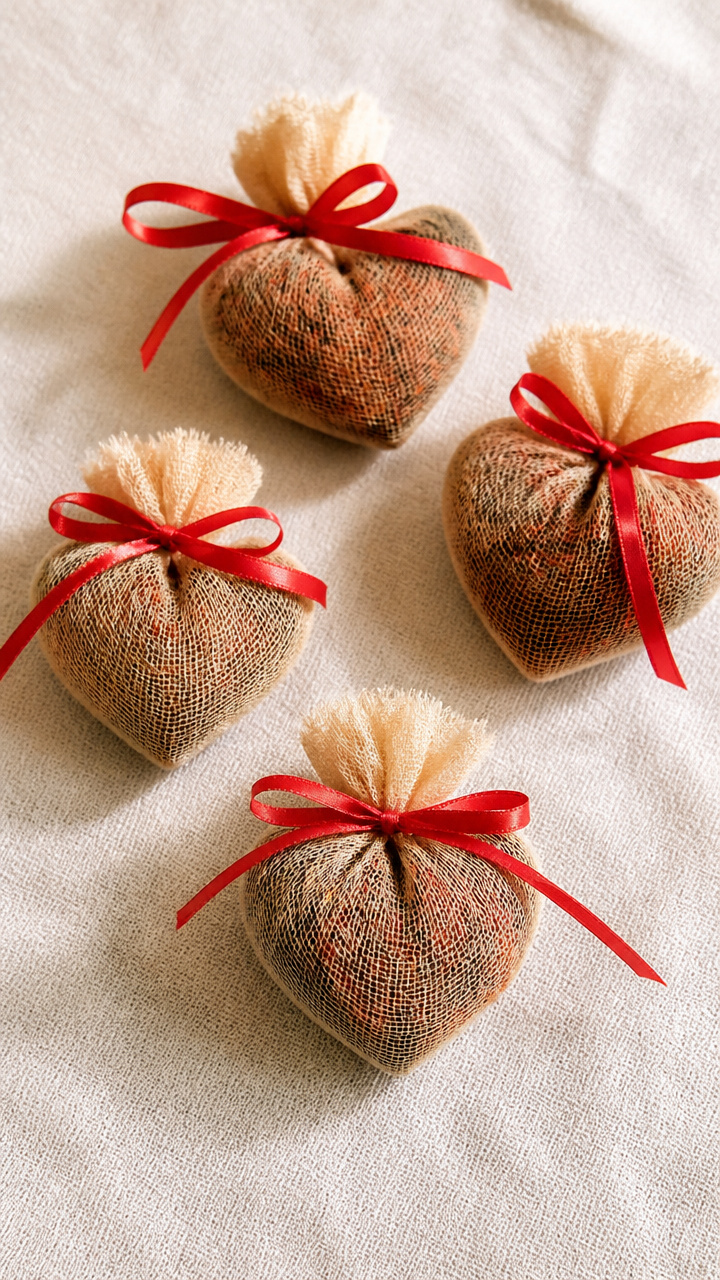
Warm, spicy-sweet bundles that smell like comfort and care. Tuck one in a drawer or hang it from a knob for a cozy surprise.
Materials Needed
- 1/4 cup whole cloves
- 1/2 cup ground cinnamon
- 1 tablespoon red hibiscus petals, dried
- Cheesecloth, 8×8 inch squares, 2 needed
- Red satin ribbon, 1/8 inch wide, 12 inches
- Small mixing bowl
- Measuring spoons
How to Make It
- In the bowl, mix the cloves, cinnamon, and hibiscus petals thoroughly with a spoon.
- Scoop half the mixture into the center of one cheesecloth square.
- Gather the edges and twist tightly just above the blend.
- Wrap the ribbon around the neck and tie a knot to secure.
- Trim the tail ends to 3 inches and repeat with the second sachet.
4. Love Note Origami Cranes
Moderate
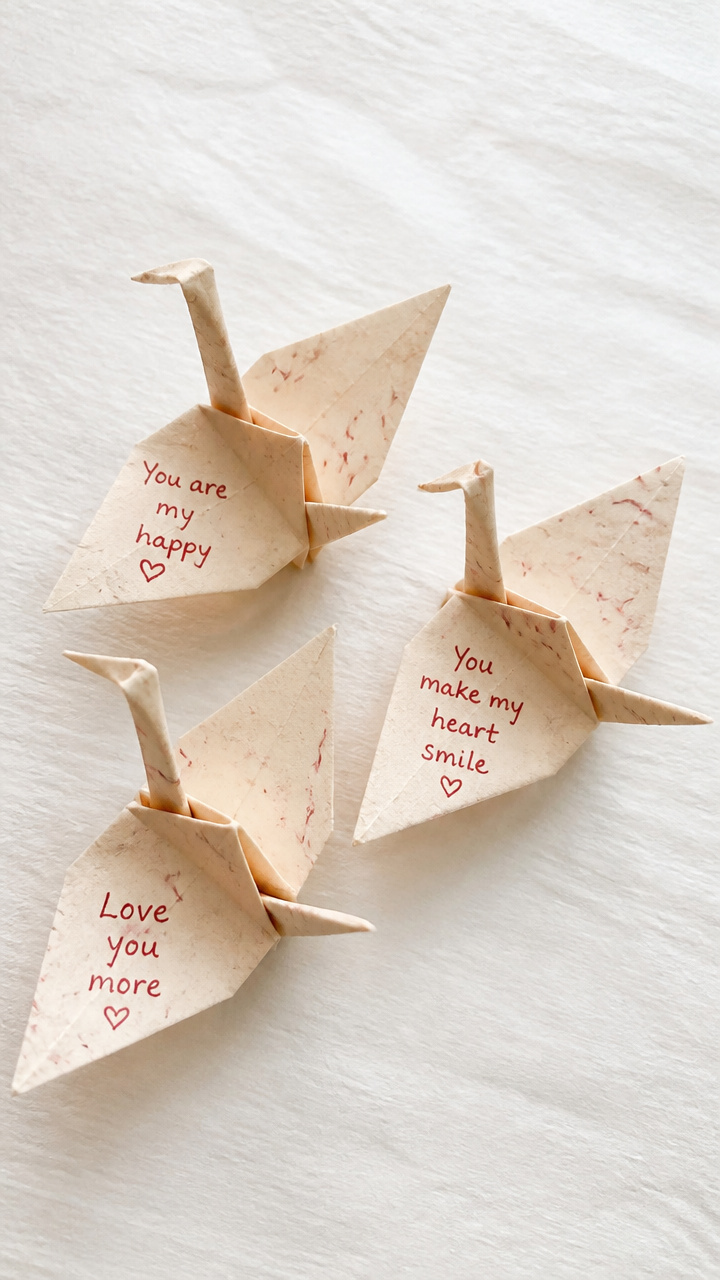
Delicate folded birds made from heartfelt messages on vintage-style paper. Each crane carries a secret wish written between the folds.
Materials Needed
- Origami paper, 6×6 inch, cream with red flecks, 3 sheets
- Red gel pen
- Flat workspace
How to Make It
- Write a short love note in cursive across the back of one paper sheet using the gel pen.
- Fold the paper corner to corner to make a triangle. Crease sharply with your fingernail.
- Fold the right corner up to the top point. Repeat with the left.
- Flip the shape over. Fold the right flap up and over toward the center.
- Repeat with the left flap to form a kite shape.
- Pull the head and tail gently apart to form the crane’s body and wings.
5. Pressed Flower Bookmark
Easy
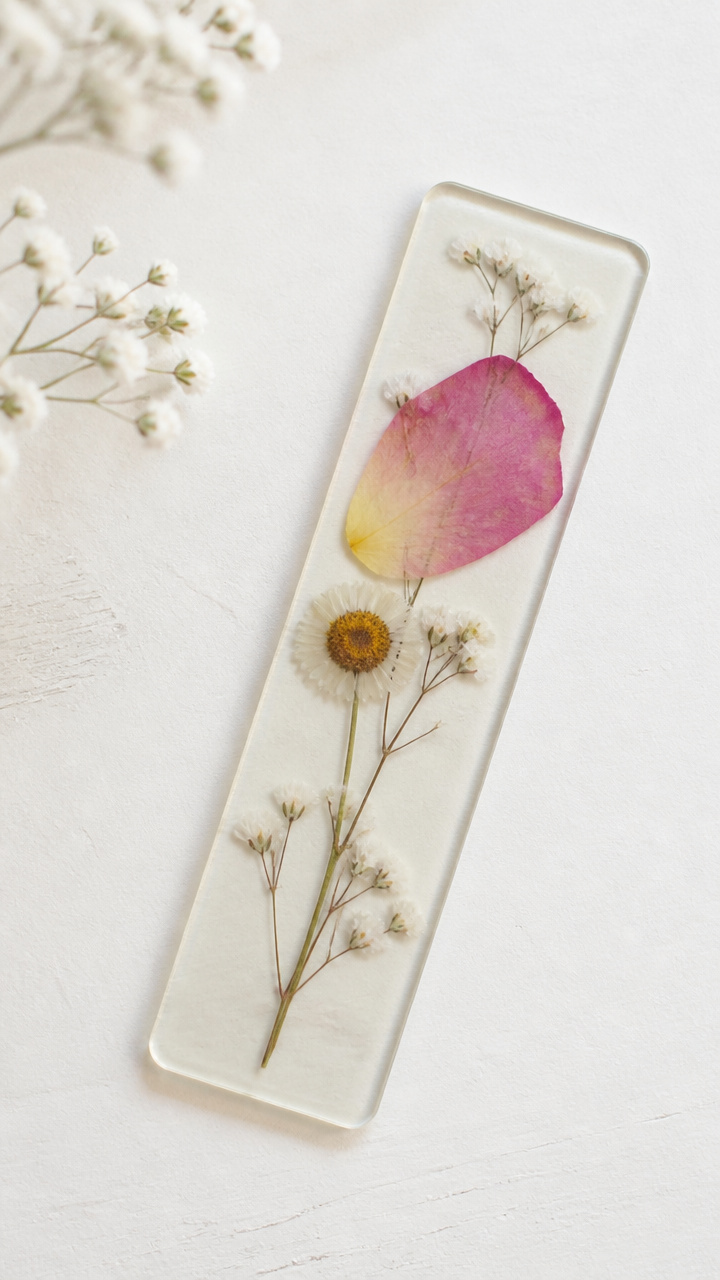
A sliver of garden beauty sealed between glassy laminate. Perfect for slipping into a favorite novel or gifting with a new read.
Materials Needed
- 2 rectangles clear self-adhesive laminating sheets, 2×6 inch
- Dried pink rose petal, 1 inch long
- Tiny white daisy, dried
- Scissors
How to Make It
- Place the rose petal diagonally across one laminating sheet, lower left to upper right.
- Set the daisy near the top right corner.
- Peel the backing off the second sheet and align it exactly over the first.
- Press from the center outward to remove air bubbles.
- Trim any uneven edges with scissors for a smooth finish.
6. Candy Box Transformation
Easy
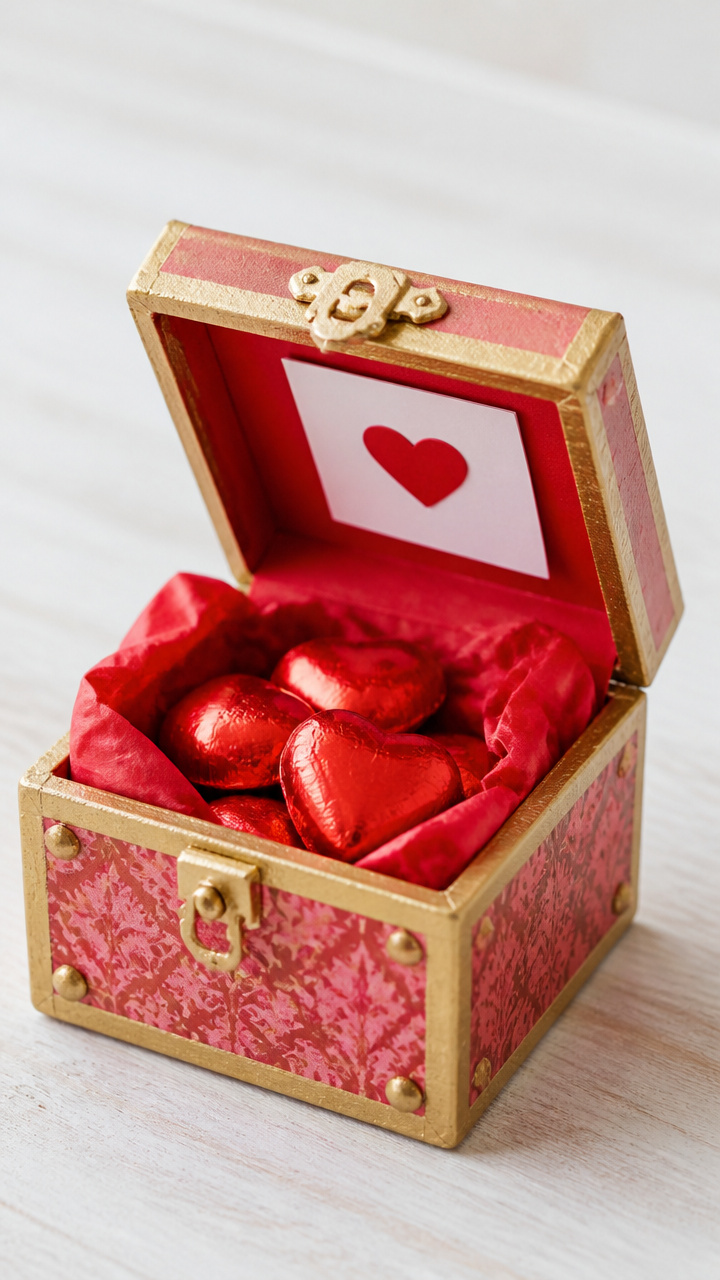
An empty chocolate box becomes a treasure chest with a hidden message under its lid. Surprise someone by refilling it with new treats.
Materials Needed
- Empty patterned candy box, 4×4 inch
- Gold metallic paint pen
- Small flat brush
- Red tissue paper, 6×6 inch
- Double-sided tape, 0.25 inch wide
How to Make It
- Use the gold paint pen to trace the outer edge of the box lid.
- Fill in any blank corners with tiny hearts using the same pen.
- Crumple the red tissue paper loosely in your hand.
- Unfold and place it inside the empty box.
- Attach a strip of double-sided tape to the underside of the lid.
- Press a rolled note into the tape so it hides when closed.
7. Twine-Wrapped Jar Lid
Easy
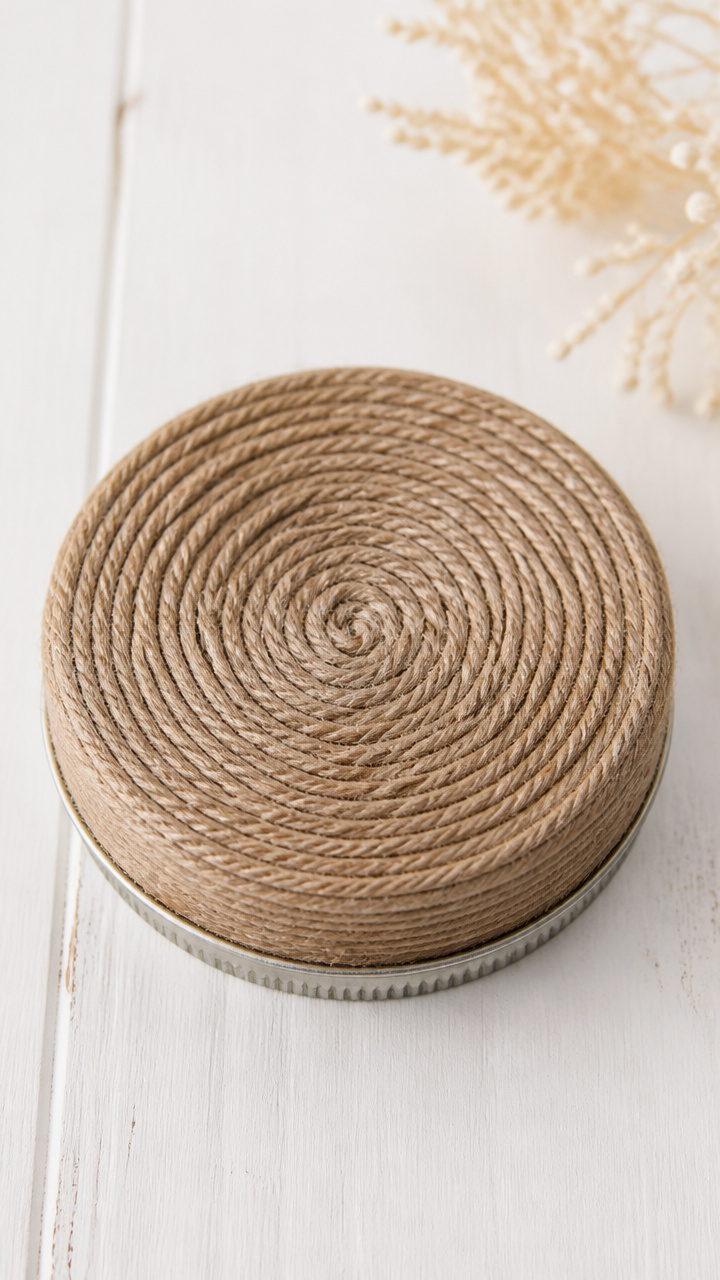
Rough natural twine softens a plain metal lid into something warm and handmade. Pair it with a jar of cookies or bath salts.
Materials Needed
- Mason jar lid, 2.5 inch diameter
- Natural jute twine, 3 yards
- Craft glue
- Small paintbrush
How to Make It
- Apply a thin line of craft glue along the outer rim of the lid using the brush.
- Start wrapping the twine tightly around the edge, pressing each coil into the glue.
- Continue wrapping inward, filling the lid completely in a spiral.
- Cut the twine and add a dot of glue under the end to secure.
- Let dry for 5 minutes before handling.
8. Watercolor Heart Socks
Moderate
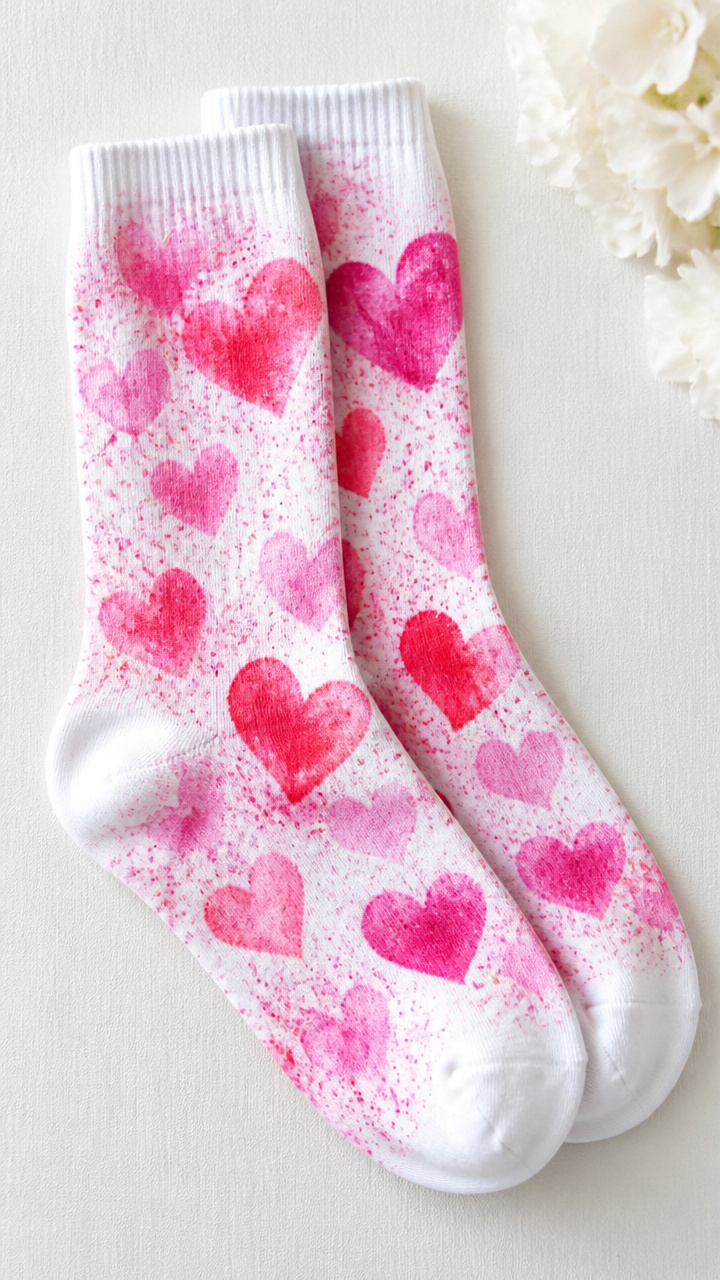
Bright splashes of paint turn plain cotton socks into wearable art. Wear them to spread cheer or give them as a bold gift.
Materials Needed
- White crew socks, cotton, 1 pair
- Liquid watercolor paints: red, pink, magenta
- Small spray bottle with water
- Pencil eraser
- Paper plate
- Clothespins
How to Make It
- Stretch the sock flat on the plate and clip it with clothespins to hold.
- Dip the pencil eraser into red watercolor and stamp hearts randomly across the fabric.
- Repeat with pink and magenta, letting some overlap.
- Spray lightly with water to blur edges slightly.
- Let dry completely on a flat surface for 20 minutes.
9. Salt Dough Heart Ornaments
Moderate
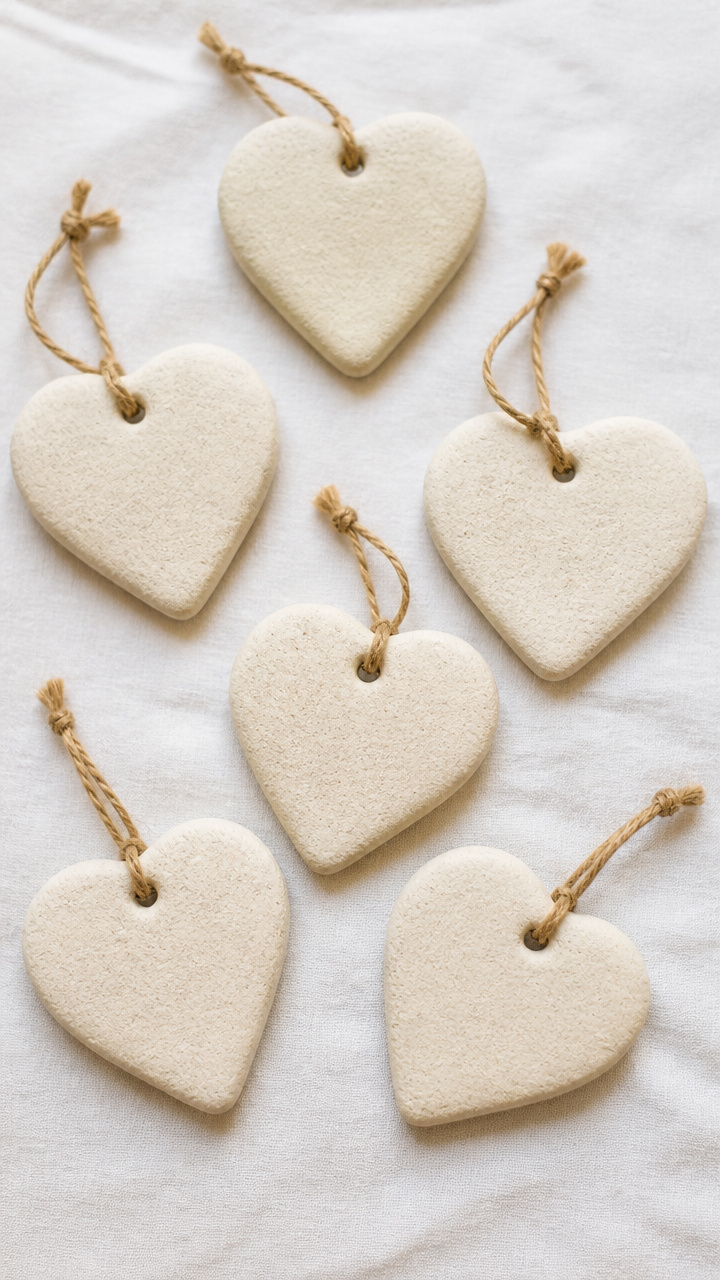
Simple shapes baked firm and ready to hang. These rustic tokens last years if stored carefully and carry a homemade warmth.
Materials Needed
- 1 cup all-purpose flour
- 1/2 cup table salt
- 3/4 cup water
- Rolling pin
- Heart-shaped cookie cutter, 2 inch
- Straw, 0.25 inch diameter
- Baking sheet
- Parchment paper
How to Make It
- Mix flour, salt, and water in a bowl until a smooth dough forms.
- Knead on a floured surface for 2 minutes until pliable.
- Roll the dough to 1/4 inch thickness with the rolling pin.
- Cut out hearts using the cookie cutter.
- Push the straw through the top center of each to make a hanging hole.
- Place on the baking sheet lined with parchment and bake at 200°F for 3 hours.
10. Photo Strip Garland
Easy
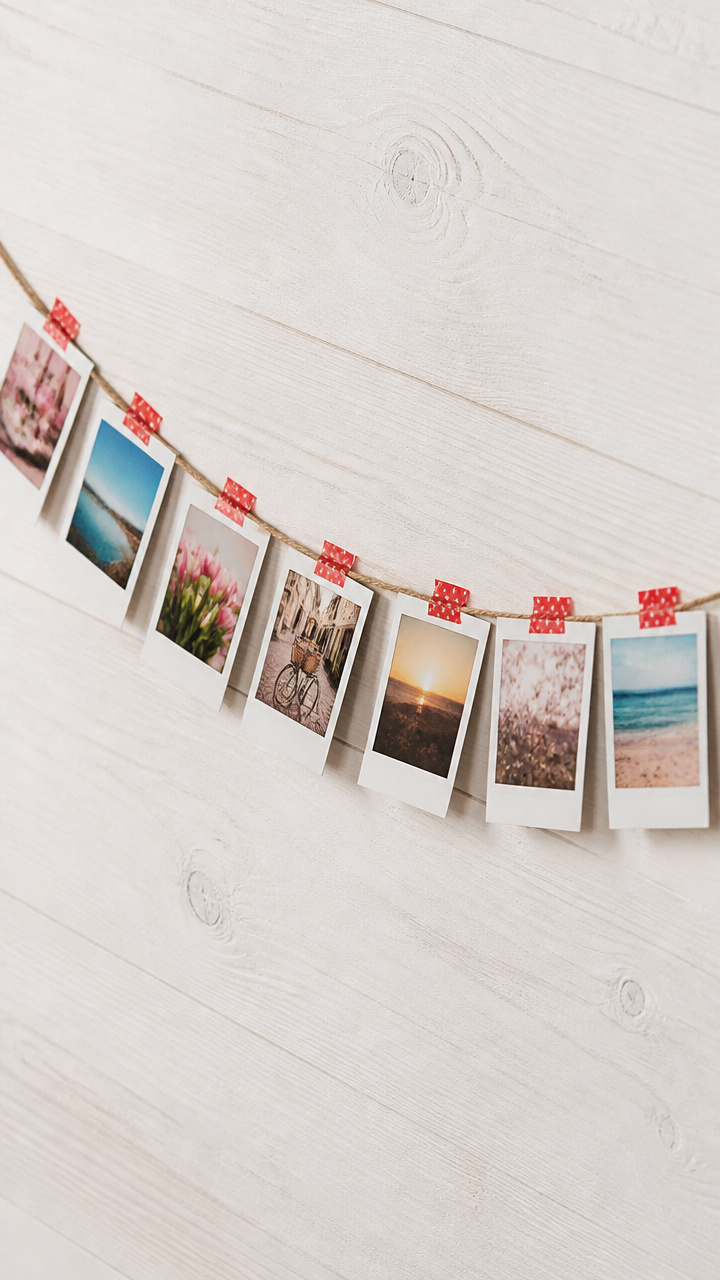
A string of real memories clipped from a single roll of instant film. Hang it across a shelf for instant joy.
Materials Needed
- Instant camera with film
- Red washi tape, 0.5 inch wide
- Scissors
- String, 3 feet long
How to Make It
- Take five close-up photos of meaningful things: hands holding, a shared meal, a pet.
- Once developed, trim each photo to 2×3 inches with scissors.
- Cut 5 pieces of washi tape, each 2 inches long.
- Tape one end of each photo to the string, spacing them 4 inches apart.
- Stick the washi tape over the top edge of each photo to secure.
11. Velvet Ribbon Rosette
Easy
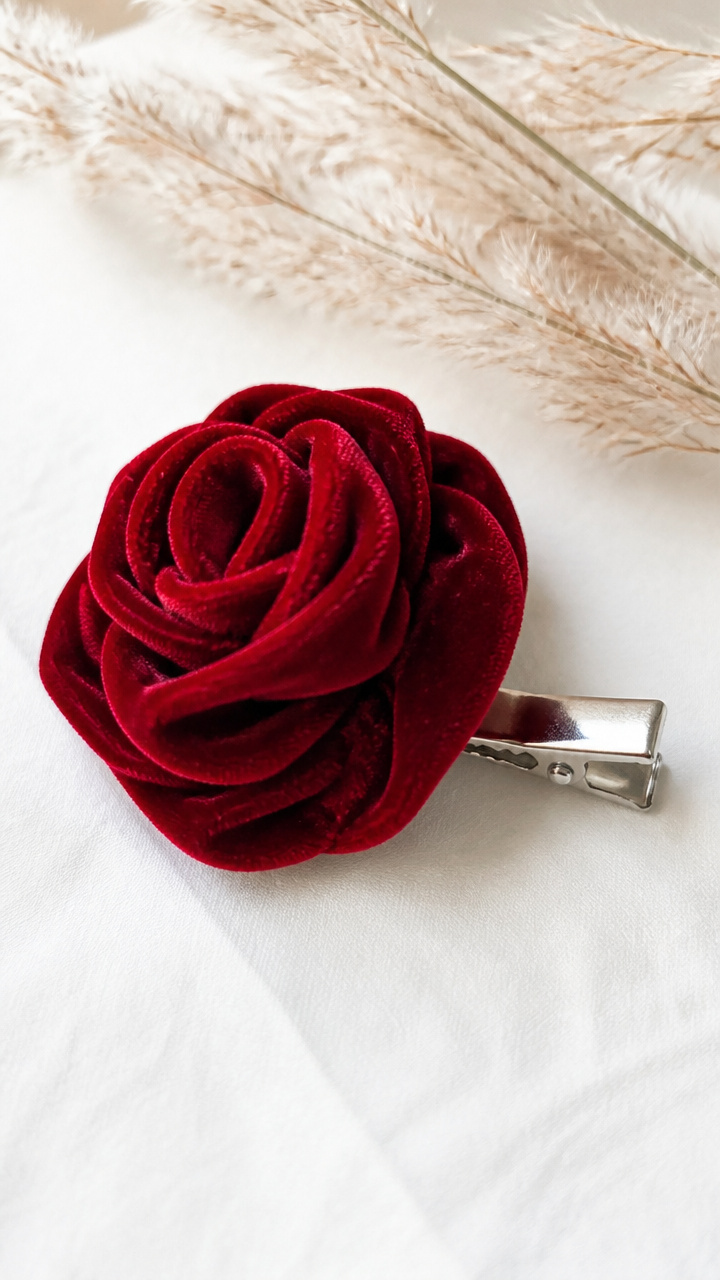
A plush red swirl pinned to a collar or tucked in hair. This elegant accent looks fancy but takes only minutes.
Materials Needed
- Red velvet ribbon, 1 inch wide, 18 inches long
- Alligator hair clip, 2 inch
- Hot glue gun with glue stick
- Scissors
How to Make It
- Fold the ribbon in half lengthwise, wrong side out.
- Starting at the fold, twist the ribbon tightly every inch as you go.
- Coil the twisted ribbon into a spiral, starting from the outside.
- Glue each layer to the one below using small dabs of hot glue.
- Glue the center base to the hair clip and let dry for 1 minute.
12. Tea Bag Heart Display
Moderate
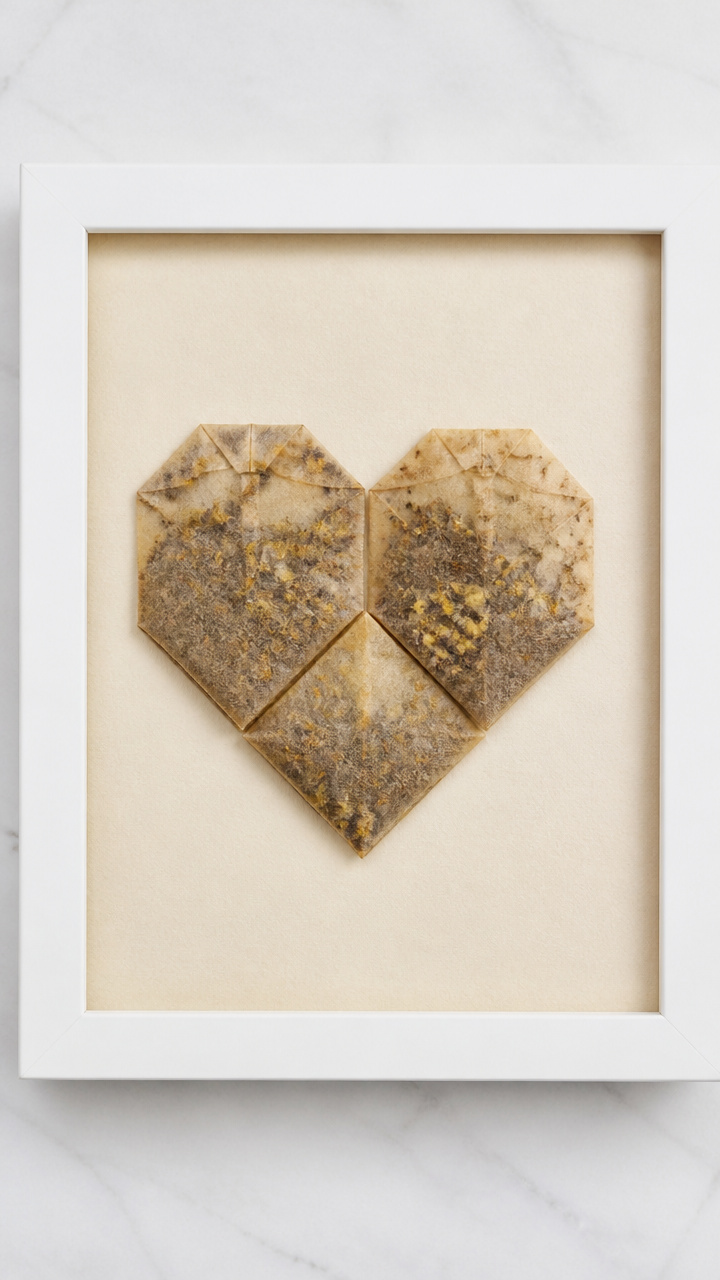
Used tea bags shaped into a tender symbol and framed simply. A quiet nod to shared quiet mornings and slow talks.
Materials Needed
- 3 used chamomile tea bags, dried overnight
- Manila folder, 8.5×11 inch
- Craft knife
- Glue stick
- Clear tape
How to Make It
- Cut a heart shape, 4 inches tall, from the manila folder using the craft knife.
- Flatten each tea bag and cut into thin 0.25 inch strips.
- Spread glue across the front of the cardboard heart.
- Weave the tea strips in overlapping rows to cover the surface.
- Let dry for 10 minutes, then seal the back with clear tape.
13. Chalkboard Paint Coasters
Moderate
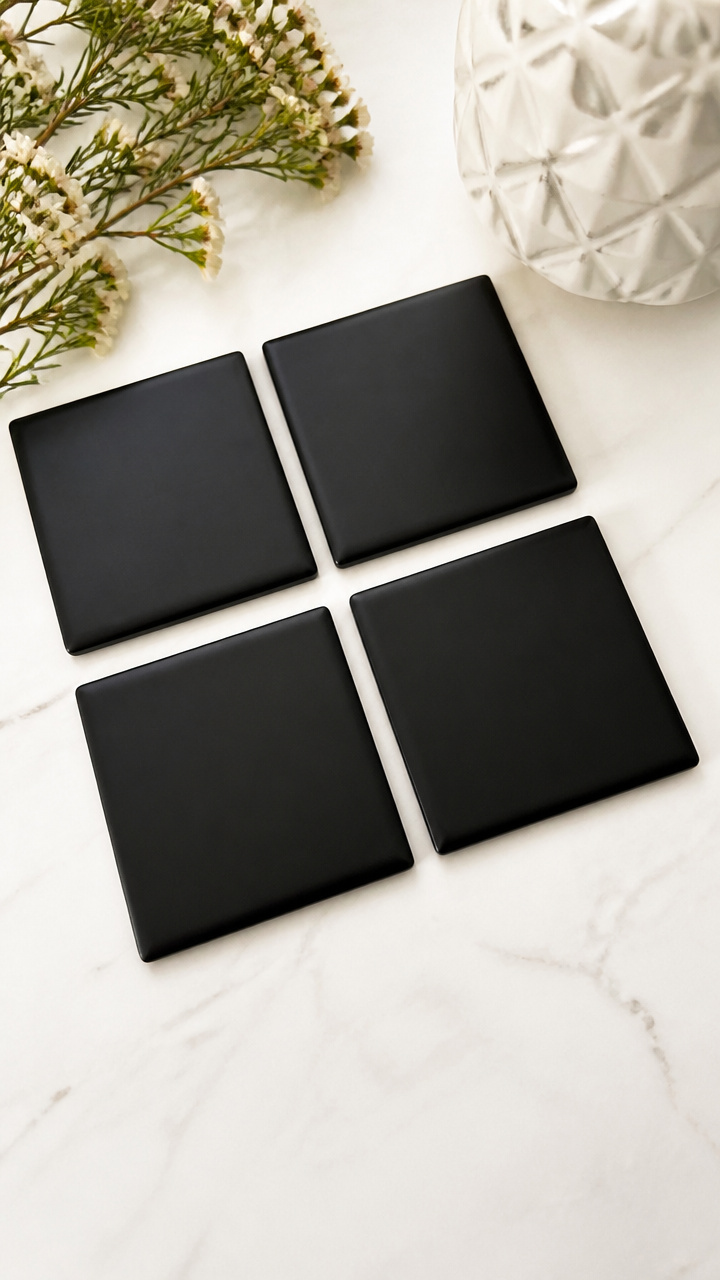
Smooth ceramic tiles turned into writable surfaces for sweet daily notes. Ideal for setting beside morning coffee.
Materials Needed
- 4 ceramic tiles, 4×4 inch, unglazed
- Black chalkboard paint, 2 oz
- Foam brush, 1 inch
- Painter’s tape
- Clear sealant spray
How to Make It
- Place painter’s tape under each tile to protect the work surface.
- Pour a dime-sized drop of paint onto one tile.
- Use the foam brush to spread evenly in one direction. Let dry 15 minutes.
- Apply a second coat and wait 2 hours to dry.
- Spray with sealant in a well-ventilated area. Let cure 24 hours.
14. Button Bouquet Pin
Moderate
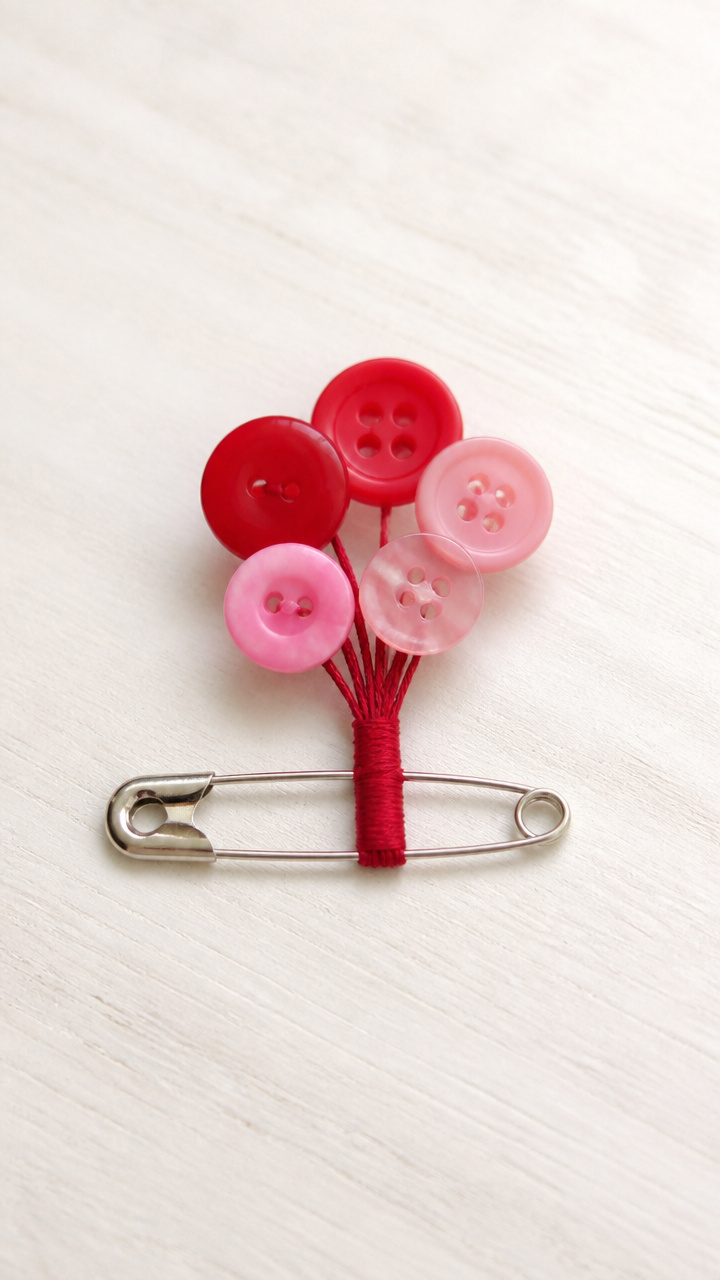
A tiny floral cluster made from mismatched buttons blooms on a safety pin. Wear it or gift it as a cheerful accessory.
Materials Needed
- Assorted red and pink buttons, 5 total
- Safety pin, 1.5 inch
- Jewelry pliers
- Red embroidery floss, 12 inches
- Needle
How to Make It
- Thread the needle with floss and knot the end.
- Stack three small buttons and sew through the centers five times.
- Knot securely on the back and trim the thread.
- Wrap the floss around the base of the stack three times.
- Tie off and attach the bundle to the safety pin using pliers.
15. Map Paper Love Vial
Easy
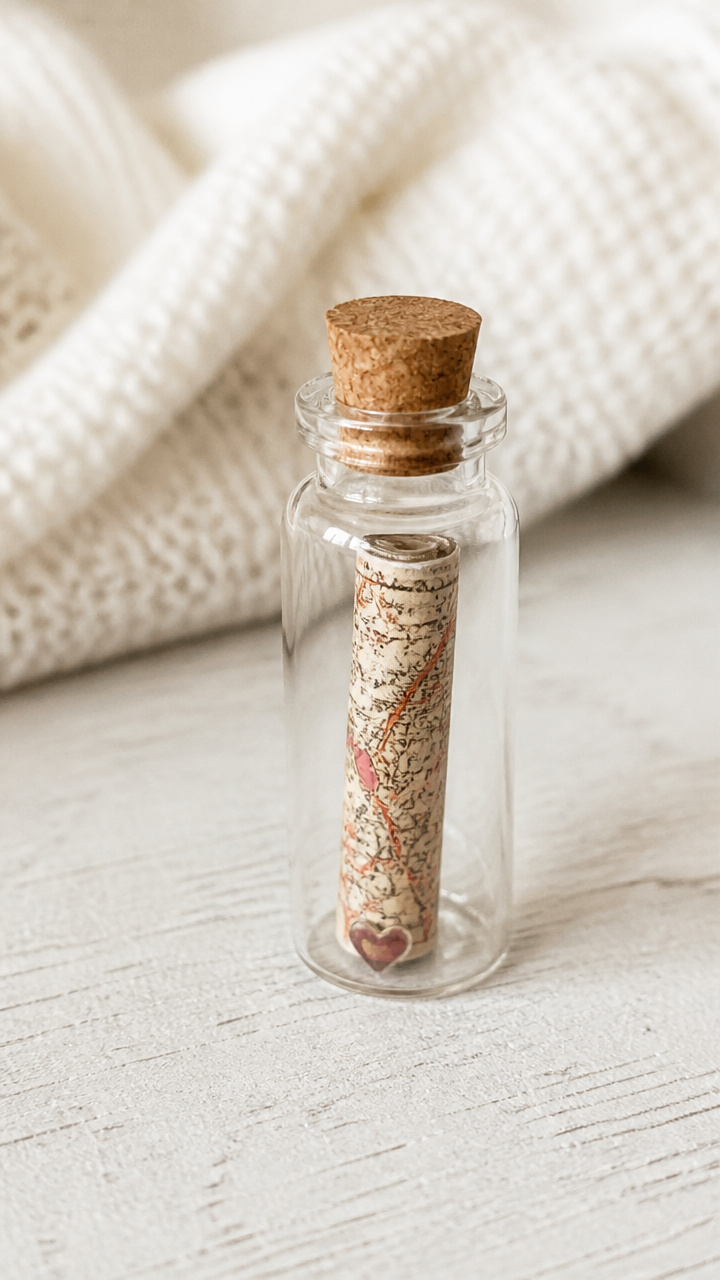
Faint street lines and city names curl inside a tiny glass tube. A romantic nod to places you’ve wandered together.
Materials Needed
- Small glass vial with cork, 2 inch long
- Scrap of old map, 1.5×1.5 inch
- Red ink pen
- Tweezers
How to Make It
- Write a short phrase like 'our first date' on the map scrap with the pen.
- Fold the paper diagonally into a narrow cone.
- Use tweezers to slide the cone into the vial.
- Push the cork in gently until snug.
You’ve got everything you need to make something meaningful today. Pick one idea and start — love grows in the doing.