15 Valentine’s Day Handprint Crafts for Kids

Soft paint on small hands, the press of fingers to paper, a giggle as hearts take shape — these moments become keepsakes long after the craft is done. Making Valentine’s Day art with kids isn’t about perfection, it’s about connection and creating something real together.
Each handprint holds a memory, a snapshot of tiny hands growing just a little bigger. These fifteen ideas turn that simple imprint into heartfelt gifts, decorations, and surprises perfect for sharing love with family, teachers, and friends.
1. Handprint Love Bug Card
Easy
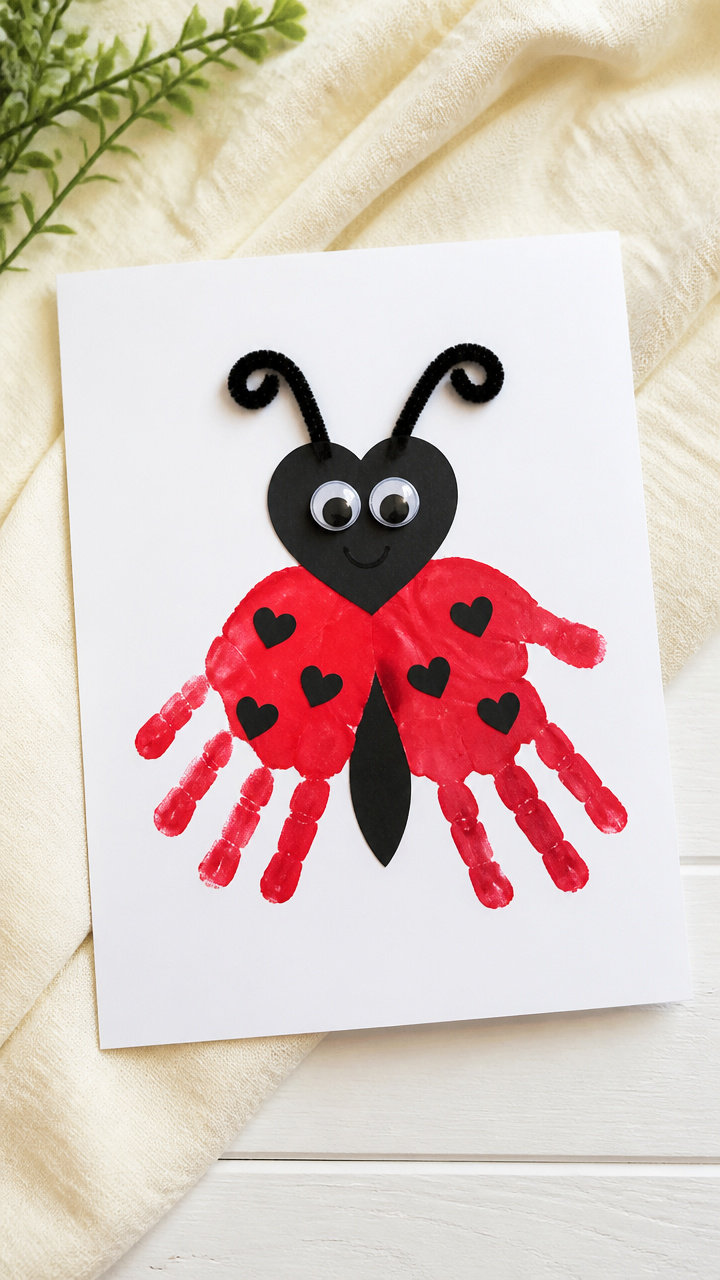
A bright red handprint transforms into a cheerful ladybug with heart-shaped spots, perfect for slipping into a lunchbox or taping to a mirror. Kids love adding googly eyes and curving antennae from pipe cleaners.
Materials Needed
- Red acrylic paint
- Black acrylic paint
- White A4 cardstock
- Googly eyes (6mm)
- Black fine-tip marker
- Two 4-inch black pipe cleaners
- Glue stick
- Paintbrush
How to Make It
- Fold the white cardstock in half horizontally to create a 5.5 x 8.5 inch card.
- Use the paintbrush to coat one palm and all fingers evenly with red acrylic paint.
- Press the painted hand firmly onto the front of the card, fingers pointing down, to form the bug’s body.
- Dip the tip of your index finger in black paint and press two small dots above the handprint for wings.
- Draw six short curved lines with the black marker along each side of the handprint for legs.
- Glue on two googly eyes just above the top edge of the handprint.
- Twist one end of each pipe cleaner into a spiral and glue them at the top corners of the handprint for antennae.


2. Heart Tree Wall Art
Moderate
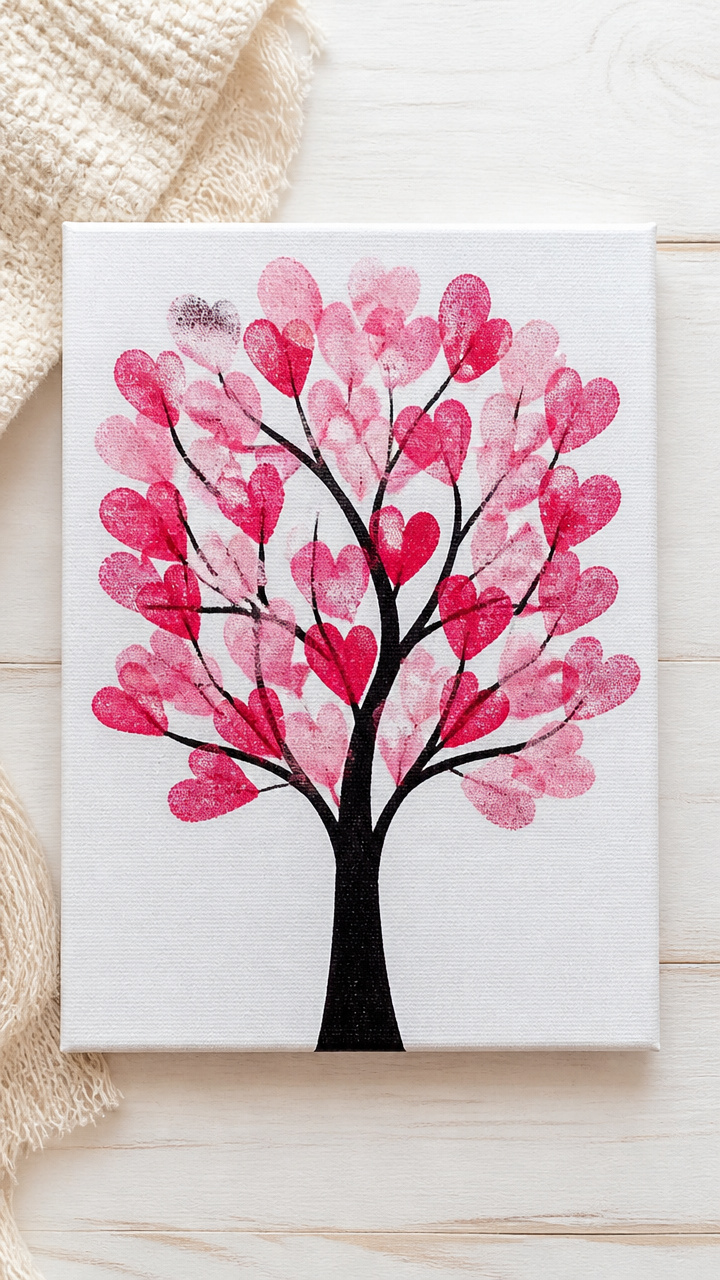
Bare branches filled with handprint hearts in soft pinks and reds make a gallery-worthy piece for any wall. This craft uses layered printing to build depth and color variation.
Materials Needed
- 9×12 inch canvas board
- Pink acrylic paint
- Red acrylic paint
- Crimson acrylic paint
- Black liquid watercolor
- Fine mist spray bottle
- Cardboard tray
- Baby wipe
- Small paint sponge (2 inches)
How to Make It
- Pour pink, red, and crimson paint into separate sections of the cardboard tray.
- Dip a child’s hand into pink paint using the sponge to spread an even layer, then press fingers together and stamp near the bottom center of the canvas.
- Repeat with red paint on the same hand, stamping slightly above and overlapping the first print to form a cluster.
- Use crimson paint to stamp a third handprint above the others, spreading fingers slightly for a fuller tree effect.
- Let all handprints dry completely for 20 minutes.
- Dip the edge of the sponge in black liquid watercolor and dab along the base of the handprints to form a trunk and branching limbs.
- Fill the spray bottle with water and lightly mist the entire canvas to soften edges and blend colors slightly.


3. Handprint Owl Valentines
Easy
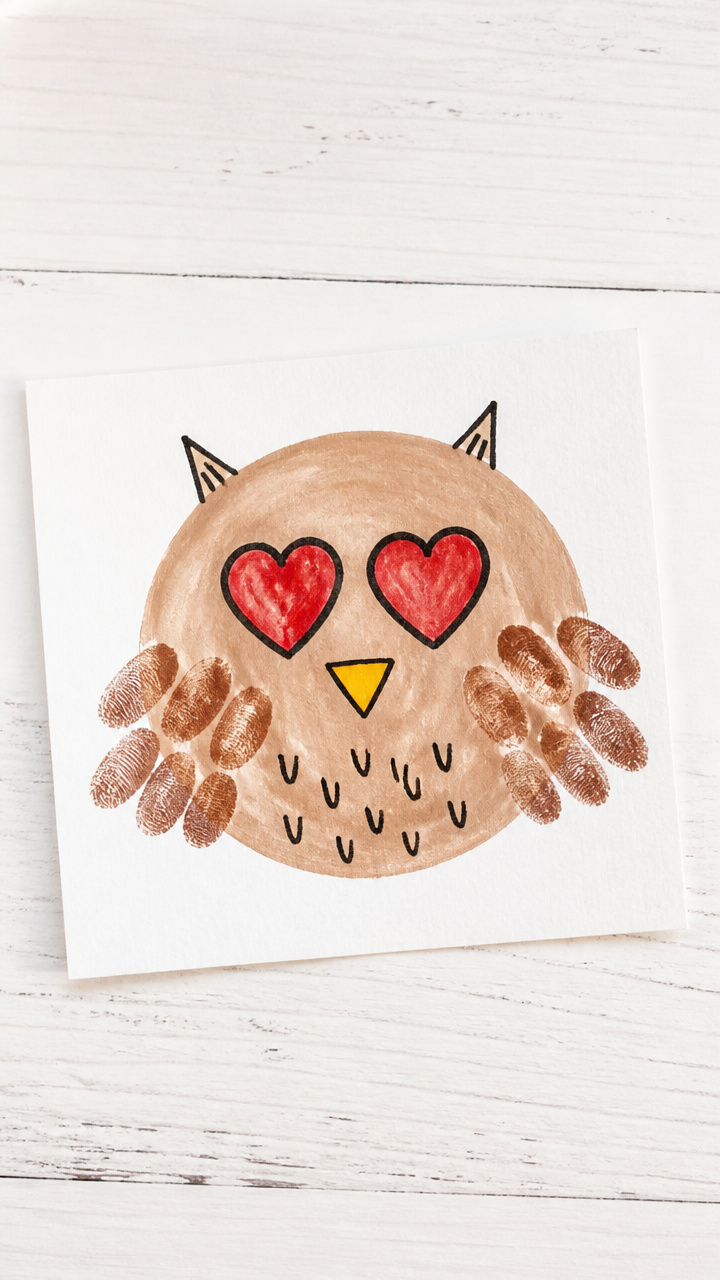
Round handprints become owl faces with feathered wings made from thumbprints, ideal for classroom exchanges. Each one can have unique heart-shaped eyes.
Materials Needed
- Light brown acrylic paint
- Red acrylic paint
- White A4 construction paper
- Black fine-tip marker
- Scissors
- Glue stick
- Hole punch
How to Make It
- Cut the white construction paper into 4 equal 4.25 x 5.5 inch cards.
- Paint the palm and fingers of one hand with light brown paint and press fingers together while stamping in the center of each card.
- Use a clean fingertip dipped in red paint to press two small heart shapes just below the wrist line of the handprint for feet.
- Let the paint dry for 10 minutes.
- Draw two large circles for eyes inside the upper part of the handprint using the black marker.
- Add heart-shaped pupils inside each eye circle.
- Draw a small triangle beak where the thumb meets the palm and add feather texture lines across the fingers with short curved marks.
- Punch a hole in the top left corner of each card and thread with a 6-inch red yarn loop.
4. Floating Heart Mobile
Moderate
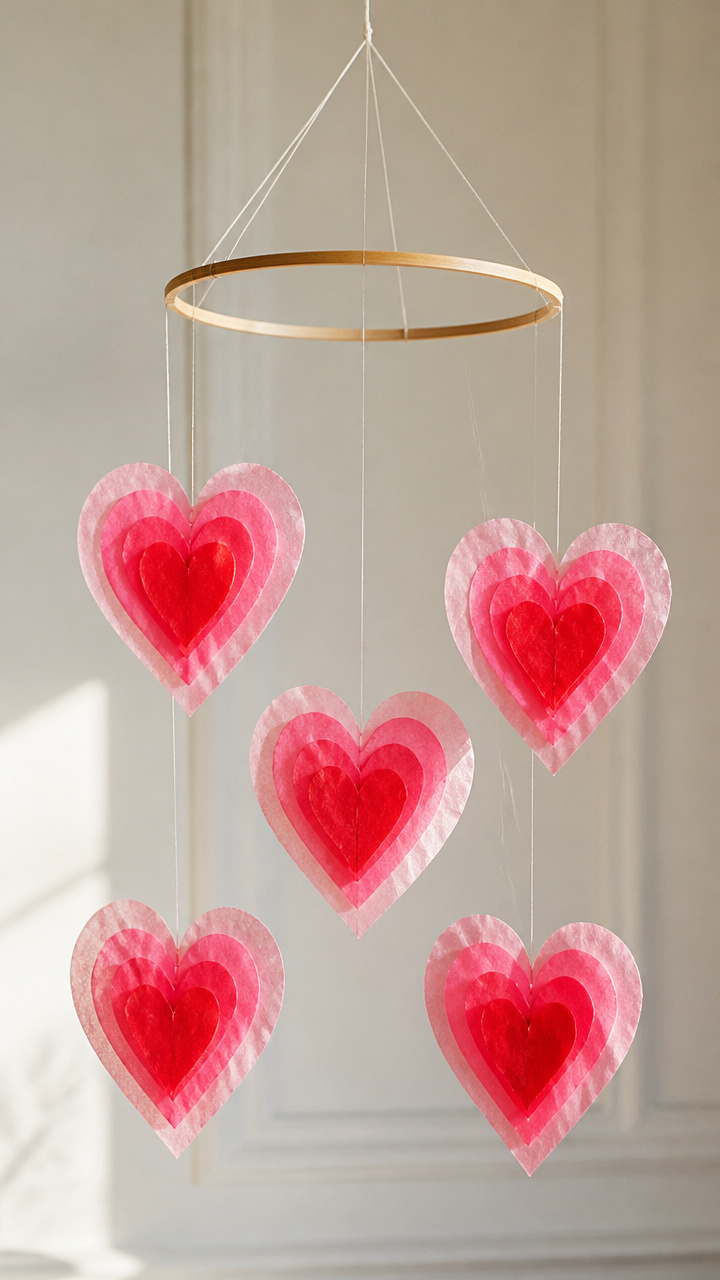
Delicate handprints dangle from ribbons like hearts in flight, catching light and spinning gently above a bed or crib. The layered tissue paper adds softness and dimension.
Materials Needed
- Five 4×4 inch squares of red tissue paper
- Five 4×4 inch squares of pink tissue paper
- White PVA glue
- Child-sized paintbrush
- Clear-drying school glue
- 12-inch wooden embroidery hoop
- Three 18-inch satin ribbons (25mm wide, red)
- Hole punch
- Scissors
How to Make It
- Lay one red tissue square flat and brush a thin layer of white PVA glue over the surface.
- Place a pink tissue square directly on top and press gently to adhere.
- Use the paintbrush to apply another layer of glue over the pink layer and let dry flat for 15 minutes.
- Once dry, use a child’s hand dipped in clear-drying school glue to press a handprint in the center of the tissue stack.
- Carefully cut around the handprint, leaving a 0.5 inch border of tissue.
- Repeat steps 1–5 to make four more layered handprint cutouts.
- Punch a hole at the top of each handprint.
- Tie one end of each ribbon to the hoop, spacing them evenly, and knot securely.
- Thread each handprint onto the loose end of a ribbon and tie a knot below to hold it in place.


5. Handprint Flower Pots
Advanced
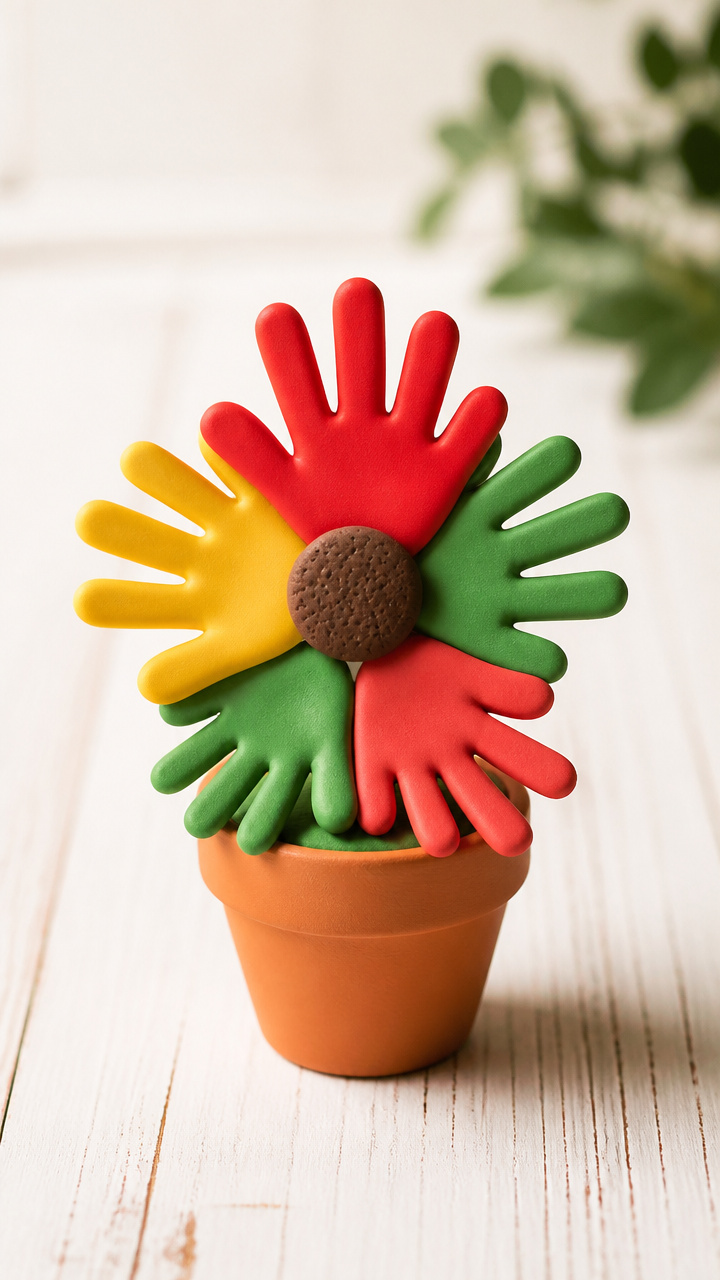
Bright handprint petals burst from a painted thumbprint center in mini terra cotta pots, ready to hold pencils or real blooms. This version uses oven-baked clay for permanence.
Materials Needed
- Oven-bake polymer clay (red, green, yellow)
- Mini terra cotta pot (2.5 inches tall)
- Rolling pin
- Craft knife
- Aluminum foil
- Toothpick
- Oven-safe baking sheet
- Acrylic sealer spray
How to Make It
- Preheat oven to 275°F according to clay instructions.
- Crumple aluminum foil to fit snugly inside the pot and support its shape during baking.
- Roll out a 1/8 inch thick slab of red clay using the rolling pin.
- Press a child’s hand firmly into the clay and cut around it with the craft knife to create a petal shape.
- Use a toothpick to poke a hole at the base of the handprint where the wrist meets the clay.
- Repeat to make five red handprint petals.
- Roll a small yellow clay ball and flatten slightly for the flower center, then press into the pot opening.
- Wrap a green clay strip around the outside base of the pot for a leaf band.
- Arrange petals around the center, inserting the base of each into the foil-supported rim, and bake on the sheet for 15 minutes.
- Let cool completely, remove foil, and spray with acrylic sealer for shine.


6. Cupid Name Plaques
Moderate
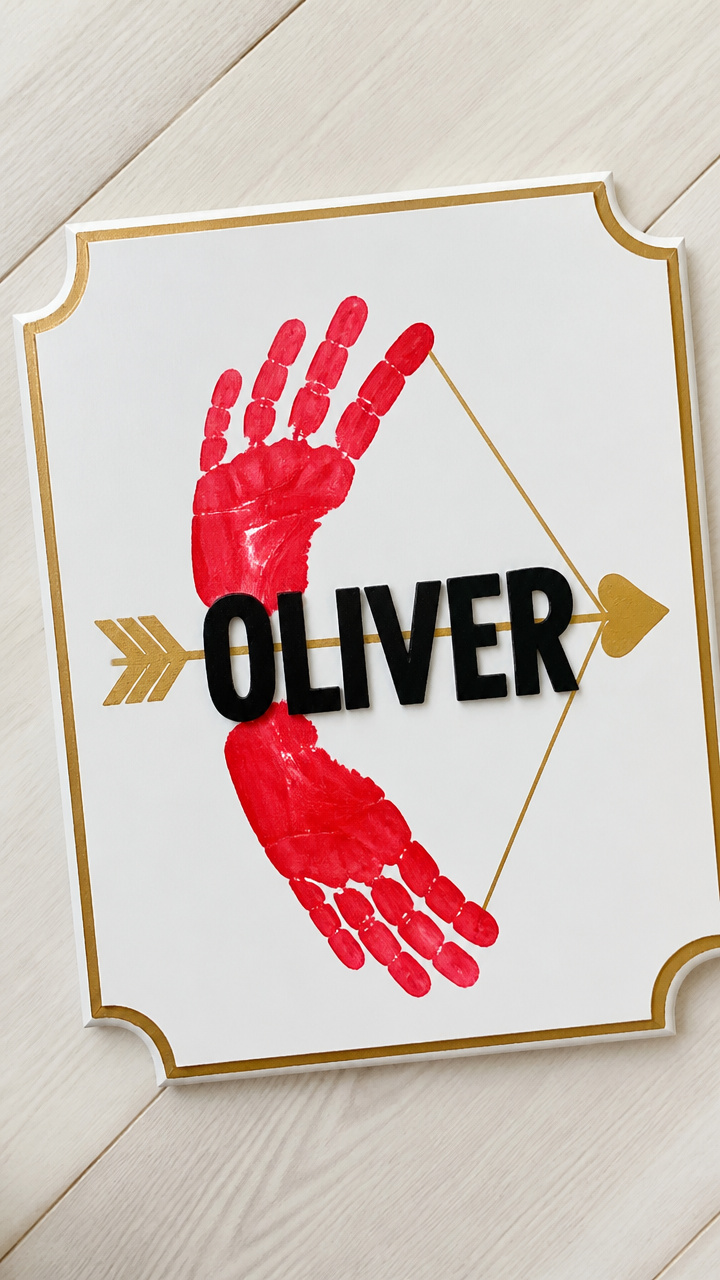
A handprint arches like Cupid’s bow behind a child’s name written in bold block letters, framed in foam core. Ideal for bedroom doors or party seating charts.
Materials Needed
- 8×10 inch foam core board
- Red acrylic paint
- Gold metallic marker
- Ruler
- Pencil
- Eraser
- Child-sized paintbrush
- Scissors
- Double-sided tape
How to Make It
- Use the ruler and pencil to draw a 6 inch horizontal line centered 2 inches from the top of the foam board.
- Write the child’s name in uppercase block letters centered on the line using the pencil.
- Trace over the name with the gold metallic marker and let dry for 5 minutes.
- Paint one hand entirely with red acrylic paint using the paintbrush.
- Press the hand vertically above the name so fingertips touch the top edge of the board and the wrist aligns with the name line, forming a bow shape.
- Let the paint dry for 15 minutes.
- Erase any visible pencil marks under the gold lettering.
- Cut out the plaque along the board edges and attach to a door with double-sided tape.

7. Handprint Sock Puppets
Moderate
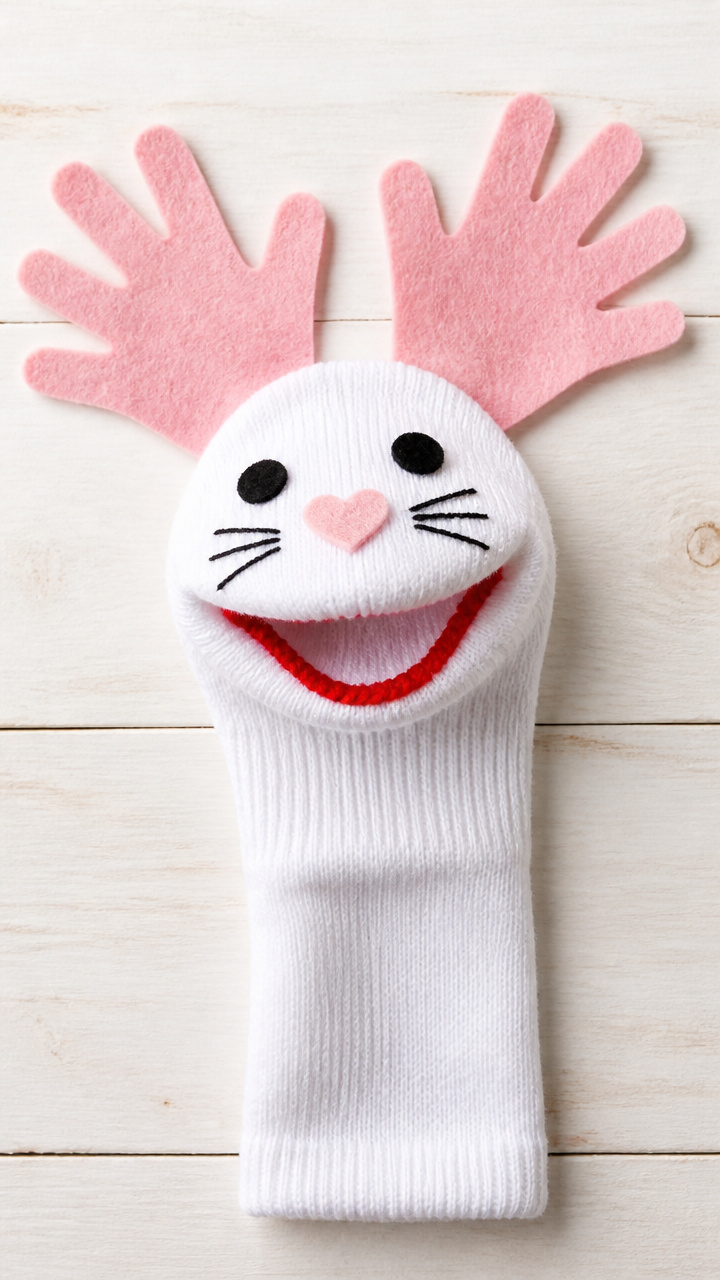
An old sock becomes a talking valentine character with handprint ears and a heart-shaped mouth. Great for sibling playdates or storytelling time.
Materials Needed
- Clean white crew sock
- Pink felt sheet (9×12 inches)
- Red yarn (10 yards)
- Fabric scissors
- Fabric glue
- Black sewing needle
- Embroidery floss (white, 6-strand)
- Hot glue gun
- Button (1 inch, red)
How to Make It
- Cut two handprint shapes from the pink felt using fabric scissors.
- Apply fabric glue along the curved edge of one handprint and press it onto the sock’s heel, fingers pointing up, to form an ear.
- Repeat with the second handprint on the opposite side.
- Thread the needle with white embroidery floss and stitch a zigzag smile just below the ankle seam.
- Glue the red button below the mouth for a nose.
- Cut twelve 6 inch lengths of red yarn and hot glue one end of each to the top of the head between the ears to form hair.
- Let all glue dry for 20 minutes before use.


8. Magnetic Fridge Hearts
Easy
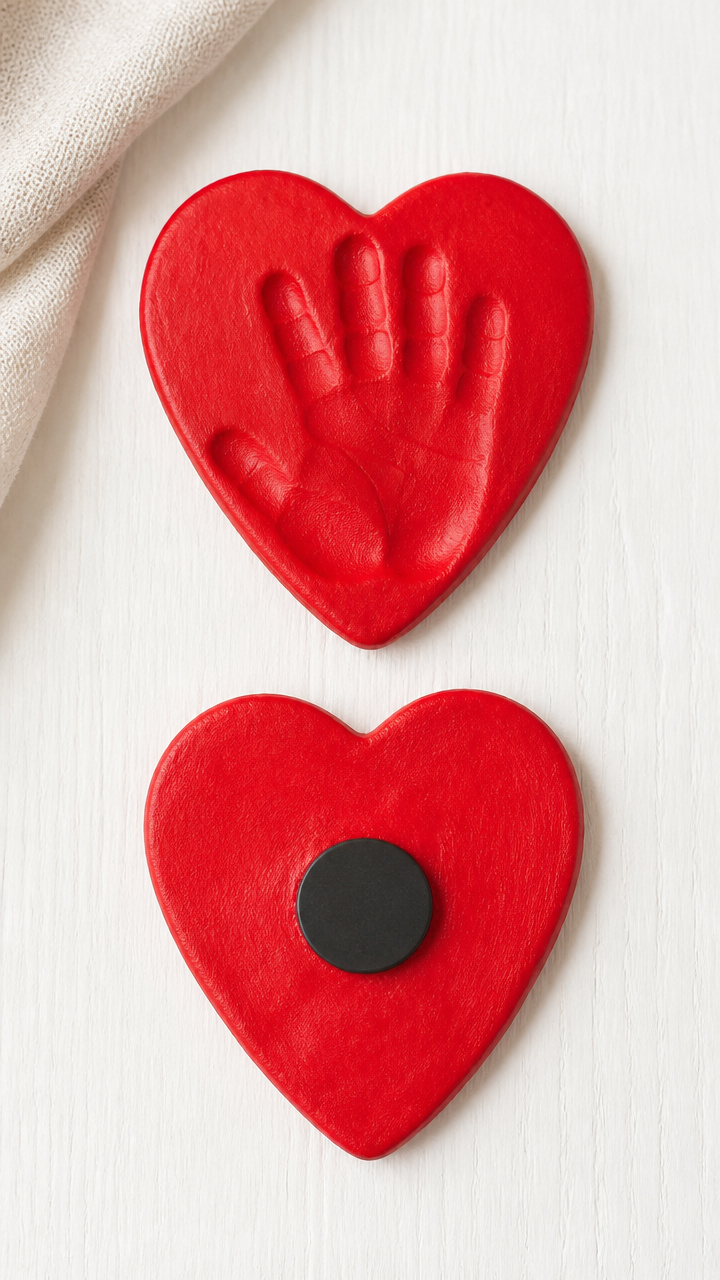
Flat handprint hearts with strong magnets on back stick proudly to the fridge, showing off a child’s latest creation. These use air-dry clay for easy shaping.
Materials Needed
- Air-dry clay (white, 1 pound pack)
- Red acrylic paint
- Child-sized paintbrush
- Rolling pin
- Heart-shaped cookie cutter (4 inches)
- Plastic straw
- Fridge magnet discs (20mm, self-adhesive, 5 count)
- Sandpaper (120 grit)
How to Make It
- Roll the clay to 1/4 inch thickness using the rolling pin.
- Press the heart cutter into the clay and lift to release a heart shape.
- Smooth any rough edges with damp fingers.
- Press a child’s hand firmly into the center of the heart and lift carefully.
- Use the straw to poke a hole at the top for hanging if desired.
- Let the clay dry undisturbed for 24 hours on a flat surface.
- Lightly sand any sharp edges with sandpaper.
- Paint the entire surface with red acrylic paint and let dry for 1 hour.
- Peel backing from a magnet disc and press firmly onto the back center.


9. Handprint Paper Chains
Easy
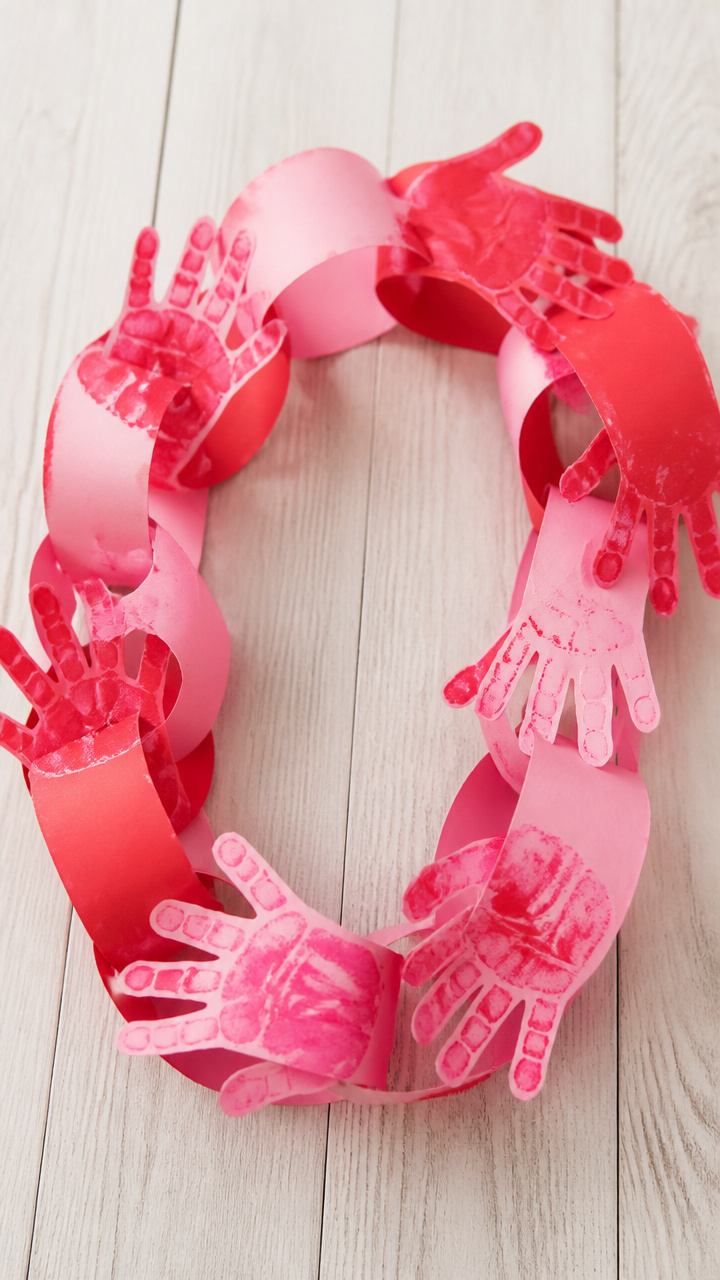
Interlocking handprint links in alternating red and pink form a festive garland for mantels or classrooms. Each loop captures a unique fingerprint pattern.
Materials Needed
- Red A4 construction paper
- Pink A4 construction paper
- White PVA glue
- Paintbrush
- Scissors
- Ruler
- Pencil
How to Make It
- Cut both paper types into 1 x 8 inch strips using the ruler, pencil, and scissors.
- Brush a thin layer of white PVA glue onto one side of a red strip.
- Press a child’s hand firmly onto the glued side and lift straight up.
- Repeat with a pink strip, alternating colors down the line.
- Let all strips dry flat for 10 minutes.
- Form the first strip into a circle and glue the ends together.
- Thread the next strip through the first loop before gluing its ends to create a chain.
- Continue linking until the garland reaches desired length.


10. Valentine Shadow Box
Advanced
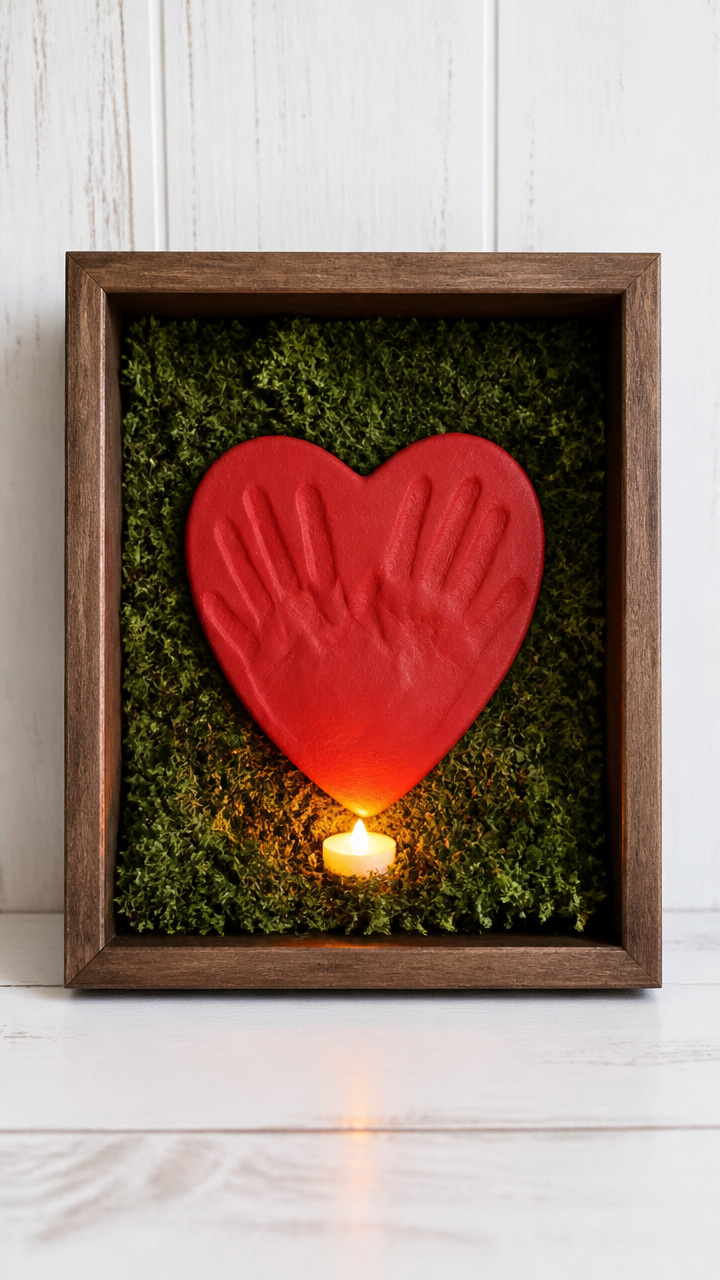
A deep wooden box holds a dimensional handprint heart rising from a bed of faux moss, lit by a tea light. This creates a warm glow perfect for nightstands.
Materials Needed
- Wooden shadow box frame (8×10 inches, 1.5 inch depth)
- Green faux moss sheet
- Red air-dry clay (4 oz)
- Tea light LED candle
- Craft knife
- Rolling pin
- Plastic heart mold (3 inches)
- White PVA glue
- Paintbrush
How to Make It
- Cut the moss sheet to fit the floor of the shadow box using the craft knife.
- Glue the moss in place with white PVA glue and let dry for 15 minutes.
- Roll red clay to 1/2 inch thickness and press into the heart mold.
- Press a child’s hand firmly into the top of the clay heart and remove carefully.
- Let the clay dry in the mold for 24 hours.
- Remove the hardened heart and glue it upright in the center of the moss using PVA glue.
- Place the LED tea light behind the heart for a glowing silhouette effect.
- Close and hang the shadow box with included hardware.


11. Handprint Bookmark Flags
Moderate
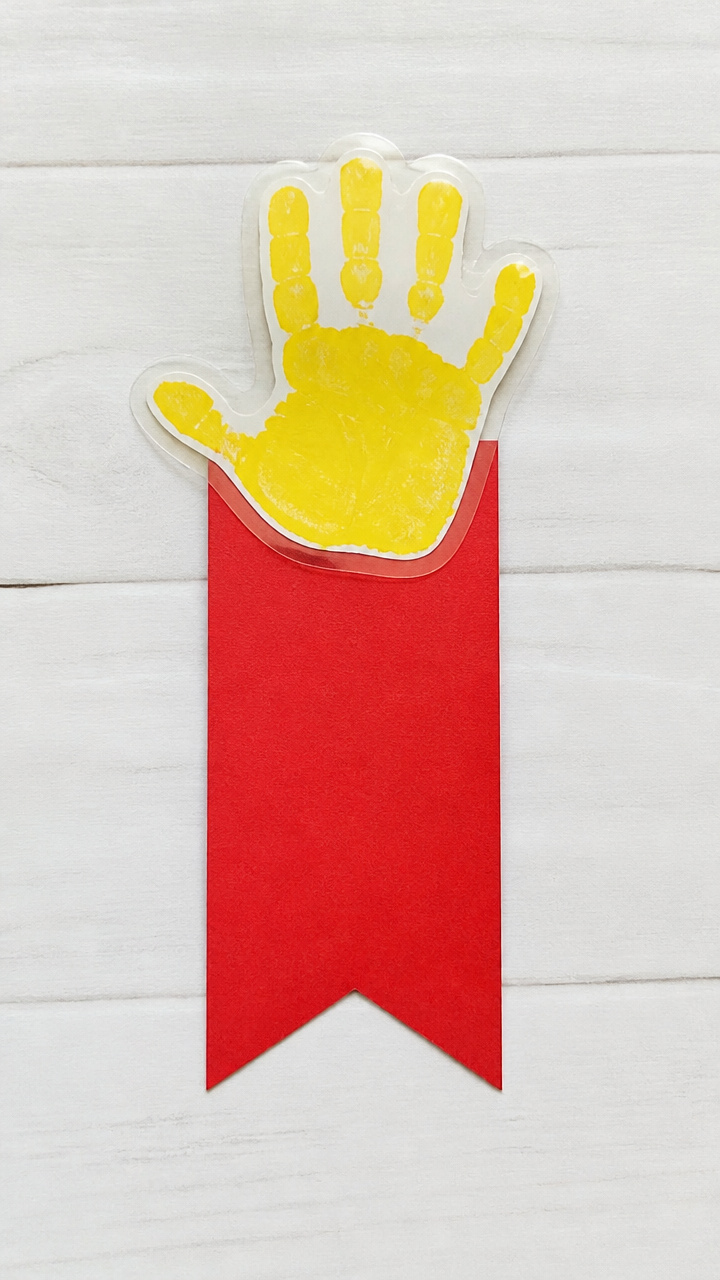
A handprint forms a fluttering flag at the top of a sturdy bookmark, perfect for gifting with a new storybook. Laminating makes it last through many reads.
Materials Needed
- Red cardstock (8.5×11 inches)
- Laminating pouch (5×7 inches)
- Yellow acrylic paint
- Paintbrush
- Scissors
- Hole punch
- Ribbon (gold, 12 inches)
How to Make It
- Cut the cardstock into a 2 x 6 inch rectangle using scissors.
- Paint the palm and fingers of one hand with yellow acrylic paint.
- Press the hand vertically at the top end of the bookmark so the wrist aligns with the edge and fingers point up.
- Let dry for 15 minutes.
- Trim around the handprint to leave a 0.25 inch border of red cardstock.
- Slide the bookmark into the laminating pouch and run through a home laminator.
- Once cooled, punch a hole at the top of the handprint flag.
- Thread the ribbon through and tie a knot.


12. Heartbeat Handprint Frame
Easy

A handprint sits beside a painted heartbeat line that dips into a red heart, symbolizing love and life. Fits perfectly in a standard 4×6 photo frame.
Materials Needed
- White 4×6 inch cardstock
- Red acrylic paint
- Black fine-tip marker
- Ruler
- Pencil
- Paintbrush
- Baby wipe
How to Make It
- Use the ruler and pencil to draw a horizontal heartbeat line starting at the left edge, peaking twice, then diving into a heart shape on the right.
- Trace the line and heart with the black marker and let dry for 2 minutes.
- Paint one hand with red acrylic paint using the brush.
- Press the hand onto the left side of the cardstock, wrist aligned with the start of the line, fingers pointing right.
- Wipe excess paint from skin with a baby wipe.
- Let dry completely before placing in a frame.
13. Handprint Tin Can Planters
Moderate
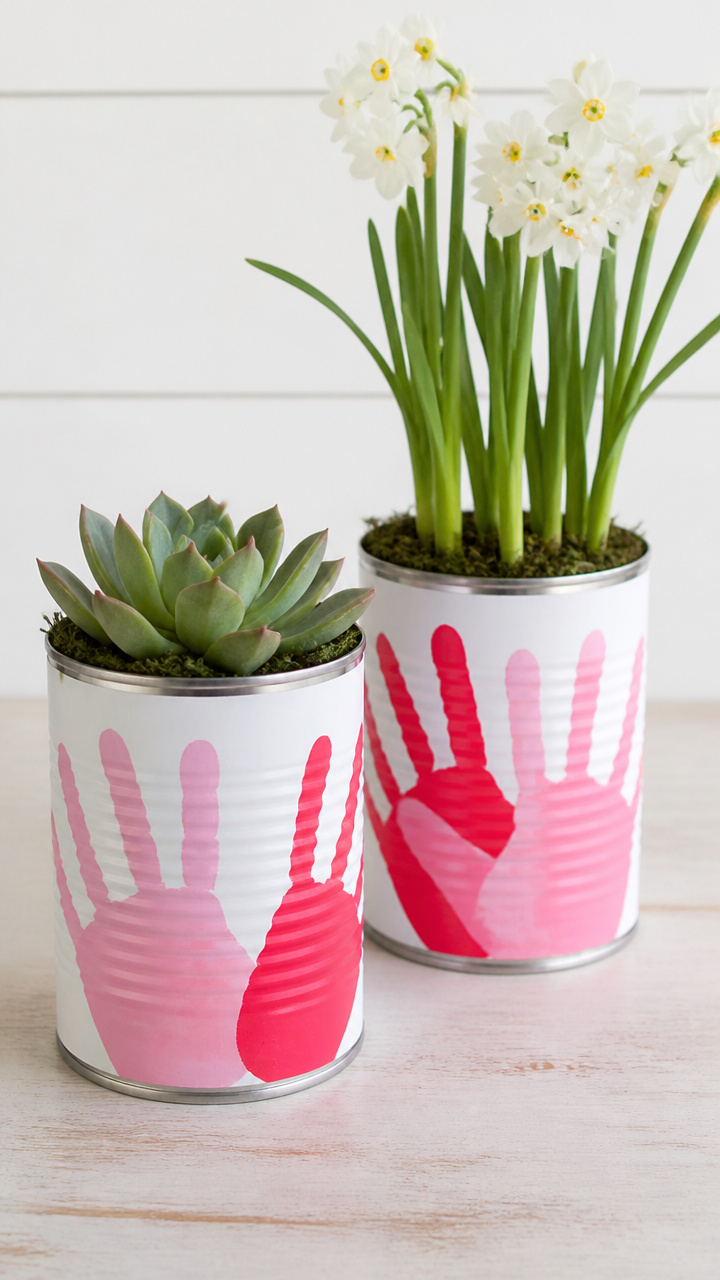
Upcycled soup cans wear handprint aprons in red and pink, holding small succulents or paperwhites. The painted design wraps fully around the metal.
Materials Needed
- Empty soup can (clean, label removed)
- Red acrylic paint
- Pink acrylic paint
- Foam paint roller (1 inch)
- Painter’s tape
- Scissors
- Mod Podge matte finish
- Paintbrush
- Small succulent in 2 inch pot
How to Make It
- Wrap painter’s tape around the lower 2 inches of the can to protect the metal from rust.
- Use the foam roller to paint the exposed upper section with red acrylic paint and let dry for 15 minutes.
- Dip a child’s hand in pink paint and press around the can, rotating it slightly between stamps to create a continuous handprint band.
- Let dry for 20 minutes.
- Brush a thin coat of Mod Podge over the entire painted area and let cure for 1 hour.
- Remove the tape and place the potted succulent inside the can.
14. Fingerprint Heart Magnets
Easy
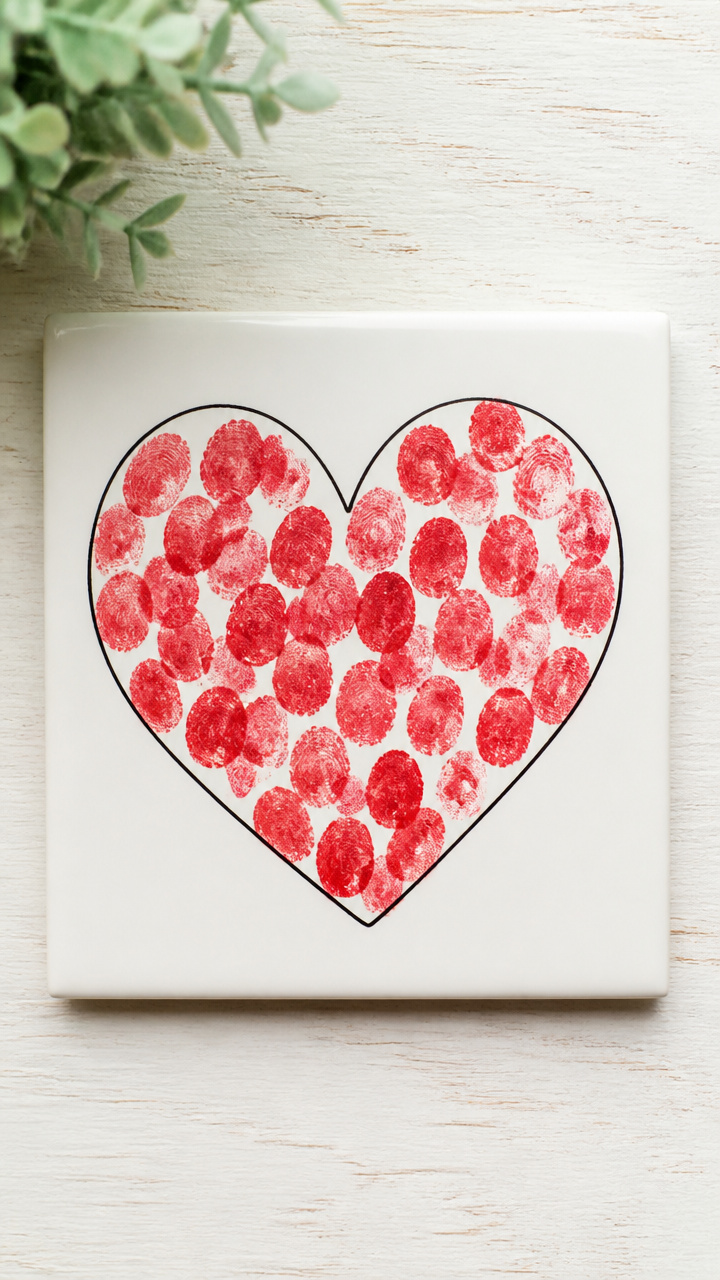
Individual fingerprints build a larger heart shape on smooth ceramic tiles, creating personalized magnets for grandparents. The tiny prints form a mosaic effect.
Materials Needed
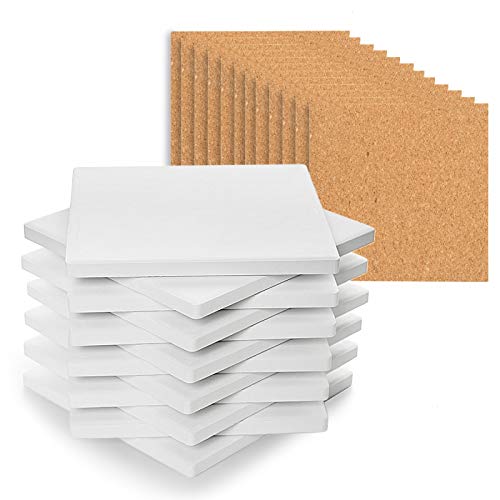
- White ceramic tile (4×4 inches)
- Red acrylic paint
- Cotton swabs
- Fine-tip black marker
- Self-adhesive magnet squares (1 inch, 4 count)
- Baby wipes
How to Make It
- Dip a cotton swab in red acrylic paint and dot a small fingerprint near the top center of the tile.
- Continue adding fingerprint dots with the swab in staggered rows below, forming a heart outline.
- Fill in the center with more fingerprint dots until the heart is solid.
- Let dry for 30 minutes.
- Use the black marker to write a name or date beneath the heart.
- Peel adhesive backing from a magnet square and press firmly onto each corner of the tile back.


15. Handprint Lantern Jars
Advanced
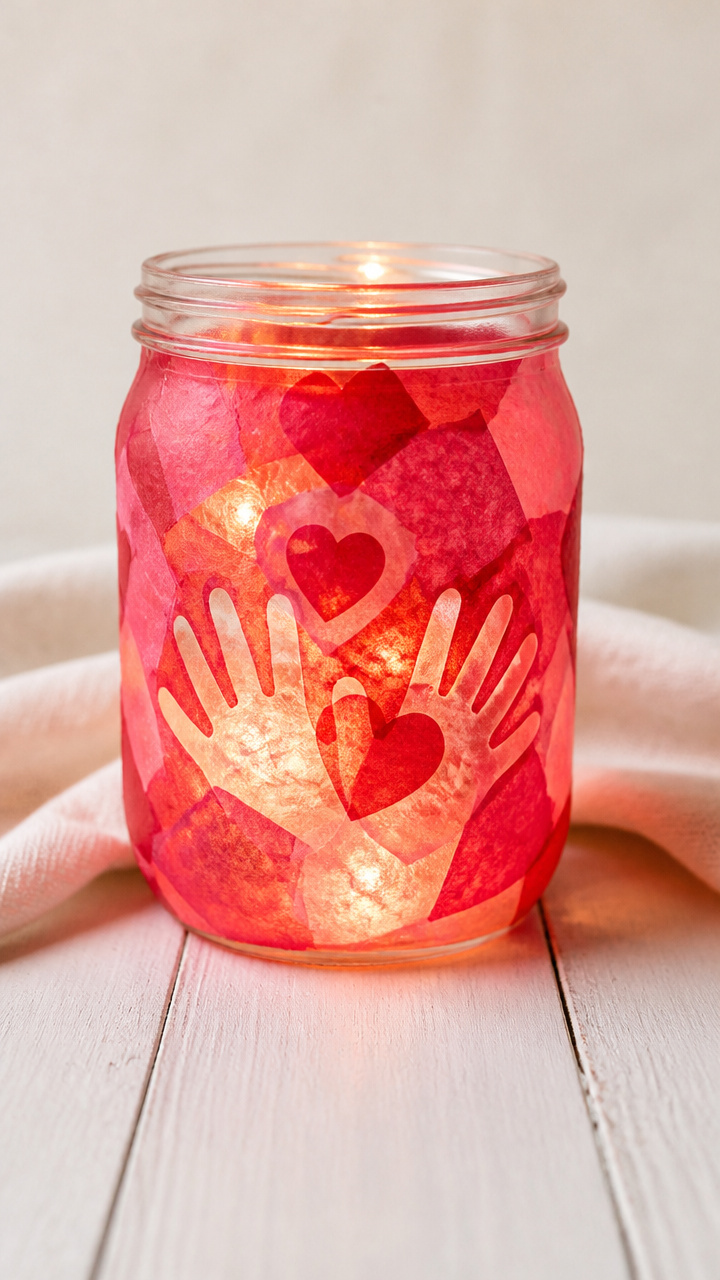
A mason jar glows with translucent handprint hearts when lit from within, casting soft shadows on the walls. Tissue paper diffuses the light beautifully.
Materials Needed
- Clear 8 oz mason jar
- Red tissue paper (12×18 inches)
- Pink tissue paper (12×18 inches)
- White school glue
- Foam brush (1 inch)
- LED string lights (battery-operated, 20 bulbs)
- Scissors
- Cardboard tray
How to Make It
- Cut tissue paper into 2×3 inch rectangles.
- Pour white school glue into the cardboard tray.
- Use the foam brush to apply a 2 inch patch of glue to the outside of the jar.
- Lay a tissue rectangle over the glue, smooth with the brush, and slightly crumple edges for texture.
- Repeat, covering the lower 4 inches of the jar in overlapping tissue pieces.
- Dip a child’s hand in diluted glue and press gently onto the tissue-covered area to leave a handprint impression.
- Let the jar dry completely for 2 hours.
- Insert the LED string lights into the jar and close the lid.


Grab your paints and paper, gather the kids, and let those little hands leave their mark on the season. You’ll end up with more than crafts — you’ll have memories you can hold.