15 DIY Valentine’s Day Wreath Ideas for Your Front Door

A bright red and pink wreath on your front door tells everyone a little love lives here. You don’t need fancy tools or years of crafting to make something beautiful — just a few thoughtful materials and the desire to create.
These handmade wreaths welcome guests with warmth and charm. Each one is designed to be doable, delightful, and full of heart.
1. Ribbon Heart Wreath
Easy

Velvety loops and soft folds form a lush ring of crimson and blush that catches the light with every breeze. This wreath brings elegance without requiring advanced skills.
Materials Needed
- 18-inch wire wreath frame
- 2 rolls 2.5-inch wide red satin ribbon
- 1 roll 2.5-inch wide pink satin ribbon
- Floral wire, 22-gauge, 10 feet
- Wire cutters
How to Make It
- Cut the satin ribbons into 12-inch lengths, making 30 red and 20 pink pieces.
- Fold each piece in half to form a loop and pinch the center.
- Use a 6-inch piece of floral wire to bind 5 red loops and 3 pink loops together at the pinch point.
- Attach each bundle to the wire frame by twisting the floral wire tightly around the frame and ends.
- Space bundles evenly around the entire frame, layering slightly to hide gaps.
2. Felt Rosette Wreath
Moderate
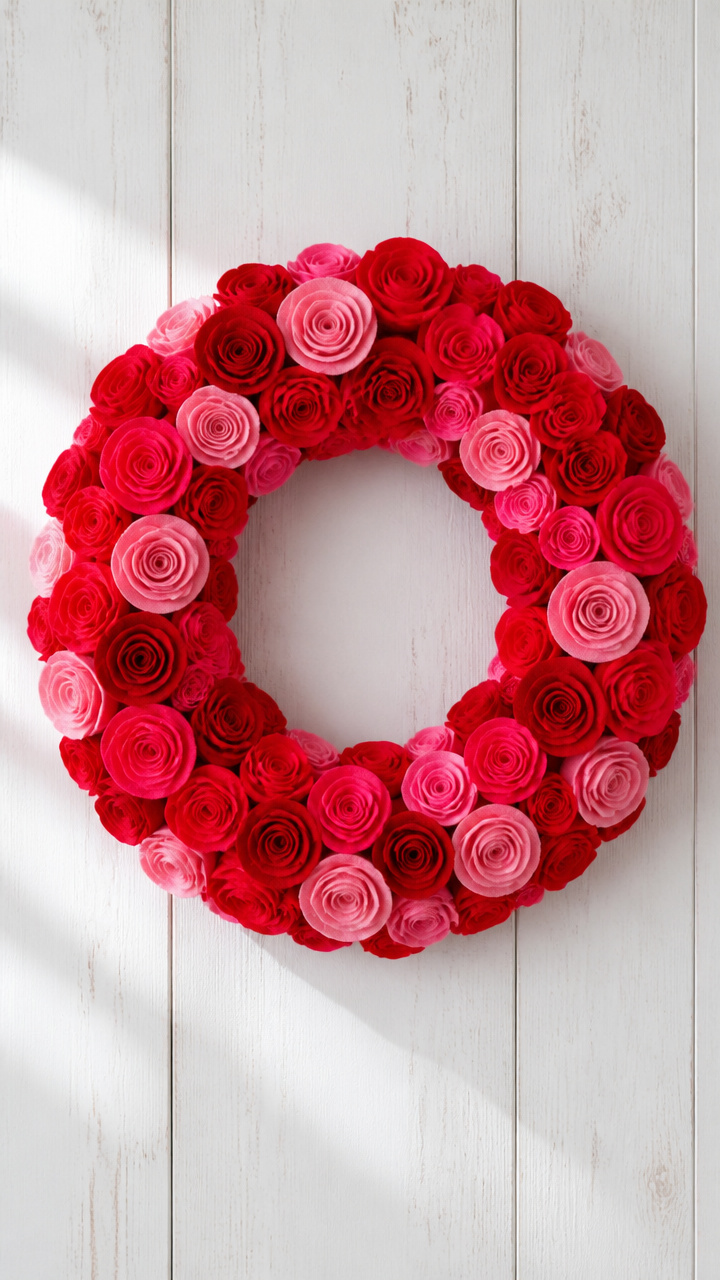
Tightly coiled felt petals bloom outward like oversized flowers, giving this wreath a modern, sculptural feel. It holds its shape perfectly through wind and rain.
Materials Needed
- 14-inch foam wreath base
- Red craft felt sheet, 18 x 12 inches
- Pink craft felt sheet, 18 x 12 inches
- Hot glue gun
- Hot glue sticks
- Scissors
- Pencil
How to Make It
- Draw a spiral on the red felt using the pencil, starting from the outer edge toward the center, about 1.5 inches wide.
- Cut along the line to create a long strip, then repeat with the pink felt.
- Begin rolling the red strip tightly from the center, adding a dot of hot glue at the end to secure.
- Glue the flat side of each rosette onto the foam base, alternating red and pink.
- Fill all visible foam, placing rosettes edge to edge for a seamless look.


3. Paper Doily Hearts
Easy
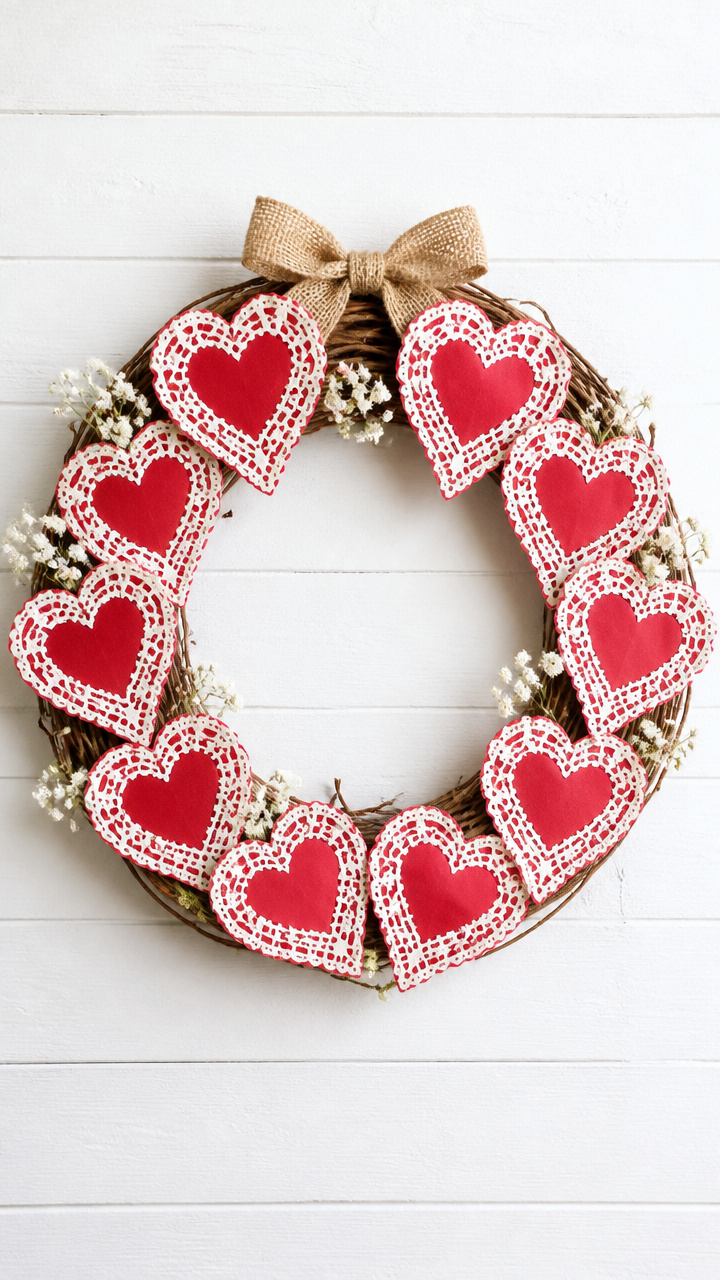
Delicate white lace patterns contrast against bold red hearts, creating a vintage-inspired piece with romantic charm. This wreath feels light and airy on your door.
Materials Needed
- 12-inch grapevine wreath
- 10 paper doilies, 10-inch diameter
- Red acrylic paint
- Paintbrush, 1-inch flat
- Craft scissors
- Mini clothespins
- White embroidery thread, 10 yards
- Needle
How to Make It
- Lay each doily flat and paint three hearts per doily using red acrylic paint, let dry for 20 minutes.
- Cut out each painted heart carefully with craft scissors.
- Thread the needle with embroidery thread and stitch a small loop at the top of each heart for hanging.
- Use mini clothespins to attach hearts to the grapevine wreath, spacing them evenly.
- Remove clothespins once satisfied with placement, leaving only the threaded hearts.


4. Cinnamon Stick Circle
Moderate
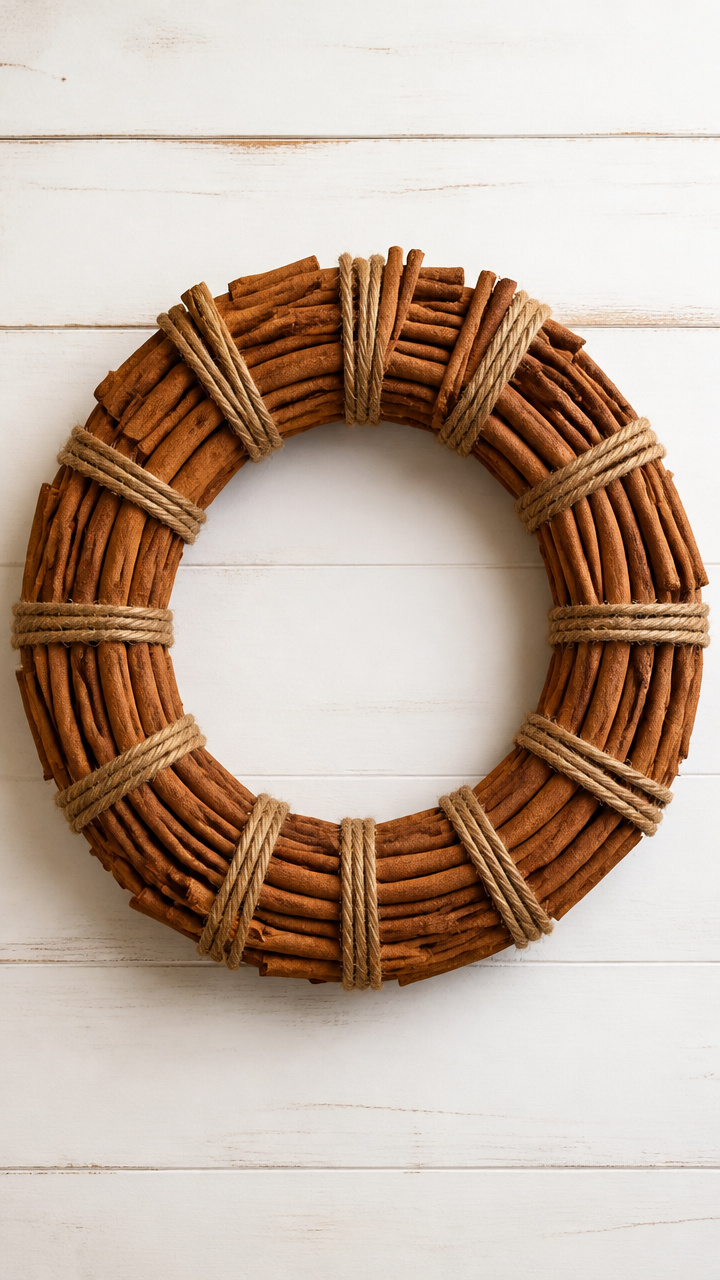
Rich brown cinnamon sticks bundled tight release a warm, spicy scent every time someone approaches. This wreath doubles as a natural air freshener with rustic flair.
Materials Needed
- 16-inch wire wreath frame
- 40 cinnamon sticks, approximately 3 inches long
- Jute twine, 1/8 inch thick, 5 yards
- Hot glue gun
- Hot glue sticks
- Scissors
How to Make It
- Lay five cinnamon sticks side by side and wrap jute twine around both ends, tying a knot to secure.
- Create eight bundles this way, letting twine hang for attachment later.
- Apply hot glue to the back of each bundle and press onto the wire frame.
- Place bundles side by side, overlapping slightly to cover the frame completely.
- Tie the loose twine ends from each bundle around the frame for extra hold.
5. Button Blossom Wreath
Easy
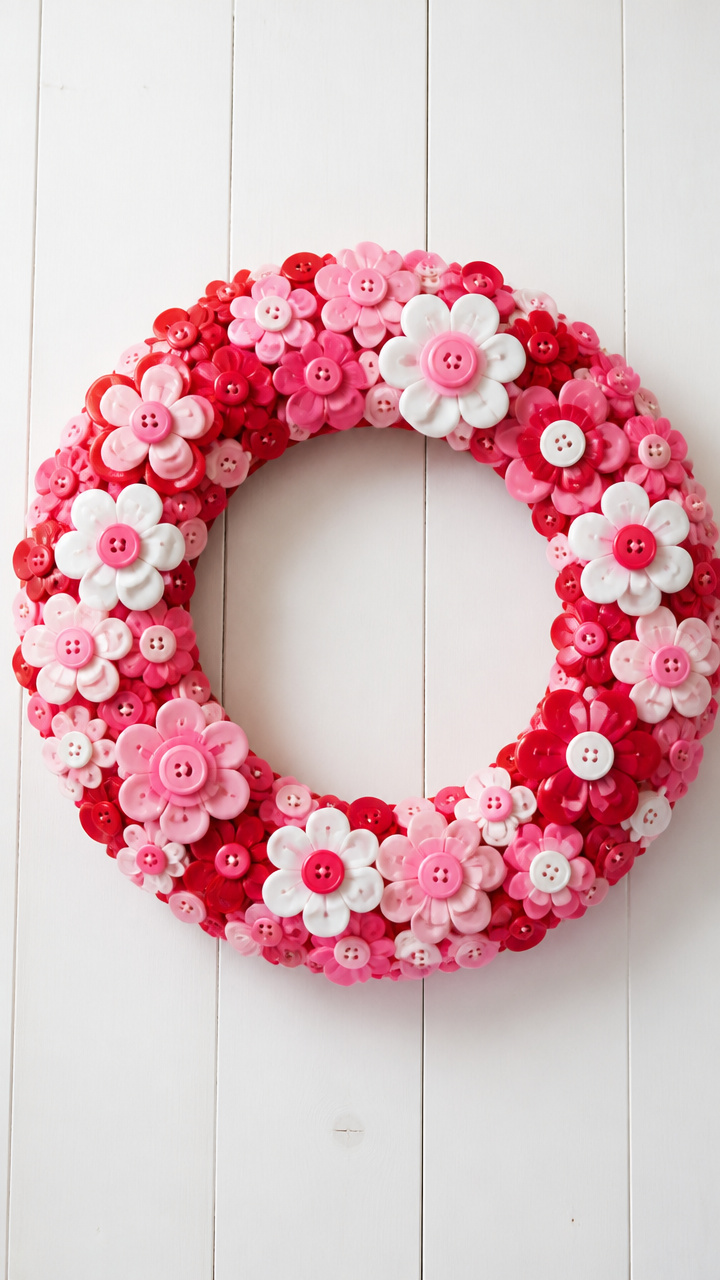
Colorful mismatched buttons cluster into floral shapes, turning tiny sewing scraps into cheerful bursts of texture. Kids can help sort and glue with supervision.
Materials Needed
- 10-inch Styrofoam wreath
- Assorted red, pink, and white buttons, 75 total
- Hot glue gun
- Hot glue sticks
- Toothpick
How to Make It
- Sort buttons by size: large for centers, small for petals.
- Glue five small buttons around one large button to form a flower, use toothpick for precision.
- Make 12 flowers total, let dry for 10 minutes.
- Glue each flower onto the Styrofoam wreath, grouping some close and leaving space between others.
- Fill any bare spots with single accent buttons.


6. Yarn Wrapped Monogram
Moderate
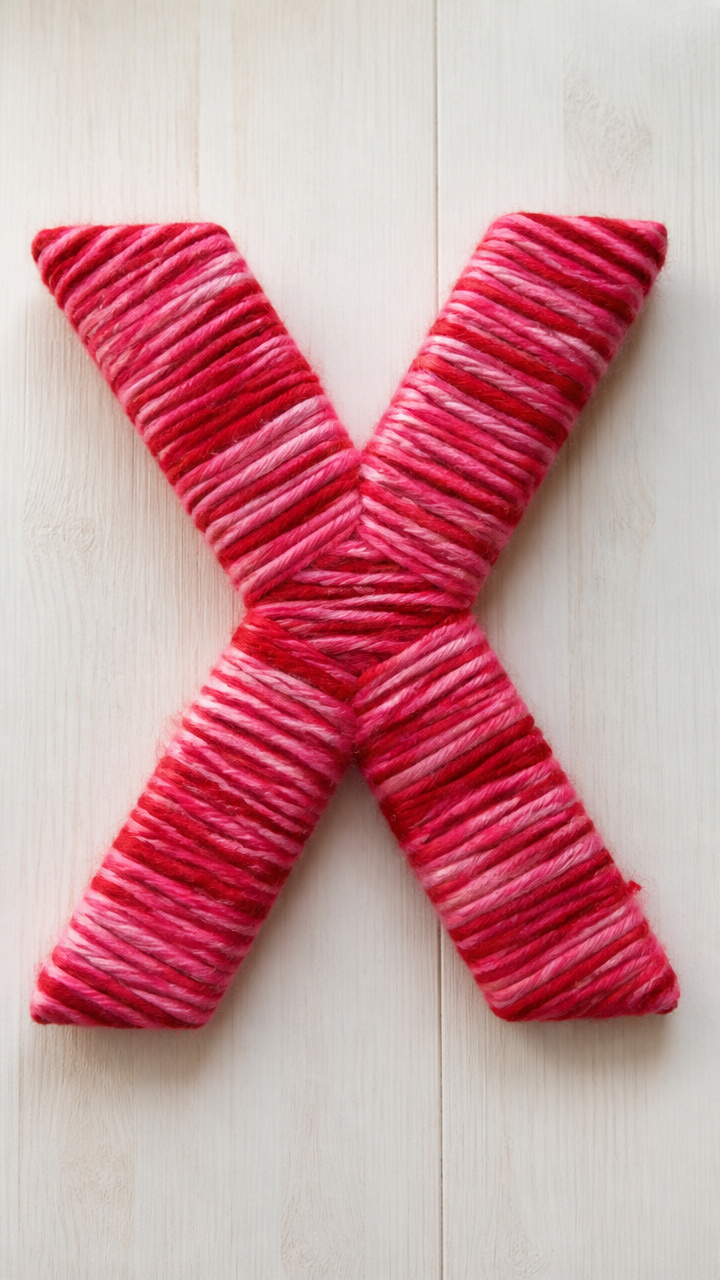
A bold letter 'X' or 'O' stands out from a fluffy halo of yarn, spelling love in soft texture. This wreath works especially well for newlyweds or best friends.
Materials Needed
- Wooden letter cutout, 12-inch tall, shaped like X or O
- Red bulky yarn, 100 yards
- Pink bulky yarn, 100 yards
- Hot glue gun
- Hot glue sticks
- Scissors
How to Make It
- Start at the bottom of the wooden letter and apply a dab of hot glue.
- Press the yarn end onto the glue and hold 10 seconds until set.
- Wrap yarn tightly around the letter, covering all wood, switching to pink after 50 yards.
- Overlap wraps slightly to prevent gaps, keep tension firm but not stretched.
- When fully wrapped, cut yarn and glue the end securely on the back.


7. Photo Frame Wreath
Advanced
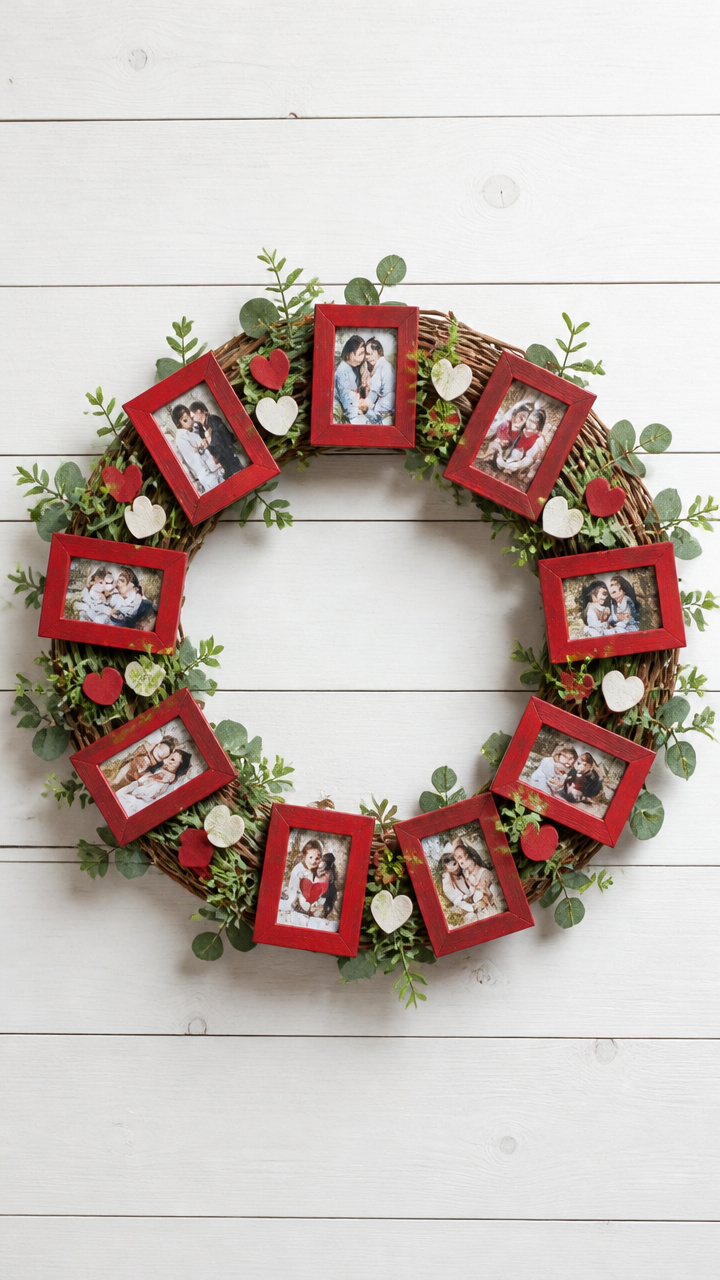
Tiny framed memories peek through a ring of greenery, personalizing your porch with moments you cherish. Choose vacation snapshots or couple selfies for extra meaning.
Materials Needed
- 18-inch willow wreath base
- 9 miniature picture frames, 2.5 x 3.5 inches, unfinished wood
- Red spray paint
- Spray booth or outdoor workspace
- Small paintbrush
- Acrylic sealer, matte finish, 4 oz
- Jute cord, 12 feet
- Hot glue gun
- Hot glue sticks
How to Make It
- Spray paint all frames red in a ventilated area, let dry 1 hour.
- Brush a coat of acrylic sealer on each to protect from weather, dry 30 minutes.
- Insert photos into frames and close backing.
- Cut jute cord into nine 16-inch lengths.
- Tie each cord to a frame to create a hanger, then knot the other end to the willow base.
- Space frames evenly around the wreath, adjusting height so all faces show clearly.
8. Pom-Pom Love Ring
Easy
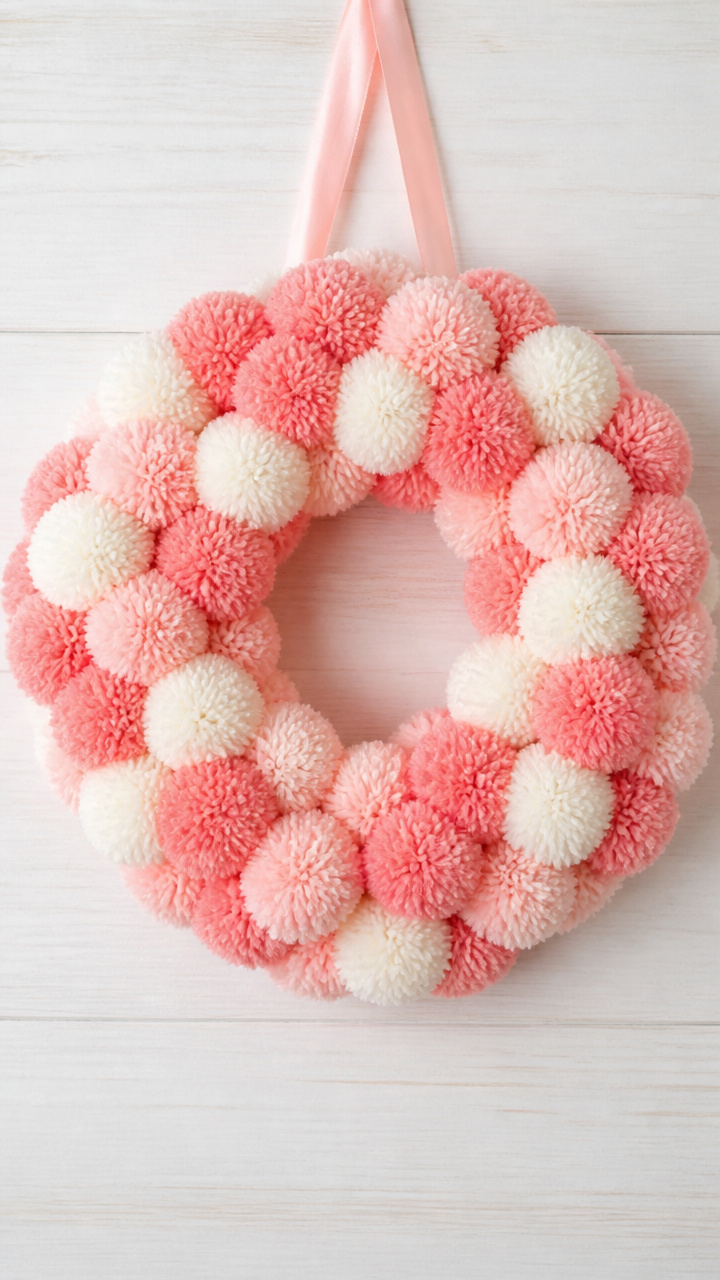
Bouncy pastel pom-poms in coral, blush, and cream bounce with every gust, giving this wreath a playful, cozy vibe. It’s like a hug for your front door.
Materials Needed
- 12-inch polystyrene wreath
- Red pom-poms, 1.5-inch, 20 count
- Pink pom-poms, 1.5-inch, 20 count
- White pom-poms, 1.5-inch, 10 count
- Hot glue gun
- Hot glue sticks
How to Make It
- Arrange pom-poms in groups of three: two pink, one white at center.
- Apply hot glue to the back of each group and press onto the wreath.
- Work in rows around the ring, placing groups close enough to touch but not overlap.
- Fill the outer and inner edges first, then complete the face.
- Let sit 15 minutes before hanging to ensure all glue sets.
9. Wine Cork Hearts
Moderate
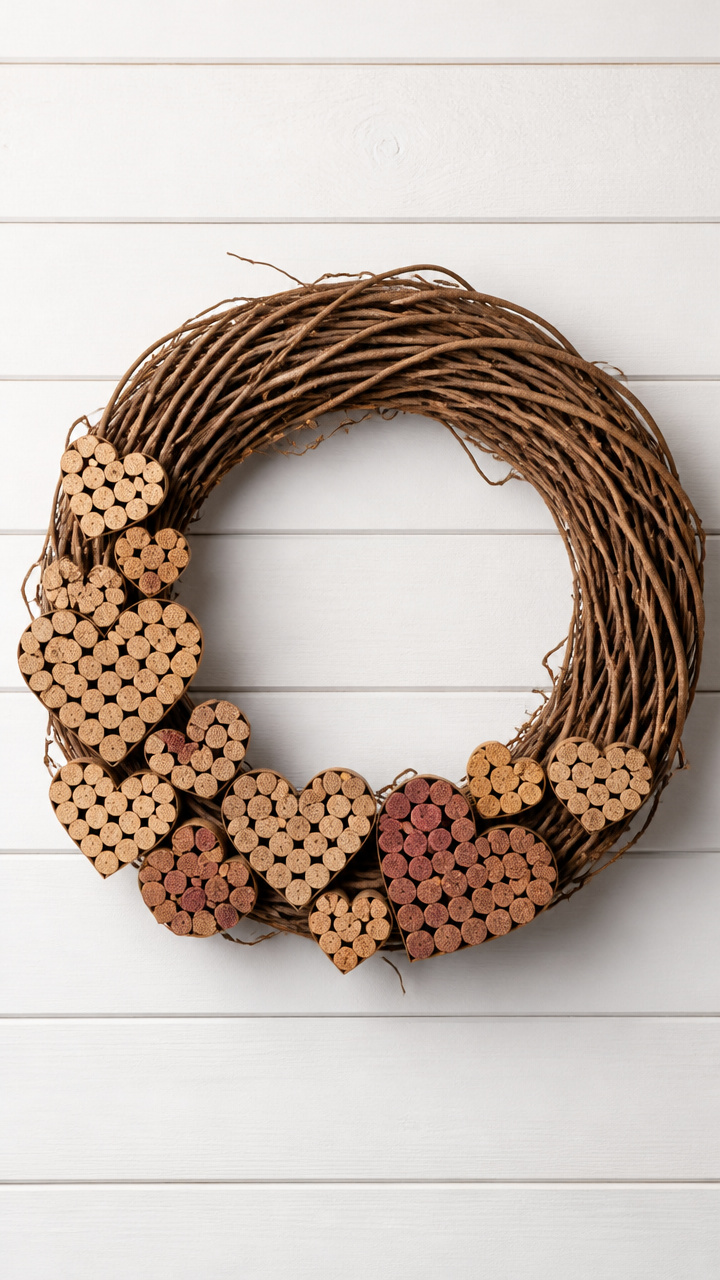
Upcycled corks stack into tiny heart shapes, forming a eco-friendly wreath with earthy tones and satisfying weight. Perfect if you save corks from date night bottles.
Materials Needed
- 14-inch grapevine wreath
- 30 wine corks
- Craft knife
- Cutting mat
- Hot glue gun
- Hot glue sticks
- Ruler
How to Make It
- Slice 10 corks in half lengthwise using the craft knife on the cutting mat.
- Arrange three whole corks vertically and two cork halves on each side to form a heart shape.
- Glue pieces together, hold 15 seconds, make 10 hearts total.
- Let hearts dry 20 minutes.
- Glue each heart onto the grapevine wreath, alternating directions for visual interest.


10. Chalkboard Charm Wreath
Moderate
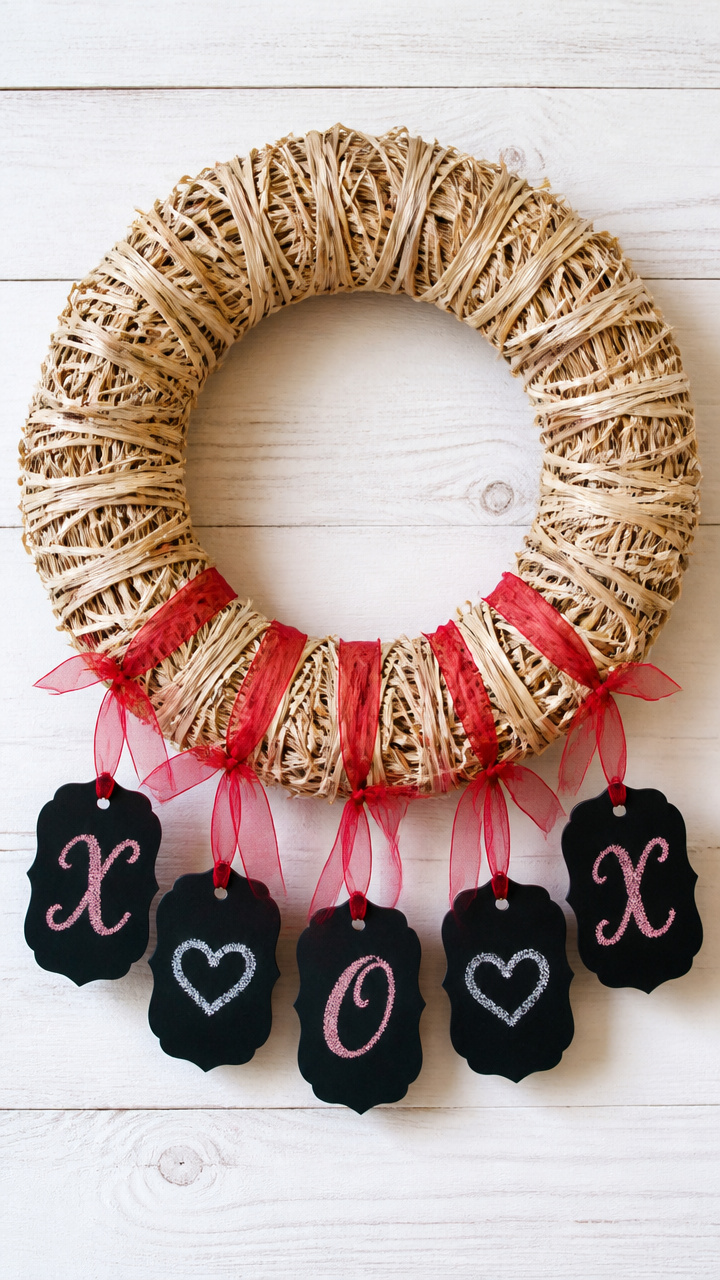
Little chalkboard tags dangle from ribbon, ready for handwritten notes like “Be Mine” or names of loved ones. Change the message whenever you like.
Materials Needed
- 10-inch straw wreath
- 12 chalkboard tags, 2 x 1 inch with hole
- Pink metallic pen
- White chalk markers, 2-pack
- Red organza ribbon, 1/4 inch wide, 6 yards
- Hole punch
- Scissors
How to Make It
- Write a short phrase on each tag using the chalk markers, let dry 5 minutes.
- Cut the organza ribbon into 12 pieces, each 12 inches long.
- Thread one end of each ribbon through a tag and tie a knot to secure.
- Punch two holes at the top edge of the straw wreath, evenly spaced.
- Tie ribbon ends to the wreath, varying lengths from 2 to 4 inches for dimension.

11. Fabric Scrap Garland
Easy
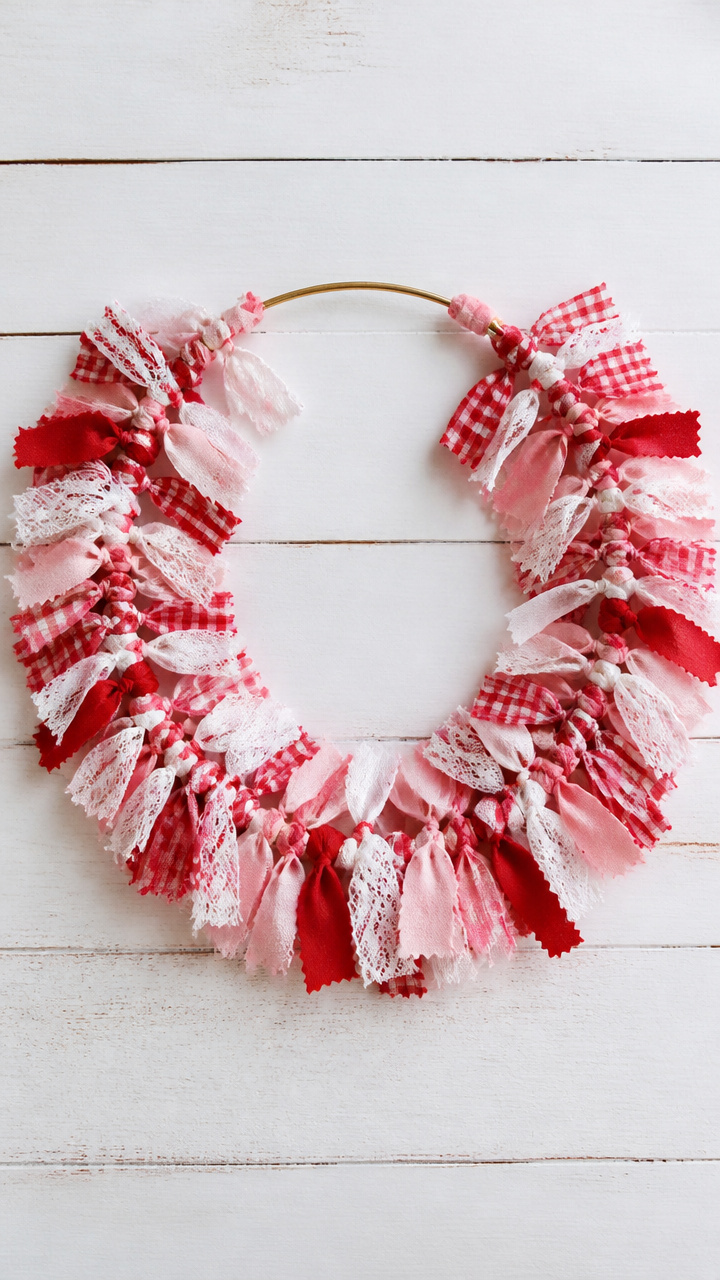
Frayed edges of vintage tablecloths and old shirts wave gently in the wind, telling stories through color and pattern. This wreath celebrates memory and reuse.
Materials Needed
- 16-inch metal embroidery hoop
- Red cotton fabric scrap, 12 x 6 inches
- Pink gingham fabric scrap, 12 x 6 inches
- White lace-trim fabric, 12 x 6 inches
- Scissors
- Clothesline rope, 8 feet
How to Make It
- Cut each fabric into 1-inch wide strips, 6 inches long, yielding about 40 strips.
- Fold each strip in half and loop over the clothesline rope, pull ends through to knot.
- Alternate colors and textures as you tie, packing knots close together.
- Once rope is full, tie ends together to form a circle.
- Slide the garland inside the embroidery hoop and adjust fabric evenly.
12. Pressed Flower Halo
Advanced
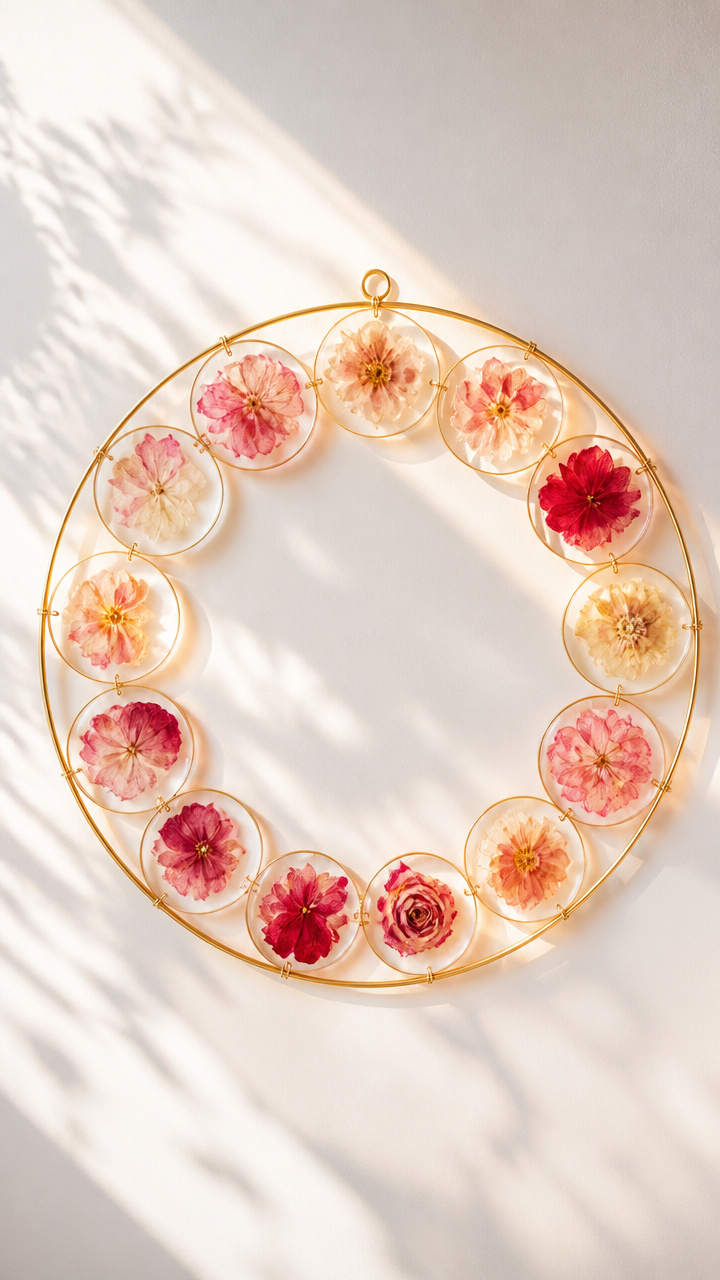
Translucent petals sealed in resin discs glow like stained glass when backlit by sunlight. This delicate wreath turns fragile blooms into lasting art.
Materials Needed
- 12-inch brass wreath frame
- Silk flowers in rose, carnation, and peony, 15 total
- Resin kit, 8 oz, includes hardener
- Silicone molds, 1.75-inch round
- Disposable gloves
- Popsicle stick
- Tweezers
- Jump rings, 10 mm, 12 count
- Chain nose pliers
How to Make It
- Disassemble silk flowers and select 12 intact petals.
- Mix resin according to package, pour a thin layer into each mold.
- Place one petal per mold, press gently with tweezers to remove bubbles.
- Pour second layer to cover, let cure 24 hours.
- Unmold discs, attach a jump ring using pliers, then hang from the brass frame.
13. Twine and Bead Ring
Moderate
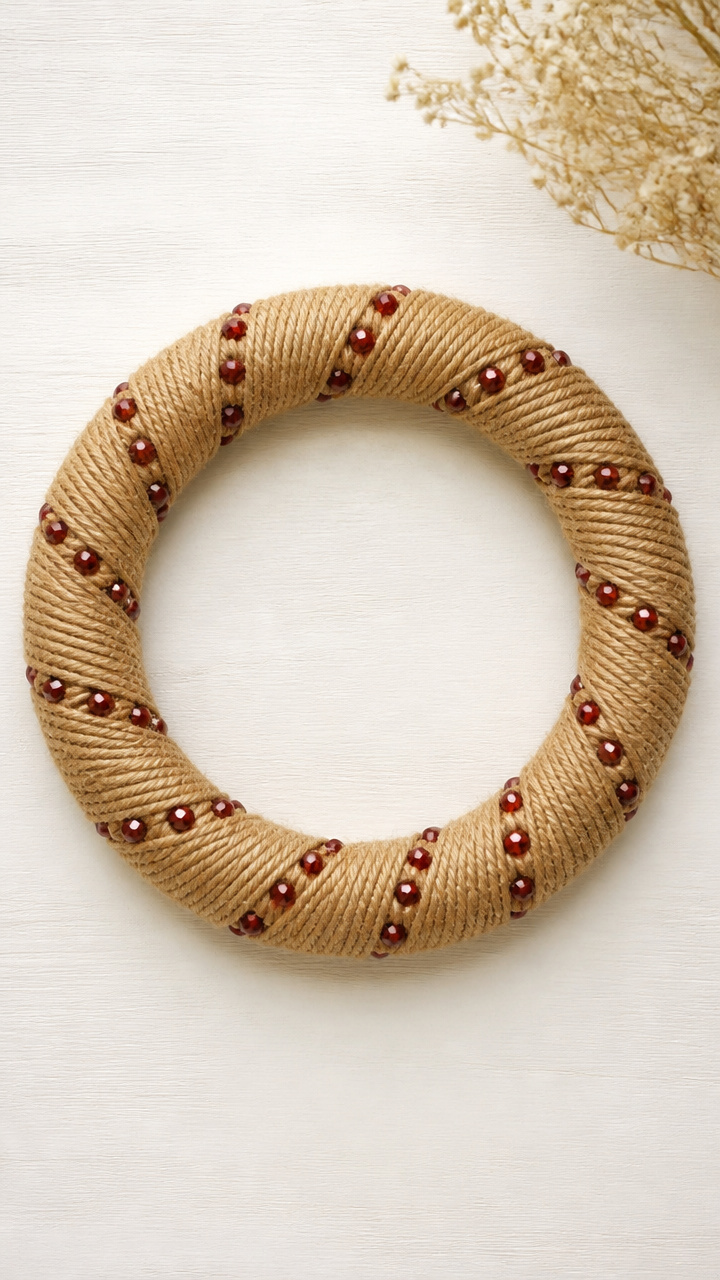
Natural jute twine spirals around a base dotted with faceted red beads that catch the sun like crystals. The mix of rough and shiny feels balanced and intentional.
Materials Needed
- 14-inch foam wreath
- Jute twine, 1/8 inch, 100 yards
- Faceted red glass beads, 8 mm, 50 count
- Beading needle
- Beading thread, 10 yards
- Scissors
- Hot glue gun
- Hot glue sticks
How to Make It
- Thread the beading needle and tie 10 beads onto the thread to form a cluster.
- Knot ends and trim excess, make five clusters total.
- Start wrapping jute twine around the foam wreath, gluing the end every 6 inches.
- After one full layer, tuck each bead cluster under the twine at even intervals.
- Continue wrapping until the wreath is covered, securing final end with glue.
14. Cardstock Spiral Wreath
Easy
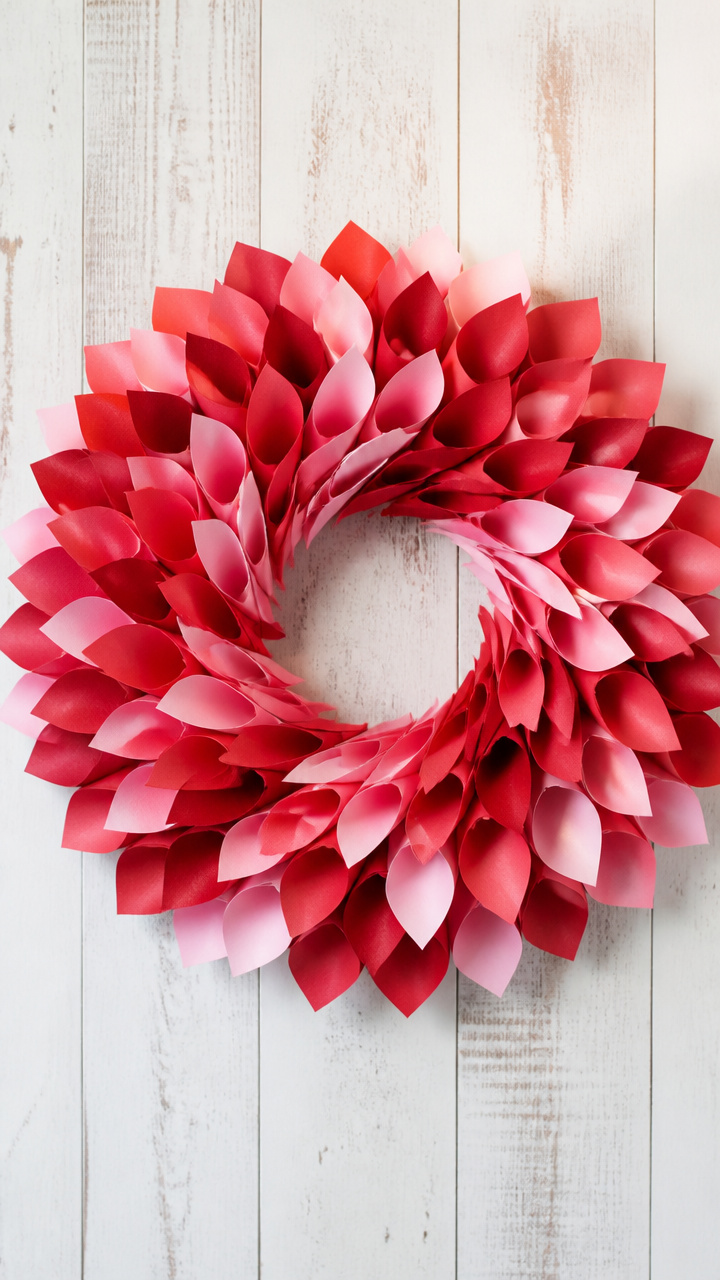
Tightly wound cones of cardstock fan out like a blooming peony, their crisp edges casting soft shadows. This paper-only design proves simplicity can shine.
Materials Needed
- A4 red cardstock, 5 sheets
- A4 pink cardstock, 3 sheets
- Glue stick
- Pencil
- Scissors
- 10-inch foam wreath
How to Make It
- Draw a spiral on each cardstock sheet using the pencil, cut it out with scissors.
- Roll each spiral from the outside end into a cone, glue tip to hold.
- Flatten the base of each cone slightly so it sits flat.
- Glue cones around the foam wreath, starting from the outer edge and working inward.
- Overlap cones slightly to create a continuous bloom effect.
15. Mason Jar Lid Medallions
Moderate
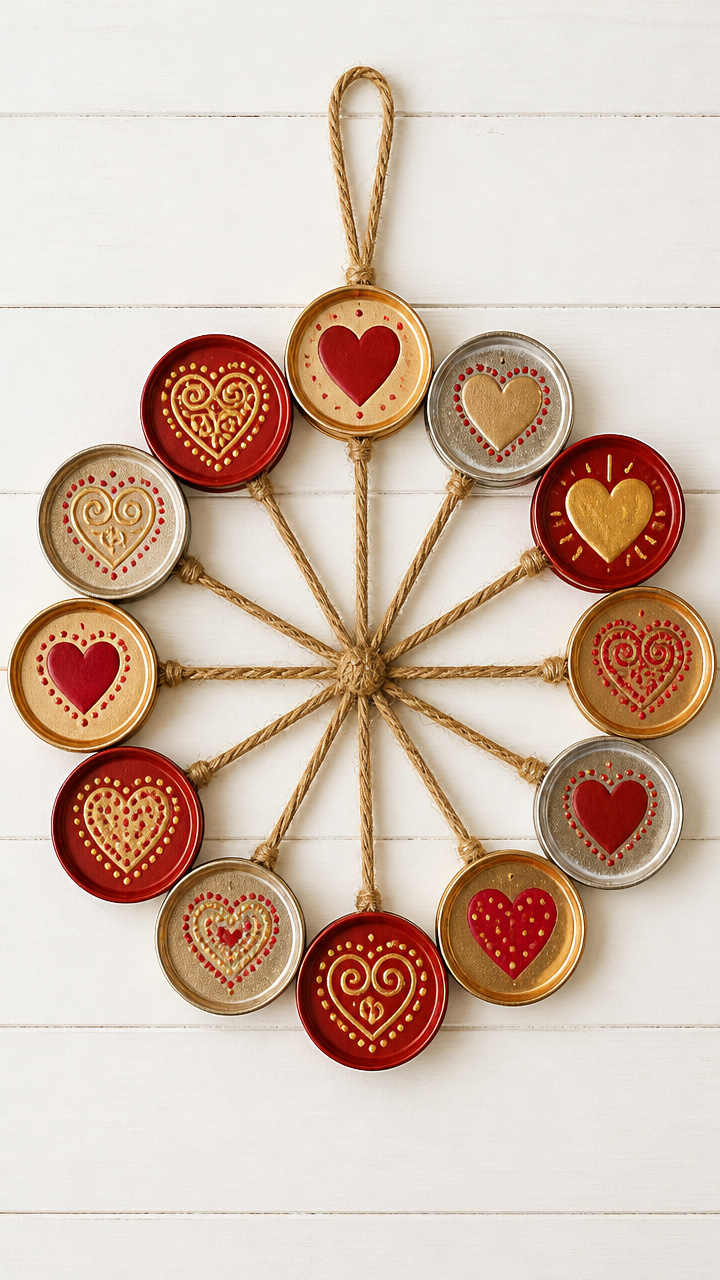
Repurposed lids become miniature canvases painted with hearts, dots, and swirls, arranged in a sunburst pattern. Rustic and sweet, they catch eyes from the sidewalk.
Materials Needed
- 12 regular-size mason jar lids
- Red acrylic paint
- Gold acrylic paint
- Paintbrush, fine tip
- Foam brush, 1-inch
- Twine, 1/4 inch, 4 yards
- Hot glue gun
- Hot glue sticks
- Scissors
How to Make It
- Clean lids and let dry completely.
- Paint the rim of each lid red using the foam brush, let dry 15 minutes.
- Use the fine brush to paint a heart in the center with gold paint, let dry 10 minutes.
- Cut twine into 12 pieces, each 8 inches long.
- Glue one end of each twine to the back of a lid, let set 5 minutes.
- Arrange lids in a circle on a flat surface, then glue twine ends to the back of a wreath form.


Grab your favorite supplies and start crafting a wreath that feels like you. Your front door is waiting to wear a little love.