15 Vertical Garden Craft Ideas for Small Patios and Balconies

Limited outdoor square footage should never stop you from growing a lush collection of plants. When floor space runs out on a compact balcony or tiny patio, looking upward gives you an entire blank canvas to fill with green foliage, edible herbs, and vibrant blooms.
Building your own vertical planters lets you customize every display to fit your exact wall space, sun exposure, and personal style. Grab a few basic tools and explore these practical, hands-on projects designed to maximize your small outdoor living area.


1. Leaning Cedar Ladder Pot Hanger
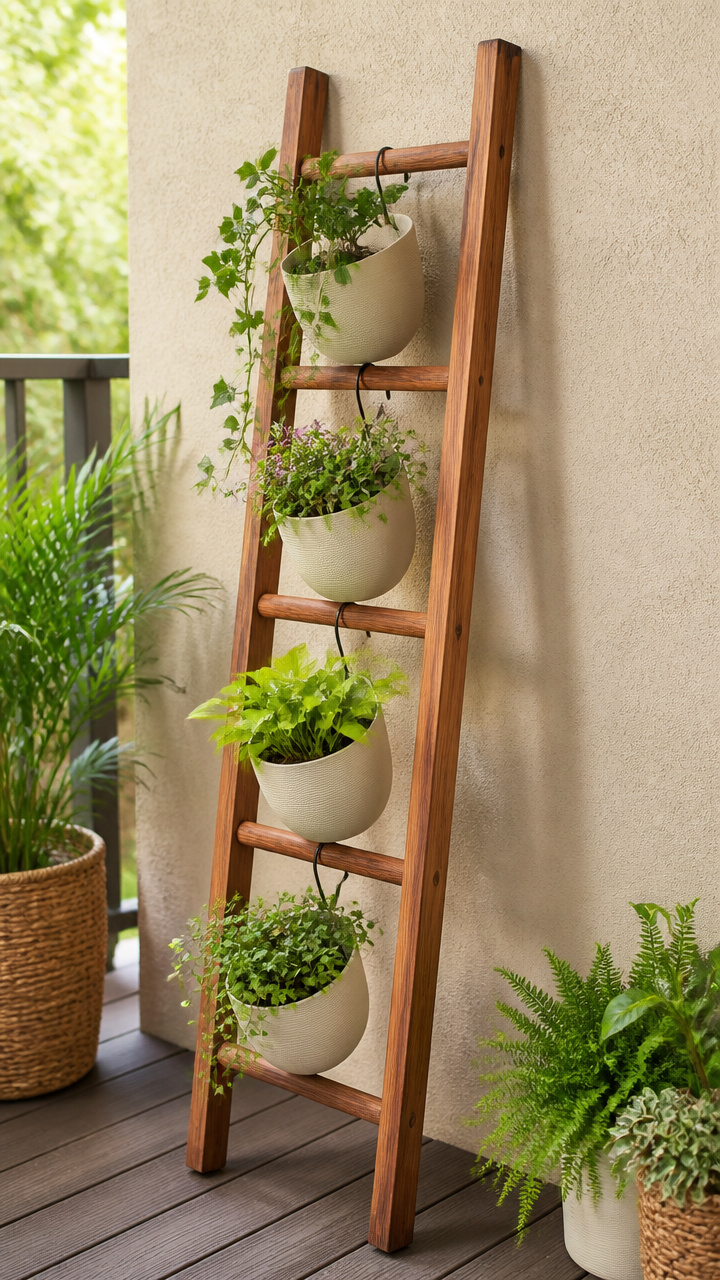
Sturdy cedar rungs provide a vertical display for small potted herbs without taking up precious balcony floor space. You will gain a freestanding planter that leans securely against any exterior wall.
Materials Needed
- Two 6-foot cedar 2×2 boards
- Four 18-inch cedar 1×2 boards for rungs
- Eight 2-inch exterior wood screws
- Five 4-inch terracotta pots with drainage holes
- Five heavy-duty stainless steel S-hooks
- Cordless drill with 1/8-inch drill bit
How to Make It
- Measure and mark rung positions along both 6-foot boards at 12-inch intervals starting from the top.
- Pre-drill pilot holes through the outer edge of the 2×2 side rails into the ends of each 18-inch rung.
- Secure the rungs to the rails using the 2-inch exterior wood screws until the frame is rigid and square.
- Slip one end of each S-hook over a wooden rung and attach your potted plants through their drainage rim wire or hanging loops.
- Lean the finished ladder against your patio wall at a stable 75-degree angle.
2. Copper Pipe Propagation Wall
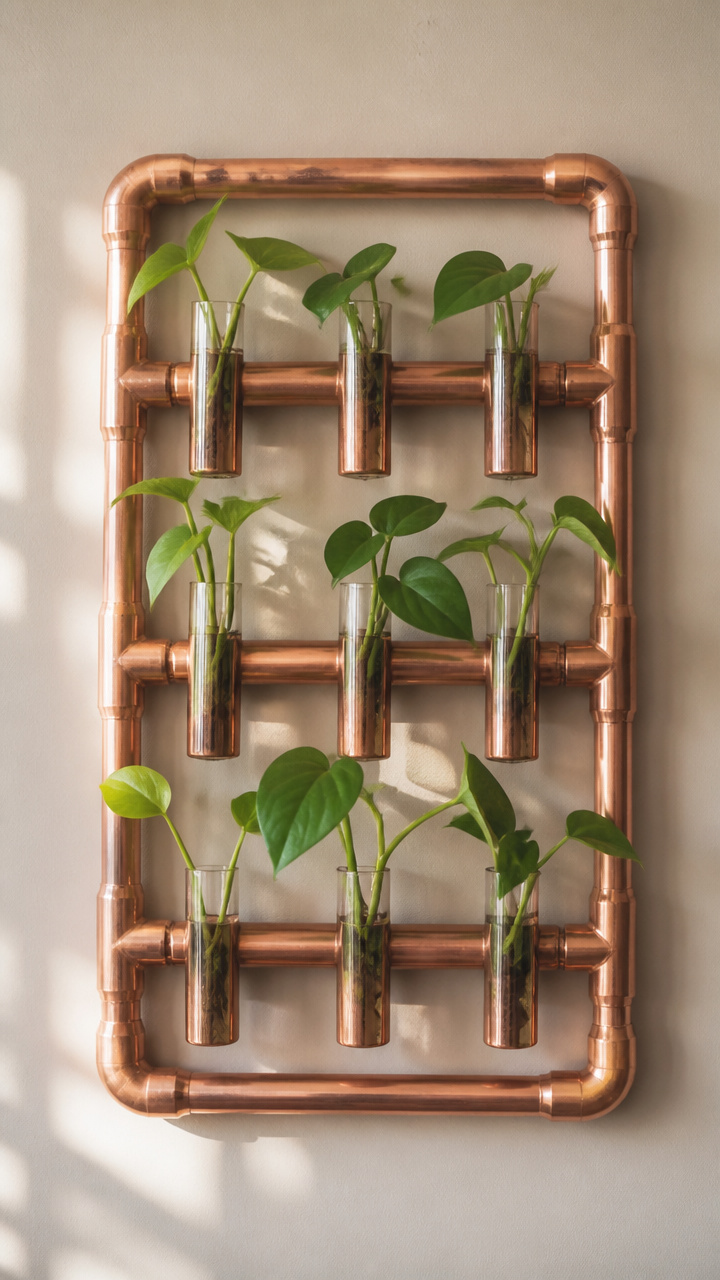
Sleek copper plumbing fittings and clear glass test tubes create a clean, modern wall system for rooting houseplant cuttings in direct sunlight. Water levels stay visible so you can monitor root progress daily.
Materials Needed
- One 36-inch piece of 1/2-inch rigid copper pipe
- Two 1/2-inch copper end caps
- Six 20ml rimmed glass test tubes
- Six feet of 3mm natural leather cord
- Six 1/2-inch rubber O-rings
- Two brass screw hooks
How to Make It
- Fit the copper end caps onto both sides of the 36-inch pipe using a firm twisting motion.
- Tie three 24-inch lengths of leather cord evenly spaced across the copper pipe using tight lark’s head knots.
- Slide rubber O-rings onto the test tubes just below their flared rims to prevent slipping.
- Secure the glass tubes along the hanging cords by tying double overhand knots directly beneath each tube body.
- Screw the two brass hooks into your patio wall 30 inches apart and set the copper pipe securely across them.
3. Heavy Canvas Pocket Herb Planter
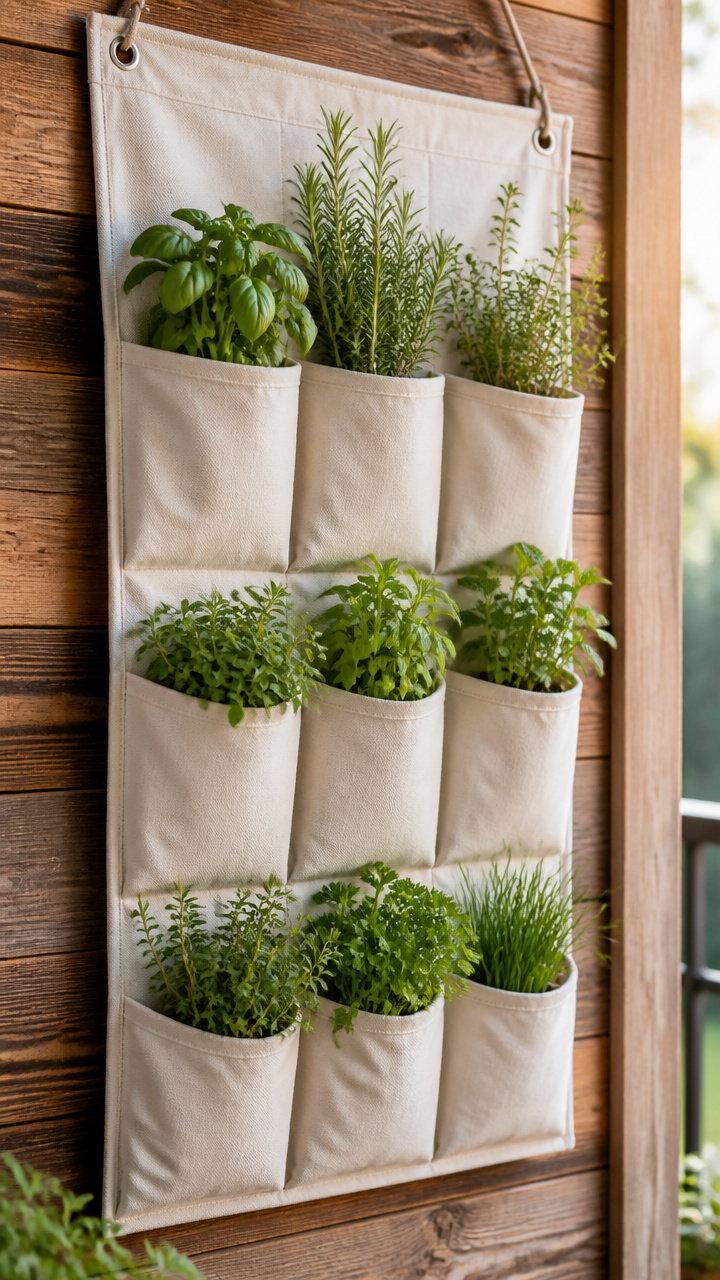
Durable cotton duck canvas sewn into deep compartments holds soil firmly while allowing plant roots to breathe better than plastic liners. Hanging this organizer on a balcony railing keeps fresh culinary herbs within arm’s reach.
Materials Needed
- 1 yard of heavy 12-ounce untreated cotton duck canvas
- Heavy-duty outdoor polyester thread
- Sewing machine with size 16 denim needle
- Six 1/2-inch brass grommets with setting tool
- Hammer
- Potting soil mixed with 20 percent perlite
How to Make It
- Cut a backing piece of canvas measuring 20 by 36 inches, folding and stitching a 1/2-inch hem around all four raw edges.
- Cut three pocket strips measuring 8 by 26 inches, press 1/2-inch double hems on the top edges, and stitch them flat.
- Pin the pocket strips horizontally onto the backing sheet, forming two 3-inch deep pleats in each strip to create pouch volume.
- Stitch along the sides and bottom of each pocket, reinforcing the vertical center dividers with double stitching.
- Install three brass grommets evenly along the top edge using the setting tool and hammer, then hang the organizer from your balcony rail with zip ties.
4. Chicken Wire Air Plant Shadowbox
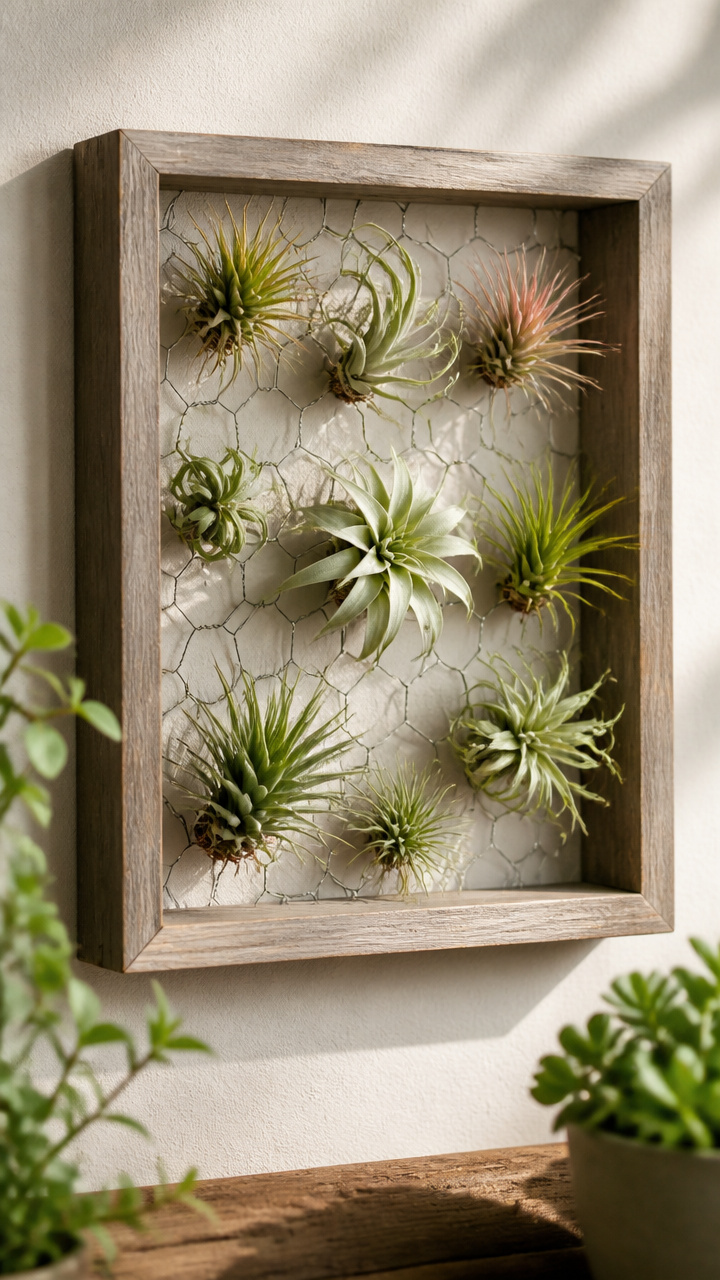
Hexagonal poultry mesh stretched inside a shallow wooden frame holds Tillandsia plants securely without soil or messy watering routines. Mist the plants directly where they rest on the wire backing.
Materials Needed
- One 12×16-inch unfinished pine shadowbox frame (1.5 inches deep)
- 14×18-inch sheet of 1/2-inch galvanized chicken wire
- Heavy-duty staple gun with 5/16-inch staples
- Wire snips
- Exterior clear matte wood sealer with paintbrush
- 8 to 10 assorted air plants (Tillandsia)
How to Make It
- Apply two coats of exterior clear matte sealer to the pine frame, allowing two hours of drying time between coats.
- Lay the frame face down and center the chicken wire over the back opening.
- Pull the wire taut and staple it into the inner wood rebate every inch around the entire perimeter.
- Trim excess wire overhang close to the staples using wire snips so no sharp edges stick out.
- Gently tuck the base leaves of your air plants through the wire hexagons to secure them across the display.
5. Tiered Jute Macrame Pot Hanger
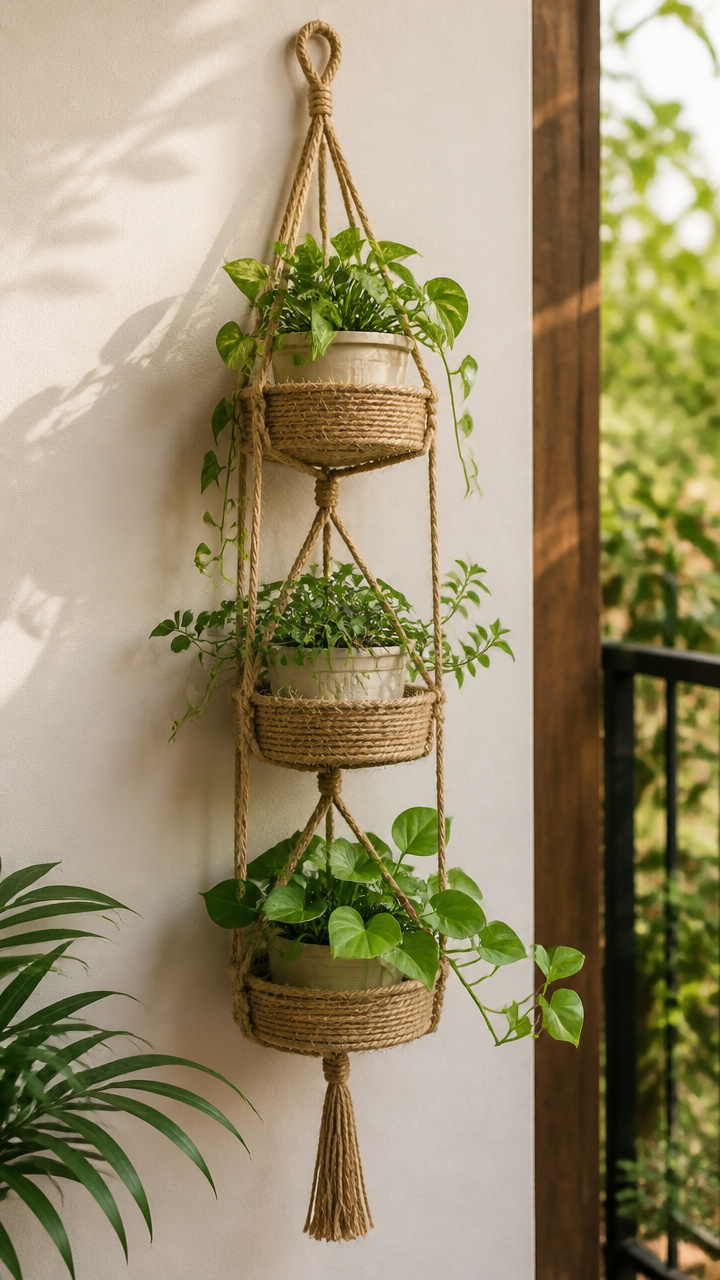
Thick natural jute twine knotted into a triple-stack suspension system lifts multiple trailing plants into sunny vertical space. The textured cordage creates a rustic focal point on any sheltered patio corner.
Materials Needed
- 120 feet of 4mm three-ply natural jute twine
- One 2-inch solid brass welded ring
- Three 6-inch glazed ceramic pots with drainage saucers
- Sharp scissors
- Measuring tape
How to Make It
- Cut eight pieces of jute twine, each measuring 15 feet in length.
- Thread all eight strands halfway through the brass ring and secure them with a 3-inch wrapped gathering knot.
- Divide the strands into four pairs of four cords, tying square knots down each arm for 10 inches.
- Create the first pot basket by knotting adjacent cords together in alternating patterns 4 inches down, closing with a gathering knot beneath the first pot base.
- Repeat the alternating square knots and gathering knots twice more down the length to hold the remaining two pots in vertical sequence.
6. Cedar Hexagon Wall Box Planters
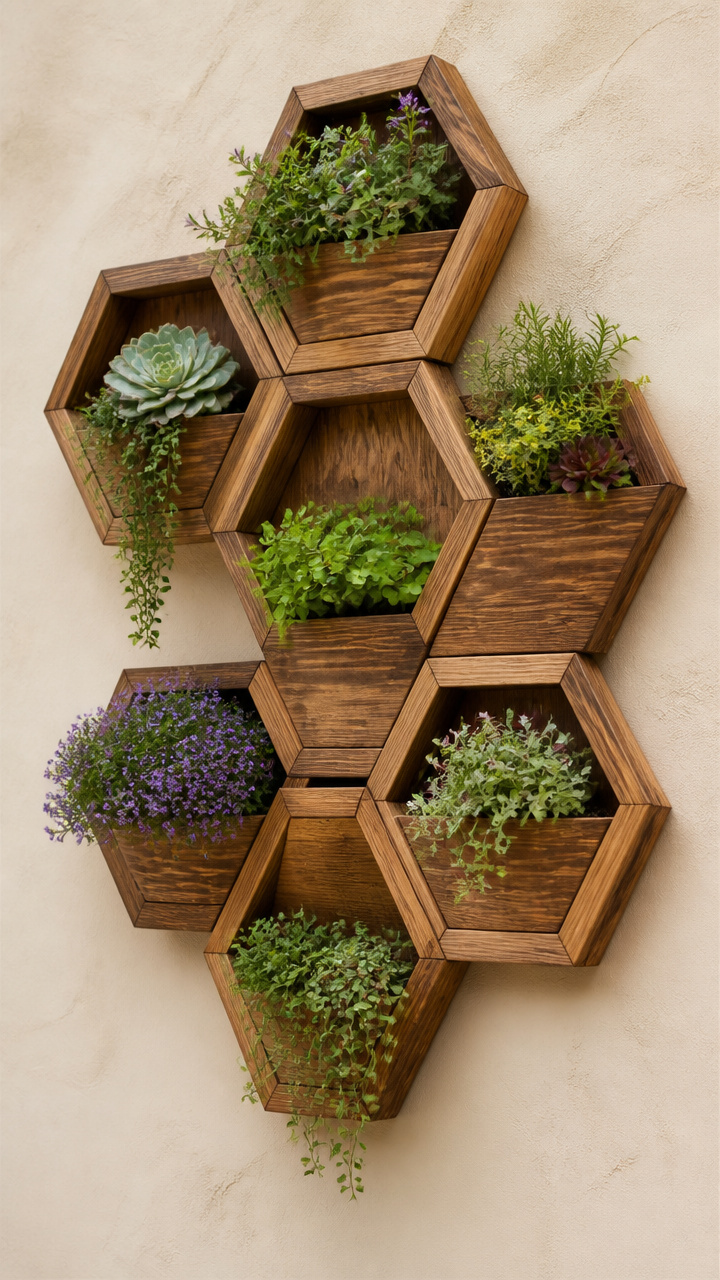
Geometric wooden shadow boxes mounted directly to a sturdy patio fence provide deep individual planting cells for shallow-rooted succulents. Cedar wood naturally resists outdoor rot and insect damage over years of weather exposure.
Materials Needed
- Six 8-inch pieces of 1×4 western red cedar boards cut with 30-degree mitered ends
- Waterproof wood glue (PVA Type III)
- Pneumatic 18-gauge brad nailer with 1.25-inch brad nails
- One 8×8-inch square of 1/4-inch exterior plywood for backing
- Jigsaw
- Two 2-inch exterior wood screws
How to Make It
- Apply waterproof wood glue to the mitered ends of the six cedar pieces and clamp them together to form a uniform hexagon.
- Pin every corner joint using two brad nails per side, wiping away excess glue squeeze-out with a damp rag.
- Trace the assembled hexagon onto the 1/4-inch plywood, cut the shape out with a jigsaw, and glue and nail it to the rear of the cedar frame.
- Drill two 1/4-inch drainage holes through the bottom-facing cedar board.
- Fasten the completed hexagon planter to your outdoor wall by driving two exterior screws through the rear plywood backing.
7. Painted Tin Can Wire Grid
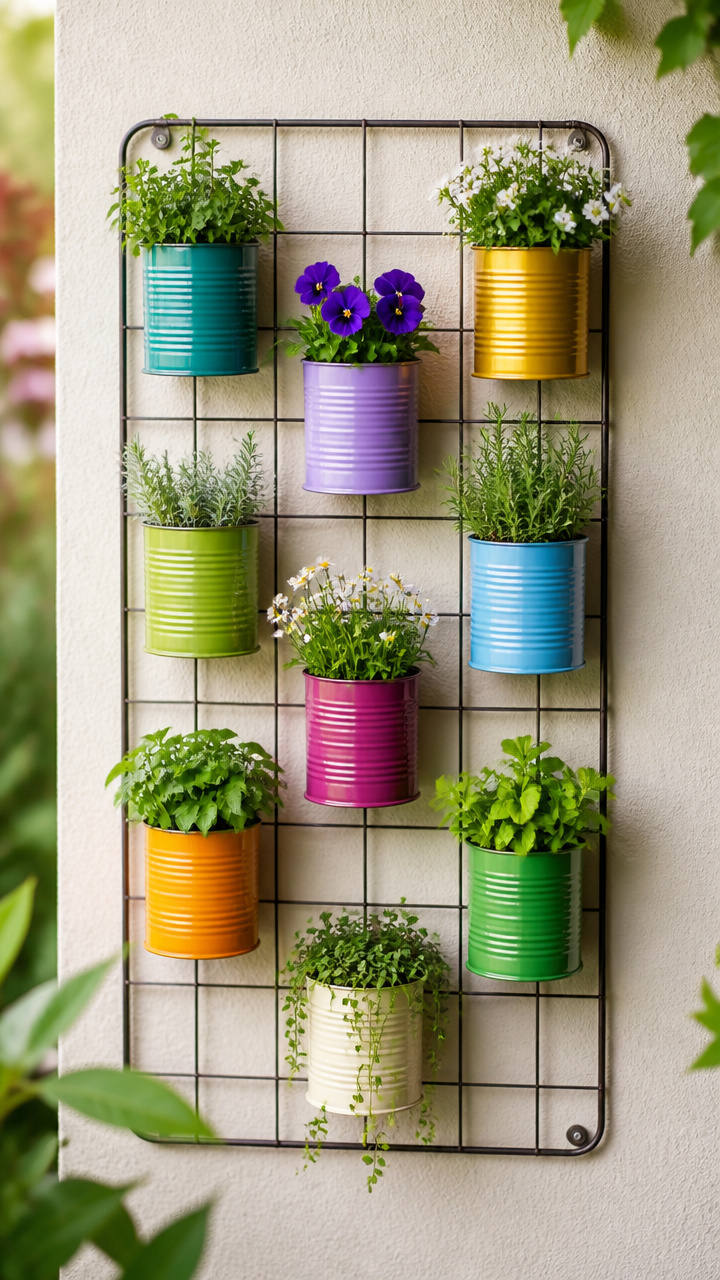
Recycled soup cans washed clean and coated in protective paint turn a bare metal trellis into an organized vertical nursery. Small drainage holes punched in each base keep root systems healthy during heavy rains.
Materials Needed
- Six 15-ounce steel soup cans, labels removed and dried
- One 24×36-inch coated metal grid panel
- One can of rust-inhibiting exterior spray paint (sage green)
- Six 1/2-inch metal sheet screws with rubber washers
- Hammer and standard nail for punching drainage
- Twelve 8-inch black UV-resistant cable ties
How to Make It
- Turn each clean tin can upside down and punch three drainage holes through the bottom base using a hammer and nail.
- Apply two light, even coats of rust-inhibiting spray paint across the exterior of all six cans, waiting 30 minutes between coats.
- Position the metal grid panel vertically and anchor it to your wall using masonry anchors or balcony railing zip ties.
- Thread two cable ties through pre-drilled side holes in each can and wrap them tightly around the horizontal wires of the grid.
- Fill each mounted tin can with lightweight potting mix and plant compact trailing succulents or dwarf herbs.
8. Vinyl Gutter Herb Trough Tier
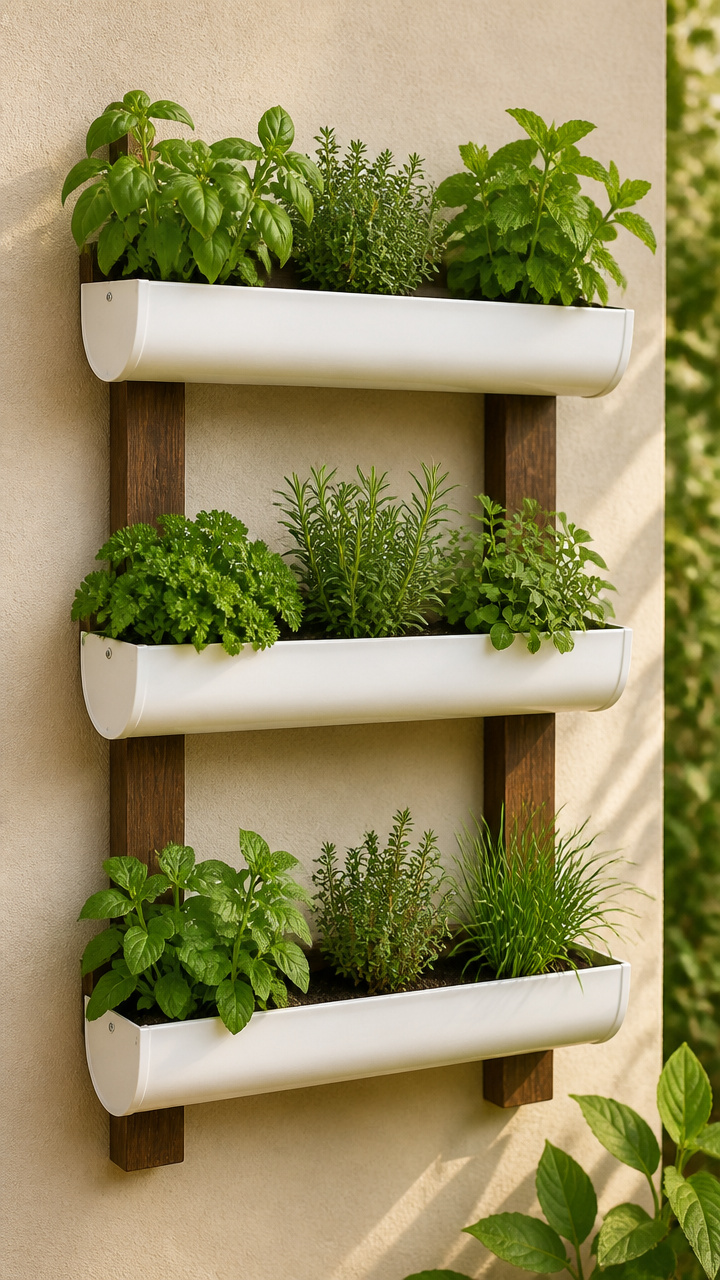
Rigid vinyl rain gutters mounted horizontally across exterior walls create wide, continuous planting troughs perfect for salad greens and strawberries. Smooth interior channels allow water to flow freely toward integrated end-cap drainage holes.
Materials Needed
- One 10-foot section of 4.5-inch white vinyl rain gutter
- Six matching vinyl gutter end caps
- Vinyl gutter adhesive sealant
- Six heavy-duty vinyl gutter mounting brackets
- Hacksaw with fine-tooth blade
- Twelve 1.5-inch stainless steel screws
How to Make It
- Cut the 10-foot gutter into three equal 40-inch sections using a fine-tooth hacksaw.
- Attach end caps to both sides of each 40-inch section, sealing the seams with vinyl gutter adhesive.
- Drill four 3/8-inch drainage holes spaced evenly along the bottom centerline of every gutter trough.
- Mount the brackets onto your patio wall in vertical pairs spaced 12 inches apart using stainless steel screws.
- Snap the gutter troughs firmly into the installed wall brackets and fill them with potting soil.
9. Landscape Felt Vertical Pocket Panel
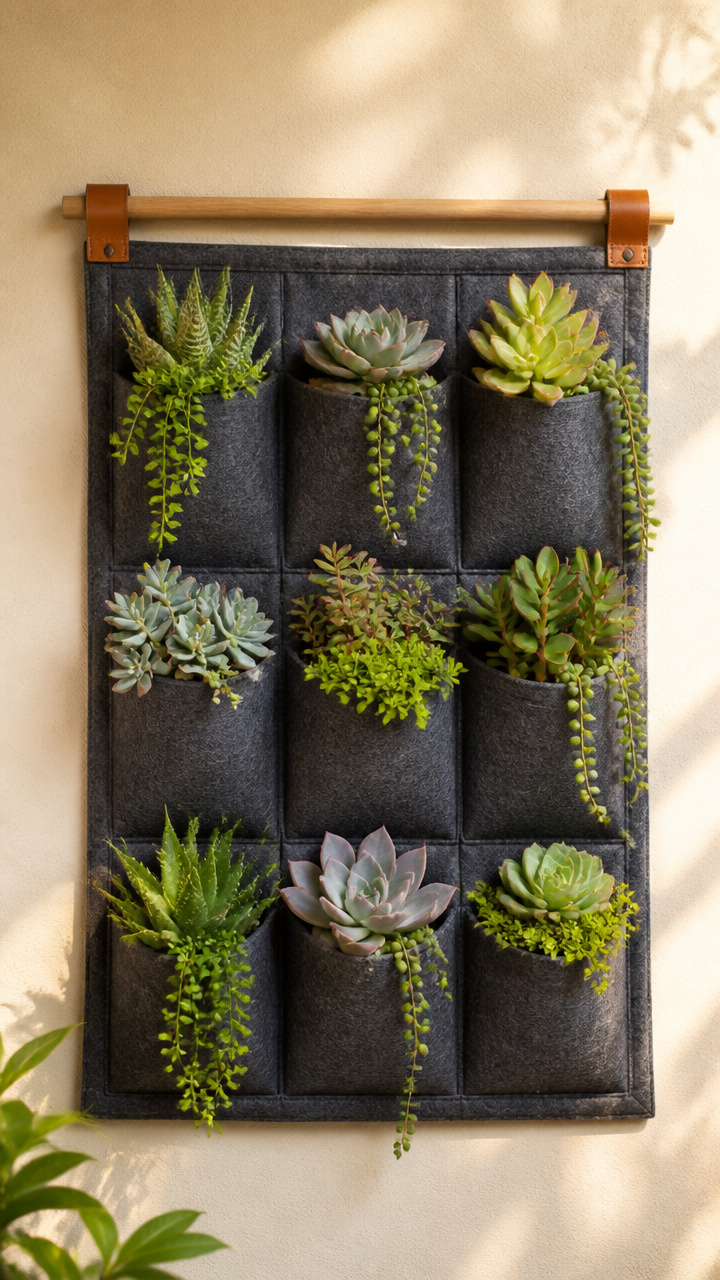
Layers of heavy non-woven landscape geotextile stapled to a sealed wooden backing board create an insulated pocket wall that protects delicate root systems from temperature swings. Moisture distributes evenly through the synthetic fibers.
Materials Needed
- One 24×36-inch sheet of 1/2-inch exterior CDX plywood
- One 3×6-foot roll of 6-ounce non-woven geotextile landscape fabric
- One half-pint can of outdoor wood spar urethane with brush
- Heavy-duty staple gun with 3/8-inch stainless steel staples
- Scissors
- Chalk pencil
How to Make It
- Coat all surfaces of the plywood panel with spar urethane and let it cure fully for 24 hours.
- Cut the landscape fabric into three strips measuring 14 inches wide by 36 inches long.
- Fold a 2-inch hem along the top of each strip and staple the fabric across the board horizontally to create deep planting pouches.
- Add vertical staple lines every 8 inches down the width of each strip to divide the horizontal layers into distinct individual plant pockets.
- Mount the wood panel to your wall using heavy-duty wall anchors before filling the pockets with potting soil.
10. Suspended Kokedama Moss Ball String Screen
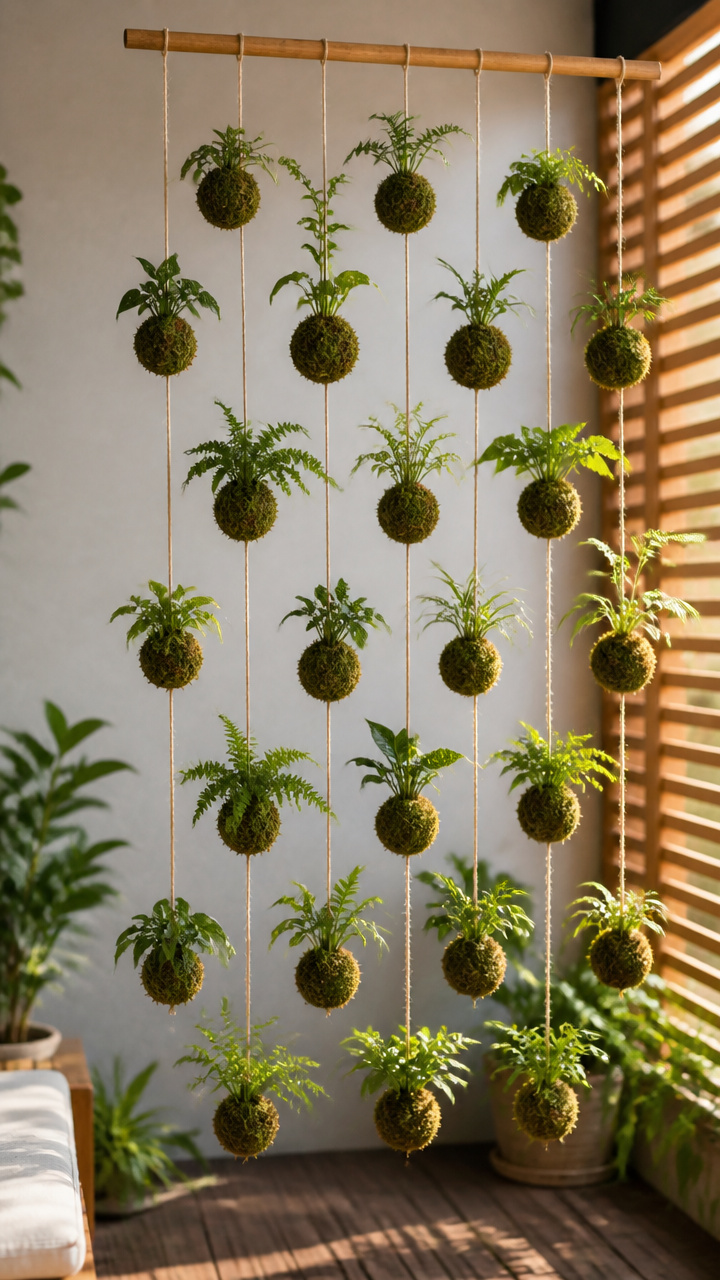
Japanese-style moss balls bound tightly with synthetic thread suspend moisture-loving ferns in mid-air along a balcony corner. Dipping the soil spheres directly into a water bucket keeps maintenance simple and mess-free.
Materials Needed
- Three 4-inch potted bird’s nest ferns
- Bonsai potting soil mixed equally with peat moss (about 6 cups)
- One bag of preserved sheet moss or live green sphagnum moss
- One spool of 100 percent waxed polyester twine
- One 30-inch natural bamboo pole (1 inch diameter)
- Two ceiling screw hooks
How to Make It
- Remove the ferns from their plastic pots and gently pack the wet peat-soil mixture around each root ball until you form a firm, 5-inch round sphere.
- Wrap damp sheet moss around the entire exterior of each soil ball so no dirt shows through.
- Wind waxed polyester twine tightly around the moss sphere in random crisscross patterns until the shape remains round and compact.
- Tie a 36-inch length of twine to the top wrapping of each moss ball to serve as the hanging lead.
- Install the ceiling hooks, suspend the bamboo pole horizontally, and tie your kokedama balls to the rod at staggered heights.
11. Mounted Virgin Cork Bark Orchid Slab
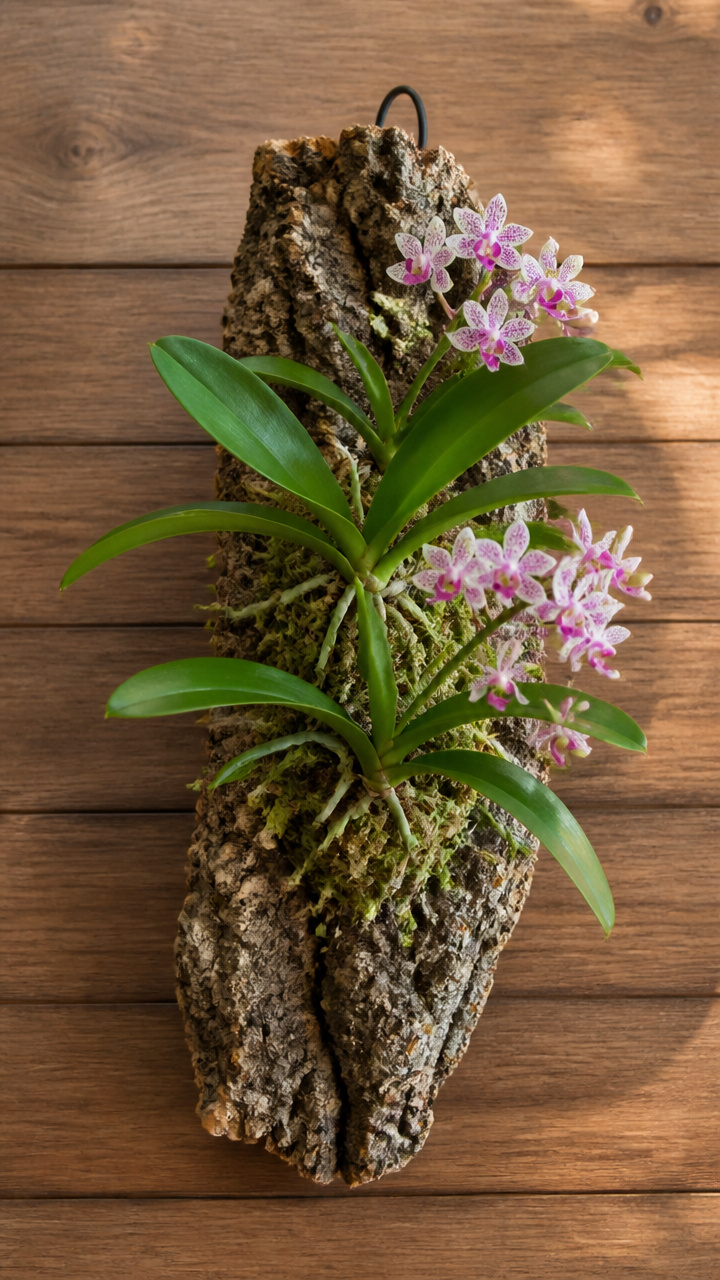
Rough-textured virgin cork bark mimics the natural tree-trunk environment required by epiphytic orchids and trailing staghorn ferns. Water drains instantly through the bark ridges, preventing root rot.
Materials Needed
- One 8×12-inch slab of raw virgin cork tree bark
- One blooming Phalaenopsis or Dendrobium orchid
- Two cups of long-fiber sphagnum moss, soaked in water and wrung out
- One spool of 12-pound clear monofilament fishing line
- Cordless drill with 1/8-inch bit
- One 8-inch loop of coated picture hanging wire
How to Make It
- Drill two small holes through the top edge of the cork slab and thread the picture wire through to form a sturdy hanging loop.
- Spread a 1-inch layer of damp sphagnum moss across the lower third of the rough cork face.
- Position the orchid root system over the moss bed, spreading the roots out wide against the bark surface.
- Cover the exposed roots with an additional layer of damp sphagnum moss to lock in moisture.
- Wrap the clear fishing line around the plant base, moss, and cork slab repeatedly until the orchid sits firmly anchored in place.
12. Cast Concrete Geometric Wall Sconces
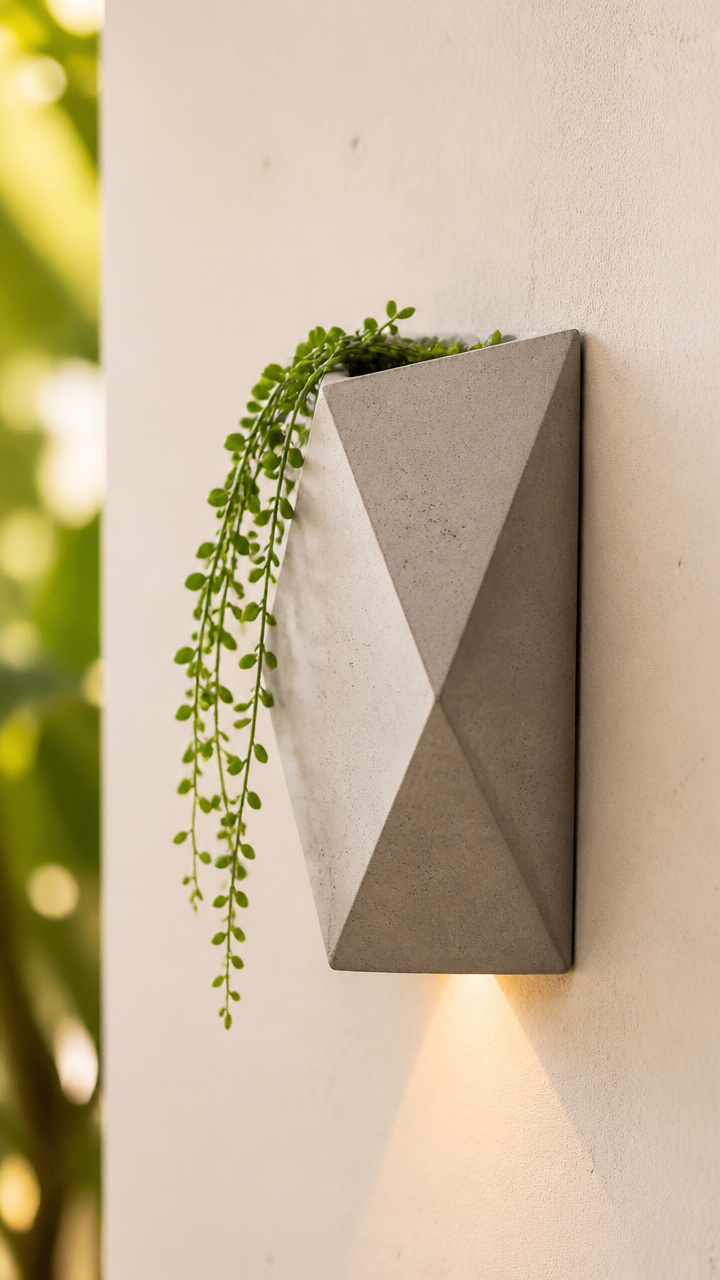
Custom-cast concrete pocket sconces provide thick, thermal-mass containers that keep plant roots cool during hot balcony afternoons. The raw stone texture contrasts beautifully with trailing ivy or string of pearls.
Materials Needed
- 5 pounds of fast-setting commercial concrete mix
- One plastic triangular craft box (outer mold)
- One smaller plastic cup (inner cavity mold)
- Vegetable oil for mold release
- Two 2-inch concrete sleeve anchors
- Cordless drill with masonry bit
How to Make It
- Coat the interior of the triangular craft box and the exterior of the smaller cup with a thin sheen of vegetable oil.
- Mix the concrete with water in a bucket until it reaches the consistency of thick peanut butter, then pour it halfway into the triangular mold.
- Press the oiled cup down into the wet concrete to create the plant cavity, weighting it with pebbles so it does not float up.
- Tap the sides of the outer mold firmly for two minutes to bring trapped air bubbles to the surface, then let the concrete cure for 24 hours.
- Demold the sconce, drill a 1/4-inch drainage hole in the bottom with a masonry bit, and mount it to your masonry wall using sleeve anchors.
13. Pallet Plank Hose Clamp Sconce Wall
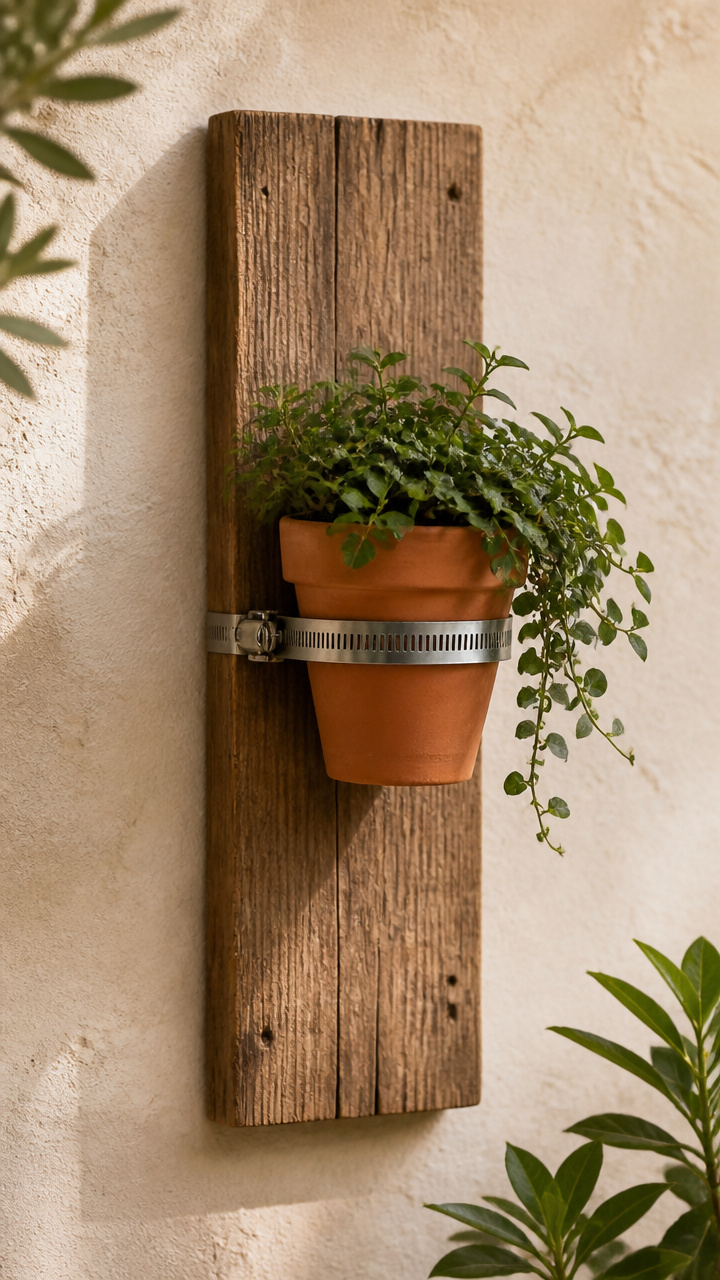
Heavy stainless steel worm-gear hose clamps bolted directly to weathered pallet boards grip glass or ceramic vessels firmly on exterior walls. Loosening the screw mechanism allows for fast pot removal during seasonal replanting.
Materials Needed
- One 6×30-inch weathered pallet plank, sanded smooth
- Four 4-inch stainless steel worm-gear hose clamps
- Four 3/4-inch pan-head wood screws with washers
- Four 4-inch cylindrical glazed terracotta pots
- Flat-head screwdriver
- Two D-ring picture hangers
How to Make It
- Sand the pallet plank with 120-grit sandpaper to remove loose splinters, then attach two D-ring hangers to the top back corners.
- Flatten the rear band of each hose clamp and drill an 1/8-inch pilot hole through the steel strip opposite the tightening screw.
- Screw each hose clamp flat against the front face of the pallet board at 7-inch vertical intervals using pan-head screws and washers.
- Slide a 4-inch pot inside each open hose clamp ring.
- Tighten the clamp screw clockwise with a flat-head screwdriver until the steel band holds the pot securely against the wood plank.
14. Louvered Wooden Shutter Succulent Pocket
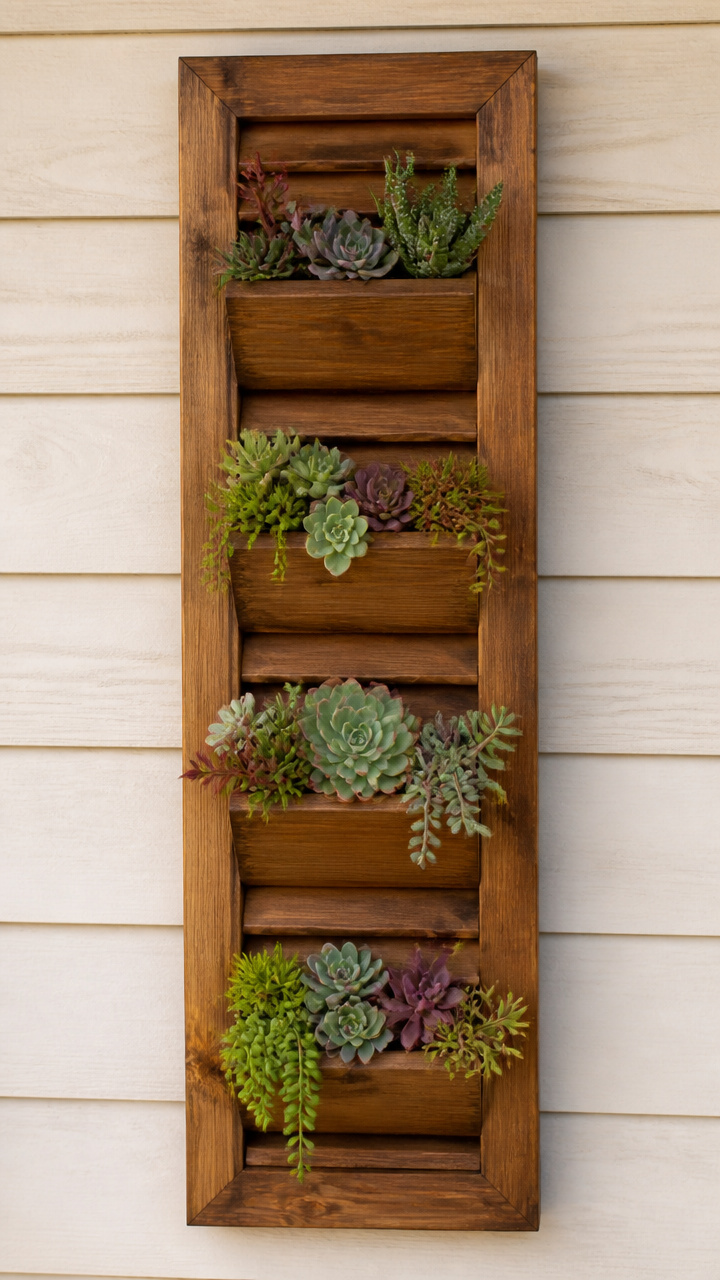
Angled slats on a vintage wooden window shutter create built-in, downward-sloping pockets for holding miniature succulent cuttings. The wood slats hold moss and shallow soil without spilling onto the deck below.
Materials Needed
- One 14×36-inch wooden louvered window shutter
- One roll of preserved sheet moss
- Two quarts of fast-draining cactus and succulent soil mix
- Heavy-duty staple gun with 1/4-inch staples
- One roll of plastic insect window screen mesh
- 15 to 20 rooted succulent cuttings
How to Make It
- Flip the wooden shutter face down and staple plastic window screen mesh across the entire rear surface to contain the soil.
- Tuck strips of damp sheet moss into each louver opening from the front face to build moisture retention barriers.
- Pour dry succulent soil mix through the slat openings, packing it firmly behind the louvers with your fingers.
- Insert succulent cutting stems into the gaps between the wooden slats, pushing their roots deep into the packed soil behind the moss.
- Keep the shutter lying flat for three weeks in filtered light while roots establish before hanging it upright on your wall.
15. Woven Reed Wall Cone Baskets
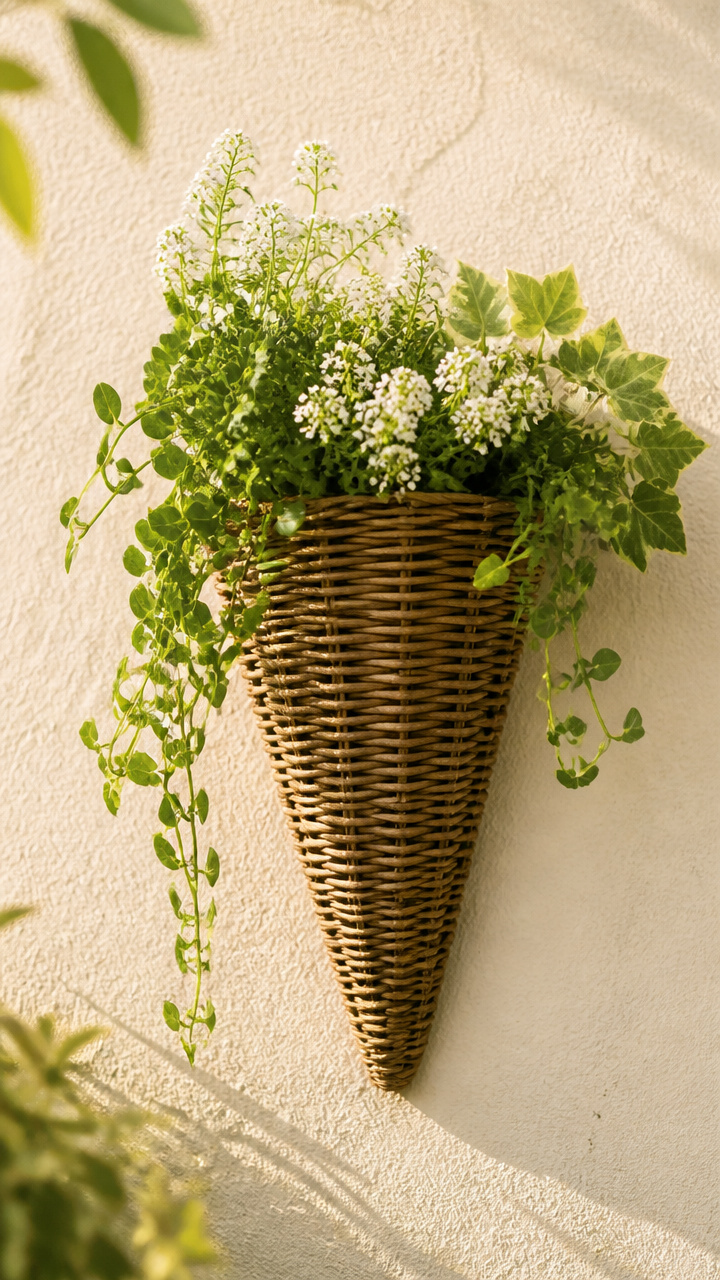
Flexible natural flat reed hand-woven into tapered hanging wall cones offers deep pockets for cascading annuals on sunny balcony railings. The tapered cone profile channels excess moisture directly out through the bottom woven tip.
Materials Needed
- 1 pound of 1/2-inch flat reed for basket weaving
- One 8-inch steel craft hoop
- Basin of warm water for soaking reed
- Spring-loaded clothespins (clamping tools)
- One spool of 20-gauge copper craft wire
- Coco coir basket liner sheet
How to Make It
- Soak the flat reed in warm water for 15 minutes until pliable and easy to bend without cracking.
- Loop twelve 24-inch reed spokes over the 8-inch steel hoop, pinning them in place with spring clothespins.
- Weave continuous strands of damp reed over and under the spokes, pulling the weavers tighter as you move downward to shape a sharp cone.
- Tuck and trim the terminal spoke ends inside the bottom point of the cone, securing the base with tightly twisted copper wire.
- Line the interior of the woven cone with fitted coco coir sheet, fill it with potting compost, and hang it on your patio wall using the steel hoop rim.
Maximizing your vertical space is the most rewarding way to build a flourishing garden on any compact balcony or patio. Pick your favorite design from this list, gather your materials, and bring your outdoor walls to life this weekend.