19 Winter Crafts with Popsicle Sticks for Rainy Days

Popsicle sticks pile up fast after summer, but they’re just waiting for a second life in your winter craft basket. With a little paint, glue, and imagination, you can turn these humble pieces into cozy handmade treasures that brighten gray days.
Gather the kids or enjoy some quiet time crafting solo. Each project uses simple tools and materials you likely have on hand, and every one brings a touch of warmth to the season.
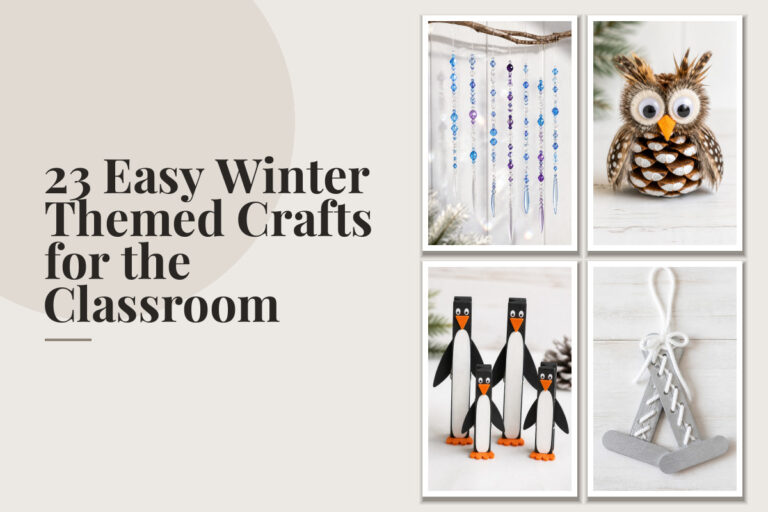
1. Mini Ice Skates Ornaments
Easy
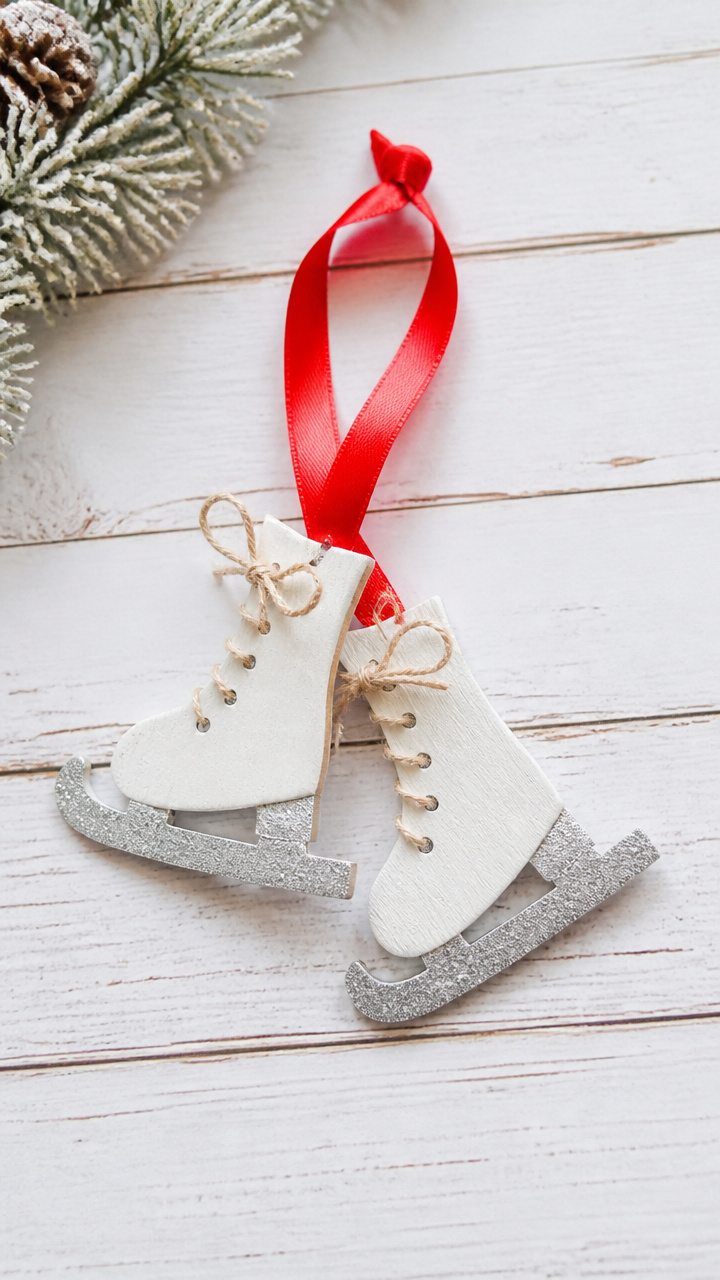
Delicate wooden skates dangle from ribbon loops, perfect for gifting or tree decor. Their crisp lines and tiny details make them feel like vintage keepsakes.
Materials Needed
- 6 standard popsicle sticks per skate
- White acrylic paint
- Small silver glitter glue pen
- Hot glue gun with glue sticks
- Red satin ribbon (12-inch piece)
- Paintbrush (small flat)
How to Make It
- Lay two popsicle sticks parallel and glue a third across both ends to form a rectangle frame.
- Glue a fourth stick vertically inside the frame to create the skate boot shape.
- Attach a fifth stick diagonally at the bottom as the blade, then add a sixth stick horizontally across the top back for the heel.
- Paint the entire structure white using the flat brush and let dry for 20 minutes.
- Draw fine lines with the silver glitter glue to mimic stitching and blade edges, then let dry completely.
- Tie the red ribbon into a loop and hot glue it to the top edge of the skate for hanging.
2. Snowflake Window Display
Moderate
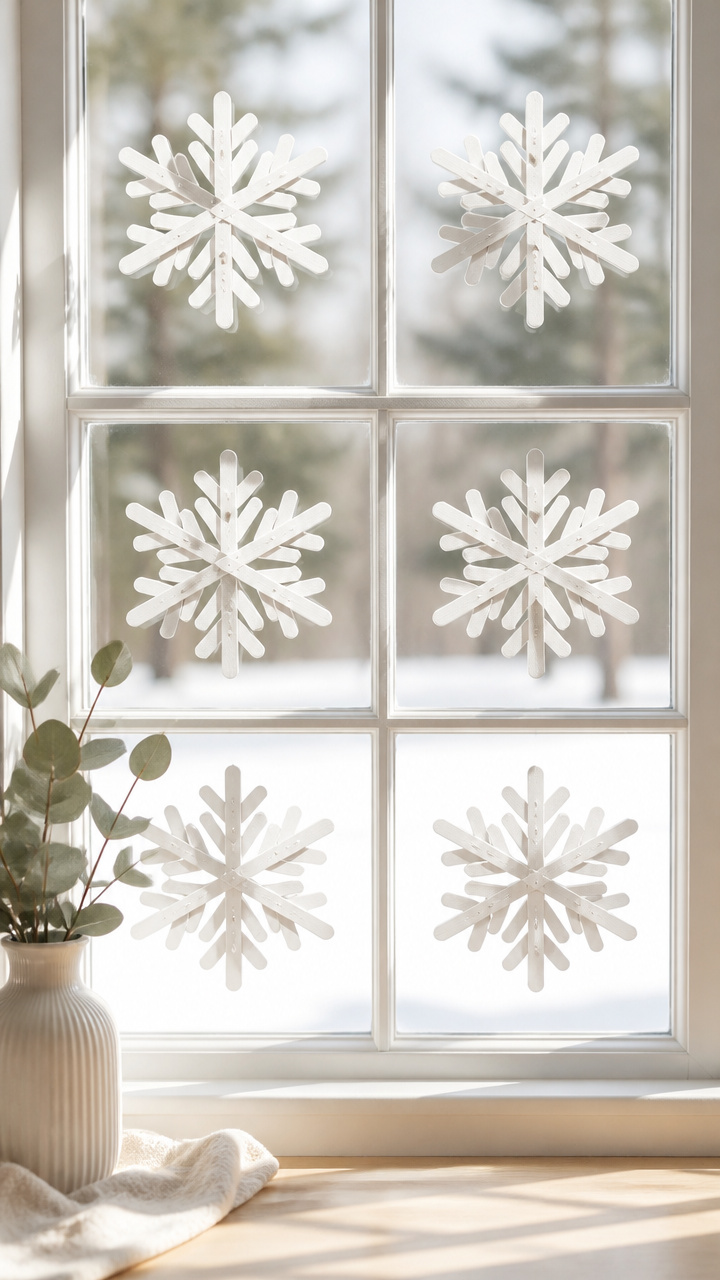
Six-pointed geometric snowflakes catch the light and cast delicate shadows on snowy afternoons. The layered effect gives depth without needing special tools.
Materials Needed
- 18 wide popsicle sticks
- Clear school glue
- White spray paint
- Ruler
- Craft knife
- Fine-grit sandpaper
- Fishing line (10 feet)
- Scissors
How to Make It
- Cut each wide popsicle stick into three equal 1.5-inch segments using the ruler and craft knife.
- Lightly sand the cut edges to prevent splinters.
- Arrange six segments in a starburst pattern, gluing each tip to meet at the center point.
- Add a second layer of six segments between the gaps of the first, offsetting them slightly.
- Repeat to build a third layer on top, aligning it with the first for symmetry.
- Let the glue dry for 1 hour, then spray the entire snowflake with white paint in a well-ventilated area.
- Once dry, tie a 6-inch piece of fishing line to one arm and hang near a window.
3. Polar Bear Picture Frame
Moderate
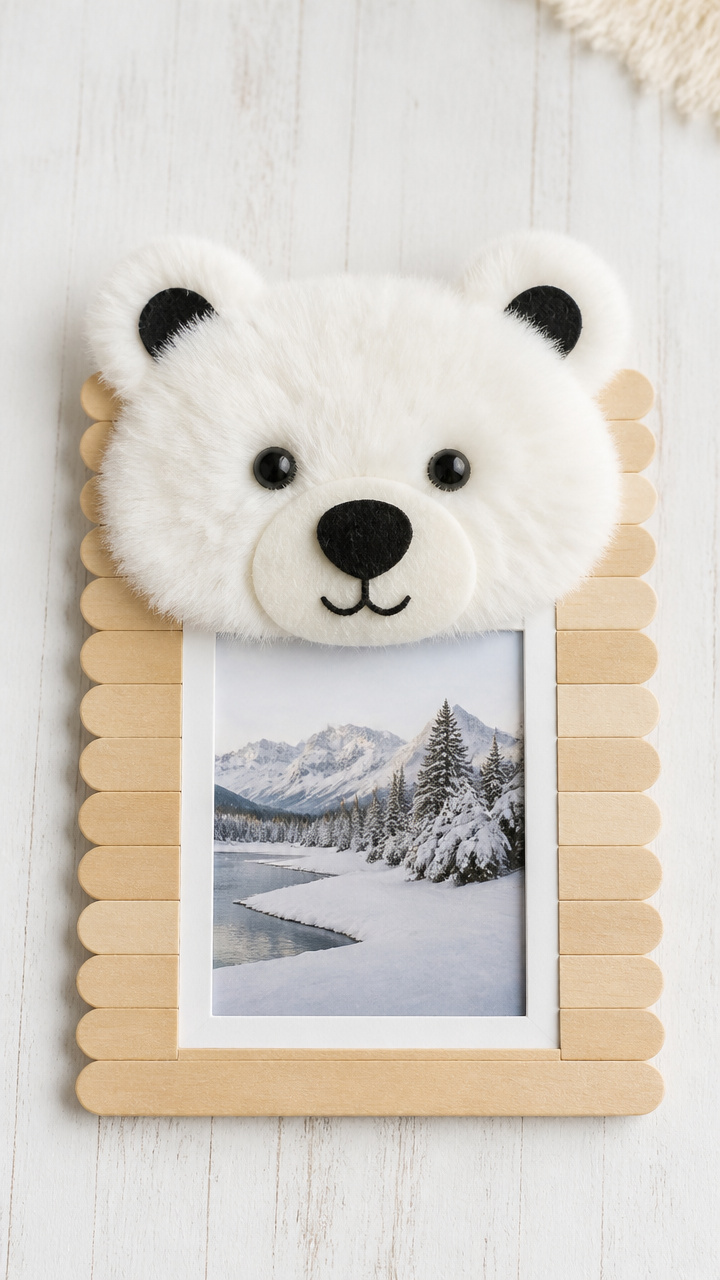
A fluffy bear peers around the corner of your favorite photo, its snowy face framed by textured sticks. This doubles as both art and display.
Materials Needed
- 12 standard popsicle sticks
- 8×10 inch photo mat board with 4×6 inch opening
- White craft fur fabric (6×6 inch square)
- Fabric scissors
- Hot glue gun with glue sticks
- Black felt sheet (3×3 inch)
- Pencil
- Craft glue
How to Make It
- Lay four popsicle sticks vertically along each side of the mat board, overlapping corners slightly, and glue in place with hot glue.
- Cut two additional sticks in half and attach them to the top corners to extend the frame upward.
- Trace a bear head shape onto the white fur using the pencil, then cut it out with fabric scissors.
- Glue the fur piece over the top left corner of the frame so the bear appears to peek around.
- Cut two small circles from black felt for eyes and glue them in place with craft glue.
- Let dry for 30 minutes before inserting a 4×6 inch photo behind the mat.
4. Tiny Igloo Lantern
Advanced
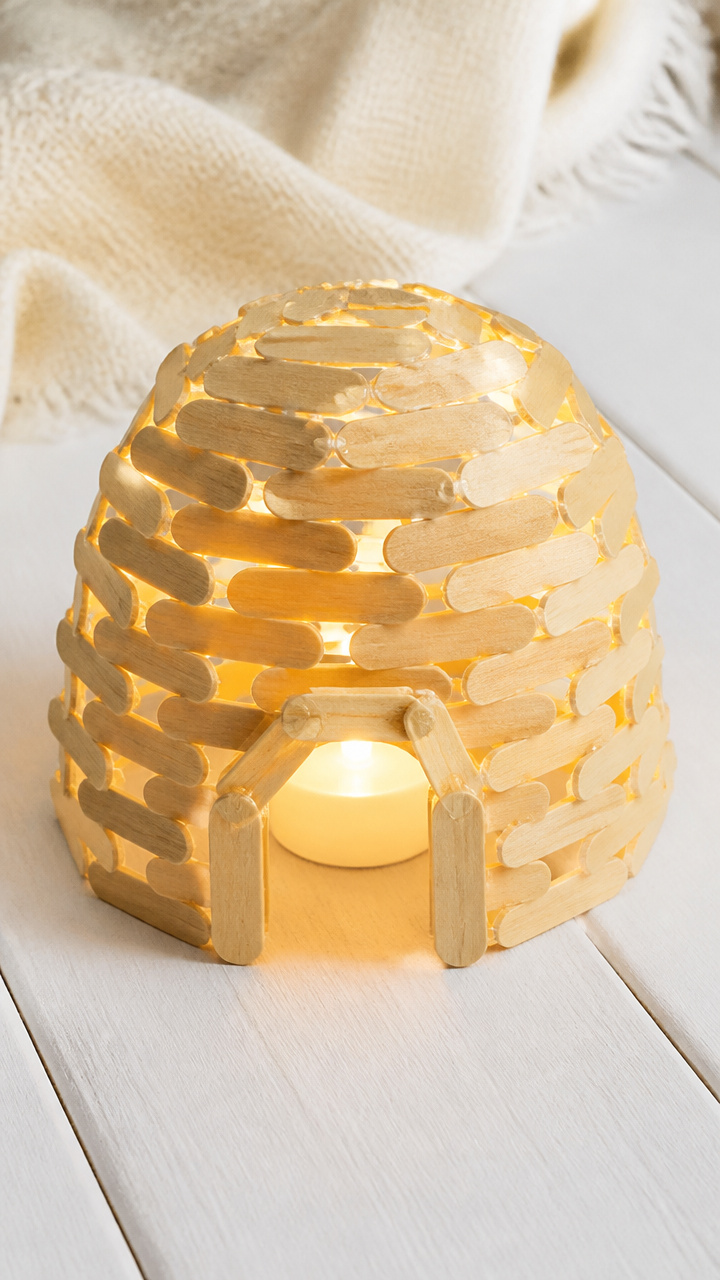
Soft golden light glows through tightly packed stick walls, mimicking a real igloo’s warmth. It holds a tea light safely inside.
Materials Needed
- 45 standard popsicle sticks
- Hot glue gun with glue sticks
- Battery-powered tea light
- Ruler
- Circular template (3-inch diameter)
- Pencil
How to Make It
- Trace the 3-inch circle onto a flat surface to use as a base guide.
- Stand 12 popsicle sticks upright around the circle, tips touching, and glue the bases to the surface.
- Begin layering sticks horizontally around the ring, angling each slightly inward and gluing ends to the sticks below.
- Continue adding layers, reducing the circle size gradually by overlapping ends more as you rise.
- After 8 layers, form a dome by bringing the tops together and securing with extra glue.
- Let the structure cure for 2 hours, then place the tea light inside and turn it on.
5. Reindeer Wall Hanging
Moderate
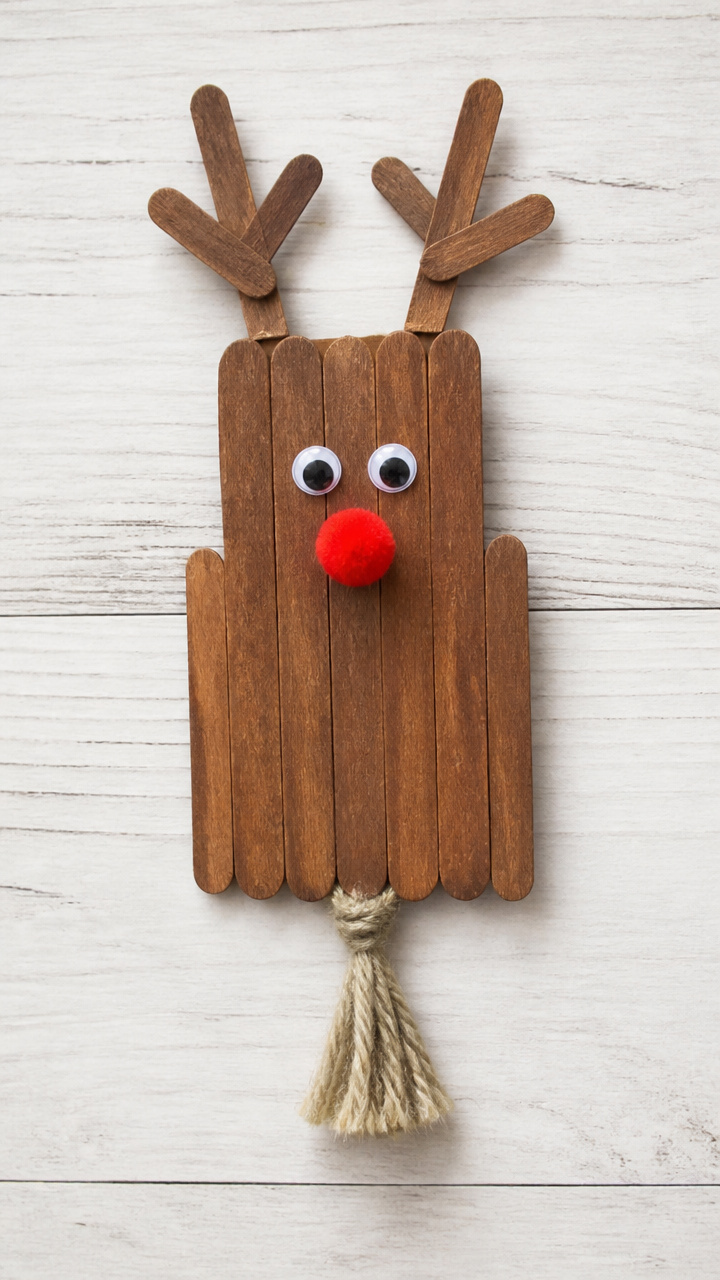
Antlers stretch proudly above a sweet-faced reindeer made from natural-toned sticks. Hang it on a bedroom door or nursery wall.
Materials Needed
- 7 standard popsicle sticks
- Brown acrylic paint
- Red pom-pom (8mm)
- Googly eyes (6mm, 2 pieces)
- Hot glue gun with glue sticks
- Tan yarn (12 inches)
- Scissors
- Paintbrush (small)
How to Make It
- Paint five sticks brown using the small brush and let dry for 20 minutes.
- Lay one painted stick vertically for the neck and glue a second horizontally across the top for the head.
- Attach the red pom-pom centered on the front of the head stick with hot glue.
- Glue googly eyes just above the pom-pom.
- Cut two 3-inch pieces of yarn and curl them into antler shapes, then glue to the top of the head.
- Glue the remaining two painted sticks at an angle beneath the neck to form legs.
- Tie a loop of yarn to the back of the neck stick for hanging.
6. Snowman Napkin Rings
Easy
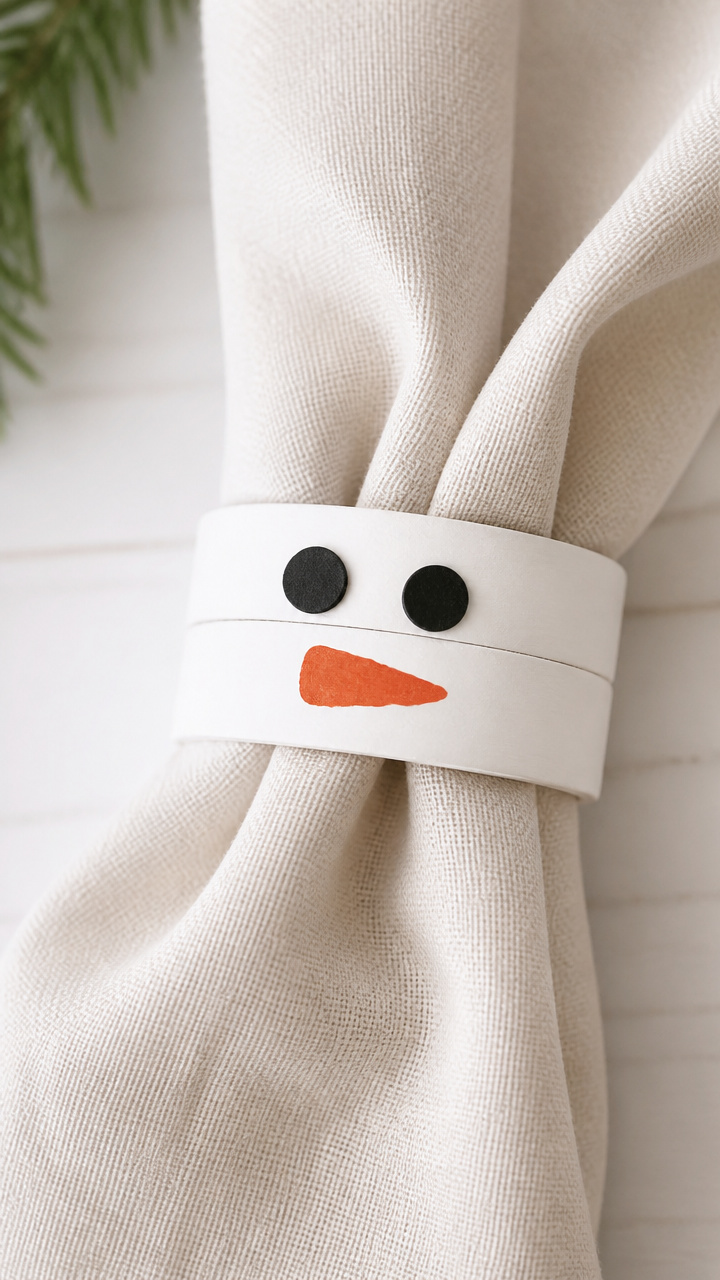
Stacked stick rings resemble cheerful snowmen at a holiday table. Add coal buttons and carrot noses for instant charm.
Materials Needed
- 3 standard popsicle sticks per ring
- White acrylic paint
- Orange marker (fine tip)
- Black foam dots (3mm, 2 per ring)
- Hot glue gun with glue sticks
- Paintbrush (small)
- Clear varnish (matte finish)
How to Make It
- Paint all three sticks white and let dry for 15 minutes.
- Form a triangle by gluing the ends of each stick together at the corners with hot glue.
- Draw a small carrot nose on one side of a bottom stick using the orange marker.
- Glue two black foam dots above the nose for eyes.
- Apply a thin coat of matte varnish to protect the paint and let dry for 30 minutes.
7. Winter Tree Silhouette Art
Easy
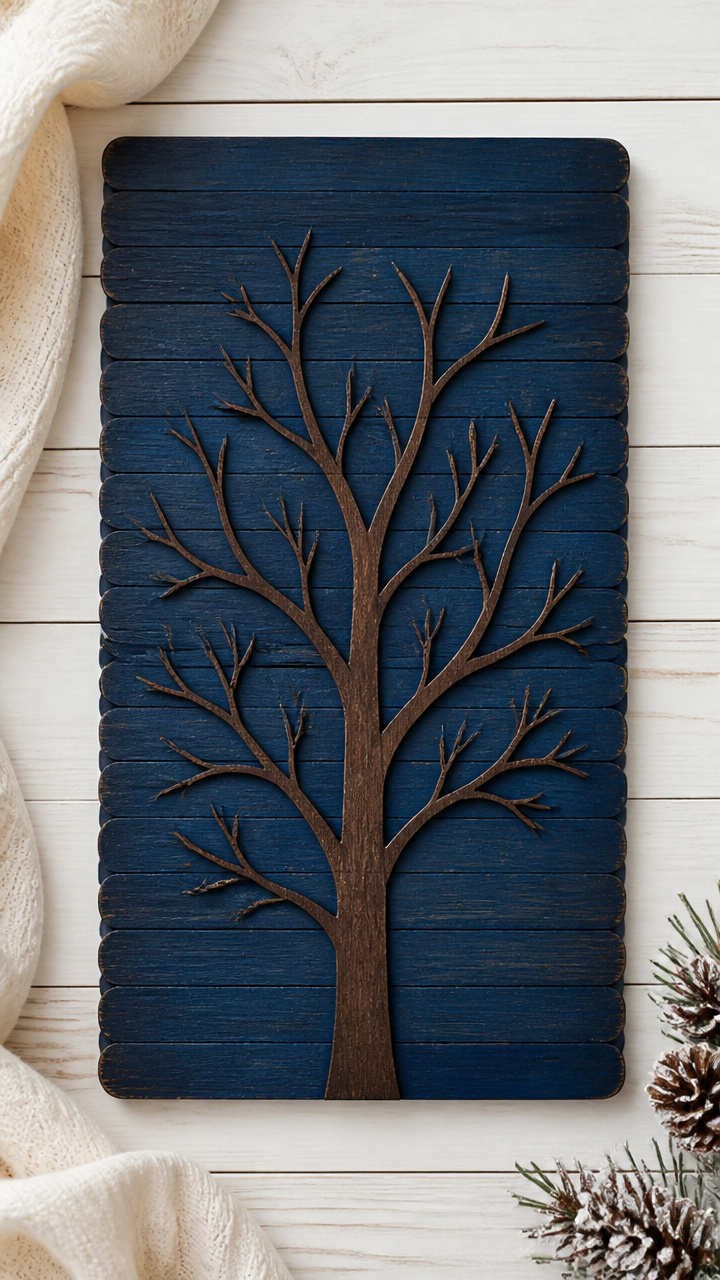
Bare branches reach skyward against a deep blue background, evoking quiet forest walks. The negative space tells the story.
Materials Needed
- 9 standard popsicle sticks
- 8×10 inch black cardstock
- Dark blue acrylic paint
- Glue stick
- Scissors
- Pencil
- Ruler
How to Make It
- Cut one stick in half lengthwise using scissors to make two thin trunks.
- Lay the halves vertically near the bottom center of the cardstock and glue down with the glue stick.
- Break four sticks into uneven pieces ranging from 1 to 2 inches long.
- Arrange the broken pieces outward and upward from the trunk to form branches, pressing each into place with the glue stick.
- Paint the sky area above the tree with dark blue paint using broad strokes, leaving the sticks unpainted.
- Let dry for 25 minutes before displaying.
8. Cardinal Bird Mobile
Moderate
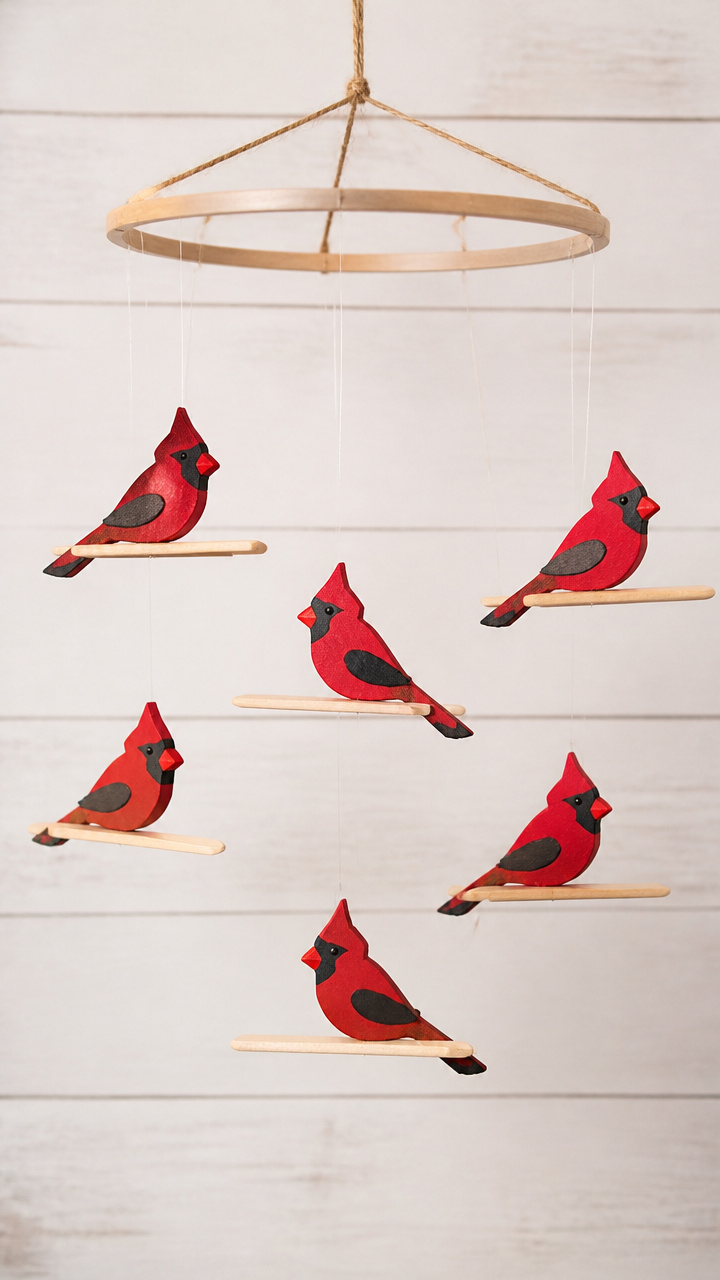
Bright red birds flutter gently overhead, their wings tipped with black. Perfect for a child’s room during winter months.
Materials Needed
- 6 wide popsicle sticks
- Red acrylic paint
- Black acrylic paint
- Paintbrush (small round)
- Fishing line (15 feet)
- Wooden embroidery hoop (6-inch diameter)
- Hot glue gun with glue sticks
- Scissors
How to Make It
- Paint four wide sticks entirely red and two sticks black, using the small round brush, and let dry for 20 minutes.
- Cut each black stick into four equal pieces and set aside.
- Glue one red stick horizontally across the center of the embroidery hoop.
- Attach the hoop to the ceiling with a 12-inch fishing line loop glued securely to the top.
- Glue two black pieces at a 45-degree angle to each end of the red stick to form wings.
- Tie 8-inch fishing line to the center of two new red sticks and hang them vertically below the hoop.
- Glue remaining black pieces to the sides of the lower sticks as wing accents.
9. Mitten String Art
Advanced
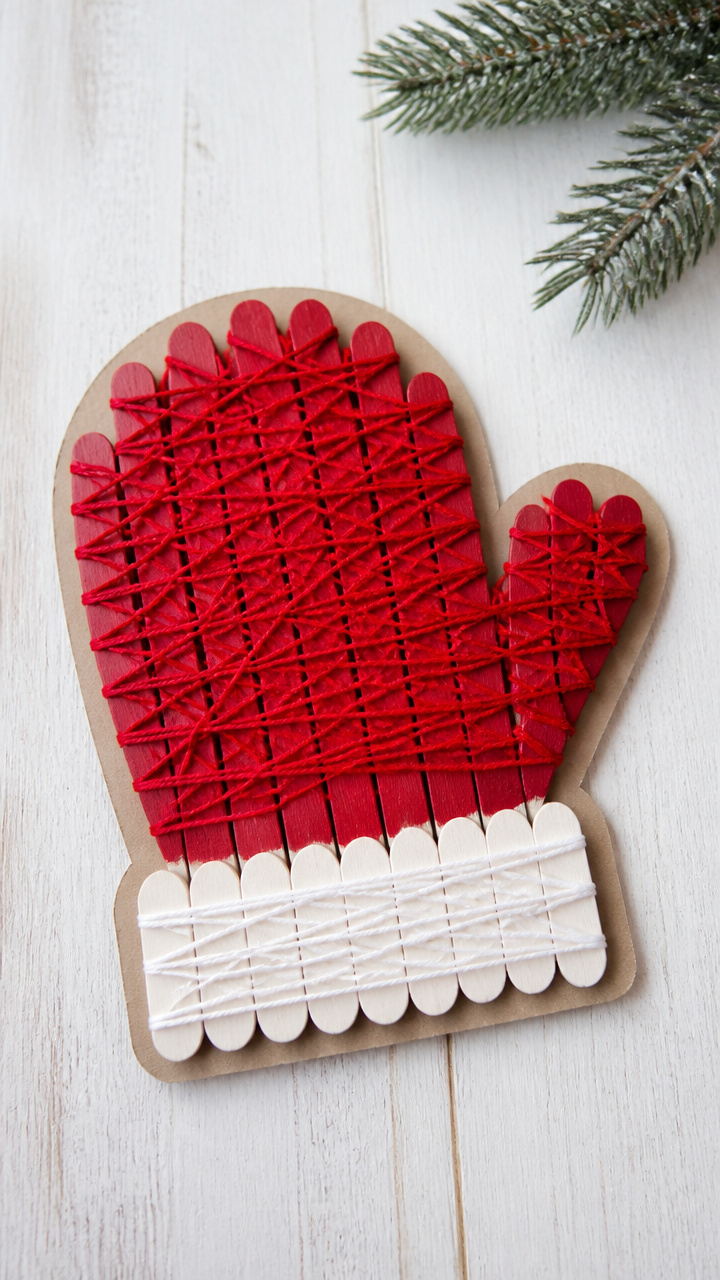
Nubby red yarn wraps around stick posts to form a cozy mitten shape. The texture invites fingertips to trace its outline.
Materials Needed
- 15 standard popsicle sticks
- Red yarn (medium weight, 20 feet)
- White acrylic paint
- Hot glue gun with glue sticks
- Cardboard base (6×8 inch)
- Pencil
- Ruler
- Scissors
How to Make It
- Paint all sticks white and let dry for 20 minutes.
- Draw a mitten shape on the cardboard using the pencil and ruler, about 5 inches tall.
- Glue 12 sticks vertically along the outline, spacing them 0.5 inches apart, and let dry for 30 minutes.
- Glue one stick horizontally across the top to form the cuff edge.
- Tie the yarn end to the bottom left stick with a double knot.
- Weave the yarn over and under each vertical stick, moving up in a spiral until the shape fills completely.
- Trim and tie off the end at the top right stick with hot glue to secure.
10. Candy Cane Candle Holder
Easy
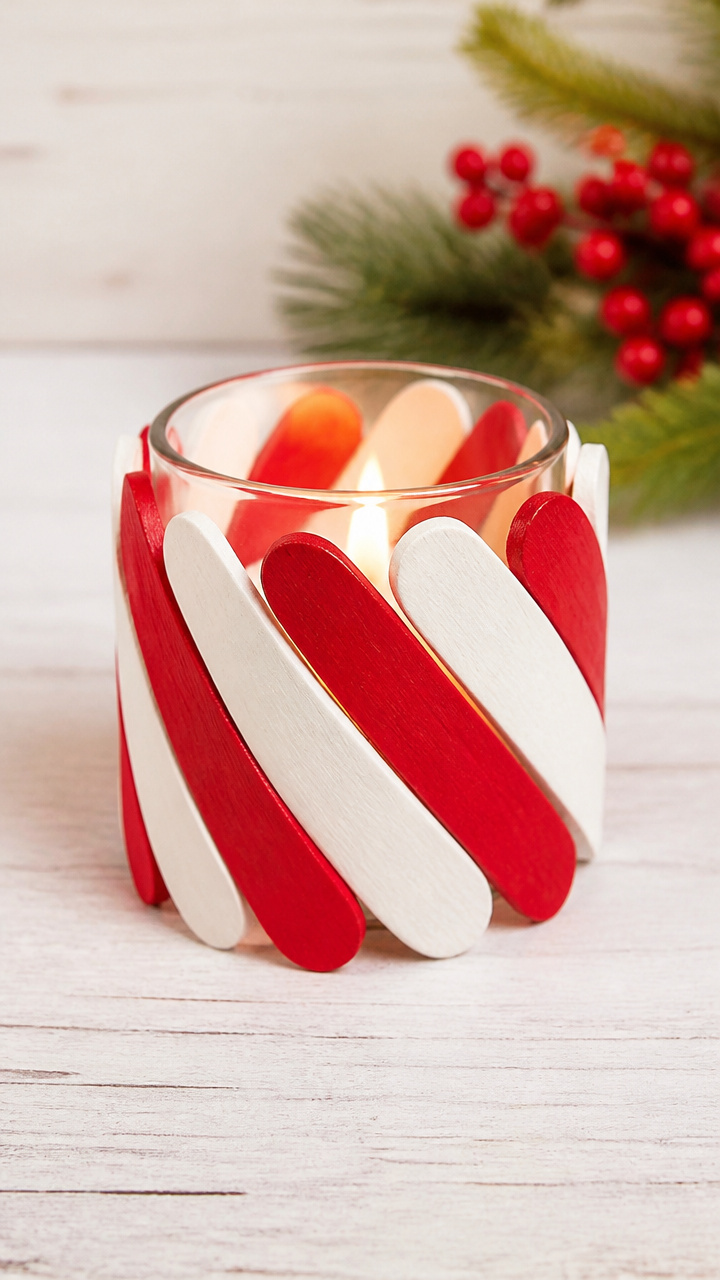
Red and white stripes spiral around a clear glass votive, mimicking a classic holiday treat. Safe for tabletops with LED lights.
Materials Needed
- 8 standard popsicle sticks
- Red acrylic paint
- White acrylic paint
- Glass tea light holder (3-inch diameter)
- Paintbrush (flat, medium)
- Mod Podge (gloss finish)
- Scissors
- Pencil
How to Make It
- Paint four sticks red and four sticks white, using even coats, and let dry for 15 minutes.
- Cut each stick in half crosswise with scissors.
- Mark the glass holder every 0.75 inches around the rim with the pencil.
- Glue one red half-stick vertically at each mark, curving slightly to follow the glass, using Mod Podge as adhesive.
- Alternate with white half-sticks between red ones, pressing firmly to adhere.
- Seal the entire outside with a coat of gloss Mod Podge and let cure for 1 hour.
11. Frozen Feather Wreath
Moderate
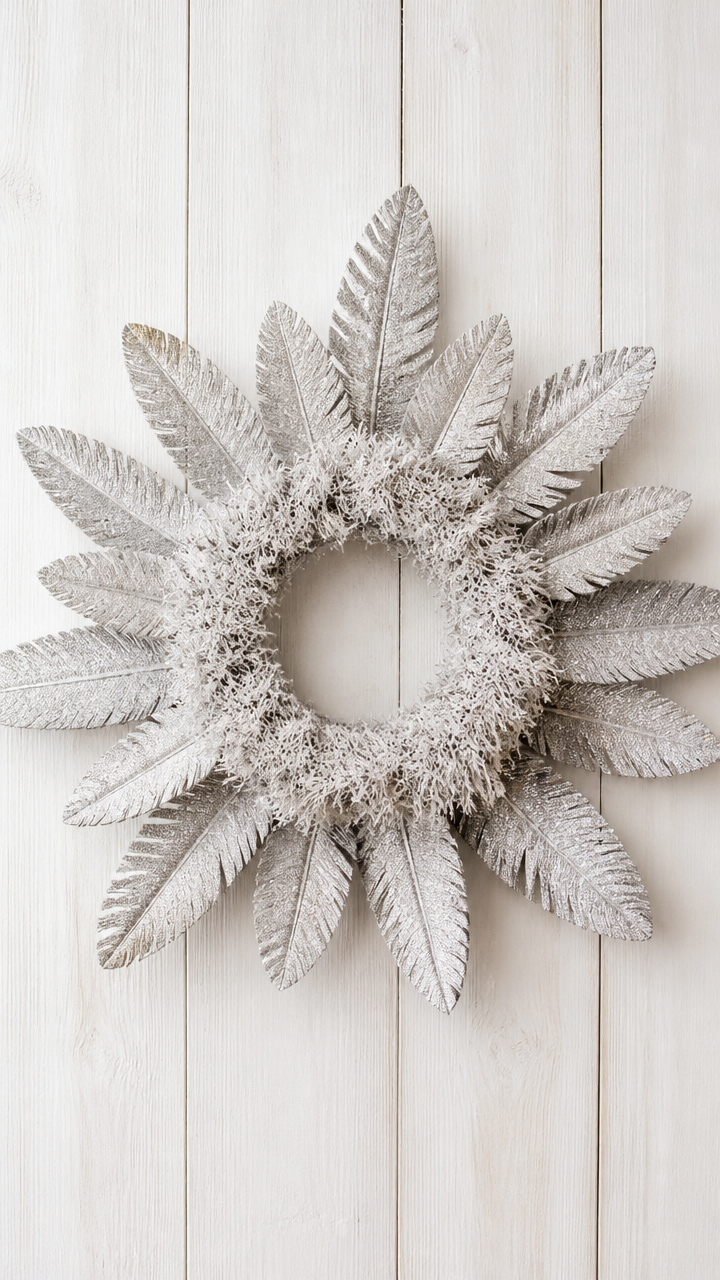
Delicate feather shapes fan out in a circular frost-kissed design. It hangs lightly and catches winter breezes indoors.
Materials Needed
- 24 standard popsicle sticks
- White craft glue
- Silver glitter (fine)
- Styrofoam wreath base (6-inch outer diameter)
- Scissors
- Pencil
- Ruler
How to Make It
- Cut six sticks in half lengthwise to make 12 thin strips.
- Lay each full stick flat and draw a feather shape with pencil, wider at one end and tapering to a point.
- Use scissors to cut out each feather shape from the full and half sticks.
- Apply a thin line of white craft glue along the central shaft of each feather.
- Sprinkle silver glitter evenly over the glue and let dry for 20 minutes.
- Glue the feathers in overlapping layers around the Styrofoam base, starting from the outer edge and working inward.
- Let the wreath sit undisturbed for 2 hours before hanging.
12. Penguin Bookend
Advanced
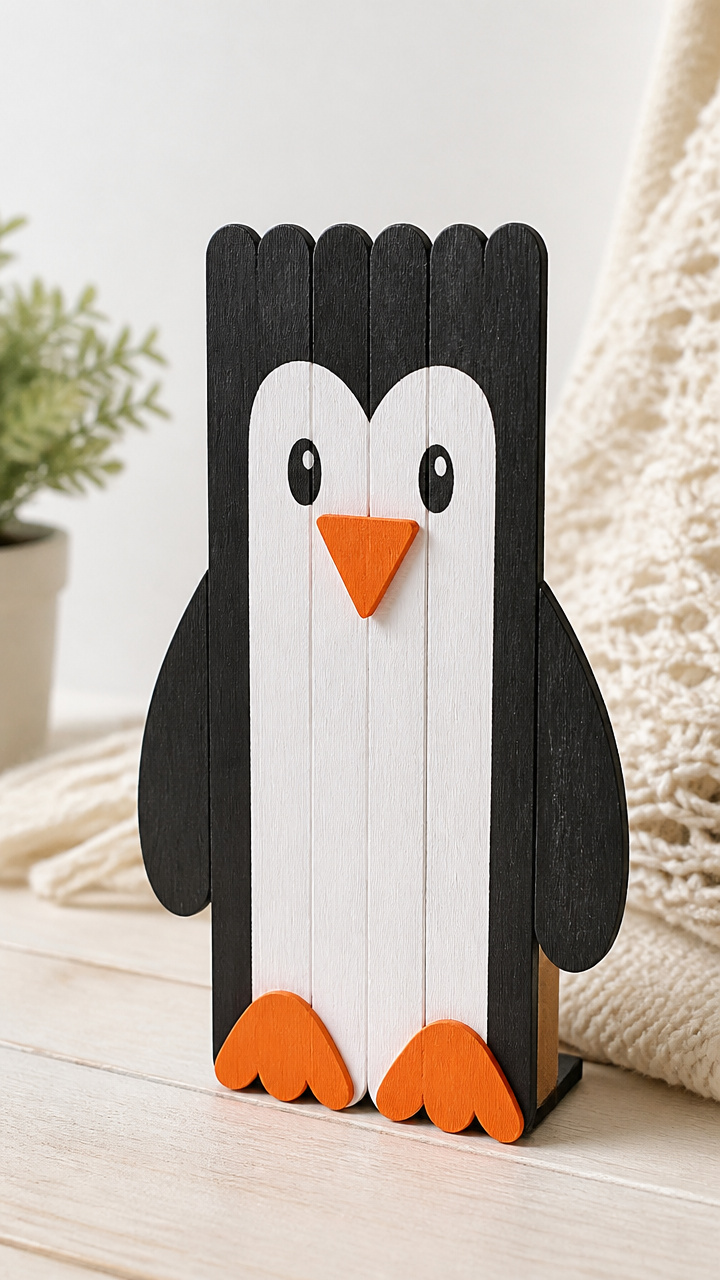
A sturdy black-and-white bird stands at attention, ready to hold your favorite stories. Its flat back keeps books upright.
Materials Needed
- 10 wide popsicle sticks
- Black acrylic paint
- White acrylic paint
- Orange craft foam (2×2 inch)
- Hot glue gun with glue sticks
- Paintbrush (small flat)
- Scissors
- Metal bookend insert (2.5×4 inch)
How to Make It
- Paint six wide sticks black and four white, using the flat brush, and let dry for 20 minutes.
- Glue three black sticks side by side to form the back panel, edges flush.
- Attach two white sticks vertically to the front center of the black panel to form the belly.
- Glue two more black sticks horizontally across the top and bottom for stability.
- Cut the orange foam into a small triangle beak and glue it where the head meets the body.
- Affix the metal insert to the back panel with hot glue, covering the top half.
- Let cure for 3 hours before placing on a shelf.
13. Sled Decoration
Moderate
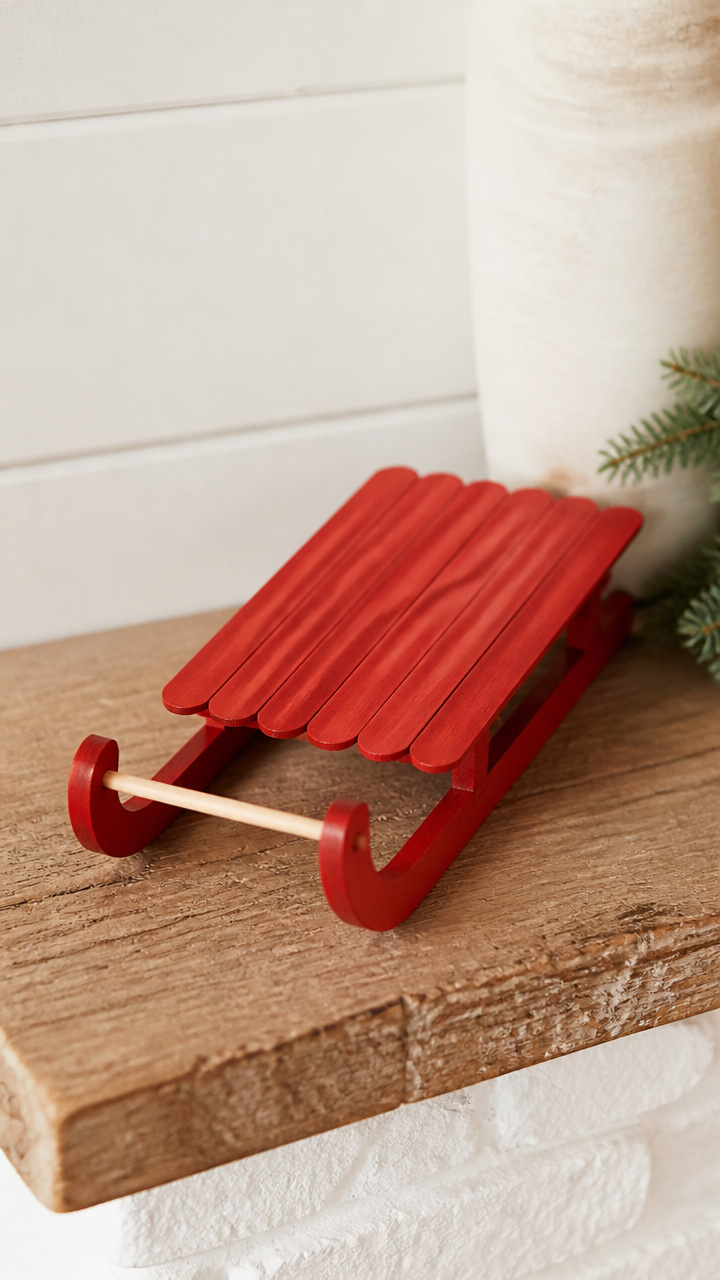
Curved runners and a slanted seat invite visions of downhill rides. Paint it red and set it on a mantel.
Materials Needed
- 7 wide popsicle sticks
- Red acrylic paint
- Wooden skewer (6 inches)
- Hot glue gun with glue sticks
- Sandpaper (medium grit)
- Paintbrush (small)
- Ruler
How to Make It
- Sand the ends of two wide sticks into gentle curves to form runners.
- Paint all seven sticks red and let dry for 15 minutes.
- Lay the two curved sticks parallel, 2 inches apart, on a flat surface.
- Glue three full sticks across the runners to form the seat, spacing them evenly.
- Cut the skewer to 3 inches and glue it diagonally across the front as a pull handle.
- Add two short support sticks underneath the seat at each end and let dry for 1 hour.
14. Northern Lights Garland
Easy
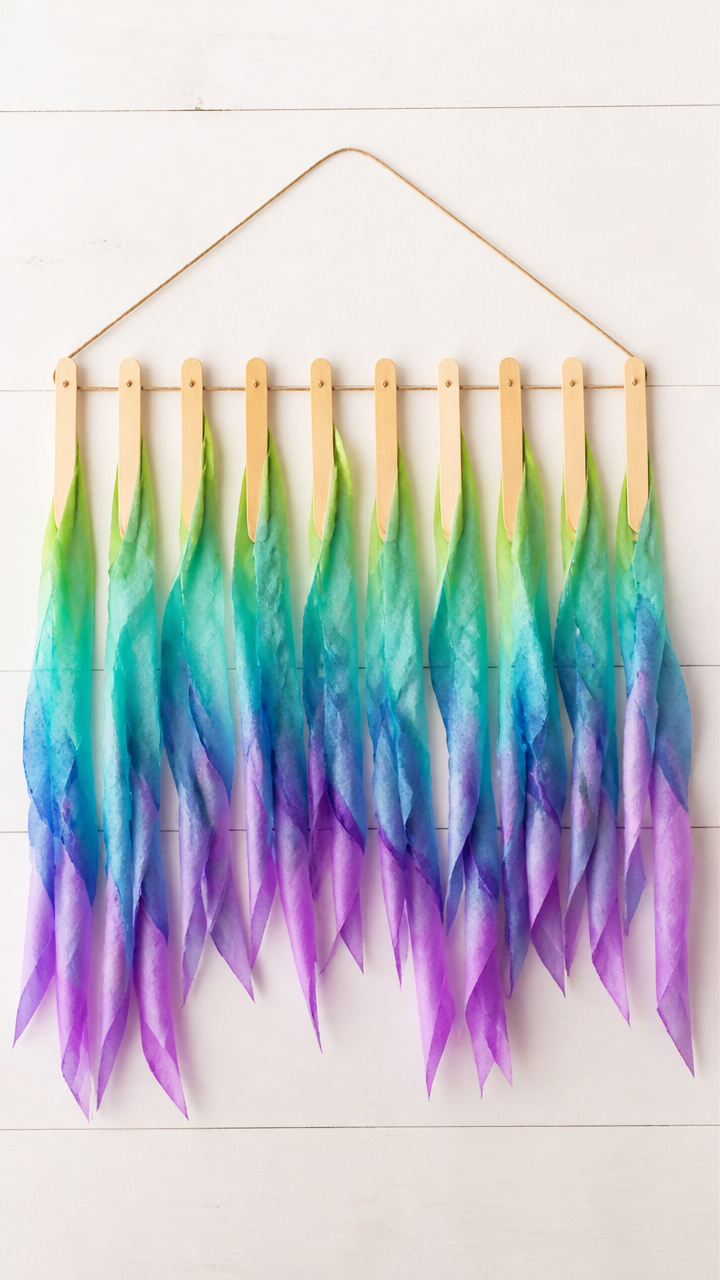
Wavy ribbons of color flow between stick posts, capturing the shimmer of auroras. Drape it above a bed or window.
Materials Needed
- 10 standard popsicle sticks
- Green tissue paper (8×10 inch sheet)
- Blue tissue paper (8×10 inch sheet)
- Purple tissue paper (8×10 inch sheet)
- White glue
- Scissors
- Twine (3 feet)
- Clothespin
How to Make It
- Cut each tissue paper sheet into 1-inch wide strips, 8 inches long.
- Layer one green, one blue, and one purple strip together and fold in half.
- Glue the folded end between two popsicle sticks pressed together to form a post.
- Repeat to make five total posts with colored streamers between.
- Let the glue dry for 20 minutes.
- Tie twine to the first and last stick, stretch taut, and clip to a wall with the clothespin.
15. Log Cabin Coaster
Moderate
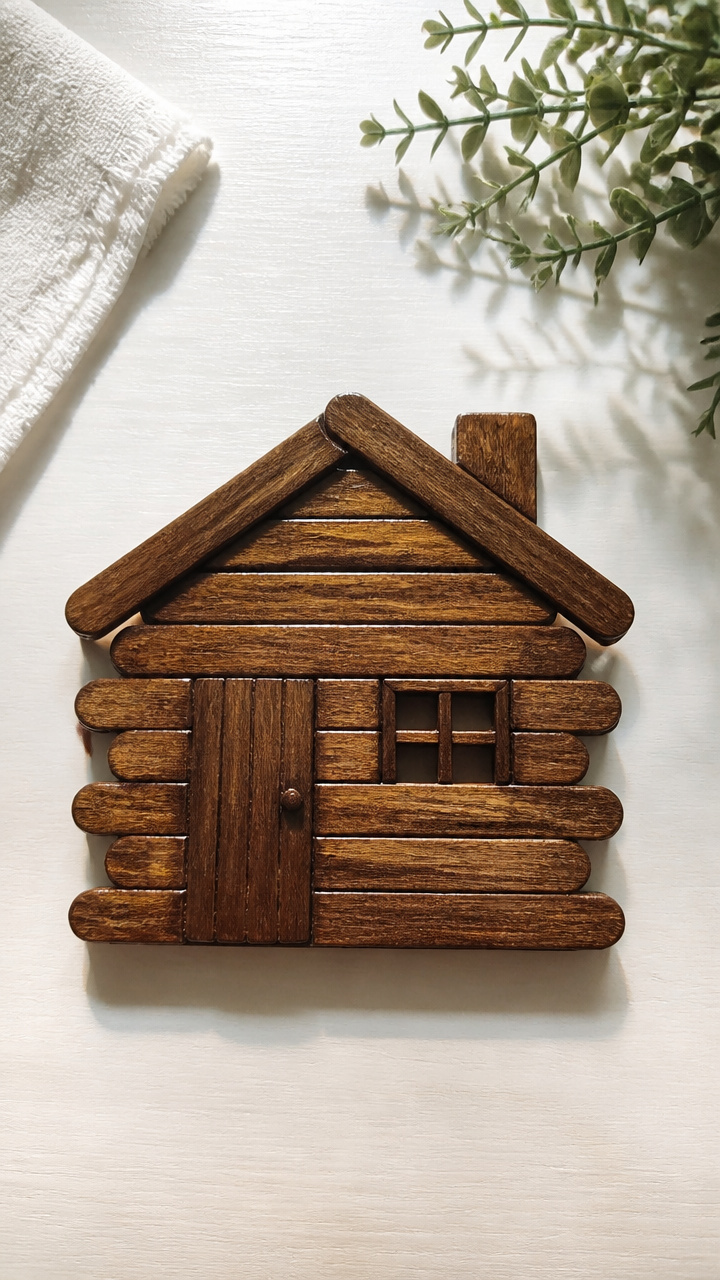
Interlocking sticks form a rustic cabin silhouette, sealed for everyday use. Each one feels like a tiny homestead.
Materials Needed
- 16 standard popsicle sticks
- Brown acrylic paint
- Clear epoxy resin (2 oz kit)
- Mixing cup
- Stir stick
- Painter’s tape
- Cardboard base (4×4 inch)
- Paintbrush (small)
How to Make It
- Paint all sticks brown and let dry for 20 minutes.
- Lay four sticks horizontally on the cardboard base, ends aligned.
- Glue four sticks vertically on top, perpendicular to the first layer.
- Add another horizontal layer, then a vertical one, alternating to form a square log pattern.
- Let the glue dry for 1 hour, then carefully peel the coaster from the cardboard.
- Tape the edges with painter’s tape and pour mixed epoxy over the top according to kit instructions.
- Let cure for 24 hours before removing tape and using.
16. Owl Ring Holder
Advanced
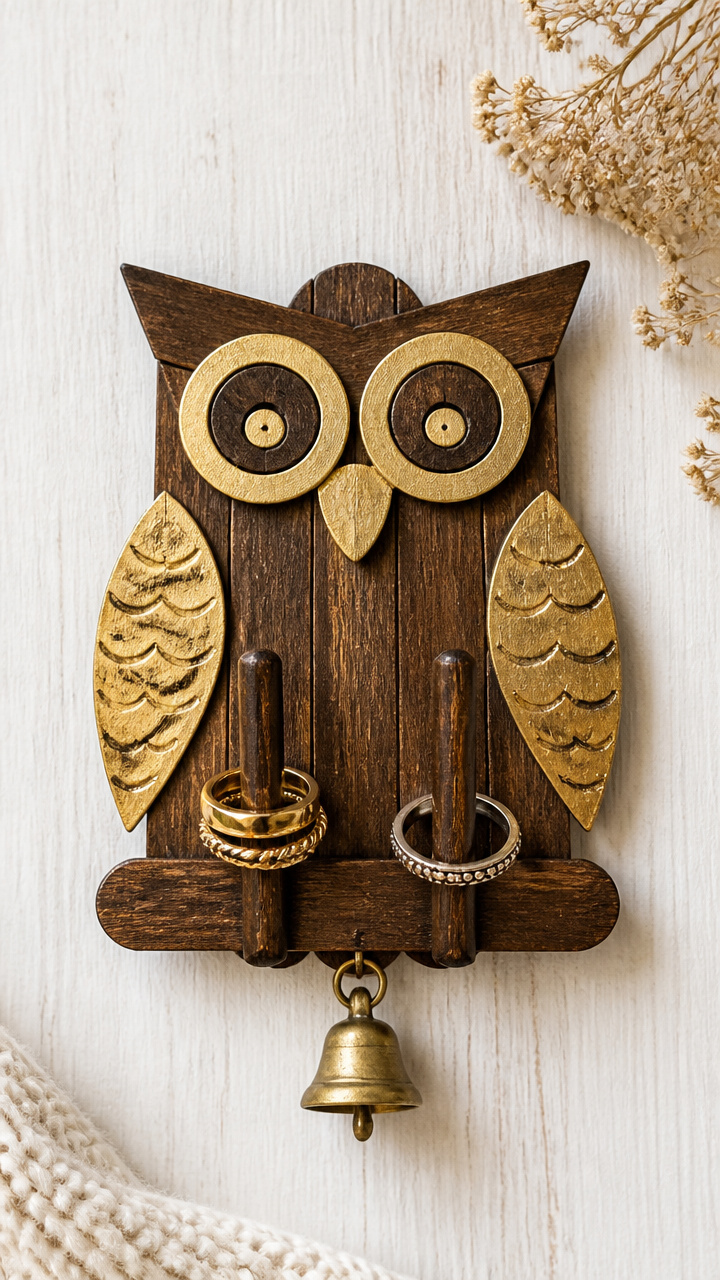
Big-eyed wisdom meets function in this charming desk piece. Rings nestle between twig-like perch arms.
Materials Needed
- 12 standard popsicle sticks
- Brown acrylic paint
- Gold acrylic paint
- Hot glue gun with glue sticks
- Small brass bell (15mm)
- Paintbrush (detail tip)
- Felt pad (1×1 inch, brown)
How to Make It
- Paint ten sticks brown and two sticks gold, using thin coats, and let dry for 20 minutes.
- Glue three brown sticks vertically in a fan shape to form the body base.
- Attach two gold sticks horizontally across the middle as wing accents.
- Glue two more brown sticks at the top to form ear tufts, angled outward.
- Paint two large eyes with gold paint using the detail brush and let dry for 10 minutes.
- Glue the brass bell to the front center as a belly accent.
- Attach the felt pad to the bottom to protect surfaces and let dry for 1 hour.
17. Frosted Pinecone Ornament
Moderate
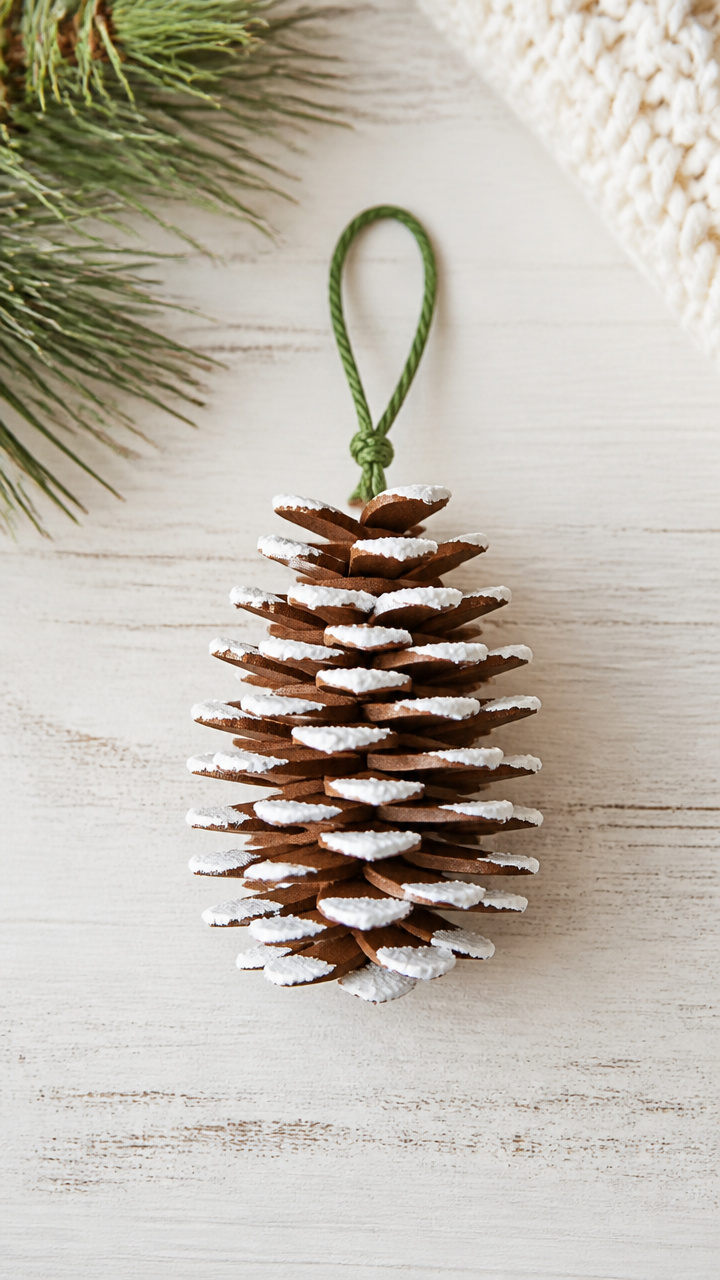
Layered sticks spiral into a pinecone shape dusted with faux snow. It hangs from a windowsill or tree branch.
Materials Needed
- 9 standard popsicle sticks
- White puffy paint
- Brown acrylic paint
- Hot glue gun with glue sticks
- Green embroidery floss (18 inches)
- Scissors
- Paintbrush (small)
How to Make It
- Paint all sticks brown and let dry for 15 minutes.
- Cut three sticks into thirds to make nine small segments.
- Glue the full sticks together at one end, fanning outward like a star.
- Layer the small segments over the base sticks, closer to the tip, angling upward.
- Squeeze white puffy paint along the edges of each segment to mimic frost and let dry for 2 hours.
- Tie green floss into a loop and glue it to the back of the cluster for hanging.
18. Snowy Fence Sign
Easy
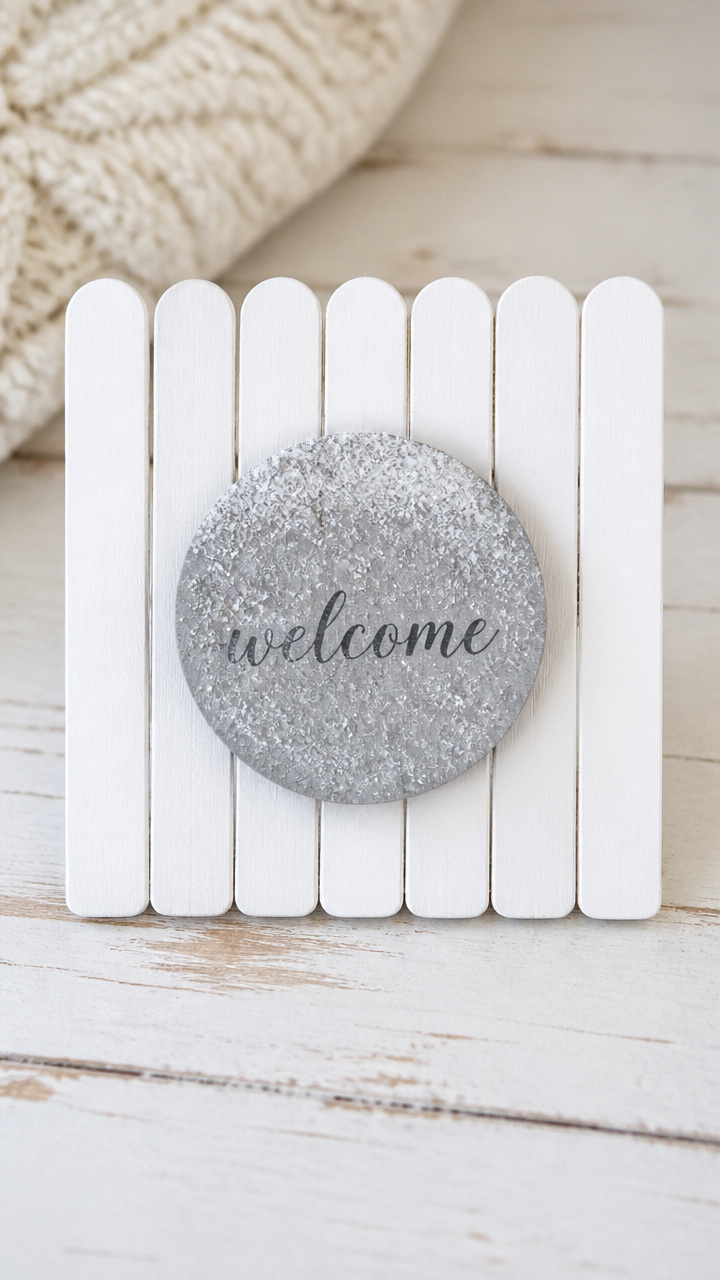
A miniature picket fence holds a hand-lettered welcome sign, dusted with sparkle. Place it on a side table or shelf.
Materials Needed
- 8 standard popsicle sticks
- White acrylic paint
- Gray acrylic paint
- Small wooden disc (1.5-inch diameter)
- Paintbrush (fine tip)
- Glitter (white, coarse)
- Glue stick
- Black marker
How to Make It
- Paint six sticks white and two sticks gray, using even coats, and let dry for 10 minutes.
- Cut the gray sticks in half to make four fence posts.
- Glue the posts vertically at each corner and center of the wooden disc.
- Write 'Welcome' on the disc with the black marker in neat block letters.
- Apply glue stick over the entire disc surface and sprinkle coarse glitter evenly.
- Shake off excess and let dry for 20 minutes.
19. Starlight House Night Light
Advanced
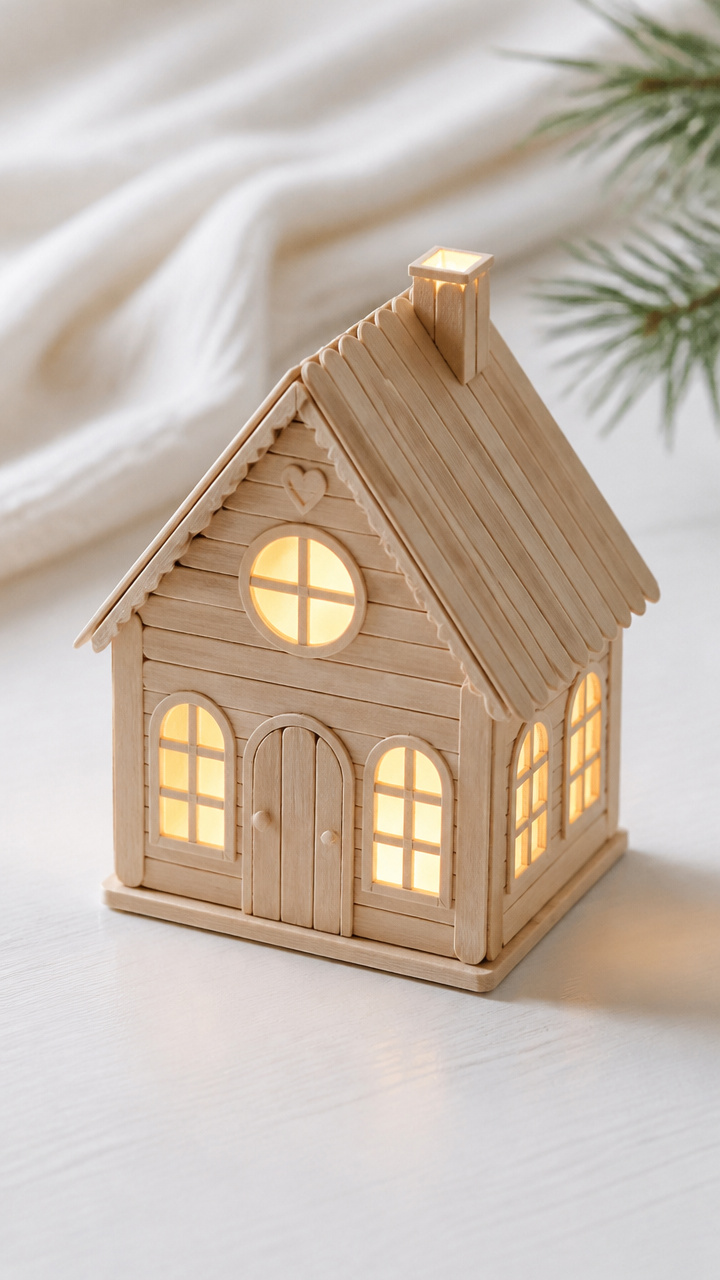
Tiny holes in stick walls glow like windows in a village cottage. Set it beside a bed for soft illumination.
Materials Needed
- 20 standard popsicle sticks
- Craft knife
- Ruler
- Pencil
- Hot glue gun with glue sticks
- Battery-powered string lights (10 bulbs, warm white)
- Tracing paper (4×4 inch)
How to Make It
- Use the ruler and pencil to mark 0.25-inch holes on four sticks, spaced evenly along the center.
- Carefully poke through each mark with the craft knife to create window openings.
- Form a square base with four uncut sticks and glue corners with hot glue.
- Stand four windowed sticks upright around the base to form walls and glue in place.
- Add a second layer of four uncut sticks, then another layer of four windowed sticks.
- Create a peaked roof by gluing two sticks at an angle across the top.
- Wrap tracing paper around the inside walls to diffuse the light, then coil the string lights within and turn on.
Grab your glue gun and a handful of sticks, and let the quiet magic of crafting carry you through the grayest afternoon. You’ve got everything you need to make something wonderful.