22 Easy Winter Home Decor Crafts for Adults on a Budget

Flickering candlelight dances across frosted pinecones tucked into a ceramic bowl, and a hand-knit throw drapes softly over the arm of your couch. These small touches don’t need to cost much or take all weekend to make.
You can create cozy, thoughtful decor with materials you already own or can pick up for under ten dollars. Each of these crafts brings warmth to your space without draining your wallet or your time.
1. Pinecone Firestarter Bundles
Easy
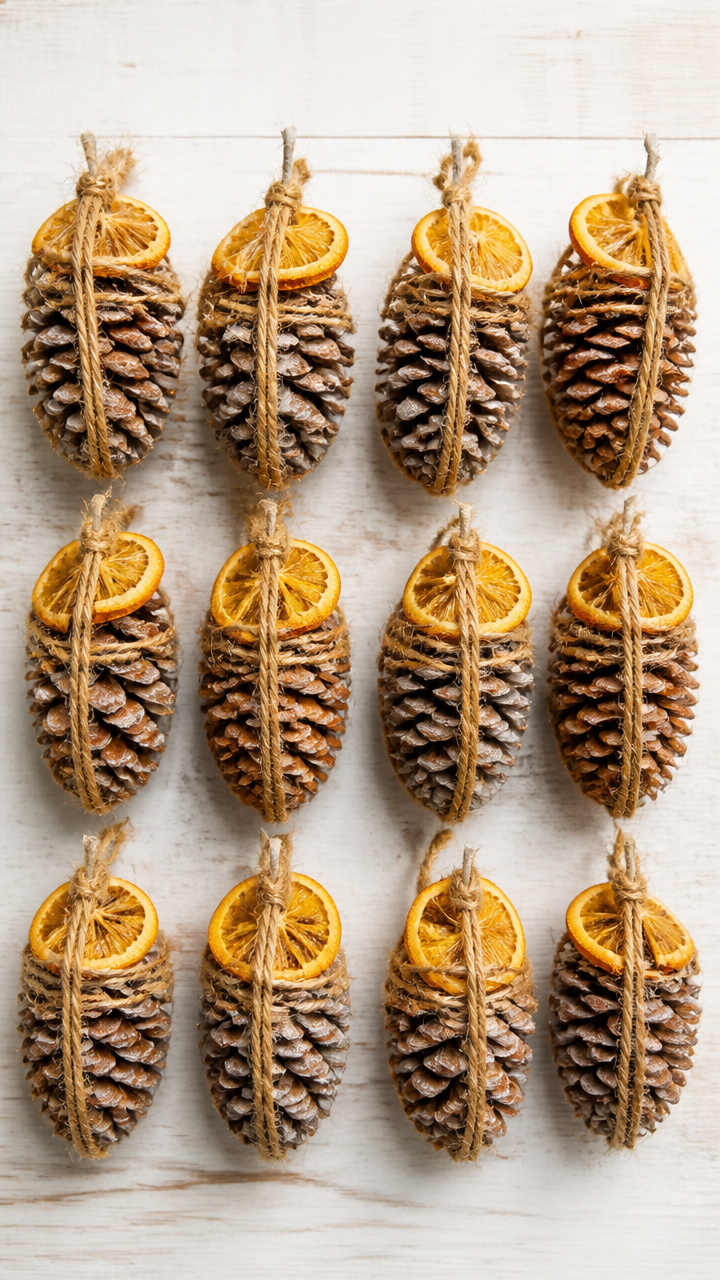
Crisp pine scent fills the air as flames curl around tightly wrapped cones. These rustic firestarters make wood-burning easier and add natural charm to your hearthside setup.
Materials Needed
- 12 medium pinecones
- 1 cup dried orange slices
- 1 bar unscented paraffin wax
- 1 roll jute twine
- 1 metal pouring pitcher
- double boiler
How to Make It
- Melt the paraffin wax in the double boiler using the metal pouring pitcher.
- Dip each pinecone into the melted wax, letting excess drip off for 10 seconds.
- Press one dried orange slice onto the top of each wax-coated pinecone.
- Tie a 12-inch piece of jute twine around the base of each cone and knot it securely.
2. Knit Cable Throw Pillow Cover
Moderate
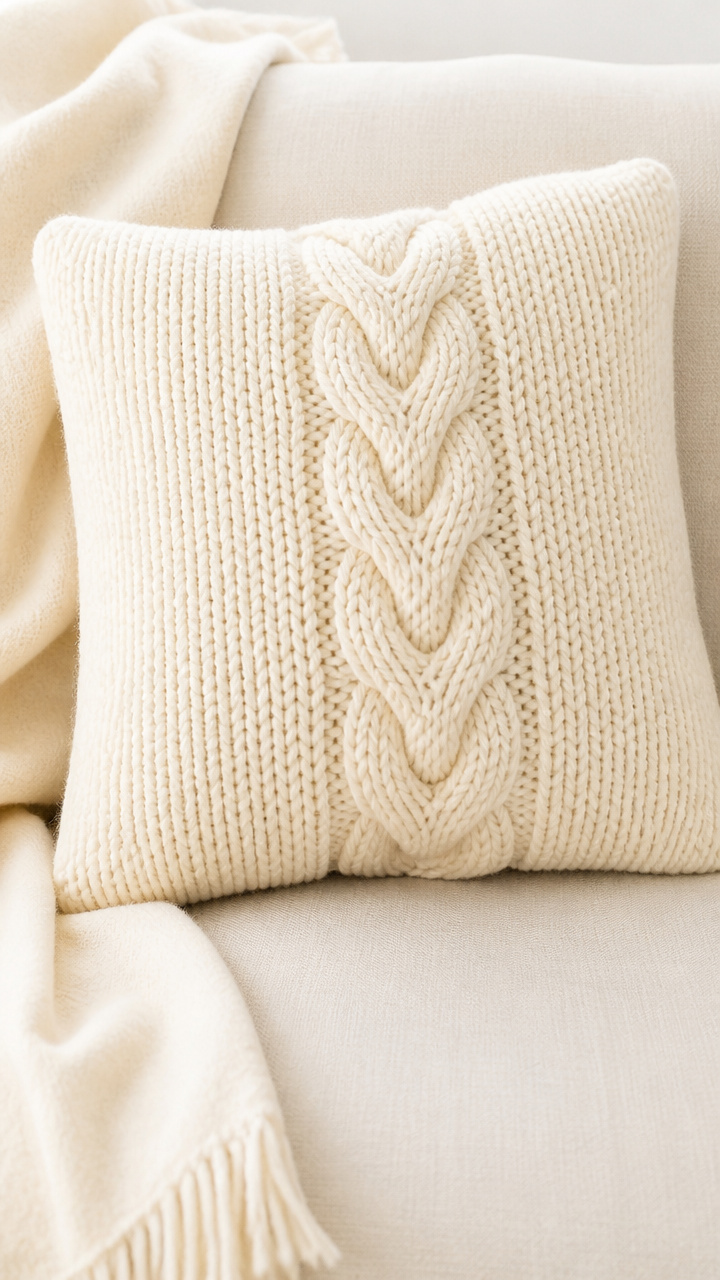
Thick wool loops form a braided ridge down the center of this soft pillow cover. You only need basic knitting skills and one evening to complete it.
Materials Needed
- 1 skein bulky cream wool yarn (approx. 150 yards)
- size 10 knitting needles
- pillow insert (18 x 18 inches)
- yarn needle
- scissors
How to Make It
- Cast on 36 stitches using the long-tail cast-on method.
- Knit 4 rows in garter stitch to create the border.
- Work in cable pattern: knit 6, cable 6 (cross right over left every 4 rows), knit 12, cable 6, knit 6 for 20 rows.
- Knit 4 more rows in garter stitch, then bind off loosely.
- Fold in half with right sides together and sew side seams using the mattress stitch; weave in ends with a yarn needle.
3. Frosted Eucalyptus Wreath
Easy
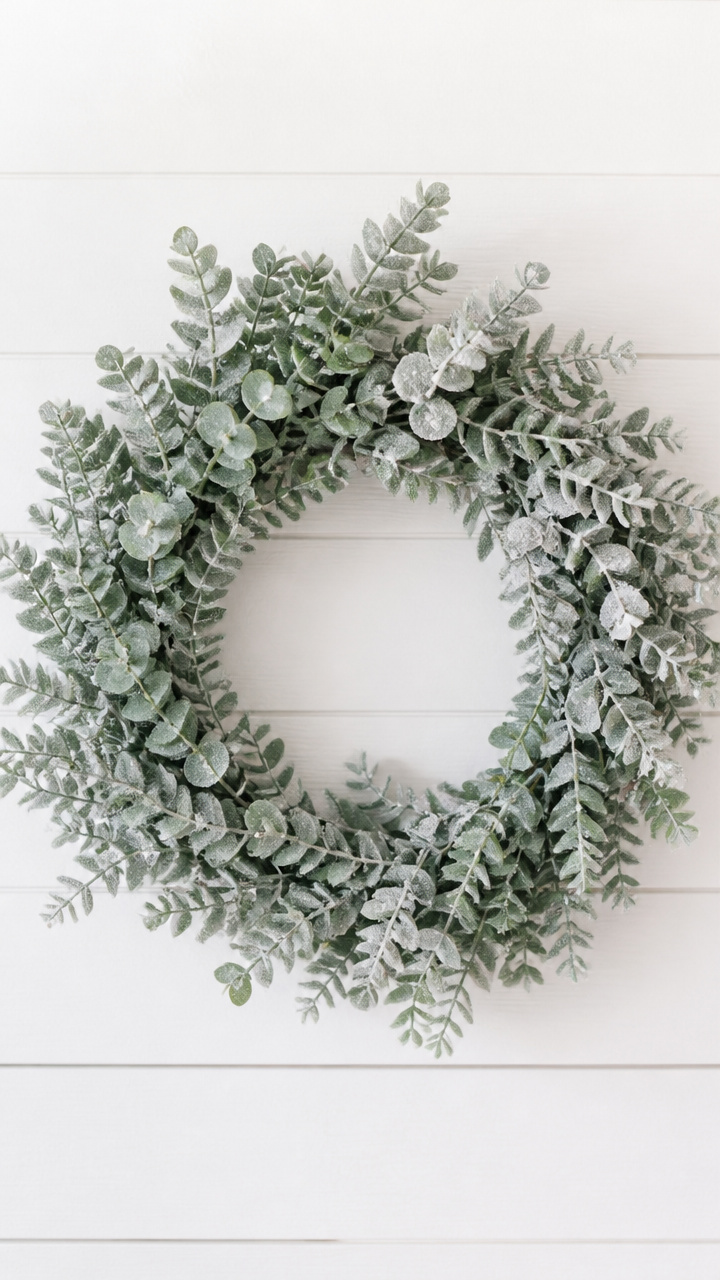
Silvery leaves shimmer with a light frost-like coating, hanging fresh above your mantel. This wreath lasts weeks and needs no watering.
Materials Needed
- 1 wire wreath frame (12 inch diameter)
- 1 bunch preserved eucalyptus stems
- 1 can artificial snow spray
- floral wire (22 gauge)
- wire cutters
How to Make It
- Cut eucalyptus stems into 6-inch lengths using wire cutters.
- Wrap each stem to the frame with floral wire, overlapping slightly as you go around.
- Spray the entire wreath lightly with artificial snow spray from 10 inches away, holding for 2 seconds per section.
- Let dry flat for 20 minutes before hanging.
4. Salt Dough Ornaments
Easy
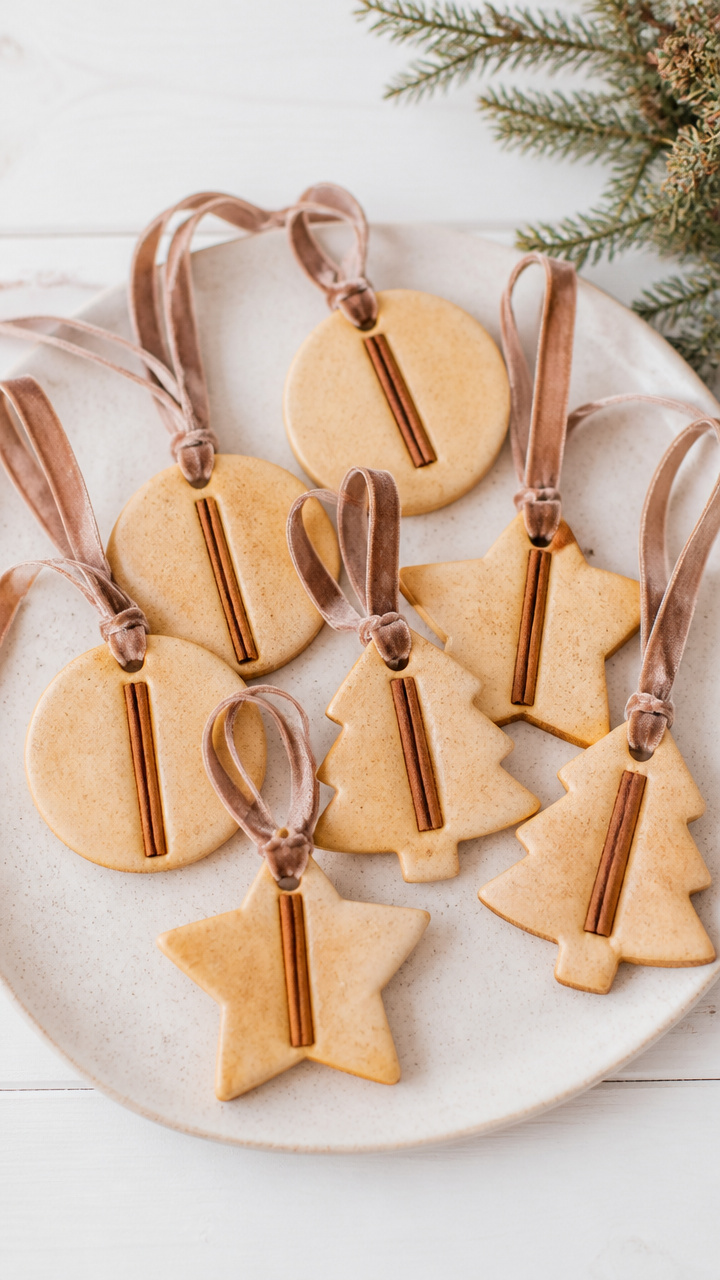
Simple dough shaped into stars and stamped with cinnamon sticks becomes timeless tree decor. Bake them until crisp and hang with velvet ribbon.
Materials Needed
- 2 cups all-purpose flour
- 1 cup table salt
- 1 cup warm water
- cinnamon stick
- cookie cutters (star, circle, tree shapes)
- wooden skewer
- red velvet ribbon (1/8 inch wide, 24 inches)
- baking sheet
- parchment paper
How to Make It
- Mix flour, salt, and warm water in a bowl until a smooth dough forms, about 3 minutes.
- Roll dough to 1/4 inch thickness on a floured surface.
- Cut shapes using cookie cutters, then press a cinnamon stick into each for texture.
- Use a skewer to poke a hole near the top edge of each ornament.
- Place on a parchment-lined baking sheet and bake at 250°F for 2 hours until hard.
- Thread ribbon through holes after cooling and tie into loops.
5. Linen Table Runner with Dip-Dye Hem
Easy
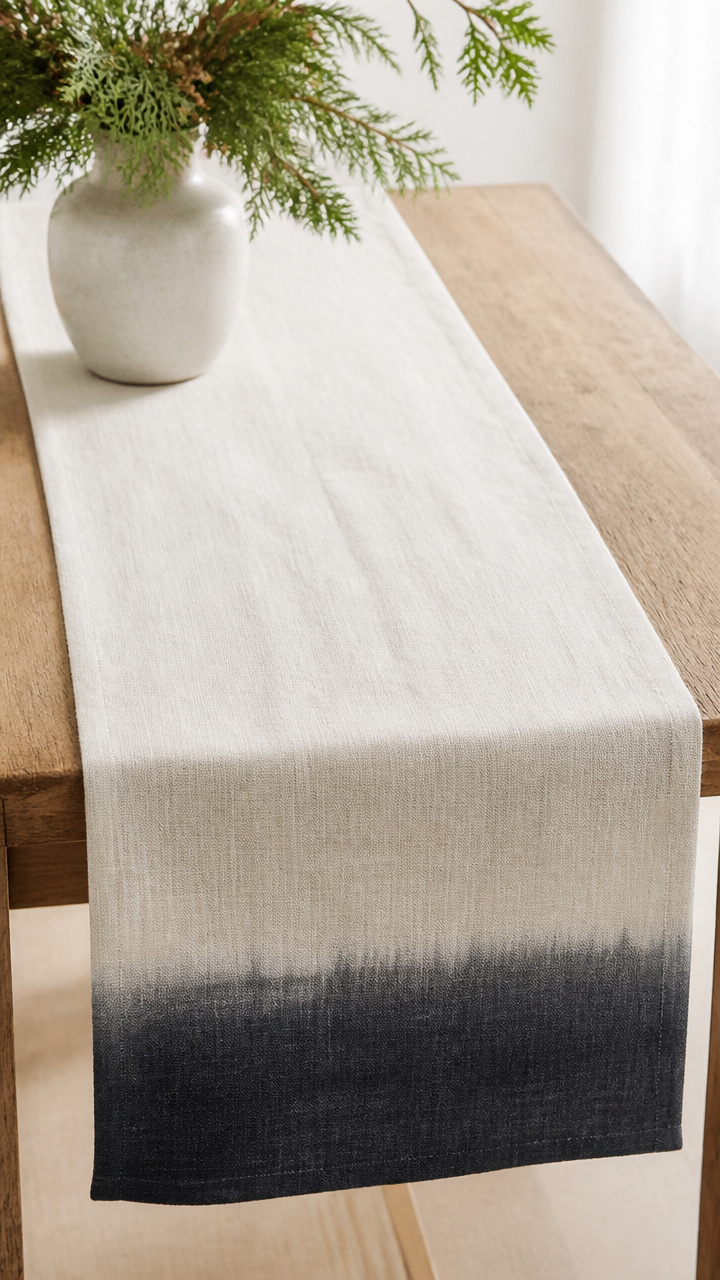
Natural undyed linen flows down your dining table, ending in a soft charcoal gradient. The ombre effect takes minutes but looks store-bought.
Materials Needed
- 1 yard unbleached linen fabric (45 inches wide)
- fabric scissors
- 1 bottle black fabric dye (liquid, 8 oz)
- plastic mixing container
- rubber gloves
- measuring cup
How to Make It
- Cut the linen to 72 inches long using fabric scissors.
- Mix 6 oz of fabric dye with 2 cups warm water in the plastic container.
- Wearing gloves, dip the bottom 6 inches of the runner into the dye, submerging evenly.
- Hold for 3 minutes, then slowly lift out at a 10-degree angle to create a fade.
- Lay flat to dry for 4 hours, then rinse under cold water until clear.
6. Birch Log Candle Holders
Easy
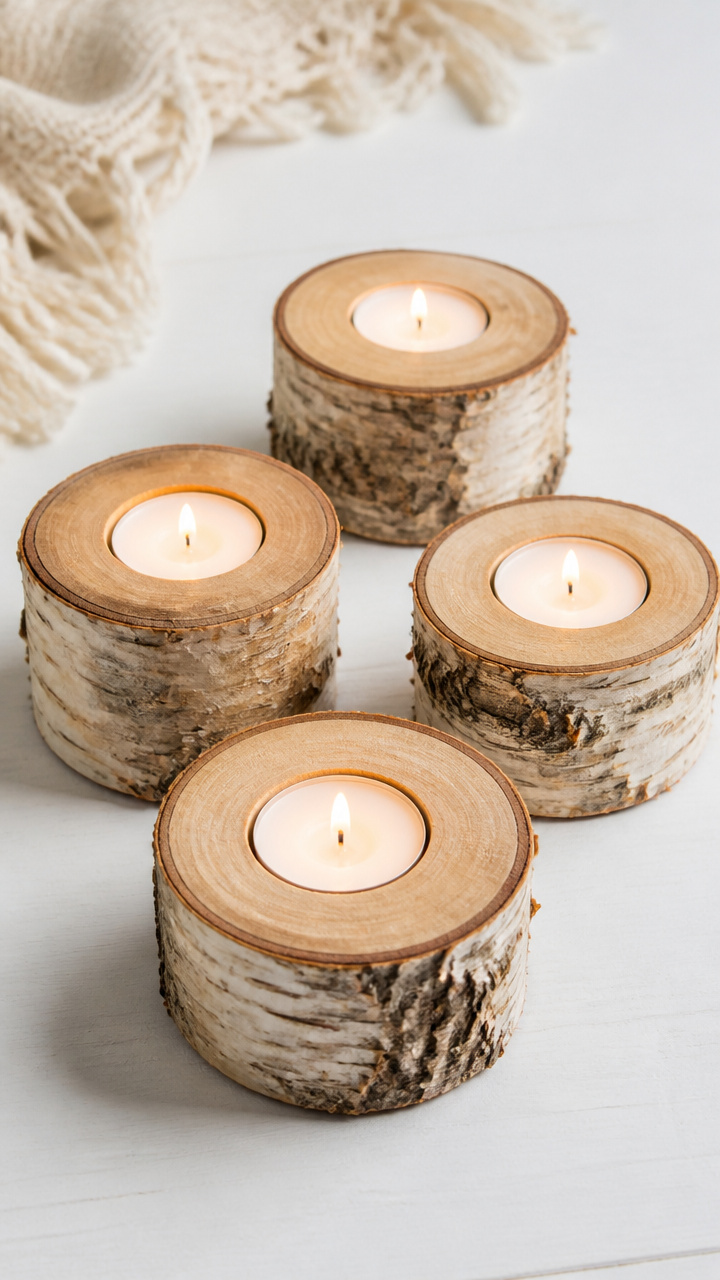
Short birch slices cradle tea lights in their centers, glowing warmly on a windowsill. Natural bark edges keep the wood feeling forest-fresh.
Materials Needed
- 4 birch log rounds (3 inches thick, 4 inches diameter)
- drill with 1 1/2 inch spade bit
- sandpaper (120 grit)
- 4 unscented tea lights
- outdoor work mat
How to Make It
- Sand the top and bottom of each log round with 120 grit sandpaper until smooth.
- Mark the center of each round with a pencil.
- Using the drill and spade bit, bore a 1 1/2 inch deep hole into the center of each log.
- Wipe sawdust from holes and place one tea light in each.
7. Wool Dryer Ball Garland
Easy
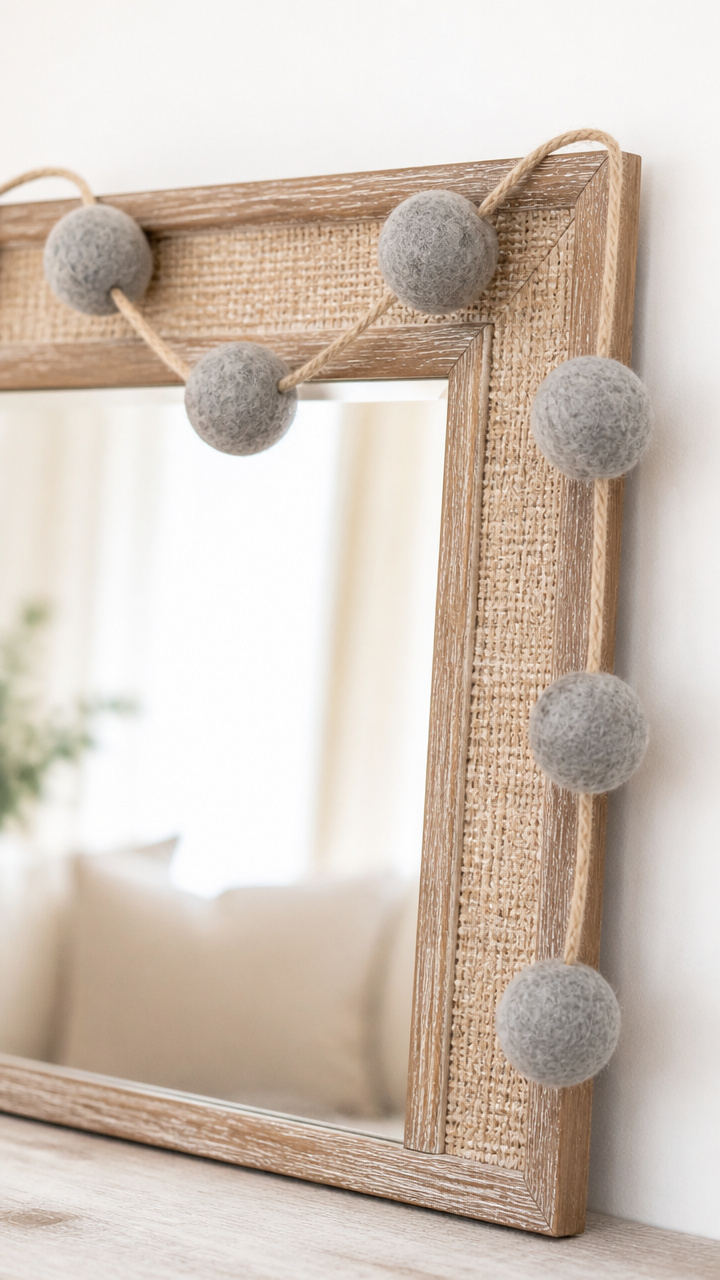
Soft gray dryer balls strung in a loose chain drape over a mirror frame. They add texture and serve as a conversation starter.
Materials Needed
- 6 wool dryer balls
- linen thread (3 mm thickness)
- needle (large-eye)
- scissors
How to Make It
- Thread the needle with 60 inches of linen thread.
- Push the needle through the center of the first dryer ball, pulling thread all the way through.
- Tie a double knot behind the ball to secure it.
- Repeat threading and knotting with remaining balls, spacing each 4 inches apart along the thread.
8. Maple Branch Towel Rack
Moderate
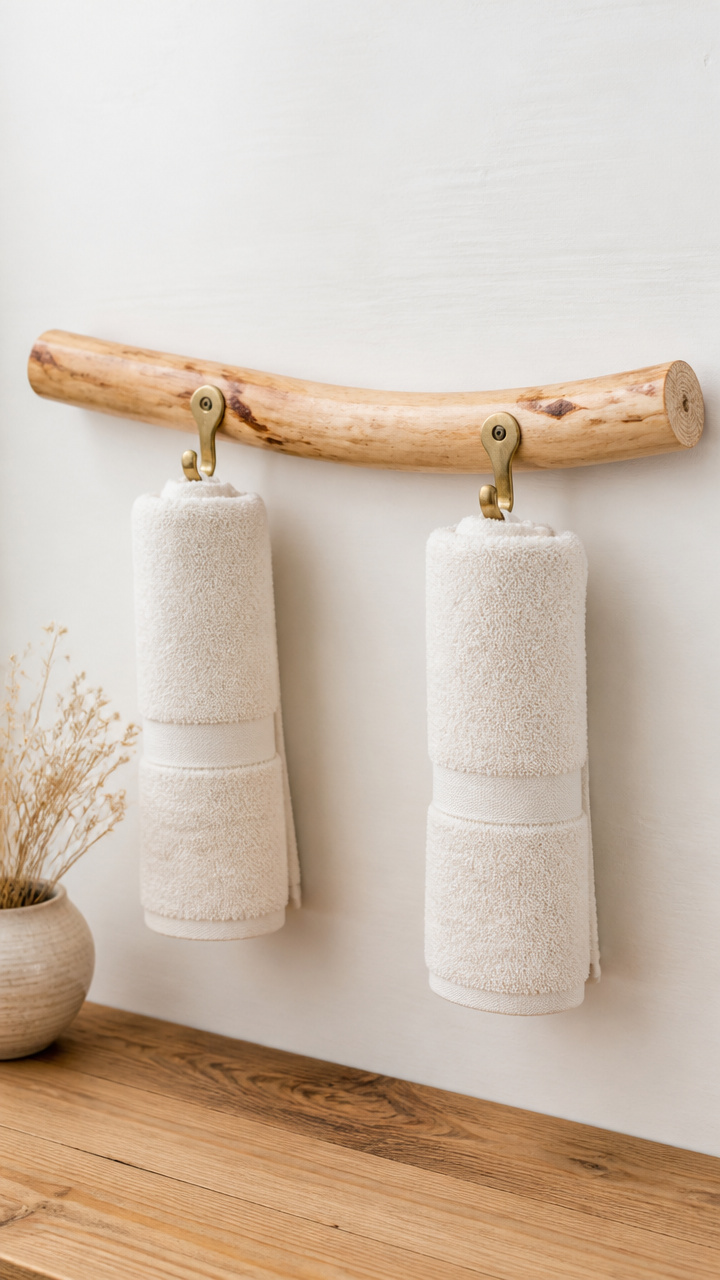
A curved maple branch stripped of bark holds rolled towels in your guest bath. Rustic hardware makes it sturdy and simple to mount.
Materials Needed
- 1 maple branch (24 inches long, 1.5 inches diameter, debarked)
- 2 brass cup hooks (1 inch size)
- wall anchors and screws (included in kit)
- drill with 1/8 inch bit
- screwdriver
- sandpaper (220 grit)
How to Make It
- Sand the entire branch with 220 grit sandpaper until smooth.
- Mark two points 8 inches from each end on the underside of the branch.
- Drill a 1/8 inch pilot hole at each mark.
- Screw a brass cup hook into each hole by hand, turning clockwise until tight.
- Mount the wall anchors into the wall, then screw the branch into place using the cup hooks as hangers.
9. Cinnamon Stick Bouquet
Easy
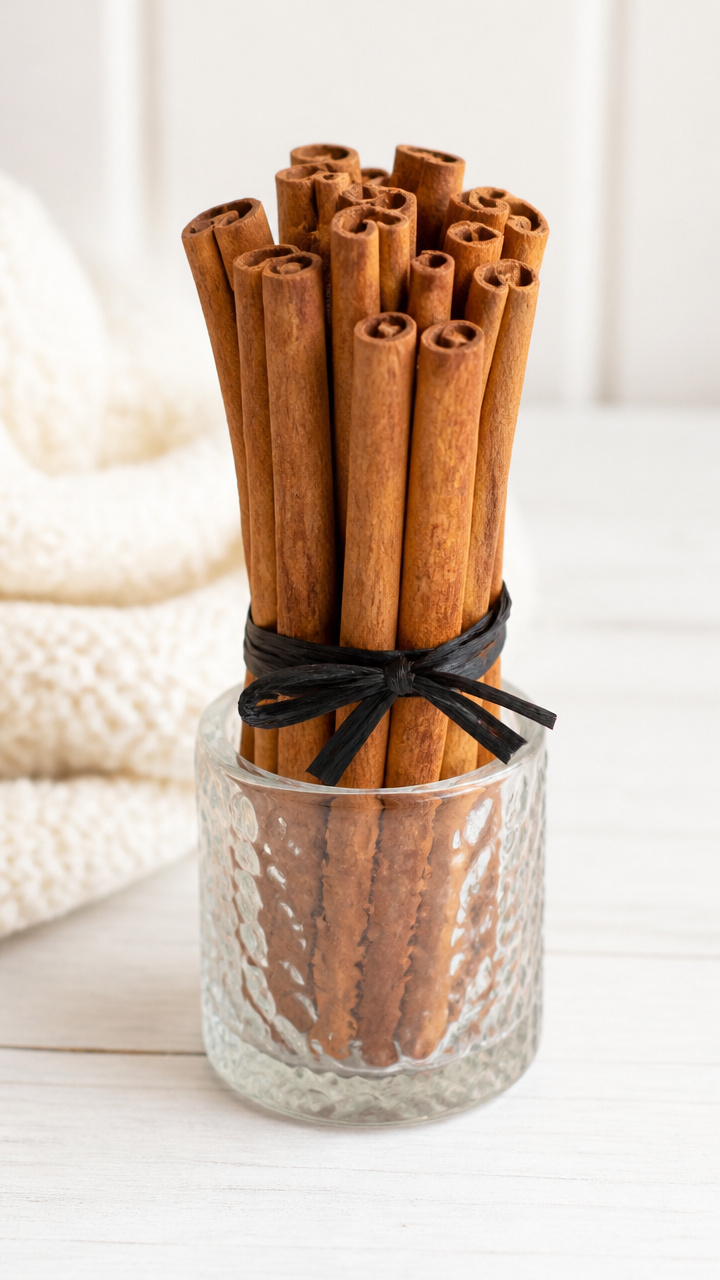
Tightly bound cinnamon sticks release a spicy warmth when touched. Display them upright in a narrow vase like a fragrant flower arrangement.
Materials Needed
- 20 cinnamon sticks (6 inches long)
- black raffia (1/4 inch width)
- scissors
- small glass vase (3 inch opening)
How to Make It
- Lay all cinnamon sticks side by side in a bundle.
- Wrap raffia around the center of the bundle and tie a double knot.
- Trim the ends of the sticks evenly with scissors if needed.
- Place the bouquet upright in the glass vase.
10. Chalkboard Paint Mason Jar Labels
Easy
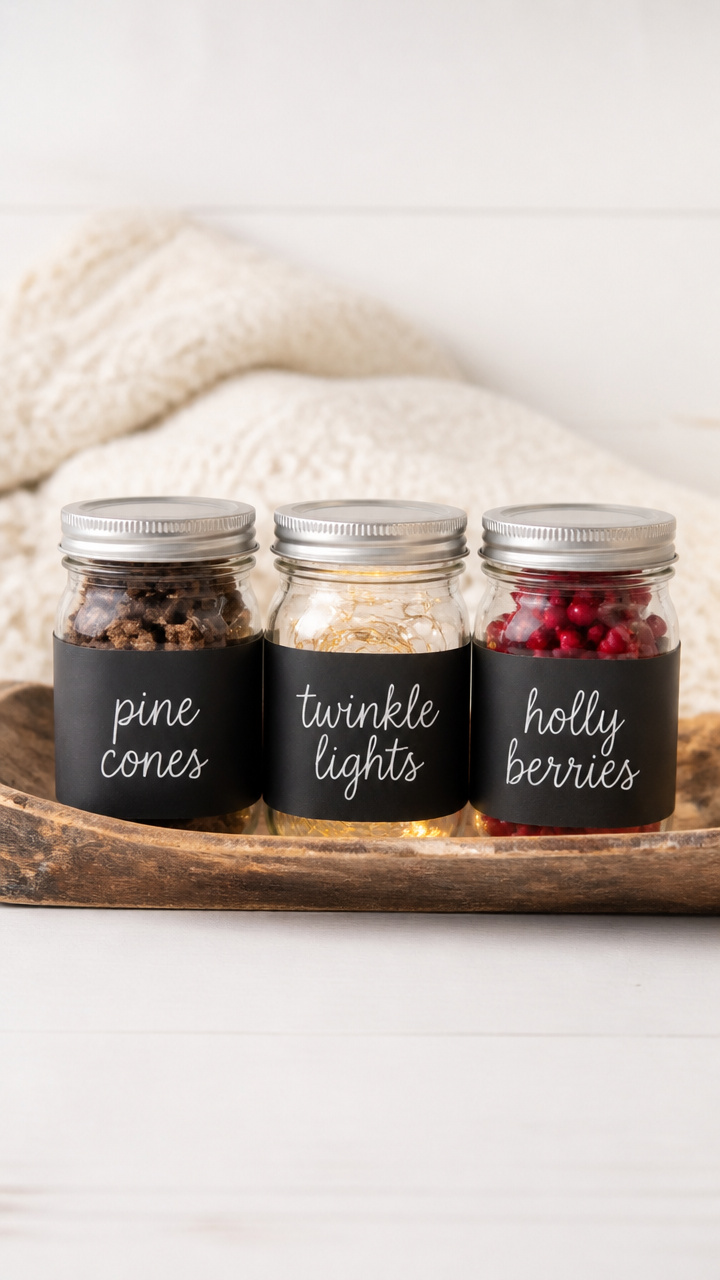
Small mason jars hold cotton balls or spices, each labeled in neat white script. Chalkboard paint turns glass into reusable writing space.
Materials Needed
- 3 mason jars with lids (8 oz size)
- chalkboard paint (2 oz bottle)
- paintbrush (1/2 inch flat)
- white chalk pencil
- paper towel
How to Make It
- Clean each jar lid with a dry paper towel to remove dust.
- Paint the top surface of each lid with one even coat of chalkboard paint using the flat brush.
- Let dry for 2 hours, then apply a second coat.
- After 4 hours, write contents on each lid with the white chalk pencil.
11. Flannel Pillow Accents
Easy
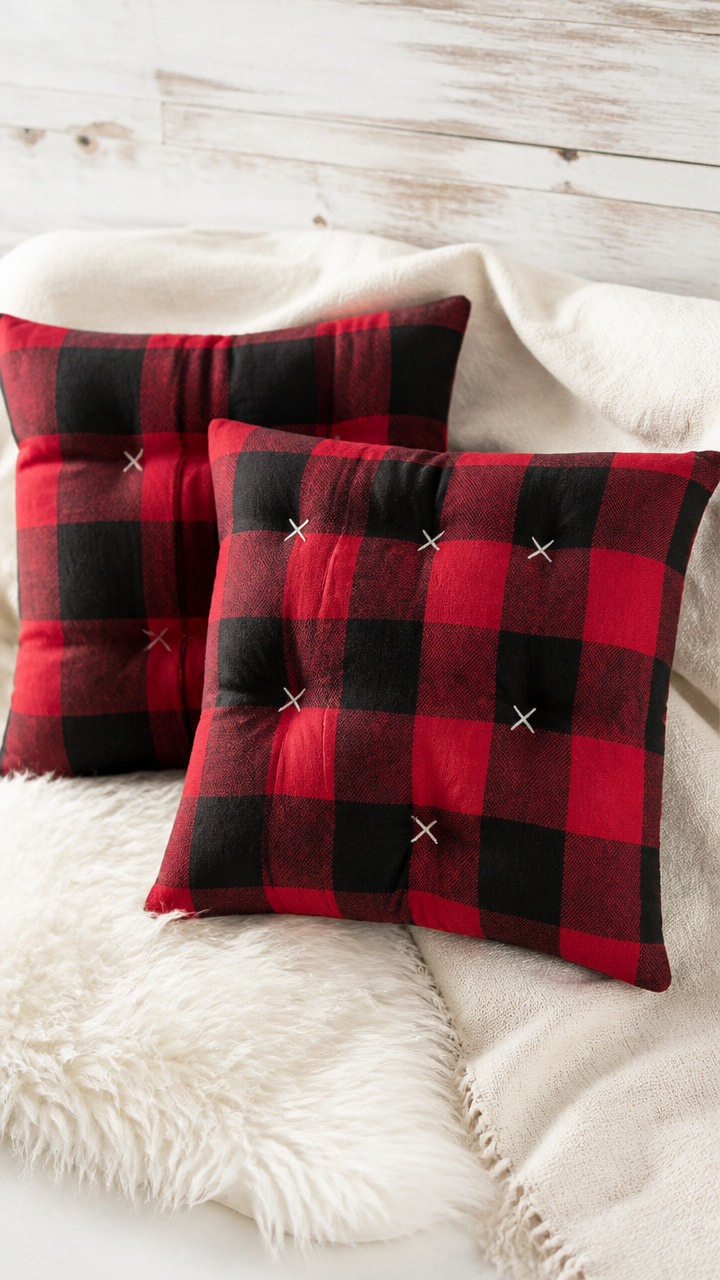
Red and black plaid squares stitched into tufted cushions bring lodge-style comfort to your sofa. No sewing machine required.
Materials Needed
- 1 yard red-and-black cotton flannel
- polyester stuffing (8 oz bag)
- embroidery needle
- embroidery floss (black, 6-strand)
- scissors
- ruler
- disappearing ink fabric pen
How to Make It
- Cut two 12×12 inch squares from the flannel using scissors and ruler.
- Place pieces together with right sides facing and pin edges.
- Using the embroidery needle and doubled floss, backstitch around three sides with a 1/4 inch seam allowance.
- Turn right side out and stuff firmly with polyester filling.
- Hand-stitch the open side closed with a ladder stitch.
- Mark center with the fabric pen and tie a French knot there using black floss.
12. Snowy Branch Centerpiece
Easy
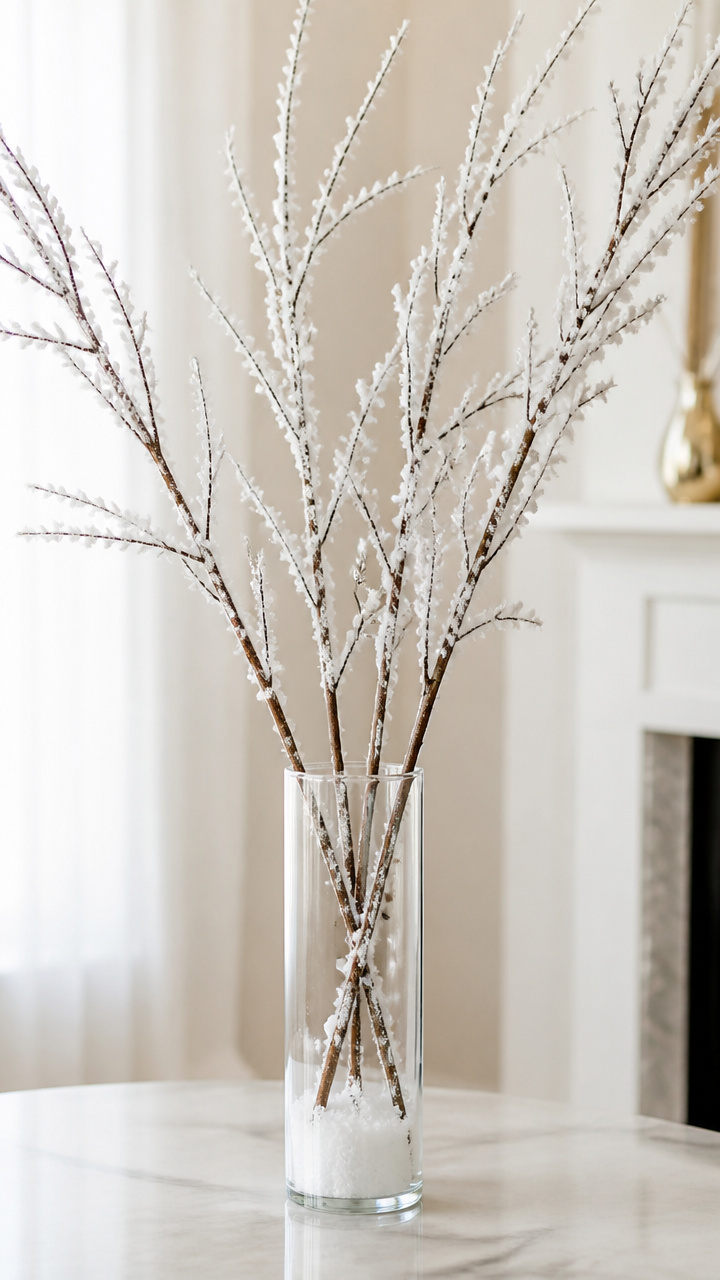
A tall glass vase holds bare branches dusted in faux snow, catching light like ice. It stands quietly beautiful on any console table.
Materials Needed
- 3 bare winter branches (24 inches tall)
- 1 clear glass vase (8 inch height)
- artificial snow spray (6 oz can)
- newspaper
- protective gloves
How to Make It
- Lay newspaper on a flat surface outdoors or in a ventilated area.
- Hold each branch upright and spray evenly with artificial snow from 8 inches away, covering outer twigs.
- Let dry for 15 minutes between coats, applying a second light layer.
- Place branches in the vase, arranging them to fan outward naturally.
13. Denim Coasters
Easy
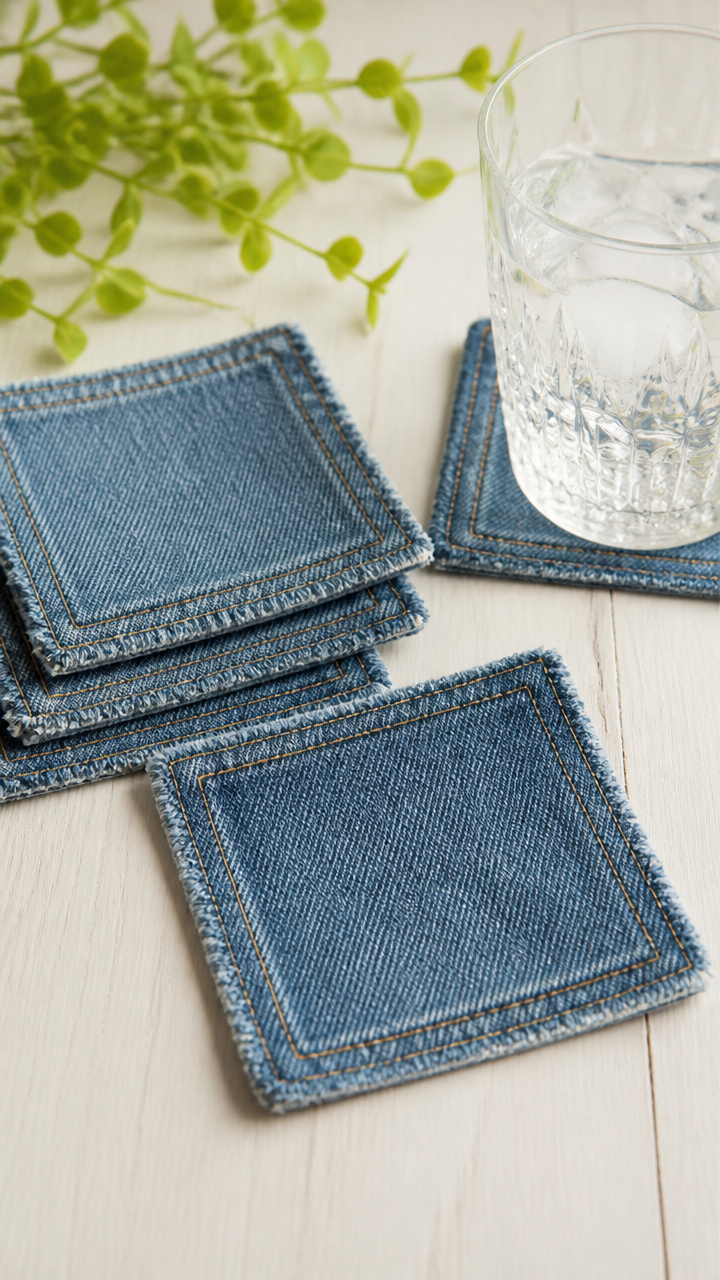
Old jeans become thick, absorbent coasters edged with contrasting thread. They protect tables and reduce fabric waste.
Materials Needed
- old blue denim jeans
- rotary cutter
- cutting mat
- self-healing mat
- ruler
- sewing machine
- tan polyester thread
- scissors
How to Make It
- Cut four 4×4 inch squares from the thigh area of the jeans using the rotary cutter and ruler on the cutting mat.
- Stack two squares together with right sides facing.
- Sew around three sides with a 1/4 inch seam using the sewing machine and tan thread.
- Clip corners, turn right side out, and press flat with fingers.
- Topstitch 1/8 inch from the edge around all four sides to close the fourth side and reinforce.
14. Pressed Fern Art
Moderate
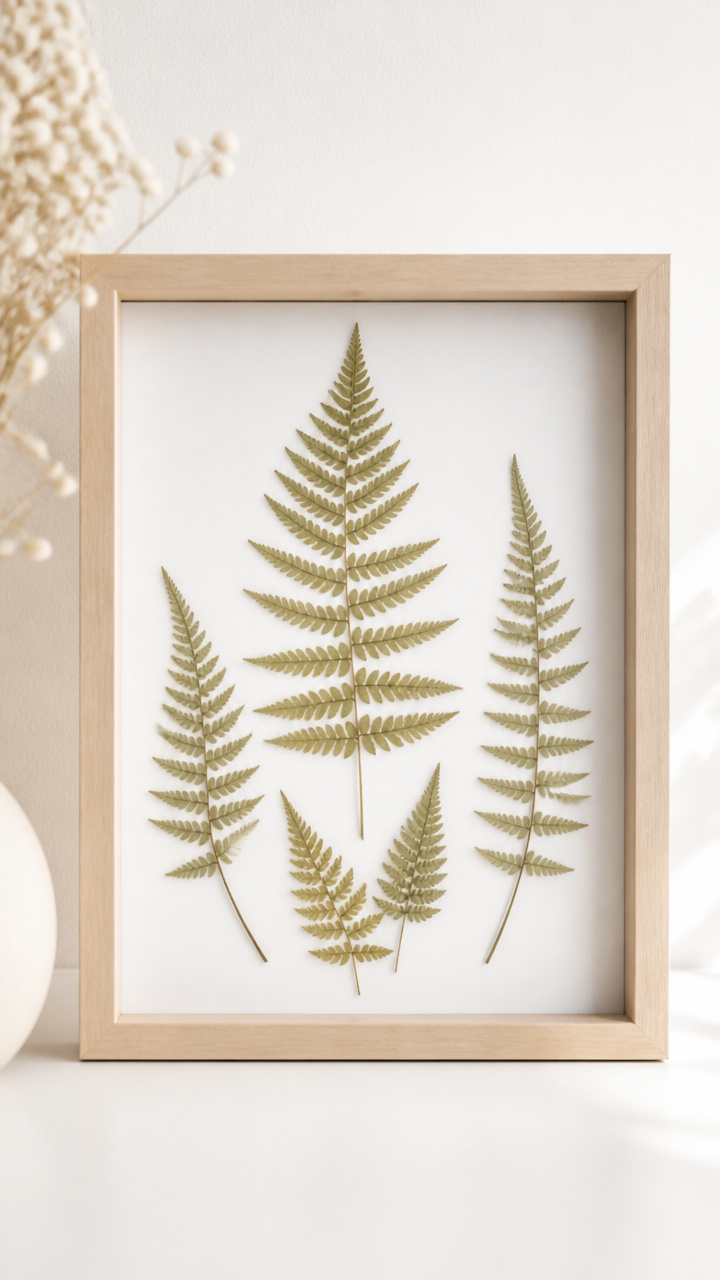
Delicate fern fronds captured between glass panes hang in a simple frame. Their fine veins look like nature’s lace against white backing.
Materials Needed
- 4 fresh fern sprigs
- heavy books
- 8×10 inch shadow box frame with glass front
- white cardstock
- acid-free glue dots
- tweezers
How to Make It
- Place each fern between two sheets of paper inside a heavy book and leave for 5 days.
- Cut the cardstock to fit the back of the shadow box.
- Arrange the pressed ferns on the cardstock in a diagonal line using tweezers.
- Secure each tip with a dab of acid-free glue dot.
- Slide the backing into the frame behind the glass and snap closed.
15. Candlelit Citrus Slices
Easy
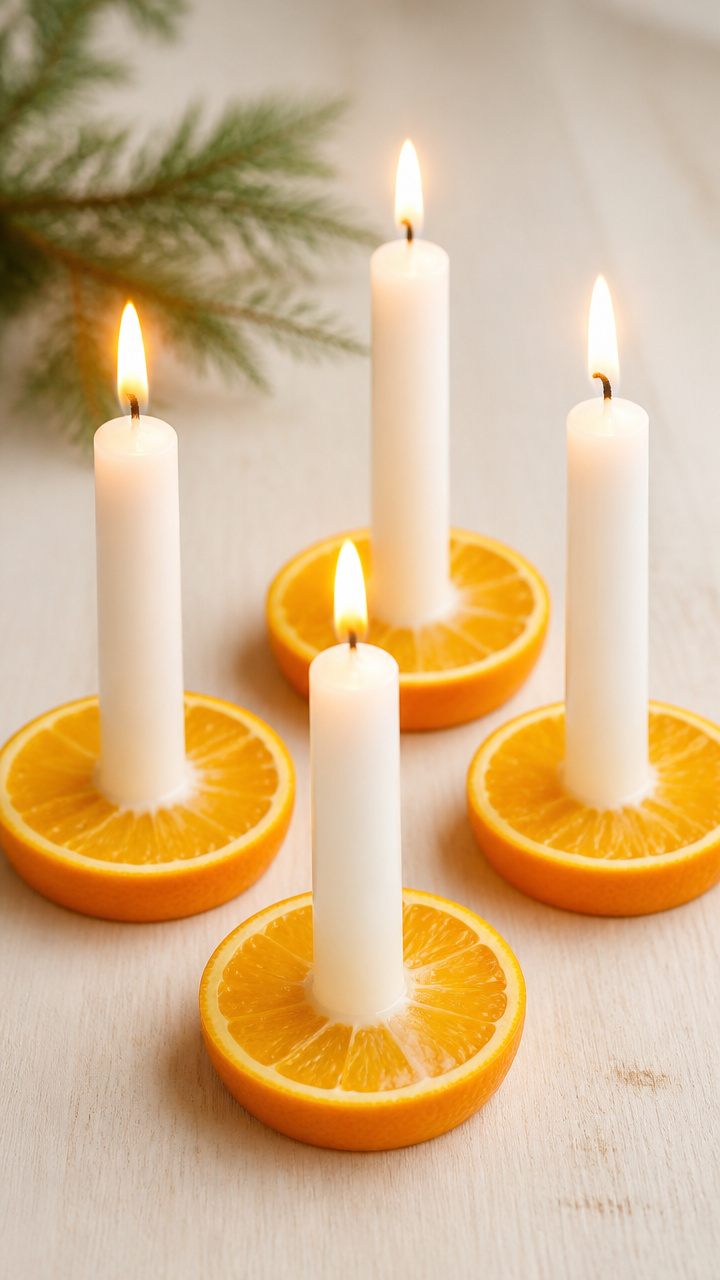
Thin oranges freeze in place around taper candles, glowing amber when lit. They last through an entire dinner party.
Materials Needed
- 4 fresh oranges
- knife
- cutting board
- 4 unscented white taper candles (10 inch)
- freezer-safe tray
- parchment paper
How to Make It
- Slice each orange into 1/4 inch thick rounds using the knife on the cutting board.
- Lay slices flat on a parchment-lined tray without overlapping.
- Freeze for 4 hours until solid.
- Slide 3 frozen slices onto the lower third of each taper candle, spacing them 1 inch apart.
16. Quilted Placemats
Moderate
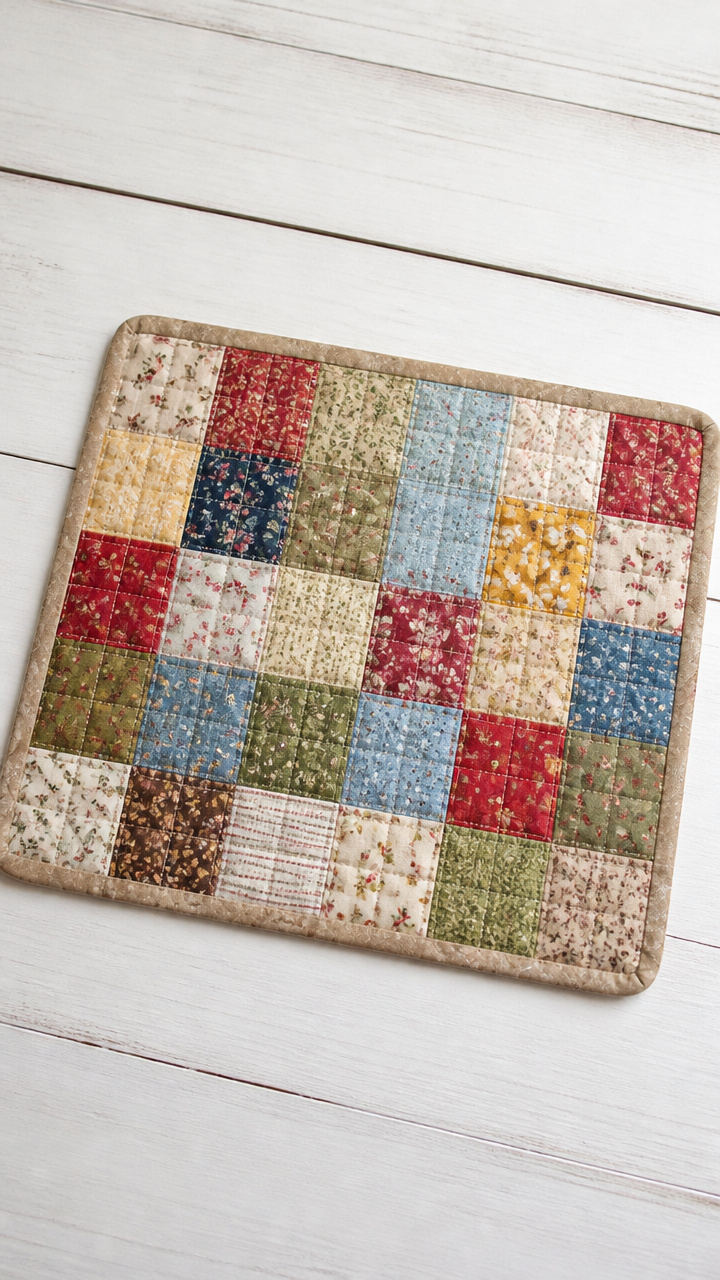
Layered cotton scraps stitched in a grid pattern make durable placemats with vintage soul. Binding gives them a clean, finished edge.
Materials Needed
- scraps of cotton fabric (assorted colors, total 1/2 yard)
- batting (18×12 inches)
- backing fabric (18×12 inches, solid color)
- rotary cutter
- ruler
- cutting mat
- sewing machine
- all-purpose thread
- quilting pins
- bias tape (1 inch width, 2 yards)
How to Make It
- Cut twenty-four 3×3 inch squares from the scrap fabrics.
- Arrange them in a 6×4 grid on a flat surface and sew together row by row using a 1/4 inch seam.
- Press seams flat, then attach batting and backing with quilting pins.
- Quilt through all layers with straight lines 3 inches apart.
- Trim edges evenly, then attach bias tape by folding it around the edge and stitching 1/8 inch from the inner fold.
17. Waxed Canvas Wall Pockets
Moderate
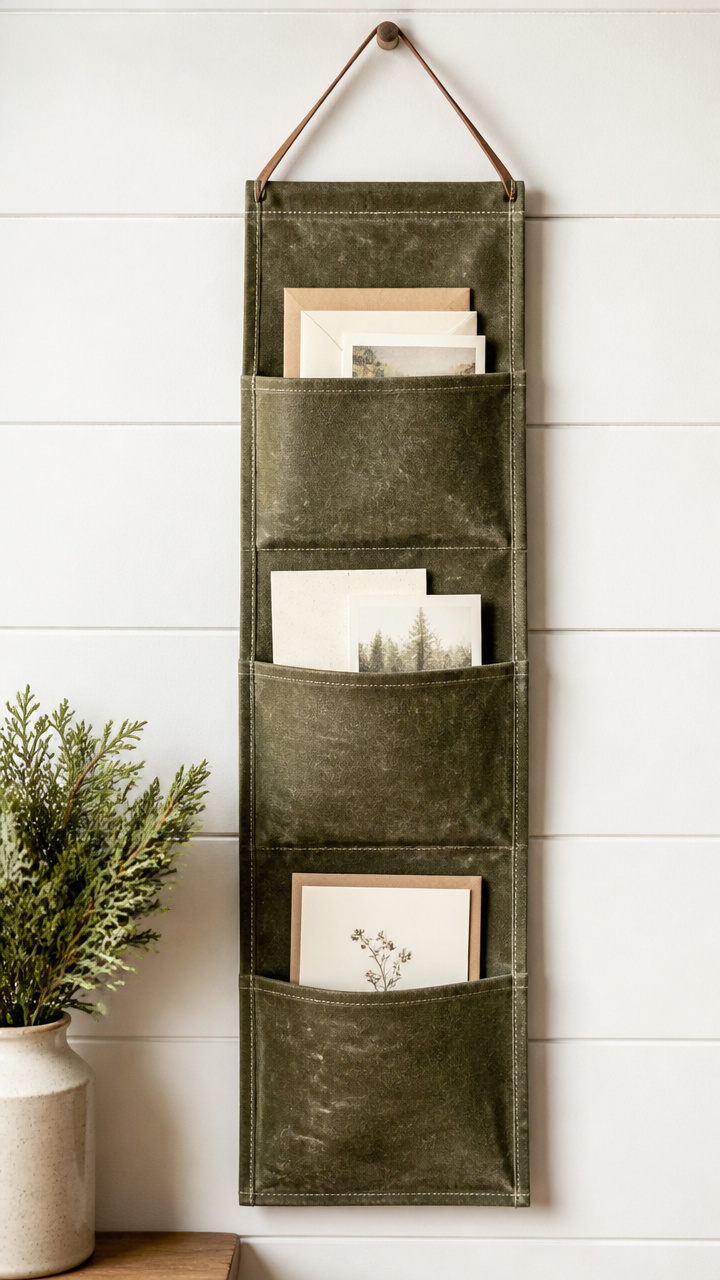
Stiff waxed canvas holds letters or seasonal cards above a desk. Folded seams give structure without lining.
Materials Needed
- waxed canvas (1/4 yard, olive green)
- ruler
- fabric marker
- scissors
- heavy-duty needle
- waxed thread
- hammer
- bookbinding awl
- 2 brass eyelets with setter
How to Make It
- Cut one 8×6 inch rectangle from waxed canvas using ruler and fabric marker.
- Fold the top 1 inch down to form a cuff and mark two holes 2 inches from each side.
- Use the awl and hammer to punch holes at the marks.
- Set a brass eyelet into each hole using the setter.
- Fold bottom corners up 2 inches at a 45-degree angle and stitch along both sides with waxed thread using a saddle stitch.
18. Glitter-Dipped Evergreen Sprigs
Easy
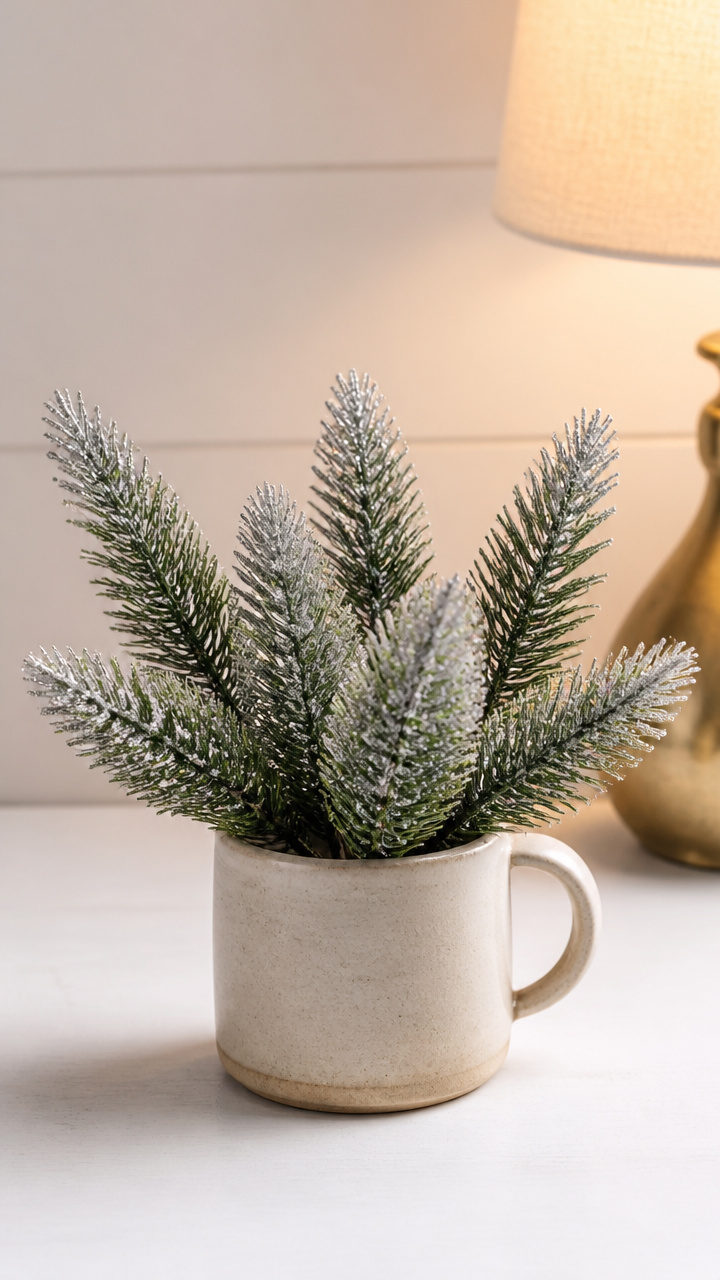
Deep green tips sparkle with fine silver glitter, tucked into a stone mug. They catch lamplight like freshly fallen snow.
Materials Needed
- 6 evergreen sprigs (5 inches long)
- clear craft glue (4 oz bottle)
- fine silver glitter (2 oz jar)
- shallow dish
- paper plate
- tweezers
How to Make It
- Pour glitter into the shallow dish and glue into the paper plate.
- Holding a sprig by the base with tweezers, dip only the top 1 inch into the glue.
- Transfer to the glitter, rolling gently to coat evenly.
- Shake off excess and lay flat to dry for 1 hour.
- Repeat for remaining sprigs.
19. Terracotta Bird Feeder
Easy
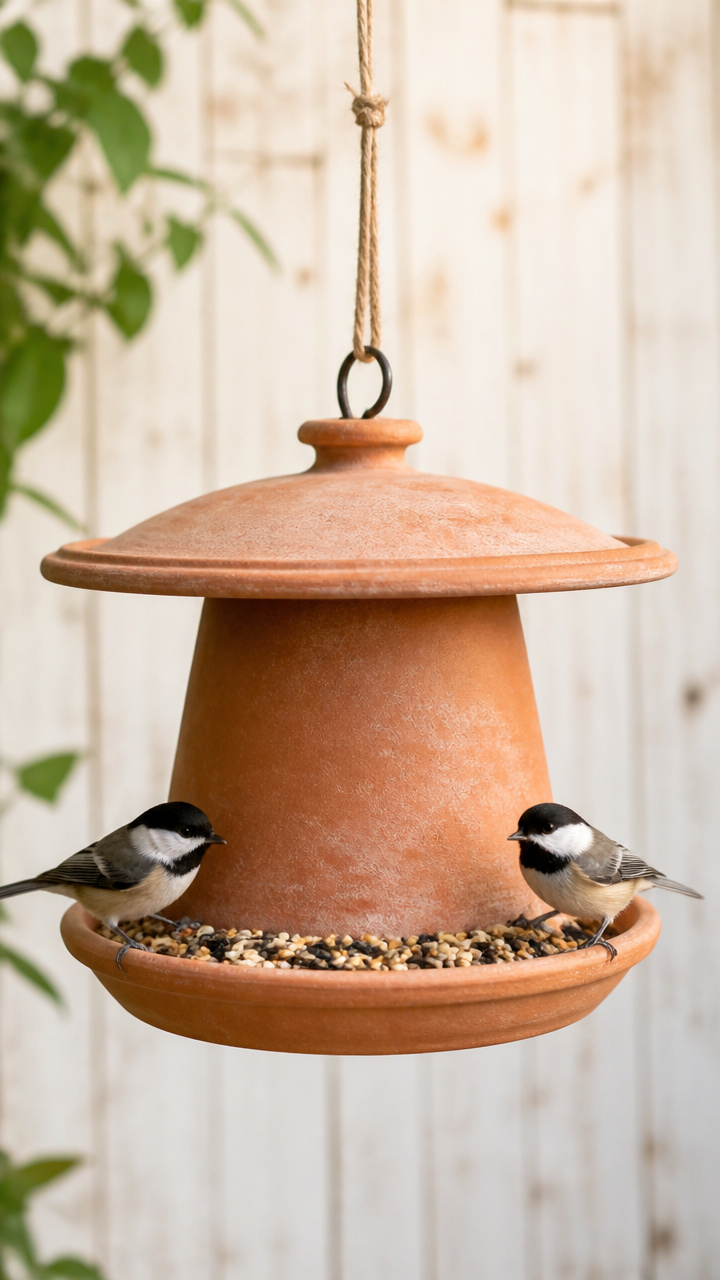
An upside-down pot with saucer roof becomes a charming backyard feeder. Birds perch on the rim and peck at scattered seed.
Materials Needed
- 1 terracotta flower pot (6 inch)
- 1 matching saucer (6 inch)
- strong outdoor adhesive
- small paintbrush
- wild bird seed (8 oz)
How to Make It
- Apply a thick bead of outdoor adhesive around the outer rim of the saucer.
- Press the pot upside down into the saucer, aligning the center.
- Let cure for 6 hours according to adhesive instructions.
- Brush off any squeeze-out with the paintbrush.
- Fill the saucer rim with bird seed.
20. Ladder Shelf Snow Scene
Easy
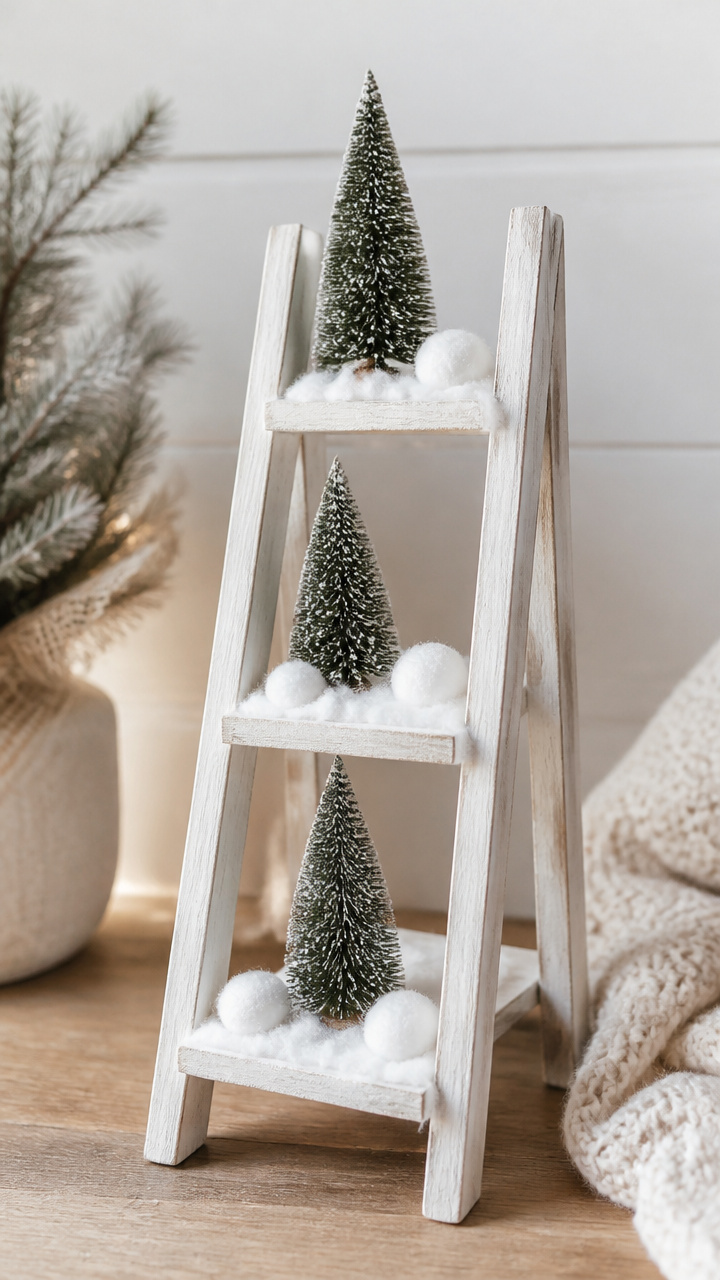
Mini pine trees and cotton puff snow sit on a leaning wooden ladder. It fits in a corner and adds whimsy without clutter.
Materials Needed
- mini wooden step ladder (12 inch tall)
- 3 miniature evergreen trees (2–3 inch height)
- cotton balls (6 pieces)
- fake snow spray (4 oz)
- hot glue gun
- glue sticks
How to Make It
- Spray each cotton ball lightly with fake snow spray and let dry for 10 minutes.
- Glue one tree to the middle of each step using the hot glue gun.
- Place a snow puff beside each tree, securing with a dot of glue.
- Lean the ladder against the wall at a 75-degree angle.
21. Cross-Stitch Nightlight Cover
Moderate
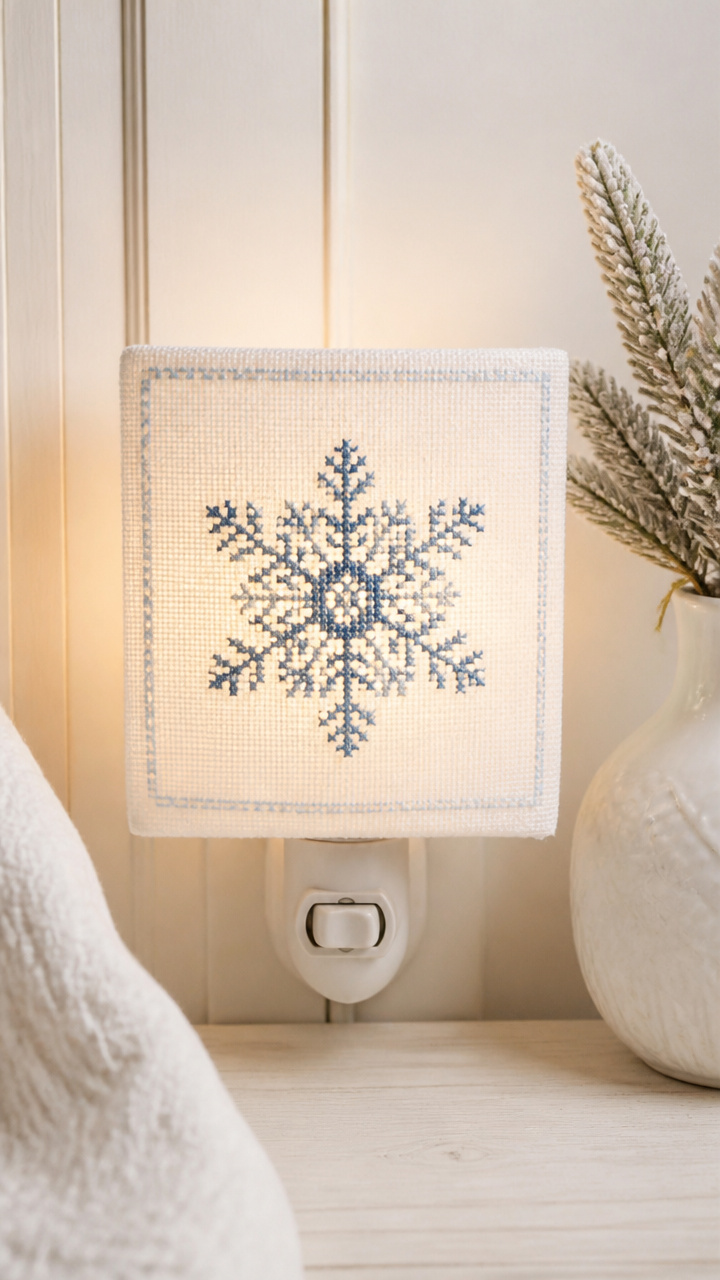
A linen square embroidered with a tiny snowflake glows softly over your bedside table. Backlighting makes the thread look delicate.
Materials Needed
- A5 piece white linen fabric
- embroidery hoop (6 inch)
- blue embroidery floss (2 strands)
- blunt-tip embroidery needle
- scissors
- printable snowflake pattern (simple six-point)
- iron-on adhesive sheet
- craft iron
How to Make It
- Print and cut out the snowflake pattern, then trace it onto the iron-on adhesive with a pencil.
- Iron the adhesive to the back of the linen following package heat settings.
- Peel off paper backing and place design in the embroidery hoop.
- Stitch the outline using backstitch with two strands of blue floss.
- Remove from hoop, trim fabric to 1/2 inch beyond stitching, and center over a plug-in nightlight.
22. Cardboard Tube Garland
Easy
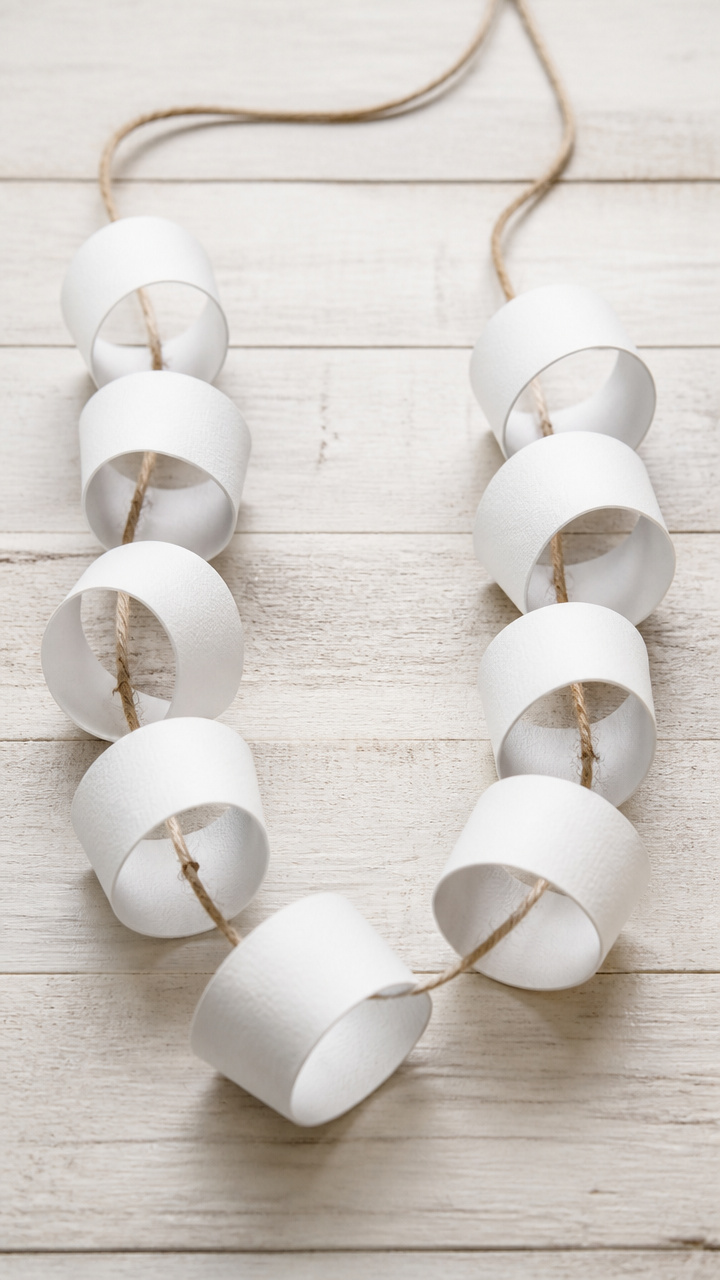
Toilet paper rolls sliced, curled, and painted become snow-white puffs strung across a mantel. They’re light, airy, and compostable.
Materials Needed
- 10 cardboard toilet paper tubes
- craft knife
- ruler
- white acrylic paint
- foam brush (1 inch)
- twine (3 yards)
- hot glue gun
- glue sticks
How to Make It
- Cut each tube lengthwise with the craft knife, then unroll into rectangles.
- Slice each rectangle into 1/2 inch wide strips using the ruler and knife.
- Curl each strip around a pencil and release to shape.
- Lay strips on a flat surface and paint both sides with white acrylic using the foam brush.
- Let dry for 30 minutes.
- Glue one end of each strip to the twine, spacing 3 inches apart, using dots from the hot glue gun.
Each of these ideas invites warmth into your home with care and creativity. Pick one that speaks to you and start tonight.