24 January Crafts for Preschool Kids That Teach and Entertain

Little hands shaping snowmen from cotton balls, fingers smearing paint in swirls of red and green, tiny voices counting buttons as they stick them onto paper mittens — these moments build more than just cute keepsakes. They grow fine motor skills, spark curiosity, and turn everyday materials into joyful learning.
Each craft here blends play with purpose. You’ll find no fluff or filler, just real activities that work with young minds and simple supplies you likely already have at home.
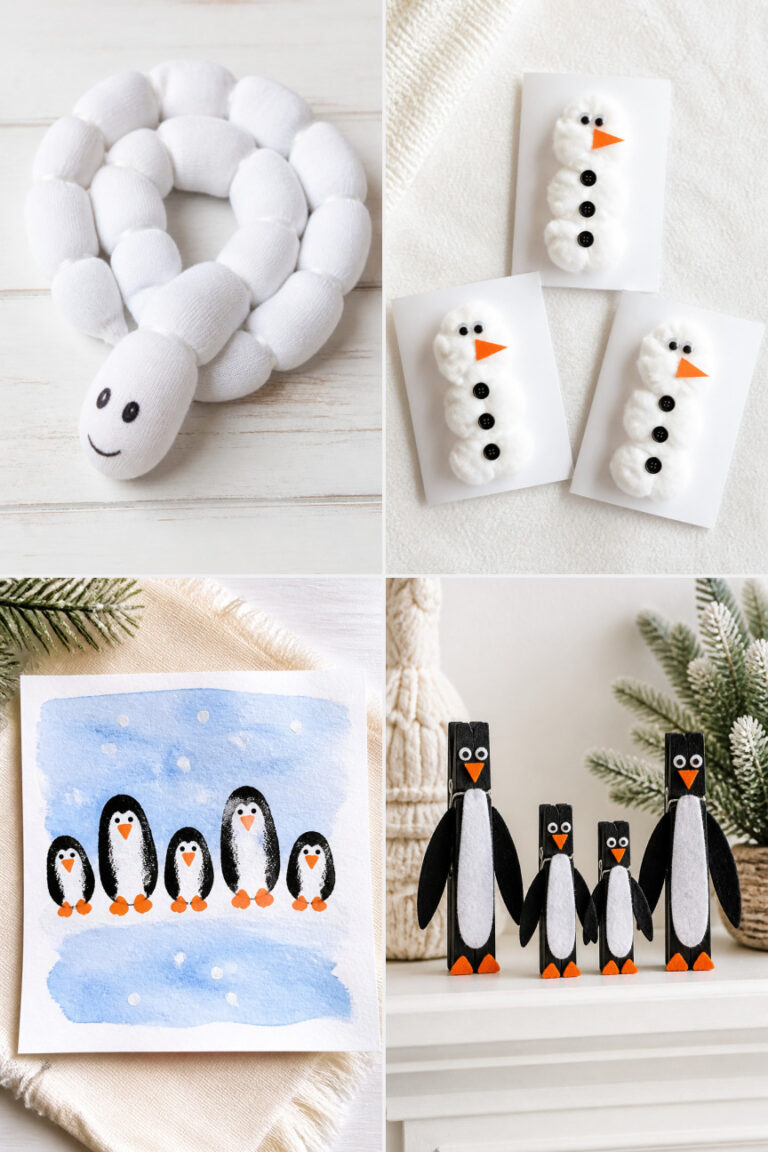
1. Cotton Ball Snowmen
Easy
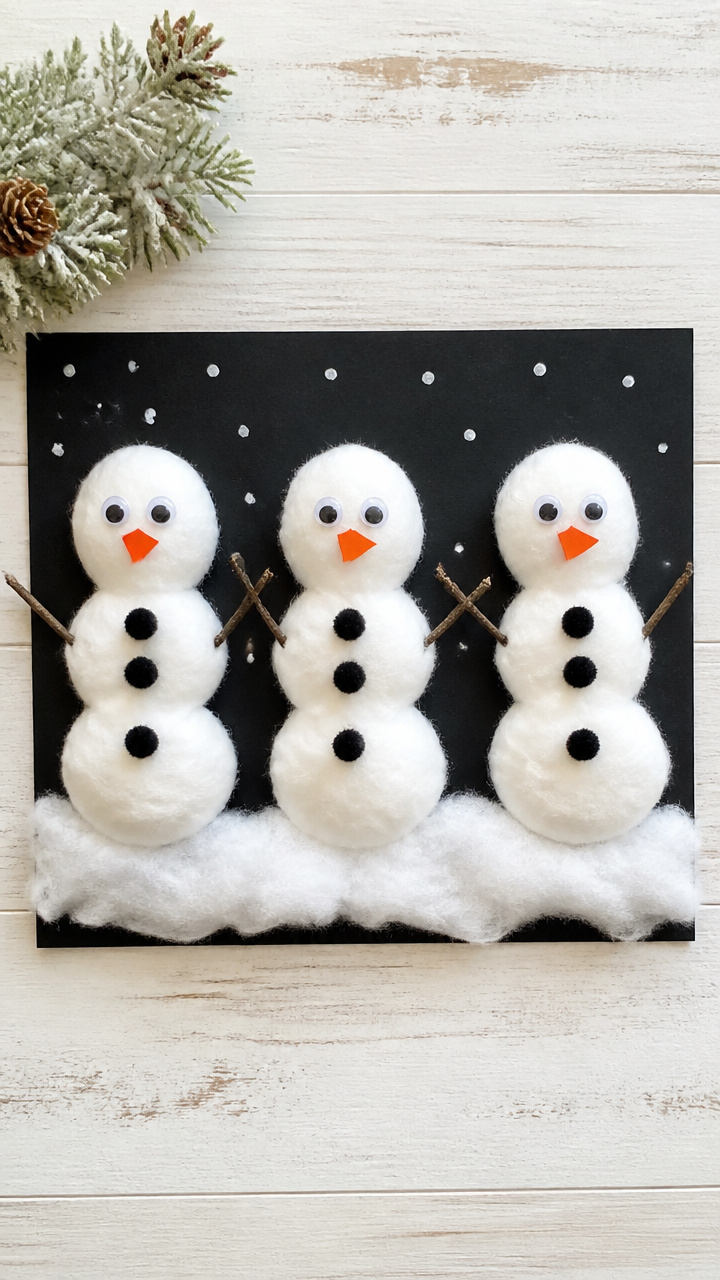
Round white puffs stack into jolly snowmen with button eyes and pipe cleaner arms, perfect for winter windowsills. This tactile craft builds hand strength while teaching size sequencing.
Materials Needed
- A4 black cardstock
- White cotton balls (30 count)
- Orange construction paper
- Googly eyes (12 mm, 6 pieces)
- Black pom-poms (8 mm, 6 pieces)
- Glue stick
- Scissors
How to Make It
- Cut the black cardstock in half vertically to make two tall background pieces.
- Pull three cotton balls apart slightly to form large, medium, and small snowman balls.
- Glue the large ball at the bottom, medium in the center, and small on top of each background piece.
- Cut two 1-inch strips from orange construction paper and curl into tiny cones for noses, then glue on.
- Add googly eyes above the nose and a black pom-pom below for the mouth.
- Cut six 2-inch lengths of pipe cleaner and press one end of each into the sides for arms.


2. Pom-Pom Number Match
Easy
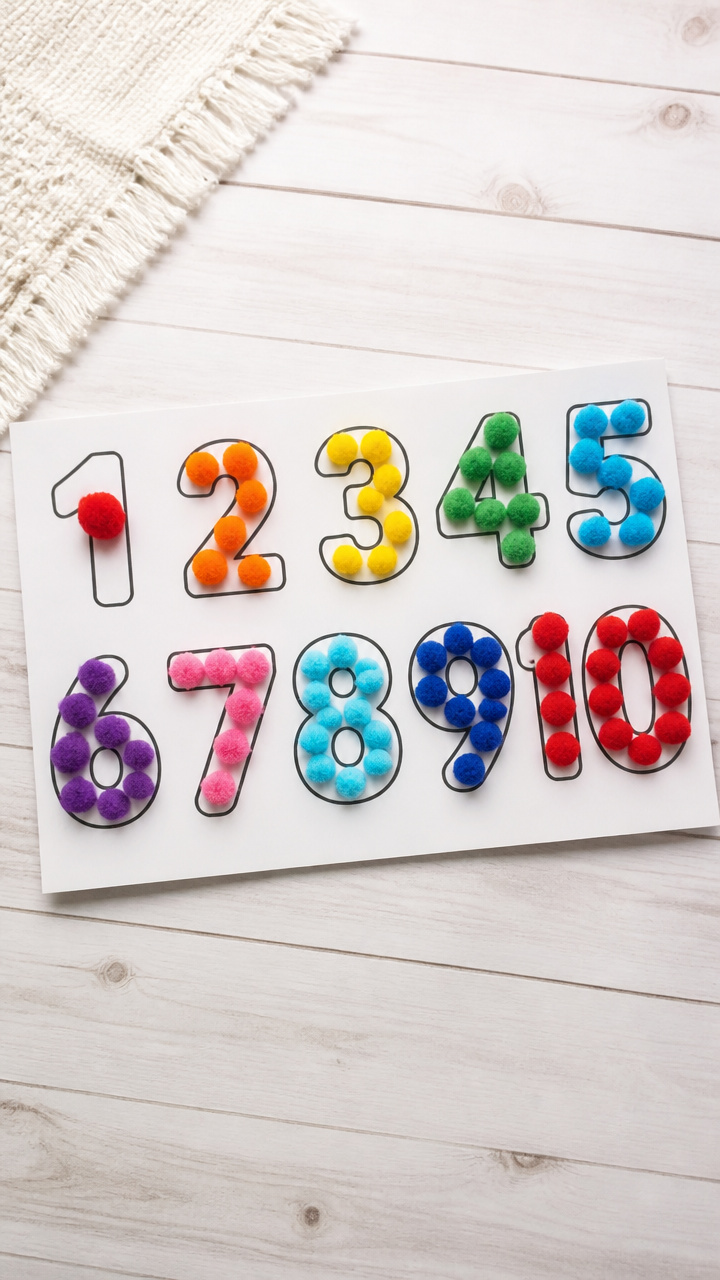
Bright pom-poms pressed into numbered circles reinforce counting with color and touch. The squishy texture keeps little fingers engaged while building number recognition.
Materials Needed
- A4 white cardstock
- Rainbow pom-poms (12 colors, 5 of each)
- Black marker
- Glue stick
- Circle punch (2 inch)
How to Make It
- Use the circle punch to cut 12 circles from the cardstock.
- Write numbers 1 through 12 clearly in the center of each circle with the black marker.
- Apply a thin layer of glue around the edge of each number circle.
- Press matching quantities of pom-poms around each number — one pom-pom on '1', two on '2', and so on.
- Let dry flat for 20 minutes before handling.


![Caydo [400 pcs] - 300PCS 1 Inch Assorted Pom Poms with 100PCS Wiggle Eyes](https://m.media-amazon.com/images/I/51J4bxAVK3L._SL500_.jpg)
3. Paper Plate Clock
Moderate
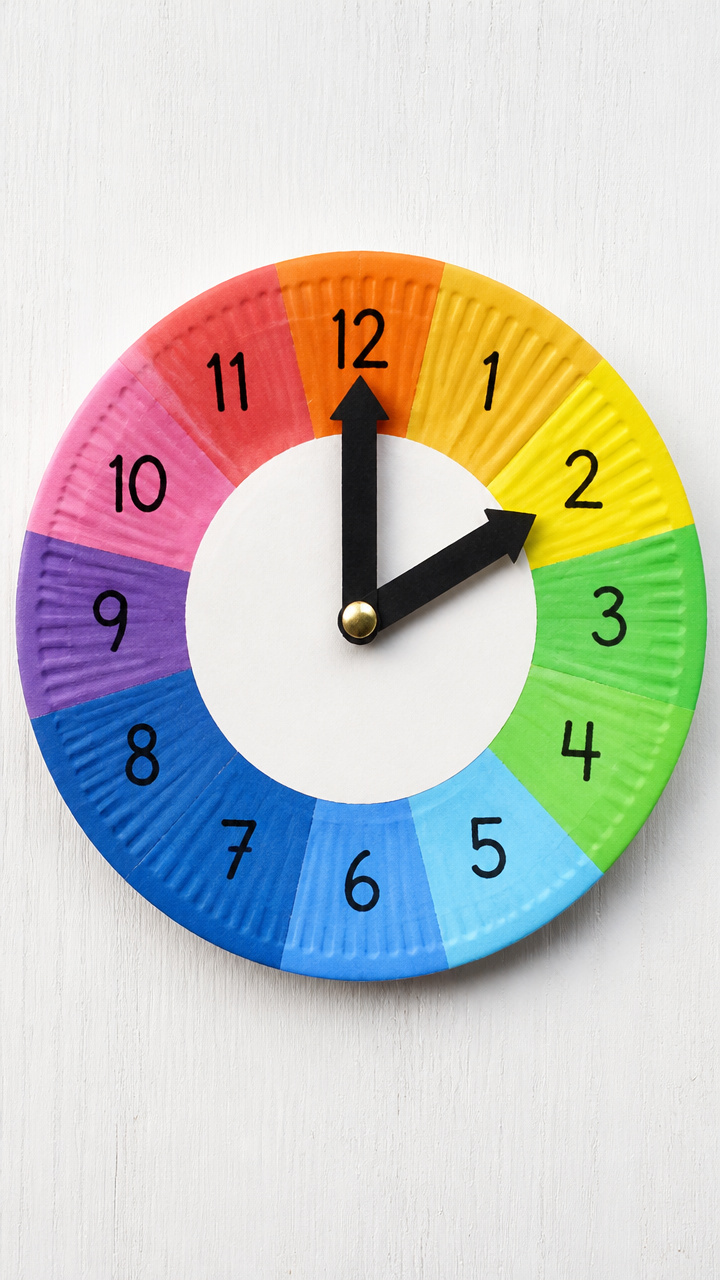
A rainbow clock face spins with movable hands, turning time into a colorful puzzle. Kids learn hour recognition through hands-on play with every twist.
Materials Needed
- 9-inch white paper plate
- Brass fastener (1 inch)
- Colored markers (red, blue, green, purple, orange, yellow)
- Scissors
- Cardboard sheet (6×6 inches)
- Ruler
- Pencil
How to Make It
- Lay the paper plate flat and divide it into 12 sections using light pencil marks every 30 degrees.
- Color each section a different bright color, alternating hues around the circle.
- Write numbers 1–12 in order at each mark using bold marker strokes.
- Cut two clock hands from cardboard: one 3 inches long (hour), one 4 inches long (minute), both 0.5 inches wide.
- Place the hands on top of each other at the center of the plate and secure with the brass fastener pushed through to the back.
4. Yarn-Wrapped Letters
Easy
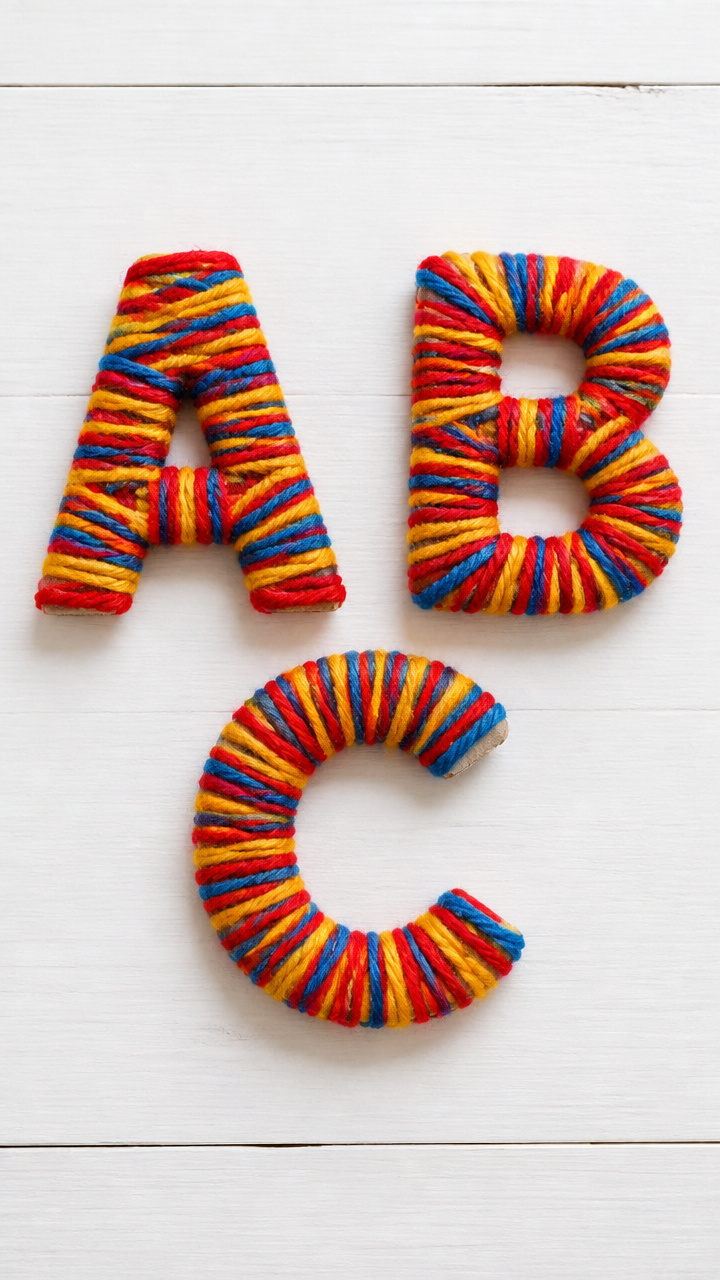
Thick yarn spirals around cardboard letters, forming textured shapes that spell fun. This craft strengthens finger control and introduces letter forms through touch.
Materials Needed
- Cardboard alphabet letters (3 inches tall, 3 pieces)
- Jumbo yarn (red, blue, yellow, 10 yards total)
- Glue stick
- Scissors
How to Make It
- Apply a small dot of glue to the front corner of a cardboard letter.
- Press the yarn end onto the glue and hold for 10 seconds until set.
- Wrap the yarn tightly around the entire outline of the letter, moving slowly and keeping loops close together.
- When you reach the start again, add another glue dot and press the yarn end down firmly.
- Repeat with two other letters and colors.


5. Button Sorting Tree
Easy
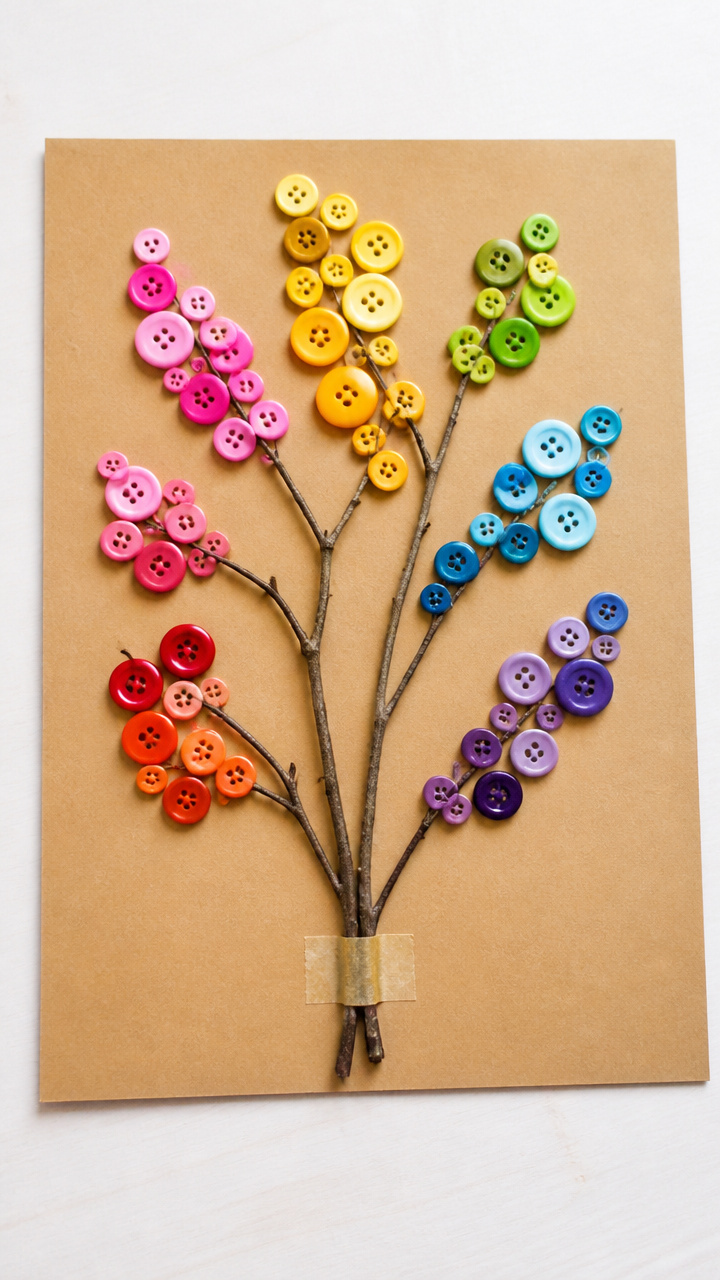
A bare tree branch taped to paper blooms with sorted buttons by color and size. This open-ended craft teaches classification and pattern making.
Materials Needed
- A4 light brown cardstock
- Small twigs (3 pieces, 4–6 inches long)
- White school glue
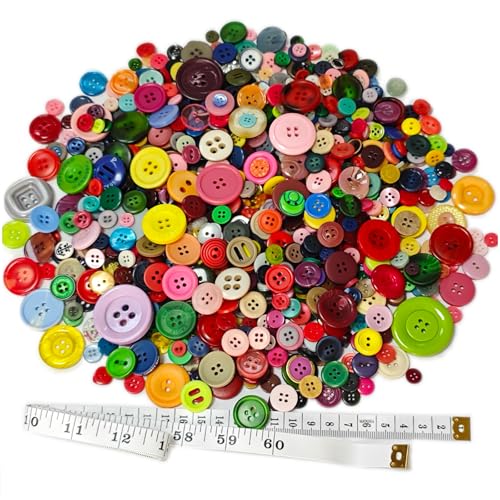
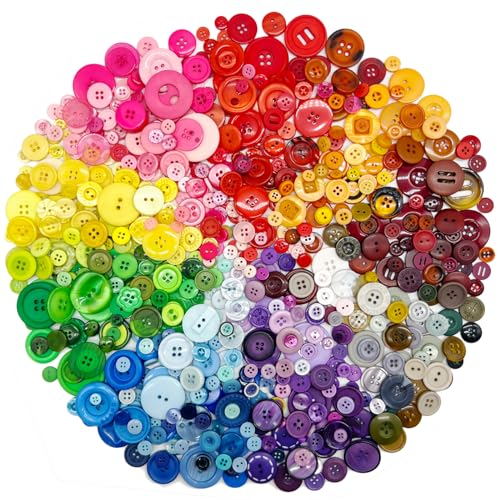
- Assorted buttons (30 pieces, 3 colors, mixed sizes)
- Tape (clear, 0.5 inch)
How to Make It
- Lay the twigs in a branching pattern on the cardstock and tape each end securely to the page.
- Squeeze small dabs of glue at intersections along the branches where buttons will go.
- Sort buttons by color and place them on the glue spots, pressing gently to stick.
- Leave space between some buttons to create a balanced, natural look.
- Let dry completely for 30 minutes before displaying.

6. Fingerprint Animal Garden
Easy
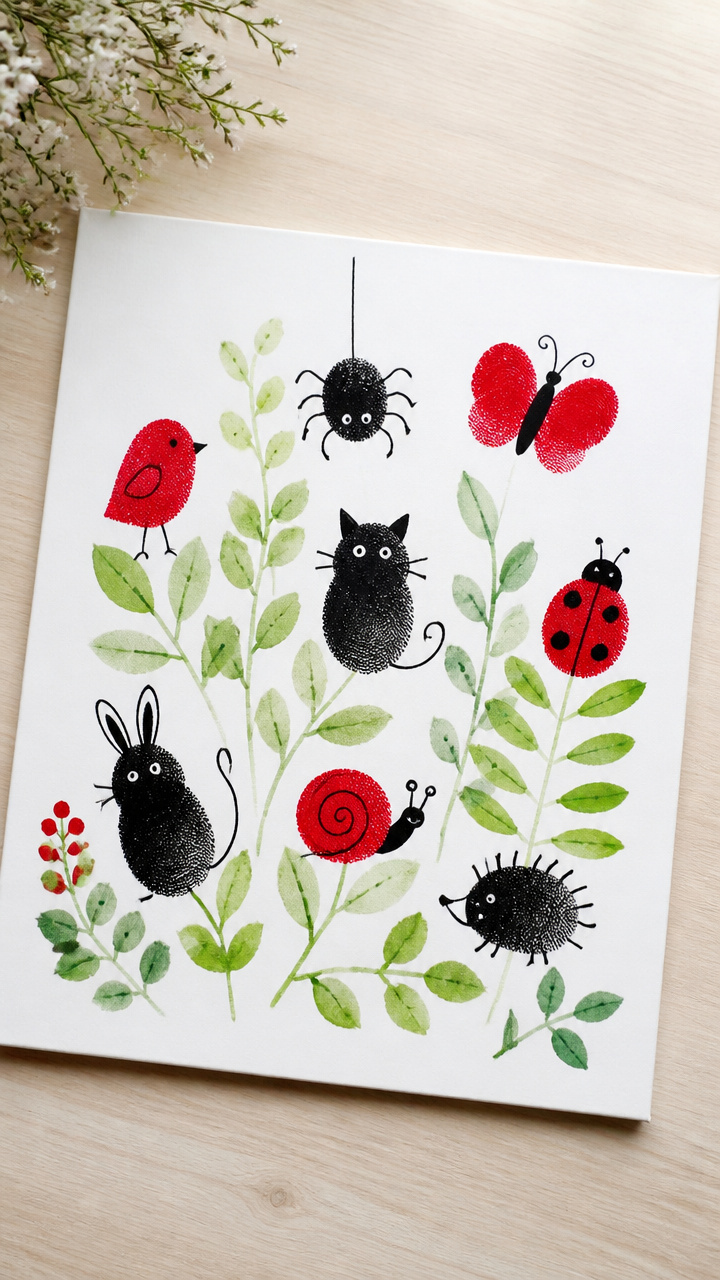
Inky fingerprints sprout into ladybugs, frogs, and bumblebees with painted details. This quick print craft turns fingertip touches into a lively scene.
Materials Needed
- A4 white drawing paper
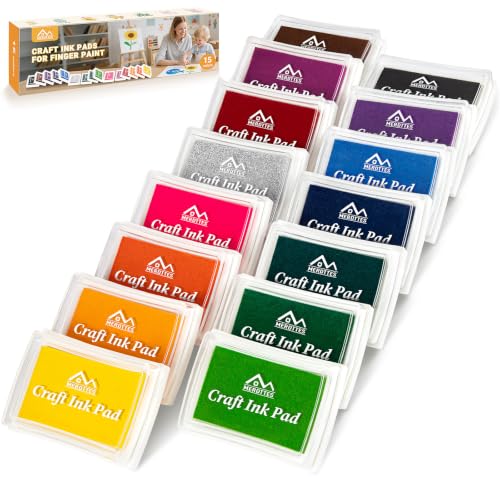
- Washable ink pads (red, green, black)
- Fine-tip black marker
- Green washable paint
- Paintbrush (small round)
- Water cup
- Paper towel
How to Make It
- Press index finger into the red ink pad and stamp 6 fingerprints in a cluster near the bottom of the paper.
- Clean finger with damp paper towel, then press into green ink and stamp 4 fingerprints scattered above the red ones.
- Use black ink to stamp 2 single dots near the top for bumblebees.
- Dip brush in green paint and draw wavy stems up from the bottom edge to each red fingerprint.
- Once dry, use the fine-tip marker to add legs, wings, and faces to each print.


7. Pipe Cleaner Bead Counting
Easy
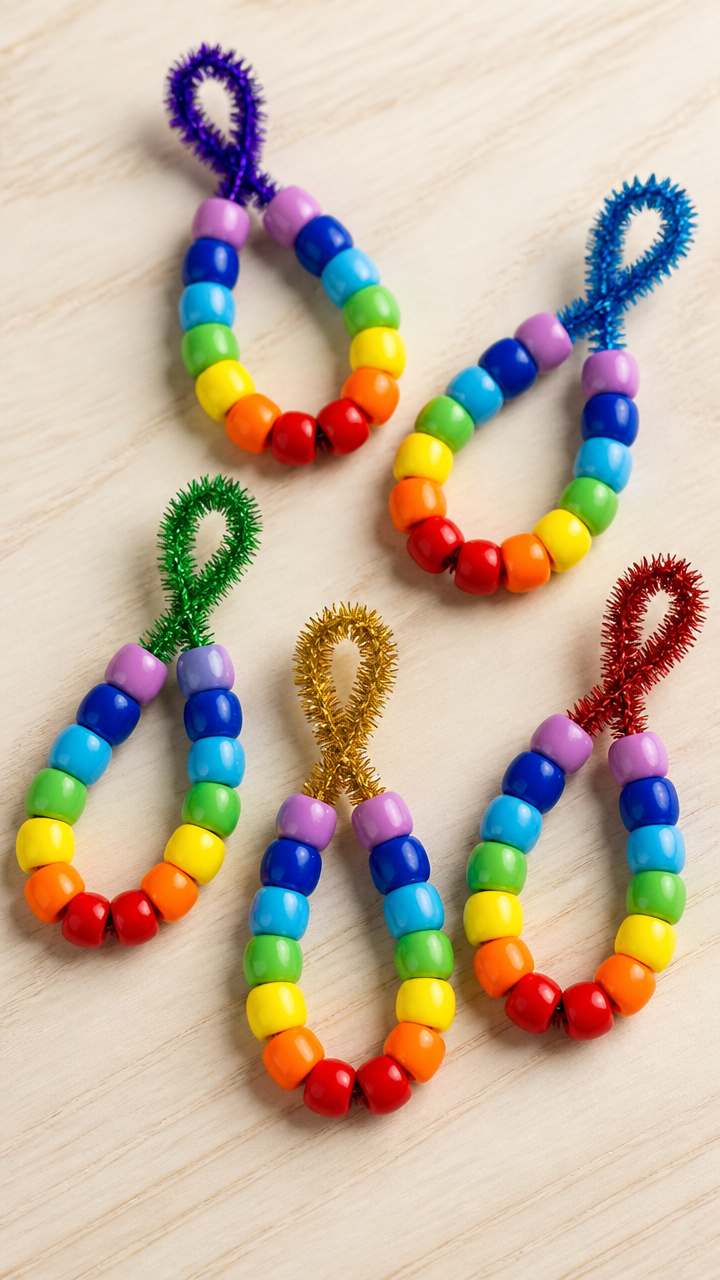
Colorful beads slide onto bent pipe cleaners, forming wearable math tools. Each loop holds ten beads, helping kids visualize counting in groups.
Materials Needed
- Chenille stems (pipe cleaners, 12 inches, 5 pieces)
- Plastic beads (10 mm, 50 total, 5 colors)
- Pliers (optional)
How to Make It
- Bend one end of each pipe cleaner into a small hook to keep beads from sliding off.
- Slide 10 beads of the same color onto each pipe cleaner.
- Bend the open end into another hook to close the loop.
- Twist the two ends together at the top to form a circular bracelet shape.
- Repeat for all five colors.


8. Tissue Paper Mosaic Hearts
Easy
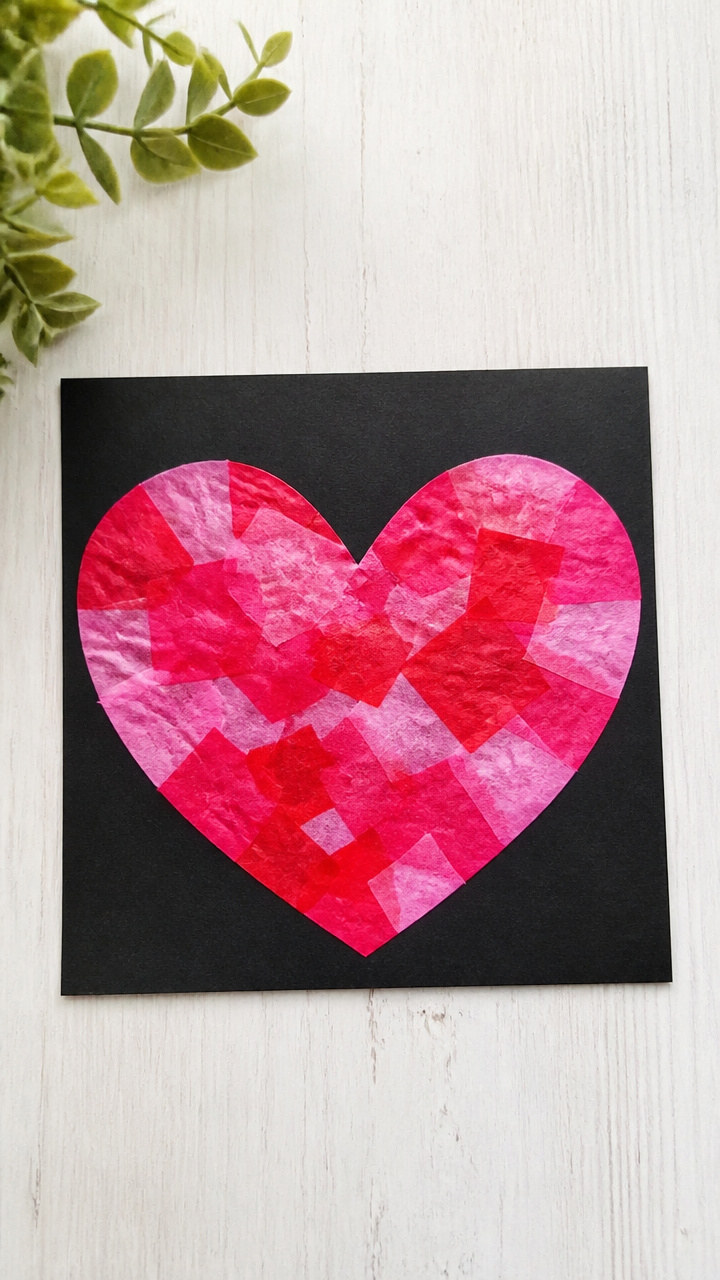
Torn squares of pink and red tissue paper form glowing hearts on dark paper. The crinkled layers teach color blending and gentle tearing skills.
Materials Needed
- A4 black construction paper
- Pink and red tissue paper sheets (6×6 inches, 2 of each)
- Glue stick
- Heart stencil (4 inch)
How to Make It
- Place the heart stencil in the center of the black paper and trace lightly with pencil.
- Tear tissue paper into 1-inch squares, mixing pink and red pieces.
- Open the glue stick and apply a thin coat inside the heart outline.
- Press tissue paper squares close together within the line, slightly overlapping edges.
- Continue until the heart is fully covered and let dry for 15 minutes.


9. Cereal Loop Necklaces
Easy
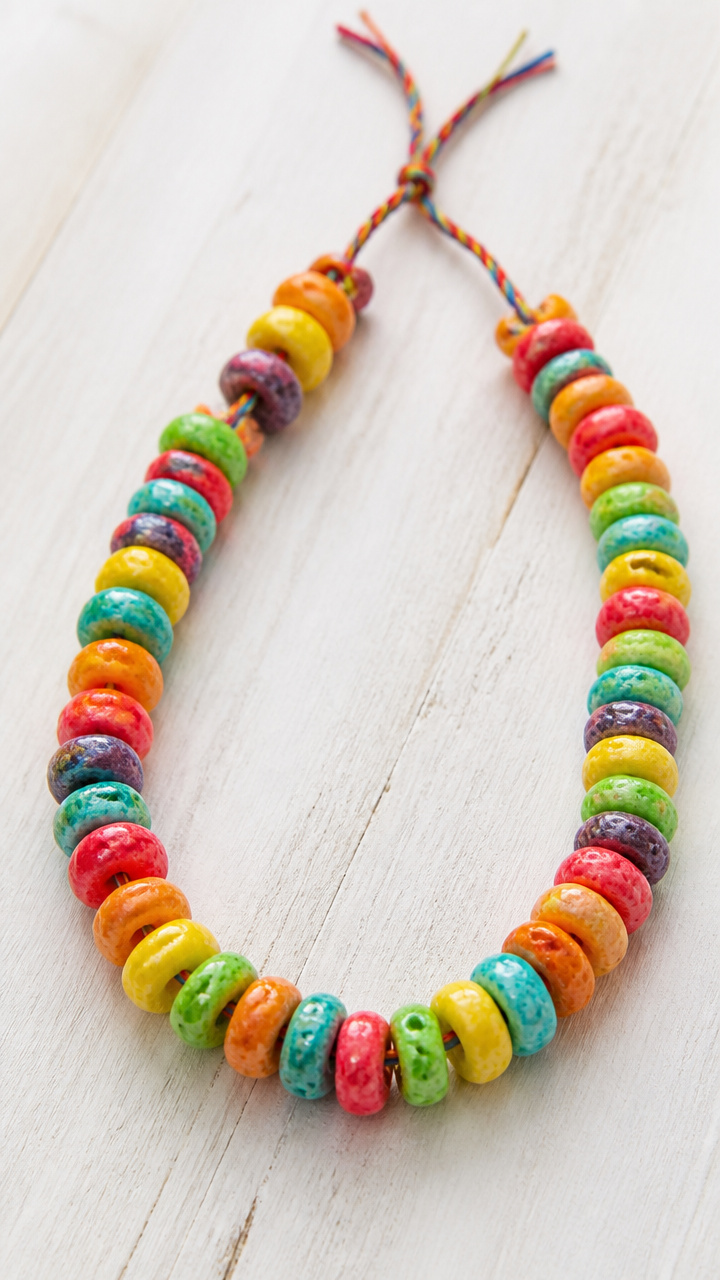
Rainbow-colored O-shaped cereal threads onto yarn, creating edible jewelry. Stringing builds hand-eye coordination and ends with a tasty reward.
Materials Needed
- Rainbow-colored oat rings (2 cups)
- Waxed thread (embroidery floss, 24 inches, 3 strands)
- Tape (0.5 inch)
- Scissors
How to Make It
- Cut a 24-inch length of waxed thread and tie a knot at one end.
- Tape the knotted end to the table to hold it steady.
- Slide cereal rings one by one onto the thread, mixing colors freely.
- Continue until the strand is full with about 20 rings.
- Tie the ends together to form a necklace once all rings are threaded.
10. Shaving Cream Marble Paper
Moderate
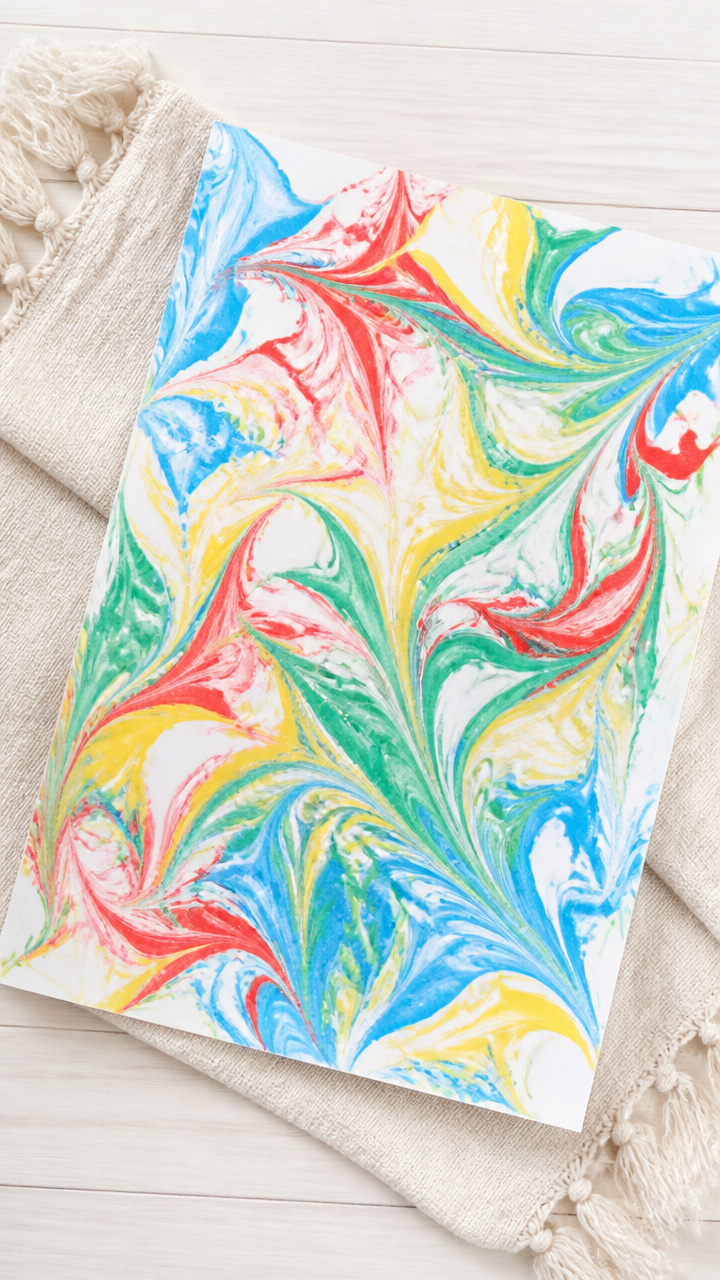
Swirled shaving cream and food coloring transform plain paper into marbled masterpieces. The foamy texture invites sensory exploration and color mixing.
Materials Needed
- A4 white drawing paper (heavyweight)
- Aerosol shaving cream (5 oz)
- Food coloring (red, blue, yellow, green, 4 drops each)
- Flat tray (9×13 inch)
- Toothpicks
- Spatula (plastic)
- Paper towels
How to Make It
- Spray shaving cream into the tray to cover the bottom in a 1-inch thick layer.
- Squirt 2 drops each of red, blue, yellow, and green food coloring across the surface.
- Drag toothpicks through the colors to create swirls and patterns.
- Lay a sheet of paper gently on top and press evenly with palms for 10 seconds.
- Lift paper carefully, scrape off excess foam with the spatula, and lay flat on paper towels to dry for 30 minutes.


11. Clothespin Alligators
Moderate
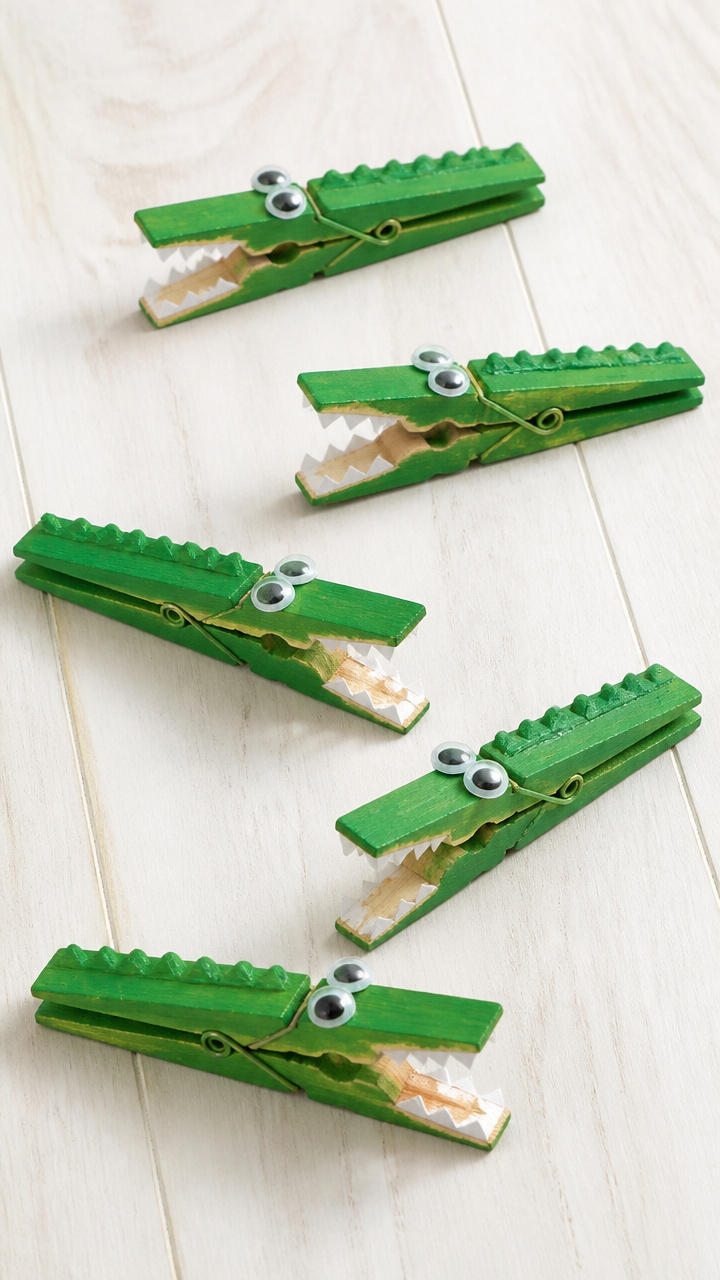
Wooden clothespins open their jaws with rubber band springs, becoming snapping friends. These movable toys teach action and reaction through simple mechanics.
Materials Needed
- Wooden clothespins (5 pieces)
- Green acrylic paint
- Paintbrush (medium flat)
- White glue
- Small googly eyes (10 mm, 2 per alligator)
- Rubber bands (size #16, 1 per alligator)
- Green craft foam sheet
- Scissors
How to Make It
- Paint each clothespin solid green and let dry for 20 minutes.
- Cut 5 triangular teeth from craft foam, each 0.5 inch tall.
- Glue two teeth to the upper jaw and two to the lower jaw of each pin.
- Wrap a rubber band around the pin below the neck to act as a spring.
- Press the jaws together and attach googly eyes above the upper jaw with glue.


12. Egg Carton Caterpillars
Easy
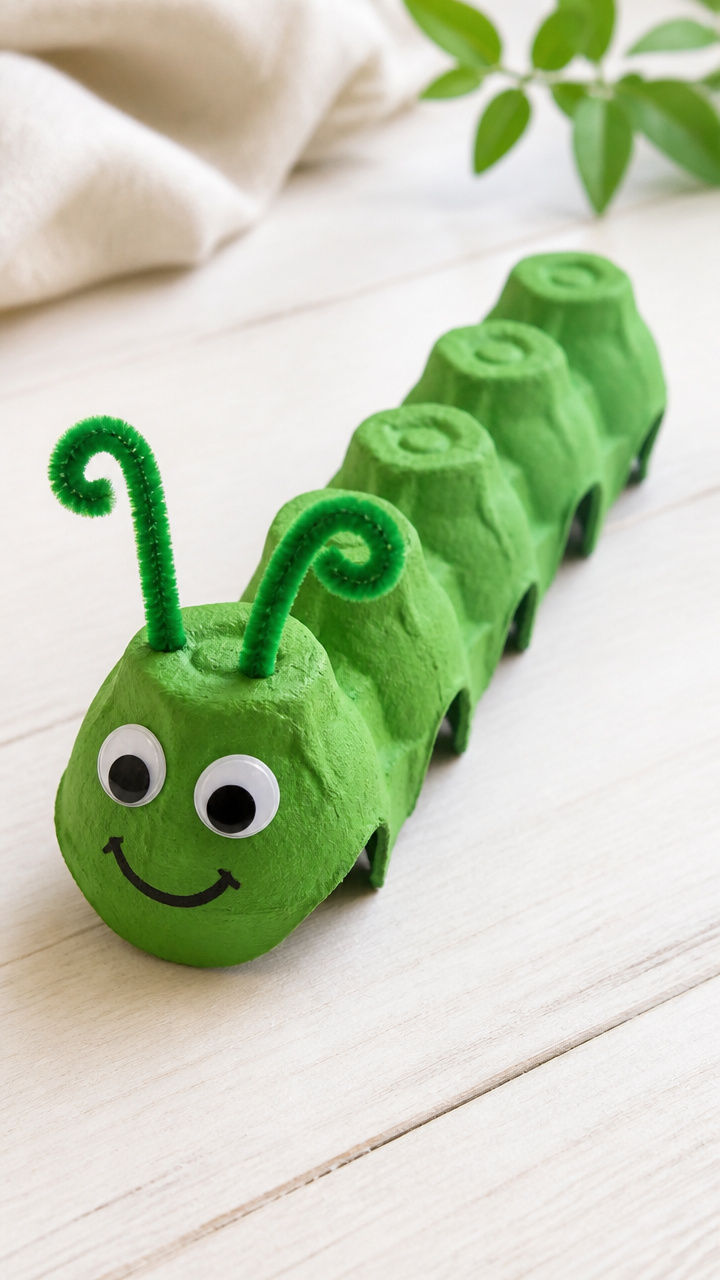
Repurposed egg cups become bumpy caterpillar bodies with bendy wire antennae. This 3D craft encourages reuse and teaches body segmentation.
Materials Needed
- Cardboard egg carton (12-cup)
- Green tempera paint
- Paintbrush (large round)
- Pipe cleaners (green, 6 inches, 2 per caterpillar)
- White glue
- Googly eyes (8 mm, 2 per caterpillar)
- Scissors
How to Make It
- Cut out 6 connected cups from the egg carton using scissors.
- Paint all six cups green and let dry for 25 minutes.
- Cut two 3-inch lengths of pipe cleaner for antennae.
- Glue one end of each pipe cleaner to the top of the first cup.
- Stick googly eyes just below the antennae on the front cup.


13. Salt Dough Ornaments
Advanced
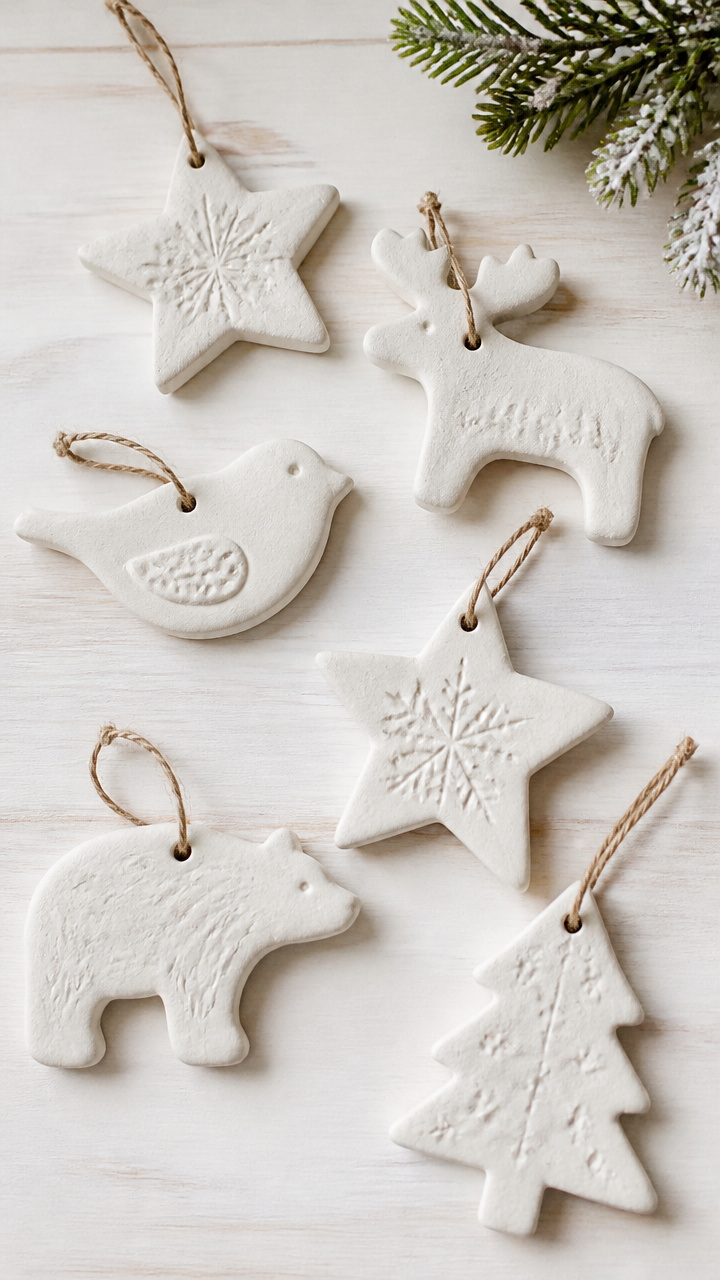
Soft dough shaped into stars and animals bakes into keepsake decorations. This recipe-based craft teaches measuring and oven safety with lasting results.
Materials Needed
- All-purpose flour (1 cup)
- Table salt (1/2 cup)
- Water (1/2 cup)
- Mixing bowl
- Wooden spoon
- Rolling pin
- Animal-shaped cookie cutters (3 types)
- Straw (regular size)
- Baking sheet
- Parchment paper
- Oven
How to Make It
- Preheat oven to 200°F and line baking sheet with parchment paper.
- Mix flour, salt, and water in the bowl with the spoon until a smooth dough forms.
- Knead dough on a clean surface for 2 minutes until elastic.
- Roll dough to 0.25 inch thickness and press out shapes with cookie cutters.
- Push a straw through the top edge of each ornament to make a hanging hole.
- Bake for 2 hours, then let cool completely before painting or leaving plain.


14. Popsicle Stick Rainbow
Easy
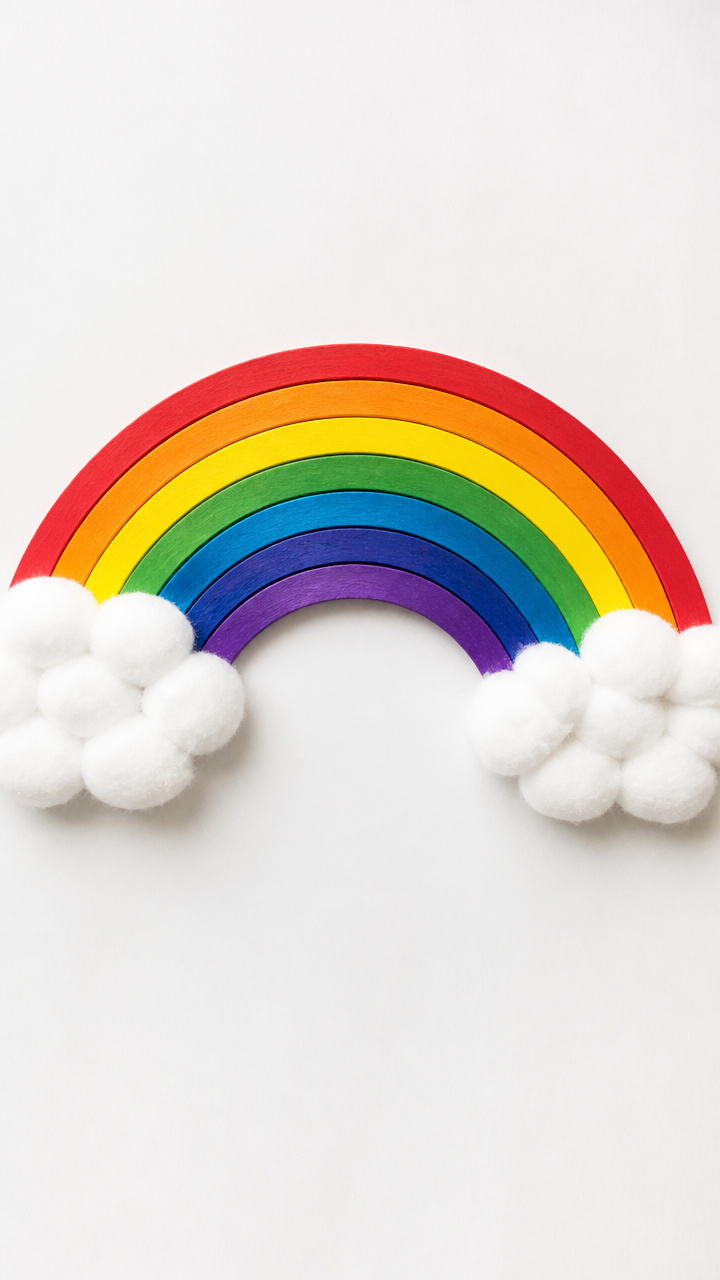
Seven colored sticks fan into a bright arc over a cloud base. This orderly craft reinforces color sequence and fine motor alignment.
Materials Needed
- Unpainted popsicle sticks (7 per rainbow)
- Red, orange, yellow, green, blue, indigo, violet acrylic paint
- Paintbrush (small flat)
- White glue
- Cotton ball
- A4 white paper
- Scissors
How to Make It
- Paint one stick each color of the rainbow and let dry for 20 minutes.
- Glue the red stick vertically to the paper near the left edge.
- Glue the orange stick slightly to the right and above, letting it overlap the red.
- Continue gluing each next color higher and closer to vertical, forming an arc.
- Flatten a cotton ball and glue it beneath the rainbow as a cloud base.


15. Feather Paint Stamping
Easy
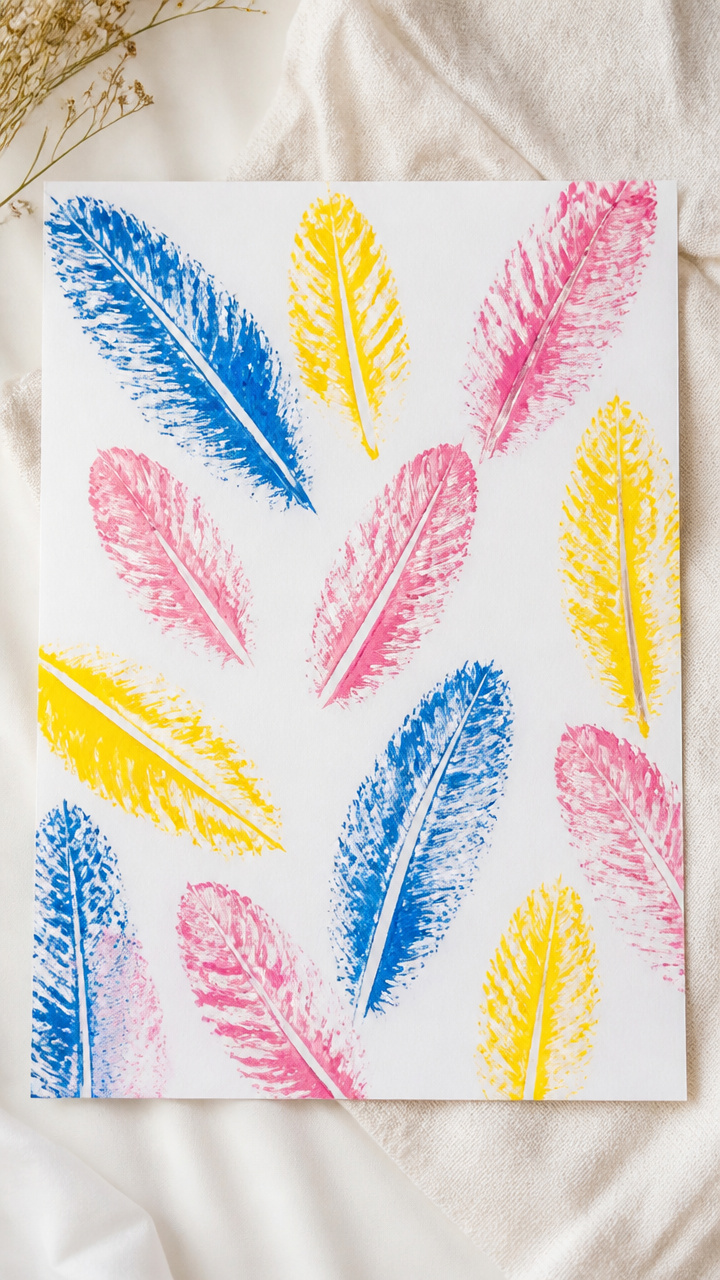
Real feathers dipped in paint leave soft, feathery prints across paper. This nature-inspired method teaches texture and pattern repetition.
Materials Needed
- Real turkey feathers (3 medium size)
- Tempera paint (blue, yellow, pink, 2 tablespoons each)
- Shallow plates (3)
- A4 white paper
- Paper towels
How to Make It
- Pour one color of paint onto each plate, spreading into a thin layer.
- Dip the quill end of a feather into one paint color, coating the barbs lightly.
- Press the feather straight down onto the paper and lift straight up to leave a print.
- Repeat with different feathers and colors, overlapping slightly for a garden effect.
- Blot used feathers on paper towel between dips to avoid muddying colors.


16. Paper Bag Puppets
Easy
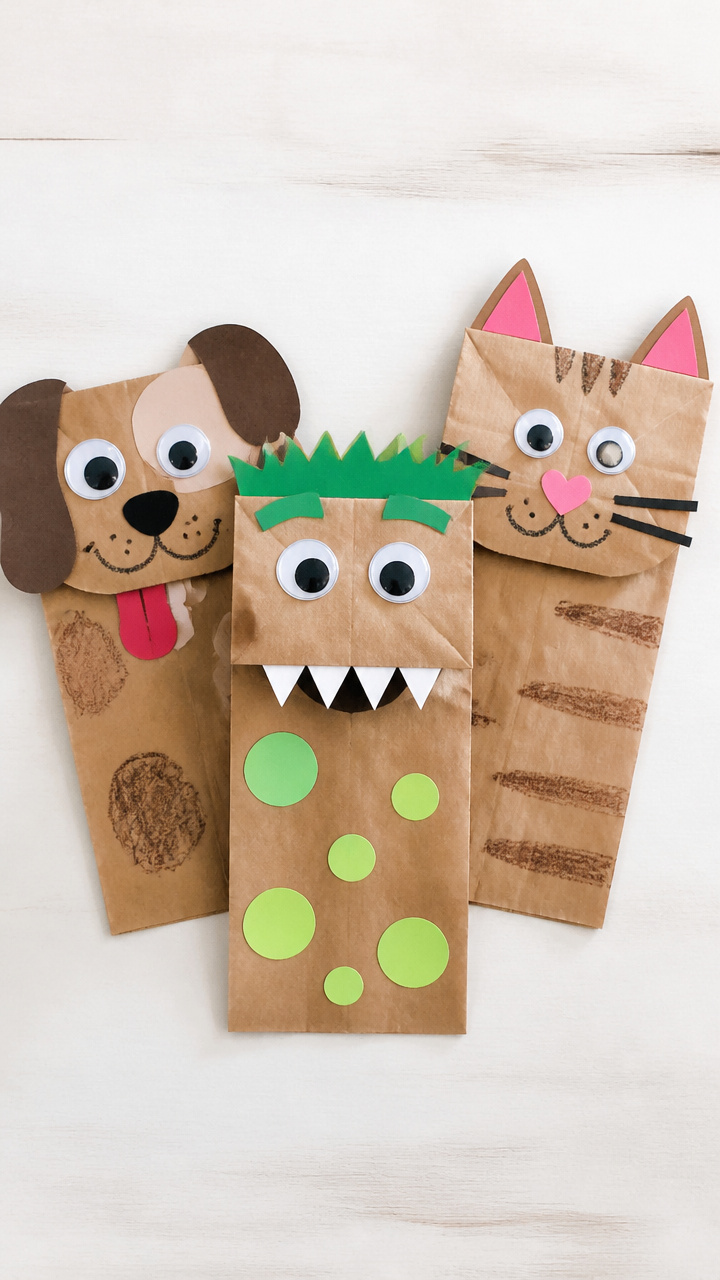
Brown lunch bags become talking characters with glued-on features and wiggle mouths. These expressive puppets inspire storytelling and vocal play.
Materials Needed
- Brown paper lunch bags (5 inch base, 3 pieces)
- Googly eyes (12 mm, 6 total)
- Construction paper (red, yellow, blue)
- White glue
- Scissors
- Crayons
How to Make It
- Lay a paper bag flat with the flap at the top and fold the flap down once.
- Draw a mouth shape on the front of the bag below the flap and cut it out.
- Cut hair, hats, and noses from colored construction paper.
- Glue eyes above the mouth and add paper features around the face.
- Use crayons to draw cheeks and eyebrows before letting dry.


17. Sticker Shape Roads
Easy
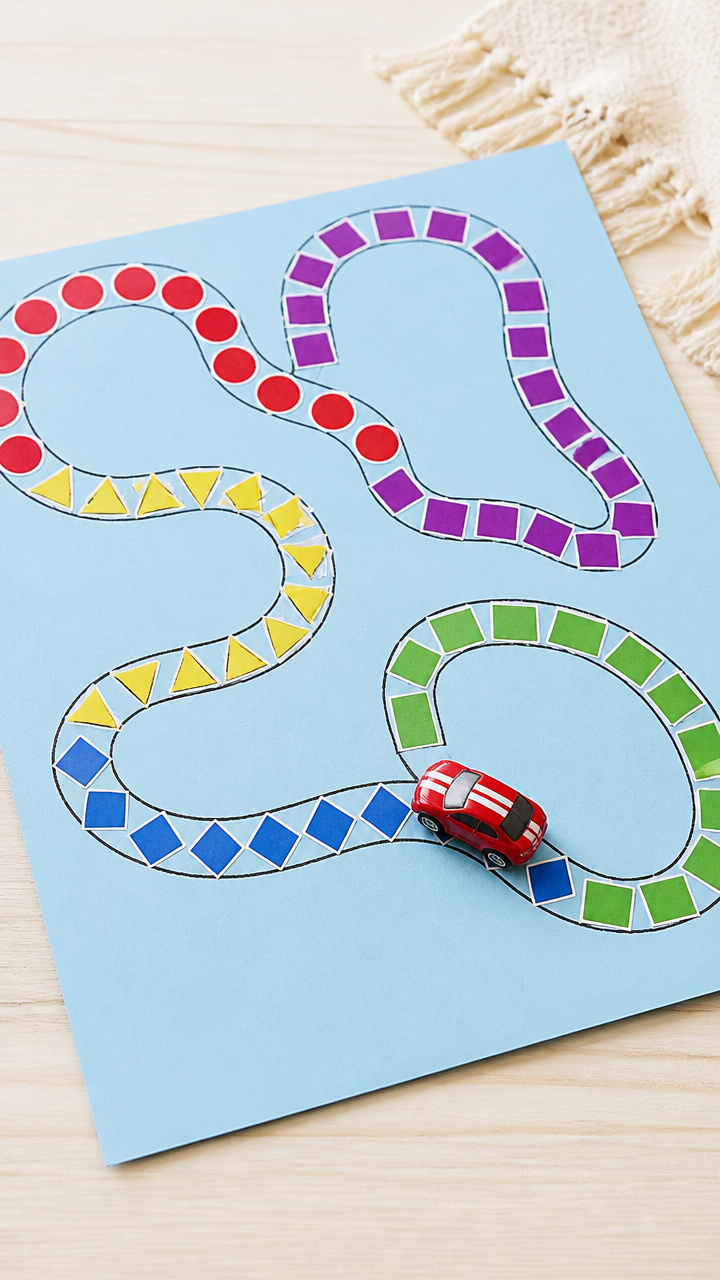
Colorful stickers connect into winding roads that guide toy cars. This layout craft teaches shape names and spatial planning.
Materials Needed
- A4 light blue cardstock
- Die-cut stickers (circle, square, triangle, star; 4 of each shape)
- Toy car (1 small)
- Black crayon
How to Make It
- Place one circle sticker in the bottom left corner of the cardstock.
- Add a square sticker touching its right edge, then a triangle above that.
- Continue placing stickers so each touches the last, forming a snaking path.
- Use the black crayon to draw lines connecting sticker centers into a road.
- Drive the toy car along the path while naming each shape aloud.


18. Q-Tip Dot Painting
Easy
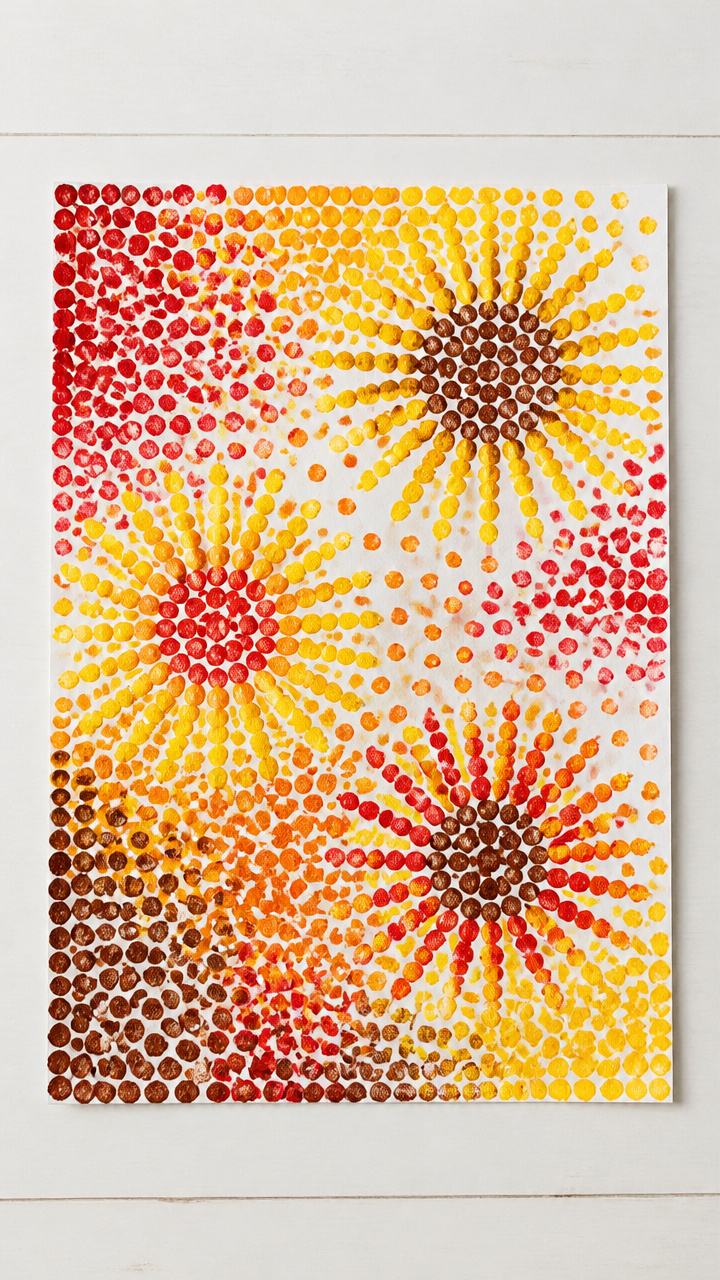
Cotton swabs dab paint into fields of tiny dots, forming suns and flowers. This controlled technique builds precision and color blending sense.
Materials Needed
- A4 white cardstock
- Q-Tips (20 count)
- Red, yellow, and brown tempera paint
- Shallow plates (3)
- Pencil
- Eraser
How to Make It
- Sketch a simple flower center and stem lightly with pencil.
- Pour small pools of red, yellow, and brown paint onto separate plates.
- Dip one end of a Q-Tip into red paint and dot around the flower center to make petals.
- Use yellow paint to fill the center with close dots.
- Switch to brown and dot along the stem, then erase any visible pencil lines.


19. Sock Worms
Moderate
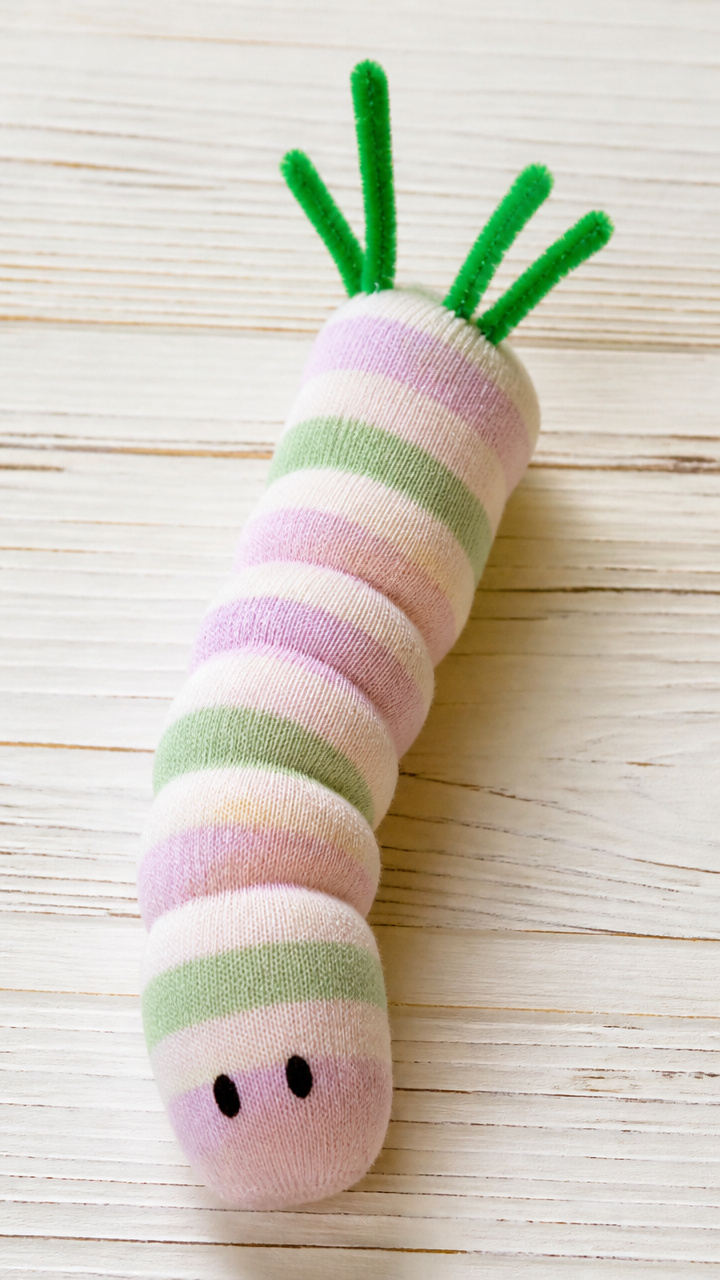
An old sock stuffed with rice wiggles with pipe cleaner bristles. This soft creature teaches fabric reuse and tactile movement.
Materials Needed
- Clean baby sock (cotton, ankle length)
- Uncooked rice (1 cup)
- Funnel
- Rubber band (wide)
- Chenille stems (green, 6 inches, 4 pieces)
- Sharpie marker (black)
- Needle and thread (blunt tip)
How to Make It
- Use the funnel to pour rice into the sock until it's 3/4 full.
- Pull the sock opening tight and secure with a rubber band.
- Thread the needle and sew a running stitch across the top to seal permanently.
- Draw a simple face on the front with the Sharpie.
- Push four chenille stems through the sides near the head to make bristles.


20. Leaf Rubbing Art
Easy
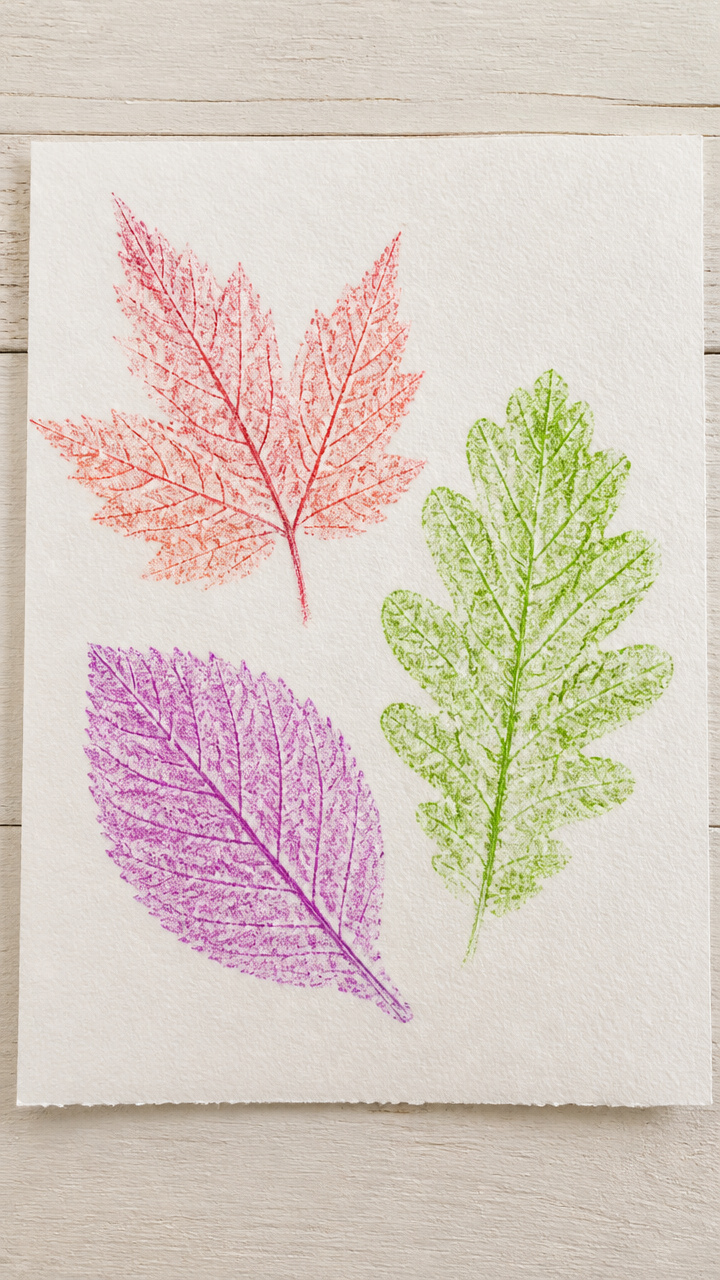
Real leaves placed under paper reveal delicate veins with crayon rubbings. This outdoor craft connects nature and texture in quiet discovery.
Materials Needed
- Fresh leaves (3 flat, veiny types)
- A4 white paper
- Crayons (peel wrappers, 3 colors)
- Tape (0.5 inch)
How to Make It
- Place one leaf vein-side up on a flat surface.
- Lay a sheet of paper over the leaf and tape all four corners down lightly.
- Hold a crayon sideways and rub firmly over the area above the leaf.
- Change colors and repeat with two other leaves on the same page.
- Lift paper to see the detailed impressions left behind.


21. Macaroni Alphabet Frames
Moderate
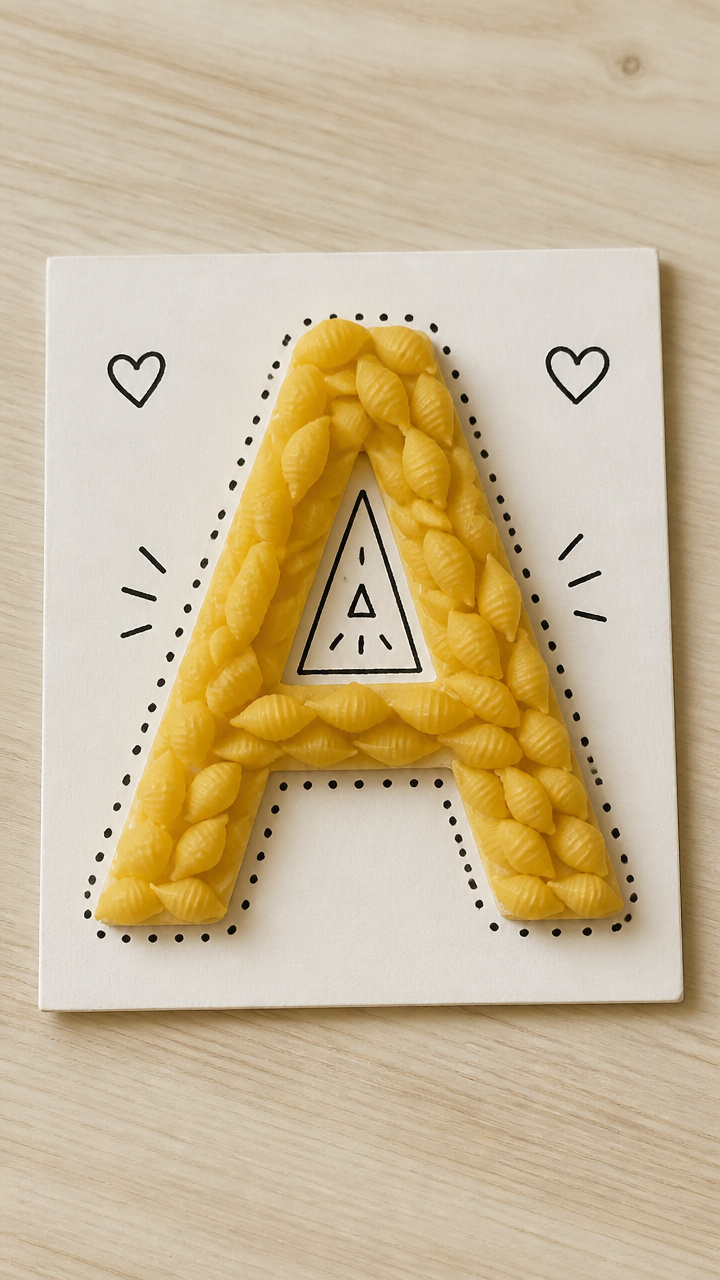
Elbow macaroni shells glue into chunky letter outlines on cardboard. This pasta craft reinforces shape memory with satisfying crunch.
Materials Needed
- Cardboard (cereal box, 6×6 inch piece)
- Elbow macaroni (30 pieces)
- White glue
- Black marker
- Scissors
- Paint (gold, optional)
How to Make It
- Cut a 5×5 inch square from the cardboard.
- Write a capital letter clearly in the center with the black marker.
- Apply small glue dots along the outline of the letter.
- Press macaroni pieces onto the glue, standing them upright to form a raised border.
- Let dry for 1 hour, then paint gold if desired and dry overnight.


22. Crayon Resist Fish
Easy
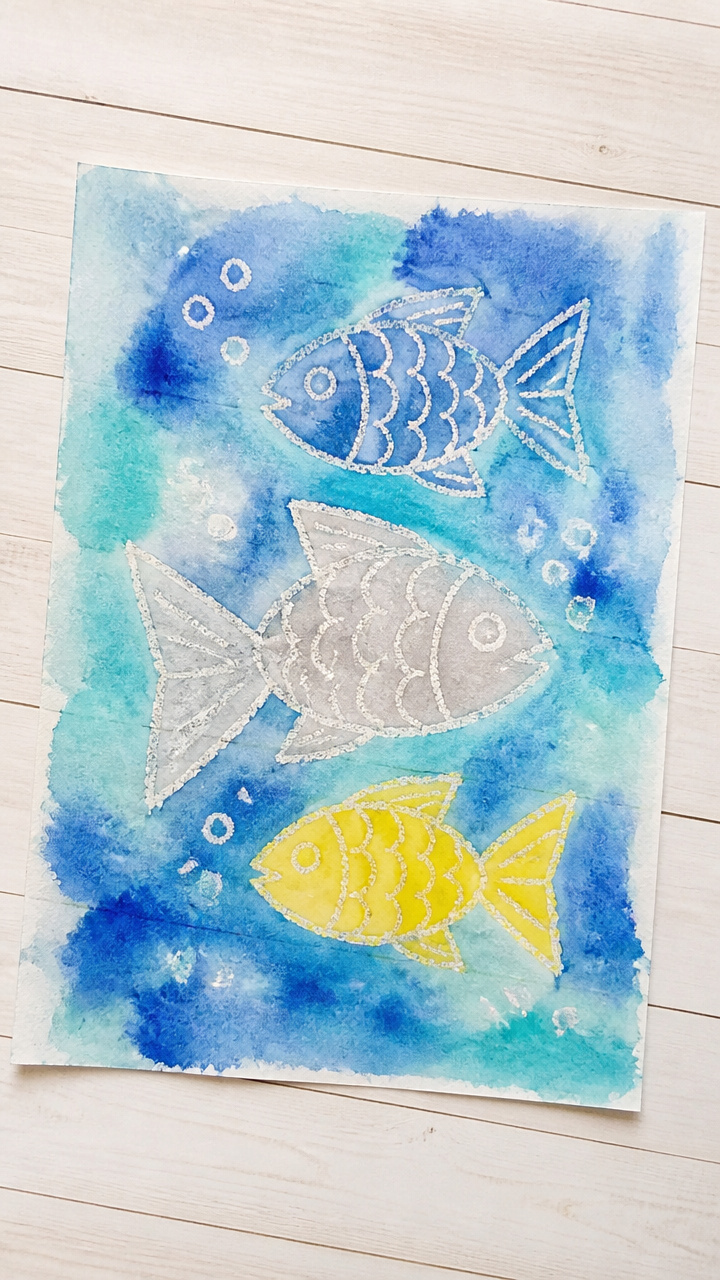
Waxy drawings repel paint to reveal bright fish swimming in watercolor seas. This chemical interaction craft surprises and delights with every stroke.
Materials Needed
- A4 watercolor paper
- Crayons (blue, silver, yellow)
- Blue liquid watercolor paint
- Paintbrush (large flat)
- Water cup
- Paper towel
How to Make It
- Draw 3 fish shapes on the paper using blue, silver, and yellow crayons, pressing hard.
- Fill in each fish with heavy crayon strokes.
- Pour a tablespoon of blue watercolor into the water cup and wet the brush.
- Paint a watery blue layer over the entire page, covering the fish completely.
- Blot excess paint with paper towel and watch the fish appear as the wax resists.


23. Playdough Color Mixing
Moderate
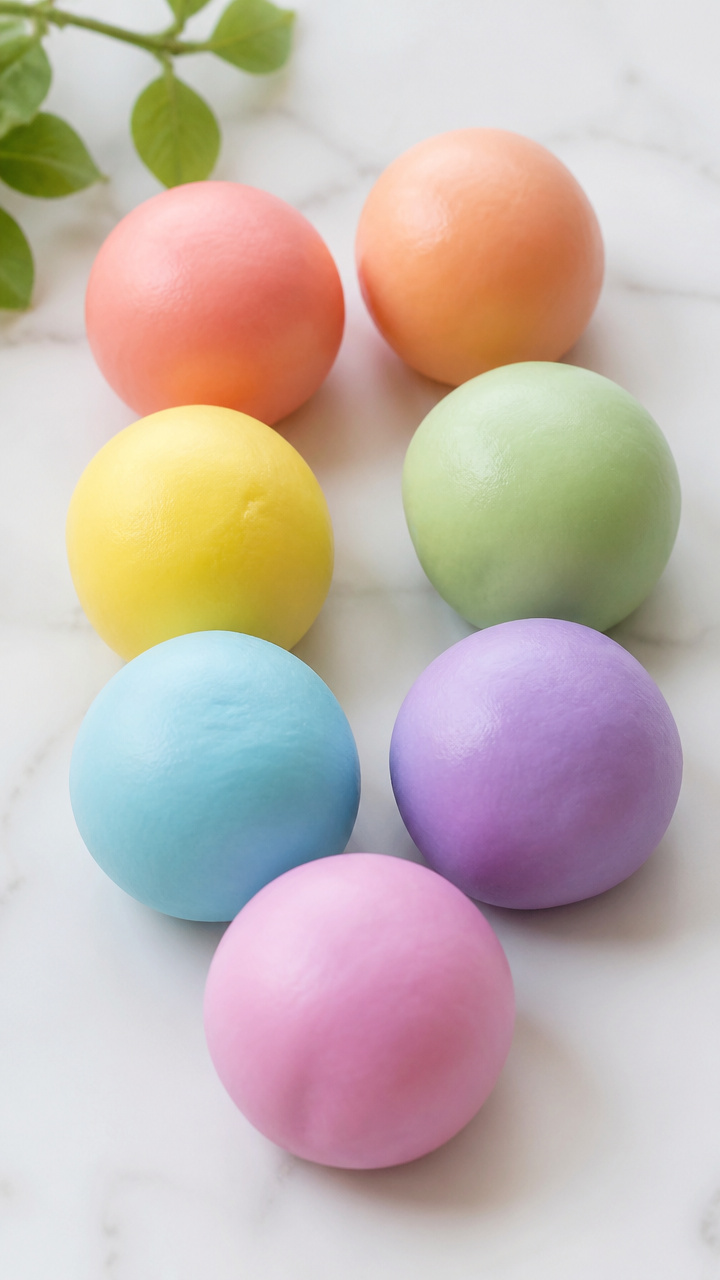
Homemade dough in primary colors squishes together to form new shades. This edible science craft teaches color theory through touch and blend.
Materials Needed
- All-purpose flour (1 cup)
- Salt (1/4 cup)
- Cream of tartar (1 tsp)
- Water (1/2 cup)
- Vegetable oil (1 tbsp)
- Saucepan
- Wooden spoon
- Food coloring (red, blue, yellow, 3 drops each)
- Small bowls (3)
How to Make It
- Mix flour, salt, cream of tartar, water, and oil in the saucepan over medium heat.
- Stir constantly with the spoon for 3–5 minutes until a soft ball forms.
- Divide dough into three equal parts and place each in a bowl.
- Add red food coloring to one, blue to another, yellow to the third, kneading each until uniform.
- Let cool 10 minutes, then invite kids to pinch and roll colors together to see new shades.


24. Tin Foil Mirror Faces
Easy
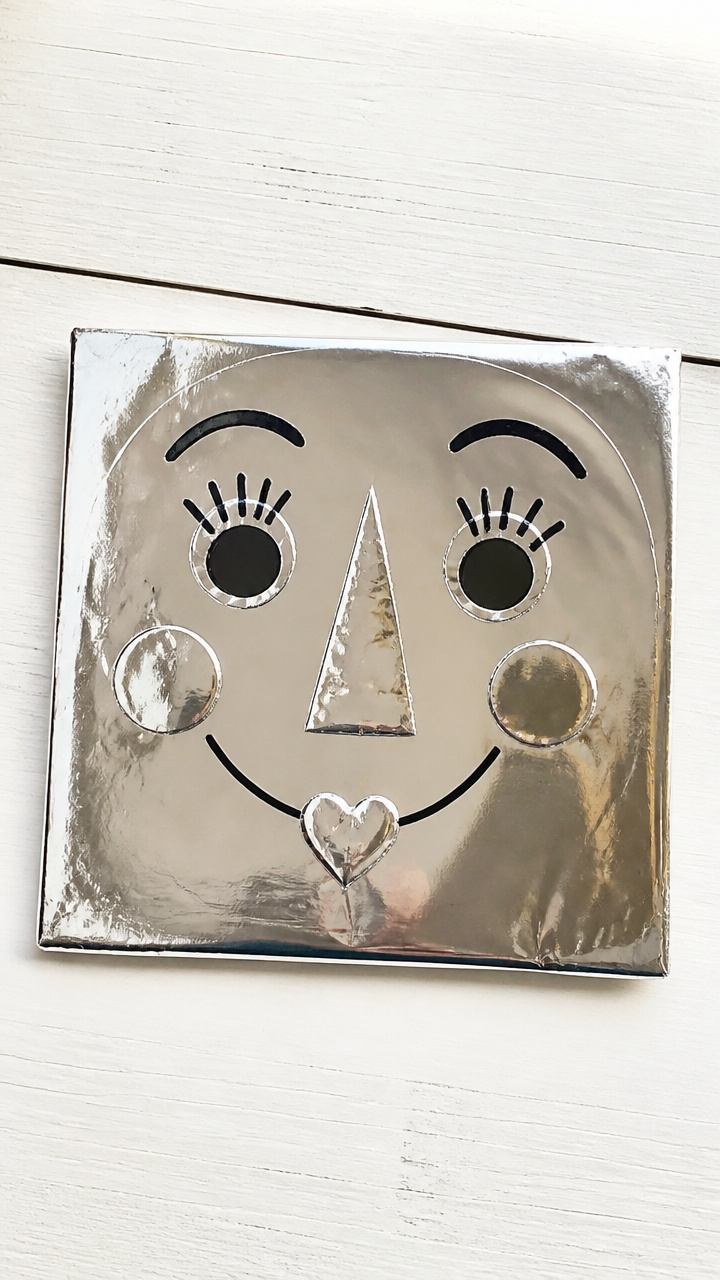
Shiny foil stretched over cardboard reflects smiles when shaped into silly faces. This reflective craft explores light and facial expression together.
Materials Needed
- Cardboard (6×6 inch square)
- Aluminum foil (12×12 inch sheet)
- Glue stick
- Scissors
- Black marker
- Craft glue
How to Make It
- Cut the cardboard into a 5-inch circle using scissors.
- Center the foil shiny-side up on the circle and wrap edges down to the back.
- Glue the foil edges flat to the back of the cardboard with craft glue.
- Draw big eyes, a nose, and a wavy mouth on the foil with the black marker.
- Let dry 15 minutes, then hold up to see your reflection in the shiny face.


Grab a few supplies and start with the one that makes you smile. Every sticky finger and glitter spill leads to something wonderful.