15 New Year Crafts for Adults

Glitter catching the light on a midnight table, the quiet focus of shaping something with your hands as the year turns—these crafts meet that moment with intention and warmth.
Each one is made for adult hands and thoughtful spaces, using materials that feel satisfying to work with and results you’ll want to keep out long after the calendar flips.
No childish glitter jars or generic resolutions here. These are meaningful, beautiful things you can make in an evening, a weekend, or spread across quiet moments.
1. Marbled Paper Journal Covers
Moderate
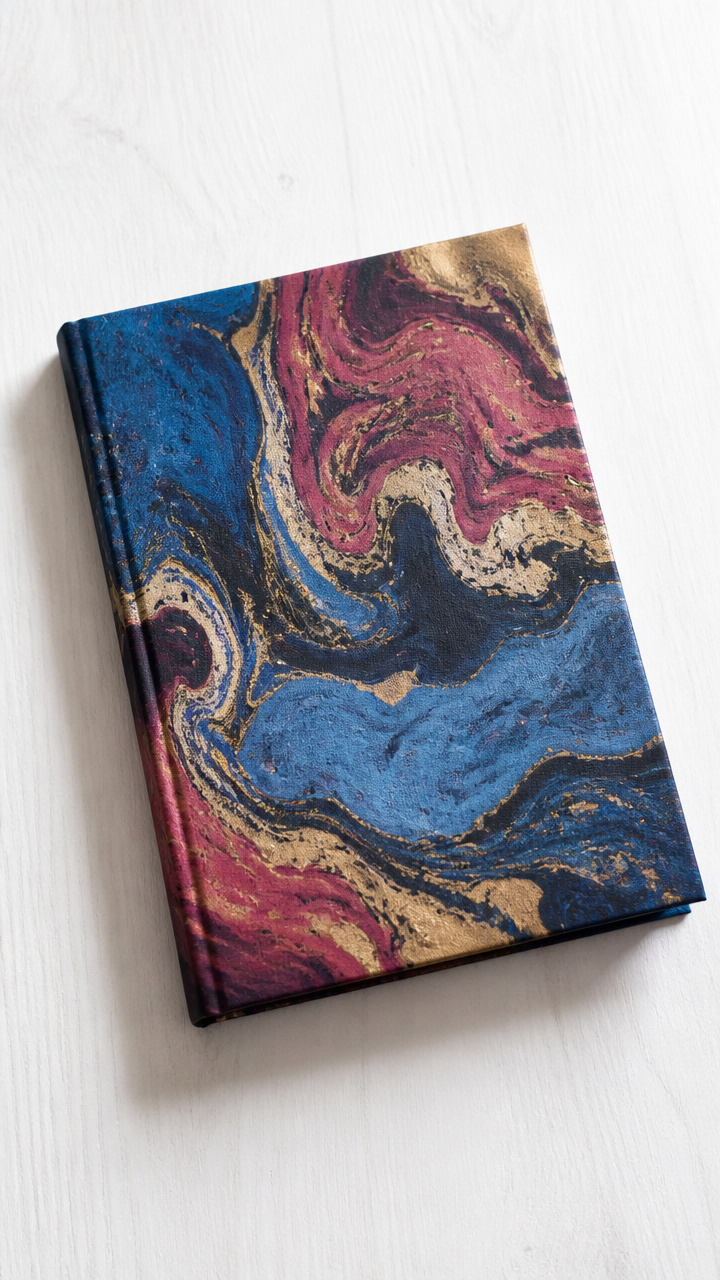
Swirling colors bloom beneath your fingers as you float ink on water, creating a one-of-a-kind cover for your new planner or notebook. This craft turns everyday stationery into a personal keepsake with bold, organic patterns.
Materials Needed
- A4 heavyweight cotton paper (2 sheets)
- Acrylic inks (3 colors: cobalt blue, gold, and deep magenta)
- Shallow plastic tray (larger than A4 size)
- Distilled water (1 liter)
- Popsicle sticks (3)
- Alum powder (1 tablespoon)
- Soft cloth towel
- Bone folder
How to Make It
- Dissolve alum powder into distilled water inside the tray, stirring gently until fully mixed.
- Drizzle 6 drops each of cobalt blue, gold, and magenta acrylic inks onto the water surface, spacing them apart.
- Drag popsicle sticks through the ink in swirling motions to create marbled patterns without overmixing.
- Slowly lay one sheet of cotton paper onto the water, ensuring full contact, then lift it after 10 seconds.
- Lay the paper on a towel to dry flat for 30 minutes, then repeat with the second sheet.
- Once dry, use the bone folder to crease each sheet in half for a softcover journal.


2. Copper Wire Moon Phases
Moderate
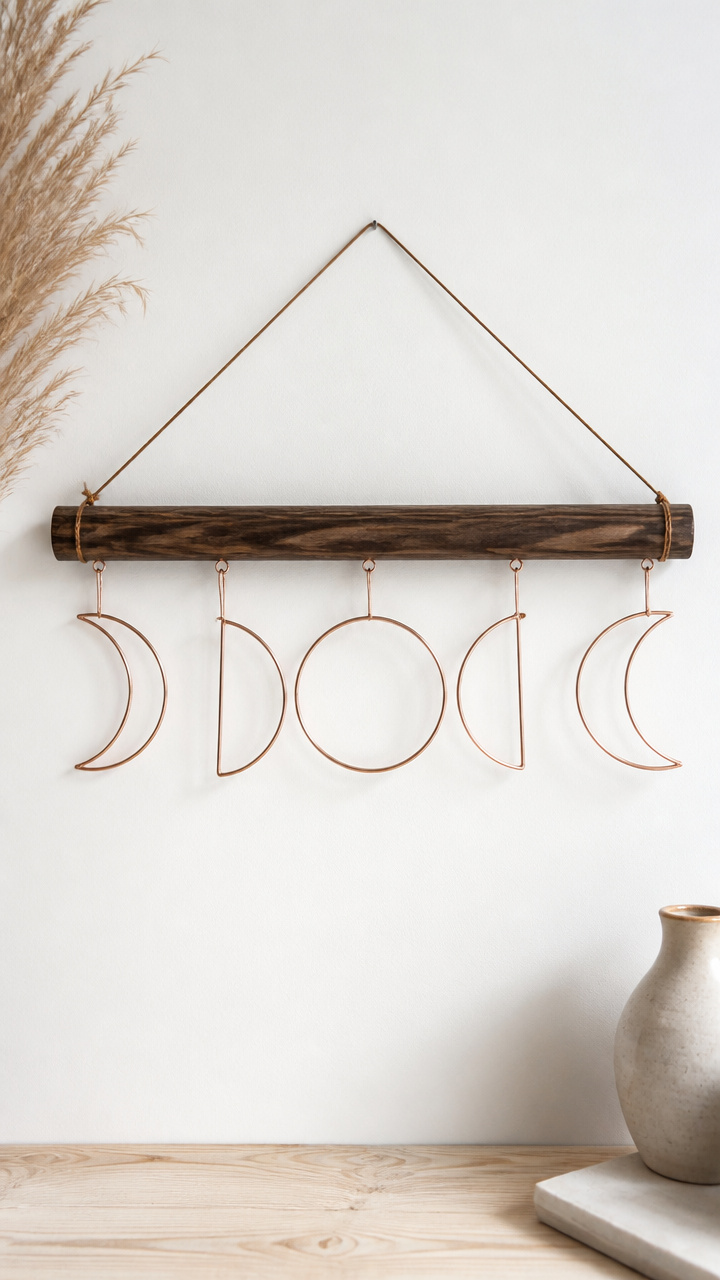
Delicate arcs of copper wire form the changing face of the moon, suspended in a minimalist wall display. This piece adds subtle celestial rhythm to a bedroom or study.
Materials Needed
- 20-gauge solid copper wire (10 feet)
- Round-nose pliers
- Chain-nose pliers
- Wire cutters
- Small wooden dowel (8 inches long, 0.5 inch diameter)
- Dark walnut stain (1 oz)
- Foam brush (1 inch wide)
- Fishing line (12 inches)
How to Make It
- Cut the copper wire into 8 equal 15-inch lengths using wire cutters.
- Use round-nose pliers to curl one end of each wire into a small spiral, then shape the rest into crescents of varying curves.
- Arrange the eight moon phases along the dowel to represent a lunar cycle.
- Stain the dowel with walnut stain using the foam brush, let dry for 20 minutes.
- Wrap each wire base around the dowel and press tightly with chain-nose pliers to secure.
- Tie fishing line to each end of the dowel for hanging.


3. Pressed Botanical Coasters
Advanced
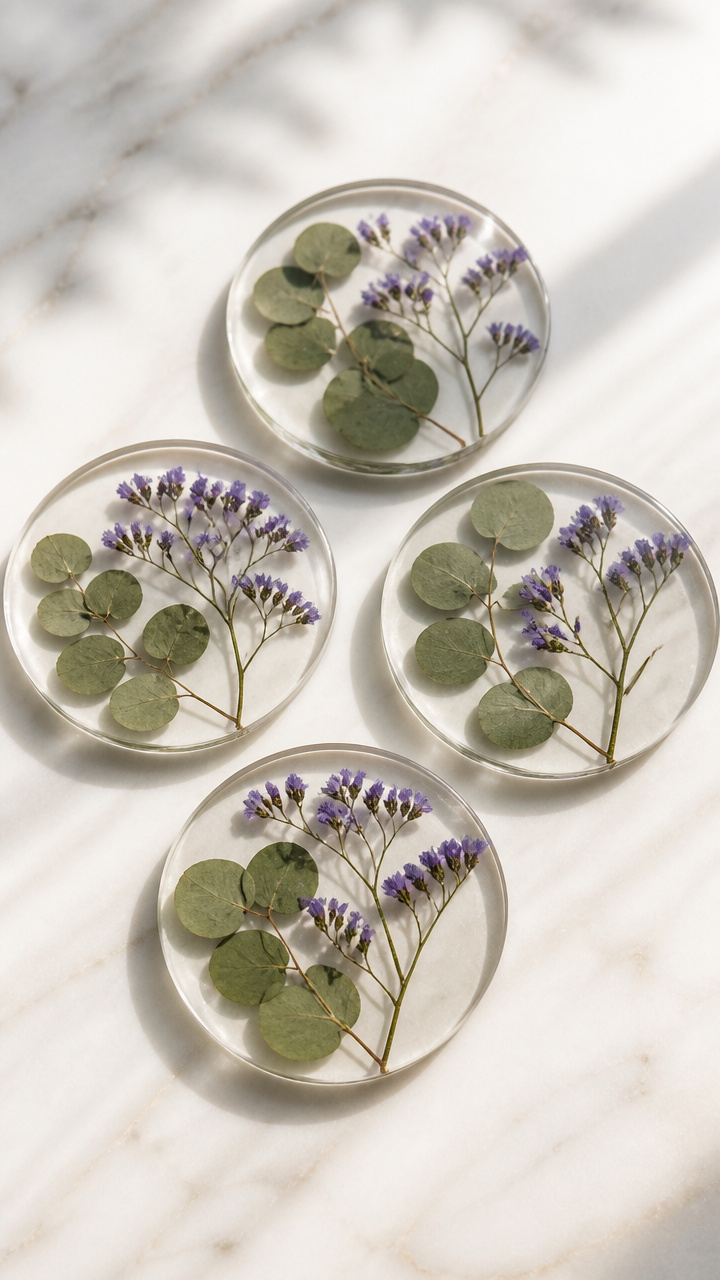
Translucent resin captures tiny ferns and flower petals between smooth layers, turning fragile plants into durable coasters. Each one holds a quiet echo of the natural world.
Materials Needed
- Epoxy resin kit (clear, 8 oz total mix)
- Silicone coaster molds (4 circular, 4 inch diameter)
- Fresh eucalyptus leaves (4 small)
- Pressed statice flowers (8 blooms)
- Disposable plastic cups (2)
- Wooden stir sticks (4)
- Toothpicks (5)
- Heat gun
How to Make It
- Mix epoxy resin according to package instructions in a plastic cup, stirring slowly for 3 minutes.
- Pour a thin layer of resin into each mold, filling about one-third full.
- Place one eucalyptus leaf and two statice flowers into each mold, arranging with toothpicks.
- Let sit for 15 minutes to allow air bubbles to rise, then pop any visible ones with a toothpick.
- Pour second resin layer to fill molds completely, tapping gently to settle.
- Pass heat gun slowly over each mold to remove remaining bubbles, cure for 24 hours.


4. Blackout Poetry Frames
Easy
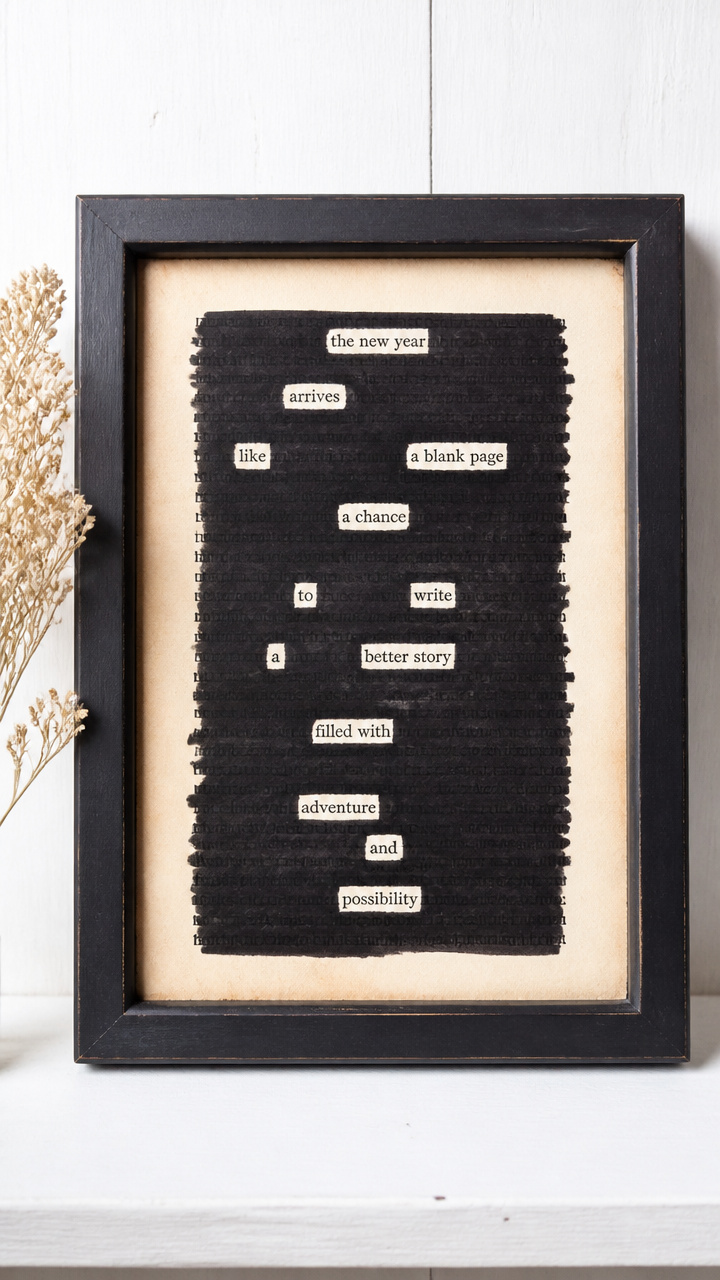
Words emerge from old book pages like secrets revealed, transformed by selective removal into short poems. This craft gives discarded text new emotional weight.
Materials Needed
- Vintage paperback book (1)
- Black fine-tip marker (Sakura Pigma Micron 08)
- White gel pen (Uniball Signo UM-151)
- Scissors
- 8×10 inch picture frame with mat board
- Craft glue
How to Make It
- Flip through the book and select a page with dense text and no images.
- Use the black marker to color over words you don’t want, leaving behind a scattered poem of readable words.
- Highlight the final phrase or line with the white gel pen for contrast.
- Cut the page section to fit the mat board opening using scissors.
- Glue the cut section centered on the back of the mat board and let dry for 10 minutes.
- Insert into frame and close the backing.


5. Salt Dough Ornamental Rings
Easy
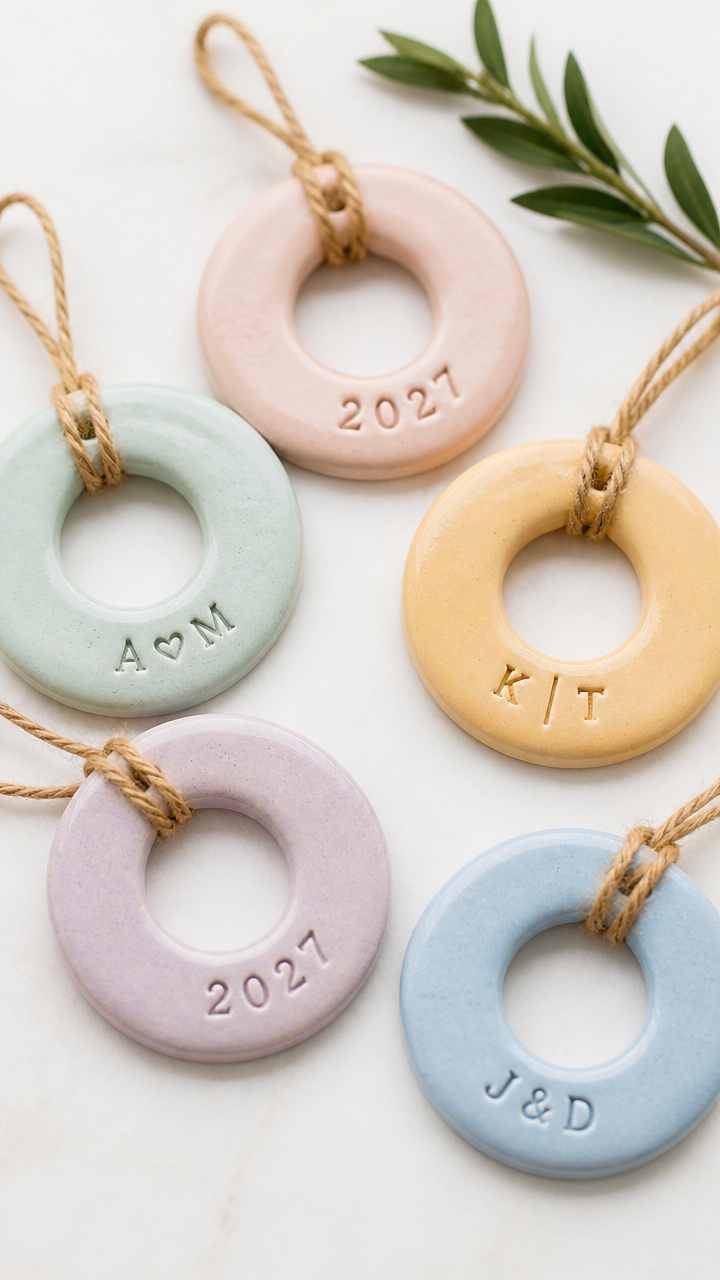
Simple dough shaped around rings bakes into lightweight ornaments stamped with initials or dates. These hold memory in their grooves and shine when painted.
Materials Needed
- All-purpose flour (1 cup)
- Table salt (1/2 cup)
- Water (2/3 cup)
- Rolling pin
- Circular cookie cutter (1.75 inch diameter)
- Straw (for hole punching)
- Baking sheet
- Parchment paper
- Acrylic paint (matte white, 2 oz)
- Paintbrush (small round)
- Clear matte sealer spray
How to Make It
- Mix flour, salt, and water in a bowl until a smooth dough forms, kneading for 2 minutes.
- Roll dough to 1/4 inch thickness on a floured surface using the rolling pin.
- Cut out 6 circles with the cookie cutter, then press a straw through the top edge to make a hanging hole.
- Place shapes on parchment-lined baking sheet and bake at 200°F for 3 hours.
- Cool completely, then paint each with white acrylic using the brush.
- Spray both sides with matte sealer and let dry for 30 minutes.


6. Indigo Shibori Napkins
Moderate
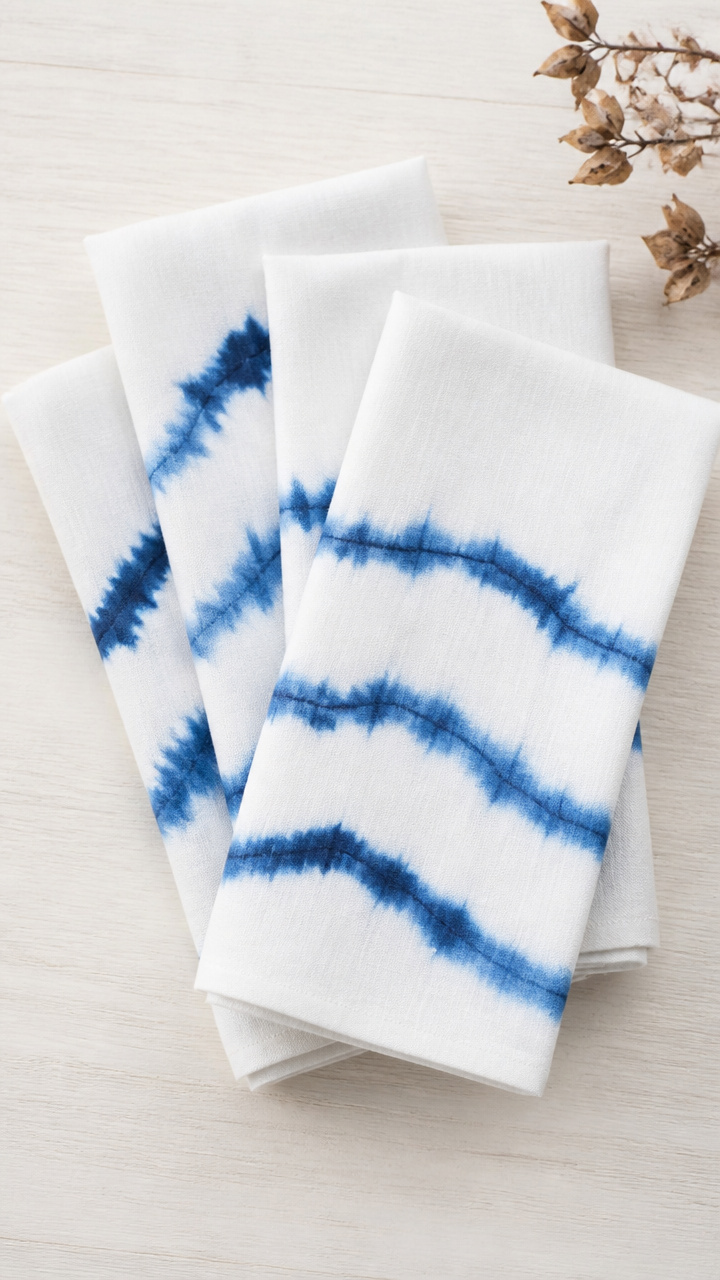
Deep blue folds ripple across white linen, created by binding fabric before dipping into dye. These napkins bring slow-crafted beauty to everyday meals.
Materials Needed
- Natural indigo dye kit (with reducer and fixer)
- White linen tea towels (4, 16×26 inches)
- Rubber bands (6)
- Plastic squeeze bottle
- Plastic gloves
- Plastic tub (large enough to submerge towel)
- Synthetic soda ash (4 oz)
How to Make It
- Soak towels in water mixed with soda ash for 20 minutes, then wring out thoroughly.
- Fold each towel into accordion pleats, bind tightly with rubber bands at 2 inch intervals.
- Prepare indigo dye in the tub following kit instructions, mixing with warm water.
- Wearing gloves, submerge bound towels for 10 minutes, gently pressing to saturate.
- Remove and let oxidize in air for 5 minutes—they will turn from green to blue.
- Repeat dunk and oxidize twice more, then rinse under cold water until clear, remove bands, and hang to dry.


7. Beeswax Candle Tapers
Easy
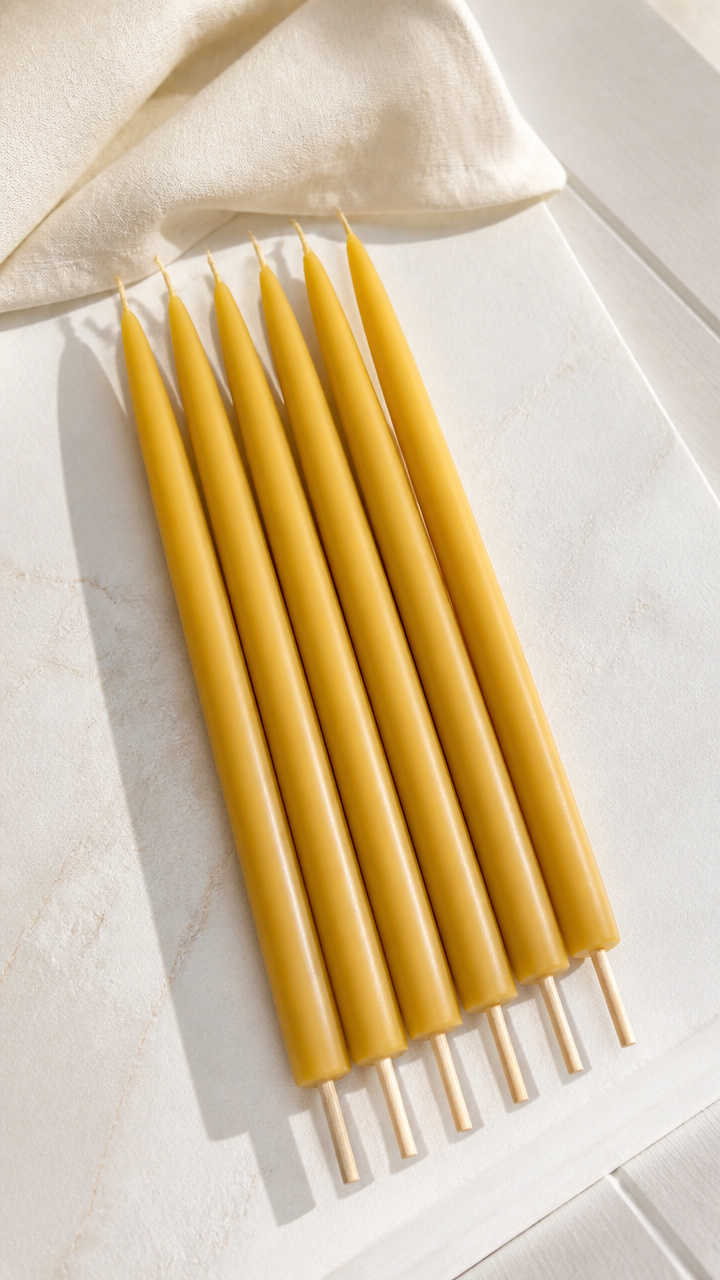
Smooth yellow tapers glow with a honeyed scent and dripless burn, rolled from sheets of pure beeswax. They cast a warm, flickering light perfect for reflection.
Materials Needed
- Beeswax sheets (4, 8×12 inches, golden yellow)
- Wooden skewers
- Ruler
- Scissors
- Parchment paper
- Heavy book
How to Make It
- Lay one beeswax sheet on parchment paper with the long side facing you.
- Place a skewer along the bottom edge, then roll the wax tightly around it.
- Continue rolling up the entire sheet, keeping tension even.
- Seam-side down, place under a heavy book for 5 minutes to set the shape.
- Slide out the skewer and trim the wick to 1/4 inch with scissors.
- Repeat for remaining sheets.


8. Concrete Succulent Planters
Advanced
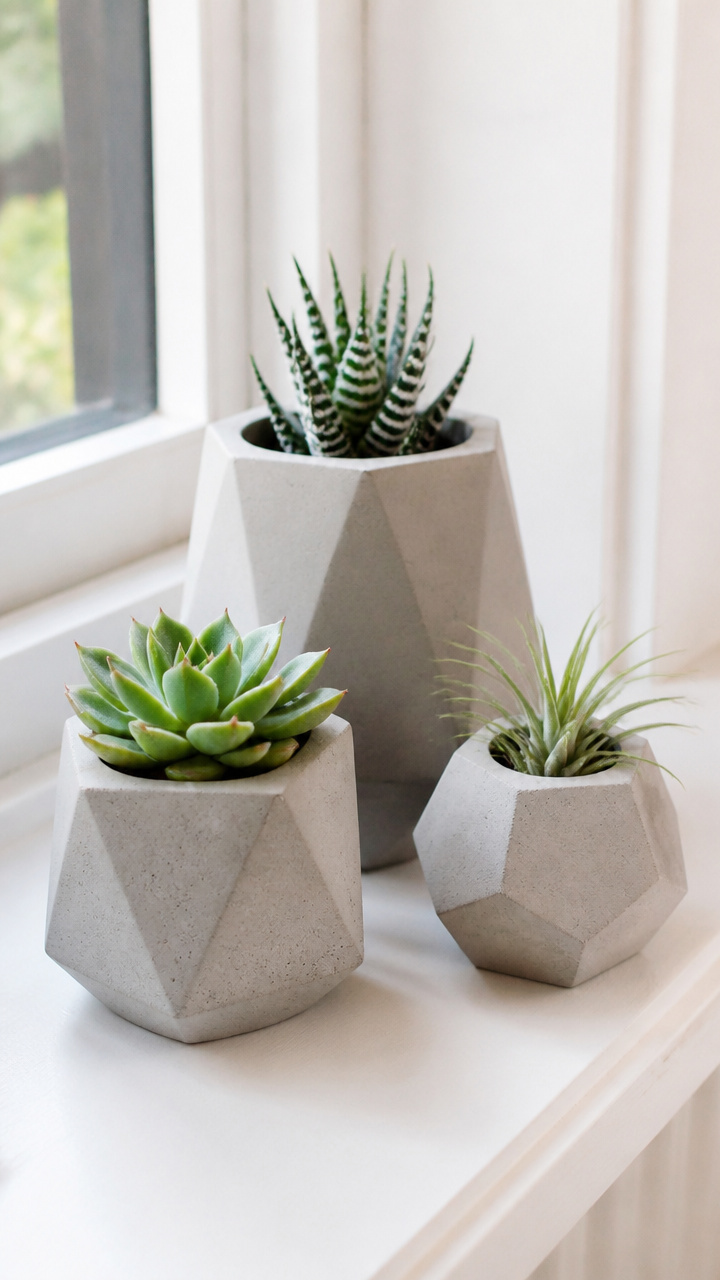
Matte gray planters shaped by hand hold air plants or tiny succulents, blending raw texture with living green. Their weight and simplicity ground any windowsill.
Materials Needed
- Quick-set concrete mix (1 lb)
- Water (1/3 cup)
- Silicone ice cube tray (geometric shapes)
- Disposable bowl
- Mixing stick
- Small paintbrush
- Mineral oil (2 tsp)
How to Make It
- Brush mineral oil into each mold cavity using the paintbrush to act as a release agent.
- Mix concrete and water in the bowl with the stick until smooth like peanut butter.
- Spoon mixture into molds, tapping gently to remove air pockets.
- Let cure for 24 hours undisturbed.
- Pop out shapes carefully and wipe clean with a dry cloth.
- Sand any rough edges lightly with fingers if needed.


9. Gold Leaf Picture Frames
Moderate
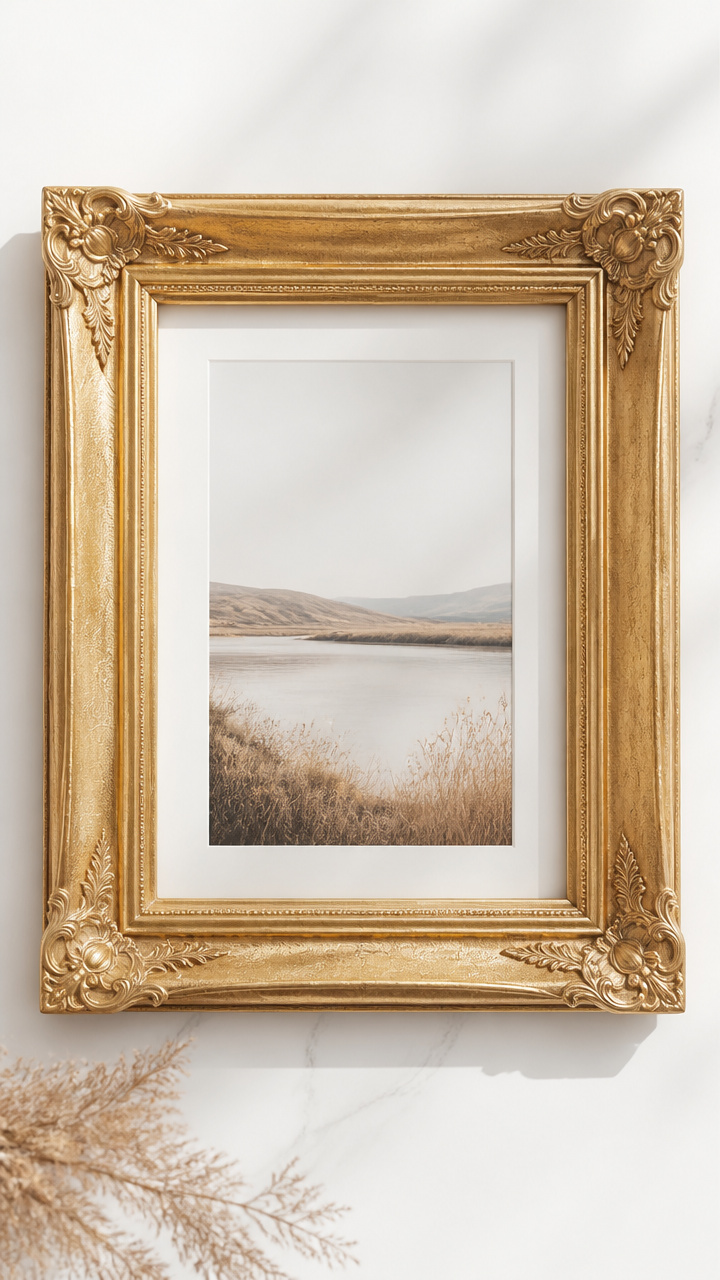
Aged brass frames gain fresh luster with delicate flakes of real gold leaf applied to recessed details. Light catches the shimmer just so, making photos feel sacred.
Materials Needed
- Plain wooden picture frame (8×10 inch)
- Acrylic paint (antique brass, 1 oz)
- Paintbrush (flat, 1 inch)
- Gesso (1 oz)
- Fine sandpaper (400 grit)
- Gold leaf sheets (3 sheets, 3.5×3.5 inches)
- Leaf adhesive (liquid, 1/2 oz)
- Soft makeup brush
How to Make It
- Paint the frame with gesso using the flat brush, let dry for 15 minutes.
- Lightly sand the surface with sandpaper to smooth, then wipe clean.
- Paint frame with antique brass acrylic, let dry for 20 minutes.
- Apply leaf adhesive to raised carvings only, wait until tacky (about 7 minutes).
- Lay a gold leaf sheet over treated area, press gently with fingers.
- Brush away excess with the makeup brush, revealing bright gold accents.


10. Knotted Silk Scarf Hanger
Moderate
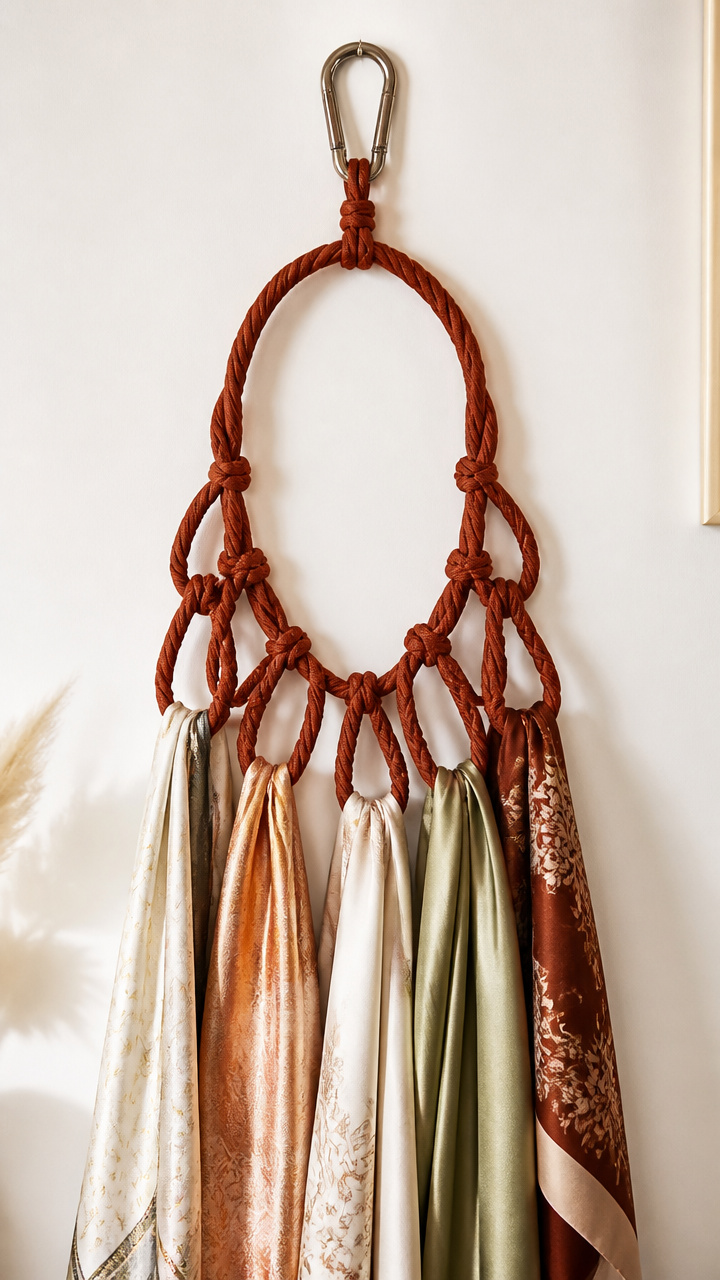
A single length of silk cord twists into elegant knots that suspend scarves like art. This hanger keeps fabrics smooth and visible in a closet or dressing room.
Materials Needed
- Silk cord (10 feet, 4mm diameter, rust color)
- Carabiner clip (1, brushed nickel)
- Measuring tape
- Lighter
How to Make It
- Fold cord in half and tie a lark’s head knot around the carabiner’s top loop.
- Divide the four strands below into pairs and tie a square knot 6 inches down.
- Skip 3 inches, then tie another square knot with the same pairs.
- Cross left strand of left pair with right strand of right pair and tie third square knot.
- Continue alternating crossed pairs every 3 inches until 4 knots are complete.
- Trim ends to 2 inches and lightly singe with lighter to prevent fraying.


11. Layered Glass Nightlight
Advanced
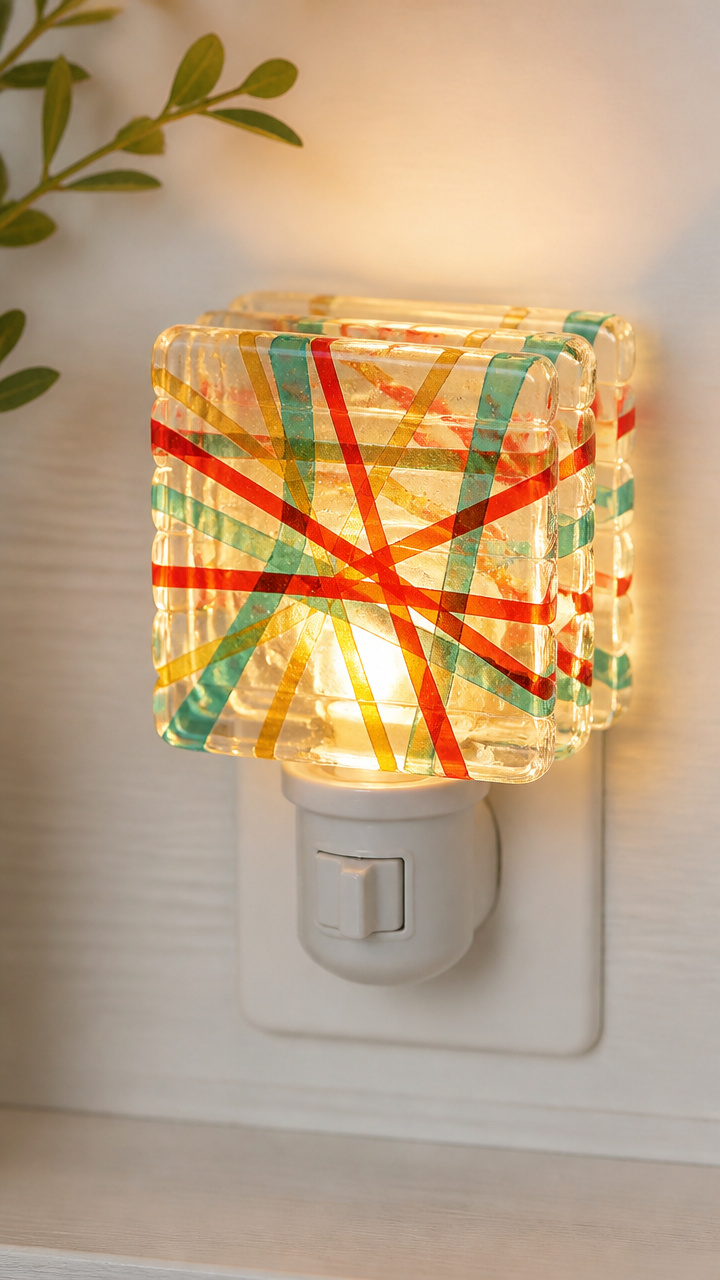
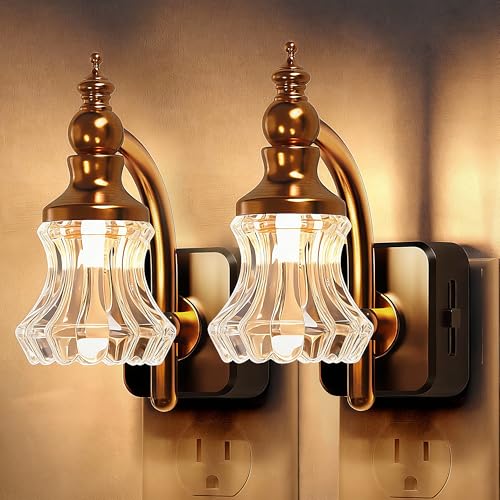
Stacked glass tiles catch LED light from below, glowing with colored geometric patterns. Set it on a nightstand to cast quiet constellations on the ceiling.
Materials Needed
- Clear glass tiles (4, 3×3 inches)
- Glass fusing kiln
- Kiln shelf
- Kiln paper
- Colored glass stringers (red, teal, gold)
- Tweezers
- LED puck light (battery-powered)
How to Make It
- Line the kiln shelf with kiln paper to protect the surface.
- Arrange three glass tiles in a stack, placing stringers between layers in radiating lines.
- Use tweezers to position stringers precisely without touching bare hands.
- Place top tile to seal the design, centering carefully.
- Fire in the kiln at 1450°F for 10 minutes, then anneal at 900°F for 30 minutes.
- Let cool overnight, then place fused block directly on top of the LED puck light.

12. Linen String Bookmarks
Easy
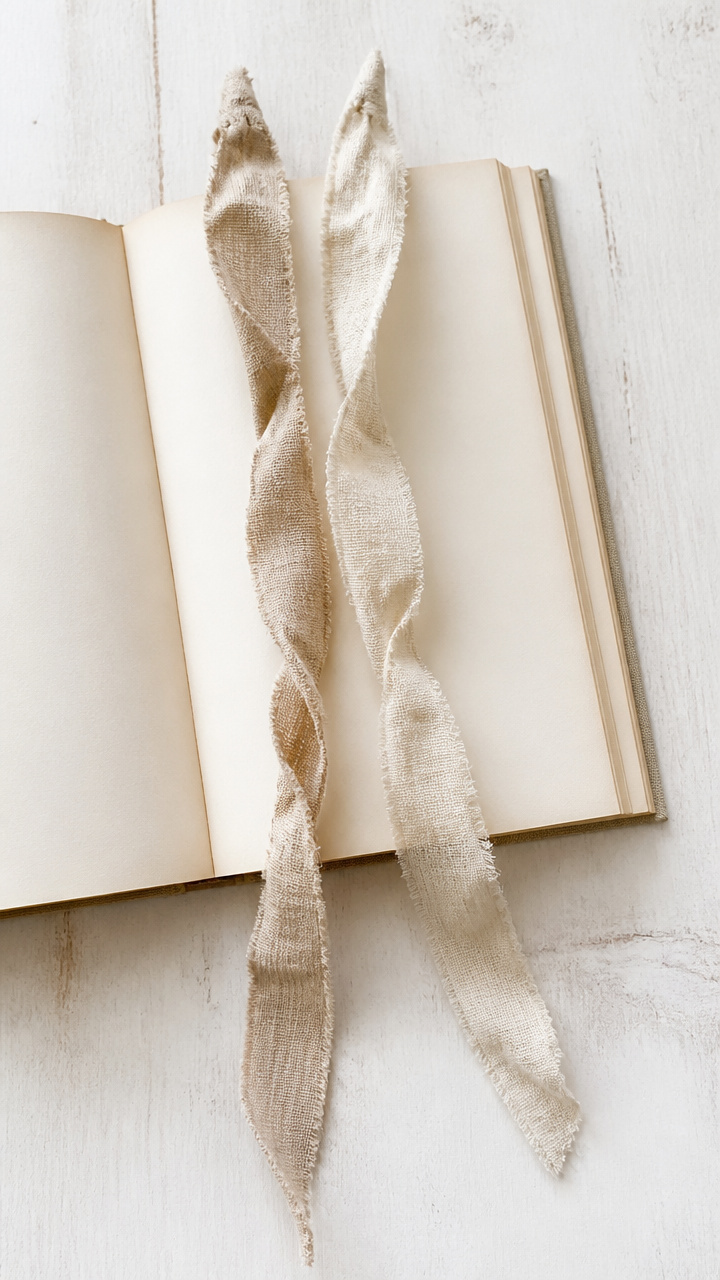
Twisted strips of vintage linen weave into slender bookmarks that soften with use. Each one carries the gentle wear of time in its fibers.
Materials Needed
- Old linen shirt (1)
- Scissors
- Ruler
- Embroidery needle (size 5)
- Matching linen thread (1 spool)
- Pinking shears
How to Make It
- Cut the shirt fabric into 12 strips, each 1 inch wide and 10 inches long.
- Use pinking shears on all edges to prevent fraying.
- Braid three strips tightly together, securing ends with a hand stitch using the needle and thread.
- Trim braid ends evenly to 9 inches.
- Repeat to make three bookmarks.
- Press lightly with an iron if desired for a crisper look.


13. Citrus Peel Fire Starters
Easy
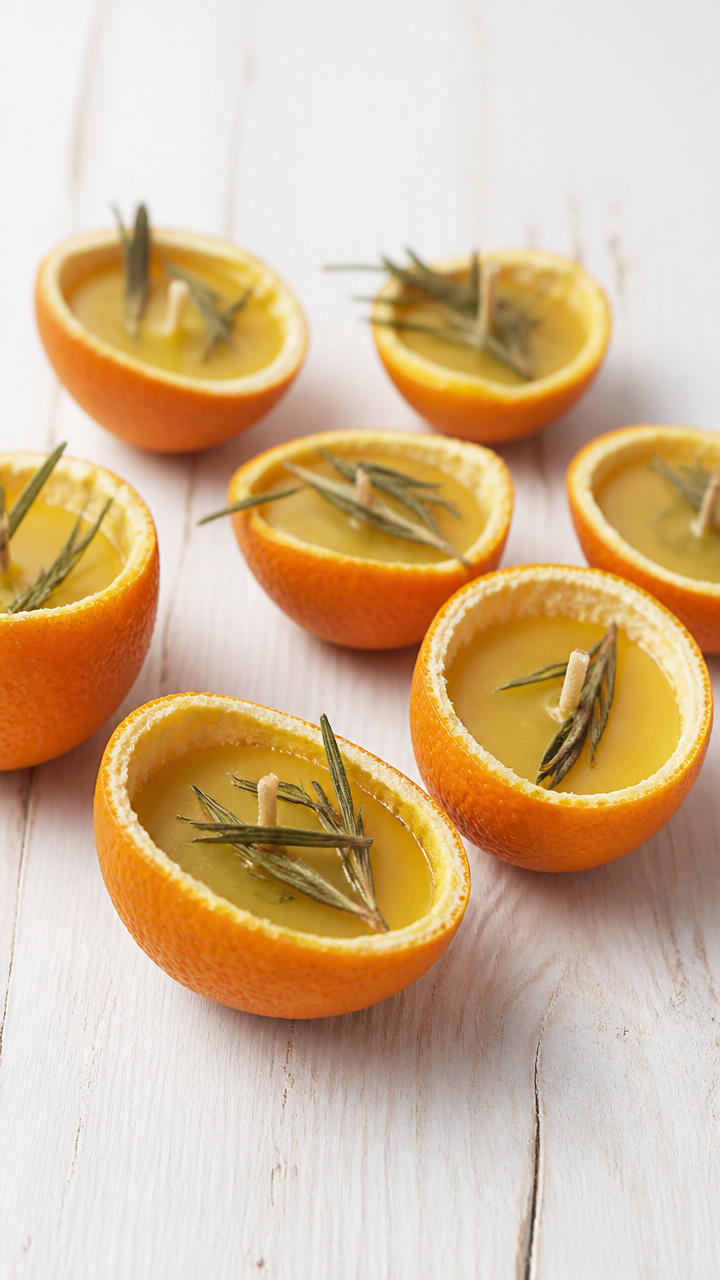
Sun-dried orange peels hold melted beeswax and dried rosemary sprigs, burning bright and citrusy in a fireplace. These add fragrance and ease to winter nights.
Materials Needed
- Orange peels (6, from large oranges)
- Beeswax pellets (1/2 cup)
- Small saucepan
- Dried rosemary sprigs (6)
- Muffin tin
- Parchment paper
How to Make It
- Line muffin tin cups with parchment paper and place one orange peel in each.
- Add rosemary sprig to each peel cup.
- Melt beeswax pellets in saucepan over low heat, stirring constantly.
- Carefully pour melted wax into each peel until three-quarters full.
- Let cool for 1 hour at room temperature.
- Pop out starters and store in a dry box.


14. Terrazzo-Inspired Trivets
Advanced
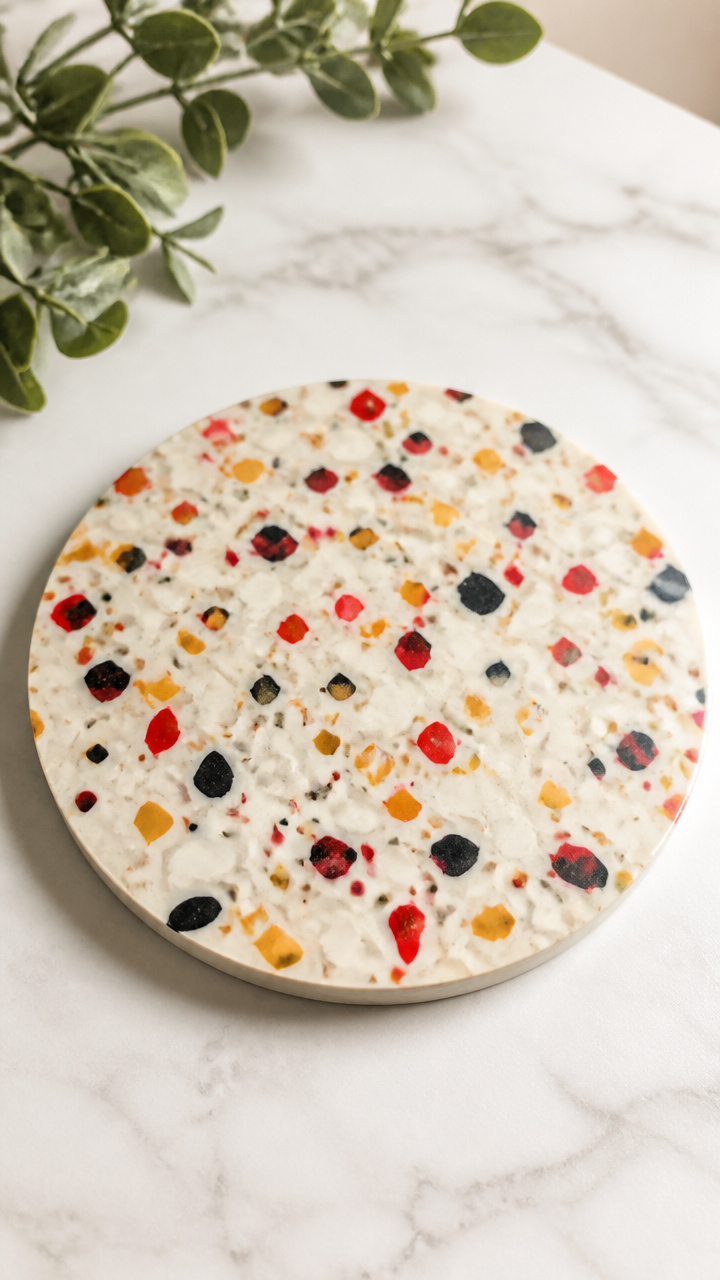
Chips of colored polymer clay mimic stone flecks in a smooth resin field, forming heat-resistant trivets. These combine modern style with handmade charm.
Materials Needed
- Polymer clay (white, red, charcoal, and yellow, 2 oz each)
- Pasta machine (dedicated to crafts)
- Resin kit (heat-resistant, 6 oz)
- Silicone trivet mold (round, 7 inch)
- Disposable cups (2)
- Stir sticks (3)
- Heat gun
How to Make It
- Condition each clay color by hand, then run through pasta machine on setting 3.
- Cut clays into 1/4 inch squares and mix randomly in a bowl.
- Press clay pieces into the mold to form a packed, uneven layer.
- Bake according to clay instructions (usually 275°F for 15 minutes), cool completely.
- Mix resin as directed, pour over baked clay layer to fill mold.
- Use heat gun to remove bubbles, cure 24 hours.


15. Calligraphy Resolution Cards
Moderate
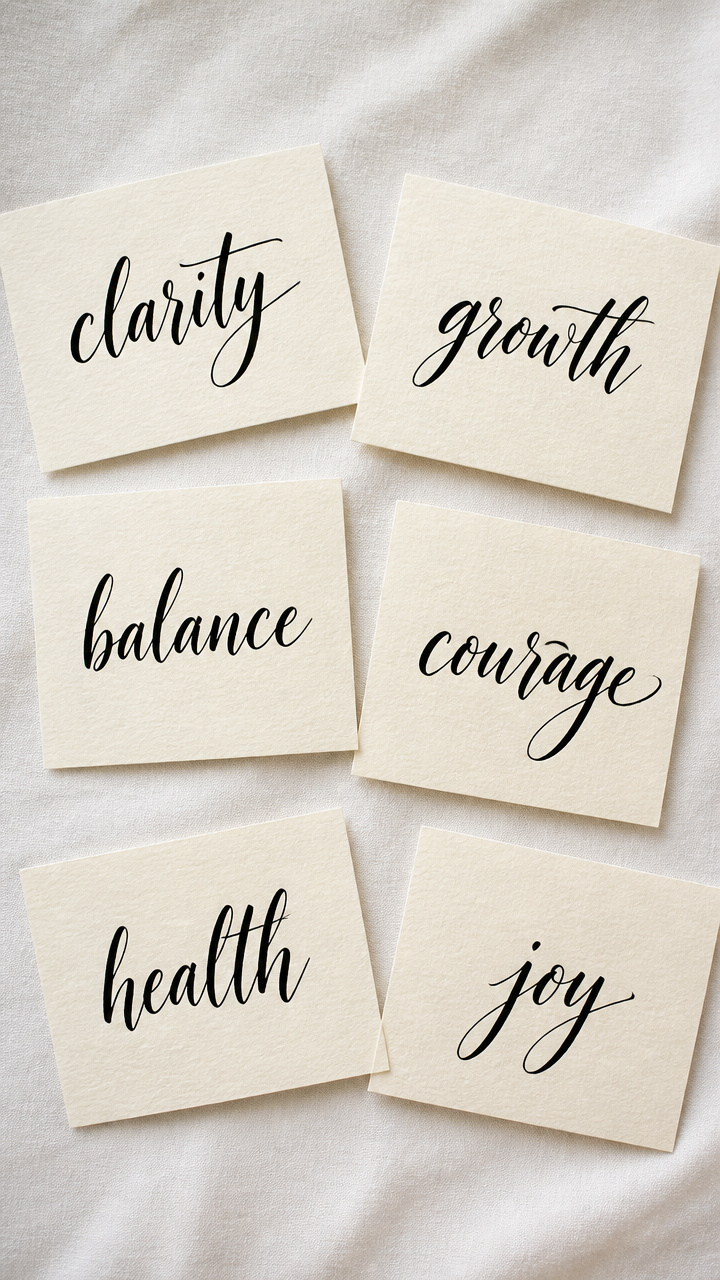
Thick cotton cards host a single word written in rich black ink, brushed with deliberate slowness. These become quiet anchors for the months ahead.
Materials Needed
- A6 cotton cardstock (6 cards, ivory)
- Oblique calligraphy pen holder
- Broad-edge nib (Brause EF66)
- India ink (black, 1 oz)
- Inkwell
- Ruler
- Pencil
- Eraser
How to Make It
- Use ruler and pencil to draw a light horizontal line across each card at 2.5 inches from the bottom.
- Pour ink into inkwell, dip nib into ink to coat the edge.
- Hold pen at a 55-degree angle and write one word per card using downstrokes thick and upstrokes thin.
- Rest 30 seconds between letters to avoid smudging.
- Let ink dry for 10 minutes, then gently erase guideline with eraser.
- Display cards upright in a small tray or prop on a shelf.


Pick one that calls to you, gather what you need, and start tonight. Your hands already know how to begin.