20 Cute Animal Crafts for Kids
Spending time crafting with kids brings joy, creativity, and a little mess in the best way. These animal-themed projects use simple materials you likely have at home and deliver big smiles when the final piece comes together.
Each craft is designed to be engaging for young hands while offering just enough detail to feel special. You'll find painting, cutting, gluing, and even some stamping and weaving—every one a chance to make something sweet and keepable.
1. Pom-Pom Chick Brood
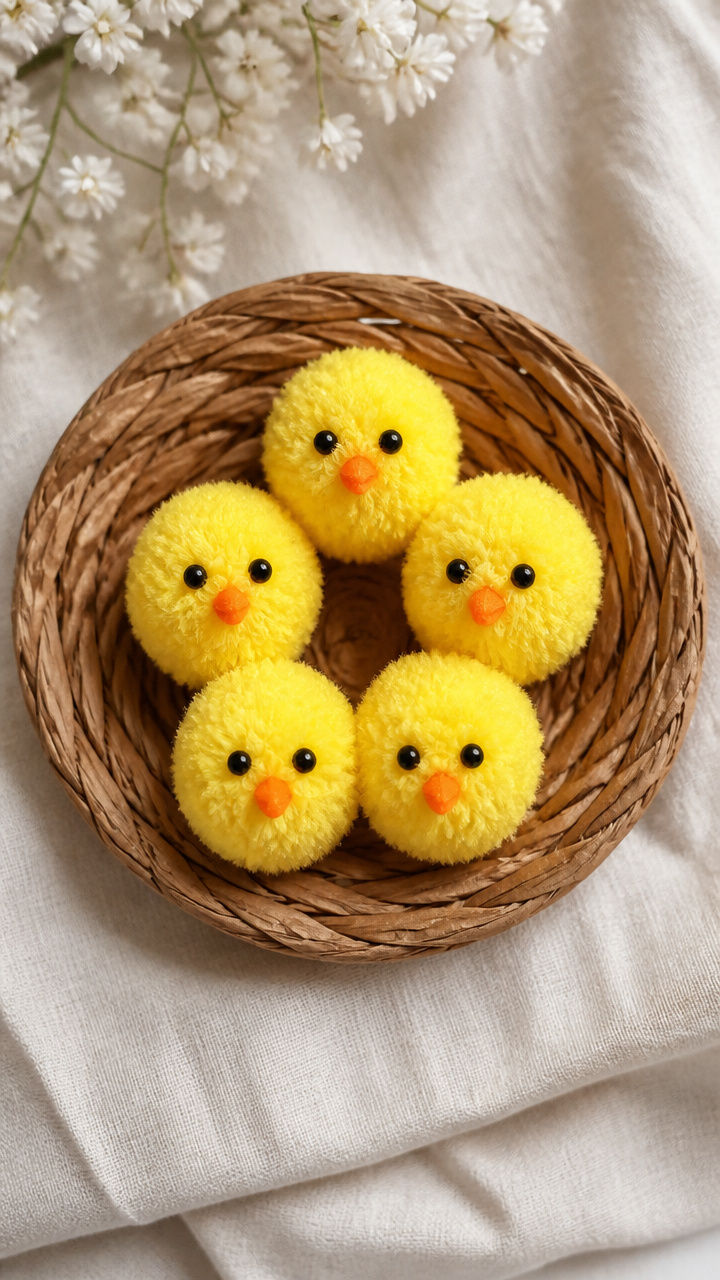
Soft yellow pom-poms become a family of baby chicks peeking from a paper nest. This no-mess craft is perfect for tiny hands and brightens any windowsill.
Materials Needed
- 6-inch brown paper plate
- 5 yellow pom-poms (1 inch diameter)
- 2 black craft eyes (6mm)
- 1 orange pipe cleaner
- White school glue
- Scissors
How to Make It
- Flatten the bottom half of the paper plate to make it sit flat. This will be the nest base.
- Glue the five yellow pom-poms inside the curved part of the plate so they peek over the edge like baby chicks.
- Glue two black eyes onto each pom-pom near the top. Let dry for 10 minutes.
- Cut the orange pipe cleaner into five 1-inch pieces. Fold each into a small triangle for a beak and glue under each eye.
- Set aside for 20 minutes to fully dry before moving.


2. Paper Plate Octopus
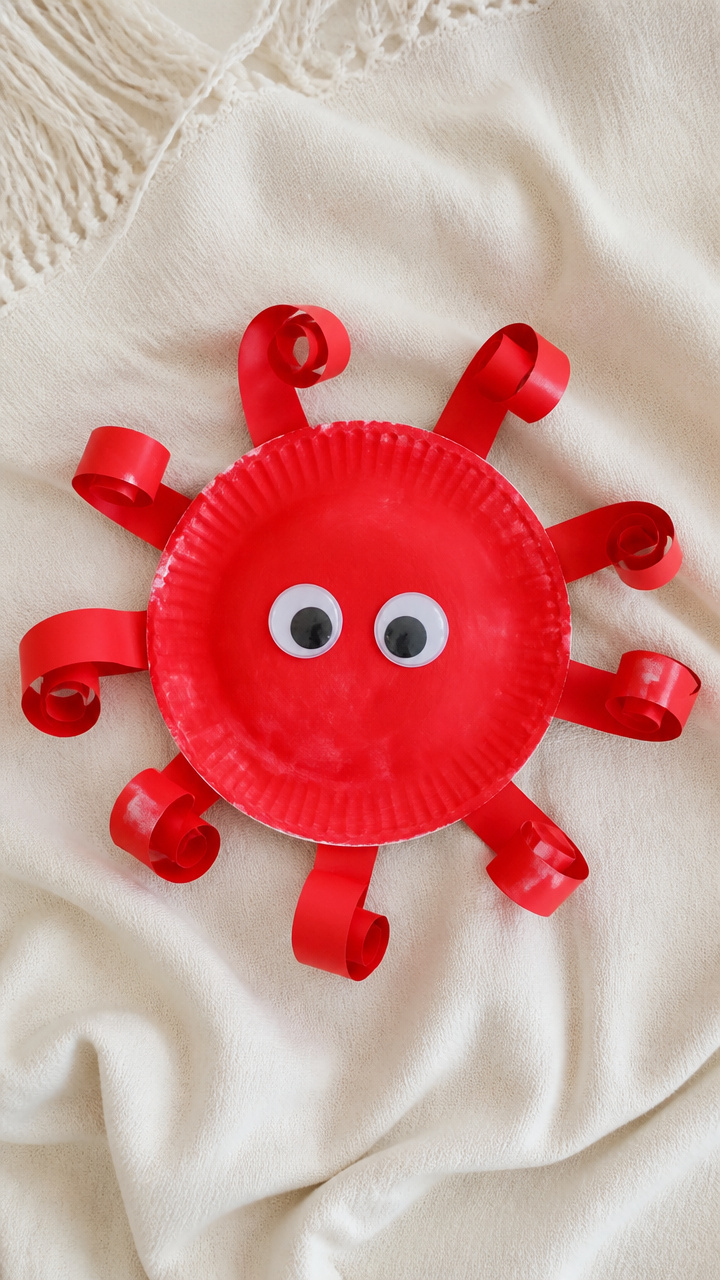
A round paper plate transforms into a wiggly eight-armed octopus with curling legs and a cheerful face. The curl technique adds fun movement kids love.
Materials Needed
- 1 white paper plate
- Red acrylic paint
- Paintbrush (size 4 round)
- 8 strips of red construction paper (1 x 12 inches)
- 2 wiggle eyes (10mm)
- White school glue
- Scissors
- Pencil
How to Make It
- Paint the entire front of the paper plate red. Let dry completely—about 20 minutes.
- Wrap a pencil around each strip of red paper to curl it tightly. Roll from one end to the other and unroll slightly.
- Glue one curled end of each strip evenly around the back rim of the plate so legs fan out.
- Glue two wiggle eyes near the top center of the plate. Add a small smile with leftover red paint if desired.
- Let all glue dry for 30 minutes before display.


3. Toilet Paper Tube Owls

Empty toilet paper tubes stand tall as wide-eyed owls in warm forest colors. Rolling feathers adds texture and fine motor practice.
Materials Needed
- 2 empty toilet paper tubes
- Brown acrylic paint
- Paintbrush (size 3 flat)
- Orange craft foam sheet (6×9 inches)
- White school glue
- Scissors
- 2 black craft eyes (12mm)
- Feathers (assorted browns, 6 total)
How to Make It
- Paint both tubes entirely with brown paint. Set aside to dry for 25 minutes.
- Cut the orange foam into two small triangles for beaks and two feet shapes with three toes each.
- Roll three feathers tightly from base to tip for each owl and secure the base with a dot of glue.
- Glue two feather sets vertically on the front of each tube for wings. Place eyes above halfway and add an orange beak just below.
- Glue feet to the bottom edge so the owl can stand. Let dry 30 minutes.


4. Handprint Duck Family
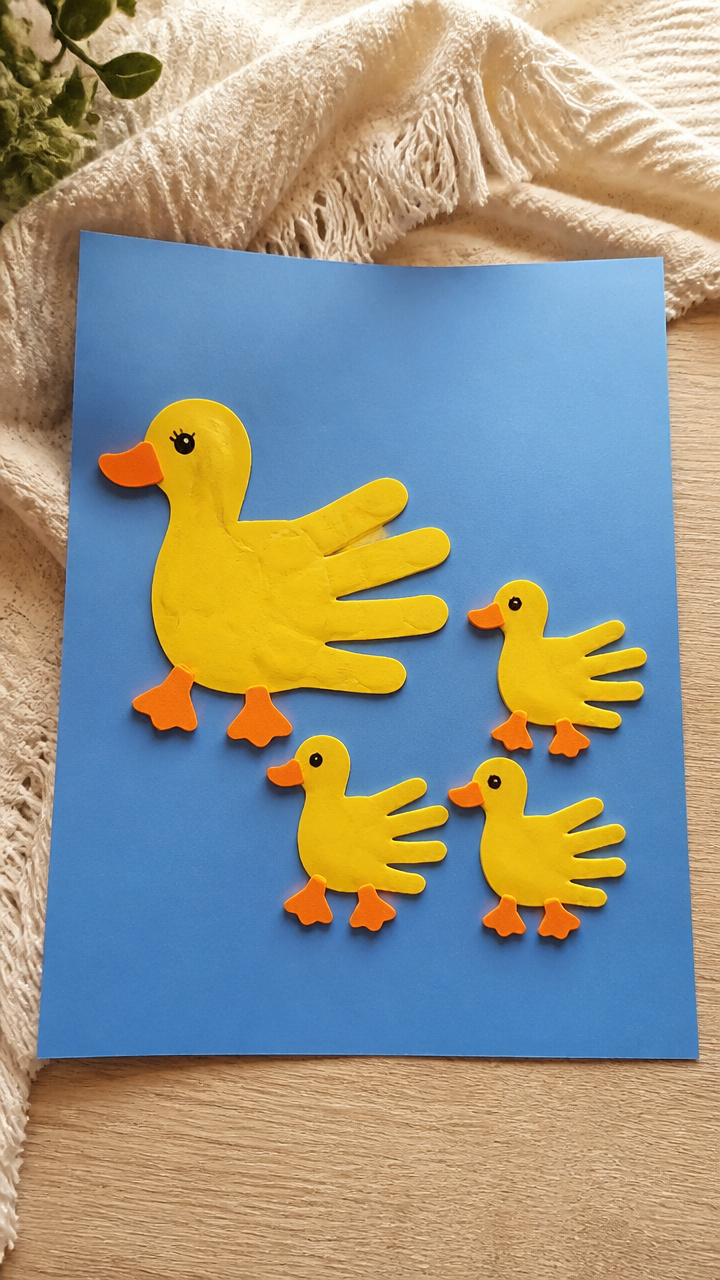
A child's handprint becomes the fluffy body of a duckling with a waddling stance. Painting multiple prints lets you build a whole flock.
Materials Needed
- Yellow tempera paint
- Paintbrush (size 6)
- Blue construction paper (9×12 inches)
- Black marker (fine tip)
- Orange craft foam
- Scissors
- White school glue
How to Make It
- Pour a small puddle of yellow paint onto a paper plate. Have the child press their hand firmly palm-down near the bottom of the blue paper.
- Repeat up to four times, angling each handprint slightly to form a line of ducklings.
- Use the black marker to draw two eyes on each handprint near the thumb base.
- Cut small orange triangles from foam for beaks and webbed feet. Glue one beak above each thumb and two feet below the wrist line.
- Let paint dry fully before handling—about 30 minutes.


5. Cotton Ball Sheep
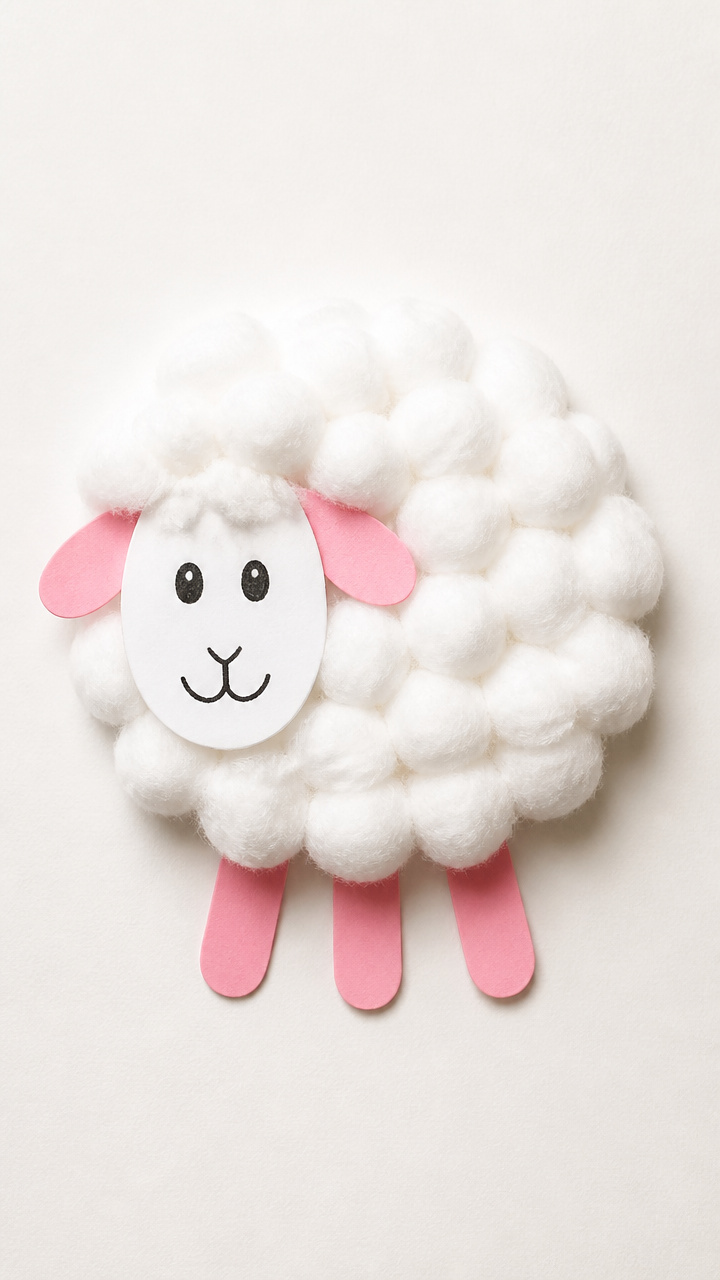
Cotton balls pile high into a woolly sheep with a smiling face and paper legs. Layering the cotton creates real fluff kids love to touch.
Materials Needed
- A4 white cardstock
- 20 cotton balls
- Black marker (fine tip)
- Pink craft foam
- White school glue
- Scissors
- Googly eyes (8mm, 2 per sheep)
How to Make It
- Draw a sheep body shape on the cardstock—a large oval with a smaller head circle connected by a short neck.
- Glue cotton balls tightly side by side and overlapping over the entire oval to create thick wool. Leave the head bare.
- Draw two ears on pink foam and cut out. Glue behind the head circle.
- Add two googly eyes and a small smile with the black marker on the head.
- Cut four thin pink rectangles for legs and glue them beneath the wool body. Dry for 35 minutes.

![McKesson Cotton Balls [2000 Count] Bulk, 100% Pure Cotton Balls for Face, Nail Polish Remover, Makeup, Medium](https://m.media-amazon.com/images/I/312YQNHbahL._SL500_.jpg)
6. Popsicle Stick Hedgehog
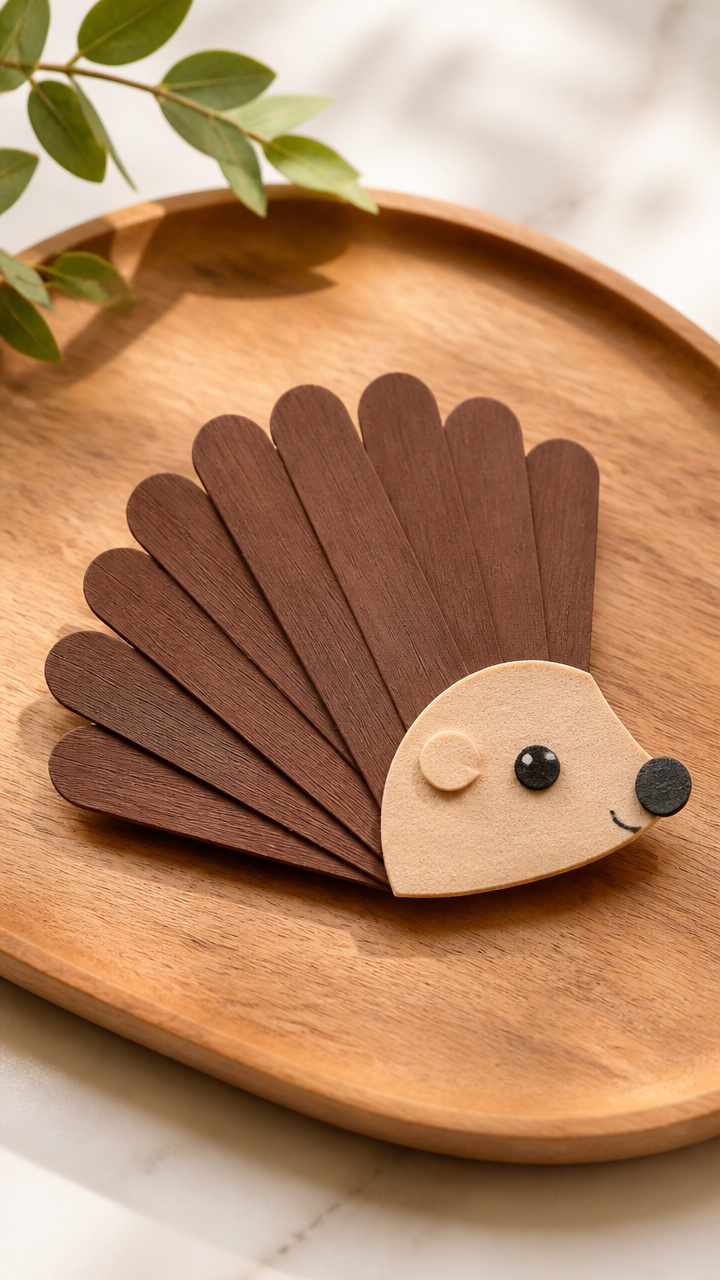
Brown craft sticks stack into a prickly hedgehog back with a soft face. The layered stick method builds dimension without sharp edges.
Materials Needed
- 8 jumbo brown craft sticks
- White school glue
- 1 small foam circle (1 inch, tan)
- 2 black dots (4mm) for eyes
- 1 black pipe cleaner
- Scissors
- Brown crayon
How to Make It
- Lay one craft stick flat. Apply glue along one long edge and place a second stick perpendicular across the middle to form a T.
- Repeat with six more sticks, layering them closely along the vertical stick to create a spiky back.
- Color the foam circle lightly with the brown crayon for a snout. Glue on the front of the first horizontal stick.
- Cut the pipe cleaner in half. Twist one half into a small nose coil and glue to the center of the snout.
- Press black dot eyes on either side. Let the entire piece dry upright for 40 minutes.


7. Egg Carton Caterpillar
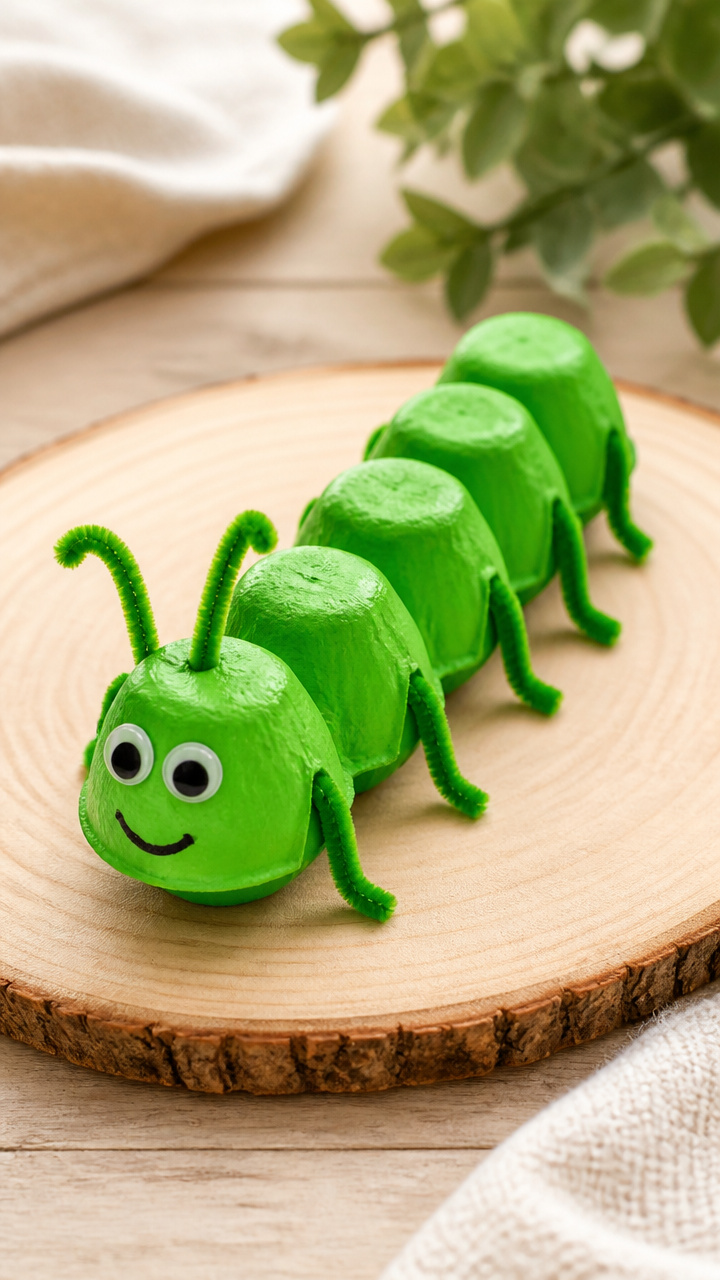
An egg carton cup sprouts legs and antennae to become a bumpy green caterpillar. Cutting and painting each segment teaches counting and color.
Materials Needed
- One section of cardboard egg carton (6 cups connected)
- Green acrylic paint
- Paintbrush (size 2 round)
- 6 pipe cleaners (green)
- White school glue
- Scissors
- 2 black craft eyes (6mm)
How to Make It
- Cut the egg carton into a chain of six connected cups. Trim jagged edges gently with scissors.
- Paint the outside of each cup green. Let dry for 20 minutes.
- Cut each pipe cleaner into two 3-inch pieces. Fold one end of each into a tiny loop for feet.
- Glue three pipe cleaner pairs to each side of cups two through five for legs.
- Glue two eyes to the front cup. Twist two pipe cleaner ends into spiral antennae and glue on top. Dry 30 minutes.


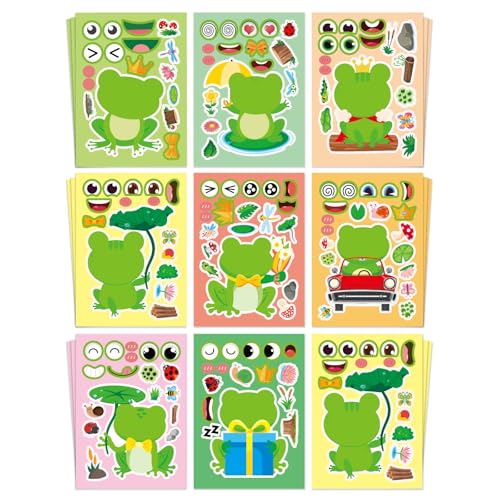
8. Tissue Paper Frog
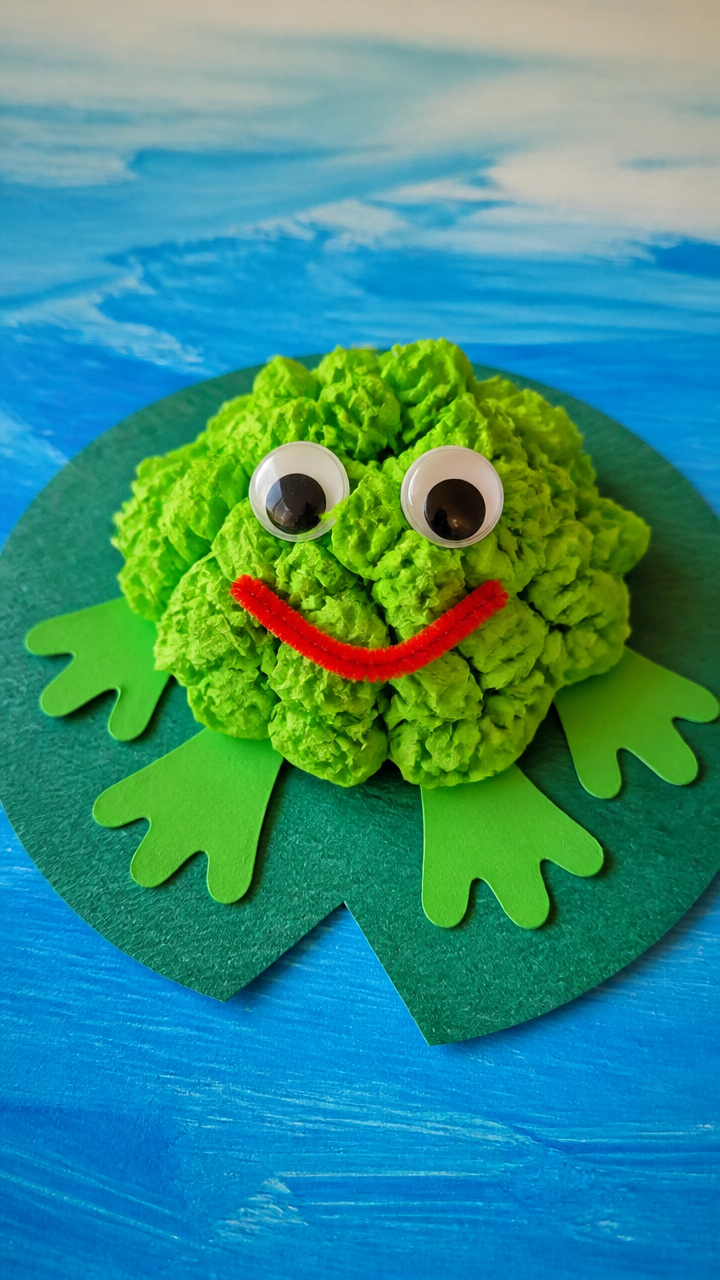
Bright green tissue squares crinkle into lily pad texture under a smiling frog. The dabbing technique builds grip strength and color blending skills.
Materials Needed
- Green tissue paper (8×8 inches, 4 sheets)
- Blue construction paper (9×12 inches)
- White school glue
- Scissors
- Googly eyes (10mm, 2)
- Red chenille stem
- Glue brush
How to Make It
- Tear tissue paper into 1-inch squares. Spread a thin layer of glue in a circle on the blue paper for the lily pad.
- Dab tissue squares onto the glue with the brush, slightly overlapping until the circle is full. Let dry 25 minutes.
- Cut a 3-inch green felt circle for the frog body. Glue it slightly off-center on the pad.
- Glue two googly eyes to the top of the felt. Bend the chenille stem into a U for a smile and glue below the eyes.
- Let all parts set for 30 minutes before display.


9. Fingerprint Ladybugs
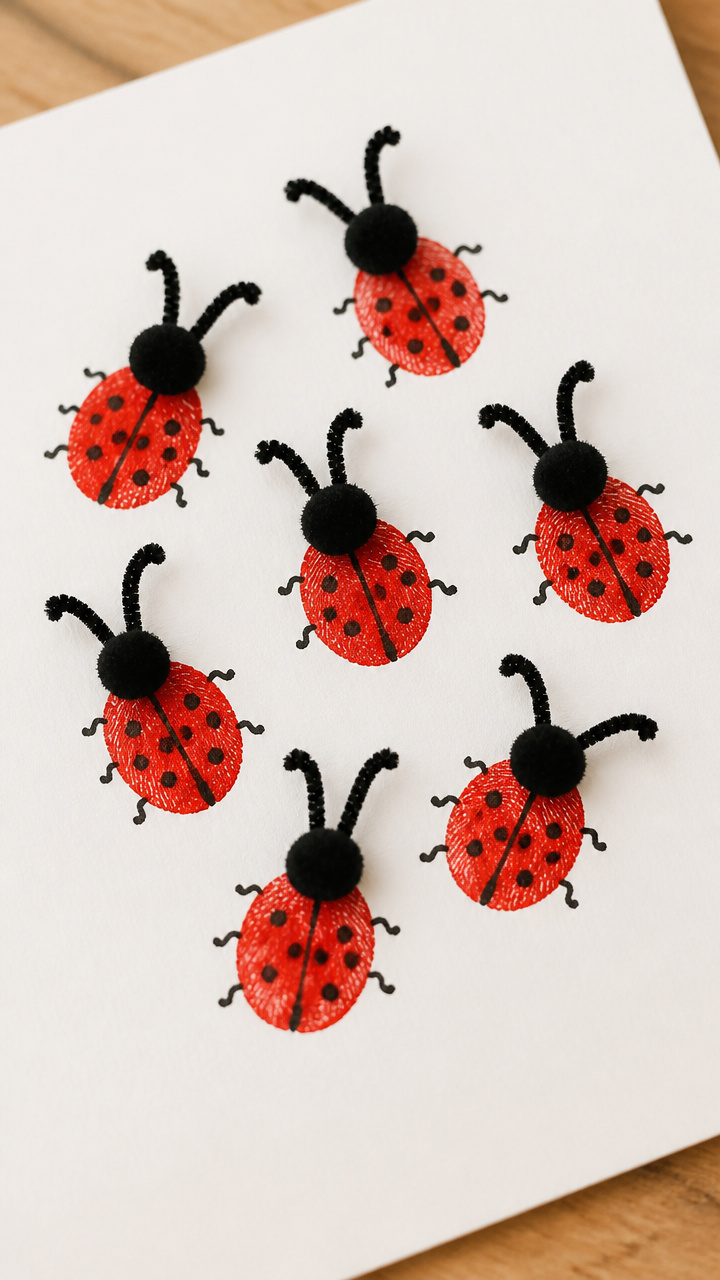
Ink-stamped fingerprints grow spots and legs into a cluster of friendly ladybugs. Using washable ink makes cleanup fast and safe.
Materials Needed
- Red washable ink pad
- White drawing paper (8.5×11 inches)
- Black fine-tip marker
- Black chenille stems (2 per bug)
- Small black pom-poms (6mm, 2 per bug)
- White school glue
How to Make It
- Press a fingertip firmly onto the red ink pad, then press straight down on the paper to leave a rounded print. Repeat for up to six bugs.
- Let ink dry completely—about 10 minutes.
- Use the black marker to draw a curved line down the center of each print to split the wings.
- Draw six small legs—three on each side—and two antennae ending in a pom-pom dot.
- Glue a tiny pom-pom to the tip of each antenna. Let dry 15 minutes.


10. Cardboard Tube Giraffe
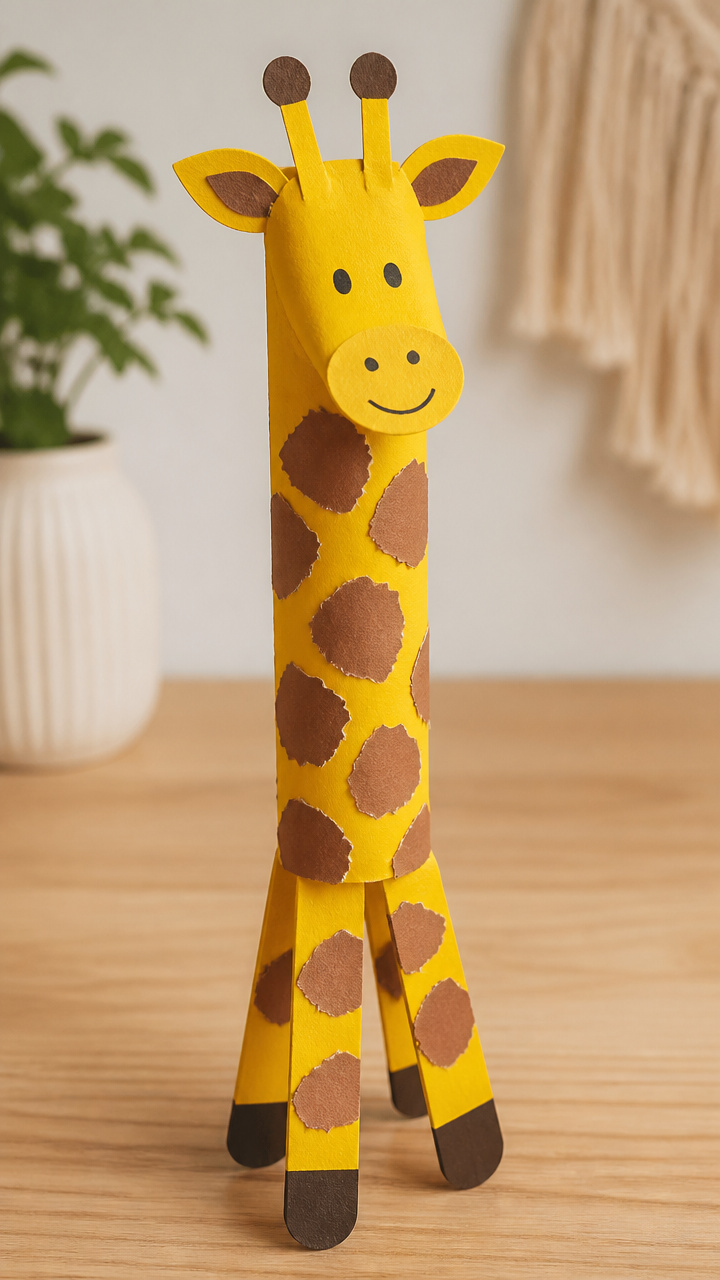
A paper towel tube stretches tall with a patterned neck and swinging legs. Adding torn paper texture mimics giraffe fur in a tactile way.
Materials Needed
- 1 empty paper towel tube
- Yellow paint
- Paintbrush (size 5)
- Brown construction paper
- White school glue
- Scissors
- 2 black craft eyes (10mm)
- Raffia (12 inches)
How to Make It
- Paint the entire tube yellow. Let dry 25 minutes.
- Cut four 3-inch strips from brown paper. Fringe each by making cuts every 1/4 inch along one edge.
- Glue fringed strips vertically to the back of the tube for tail and mane sections.
- Cut four short legs from yellow paper and glue to the bottom. Add eyes near the top and twist raffia into horns on top.
- Allow 30 minutes drying time before play.


11. Paper Bag Bunny
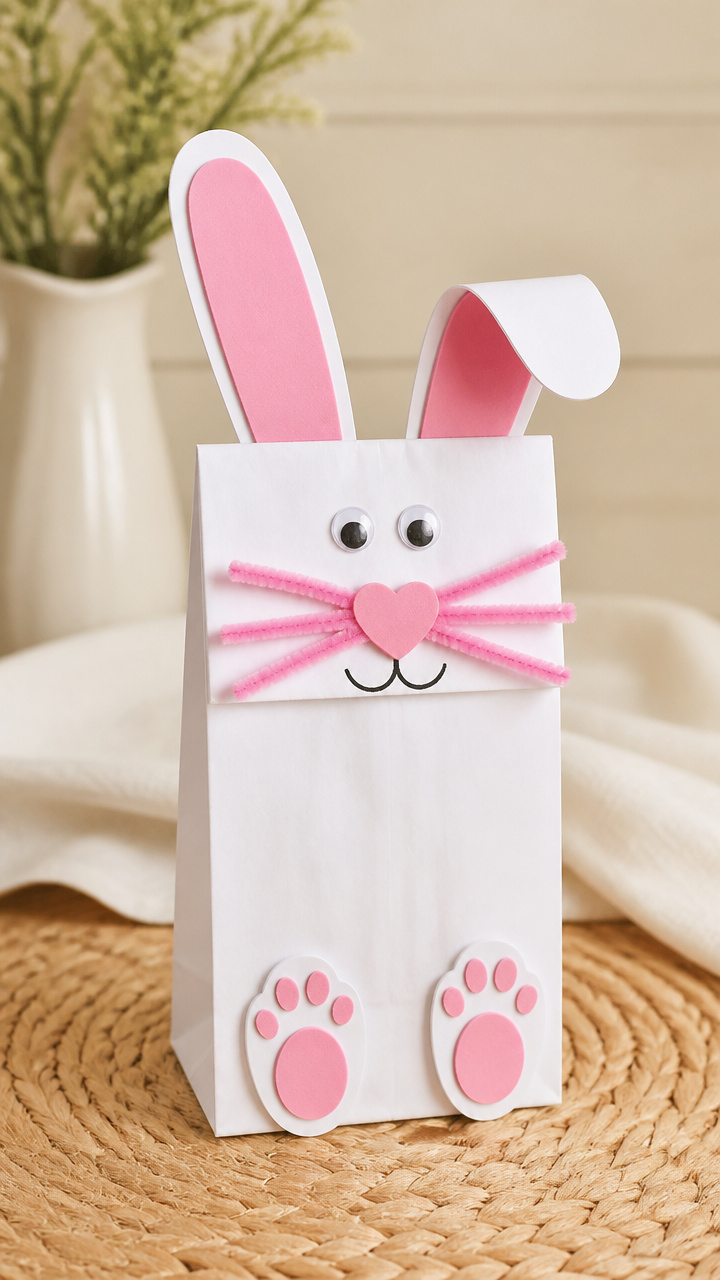
A lunch bag opens into floppy-eared bunny heads that wiggle with hand movement. Drawing expressive faces encourages storytelling and play.
Materials Needed
- 1 white paper lunch bag
- Pink craft foam
- White school glue
- Scissors
- 2 wiggle eyes (12mm)
- Pink chenille stem
- Cotton ball
How to Make It
- Cut two long ovals from pink foam for ears. Glue the bottom third of each to the inside top corners of the bag flap.
- Turn the bag over and glue two wiggle eyes near the center of the flap.
- Cut a small pink triangle from foam for the nose. Glue below the eyes.
- Bend the chenille stem into a U shape for whiskers and glue beside the nose. Fluff the cotton ball and glue under the nose for a tail.
- Let dry 20 minutes. Use your hand inside to make the bunny talk.


12. Butterfly Pasta Art
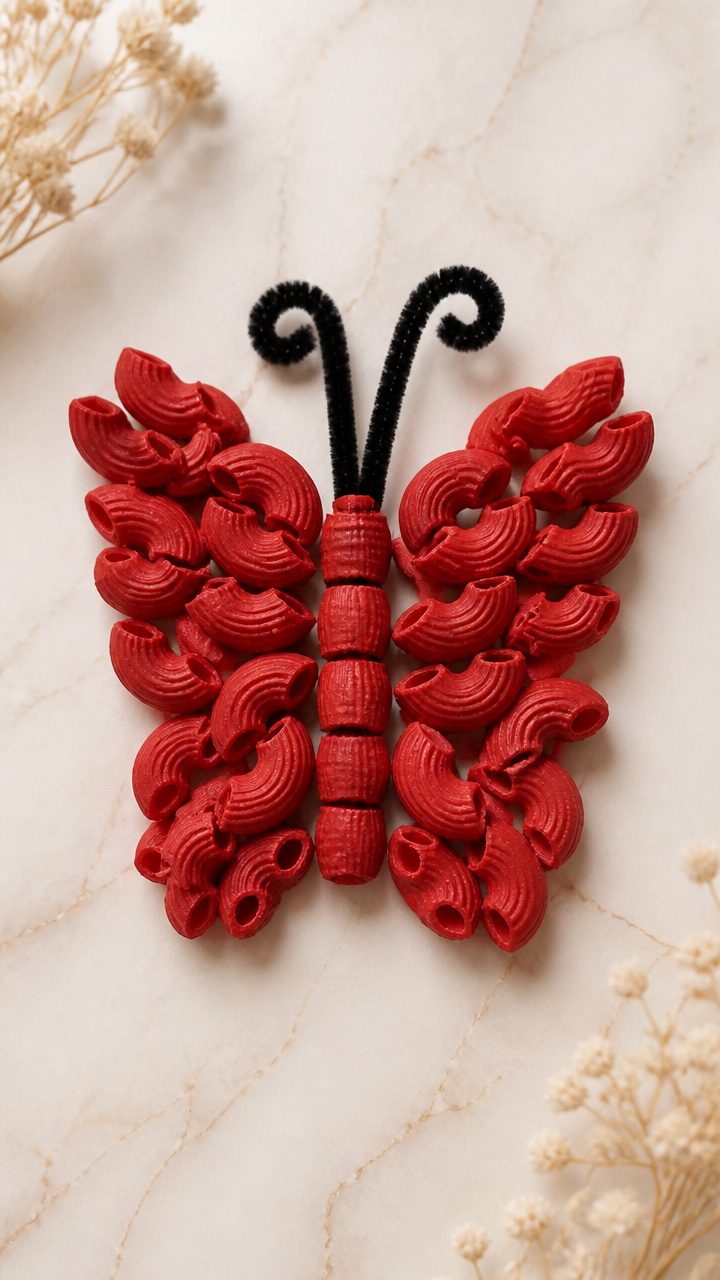
Colored macaroni arcs into butterfly wings with a pasta body. Stringing and sorting builds focus and coordination.
Materials Needed
- 20 elbow macaroni noodles
- Red food coloring
- Water
- Small bowl
- White school glue
- Black pipe cleaner
- Cardstock (5×7 inch, white)
- Tweezers
How to Make It
- Mix 10 drops red food coloring with 2 tablespoons water in a bowl. Soak 20 macaroni for 5 minutes. Drain and lay flat to dry 20 minutes.
- Cut the pipe cleaner to 3 inches. Fold one end into a small loop for the head and bend the rest into antennae.
- Arrange ten dyed macaroni in a fan shape on each side of the pipe cleaner to form wings.
- Use tweezers to place each noodle and glue it down carefully. Overlap slightly for fullness.
- Let the entire piece dry for 40 minutes before display.


13. Yarn-Wrapped Bee
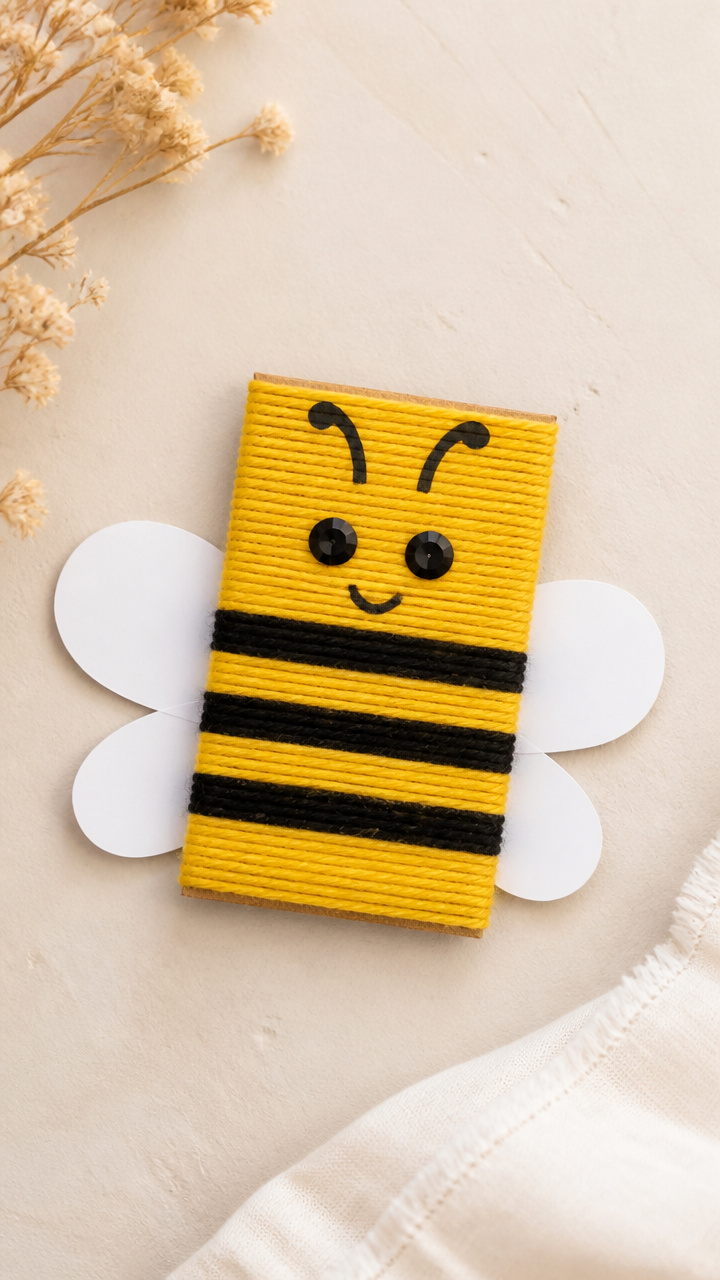
A stiff cardboard bee body takes on stripes through tight yellow yarn wrapping. The winding motion calms and focuses active hands.
Materials Needed
- Cardboard (3×5 inch piece)
- Black marker
- Yellow yarn (12 yards)
- White school glue
- Scissors
- 2 black sequins (6mm)
- Clear tape
How to Make It
- Draw a bee shape on cardboard—a rounded oval with a small head circle. Cut out with scissors.
- Draw six black stripes across the oval body, spaced evenly.
- Apply a dot of glue at the start of the oval. Press the yarn end down and begin wrapping tightly around the shape.
- Follow each stripe with yarn, covering black lines completely. Wrap back and forth until the body is dense and striped.
- Glue two sequins for eyes. Tape antennae made from leftover yarn to the head. Dry 30 minutes.


14. Mitten Fox Puppets
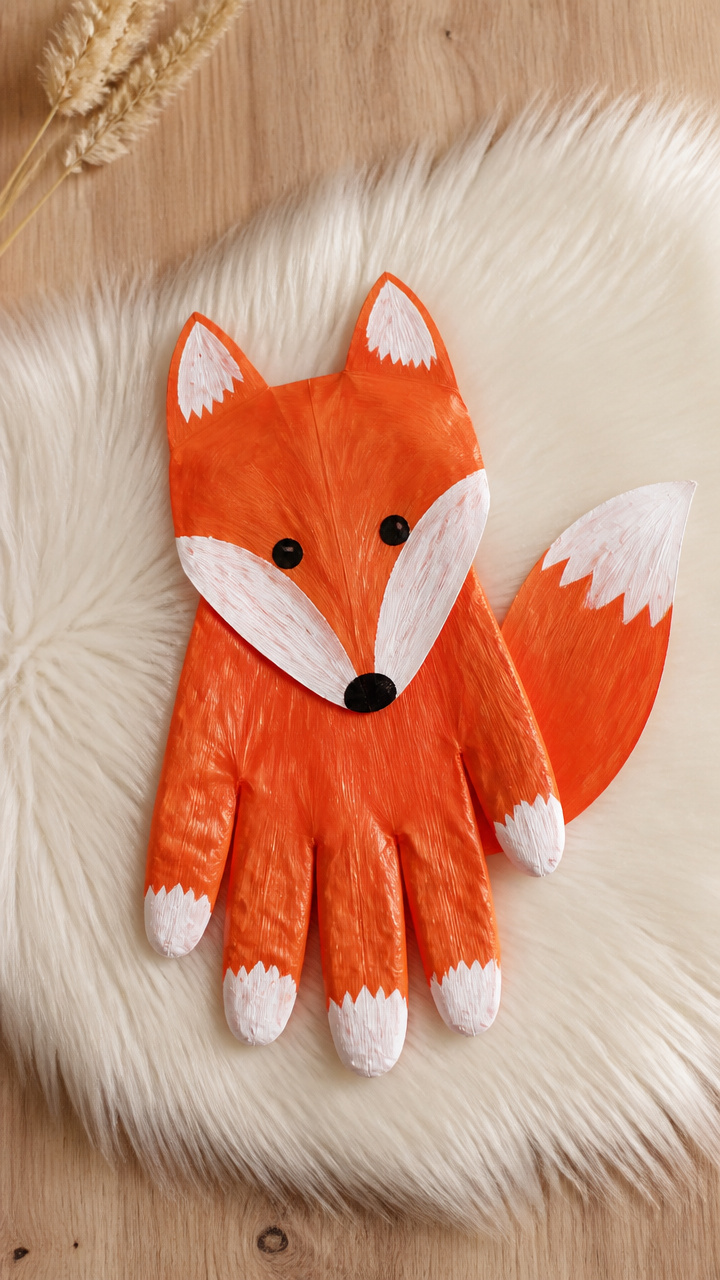
Disposable plastic gloves turn into finger-walking foxes with bushy tails and pointy muzzles. Stuffing the fingers keeps shape during play.
Materials Needed
- 1 orange disposable glove
- Polyester stuffing
- Orange acrylic paint
- Paintbrush (size 2)
- 2 black craft eyes (8mm)
- White school glue
- Scissors
How to Make It
- Blow up the glove slightly and tie the end closed. Paint the entire surface orange. Let dry 30 minutes.
- Snip off the tips of the thumb and index finger. Turn each inside out to form ears.
- Stuff the thumb and fingers lightly with polyester filling to hold shape.
- Glue two black eyes just above the index finger knuckle. Draw a small black nose at the fingertip.
- Let glue dry 20 minutes. Wear on your hand and wiggle the fingers to walk the fox.


15. Cereal Box Turtle
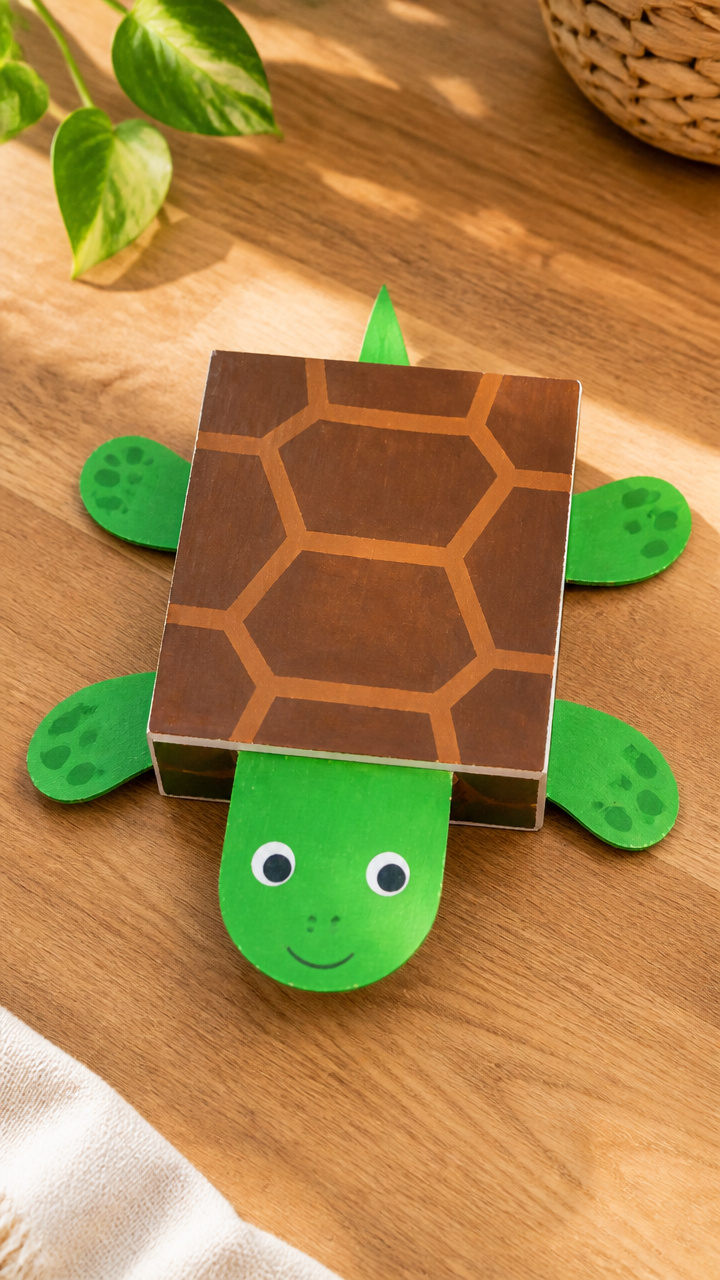
A scrap of cereal box becomes a hard-shelled turtle with a patterned back. Cutting and gluing the shell teaches symmetry.
Materials Needed
- Cereal box cardboard (4×4 inch piece)
- Green acrylic paint
- Paintbrush (size 3)
- Brown marker
- White school glue
- Scissors
- 4 green pipe cleaners
How to Make It
- Cut the cardboard into a turtle shape—round shell with a neck and four short legs.
- Paint the entire piece green. Let dry 25 minutes.
- Use the brown marker to draw a hexagon pattern across the shell.
- Cut four 2-inch pieces from pipe cleaners. Fold each into a small foot shape and glue to leg ends.
- Glue one pipe cleaner foot to each leg. Let dry 20 minutes before play.


16. Sock Monkey Faces
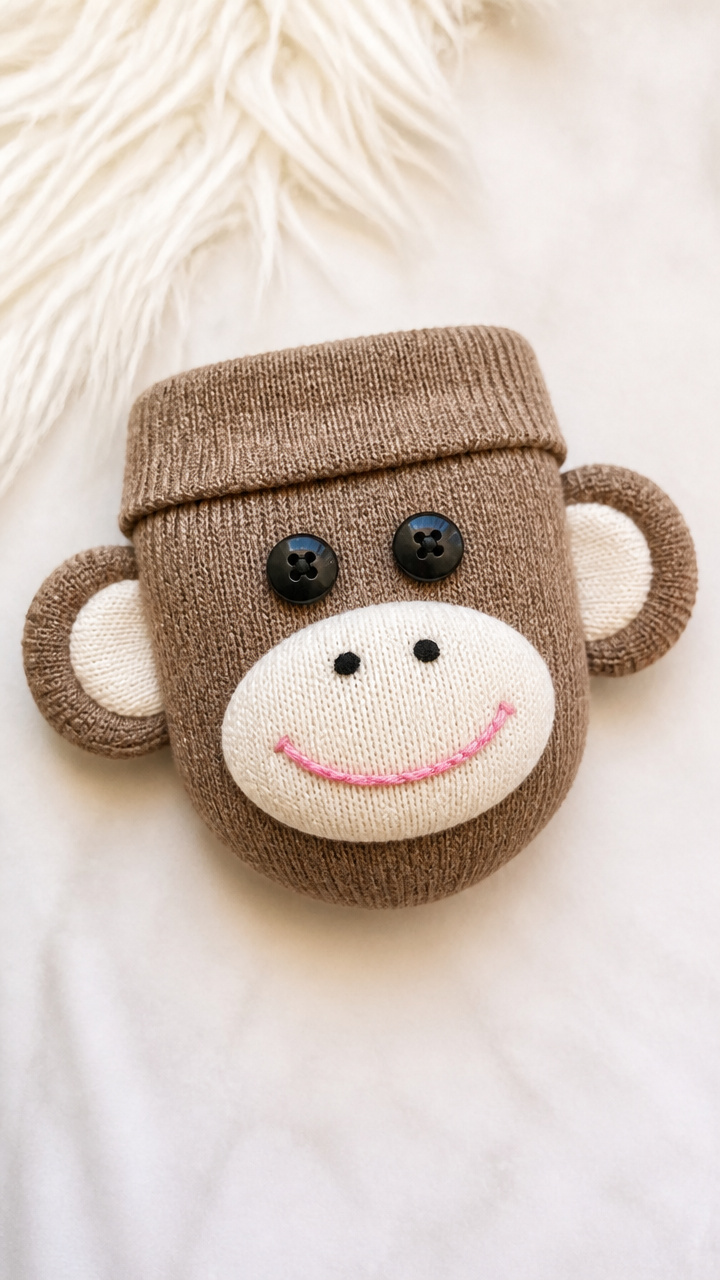
An old crew sock rolls into a monkey face with button eyes and a stitched smile. No sewing needed—just glue and folding.
Materials Needed
- 1 brown crew sock
- 2 black buttons (10mm)
- Pink embroidery floss
- White school glue
- Needle (blunt tip)
- Scissors
- Polyester stuffing
How to Make It
- Turn the sock inside out. Fill the toe lightly with stuffing and fold the excess down to form a face frame.
- Glue two black buttons near the top for eyes.
- Thread the needle with pink floss. Stitch a curved smile below the eyes using a backstitch. Knot securely.
- Fold the heel corners outward to form ears. Glue in place if needed.
- Let all glue dry for 30 minutes before handling.


17. Pinecone Hedgehogs
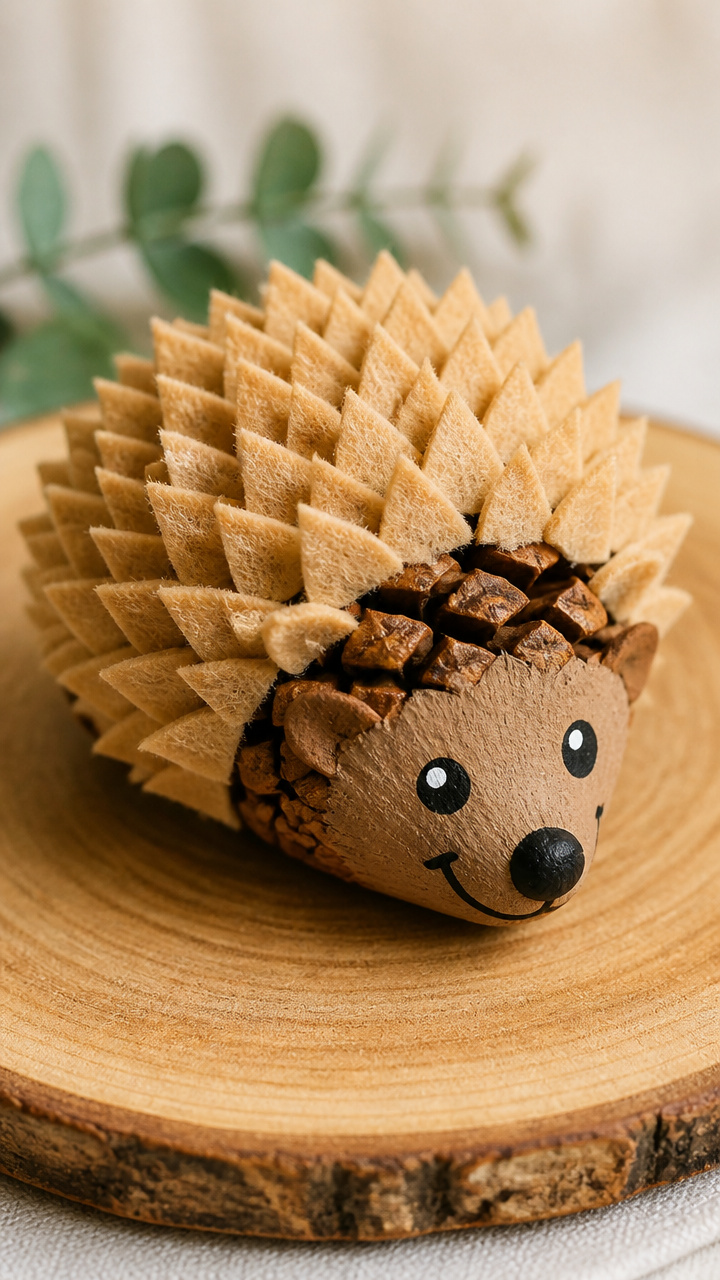
Natural pinecones host layers of felt spines and sweet painted faces. The cone’s ridges make perfect homes for textured quills.
Materials Needed
- 1 medium pinecone
- Tan felt sheet (5×7 inches)
- Brown acrylic paint
- Paintbrush (size 1)
- White school glue
- Scissors
- 2 black micro beads (4mm)
How to Make It
- Cut the felt into 20 thin strips (1/4 x 2 inches). These are the spines.
- Slide one end of each strip between the pinecone scales, starting from the base and working upward.
- Paint the uncovered tip of the pinecone brown for a snout. Let dry 15 minutes.
- Glue two micro beads just below the painted tip for eyes.
- Let everything dry for 35 minutes before display.


18. Button Fish Bowl
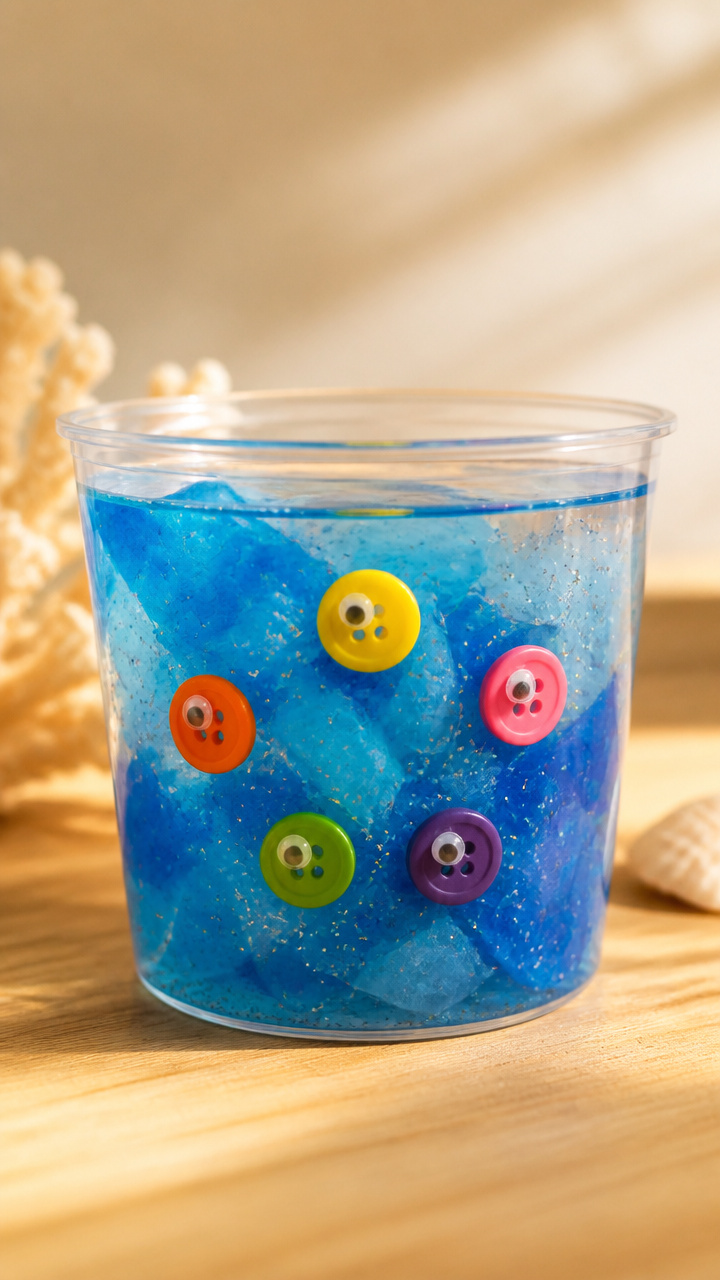
Mismatched buttons swim in a glittery bowl of swirling water. Arranging by size and color turns sorting into art.
Materials Needed
- Clear plastic cup (8 oz)
- Blue tissue paper (6×6 inches)
- Glitter (blue and silver)
- White school glue
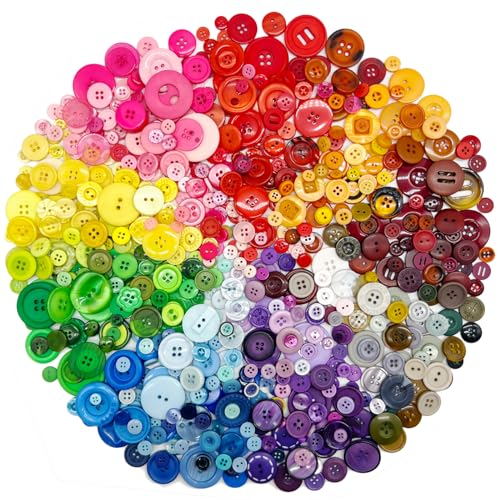
- Assorted buttons (15 total, various sizes)
- Googly eyes (6mm, 1 per fish)
- Craft glue pen
How to Make It
- Tear tissue paper into small pieces. Mix with a pinch of glitter in a bowl.
- Brush glue evenly over the outside of the cup. Press tissue pieces onto the glue, covering the lower two-thirds.
- Sprinkle extra glitter over wet tissue. Shake off excess. Let dry 20 minutes.
- Choose five buttons for fish. Glue one googly eye to each. Use the glue pen to attach them to the cup sides.
- Let dry completely for 30 minutes before handling.


19. Salt Dough Seahorses
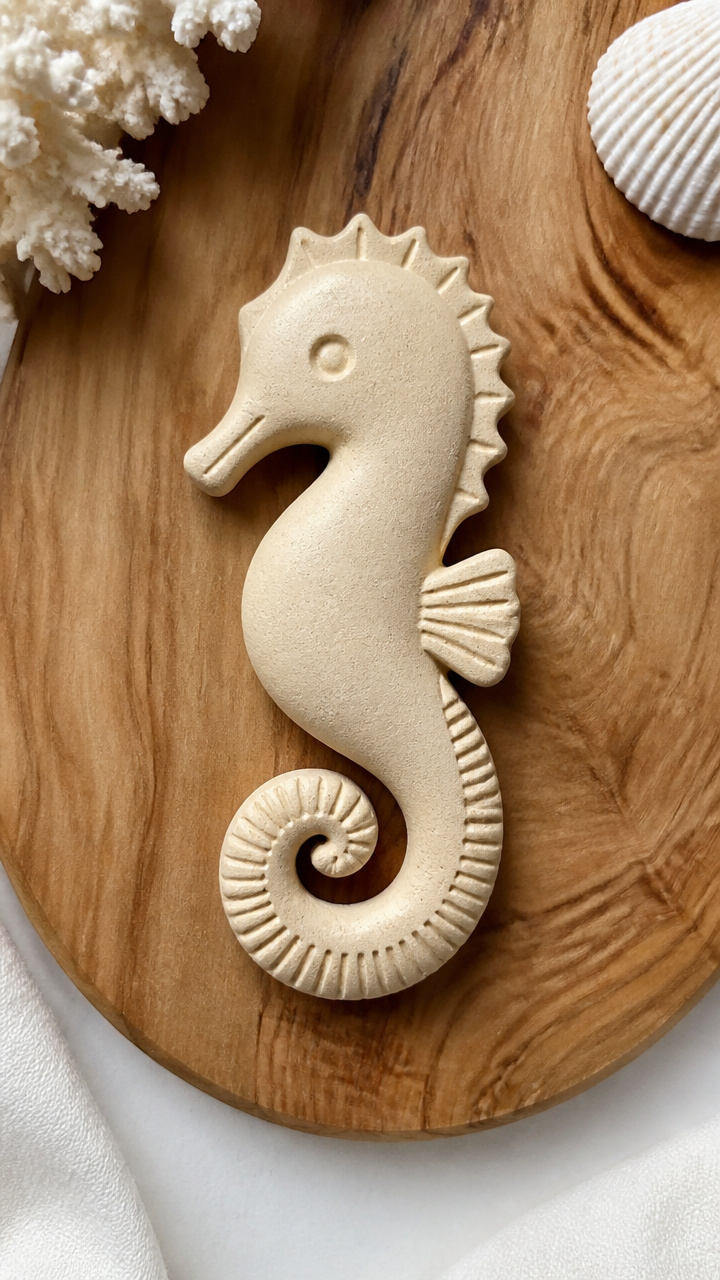
Homemade salt dough molds into curly seahorses with textured tails. Baking hardens them into keepsakes.
Materials Needed
- 1/2 cup flour
- 1/4 cup salt
- 3 tbsp water
- Mixing bowl
- Rolling pin
- Seahorse cookie cutter (2 inch)
- Baking sheet
- Parchment paper
- Acrylic paint (teal, purple)
How to Make It
- Mix flour, salt, and water in a bowl until a smooth dough forms. Knead for 2 minutes.
- Roll the dough to 1/4 inch thick. Cut out two seahorse shapes with the cutter.
- Place on a parchment-lined baking sheet. Bake at 200°F for 3 hours until hard.
- Let cool completely. Paint with teal and purple swirls. Let paint dry 20 minutes.
- Display on a shelf or string with thread for hanging.


20. Woolly Lamb Rocks
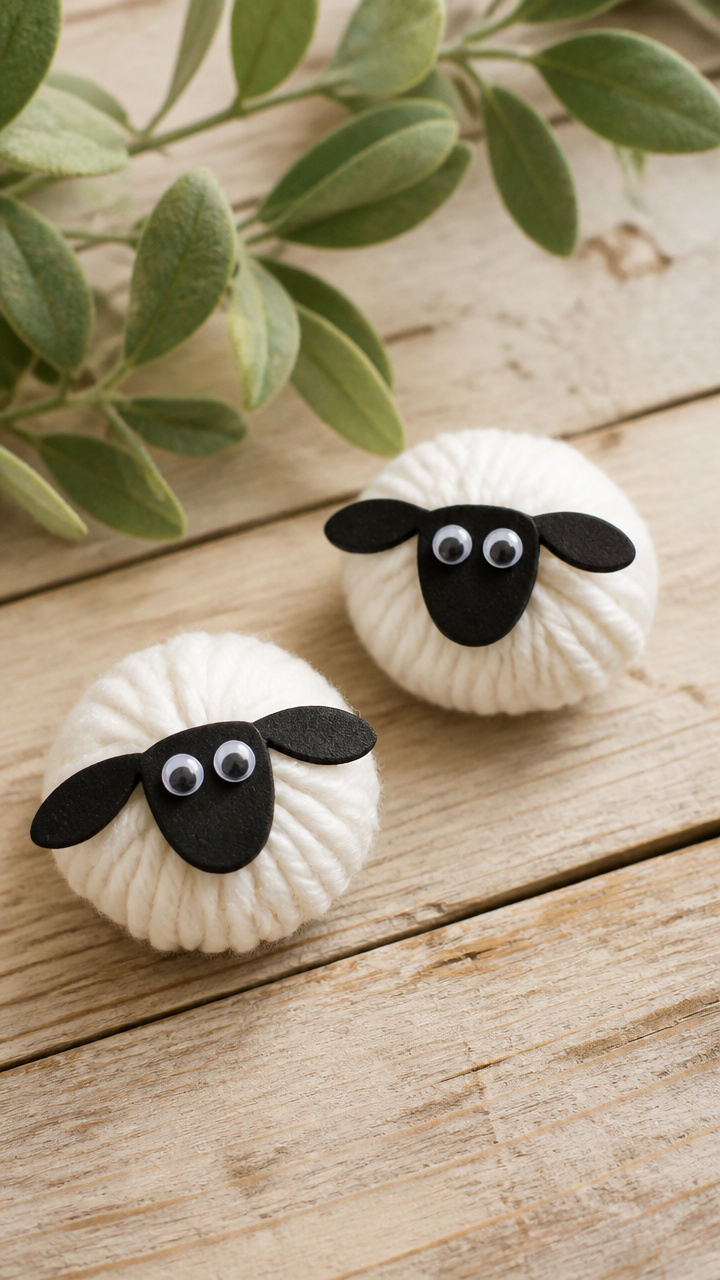
Smooth river stones wear fuzzy white wool coats and silly faces. Wrapping yarn around rock curves teaches tension control.
Materials Needed
- 2 smooth river rocks (2 inch)
- White yarn (10 yards)
- White school glue
- Black craft foam
- Scissors
- 2 black craft eyes (6mm)
- Paintbrush
How to Make It
- Place a dot of glue on the top back of the rock. Press the yarn end down and wrap tightly around the stone.
- Continue wrapping in crossing patterns to cover most of the rock, leaving the bottom clear.
- Secure the end with a glue dot. Let dry 15 minutes.
- Cut two small ear shapes from black foam. Glue to the top with eyes just below.
- Let all glue cure for 25 minutes before play.


These little animals bring big joy with just a few simple supplies. Pick one that matches your mood today and start creating—you’ve got everything you need to begin.