15 DIY Valentine’s Day Home Decor Crafts

Soft pinks, deep reds, and handcrafted love fill the air when you decorate your home for Valentine's Day with pieces made by your own hands. These thoughtful touches turn everyday spaces into warm celebrations of connection.
Each craft on this list brings something different to your home, from glowing centerpieces to delicate wall art. You’ll find exactly what you need to create them—no guesswork, no missing supplies, just clear steps and heartfelt results.
1. Heartfelt Mason Jar Candle Holder
Easy
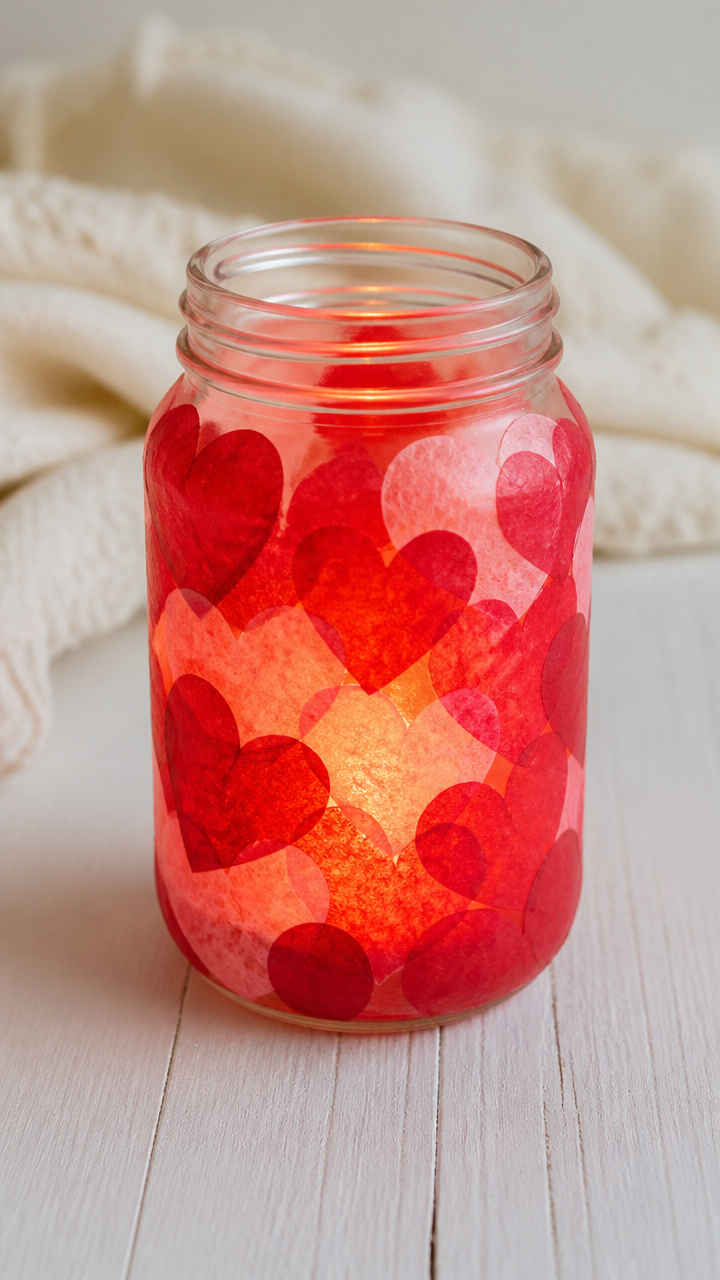
A cluster of tiny hearts dances around a glass jar, casting a soft glow across your table. This candle holder turns simple materials into an intimate centerpiece perfect for a dinner at home.
Materials Needed
- 1 clean 16 oz mason jar
- Red tissue paper (one full sheet)
- White school glue
- Foam brush (1 inch wide)
- Tealight candle (battery-operated)
- Scissors
How to Make It
- Cut the tissue paper into small heart shapes, about 1 inch wide, using scissors.
- Mix equal parts white school glue and water in a small bowl to make a paste.
- Use the foam brush to apply a thin layer of glue to a small area on the jar.
- Press one tissue paper heart onto the glued spot, smooth it flat, and repeat around the jar until fully covered.
- Let the jar dry completely for at least 2 hours before placing the tealight inside.
2. Felt Heart Wall Garland
Easy
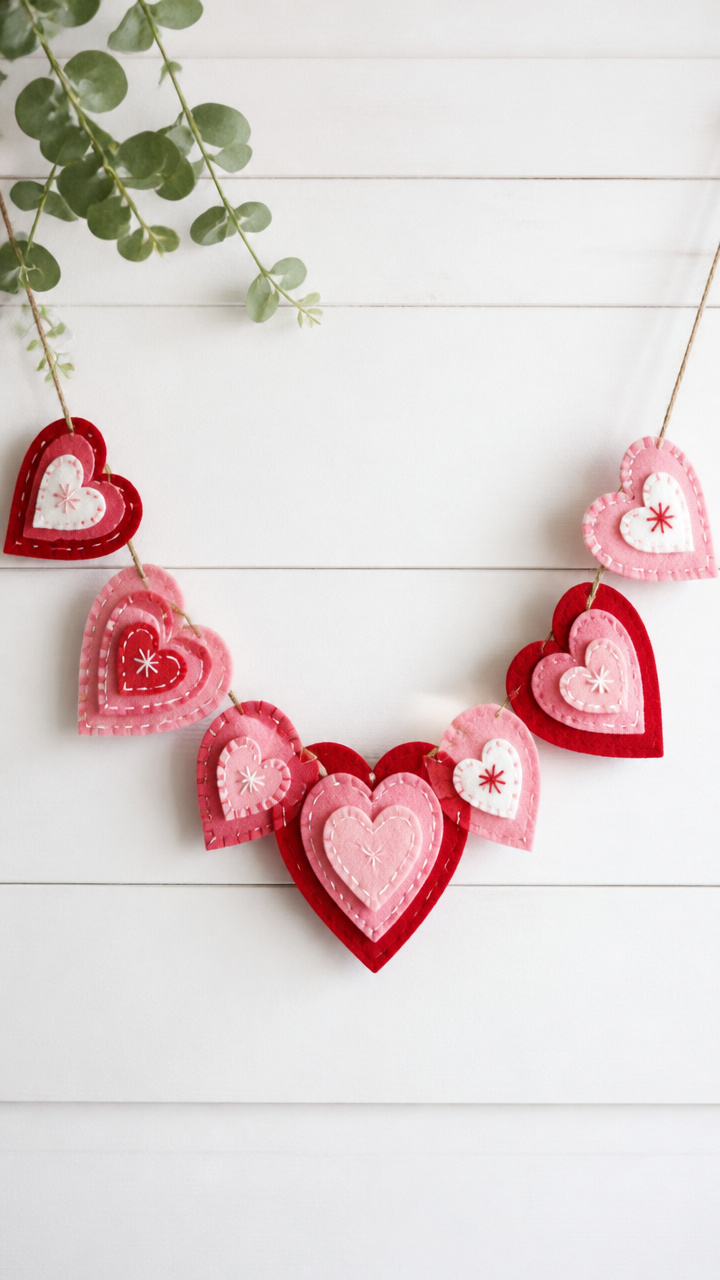
Rich textures and layered shapes add depth to your walls without a single nail. Hang this garland above a bed or along a staircase for a cozy burst of color.
Materials Needed
- Red felt sheet (9 x 12 inches)
- Pink felt sheet (9 x 12 inches)
- Emery board
- Embroidery floss (white, 1 meter)
- Needle
- Twine (1.5 meters)
- Scissors
How to Make It
- Use the emery board to trace 10 medium hearts onto the red felt and cut them out with scissors.
- Trace and cut 10 smaller hearts from pink felt, each about half the size of the red ones.
- Center a pink heart on each red heart and sew them together using a running stitch with white embroidery floss.
- Knot the twine at both ends to prevent fraying, then space the hearts evenly along the twine.
- Tie small loops at each end of the twine for hanging.
3. Painted Wood Slice Hearts
Moderate

Natural wood grain meets bold paint in rustic decorations you can use year after year. Arrange them on a mantel or scatter them down a table runner.
Materials Needed
- 3 round wood slices (4 inches diameter, 0.5 inch thick)
- Sandpaper (220 grit)
- Red acrylic paint
- Small paintbrush (0.5 inch flat)
- Pencil
- Ruler
How to Make It
- Lightly sand both sides of each wood slice with sandpaper until smooth.
- Use the ruler and pencil to draw a straight vertical line through the center of one face.
- On one half of the wood slice, paint a solid heart shape using red acrylic paint and the small paintbrush.
- Let the paint dry for 1 hour, then flip the slice and repeat on the opposite side.
- Leave unpainted areas natural for contrast between wood and color.
4. Cinnamon Stick Rose Bouquet
Moderate
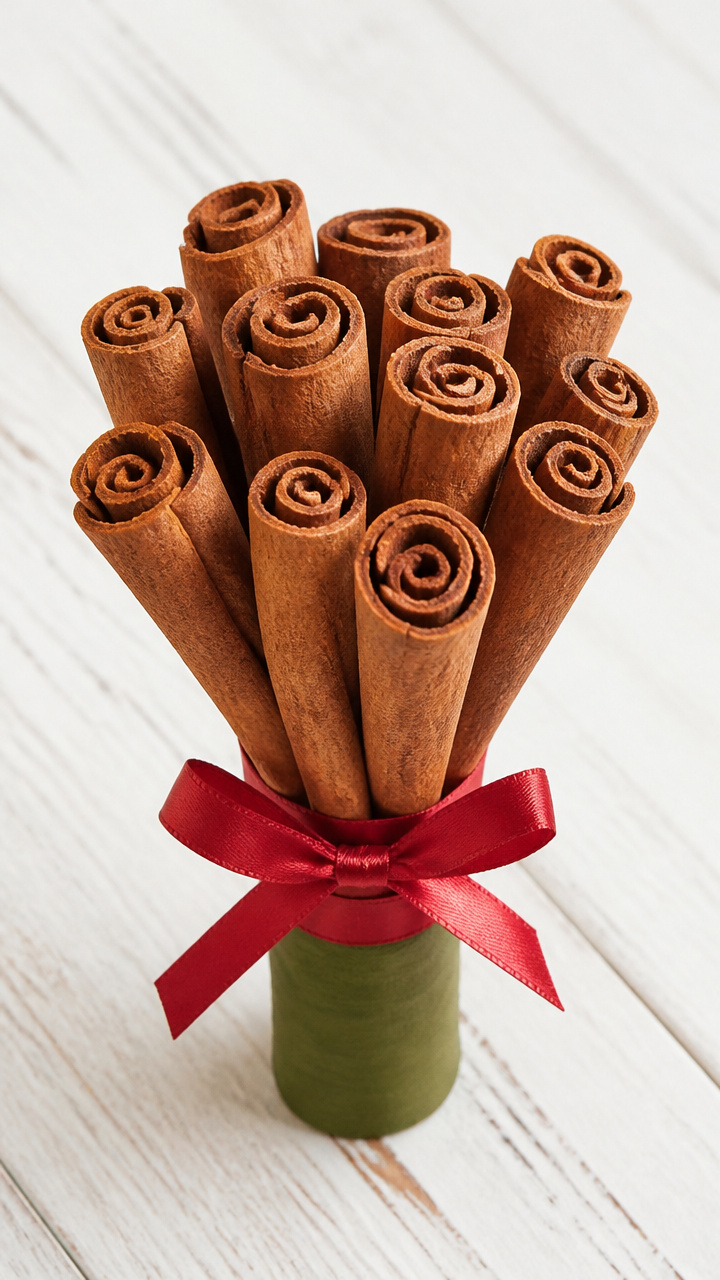
Spicy warmth fills the room as cinnamon sticks are shaped into long-lasting floral forms. Display them in a vase where their scent lingers all week.
Materials Needed
- 12 whole cinnamon sticks (6 inches long)
- Hot glue gun
- Glue sticks (2)
- Green floral tape
- Ribbon (red, 0.5 inch wide, 24 inches long)
- Scissors
How to Make It
- Lay three cinnamon sticks side by side and glue them together at the base with hot glue.
- Wrap the glued end tightly with green floral tape to form a stem.
- Take one additional stick and spiral it around the base using hot glue to attach each point.
- Continue adding sticks outward, gluing and taping as you go, until the bloom feels full.
- Tie the ribbon around the stem base and trim the ends at an angle with scissors.
5. Pressed Flower Frame Art
Moderate
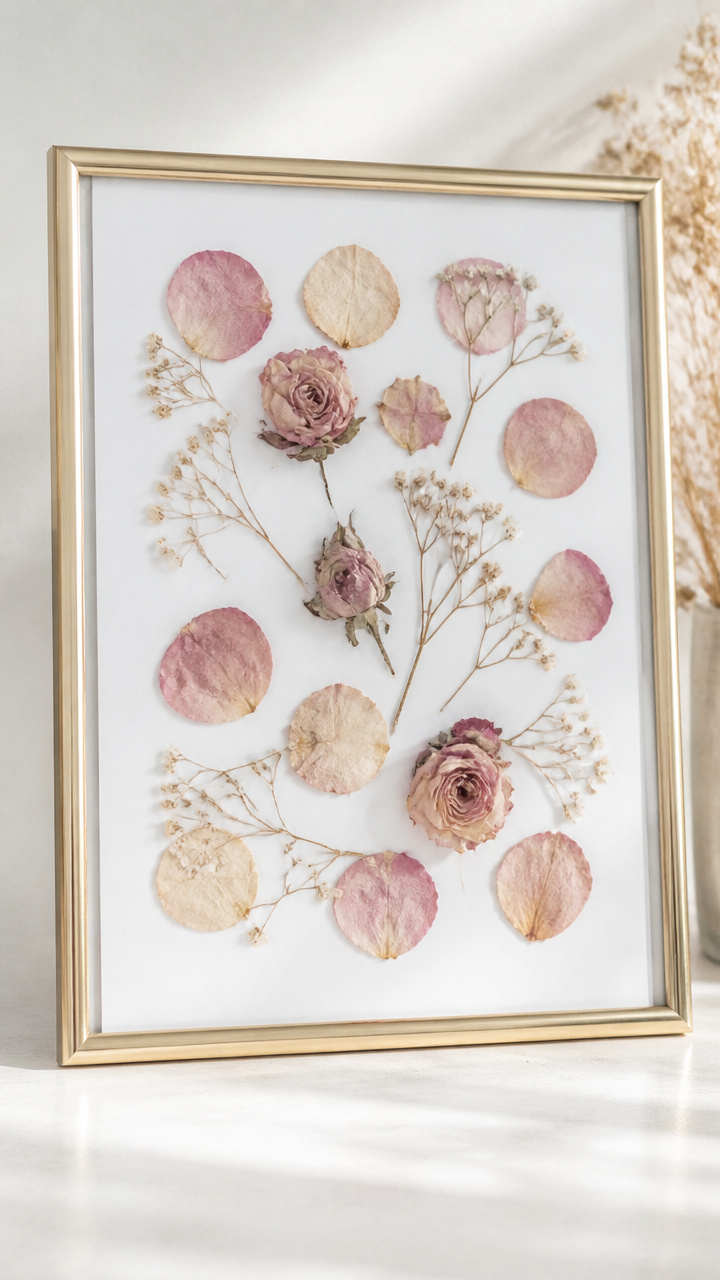
Delicate blooms captured in glass bring quiet romance to any wall. Frame real flowers you’ve saved or buy dried ones for lasting beauty.
Materials Needed
- Dried rose petals (6 small, flat ones)
- Dried baby’s breath sprigs (3)
- 8 x 10 inch picture frame with glass front
- White cardstock (8 x 10 inches)
- Tweezers
- Clear-drying craft glue
How to Make It
- Place the white cardstock inside the frame to check fit, then remove it.
- Arrange one rose petal in the center of the cardstock using tweezers for precision.
- Add two baby’s breath sprigs crossing beneath the petal to mimic stems.
- Dot a tiny amount of clear-drying craft glue under each flower part and press gently into place.
- Let the glue dry for 30 minutes before reassembling the frame.
6. Yarn-Wrapped Heart Ornament
Easy
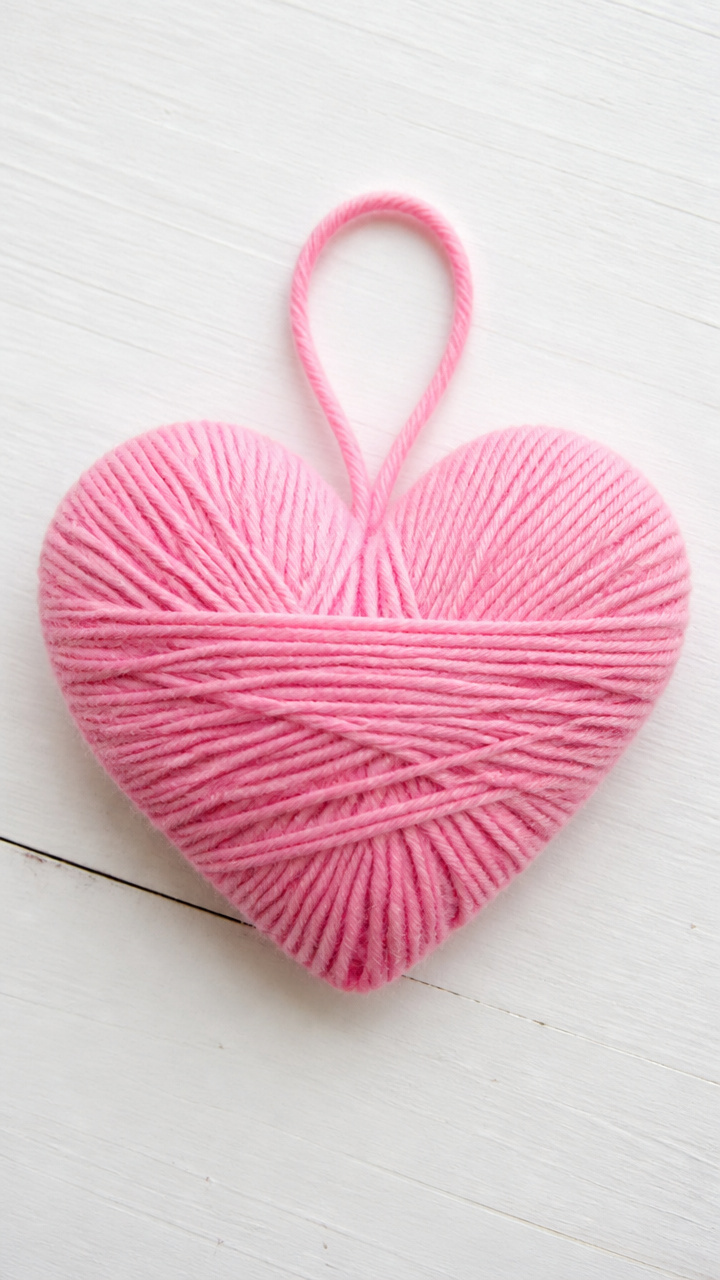
Plump and soft, these hearts hang beautifully on a doorknob or mirror. The wrapping technique builds tension so the shape holds firm.
Materials Needed
- Cardboard (6 x 6 inches)
- Pencil
- Scissors
- Pink yarn (size 4, 50 yards)
- Glue dot (1)
How to Make It
- Draw a heart shape 4 inches tall on the cardboard and cut it out with scissors.
- Start at the bottom tip and wrap the yarn tightly around the heart, moving upward.
- Overlap each wrap slightly to cover the cardboard completely.
- When the top is reached, tie a small knot at the back and trim the end with scissors.
- Press a glue dot to the back top center and attach a short loop of yarn for hanging.
7. Chalkboard Love Sign
Easy
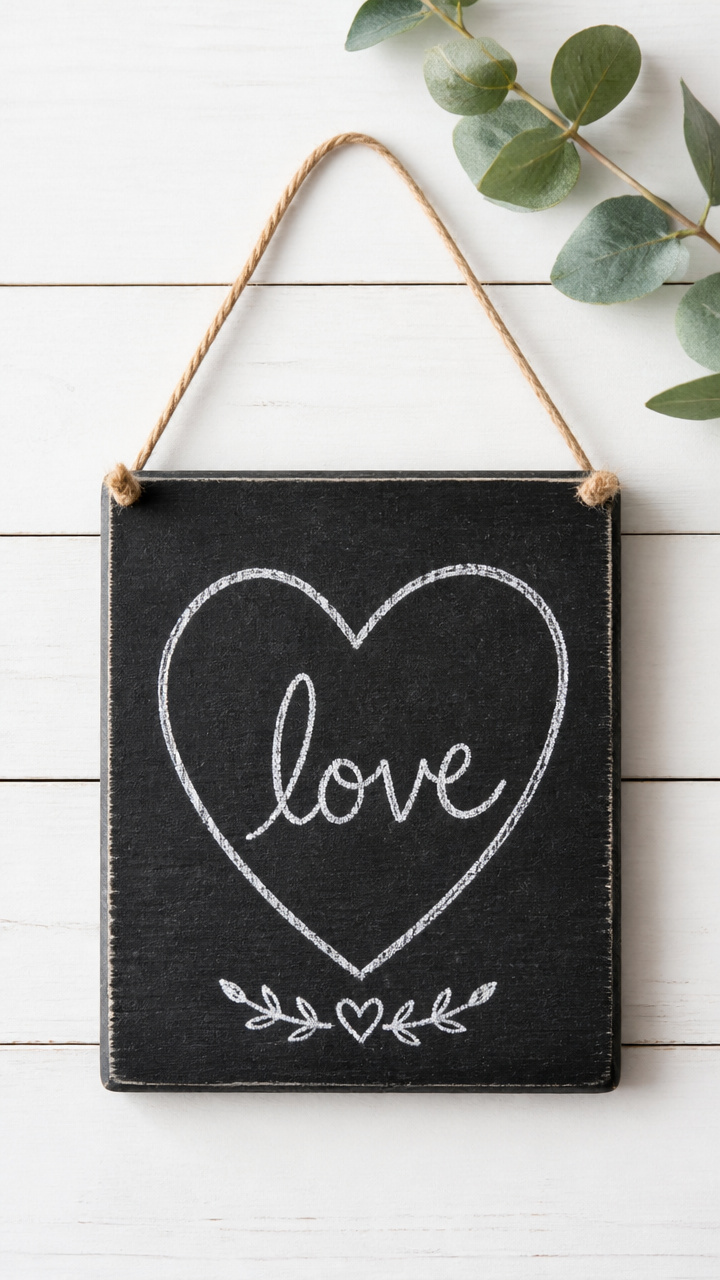
Changeable messages greet your loved one daily on this reusable chalkboard. Hang it in the kitchen or bedroom for sweet reminders.
Materials Needed
- Small wooden plaque (6 x 8 inches)
- Black chalkboard paint (1 fl oz)
- Foam brush (1 inch)
- Chalk (white)
- Twine (12 inches)
- Hole punch tool
How to Make It
- Shake the black chalkboard paint and pour a small amount onto the plaque surface.
- Use the foam brush to spread an even coat over the front, covering all edges.
- Let the paint dry for 2 hours, then apply a second coat the same way.
- After 4 more hours of drying, lightly rub a piece of white chalk over the surface and wipe it off with a dry cloth.
- Punch two holes at the top corners with the hole punch and thread twine through for hanging.
8. Paper Quilled Heart Card
Advanced
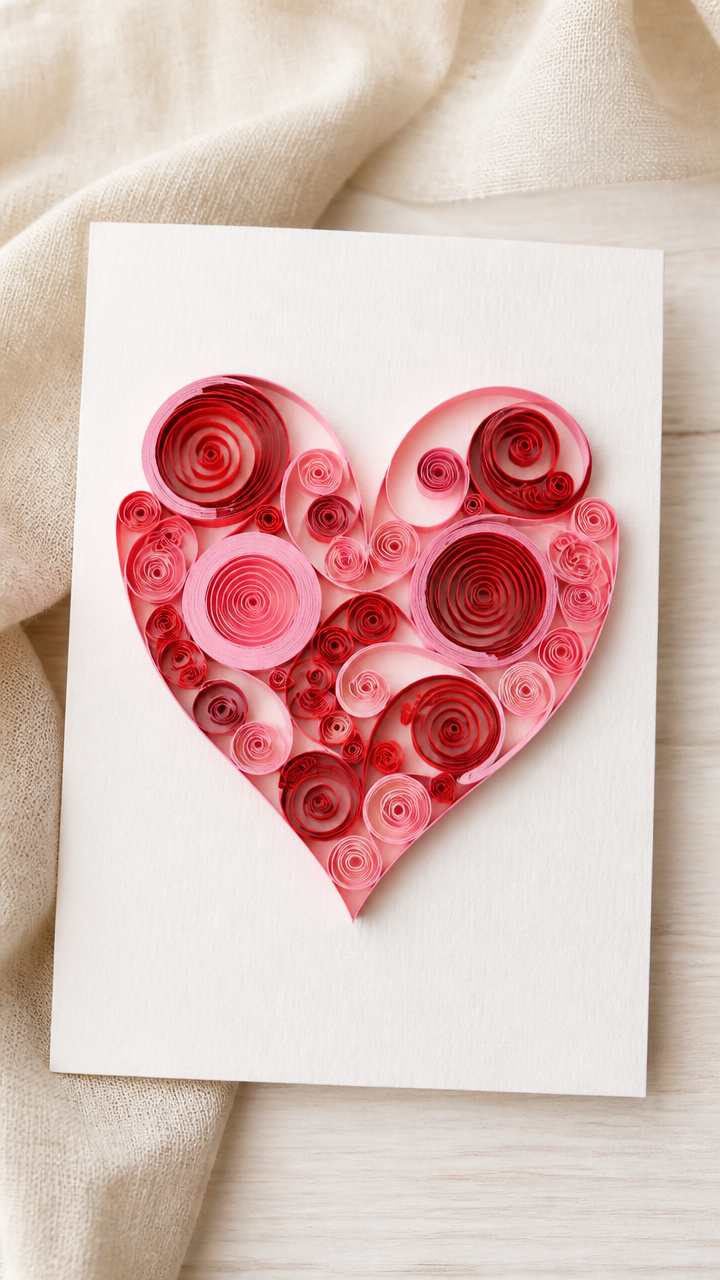
Tiny scrolls of paper form a detailed heart you can mount and display. This technique rewards patience with elegant texture.
Materials Needed
- Red quilling paper strips (1/4 inch wide, 12 inches long, 10 pieces)
- Pink quilling paper strips (1/4 inch wide, 12 inches long, 5 pieces)
- Quilling tool (slotted type)
- White A4 cardstock
- Double-sided tape (small squares)
- Tweezers
- Glue pen (fine tip)
How to Make It
- Roll one red strip around the slotted quilling tool and slide it off, pinching one end to form a teardrop shape.
- Repeat with nine more red strips to make ten teardrop coils.
- Make five loose circle coils using pink strips, leaving them unpinched.
- Arrange five red teardrops in a semicircle on the cardstock, securing each with double-sided tape.
- Fill the inner curve with pink circles, then complete the lower half with the remaining red teardrops, gluing each in place with the glue pen using tweezers for alignment.
9. Macramé Plant Hanger with Hearts
Advanced
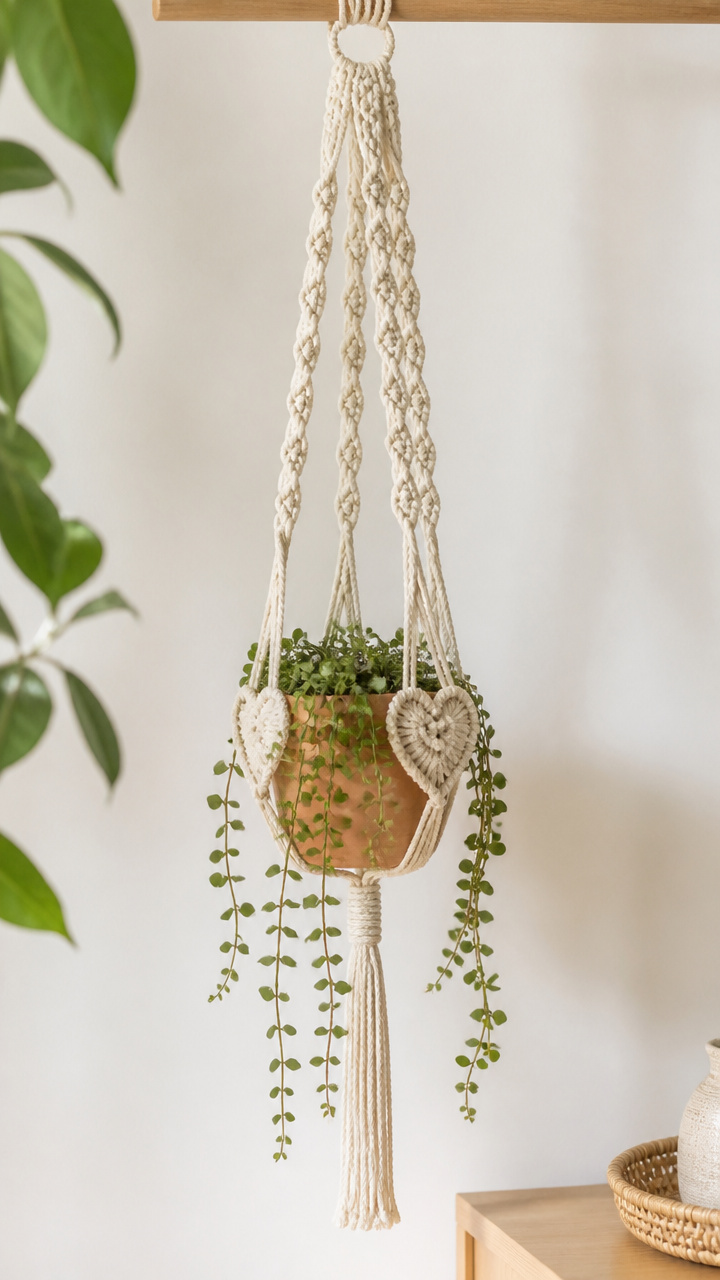
A trailing knot pattern ends in two knotted hearts cradling a small pot. This piece blends greenery with handmade affection.
Materials Needed
- Cotton cord (4 mm thickness, 4 strands, each 3 meters long)
- Scissors
- Small terracotta pot (3 inch diameter)
- Lighter
- Measuring tape
How to Make It
- Fold all four cords in half and measure 15 cm from the fold to mark the start of knotting.
- Secure the fold with tape to a work surface and begin square knots: left outer cord over middle two, right outer under and through.
- Complete four rows of square knots, each row containing four knots.
- Separate cords into two groups of four and tie a heart knot in each using the left half for one heart and the right for the other.
- Trim ends at an angle and singe lightly with a lighter to prevent fraying, then rest the pot in the hearts.
10. Salt Dough Heart Ornaments
Easy
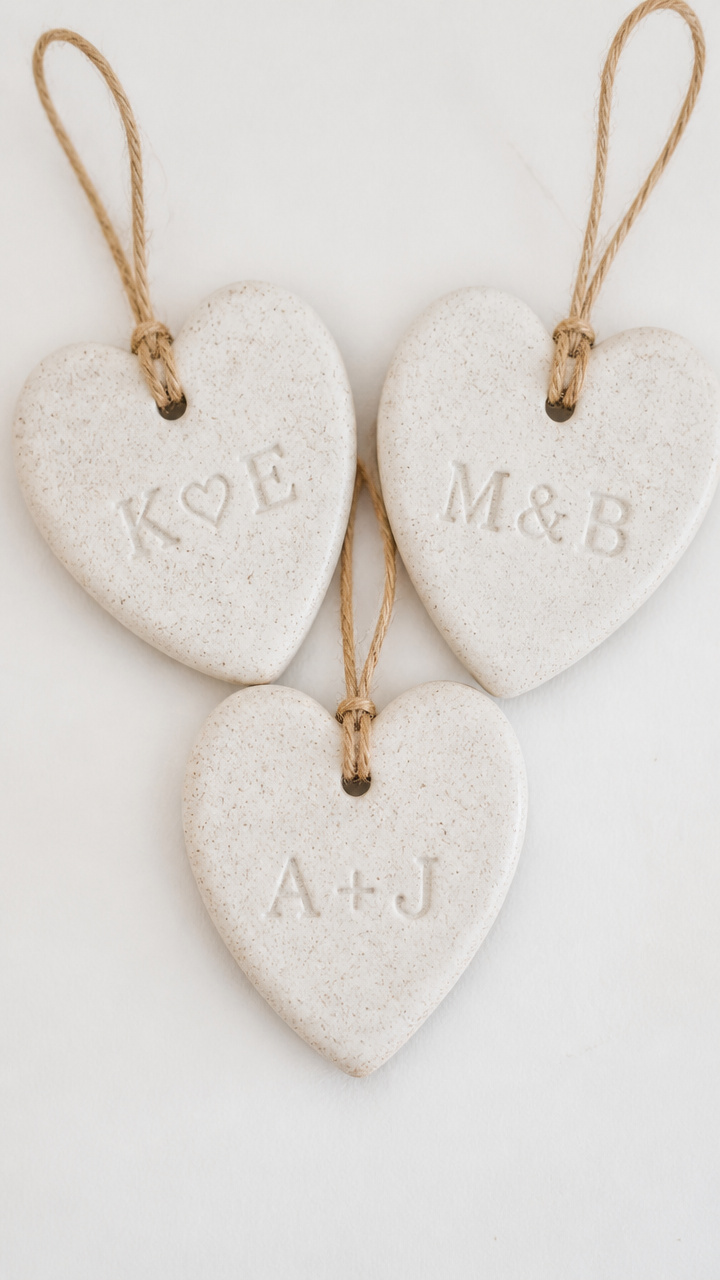
Scented dough shaped by hand bakes into keepsakes you can paint and keep. Kids and adults alike love pressing initials into these.
Materials Needed
- Flour (1 cup)
- Salt (1/2 cup)
- Water (1/2 cup)
- Rolling pin
- Heart-shaped cookie cutter (2.5 inches)
- Straw
- Baking sheet
- Parchment paper
- Acrylic paint (red and white)
- Brush (small)
How to Make It
- Mix flour, salt, and water in a bowl until a smooth dough forms, adding a teaspoon of water if too dry.
- Roll the dough to 0.25 inch thickness using the rolling pin on a floured surface.
- Cut out six hearts using the cookie cutter and place them on a parchment-lined baking sheet.
- Push a straw through the top center of each heart to make a hanging hole.
- Bake at 200°F for 2 hours, let cool, then paint with red and white acrylic paint using the small brush.
11. Ribbon-Chained Bunting
Easy
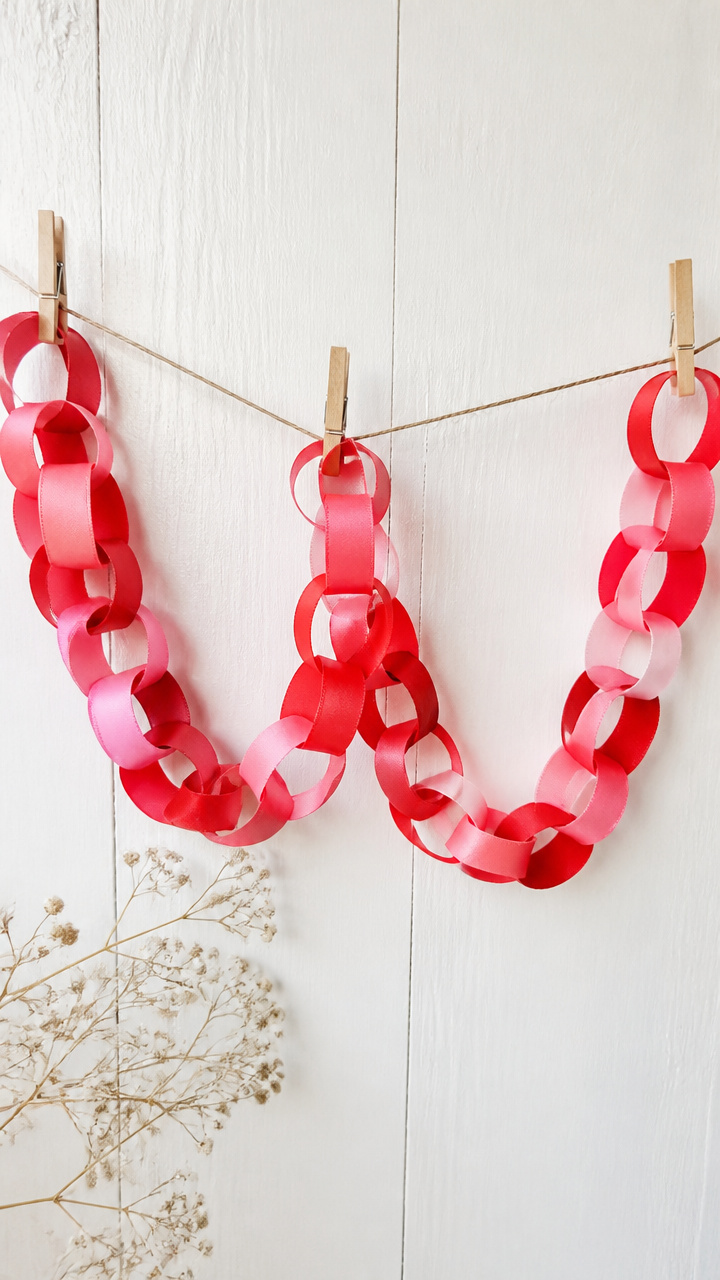
Loops of satin catch the light as they flutter across your room. Cut and link each piece to build a shimmering line of love.
Materials Needed
- Red satin ribbon (1 inch wide, 3 meters)
- Pink satin ribbon (1 inch wide, 3 meters)
- Scissors
- Clothespins (10)
How to Make It
- Cut both ribbons into 12-inch lengths, making six red and six pink strips.
- Take one red strip and one pink strip and lay them perpendicular in a cross shape.
- Loop the ends of the red strip through the center of the pink and pull tight to form a knot.
- Continue linking alternating colors the same way until all pieces are joined.
- Clip each end loop to a wall or curtain rod using clothespins.
12. Copper Wire Heart Sculpture
Moderate
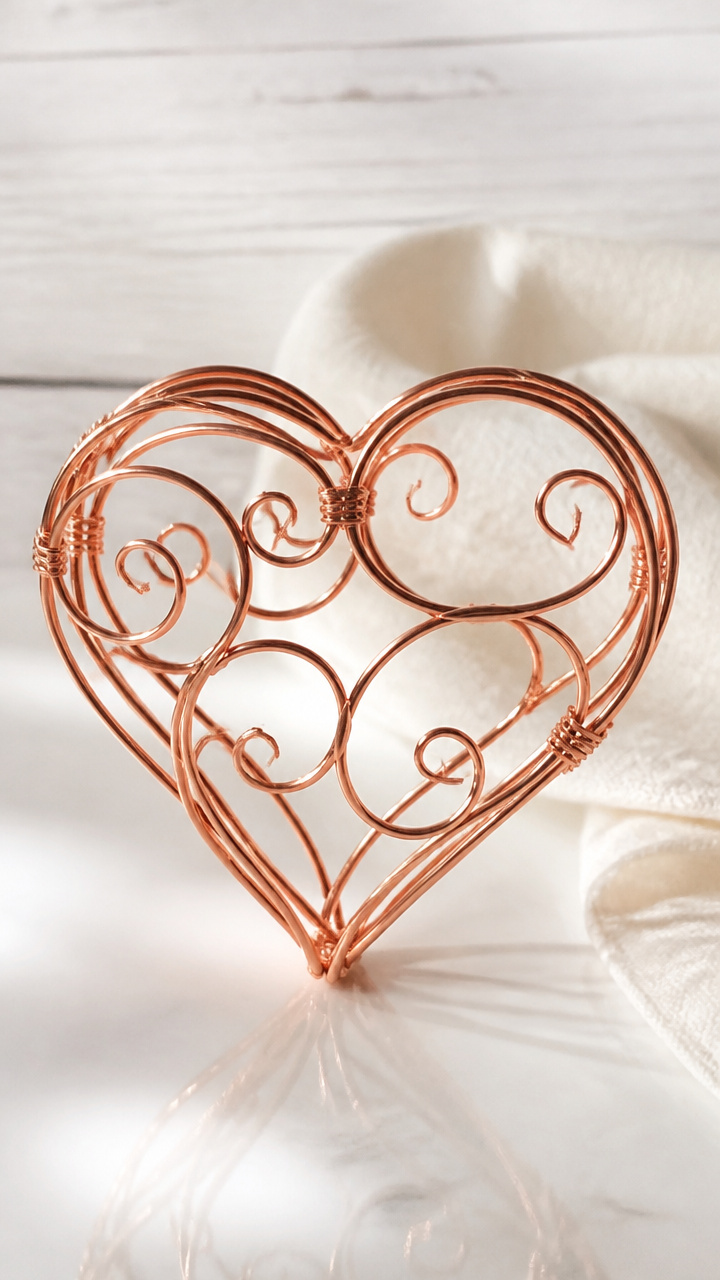
Twisted metal curves into a freestanding heart that catches afternoon light. Shape it once and leave it on display for years.
Materials Needed
- Copper wire (16 gauge, 1 meter)
- Wire cutters
- Round-nose pliers
- Work gloves
How to Make It
- Put on work gloves to protect your hands from sharp wire ends.
- Use wire cutters to snip 1 meter of copper wire from the spool.
- Bend the wire in half and use round-nose pliers to curl both ends into tight spirals.
- Shape each side into a symmetrical heart curve, adjusting with pliers for balance.
- Set it upright on a shelf where light reflects off the metal surface.
13. Love Letter Paper Chain
Easy
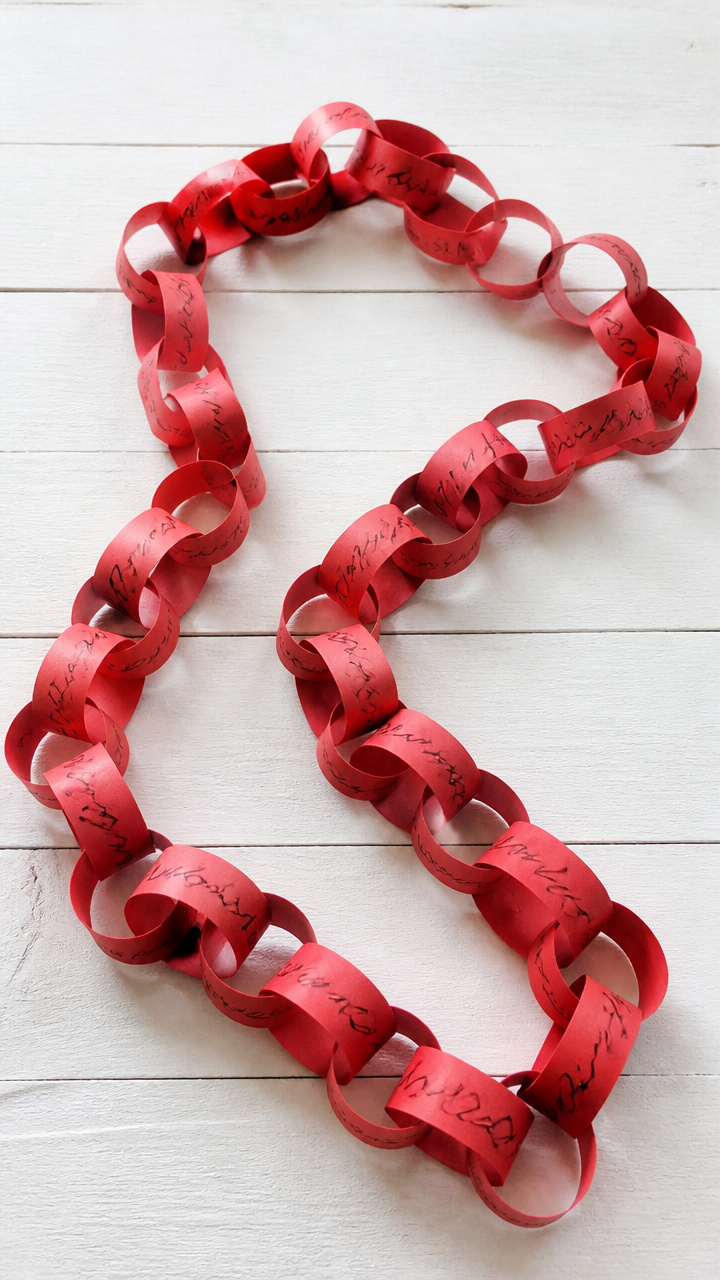
Words like 'dear' and 'forever' link together in a chain that tells a story. Write each strip by hand for personal charm.
Materials Needed
- Red construction paper (8.5 x 11 inches, 3 sheets)
- Pencil
- Ruler
- Scissors
- Glue stick
How to Make It
- Use the ruler and pencil to mark 1 inch wide strips across each sheet and cut them with scissors.
- Write one romantic word on each strip, such as 'yes', 'kiss', or 'always'.
- Form a loop by bringing the short ends together and gluing them with the glue stick.
- Thread the next strip through the first loop before gluing its ends closed.
- Repeat until all strips are linked in a continuous chain.
14. Vintage Book Page Hearts
Moderate
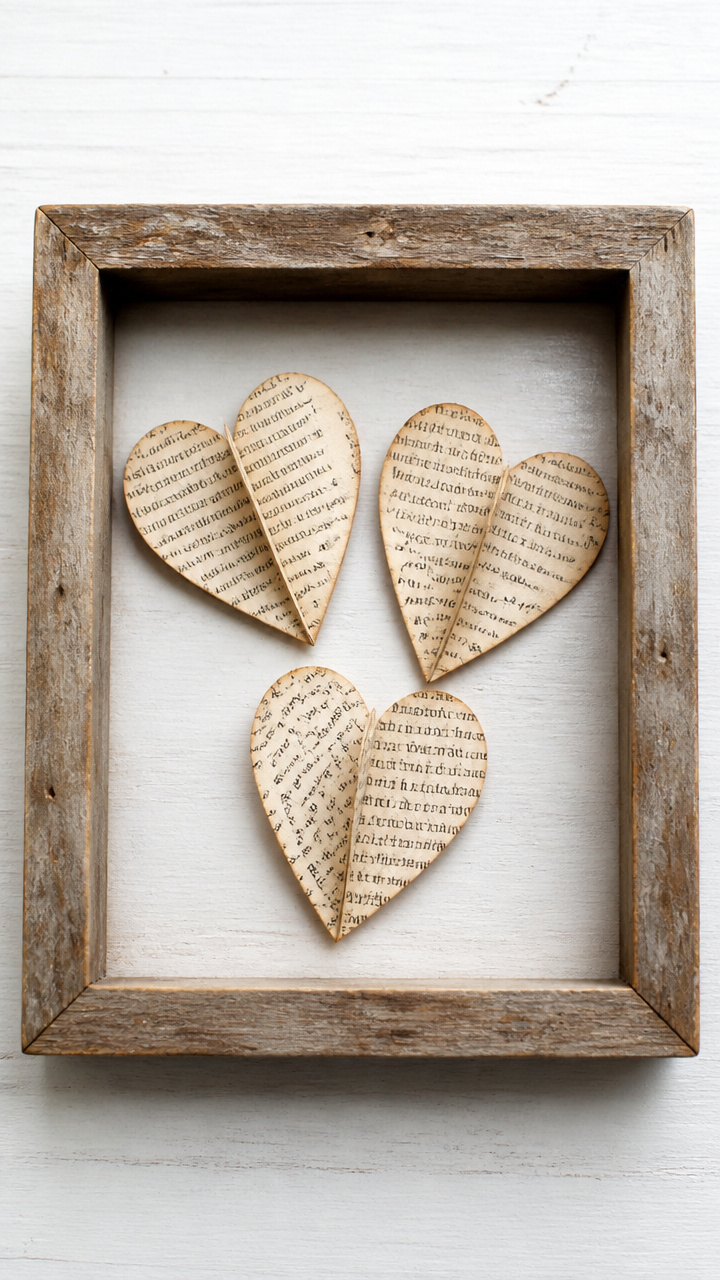
Fragile pages from an old novel curl into hearts that honor shared stories. Cluster them in a shadow box for literary romance.
Materials Needed
- Pages from a vintage book (3 pages, 6 x 9 inches)
- Bone folder
- Heart stencil (3 inches tall)
- Craft knife
- Self-healing cutting mat
- Double-sided tape
How to Make It
- Place the heart stencil on a book page and trace around it with the bone folder to crease the outline.
- Position the page on the cutting mat and carefully cut out the heart shape with the craft knife.
- Run the bone folder along the center of each heart to create a slight inward curve.
- Repeat for all three pages to make matching hearts.
- Arrange them on a wall or inside a frame using double-sided tape to hold in place.
15. Glitter-Dipped Pinecone Centerpiece
Easy
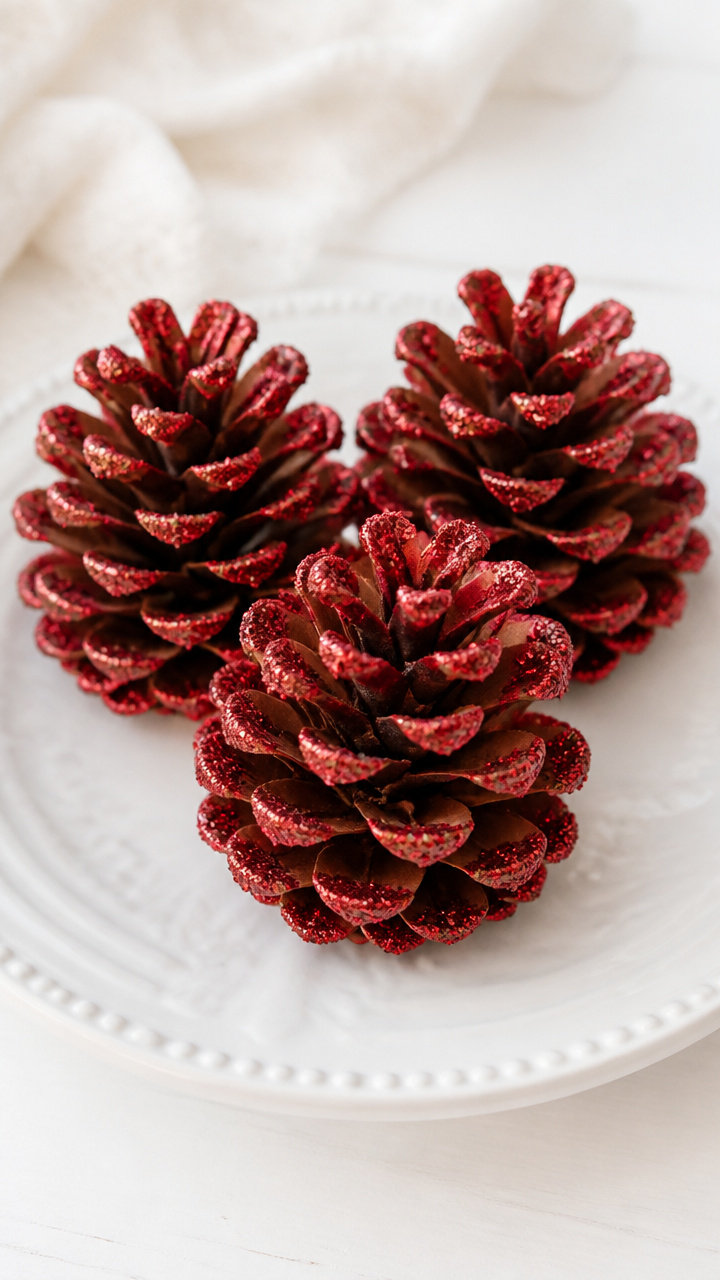
Woodland elegance shines when pinecones wear glitter like winter frost. Nestle them in a bowl with tea lights for golden sparkle.
Materials Needed
- 3 medium pinecones
- Red fine glitter
- White craft glue
- Small paintbrush (0.5 inch)
- Tray
- Paper plate
How to Make It
- Lay a paper plate on a tray to catch excess glitter.
- Use the small paintbrush to coat only the outer tips of the pinecone scales with white craft glue.
- Pour red glitter onto the plate and roll the glued tips gently through it until covered.
- Shake off extra glitter over the tray and let the pinecone dry for 1 hour.
- Repeat with the other two pinecones and arrange all in a shallow bowl with battery tea lights.
You now have everything you need to bring warmth and creativity into your home. Pick one craft that speaks to you and start gathering your supplies today.