15 Valentine’s Day Paper Crafts for Adults

Soft reds, delicate folds, and the quiet satisfaction of creating something heartfelt with your own hands—paper crafts bring a personal touch to love notes and home decor. These projects blend precision and warmth, perfect for expressing affection without saying a word.
Each craft here is made for adults who appreciate detail, texture, and the joy of handmade gestures. From elegant lanterns to intimate cards, these ideas invite you to slow down and make something meaningful.
1. Origami Heart Lantern
Moderate
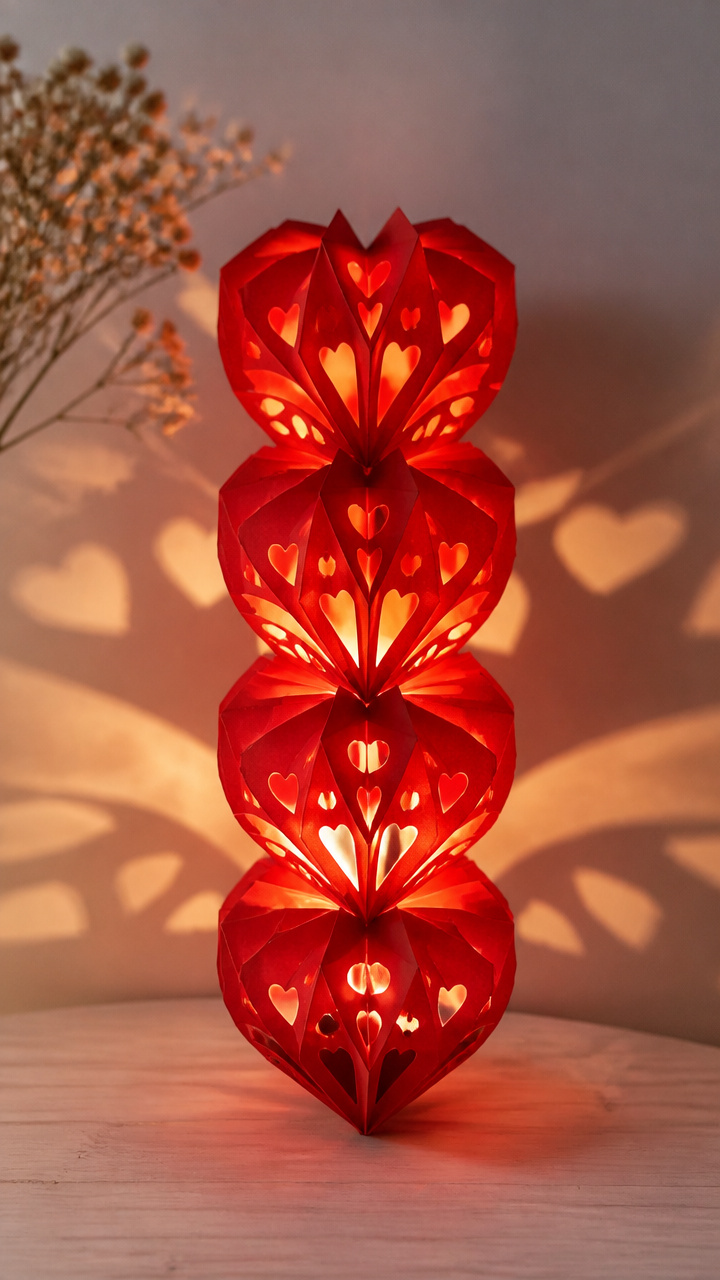
Delicate paper hearts stacked into a glowing centerpiece that casts romantic shadows across the room. This lantern turns simple folds into ambient light.
Materials Needed
- 10 sheets 6×6 inch red origami paper
- White glue
- LED tea light
- Scissors
- Pencil
- Ruler
How to Make It
- Fold each 6×6 inch paper into a classic origami heart using valley and mountain folds, pressing creases sharply with your fingernail.
- Once all 10 hearts are folded, apply a small dot of white glue to the bottom tip of one heart and attach it to the top tip of another, forming a vertical chain.
- Continue gluing hearts in sequence until all are connected, then gently curve the chain into a circle and glue the first and last hearts together.
- Center the LED tea light on a heat-safe surface and place the heart ring over it, adjusting the shape so it stands evenly and allows light to shine through the gaps.
2. Layered Paper Love Pop-Up Card
Moderate
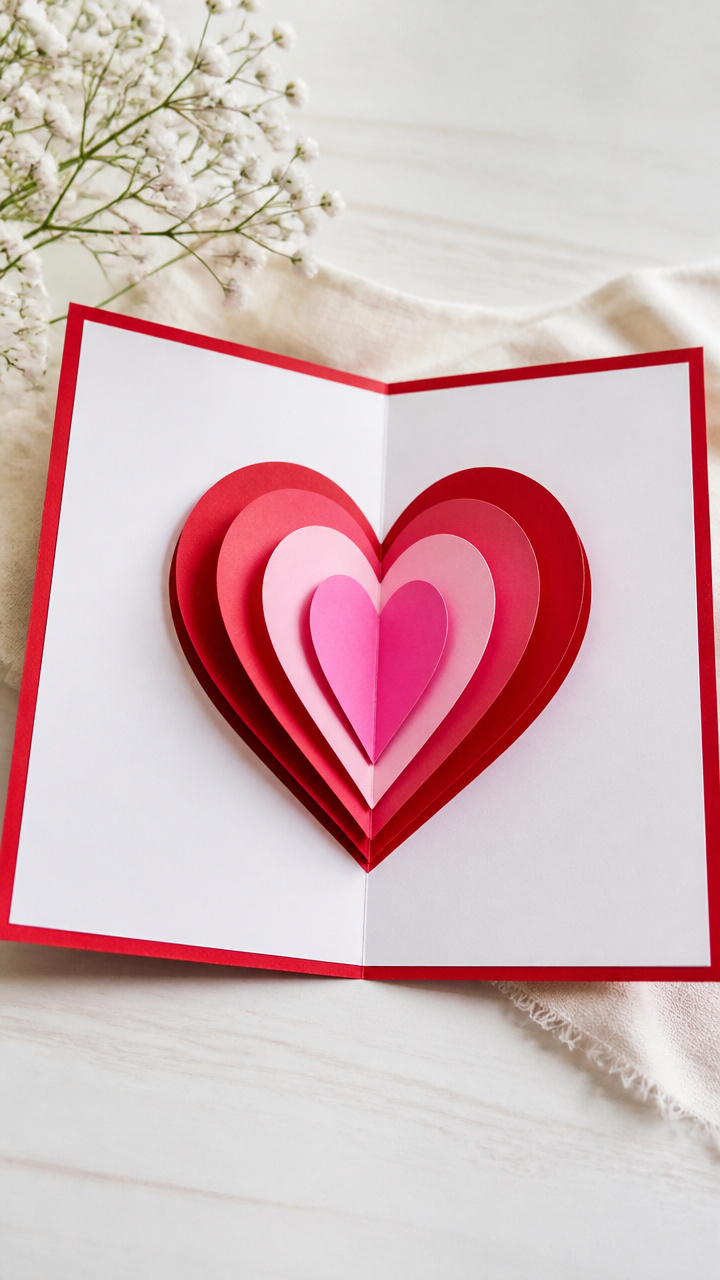
A bold three-dimensional heart bursts from the card when opened, built from precisely stacked paper layers. This card feels like a surprise hug.
Materials Needed
- A4 red cardstock
- A4 pink cardstock
- Craft knife
- Cutting mat
- Glue stick
- Metal ruler
- Pencil
How to Make It
- Fold the A4 red cardstock in half to create a 5.8 x 8.3 inch card base, creasing firmly with the ruler’s edge.
- On the pink cardstock, draw five concentric heart shapes, each 0.4 inch smaller than the last, then cut them out carefully with the craft knife on the cutting mat.
- Glue the largest pink heart centered on the inside front flap of the red card, then layer the next four hearts on top, offset slightly upward to create lift.
- Let the glue dry flat under a light book for 5 minutes, then open the card to reveal the pop-up effect.
3. Paper Quilled Rose Frame
Advanced
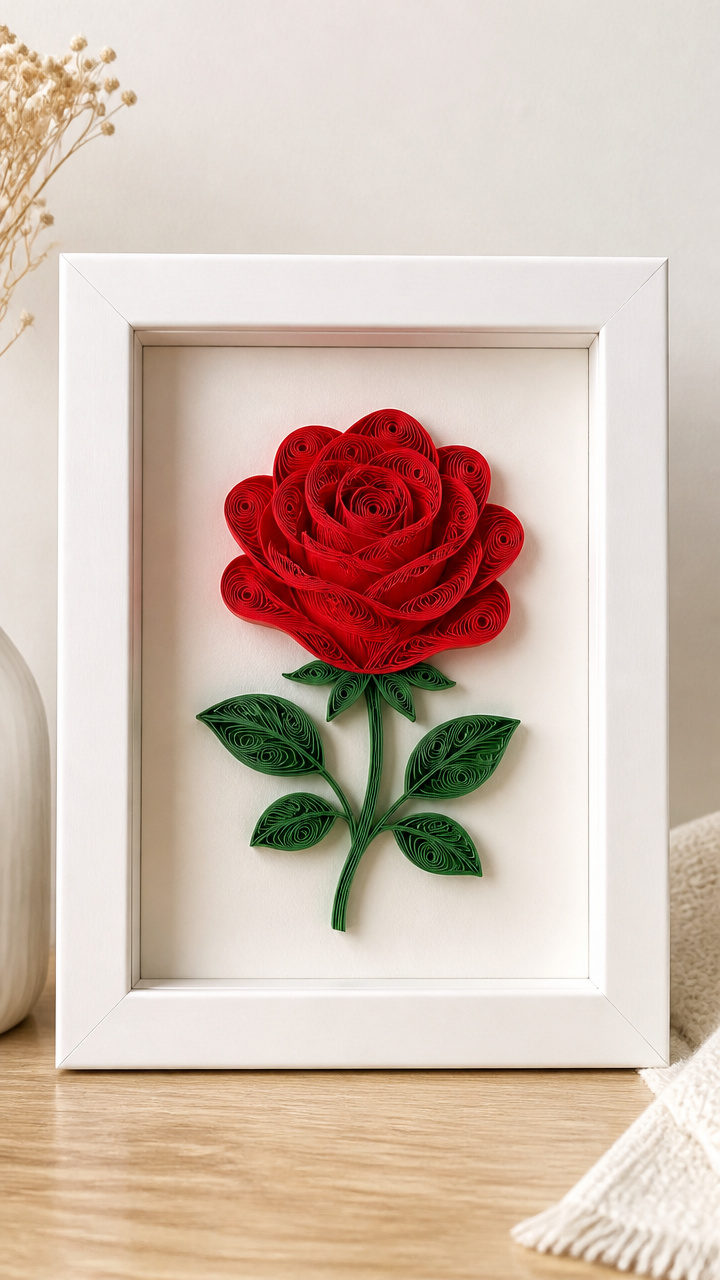
Tightly coiled paper strips form a lifelike rose mounted in a shadow box frame. This keepsake blooms forever without water.
Materials Needed
- Quilling paper strips, 1/8 inch wide (10 red, 5 green)
- Quilling tool
- Tweezers
- Double-sided foam squares
- 8×10 inch shadow box frame
- White glue
How to Make It
- Wrap one red quilling strip around the quilling tool, glue the end, and release to form a tight coil; repeat to make 12 tight coils.
- Pinch each coil at one point to create teardrop shapes, then pinch opposite sides of six to form marquise shapes.
- Arrange three marquise shapes around a tight coil center, gluing tips together to form the inner rose petals; let dry 2 minutes.
- Layer six teardrop petals around the base, angling outward, and add two loose outer petals with slight bends for realism.
- Use tweezers to position the rose onto a foam square adhered inside the shadow box, then place green strips as leaves beneath with white glue.
4. Geometric Paper Wall Art
Moderate
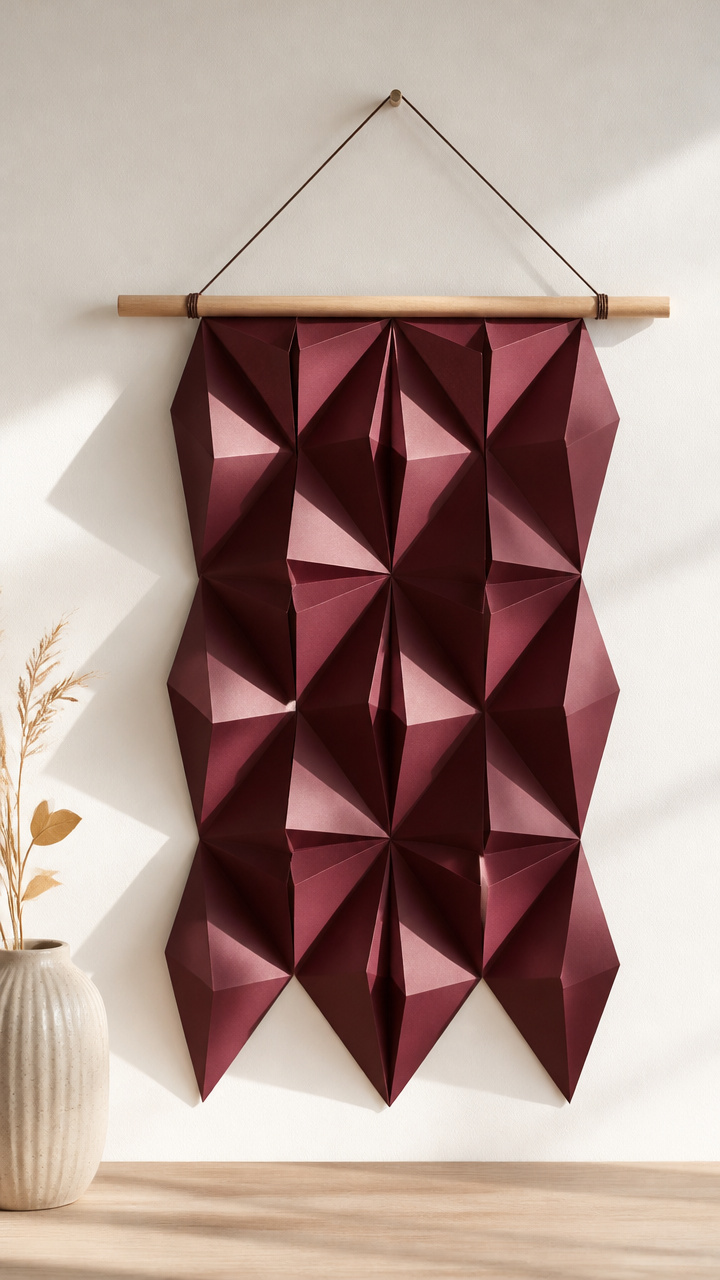
Sharp angles and deep reds come together in a modern wall piece that catches light and attention. This design adds drama to any space.
Materials Needed
- 12 sheets 8.5×11 inch burgundy cardstock
- X-Acto knife
- Cutting mat
- Metal ruler
- Glue gun
- Wooden dowel, 12 inch long, 1/4 inch diameter
- Red satin ribbon, 24 inches
How to Make It
- Cut each sheet of cardstock into six 1.5×11 inch strips using the X-Acto knife, ruler, and cutting mat for straight edges.
- Fold each strip in half lengthwise with a crisp crease, then unfold and bend into a shallow V-shape.
- Hot glue the center crease of each V to the wooden dowel, spacing them evenly and rotating each by 30 degrees for full coverage.
- Tie the satin ribbon around both ends of the dowel to create a hanger, letting the tails drape 6 inches down.
5. Pressed Flower Paper Bookmarks
Easy
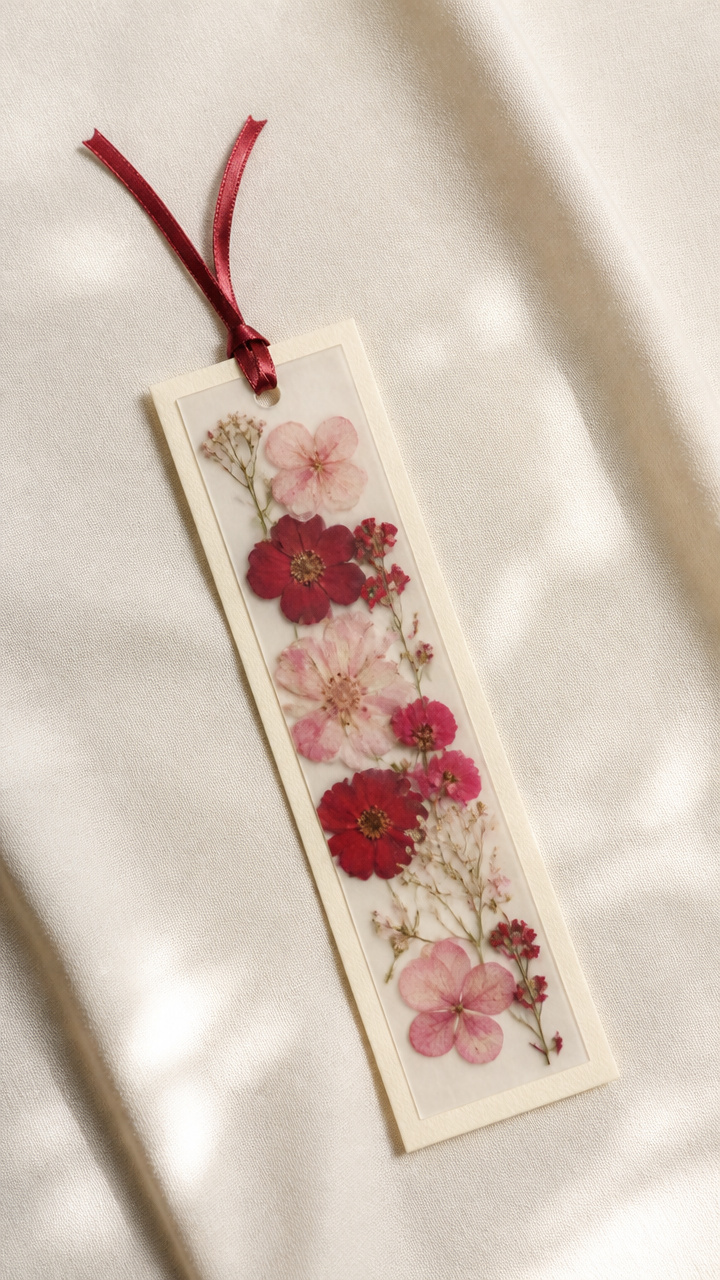
Real dried flowers sealed between vellum and cardstock create translucent bookmarks that flutter with memory. Perfect for gifting with a favorite novel.
Materials Needed
- Pre-pressed red and pink flowers (5 sets)
- 3×8 inch ivory cardstock, 5 pieces
- 3.2×8.2 inch vellum sheets, 5 pieces
- Double-sided tape
- Hole punch
- Satin cord, 10 inches per bookmark
How to Make It
- Center one set of pressed flowers on the short edge of a 3×8 inch cardstock piece, arranging stems toward the top.
- Lay a piece of double-sided tape along all four edges of the vellum sheet, then carefully place it over the flowers to seal them in place.
- Punch a hole at the top center of the bookmark and thread 10 inches of satin cord through, tying a knot at the end to secure.
- Repeat for remaining sets, ensuring no moisture touches the flowers during assembly.
6. Pop-Out Paper Heart Garland
Easy
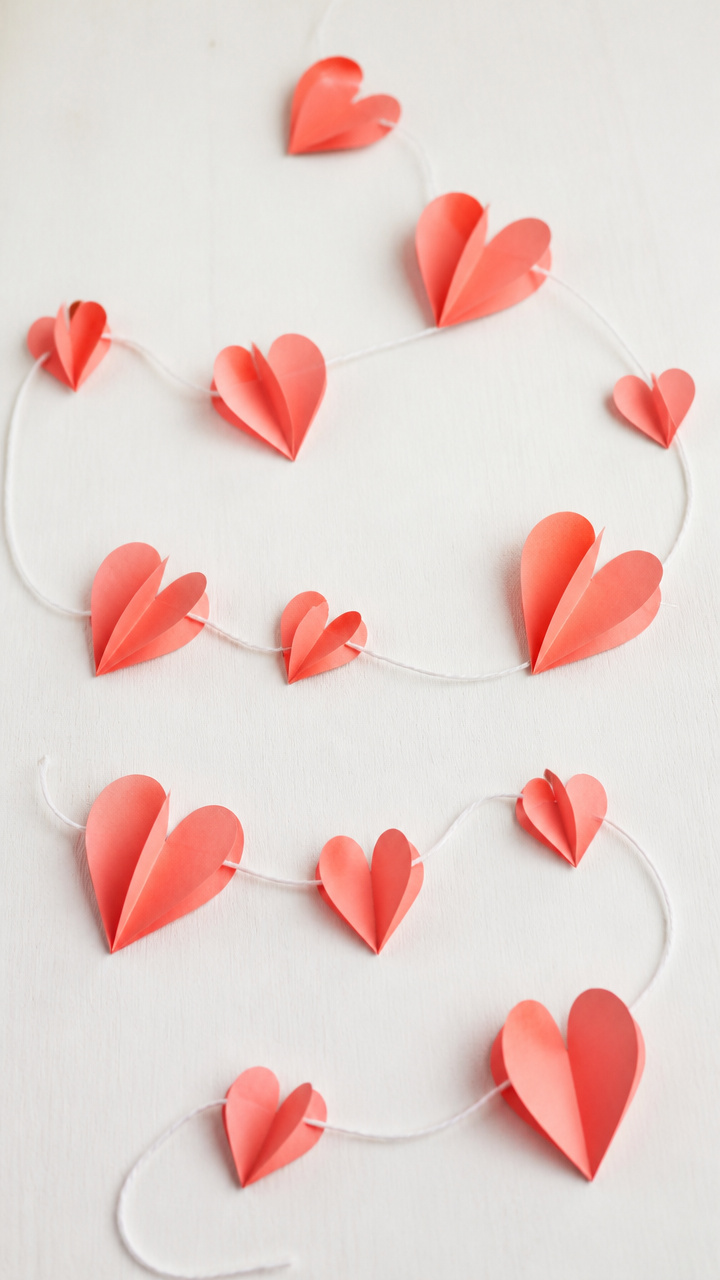
Flat hearts strung together leap into 3D when hung, creating a dynamic garland that dances above a table or mantel. Movement meets minimalism.
Materials Needed
- 8 sheets 8.5×11 inch coral cardstock
- Hole punch
- White string, 6 feet
- Scissors
- Glue stick
How to Make It
- Cut each sheet into three 3.6×8.5 inch rectangles, then fold each in half widthwise to form a 3.6×4.25 inch base.
- Draw half a heart on the folded edge of each rectangle, cut it out with scissors, and unfold to reveal a symmetrical heart with a center crease.
- Open each heart slightly and glue the two halves together at the top and bottom points only, leaving the middle open to allow pop-out action.
- Punch a hole at the top of each heart and thread them onto the string every 6 inches, knotting behind each to hold in place.
7. Hand-Cut Paper Shadow Box
Advanced
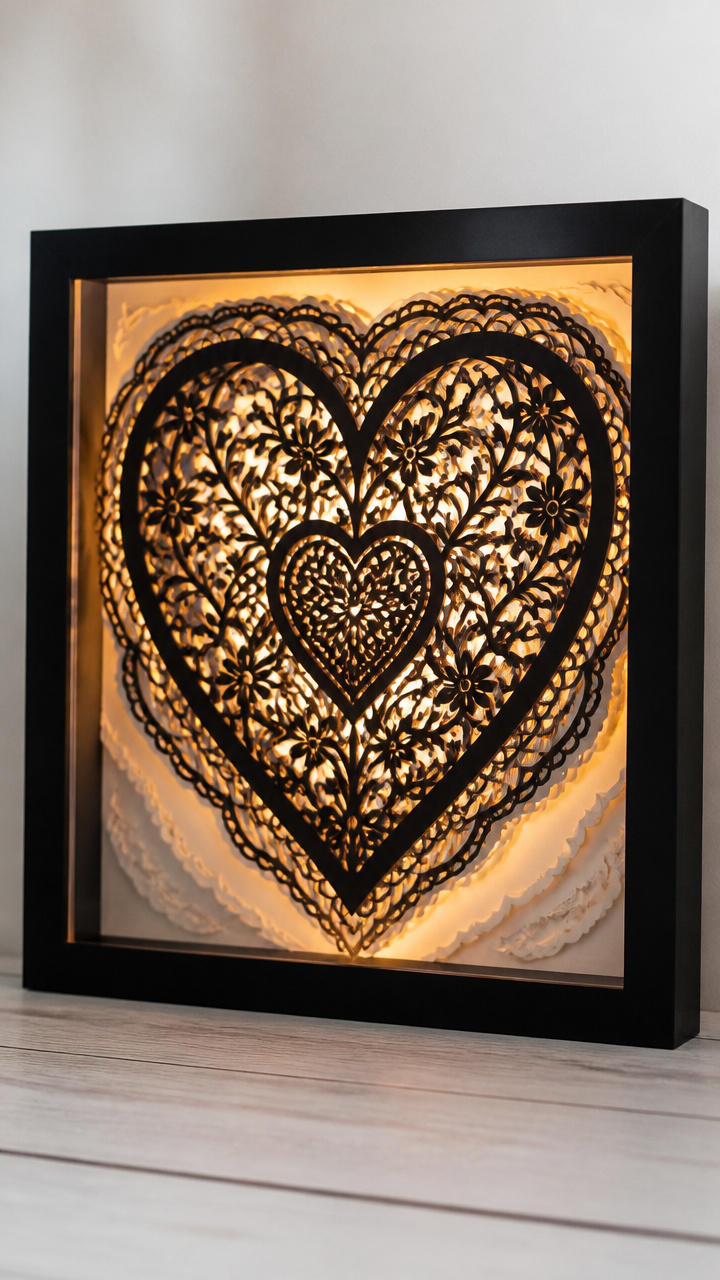
Intricate lace-like patterns cut from black paper glow when backlit in a deep frame. This moody piece speaks softly but deeply.
Materials Needed
- 8×10 inch black cardstock
- Craft knife with extra blades
- Cutting mat
- Printed heart filigree template
- Pencil
- Double-sided tape
- LED panel light, 8×10 inch
How to Make It
- Place the printed filigree template under the black cardstock and trace the design lightly with pencil, checking alignment with a ruler.
- Secure the paper to the cutting mat and use the craft knife to cut along all interior lines, changing blades every 2 sheets to keep edges sharp.
- Remove all cut-out sections carefully with tweezers, then lay the finished sheet flat on a clean surface.
- Attach double-sided tape around the edges of the LED panel and press the cut paper firmly onto the light surface, avoiding fingerprints.
8. Watercolor Wash Greeting Cards
Easy
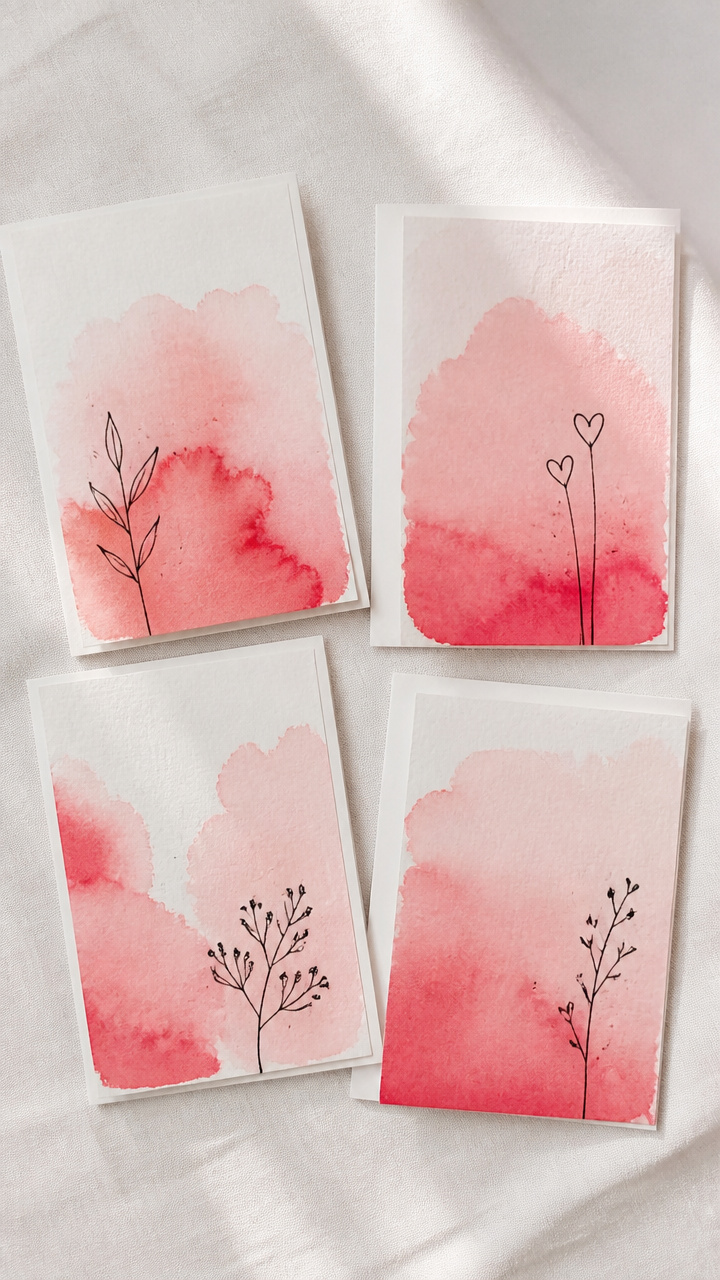
Soft gradients of red and pink bleed across handmade cards, each one unique like a whispered secret. These feel luxurious to send and keep.
Materials Needed
- A2 watercolor paper cards, 5 pieces
- Round watercolor brush, size 6
- Cup of water
- Red and pink watercolor pans
- Paper towel
- Fine-tip black pen
How to Make It
- Wet the brush and pick up red watercolor, painting a horizontal band across the front of one card near the center.
- While still wet, touch the brush to pink pigment and blend it into the red edge, letting colors merge naturally on the paper.
- Blot excess moisture with a paper towel corner and let dry flat for 15 minutes away from direct sunlight.
- Once dry, write 'You're loved' in cursive with the fine-tip pen just below the color wash.
9. Paper Beaded Jewelry Set
Moderate
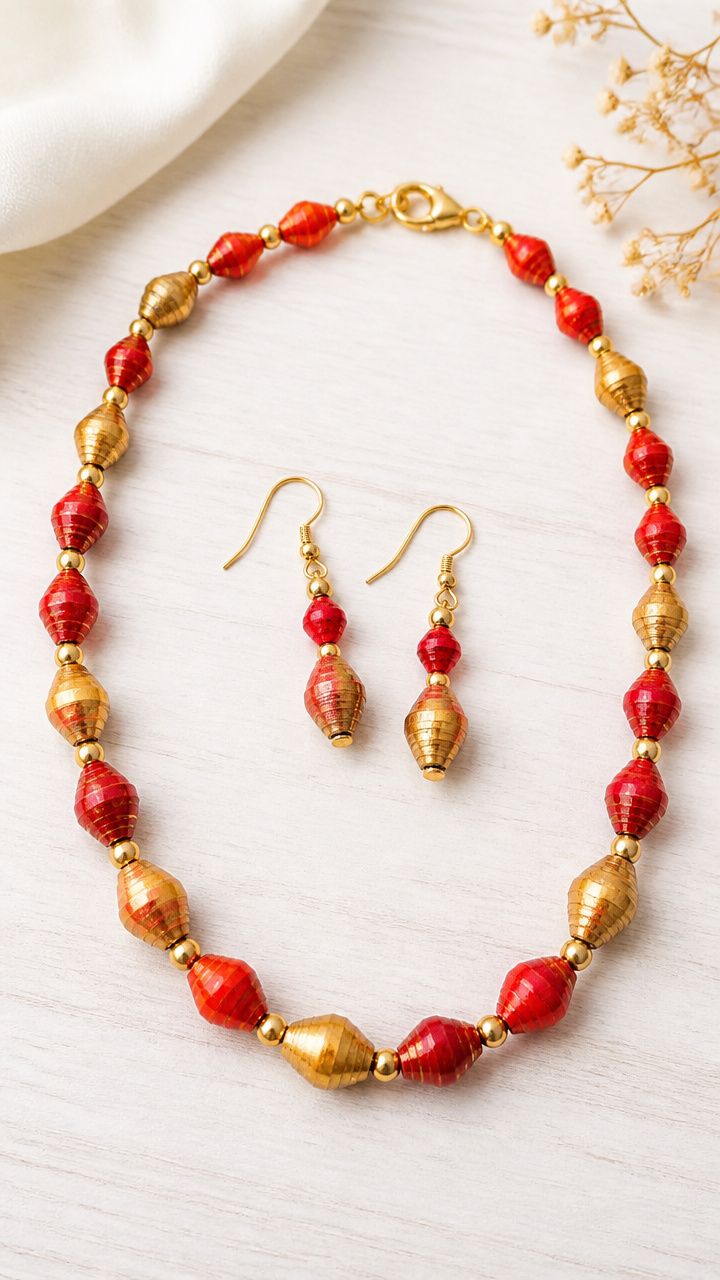
Rolled and varnished paper strips become glossy beads strung into a necklace and earrings. Lightweight, colorful, and totally wearable.
Materials Needed
- Paper beading strips, 1/4 inch wide, red and gold (20 each)
- Beading roller tool
- Clear-drying glue
- Clear acrylic sealer spray
- Earring hooks, 1 pair
- Clasp necklace chain, 18 inch
- Jewelry pliers
How to Make It
- Apply a small dot of glue to one end of a red strip and roll it tightly around the beading roller, keeping edges aligned.
- When the strip is fully rolled, add another dot of glue to the end and press it to the side of the bead to secure.
- Repeat to make 10 red and 5 gold beads, then arrange them on wax paper and spray lightly with acrylic sealer, turning after 10 minutes to coat both sides.
- Let beads cure 30 minutes, then use pliers to attach earring hooks to two matching beads and thread the rest onto the chain with jump rings.
10. Folded Paper Heart Coasters
Moderate
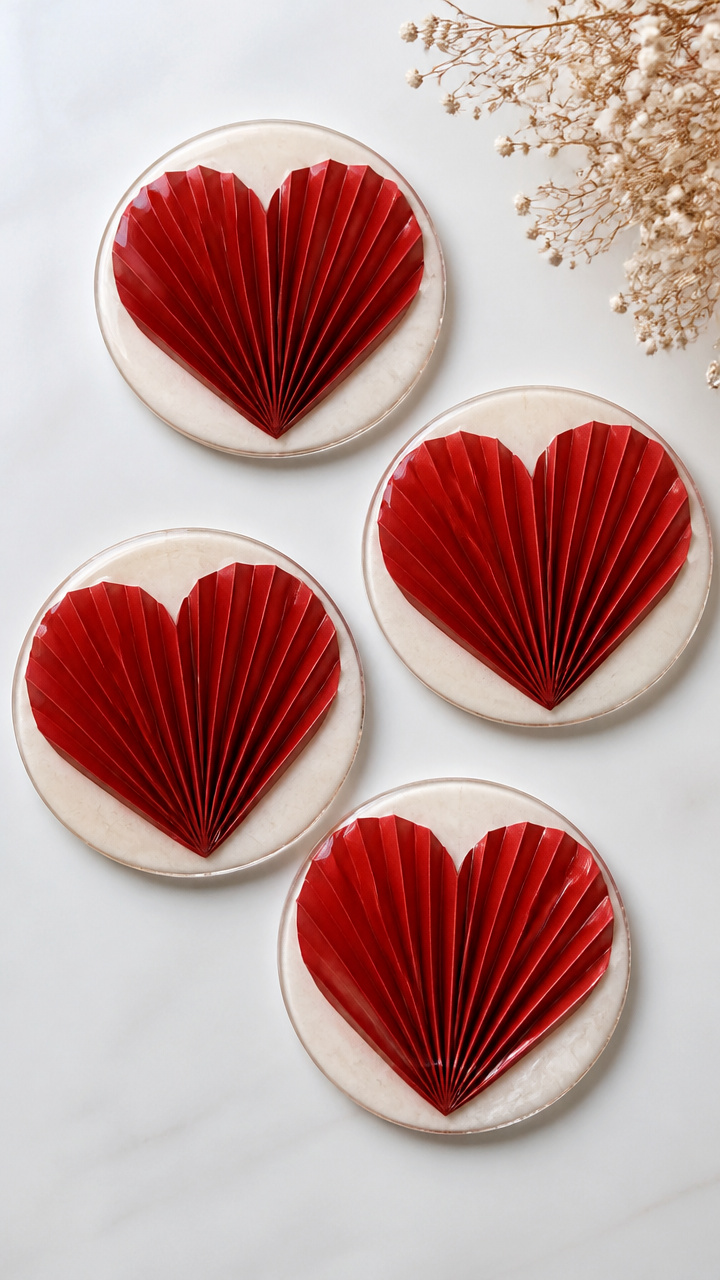
Sturdy, wipeable coasters made from layered paper folds resist moisture while adding charm to coffee tables. Practical romance at its best.
Materials Needed
- 12 sheets 6×6 inch red scrapbook paper
- PVA glue
- Non-porous plastic coaster base, 4 inches diameter, 4 units
- Rolling pin
- Clamps
- Clear contact paper, 9×12 inch sheet
How to Make It
- Apply a thin layer of PVA glue to one 6×6 sheet and stack 12 sheets together, aligning corners precisely.
- Roll over the stack with a rolling pin to remove air bubbles, then clamp between two flat boards for 2 hours until fully bonded.
- Trace the coaster base onto the block and cut out the circle with a craft knife on a cutting mat.
- Cover both sides and edge of the paper coaster with clear contact paper, smoothing out wrinkles with your palm.
11. Paper Weaving Wall Hanging
Moderate
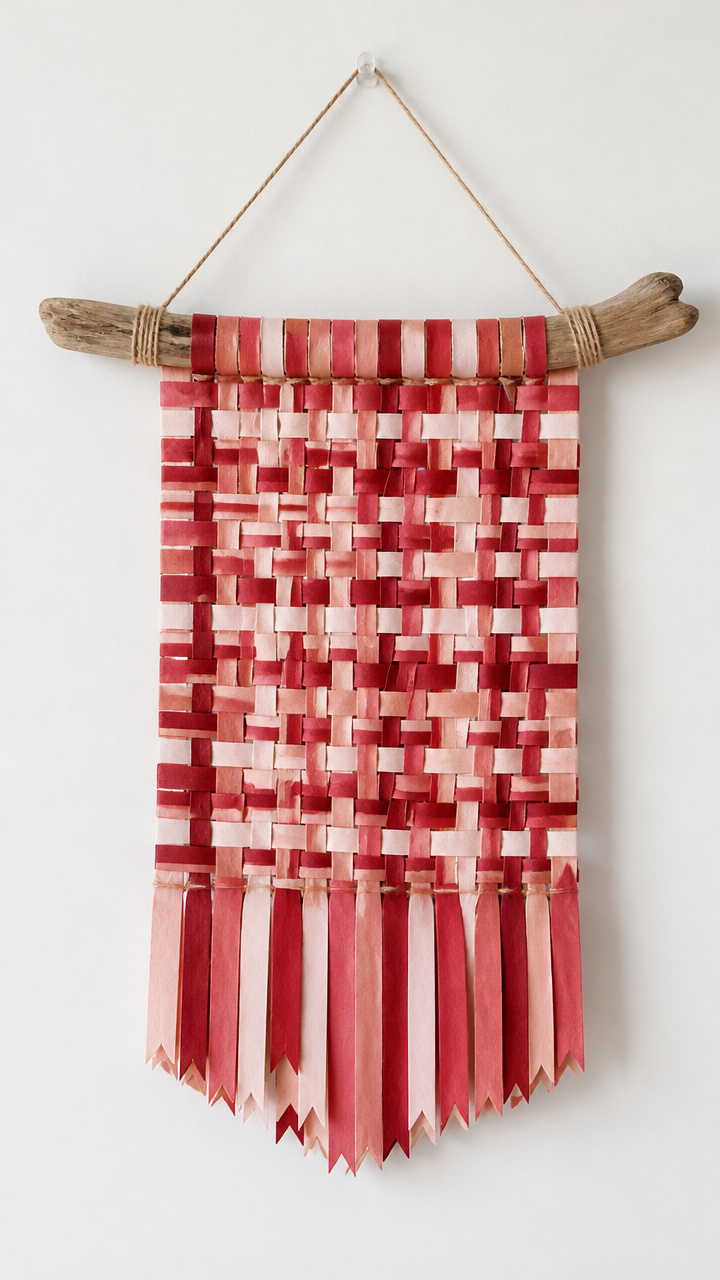
Interlaced strips of crimson and blush weave into a soft textile-like piece that hangs like a tapestry. Rhythm and color find balance here.
Materials Needed
- 9×12 inch red cardstock, 3 sheets
- 9×12 inch blush cardstock, 3 sheets
- Scissors
- Glue stick
- Wooden skewer
- Driftwood branch, 10 inches long
How to Make It
- Cut each sheet into eight 1.1 inch wide vertical strips, yielding 24 red and 24 blush strips, each 9 inches long.
- Glue one red strip vertically to the back of the driftwood branch, spacing the next 11 strips 0.6 inch apart to form the warp.
- Weave a blush strip horizontally over and under the vertical threads, pushing it to the top with the skewer to tighten tension.
- Alternate the over-under pattern with each new row and secure the end of every weft strip with a dot of glue on the back.
12. Laser-Cut Paper Love Letters
Advanced
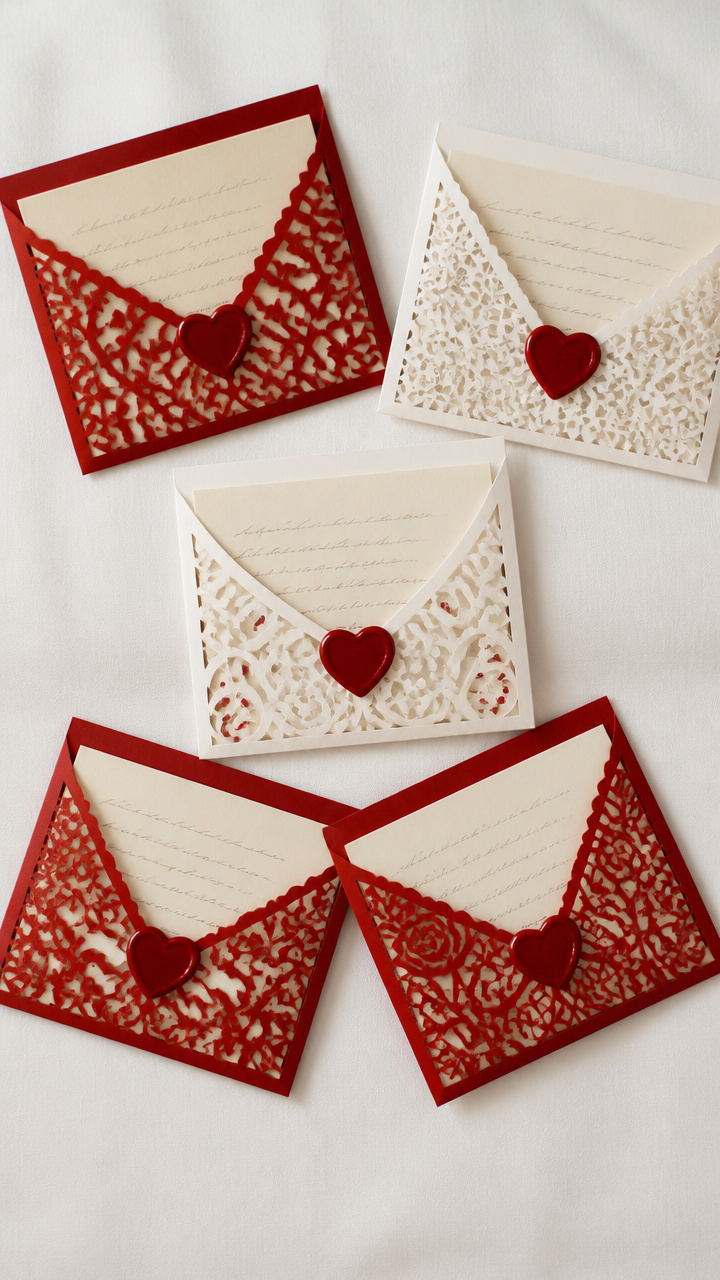
Precision-cut envelopes with hidden messages inside unfold like secrets meant only for one person. Intimate and unforgettable.
Materials Needed
- 5×7 inch laser-cut paper envelope templates (5 units)
- Red calligraphy pen
- Tiny letter paper, 2×3 inch, 5 sheets
- Bone folder
- Wax seal kit with red wax beads
- Sealing stamp
How to Make It
- Write a short personal message on each 2×3 inch paper using the red calligraphy pen, letting ink dry 2 minutes.
- Fold each note in thirds and insert into the corresponding laser-cut envelope, creasing shut with the bone folder for a crisp edge.
- Melt one red wax bead over the envelope closure using the wax spoon, then press the stamp into the wax for 10 seconds to set.
- Leave envelopes unaddressed for a mysterious, hand-delivered feel.
13. Paper Mache Candle Holders
Advanced
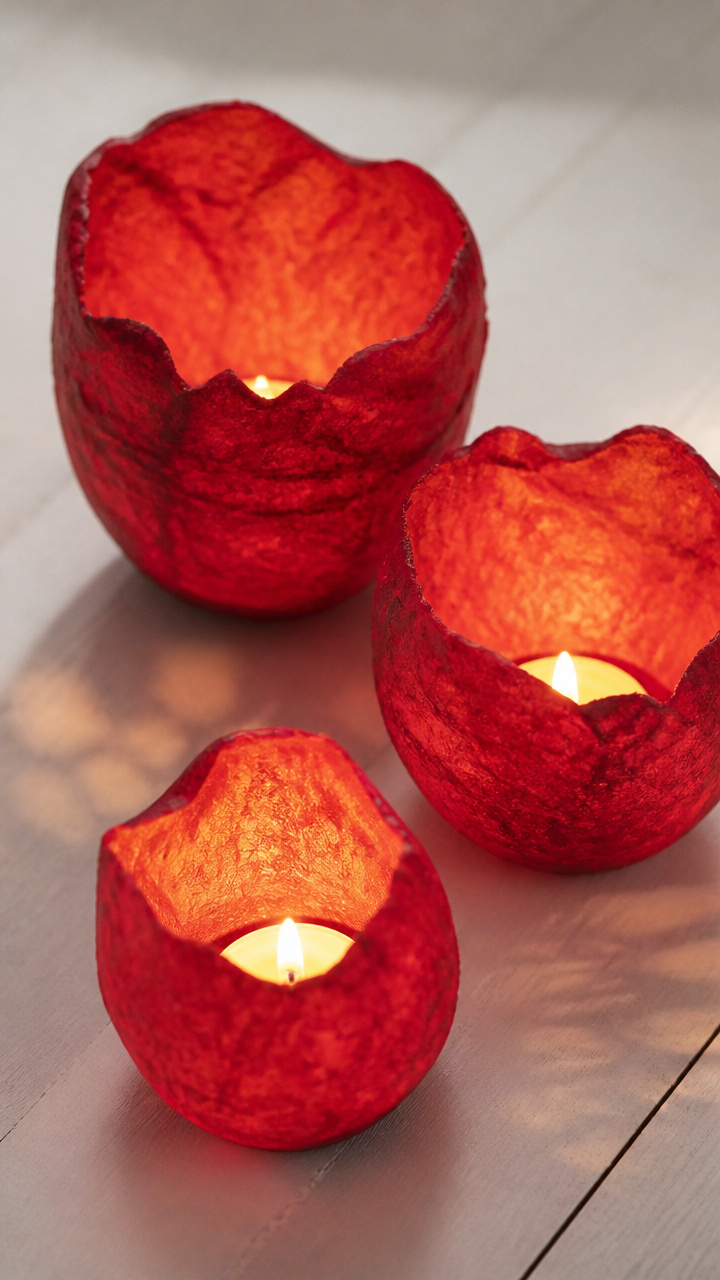
Textured red vessels cradle tea lights, their uneven surfaces casting flickering patterns on the walls. Raw and romantic.
Materials Needed
- Balloon, 5 inch diameter, 3 units
- Newspaper strips, 1×3 inch, 100 pieces
- Flour paste (mix 1/4 cup flour + 1/2 cup water)
- Red tissue paper, 10 sheets
- White glue
- Tea lights, 3
How to Make It
- Inflate one balloon and dip newspaper strips into flour paste, applying 3 layers over the lower half of the balloon, leaving the neck bare.
- Let dry 24 hours completely, then pop and remove the balloon.
- Tear tissue paper into rough pieces and layer over the paper mache with white glue, covering all but the rim for a frayed edge.
- Once dry, place a tea light inside each holder and group them on a tray for display.
14. Embossed Foil Greeting Cards
Moderate
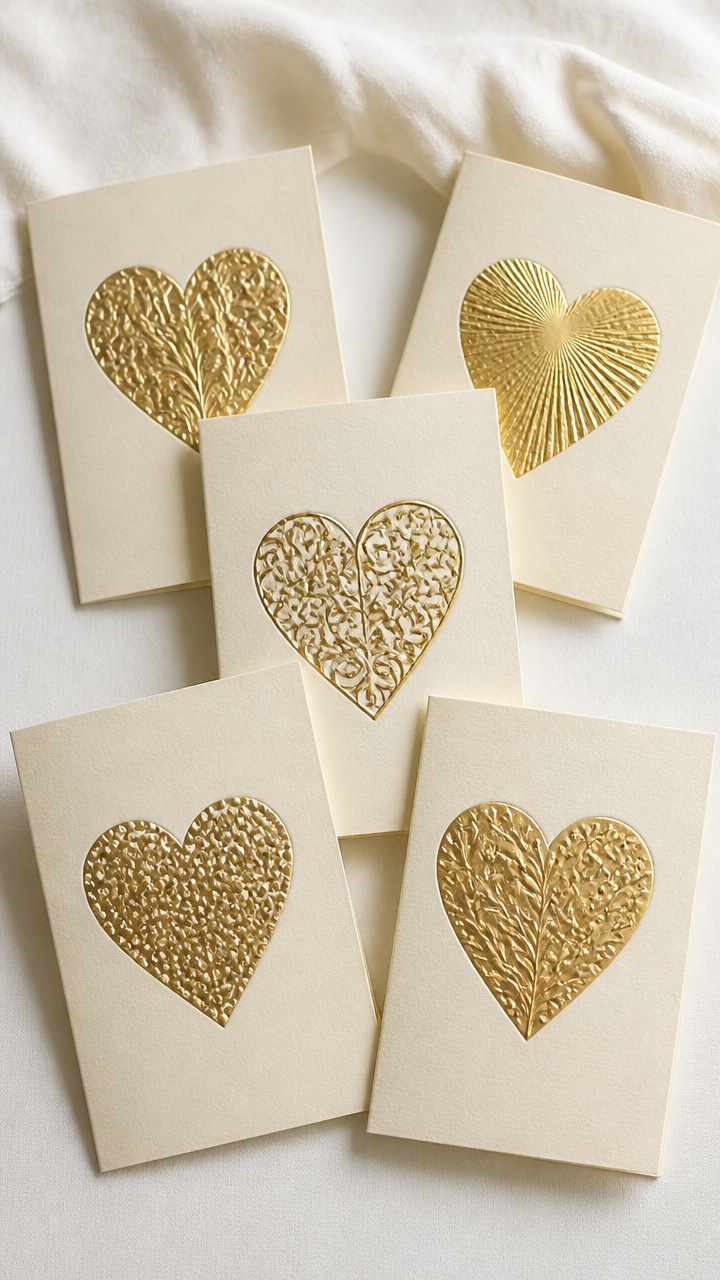
Shiny gold hearts rise from deep impressions on matte card fronts, catching light with quiet luxury. These feel expensive to give.
Materials Needed
- A2 cream cardstock, 5 cards
- Heart-shaped embossing folder
- Letterpress machine
- Gold foil transfer sheet
- Low-tack tape
- Soft cloth
How to Make It
- Insert one card into the heart embossing folder and run it through the letterpress machine once to create a deep impression.
- Place the gold foil shiny side down over the embossed heart and secure with low-tack tape on two edges.
- Run the sandwich through the machine again at medium pressure, then peel back the foil sheet to reveal the transferred gold.
- Buff the surface gently with a soft cloth to enhance shine and remove any residue.
15. Modular Paper Heart Sculpture
Advanced
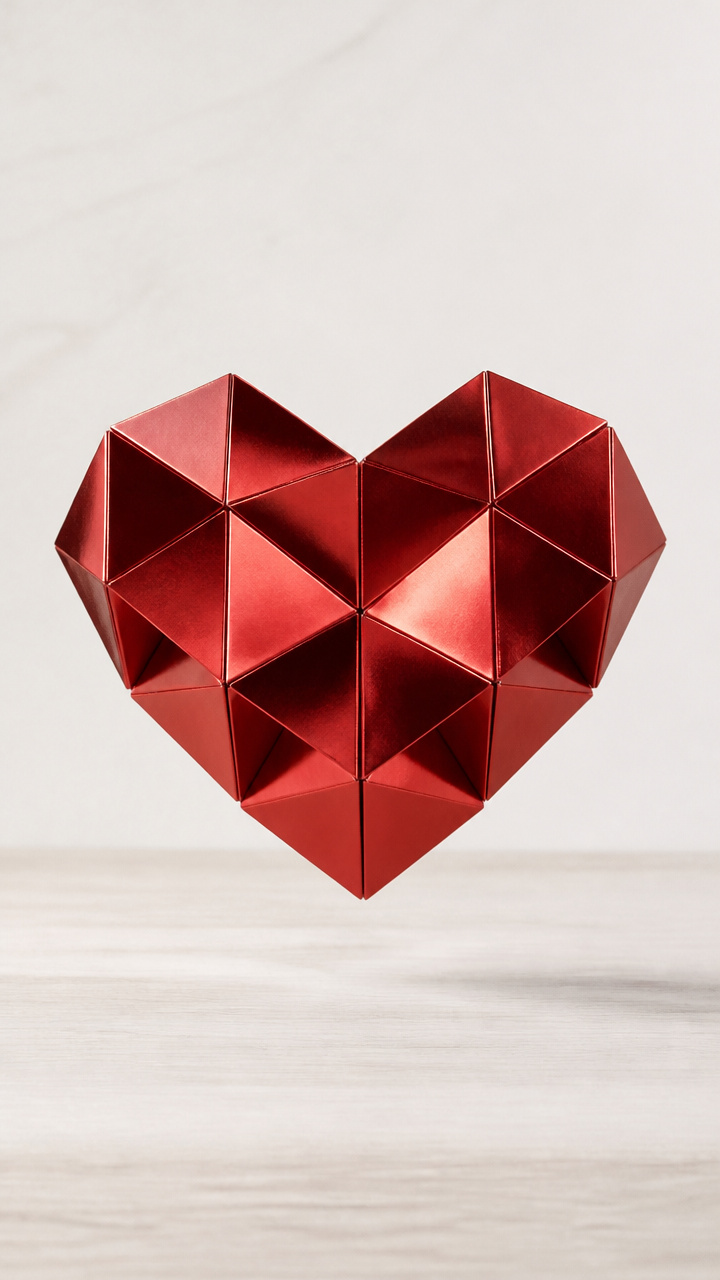
No glue, no wire—just interlocking paper units form a floating heart sculpture. Precision and patience build this striking centerpiece.
Materials Needed
- 30 sheets 3×3 inch red metallic paper
- Bone folder
- Ruler
- Pencil
How to Make It
- Fold each 3×3 inch sheet diagonally to form a triangle, then make two additional valley folds from each corner to the center point.
- Reverse one side of each flap to create a locking tab, using the bone folder for sharp creases.
- Assemble five units into a ring by inserting tabs into adjacent pockets, forming the first pentagon module.
- Connect five more modules around the edges, then mirror the structure to build the second half, finally joining both halves by interlocking outer tabs.
Pick one project that calls to you, gather your supplies, and let your hands do the talking. Love shows up in the details.