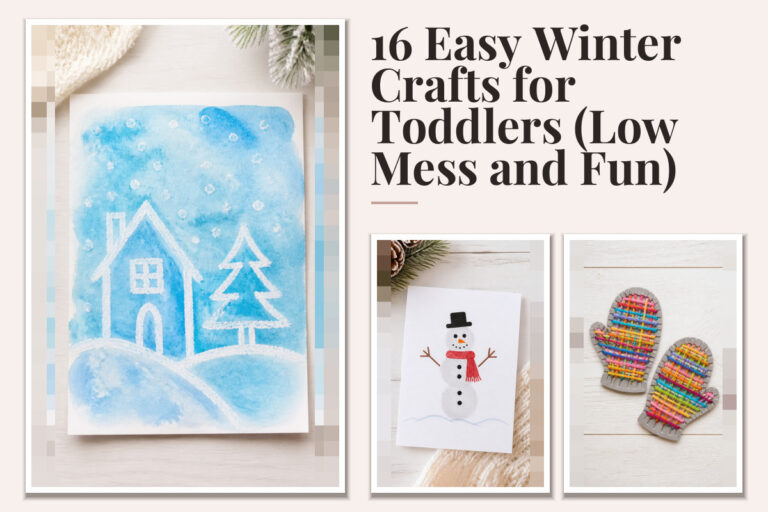
19 Winter Handprint Crafts for Toddlers to Keep Forever

Fingerprints smudged with glitter, tiny palms dipped in paint, mittens pressed into paper—these are the quiet moments that become keepsakes. The cold season wraps your home in stillness, and within it, little hands leave behind warmth you can hold onto.
These crafts turn fleeting days into something tangible. Each one is made to last, simple enough for wiggly toddlers, and designed so you use what you already have or can easily find.
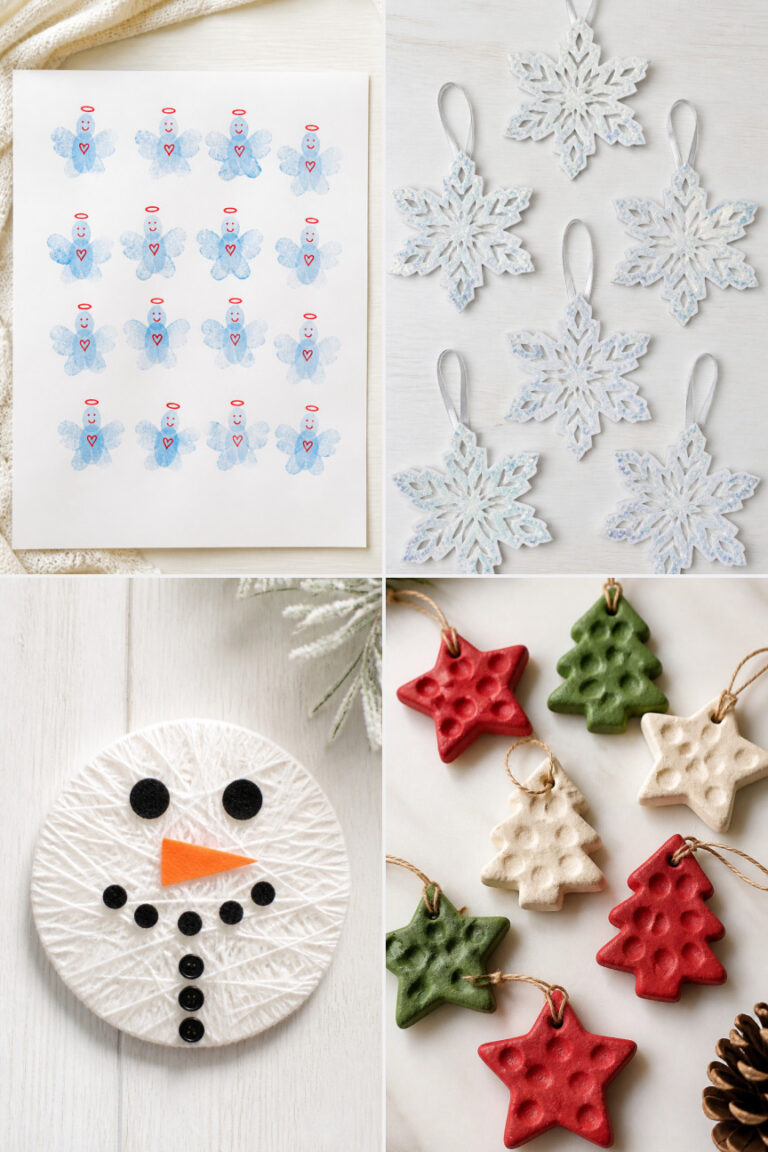
1. Snowman Handprint Ornament
Easy
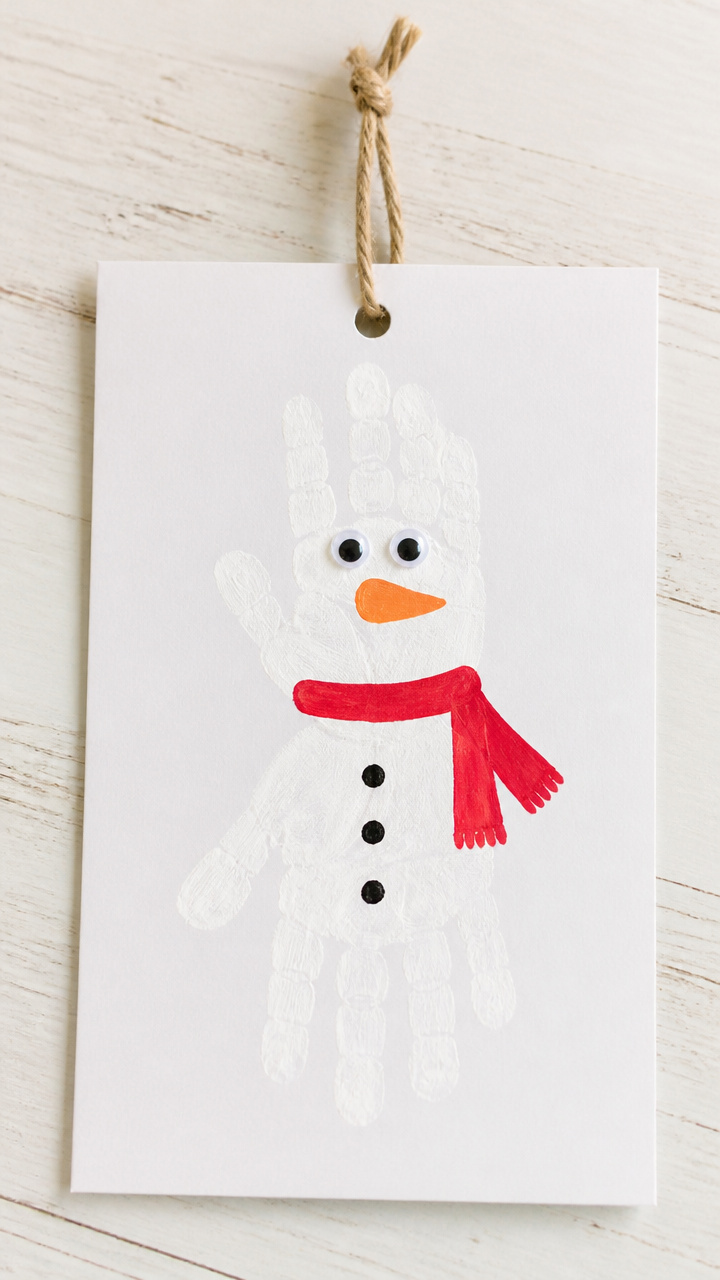
A rounded snowman body shaped from two stacked handprints becomes a sweet holiday decoration you hang year after year. This one captures toddler proportions perfectly, down to the slightly lopsided scarf.
Materials Needed
- Red acrylic paint
- Black acrylic paint
- Orange acrylic paint
- White cardstock (8.5 x 11 inches)
- Googly eyes (12mm, 2 per ornament)
- Glue stick
- Scissors
- Ribbon (red, 12 inches per ornament)
- Fine-tip black marker
How to Make It
- Press both of your child's palms together vertically on the white cardstock and trace around them with a pencil to form the snowman's body and head.
- Cut out the traced shape with scissors.
- Use the glue stick to attach two googly eyes just below the top curve of the handprint head.
- Draw two small black dots for buttons down the center of the lower handprint using the fine-tip black marker.
- Cut a 1-inch strip of red paint-dipped paper or use ribbon and glue it around the neck area as a scarf.
- Dip your child's fingertip in orange paint and press it at the center of the face to make a carrot nose.
- Punch a hole at the top with a hole punch and thread the 12-inch red ribbon through for hanging.
2. Reindeer Frame Keepsake
Moderate
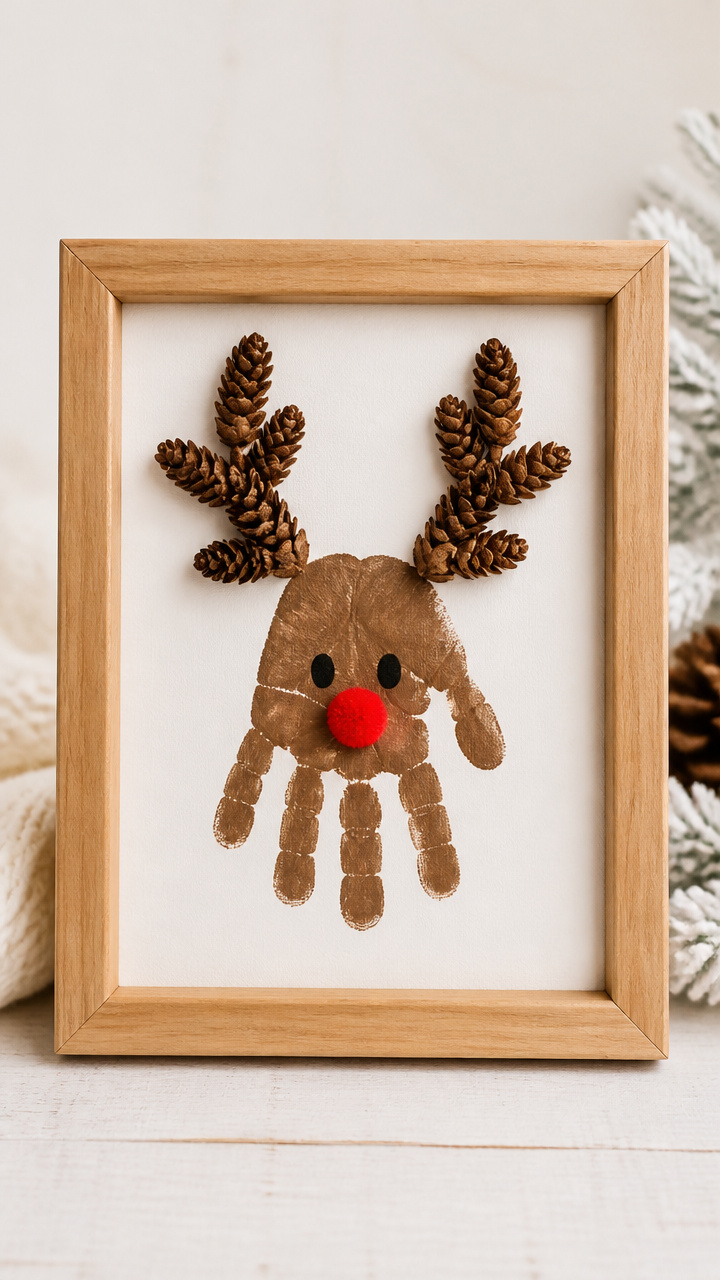
Velvety antlers rise from a painted handprint deer face tucked into a simple wooden frame. This craft doubles as wall art that draws everyone’s attention during winter visits.
Materials Needed
- Brown acrylic paint
- White acrylic paint
- Red pom-pom (10mm, 1 per craft)
- Small craft pinecones (2 per craft)
- Hot glue gun with glue sticks
- Natural wooden photo frame (6×8 inches)
- Paintbrush (1/2 inch flat)
- Cardboard sheet (6×8 inches)
- Scissors
- Googly eyes (10mm, 2 per craft)
How to Make It
- Paint your child's palm and four fingers brown and press firmly onto the cardboard sheet, spreading fingers slightly to create the reindeer head and antler base.
- Let the paint dry completely, about 20 minutes.
- Use the hot glue gun to attach a googly eye on each side of the palm near the wrist edge.
- Glue the red pom-pom just below the center of the palm to make the nose.
- Position one pinecone on each side of the top of the handprint and glue securely with the hot glue gun to form antlers.
- Once dry, place the painted cardboard inside the wooden frame, picture-side forward.
- Leave the back open or secure it so you can swap in a family photo behind the cutout later.
3. Handprint Cardinal Bird
Easy
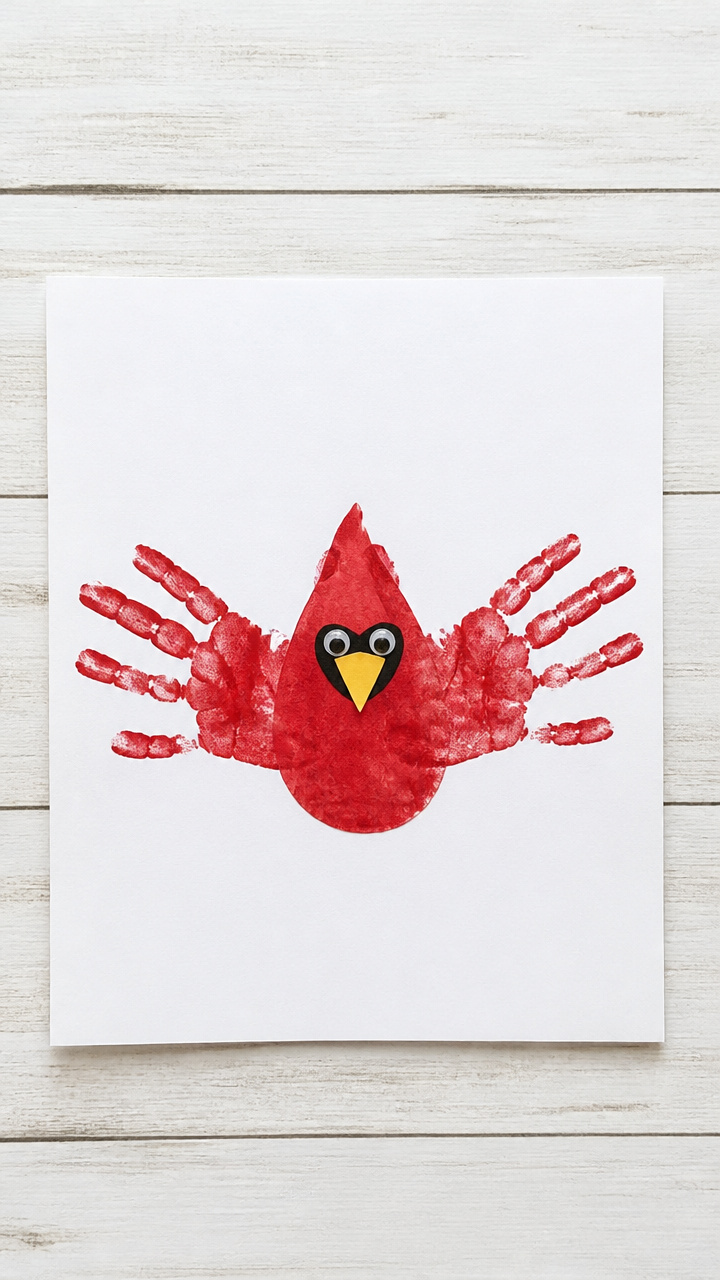
Crisp red wings flare from a bright-feathered bird shaped by pressing both hands in opposite directions. This one mimics how cardinals flash through snowy trees, sudden and vivid.
Materials Needed
- Red acrylic paint
- Black acrylic paint
- White cardstock (8.5 x 11 inches)
- Yellow craft foam sheet
- Scissors
- Glue stick
- Fine-tip black marker
How to Make It
- Press your child's right hand, palm down, onto the left side of the paper with fingers pointing outward to form one wing.
- Press the left hand on the right side, mirroring the first, to create the second wing.
- Use the black paint and a paintbrush to draw a small oval body where the wrists meet.
- Let the paint dry for 15 minutes.
- Cut a small triangle from the yellow craft foam and glue it to the front of the body as a beak.
- Use the fine-tip black marker to add two tiny eyes above the beak.
4. Mitten Tree Wall Art
Moderate
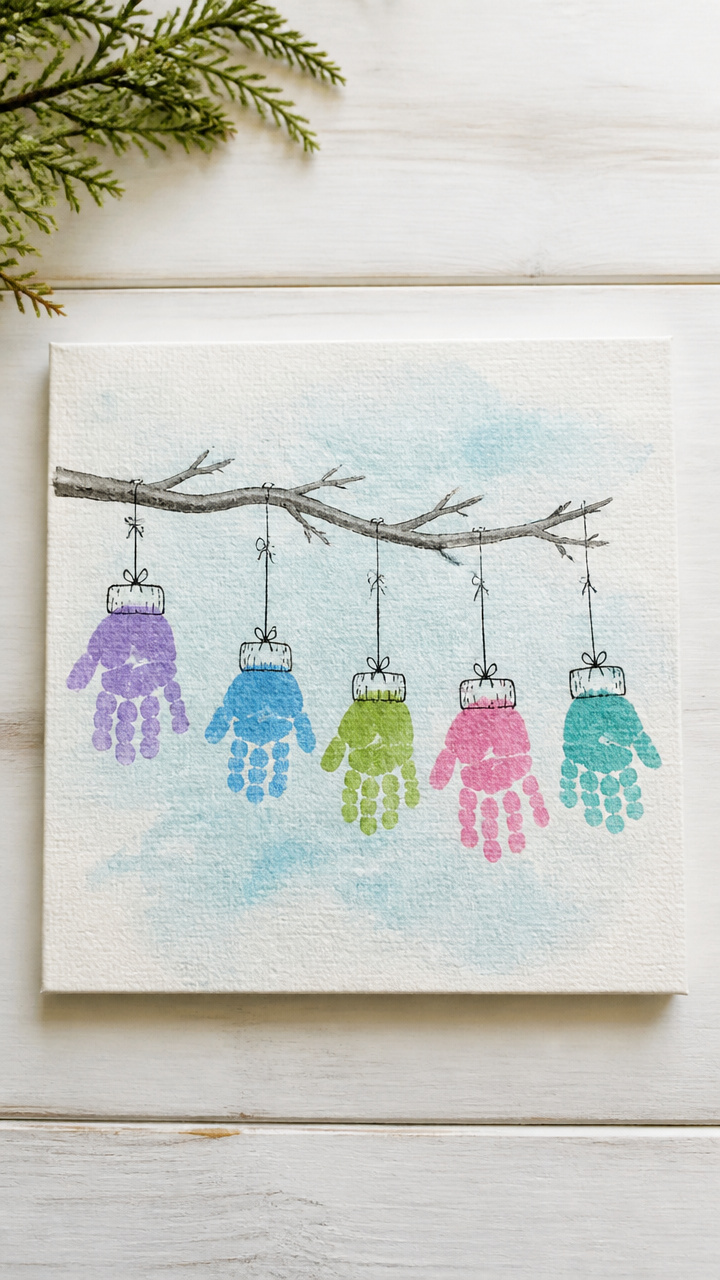
Five handprint mittens dangle from a crooked tree branch drawn in soft gray ink. This piece grows more meaningful each year when you add another mitten beside the last.
Materials Needed
- Light blue acrylic paint
- Dark gray watercolor paint
- Watercolor brush (size 6 round)
- Watercolor paper (9×12 inches)
- Ruler
- Pencil
- Eraser
- White gel pen
- Scissors
How to Make It
- Use the pencil and ruler to lightly draw a short trunk and curved upward branches across the bottom third of the watercolor paper.
- Paint over the pencil lines with dark gray watercolor paint and let dry completely, about 30 minutes.
- Dip your child's palm in light blue paint and press five times up the page, spacing them like hanging mittens with thumbs pointed down.
- Once dry, use the white gel pen to draw a string line connecting each mitten to the branch above.
- Erase any visible pencil marks under the paint once everything is dry.
5. Polar Bear Family Canvas
Moderate
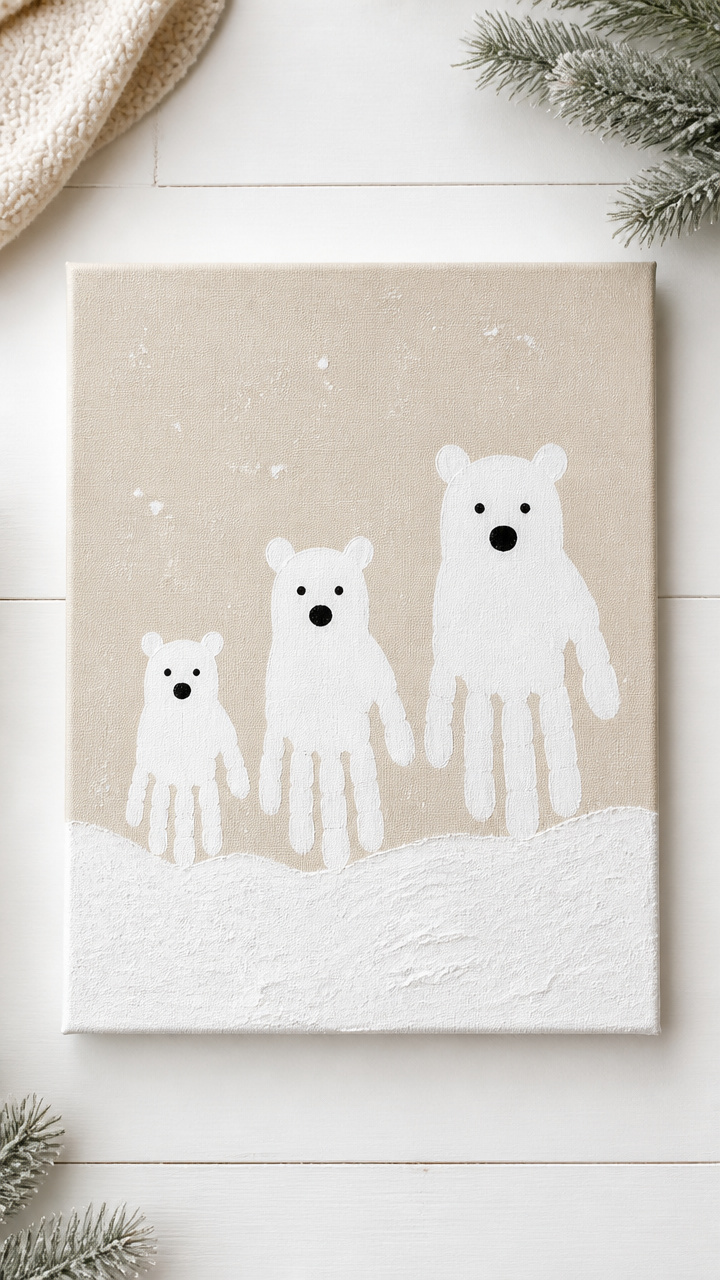
Three layered handprints in graduated sizes stand side by side like real bear cubs and parents in snow. Painted on canvas, this one withstands time and touch.
Materials Needed
- White acrylic paint
- Black acrylic paint
- Pre-stretched canvas (8×10 inches)
- Paintbrush (1 inch flat)
- Cotton swabs (2 per bear)
- Scissors
- Cardboard scrap
How to Make It
- Paint the entire canvas surface with white acrylic paint using the 1 inch brush and let dry for 20 minutes.
- Dip the largest hand (yours) in white paint and press gently near the center-left of the canvas to make the parent bear.
- Repeat with a medium-sized hand and smaller hand to the right, creating a family line.
- Use a cotton swab dipped in black paint to dot two eyes on each handprint near the wrist end.
- Cut two tiny ovals from cardboard and glue them beneath each set of fingers to look like feet if desired.
6. Snowflake Suncatcher
Easy
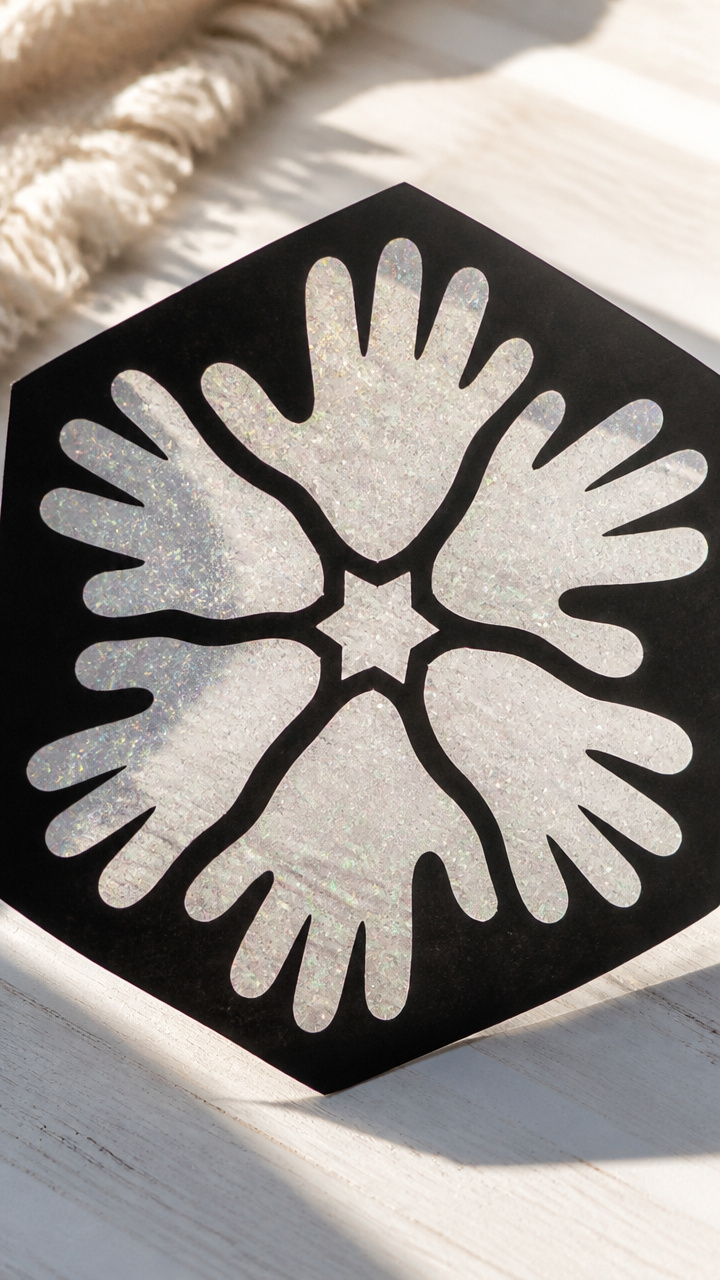
Translucent handprints glow in sunlight when framed in clear contact paper and dusted with iridescent glitter. Hang it in a window and watch winter light dance across the floor.
Materials Needed
- Clear contact paper (12×18 inches)
- White finger paint
- Iridescent glitter (fine)
- Scissors
- Black construction paper (8.5 x 11 inches)
- Hole punch
- Ribbon (silver, 10 inches)
How to Make It
- Cut two identical hand shapes from the clear contact paper using scissors, peeling off the backing from one piece.
- Have your child spread white finger paint over their palm and press it onto the sticky side of the contact paper.
- While still wet, sprinkle iridescent glitter evenly over the painted print.
- Place the second contact paper piece on top, sticky sides together, and press gently to seal.
- Trim excess contact paper around the hand shape, then cut a small black paper snowflake and glue it in the center.
- Punch a hole at the top and thread the silver ribbon through for hanging.
7. Owl Handprint Decoration
Easy
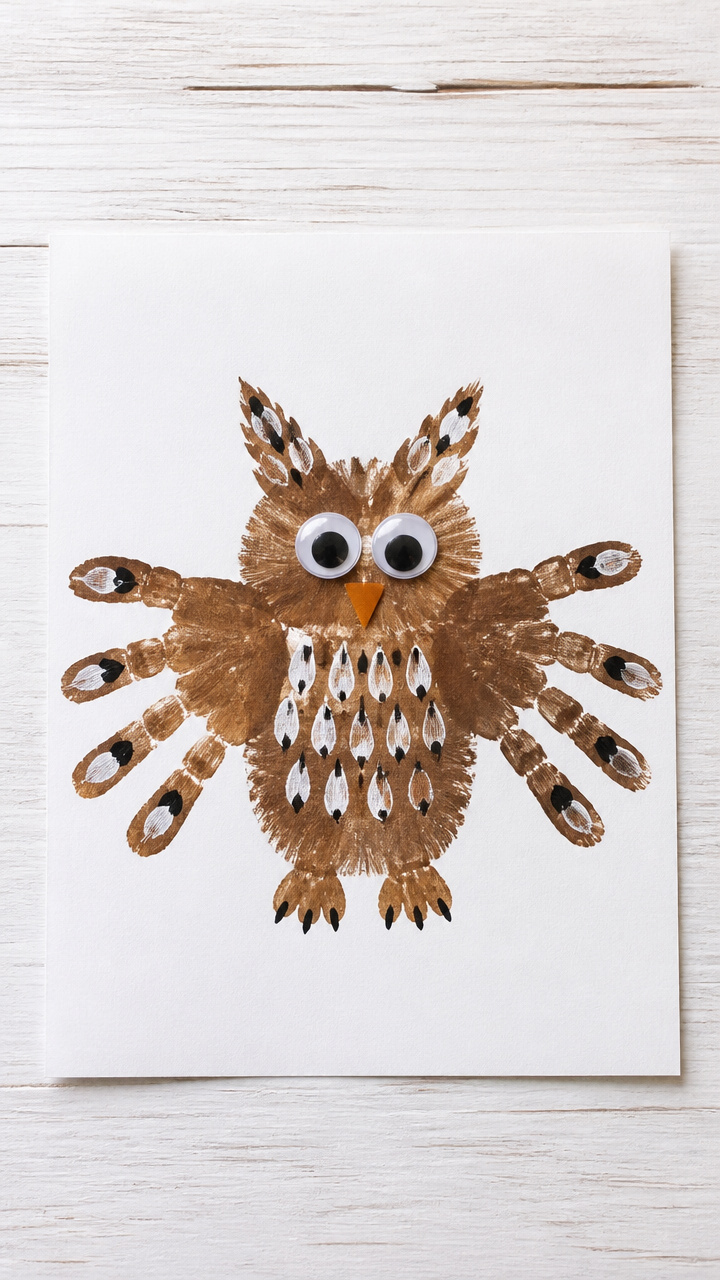
Flared wings made from downward-facing handprints give this wise-looking owl its silhouette. Add feather details with a toothpick and watch it come alive.
Materials Needed
- Brown acrylic paint
- White acrylic paint
- Black acrylic paint
- Toothpick
- White cardstock (8.5 x 11 inches)
- Googly eyes (15mm, 2 per craft)
- Glue stick
How to Make It
- Press both of your child's palms down on the paper with fingers pointing toward the bottom to form the wings.
- Use brown paint to fill in the space between the two handprints as the owl’s body.
- Let dry for 15 minutes.
- Glue one googly eye on each side near the top center between the hands.
- Dip the blunt end of a toothpick in black paint and dot small feather markings along the wings.
- Use white paint to add a small chest patch below the eyes.
8. Handprint Igloo Card
Easy
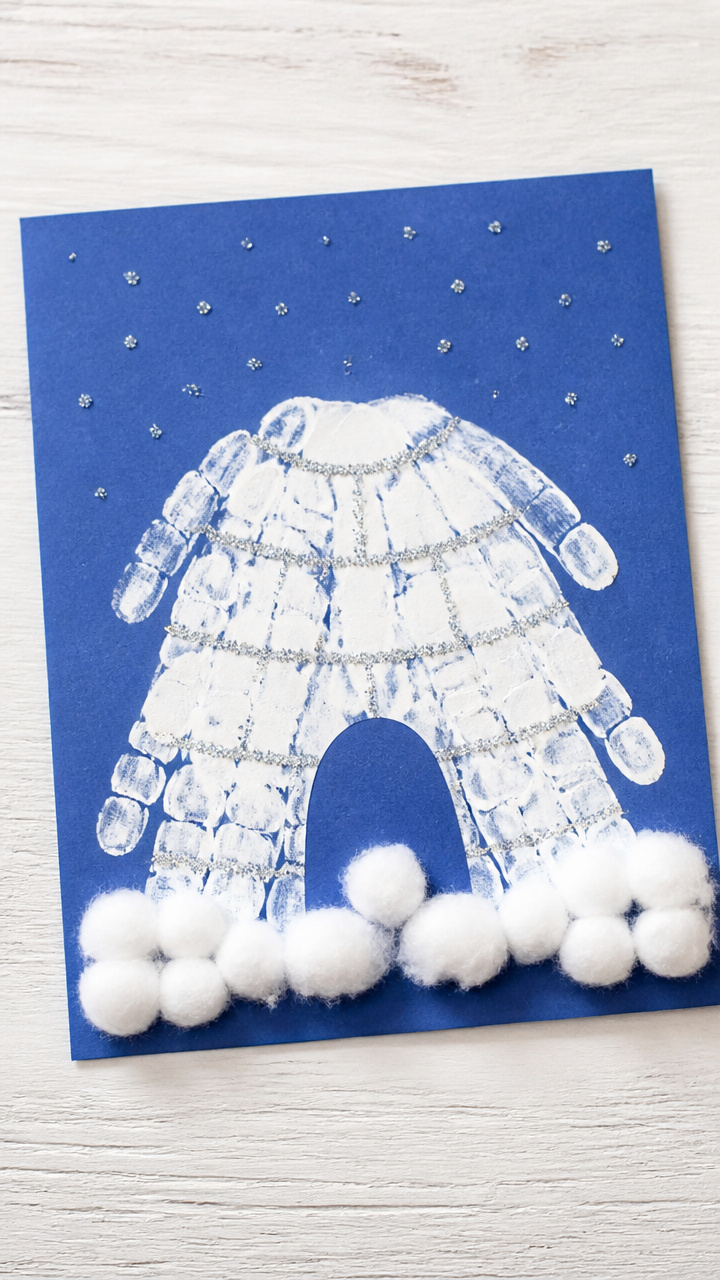
Layered white handprints arch into a dome-shaped igloo, perfect for sending love across the miles. This handmade card feels personal in a world of texts.
Materials Needed
- White acrylic paint
- Blue cardstock (5×7 inches, folded)
- Silver glitter glue
- Paintbrush (1/2 inch)
- Cotton ball
- Glue stick
How to Make It
- Paint your child's palm white and press it three times in a curved row across the front of the folded card to begin the igloo wall.
- Repeat above the first row with two handprints, then one at the top center to form a dome.
- Let dry for 15 minutes.
- Outline each handprint with silver glitter glue and let dry for 20 minutes.
- Glue a small torn cotton ball to the upper corner to represent the moon.
9. Fox Paw Print Plaque
Moderate
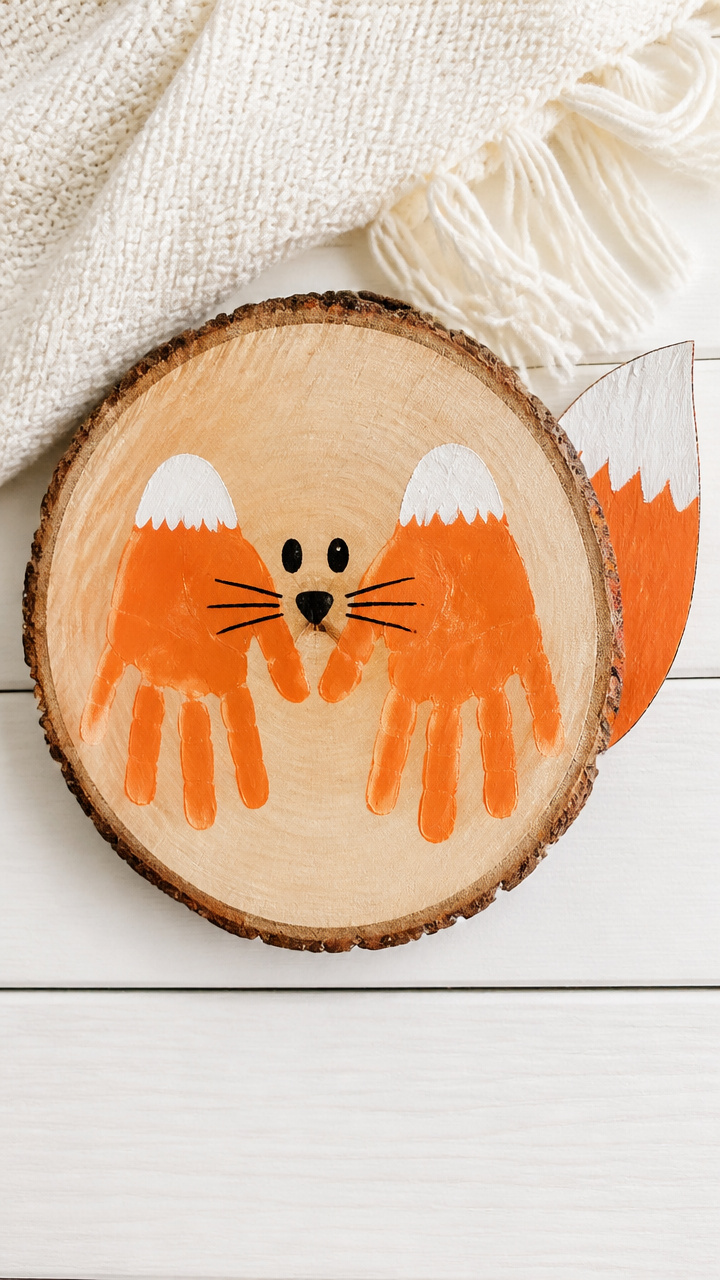
Orange handprints curl into bushy fox tails with sharp black whisker scratches drawn beside them. Mounted on wood, this one looks like it stepped right out of a snowy tale.
Materials Needed
- Orange acrylic paint
- Black acrylic paint
- Natural wood slice (6 inches diameter)
- Paintbrush (1/2 inch flat)
- Fine-tip black marker
- Clear acrylic sealer spray
- Paper plate
How to Make It
- Pour a puddle of orange paint onto the paper plate.
- Press your child's palm into the paint and then onto the wood slice, positioning fingers to the left to mimic a curled tail.
- Let dry for 20 minutes.
- Use the fine-tip black marker to draw two eyes near the heel of the handprint and three short lines on each side for whiskers.
- Spray the entire wood slice with clear acrylic sealer in a well-ventilated area and let dry for 30 minutes.
10. Winter Tree Silhouette
Easy
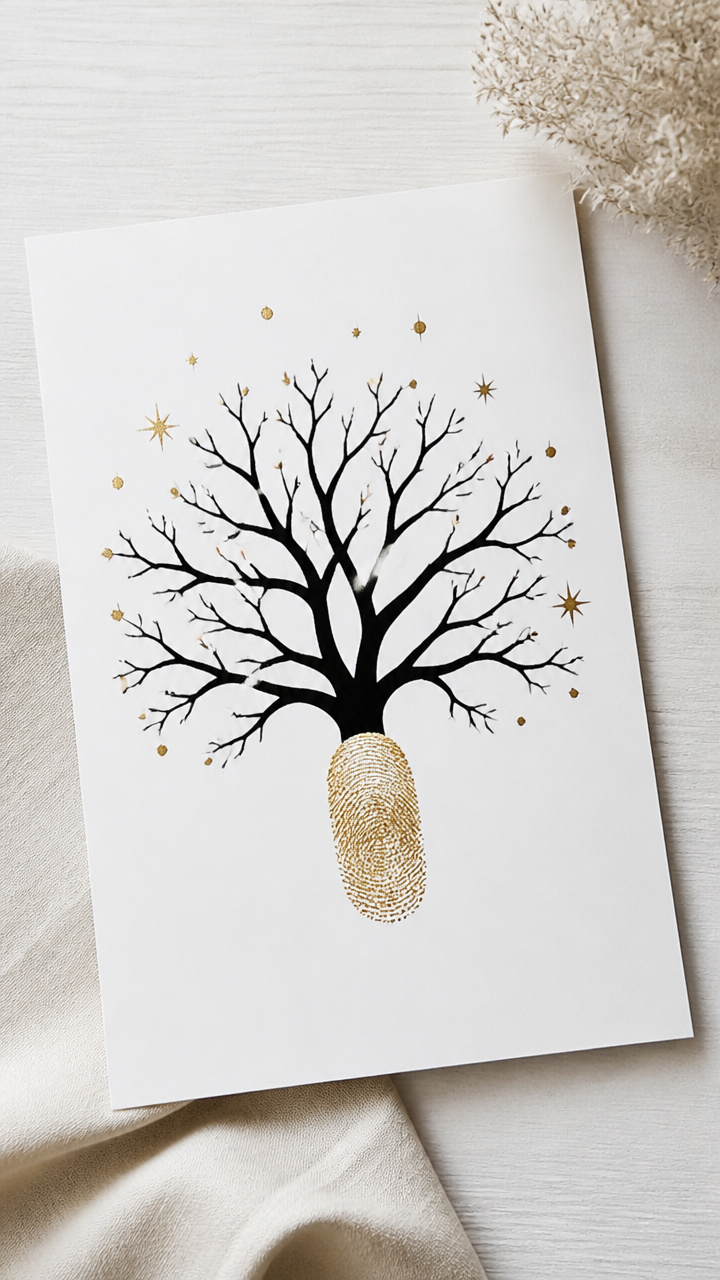
Bare branches twist upward from a trunk formed by a single fingerprint stack. This minimalist piece shows how much beauty fits in a tiny mark.
Materials Needed
- Black acrylic paint
- White cardstock (8.5 x 11 inches)
- Q-tip
- Gold metallic pen
- Ruler
How to Make It
- Use the Q-tip to dab a vertical line of black paint 4 inches tall at the center bottom of the cardstock as the trunk.
- Dip your child's fingertip in black paint and press five fingerprints branching outward from the top of the trunk.
- Let dry for 10 minutes.
- Use the gold metallic pen to draw delicate snowflakes scattered across the background.
11. Handprint Penguin Family
Moderate
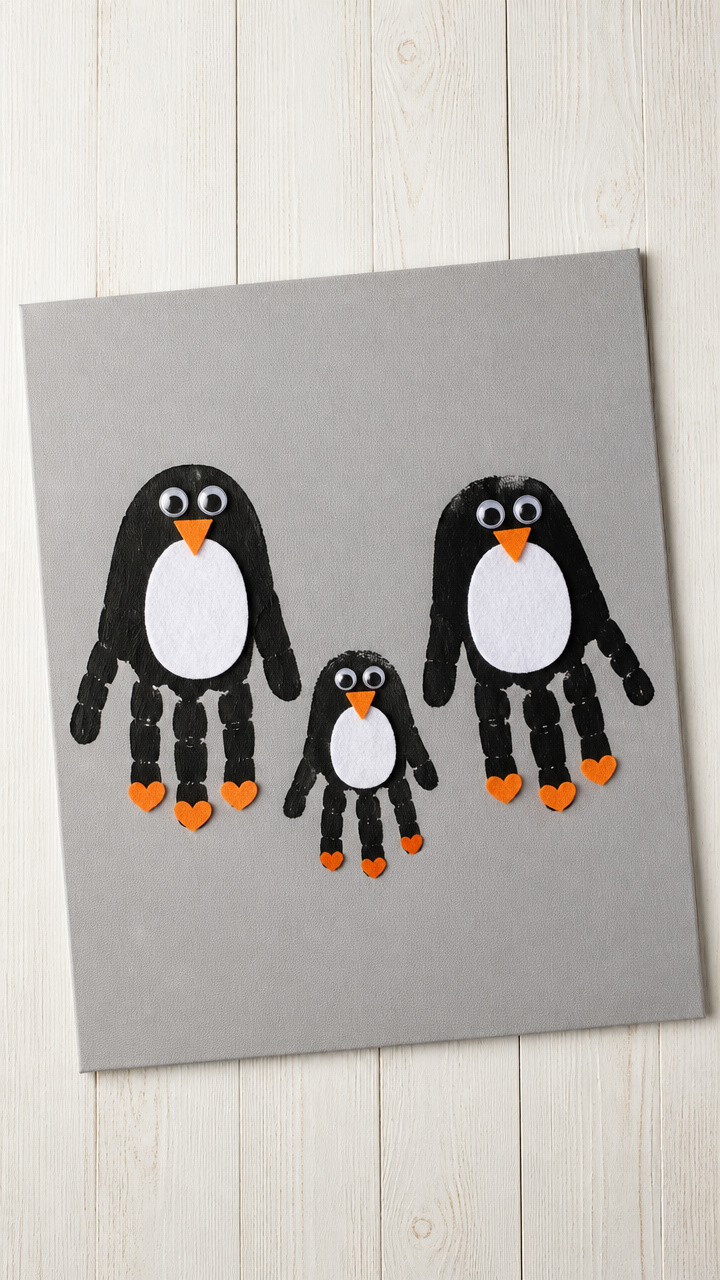
Chubby black handprint bodies waddle together with white belly patches cut from felt. Their glossy eyes catch the light like real penguin stares.
Materials Needed
- Black acrylic paint
- White felt sheet
- Googly eyes (10mm, 6 total)
- Hot glue gun with glue sticks
- Gray cardstock (9×12 inches)
- Scissors
- Paintbrush (1 inch)
How to Make It
- Paint three different-sized hands black and press them in a staggered row on the gray cardstock to form penguin bodies.
- Let dry for 20 minutes.
- Cut three small oval belly shapes from the white felt, each slightly smaller than a palm.
- Use the hot glue gun to attach a felt belly to the center of each handprint.
- Glue one googly eye on each side of the top of every handprint.
12. Santa’s Helper Tag
Easy
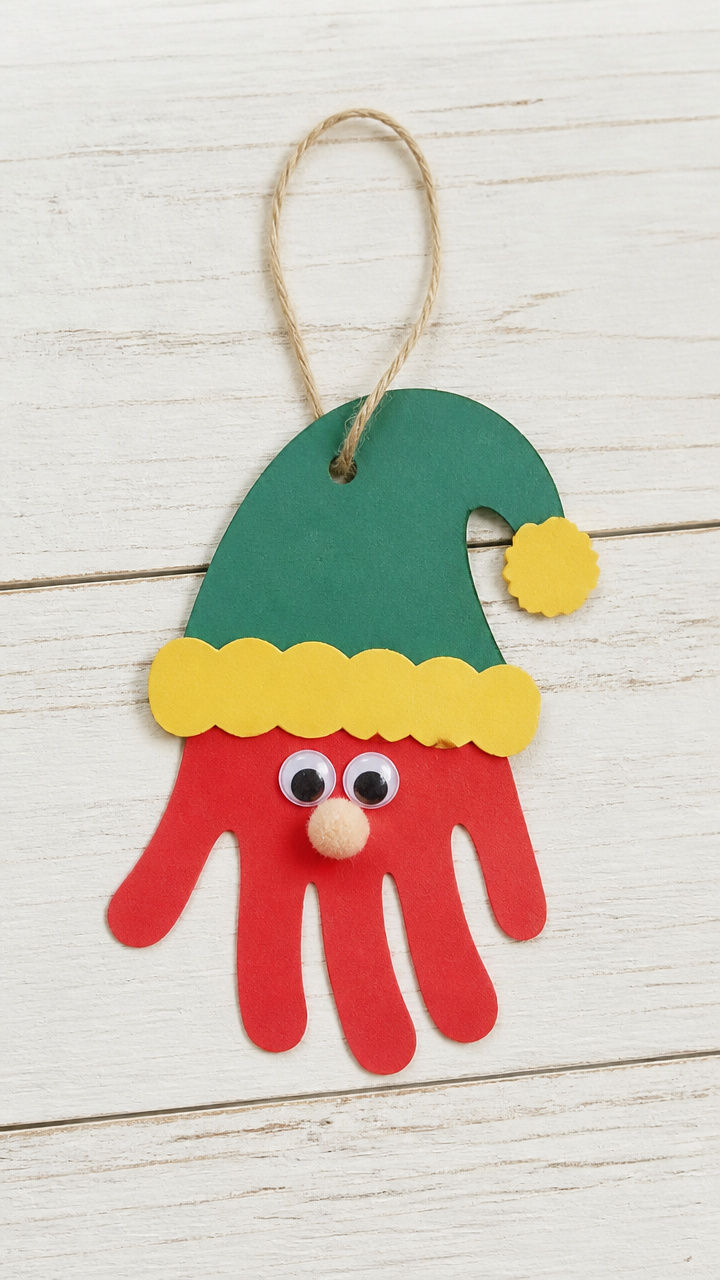
A jolly red handprint elf wears a green hat cut from construction paper. Tie it to a gift and watch faces light up at the sight.
Materials Needed
- Red acrylic paint
- Green construction paper
- Yellow craft foam
- Glue stick
- Scissors
- Googly eyes (8mm, 2 per tag)
- Hole punch
- Baker's twine (6 inches)
How to Make It
- Press your child's palm in red paint and onto the center of a 4×6 inch cardstock scrap to make the elf body.
- Let dry for 15 minutes.
- Cut a triangle from green paper and glue it above the handprint as a hat.
- Cut a small yellow pom-pom shape from foam and glue it to the tip of the hat.
- Glue on two googly eyes near the wrist end.
- Punch a hole at the top and thread baker's twine through for tying to gifts.
13. Northern Lights Mobile
Advanced
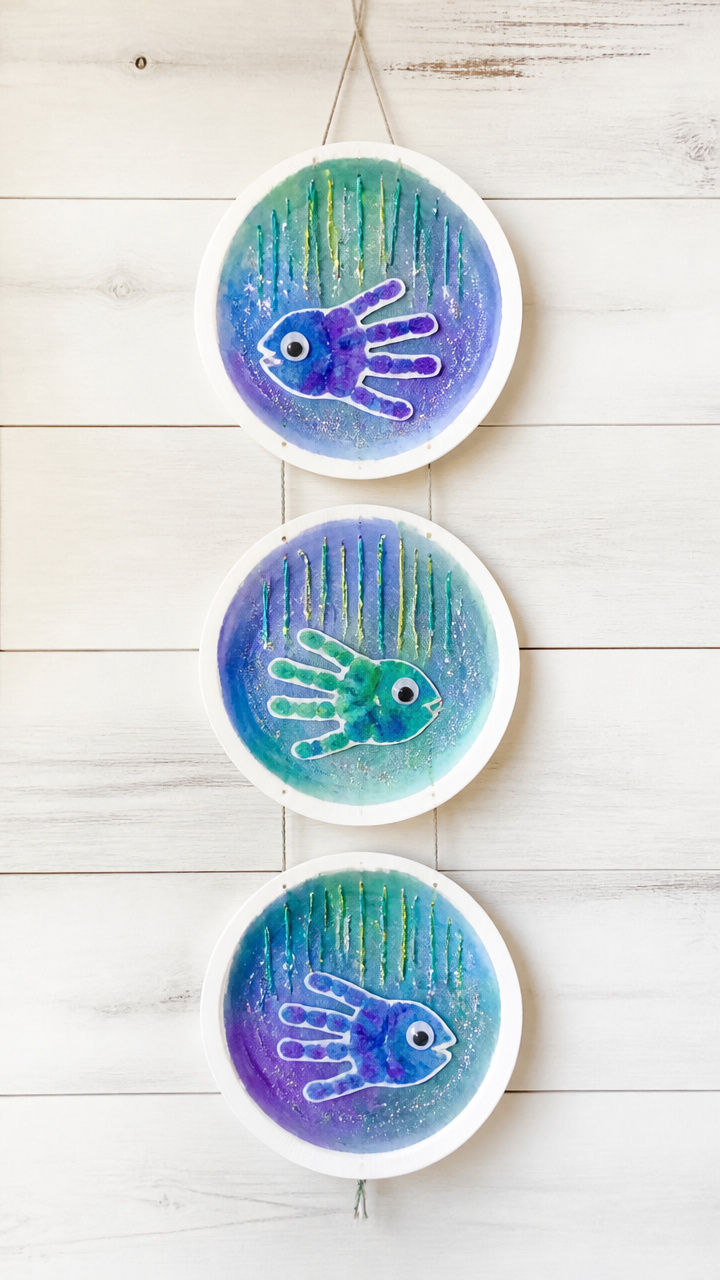
Floating handprint fish shimmer in blues, purples, and greens beneath streaks of airbrushed color. Spin it slowly and the whole room changes mood.
Materials Needed
- Blue acrylic paint
- Purple acrylic paint
- Green acrylic paint
- White paper plates (3 per mobile)
- Craft knife
- Embroidery thread (assorted colors, 12 inches each)
- Paintbrushes (three, 1/2 inch)
- Straw
- Compressed air duster (used upside down to spray)
How to Make It
- Paint one handprint in blue, one in purple, and one in green on separate paper plates and let dry for 20 minutes.
- Use the craft knife to cut a small slit near the edge of each plate and thread 12 inches of embroidery thread through, knotting underneath.
- Hold the compressed air duster upside down and spray a light mist across the top of each plate to create a soft aurora effect.
- Tie all three threads to a horizontal straw, spacing them evenly, and hang by a central string.
14. Handprint Snowplow Card
Moderate
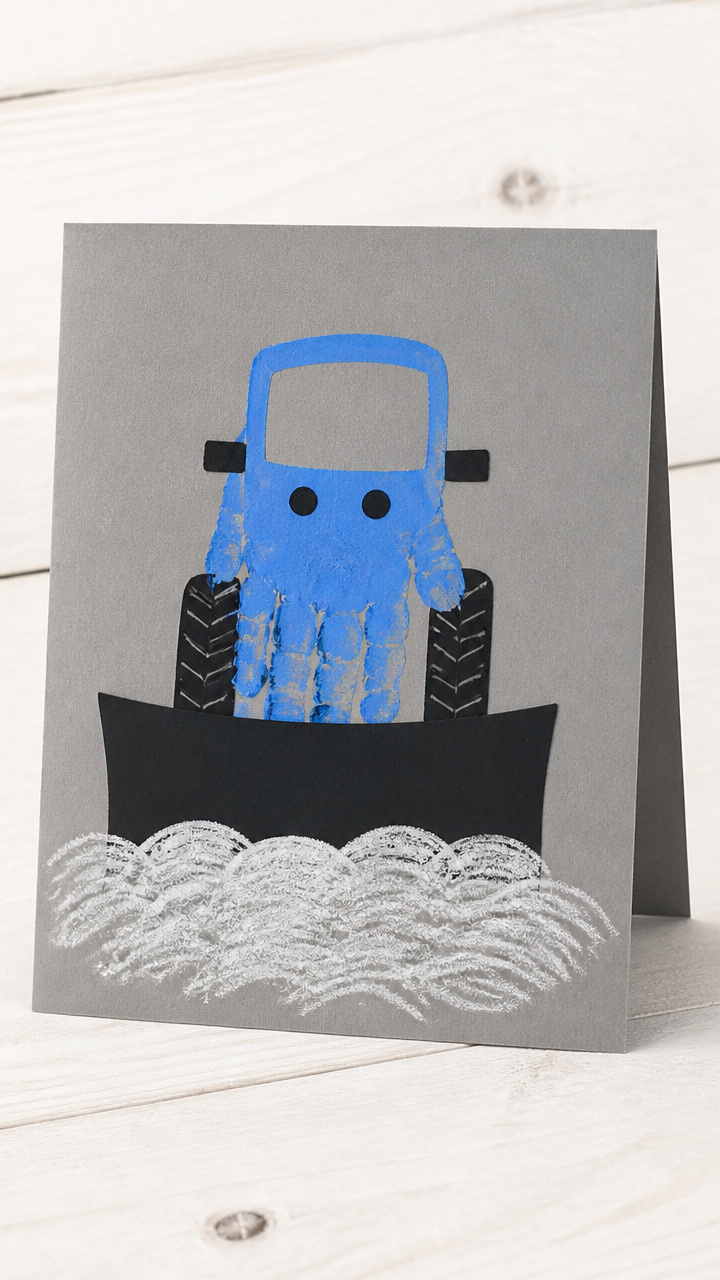
A bold blue handprint forms the cab of a snow-clearing truck with a bent paper shovel blade. This sturdy vehicle pushes through drifts drawn in white crayon.
Materials Needed
- Blue acrylic paint
- White crayon
- Gray cardstock (5×7 inches, folded)
- Black construction paper
- Scissors
- Glue stick
- Brass fastener (1/2 inch)
How to Make It
- Press your child's palm in blue paint onto the front of the folded card to make the truck cab.
- Let dry for 15 minutes.
- Cut a small rectangle from black paper and fold it in half to make tires, gluing two on each side of the handprint.
- Cut a curved scoop shape from gray paper and attach it to the front using the brass fastener so it pivots slightly.
- Use the white crayon to draw snowdrifts across the bottom of the card.
15. Frozen Flower Garden
Advanced
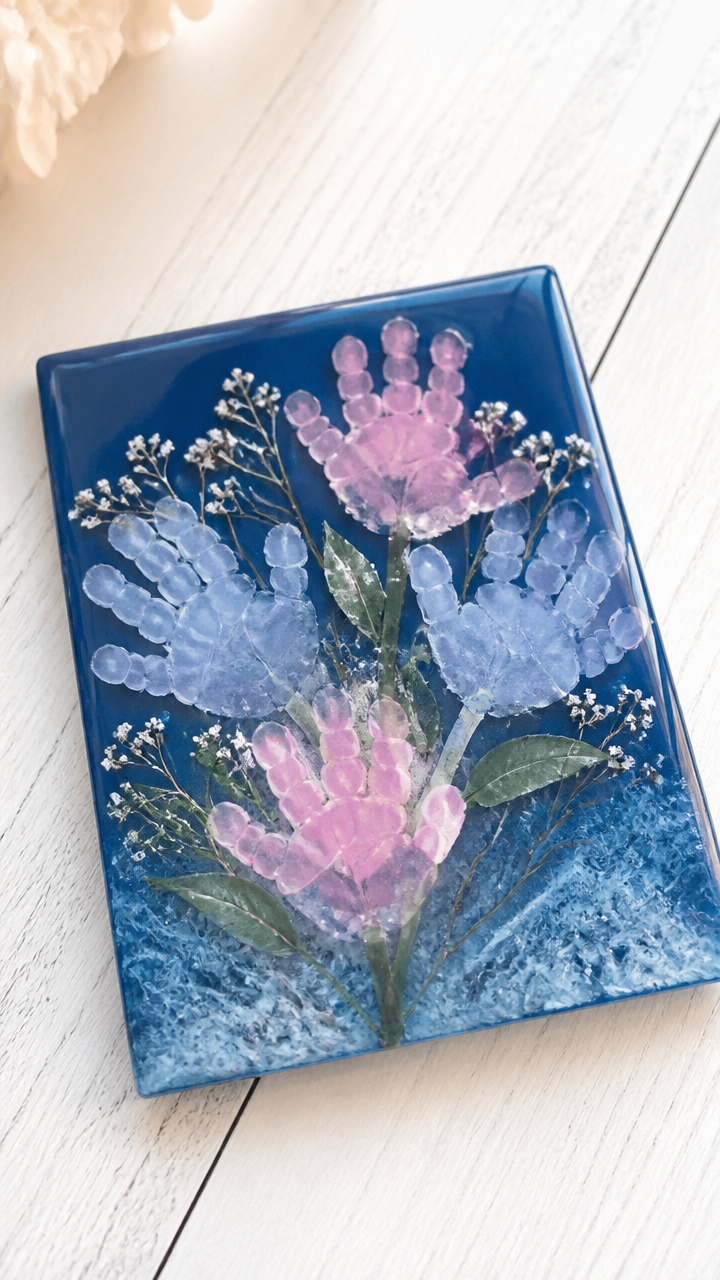
Delicate handprint petals bloom in icy pastels against a dark background. Sealed under resin, they look like flowers caught mid-thaw.
Materials Needed
- Light pink acrylic paint
- Pale blue acrylic paint
- Dark blue cardstock (8.5 x 11 inches)
- Epoxy resin kit (non-toxic, 2 oz)
- Disposable mixing cups (3 oz)
- Stir sticks
- Silicone mold (flat, 4×6 inches)
- Latex gloves
How to Make It
- Press your child's fingertips in light pink and pale blue paint and stamp them in clusters across the dark blue cardstock to resemble flower blooms.
- Let dry completely for 30 minutes.
- Cut the painted section into a 4×6 inch rectangle.
- Wearing latex gloves, mix the epoxy resin according to package instructions.
- Pour a thin layer into the silicone mold, place the paper on top, and cover with another resin layer.
- Let cure undisturbed for 24 hours before removing from the mold.
16. Handprint Hot Cocoa Mug
Easy
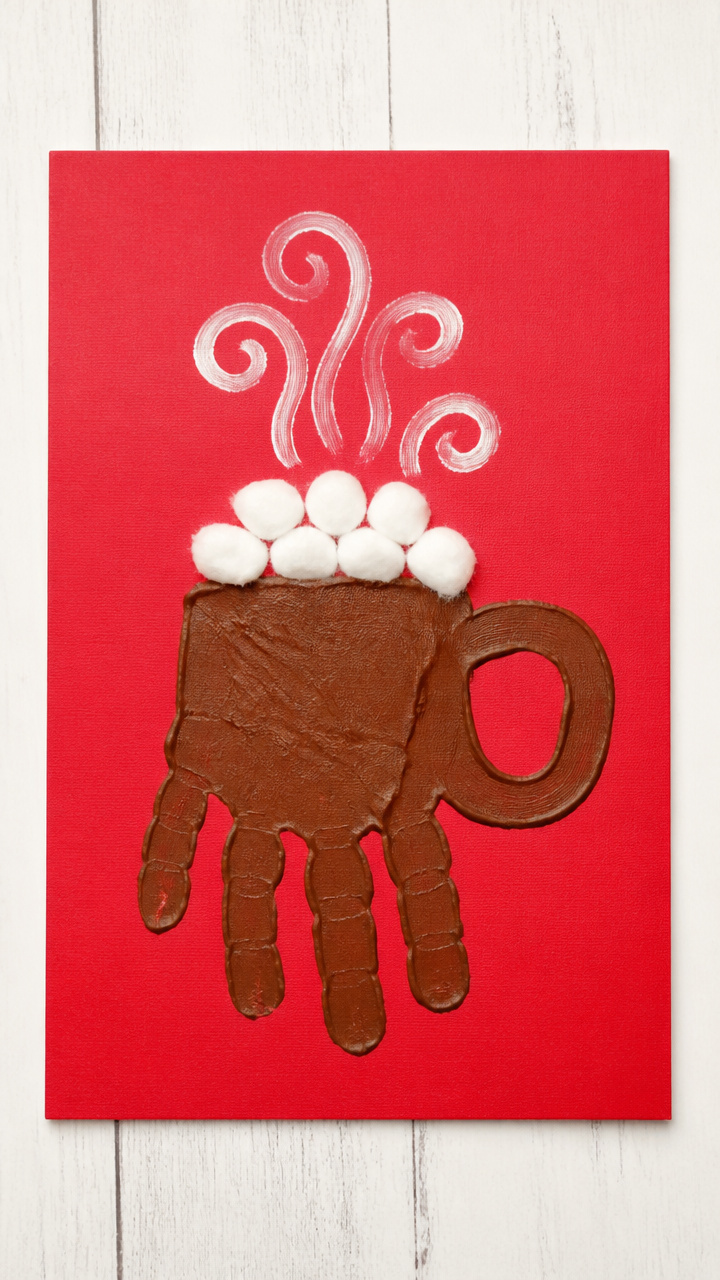
Steam swirls up from a steaming mug shaped by a brown handprint base. Tiny marshmallows float on top, ready to melt in imagination.
Materials Needed
- Brown acrylic paint
- White acrylic paint
- Cotton balls
- Red construction paper
- Scissors
- Glue stick
- White cardstock (8.5 x 11 inches)
How to Make It
- Press your child's palm in brown paint and onto the lower half of the cardstock to form the cocoa.
- Let dry for 15 minutes.
- Cut a large C-shape from red paper and glue it beside the handprint as the mug.
- Glue three small cotton balls on top of the brown print for marshmallows.
- Use white paint to flick wispy steam lines upward with a toothbrush.
17. Walrus with Whiskers
Moderate
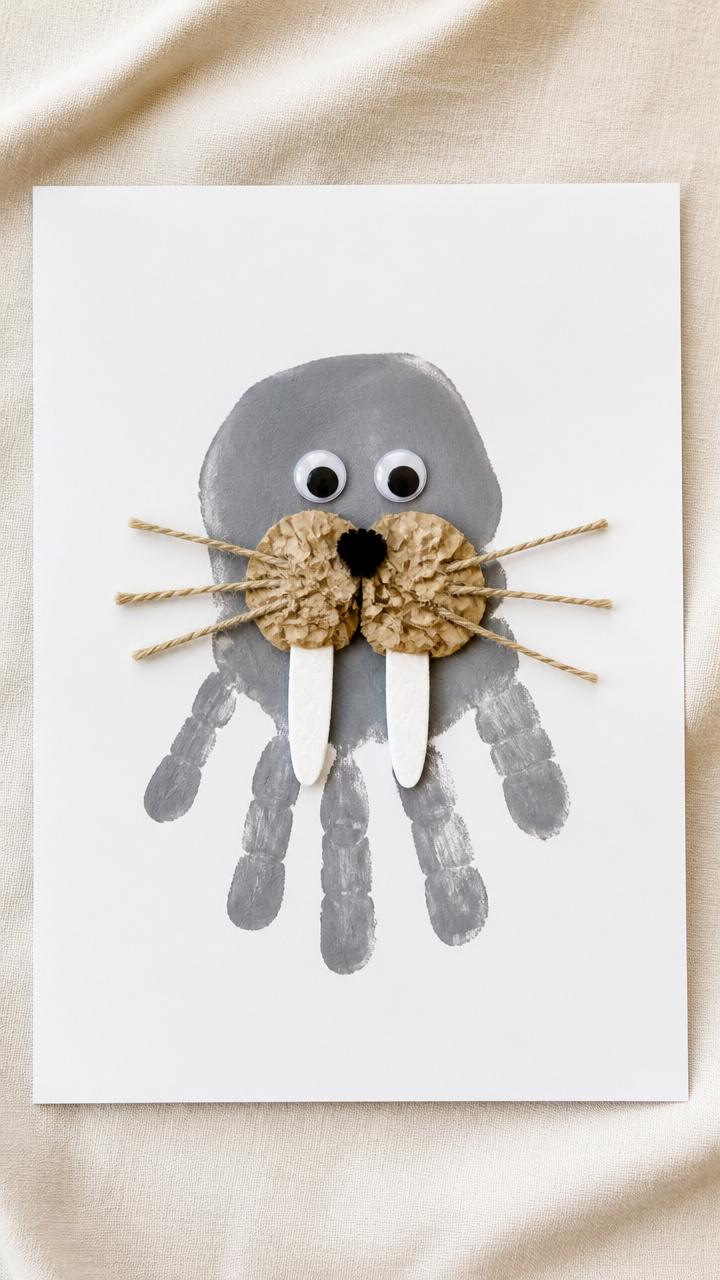
A thick gray handprint tusk stretches from a wrinkled snout made with crumpled tissue paper. Those long whiskers twitch with personality.
Materials Needed
- Gray acrylic paint
- Tan tissue paper (2 inches square)
- White acrylic paint
- Twine (6 inches)
- Glue stick
- White cardstock (8.5 x 11 inches)
- Scissors
How to Make It
- Press your child's palm in gray paint and onto the cardstock with fingers pointing down.
- Crumple the tan tissue paper into a small ball and glue it over the heel of the handprint as the face.
- Let dry for 15 minutes.
- Cut two 3-inch lengths of twine and glue them radiating from the tissue ball for whiskers.
- Use white paint to add two small tusks extending down from the sides of the face.
18. Handprint Sled Ride
Easy
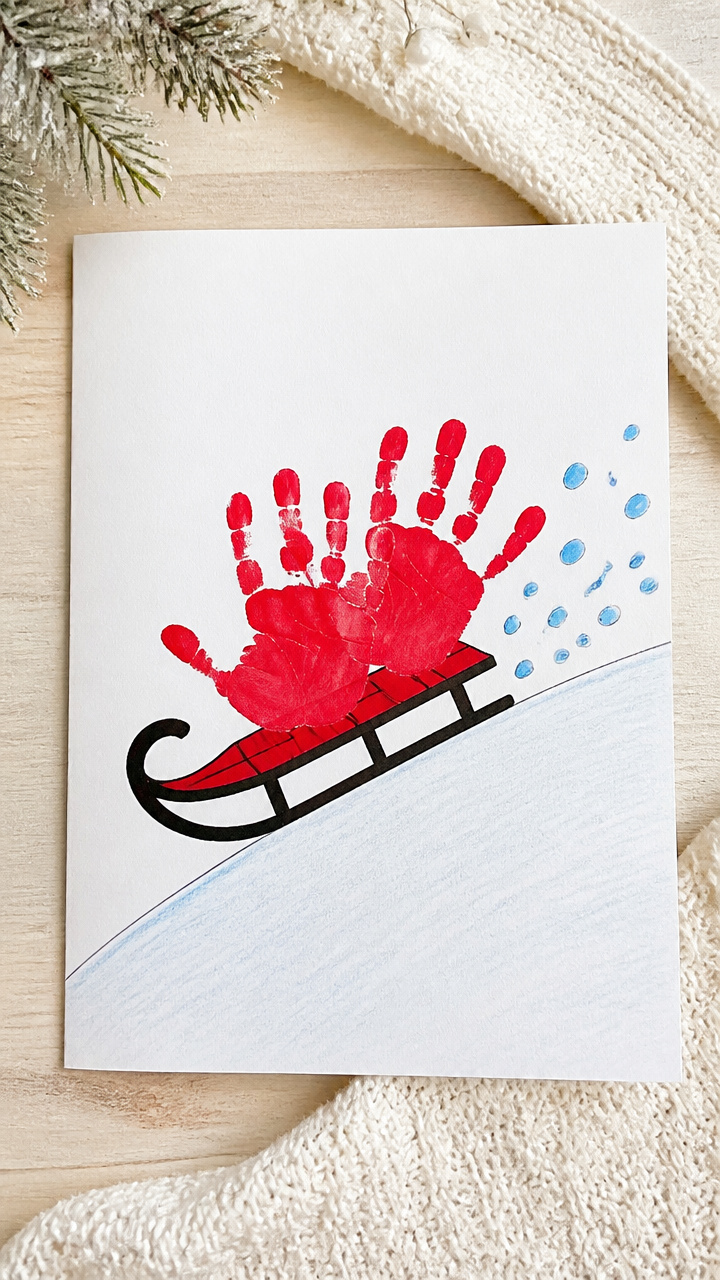
Two overlapping handprints zip down a hill on a red sled outlined in black marker. A trail of fingerprint snow puffs behind them.
Materials Needed
- Red acrylic paint
- Black fine-tip marker
- Blue finger paint
- White cardstock (8.5 x 11 inches)
- Q-tip
How to Make It
- Press one hand in red paint and slightly lower, press a second hand to show motion on a ride.
- Let dry for 10 minutes.
- Use the black marker to draw a sled outline around the bottom edges of both handprints.
- Dip the Q-tip in blue finger paint and dot a winding path behind the hands to look like snow spray.
- Add three fingerprint snow puffs behind the sled using the same blue paint.
19. Handprint Aurora Fox
Moderate
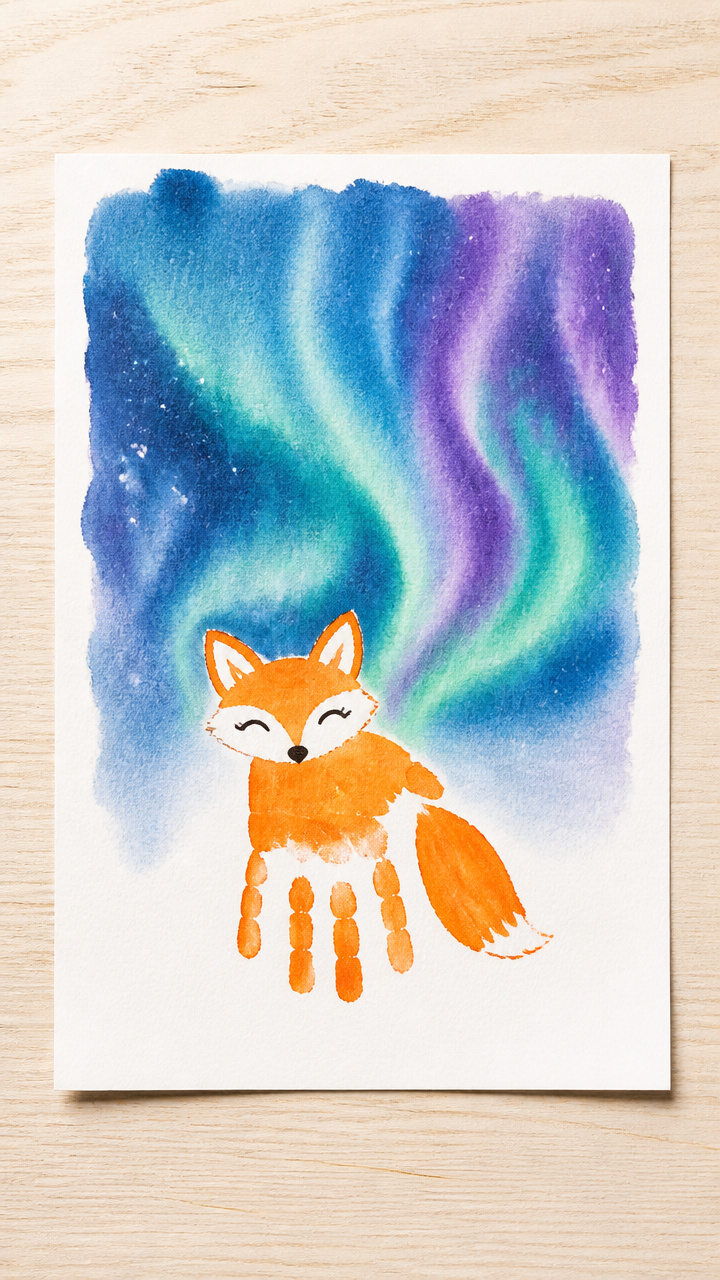
A glowing orange handprint fox sits beneath swirling northern lights made with watercolor wash. This one feels magical, like a story whispered at bedtime.
Materials Needed
- Orange acrylic paint
- Blue liquid watercolor
- Green liquid watercolor
- Purple liquid watercolor
- Watercolor paper (9×12 inches)
- Paintbrush (size 8 round)
- Straw
- White crayon
How to Make It
- Press your child's palm in orange paint near the bottom right of the watercolor paper to make the fox body.
- Let dry for 15 minutes.
- Use the white crayon to draw faint snowbank curves across the bottom.
- Mix drops of blue, green, and purple liquid watercolor in separate cups.
- Use the brush to paint soft vertical streaks above the fox, blending colors slightly.
- Blow gently through the straw at the wet paint to create wispy aurora movement.
Grab a sheet of paper and some paint. Let those little hands make their mark while the winter light slants low. You're not just making crafts, you're saving moments you'll want to hold forever.