20 Free Printable January Crafts for Kids

Crisp mornings and quiet afternoons call for cozy creativity, and printable crafts make it easy to turn simple paper into joyful keepsakes. With just a few basic supplies, you can bring color and cheer into your home while keeping little hands busy and imaginations sparking.
These twenty hand-picked projects are all free to print and designed with kids in mind. Each one uses unique materials and techniques so you never feel like you're repeating yourself, and every step is clear enough for crafters of all levels to follow with confidence.
1. Snowman Counting Cards
Easy
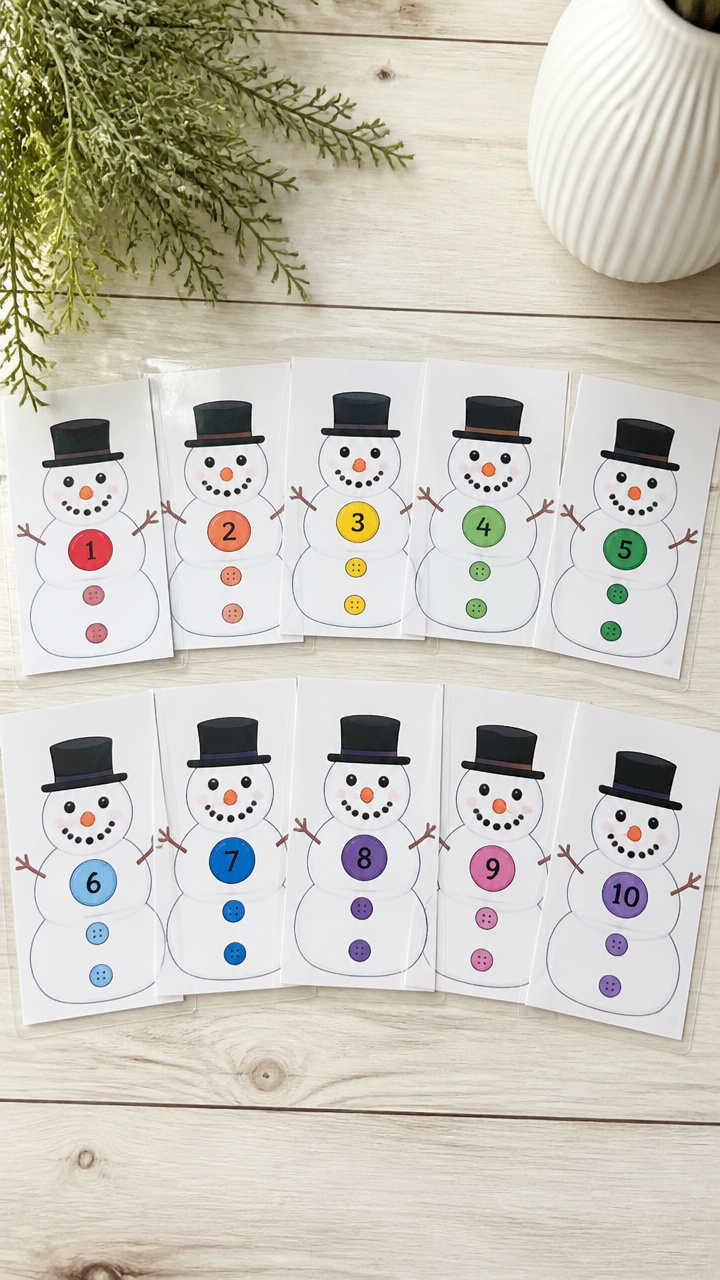
Brightly colored snowmen with numbered buttons help children build early math skills through play. These sturdy cards stand up to repeated use and invite little fingers to touch and count.
Materials Needed
- Free printable snowman counting cards (numbers 1–10)
- A4 white cardstock
- Laminating sheets
- Laminator
- Scissors
How to Make It
- Print the snowman counting cards on A4 white cardstock using a color printer.
- Cut out each card along the solid outer lines with scissors.
- Laminate each card using a laminator and laminating sheets for durability.
- Let the cards cool for 30 seconds after laminating, then trim any excess laminate around the edges.


2. Arctic Animal Masks
Easy
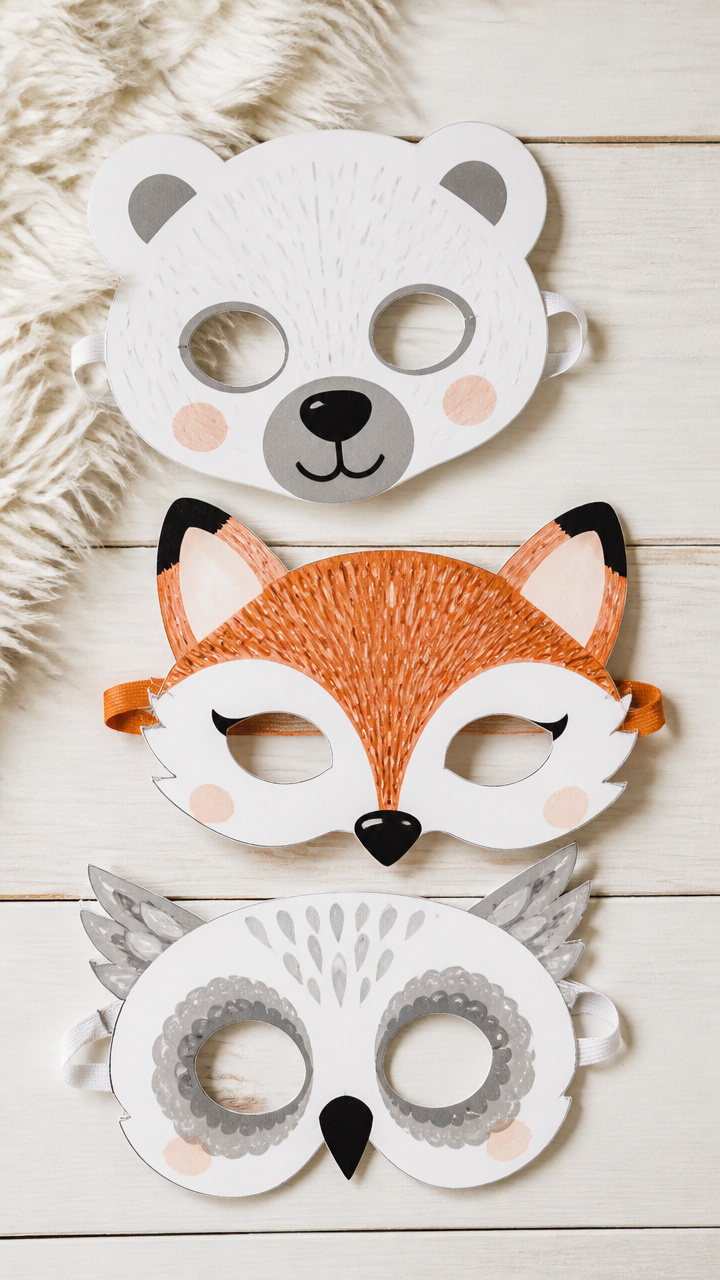
Fuzzy polar bears, wide-eyed owls, and playful foxes come to life with these wearable animal masks. Perfect for storytelling time or imaginative play after a snowy walk.
Materials Needed
- Free printable arctic animal mask templates (polar bear, fox, owl)
- A4 white cardstock
- Crayons or washable markers
- Scissors
- Elastic string (30 cm per mask)
- Hole punch
How to Make It
- Print the arctic animal mask templates on A4 white cardstock.
- Let children color each animal’s face using crayons or washable markers.
- Cut out each mask carefully along the outer edges using scissors.
- Punch one hole on each side of the mask near the ears, then thread a 30 cm piece of elastic string through and tie securely.


3. Penguin Paper Bag Puppet
Easy
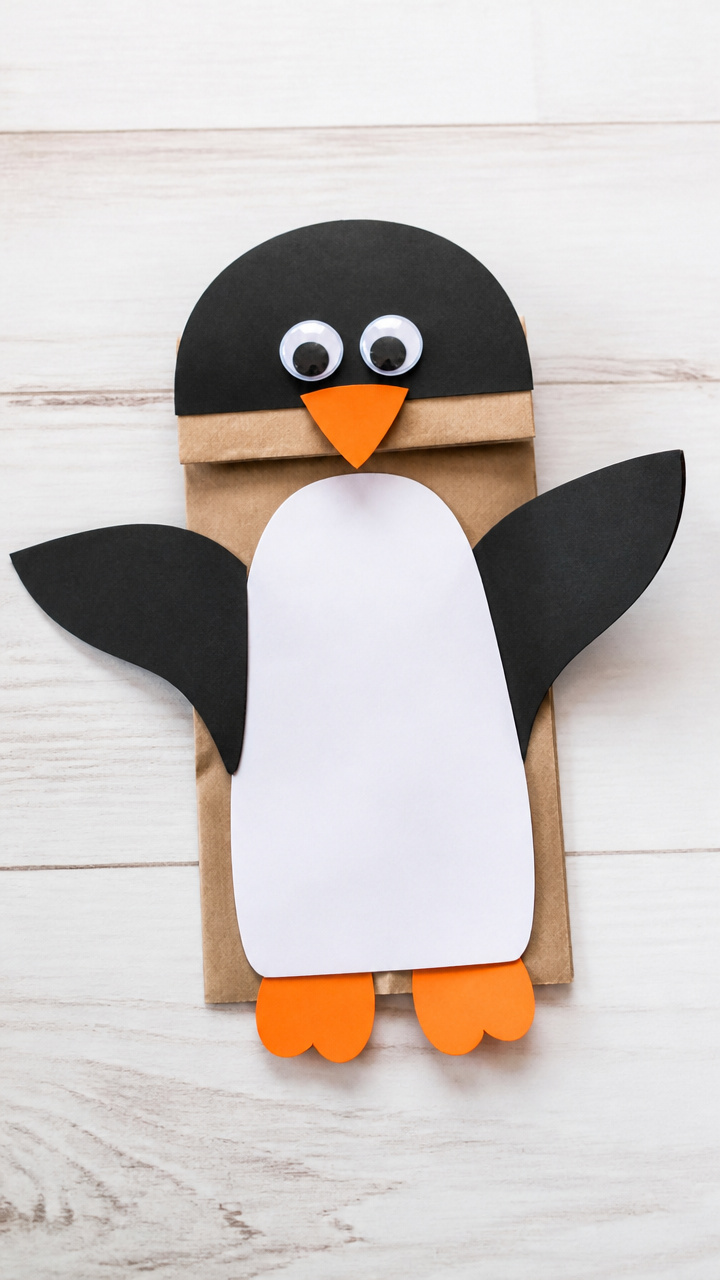
A waddling penguin with flapping wings brings laughter and movement to any living room stage. This puppet turns a lunch bag into a character full of personality.
Materials Needed
- Free printable penguin puppet pieces
- Brown paper lunch bag
- A4 white cardstock
- Glue stick
- Black and orange construction paper
- Scissors
- Googly eyes (12 mm, 2 per puppet)
How to Make It
- Print the penguin puppet pieces on A4 white cardstock and cut them out.
- Cut wings from black construction paper using the printed template as a guide.
- Glue the penguin body piece to the front of the brown paper lunch bag, just below the flap.
- Attach the wings with the glue stick so they hang slightly below the bag’s sides, then glue on the orange beak and feet cut from orange paper.
- Stick two 12 mm googly eyes above the beak for a lively look.


4. Winter Tree Silhouette Art
Moderate
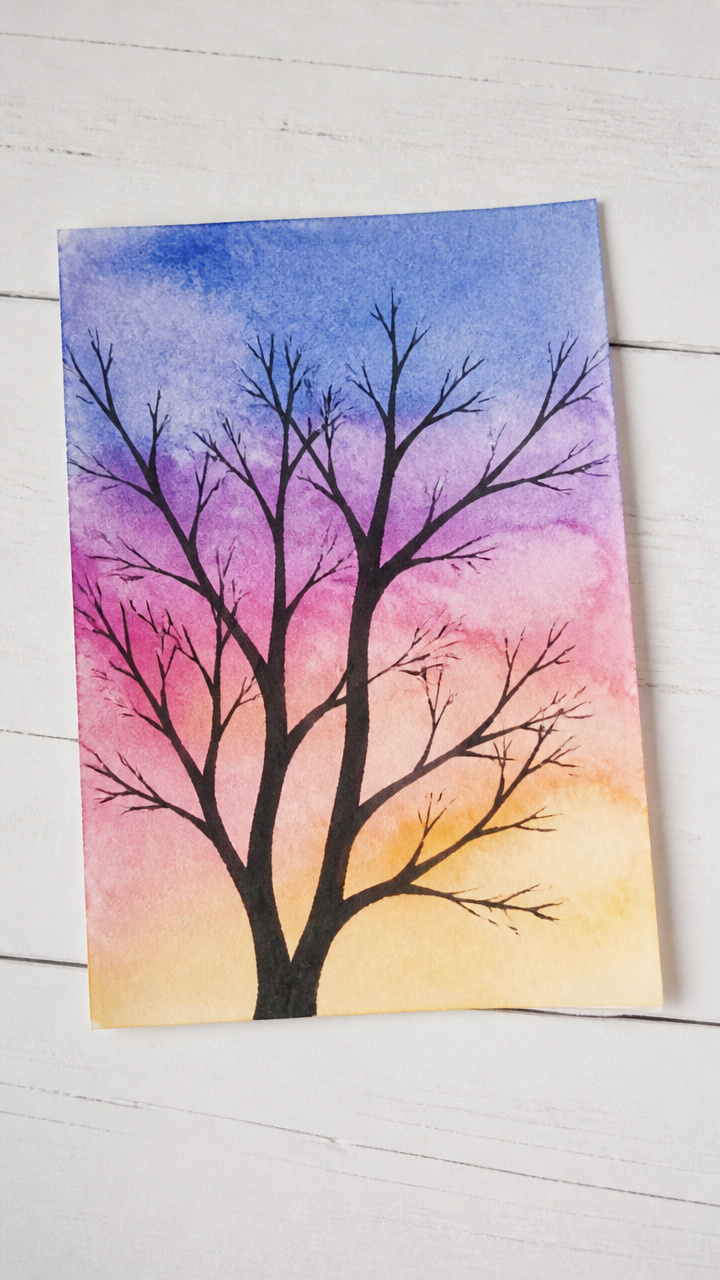
Delicate black tree branches stretch across a colorful gradient sky, made with just paint and a printed template. This craft introduces kids to silhouette art in a simple, satisfying way.
Materials Needed
- Free printable winter tree silhouette template
- A4 watercolor paper
- Watercolor set (blue, pink, purple, yellow)
- Watercolor brush (size 6 round)
- Pencil
- Scissors
- Glue stick
How to Make It
- Wet the watercolor brush and blend blue, pink, and purple paints across the top two-thirds of the A4 watercolor paper to create a soft sunset sky. Let it dry completely.
- Print the winter tree silhouette template and cut out the tree shape with scissors.
- Place the dried painted paper on a flat surface and position the cut-out tree near the bottom third.
- Trace around the tree lightly with a pencil, then remove the template.
- Use the glue stick to evenly coat the traced area and press the tree cut-out firmly into place.


5. New Year Countdown Chain
Easy
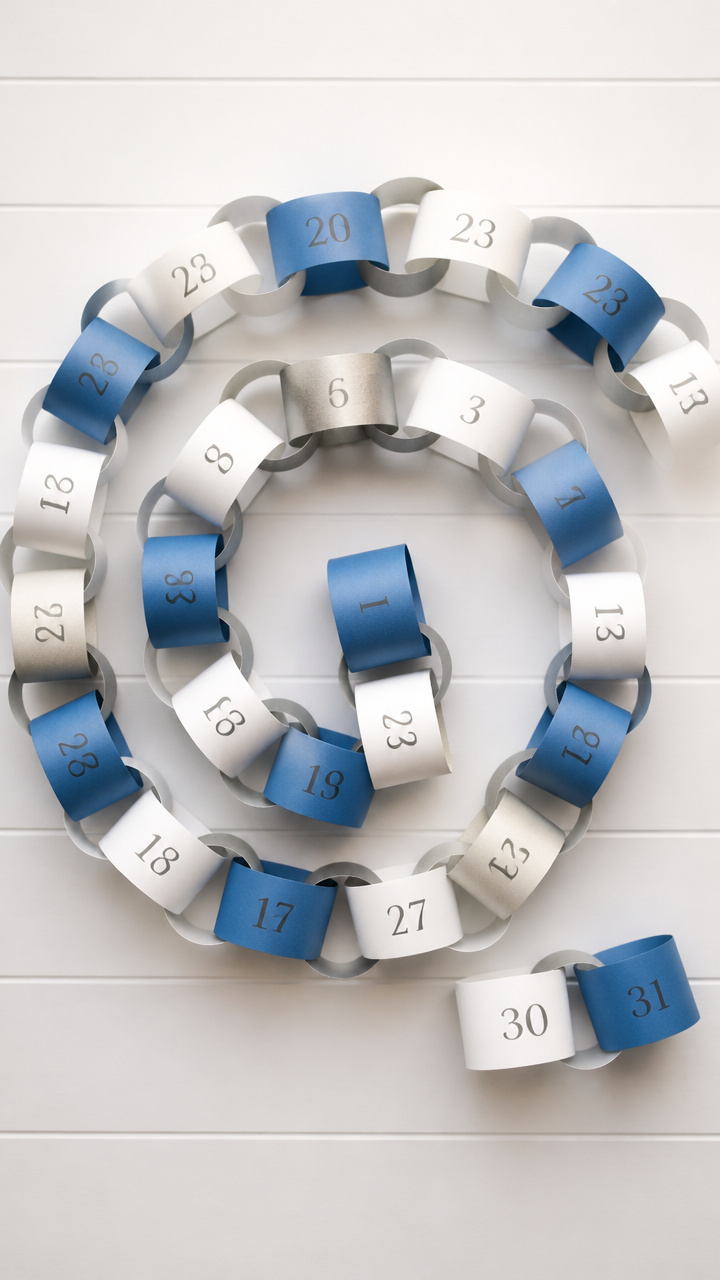
A linked paper chain with one ring for each day helps children anticipate the new year. Each twist and link builds excitement and a sense of time passing.
Materials Needed
- Free printable numbered countdown rings (1–31)
- A4 colored construction paper (blue, silver, white)
- Scissors
- Glue stick
How to Make It
- Print the numbered countdown rings on A4 colored construction paper, using a mix of blue, silver, and white sheets.
- Cut out each ring along the solid outer line with scissors.
- Bend one ring into a circle and glue the ends together with the glue stick.
- Thread the next ring through the first before gluing its ends, continuing until all 31 rings are linked in order.
6. Snowflake Doily Window Display
Easy
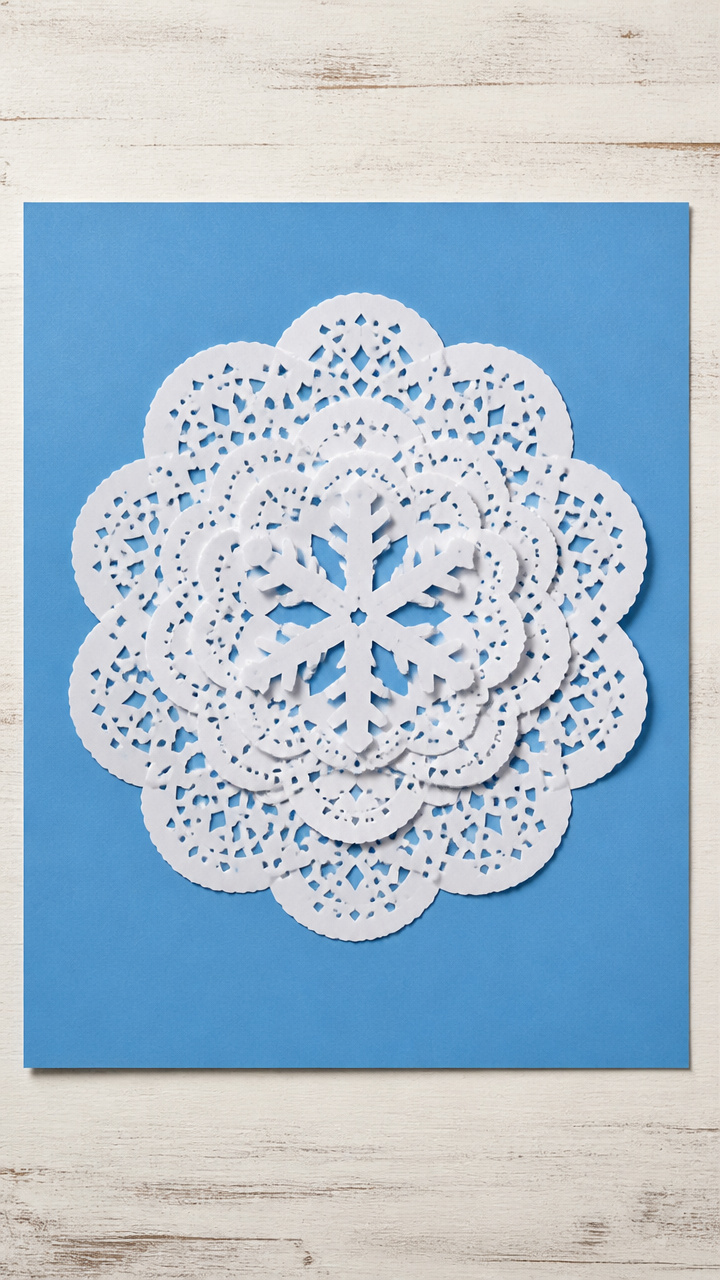
Lacy paper snowflakes made from doilies sparkle against the window when backlit by winter light. This craft combines fine motor practice with instant decoration.
Materials Needed
- Free printable snowflake design templates
- White paper doilies (15 cm diameter, 5 per display)
- Glue stick
- Scissors
- Clear tape
- A4 blue construction paper
How to Make It
- Print the snowflake design templates and lay one on top of a white paper doily.
- Carefully cut along the printed lines through both the template and doily using scissors.
- Repeat to make five cut-out doily snowflakes.
- Glue each snowflake onto a sheet of A4 blue construction paper in a scattered pattern using the glue stick.
- Tape the finished display to a window with clear tape so light shines through the cutouts.


7. Polar Bear Paw Prints
Easy
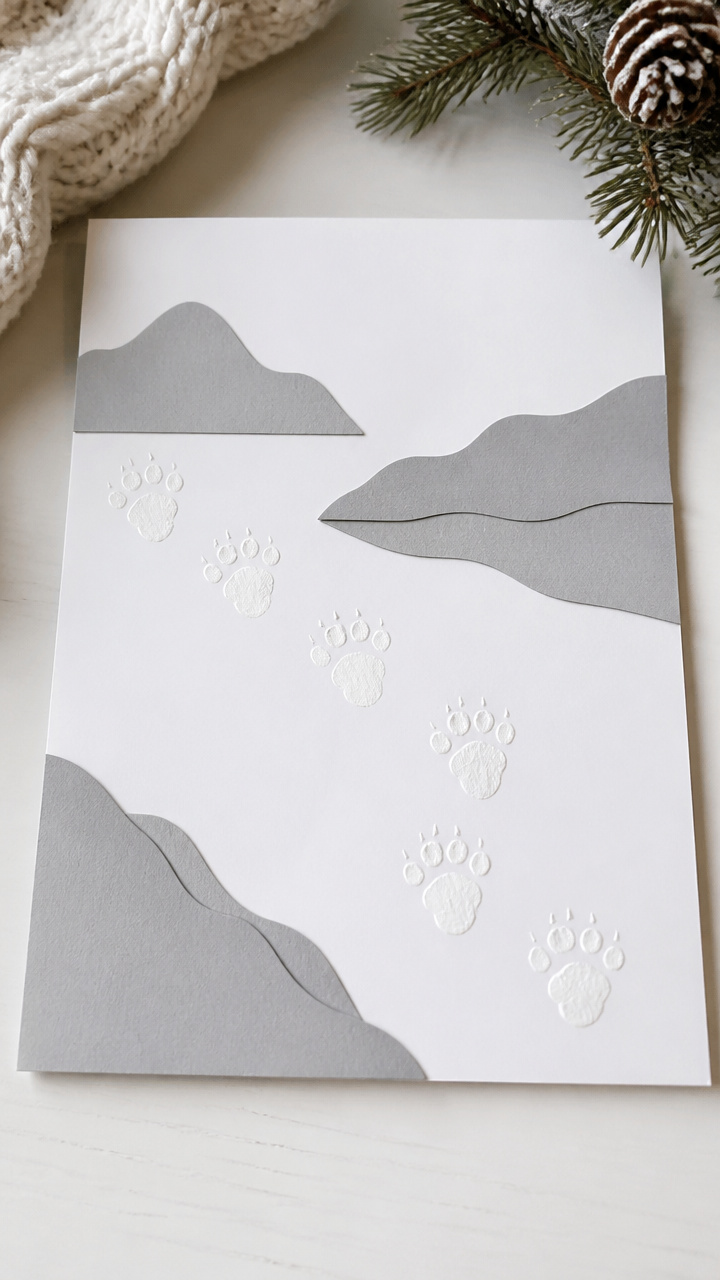
Soft white paw tracks stretch across a snowy scene, created using a printable stamp and paint. This sensory craft blends art and animal learning.
Materials Needed
- Free printable polar bear paw stamp
- A4 white cardstock
- Grey craft foam (15 x 20 cm)
- Pencil
- Scissors
- White acrylic paint
- Paint tray
- Paintbrush (size 4)
- Blue construction paper (22 x 30 cm)
How to Make It
- Trace the printable paw stamp onto grey craft foam using a pencil, then cut it out with scissors.
- Pour a small amount of white acrylic paint onto the paint tray.
- Dip the foam paw stamp into the paint using the paintbrush to spread an even coat.
- Press the stamp firmly onto the A4 white cardstock to make a track, repeating to form a trail.
- Glue the painted cardstock onto the blue construction paper background with the glue stick to represent sky and snow.


8. Ice Crystal Wind Chime
Moderate
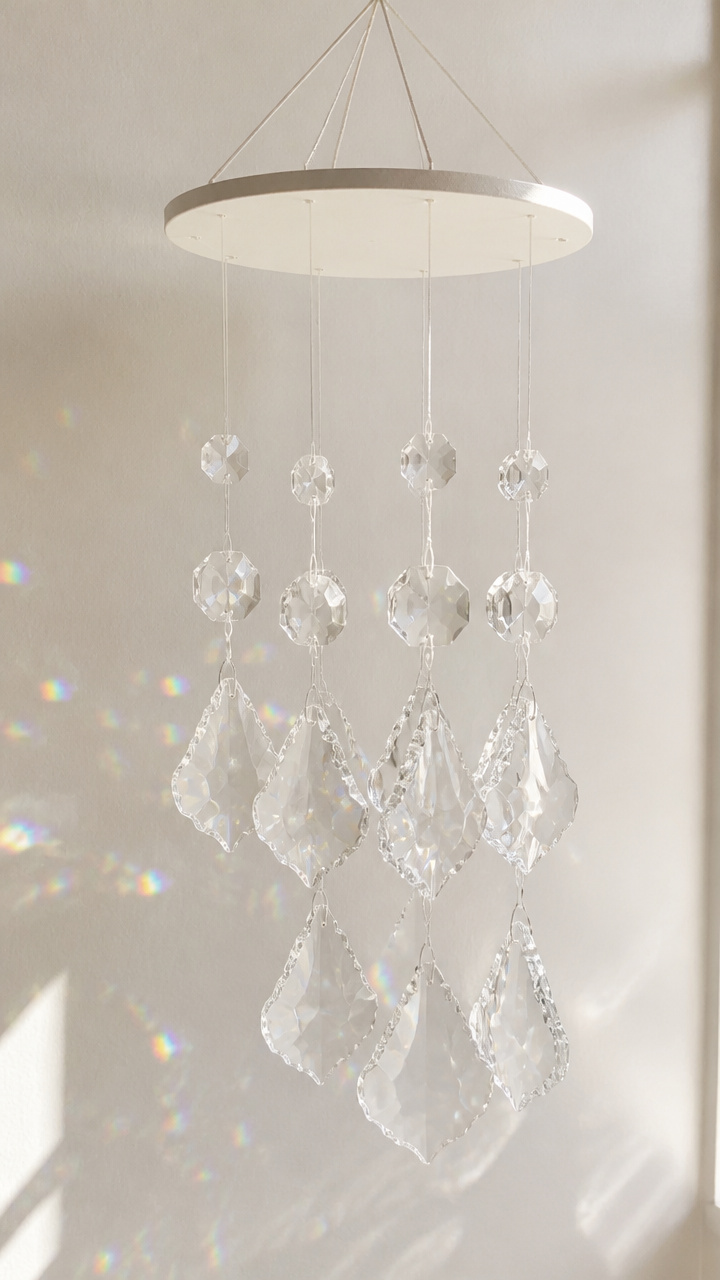
Gleaming paper crystals dangle from a cardboard ring, catching light and spinning in the breeze. This hanging craft adds quiet beauty to any room.
Materials Needed
- Free printable ice crystal templates (3 sizes)
- Clear acetate sheets (A4, 3 sheets)
- Hole punch
- White embroidery thread (1 m)
- Cardboard circle (10 cm diameter)
- Glue dots (permanent, 5 mm)
- Scissors
- Ruler
How to Make It
- Print one of each ice crystal template onto clear acetate sheets.
- Cut out each crystal carefully with scissors, following the outline precisely.
- Use the hole punch to make a small hole at the top of each crystal.
- Cut three pieces of white embroidery thread, each 30 cm long.
- Tie one end of each thread through a crystal hole, then attach the other end to the cardboard circle using a glue dot.
- Tie the remaining thread (10 cm) to the top of the circle for hanging.


9. Arctic Fox Paper Plate Mask
Easy
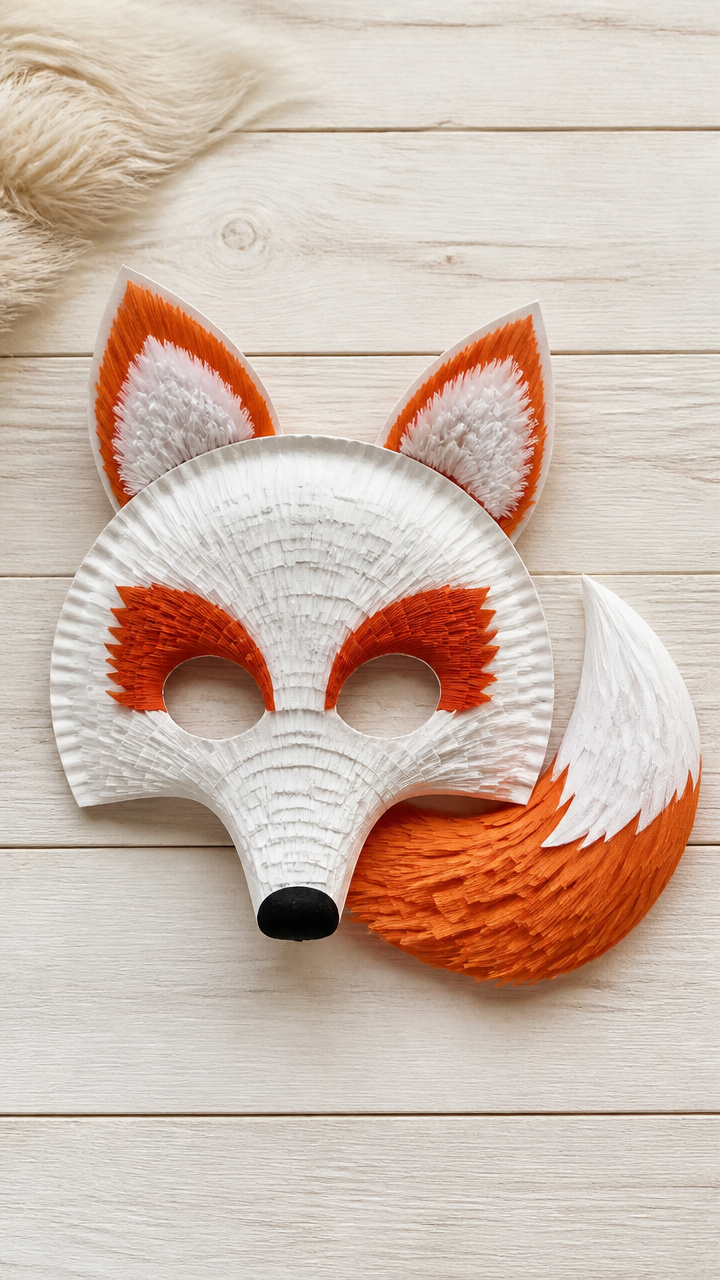
Fluffy orange ears and a bushy tail turn a plain paper plate into a clever fox ready for adventure. This mask is light, durable, and full of charm.
Materials Needed
- Free printable arctic fox mask pieces
- White paper plate (20 cm diameter)
- Orange and white construction paper
- Glue stick
- Scissors
- Hole punch
- Elastic string (30 cm)
- Googly eyes (10 mm, 2 per mask)
How to Make It
- Print the arctic fox mask pieces and cut out the snout, ears, and tail from the templates.
- Cut the snout and ears from orange construction paper and the tail tip from white paper.
- Glue the snout to the bottom center of the paper plate and the ears near the top edges.
- Attach the tail to the back of the plate with the glue stick.
- Punch one hole on each side of the plate, thread a 30 cm elastic string through, and tie knots to secure. Add googly eyes above the snout.
10. Snowy Owl Folding Card
Moderate
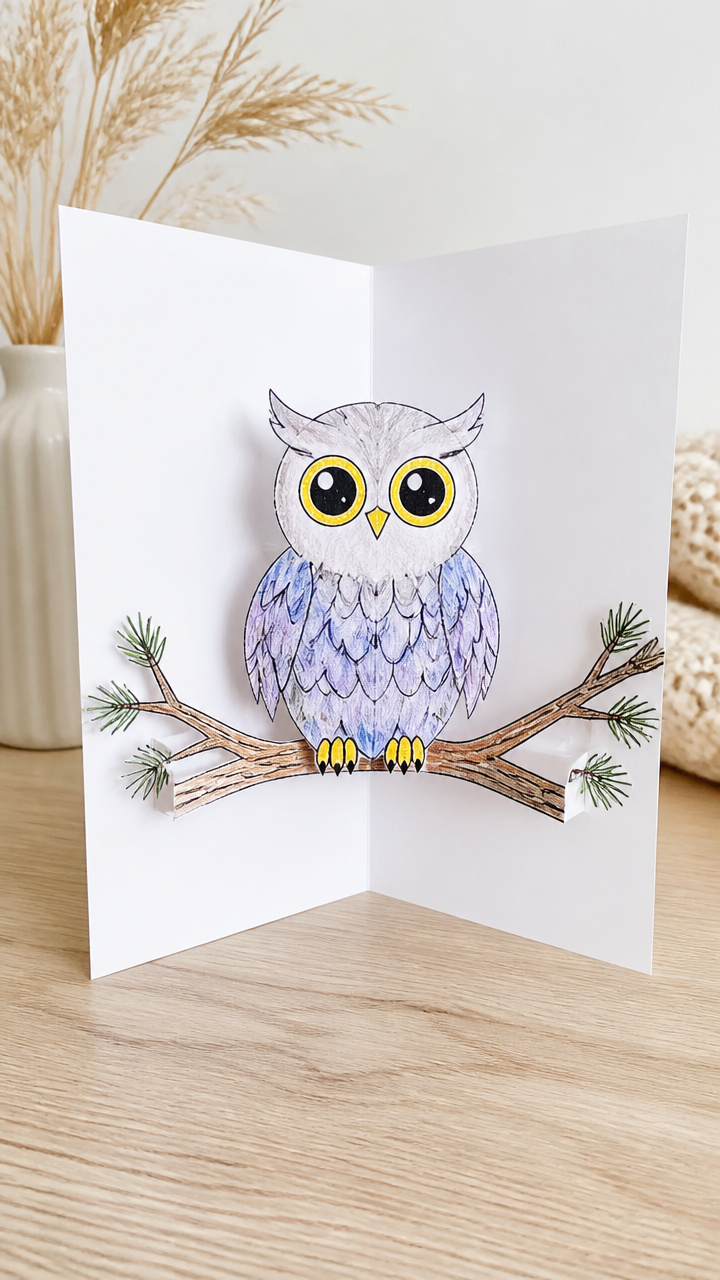
A wide-eyed owl perched on a branch pops up when the card opens, surprising anyone who receives it. This interactive design teaches simple paper mechanics.
Materials Needed
- Free printable snowy owl pop-up card template
- A4 white cardstock
- Scissors
- Glue stick
- Crayons or colored pencils
- Ruler
How to Make It
- Print the snowy owl pop-up card template on A4 white cardstock and fold it in half vertically using the pre-marked line, creasing firmly with a ruler.
- Cut along the two short dotted lines inside the folded card using scissors.
- Push the inner rectangle gently forward so it stands upright when the card is opened.
- Color the owl and branch on the pop-up piece with crayons or colored pencils.
- Glue the owl piece to the standing tab inside the card, then decorate the front cover as desired.


11. Winter Boot Collage
Easy
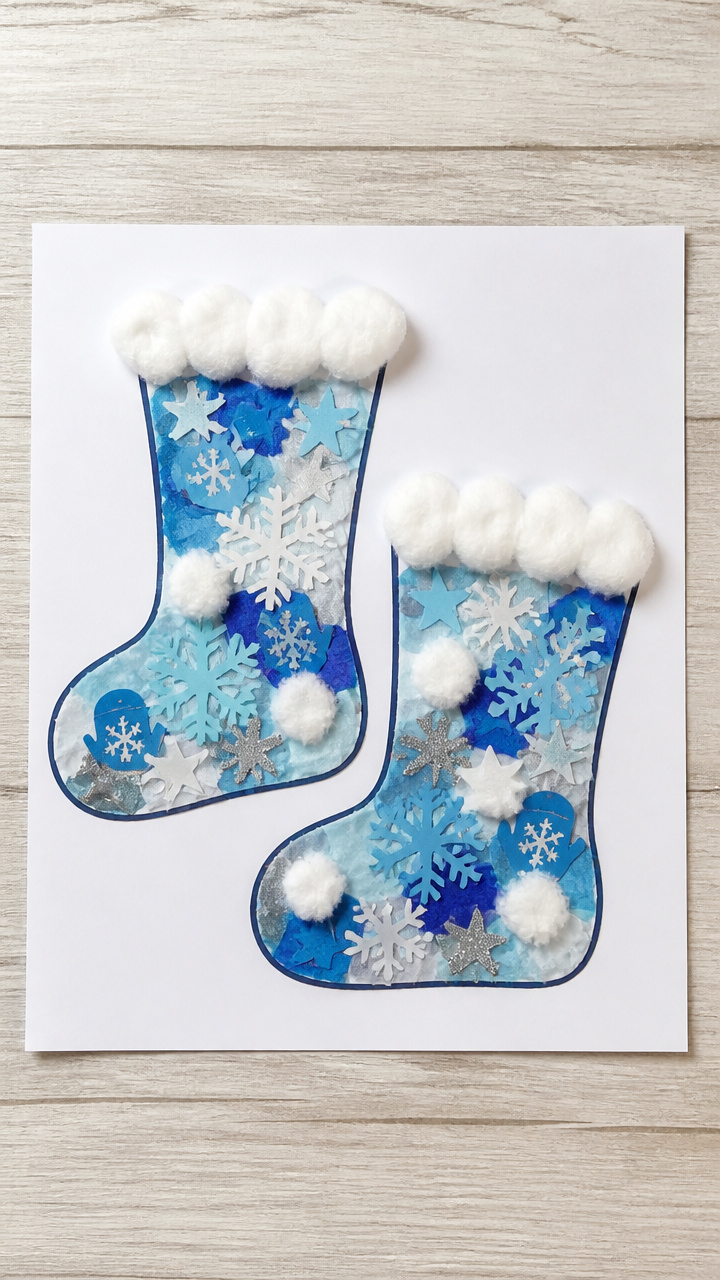
A pair of boots filled with tiny snowflakes, mittens, and stars tells a quiet winter story. This collage builds visual storytelling skills with simple shapes.
Materials Needed
- Free printable winter boot outline
- A4 white drawing paper
- Blue, silver, and white tissue paper
- Glue stick
- Scissors
- Cotton balls (10 per boot)
How to Make It
- Print the winter boot outline and trace both boots onto A4 white drawing paper, then cut them out with scissors.
- Tear small pieces of blue, silver, and white tissue paper into 2 cm squares.
- Spread glue inside the boot shapes with the glue stick and press the tissue paper pieces into place to fill them.
- Glue three cotton balls at the top of each boot to represent fur trim.


12. Cardboard Tube Penguins
Moderate
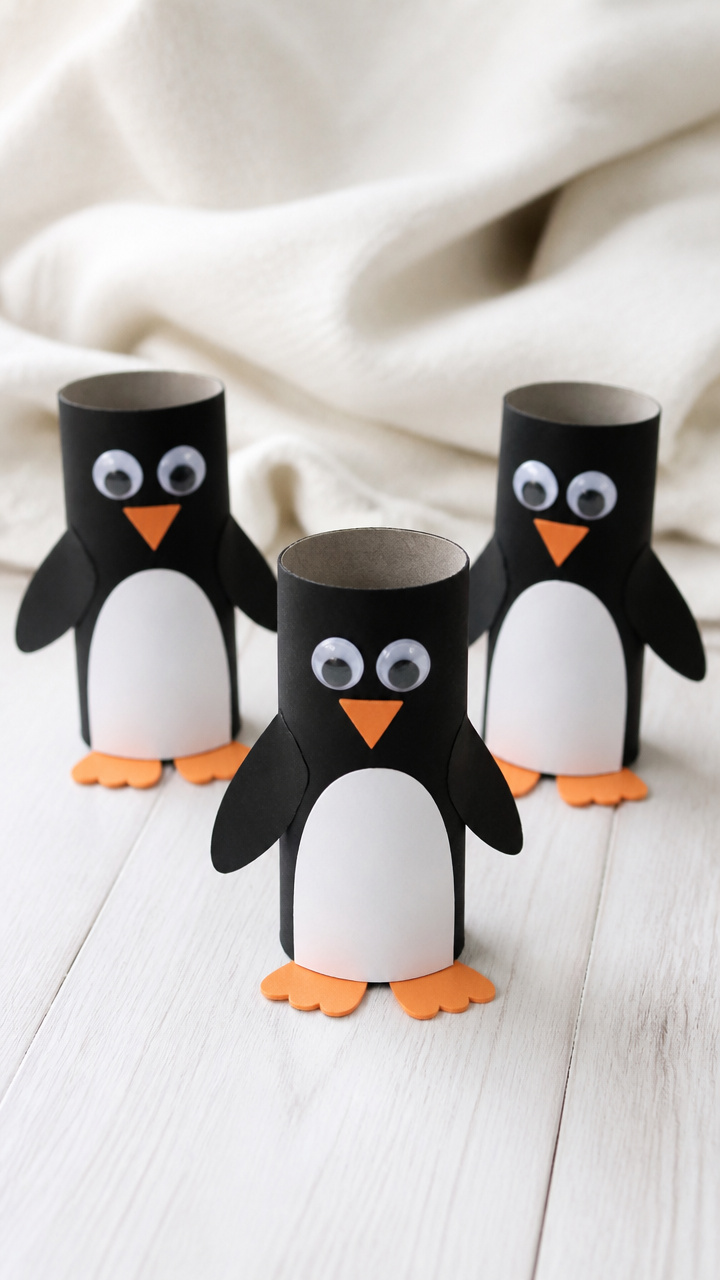
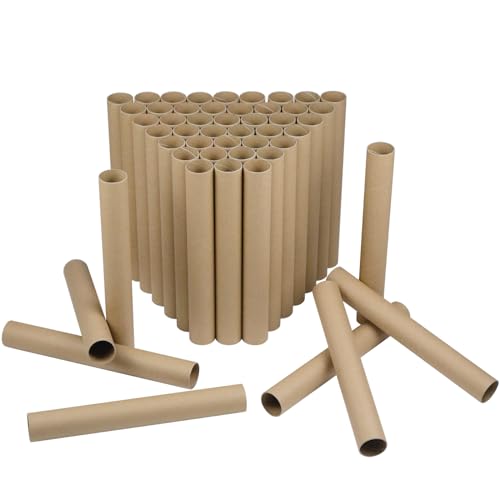
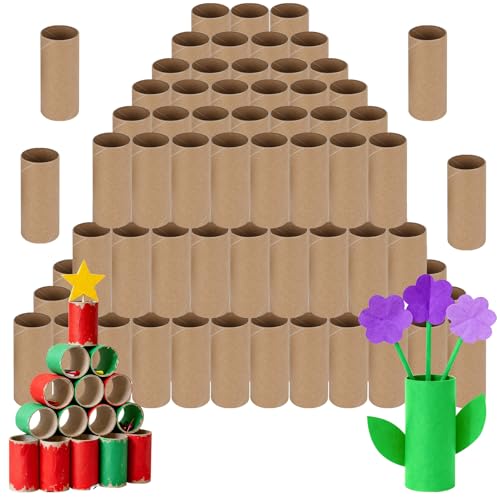
Rolled paper tubes become waddling penguins with glossy eyes and tilted heads. These 3D figures stand on their own and look great on a shelf.
Materials Needed
- Free printable penguin body and wing templates
- Cardboard toilet paper tubes (2 per penguin)
- Black and white construction paper
- Glue stick
- Scissors
- Googly eyes (15 mm, 2 per penguin)
- Orange craft foam
How to Make It
- Print the penguin body and wing templates and cut them out.
- Cut one toilet paper tube in half horizontally; use one half for the body and one full tube for the base.
- Wrap the full tube with black construction paper using the glue stick to secure it.
- Attach the half-tube to the top of the wrapped base to form the head and neck.
- Glue on the white belly cut from white paper, then add wings from the template cut from black paper.
- Cut a small triangle beak from orange craft foam and glue it below the eyes, then stick on two 15 mm googly eyes.

13. Felt Snowflake Ornaments
Moderate
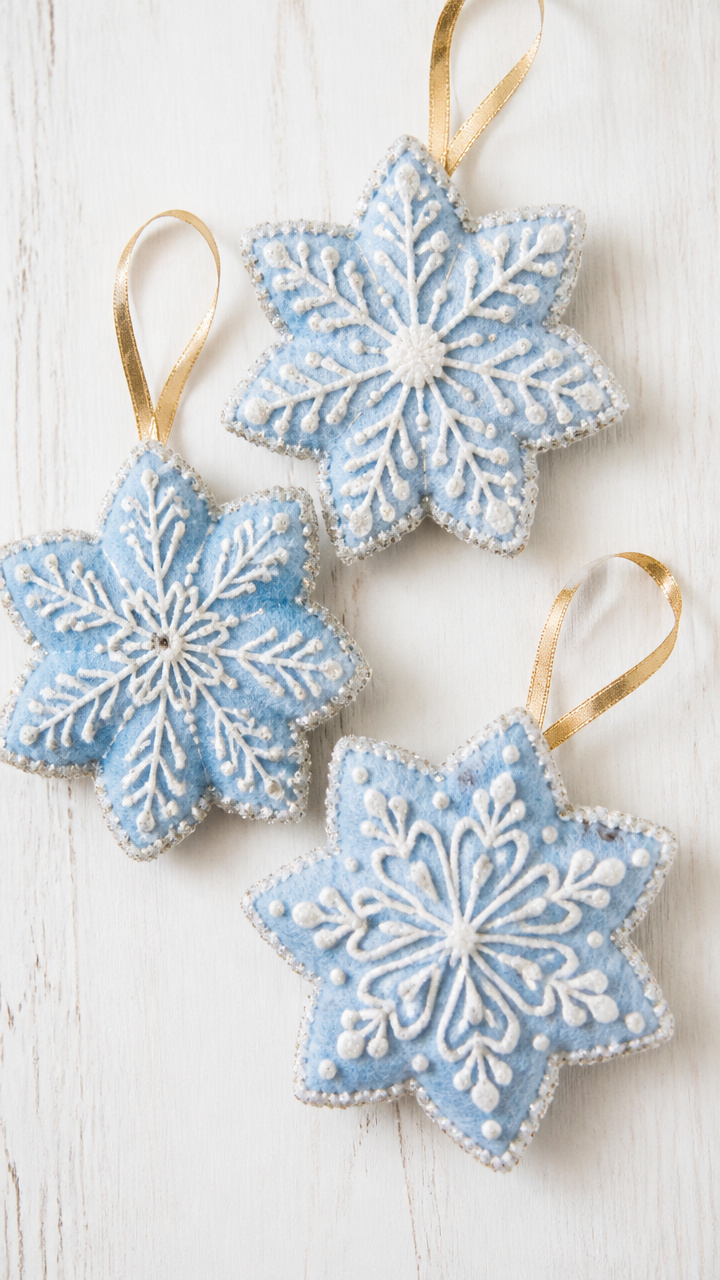
Soft blue felt snowflakes with glittered edges hang from ribbons and shimmer on any surface. These tactile ornaments are safe for little hands.
Materials Needed
- Free printable snowflake patterns (3 styles)
- Blue felt sheets (20 x 30 cm, 1 per ornament)
- White puff paint
- Ribbon (gold, 15 cm per ornament)
- Scissors
- Pencil
- Straight pins
How to Make It
- Print the snowflake patterns and pin one to a blue felt sheet using straight pins at each corner.
- Trace the design with a pencil, then cut along the lines with scissors.
- Squeeze white puff paint along each edge of the snowflake, making a raised outline.
- Let the puff paint dry completely (at least 2 hours).
- Tie a 15 cm piece of gold ribbon to the top point for hanging.


14. Mitten Matching Game
Easy
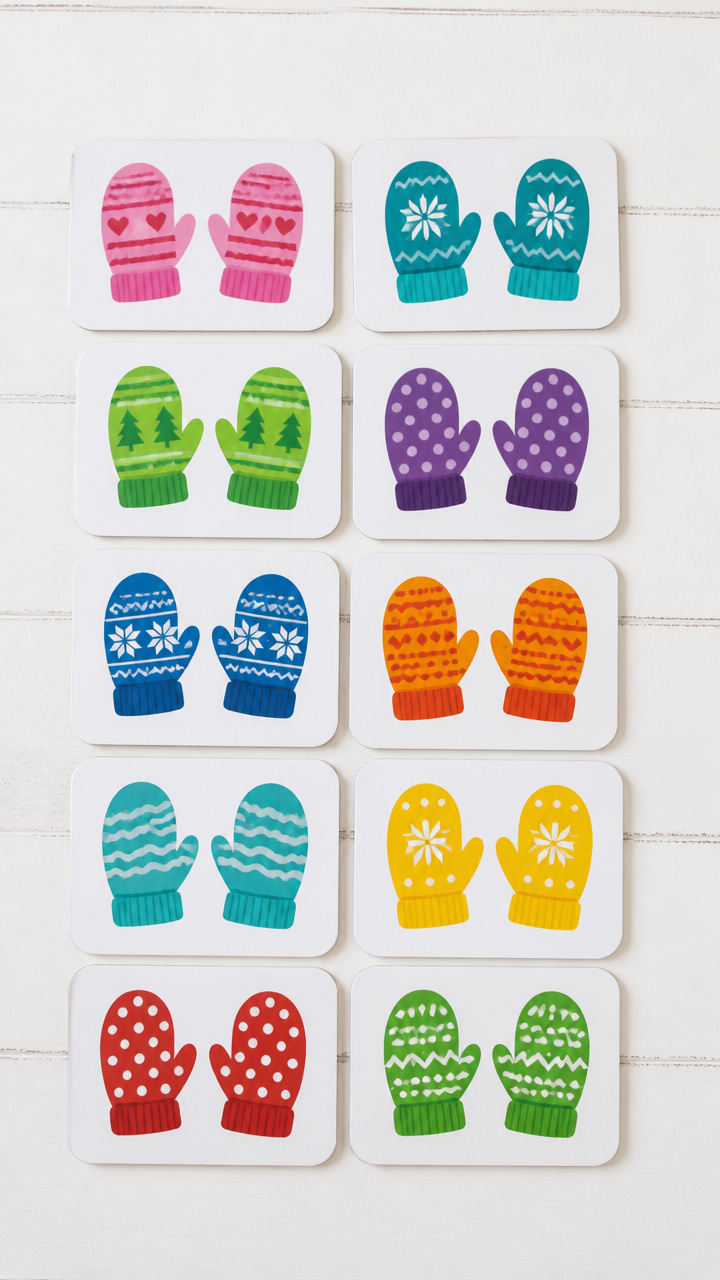
Colorful mittens with patterned palms teach memory and pairing through play. This game builds cognitive skills while looking cheerful on the table.
Materials Needed
- Free printable mitten matching cards (10 pairs)
- A4 white cardstock
- Laminating sheets
- Laminator
- Scissors
How to Make It
- Print the mitten matching cards on A4 white cardstock.
- Cut out each mitten card with scissors along the outer lines.
- Laminate all cards using laminating sheets and a laminator.
- Let them cool, then trim any excess laminate. Shuffle and lay face down to play.
15. Paper Quilted Snow Scene
Moderate
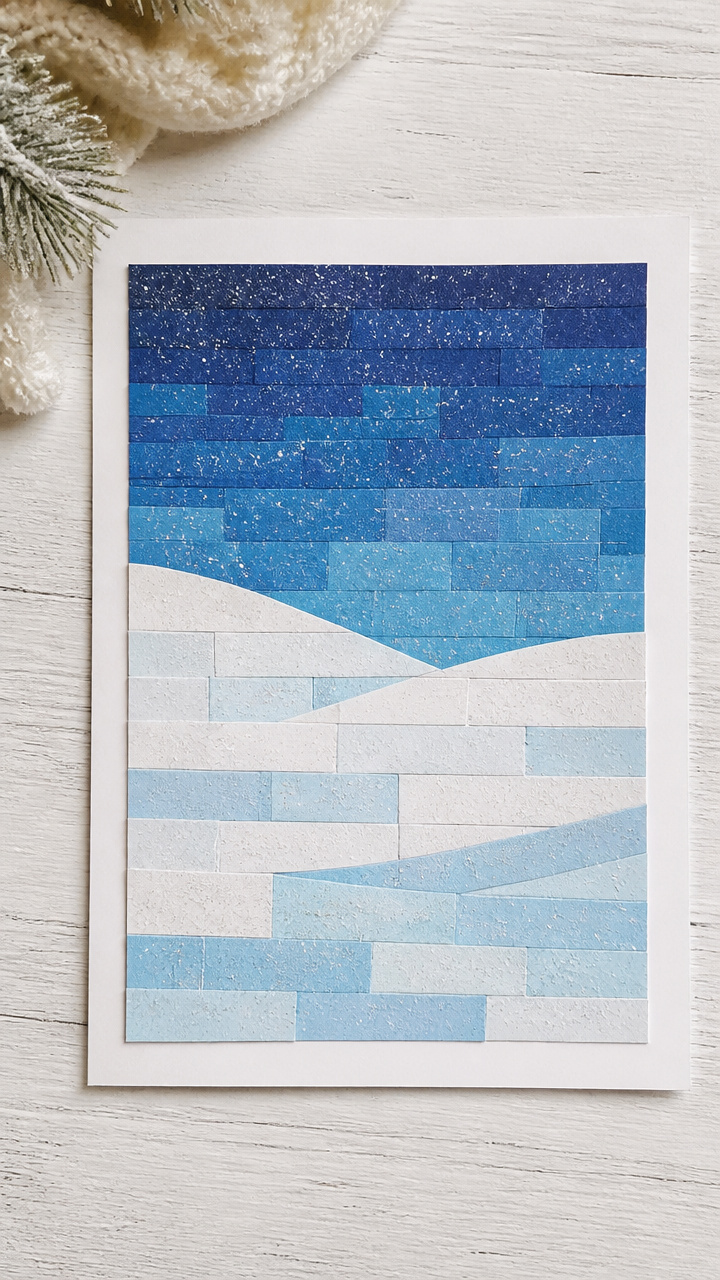
Layered rectangles of blue and white paper form a textured winter landscape under a glittered sky. This craft teaches depth and dimension with paper alone.
Materials Needed
- Free printable snow scene layer templates
- A4 white cardstock
- Light blue, dark blue, and white construction paper
- Glue stick
- Scissors
- Fine glitter (white, 1 tsp)
- Glue (liquid, 1 tsp)
How to Make It
- Print the snow scene layer templates and cut out the background, hill, and tree line pieces.
- Cut a background rectangle from dark blue construction paper (20 x 25 cm) and glue it to the A4 white cardstock.
- Cut the hill from light blue paper and the tree line from white paper, then layer and glue them in order.
- Mix 1 tsp liquid glue with 1 tsp white glitter in a small dish.
- Paint the glitter mixture across the top third of the scene and let it dry completely.
16. Walrus Toothpaste Tube Craft
Moderate
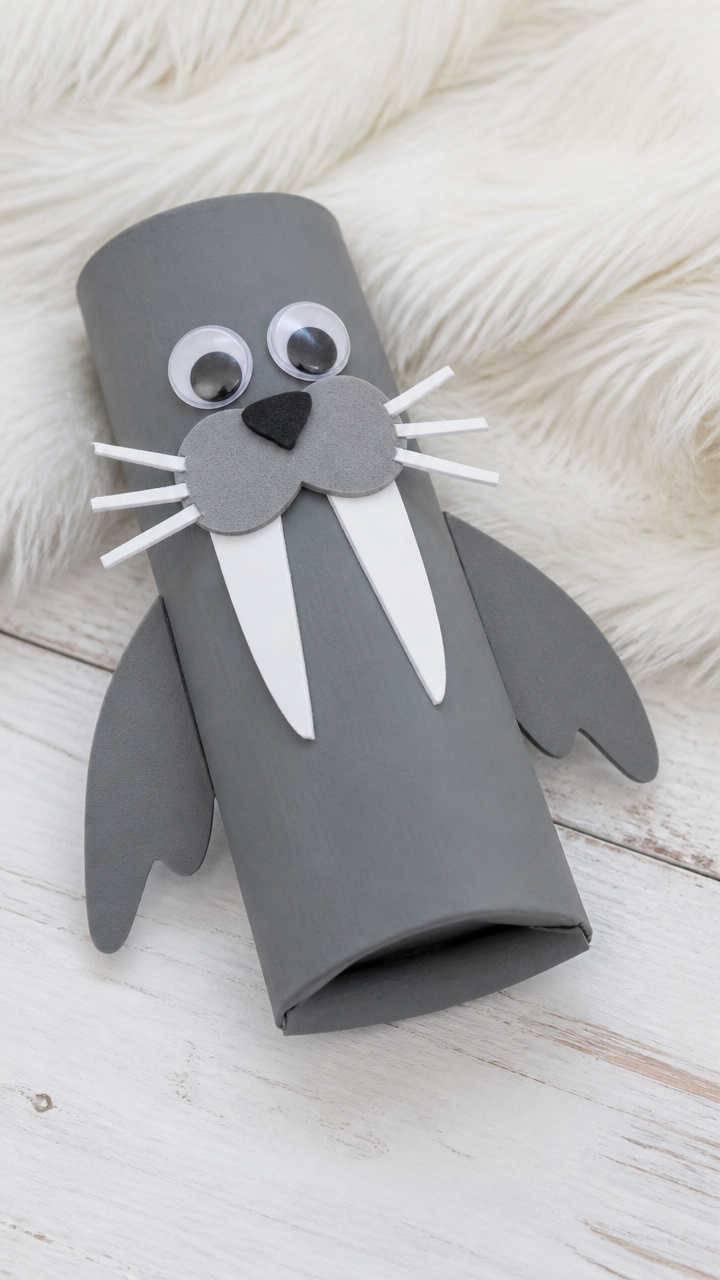
A squishy toothpaste tube becomes a plump walrus with whiskers and tusks. This upcycled craft gives new life to an everyday object.
Materials Needed
- Free printable walrus face and tusk templates
- Empty toothpaste tube (aluminum or plastic)
- Grey paint (acrylic, 2 tbsp)
- Paintbrush (size 5)
- White craft foam
- Googly eyes (20 mm, 2 per walrus)
- Glue stick
- Scissors
How to Make It
- Print the walrus face and tusk templates and cut them out.
- Paint the entire toothpaste tube with grey acrylic paint using the paintbrush, then let it dry for 1 hour.
- Cut tusks from white craft foam using the template and glue them below the cap end.
- Glue on the printed face just above the tusks, then stick two 20 mm googly eyes near the top.


17. Frozen Bubble Art
Advanced
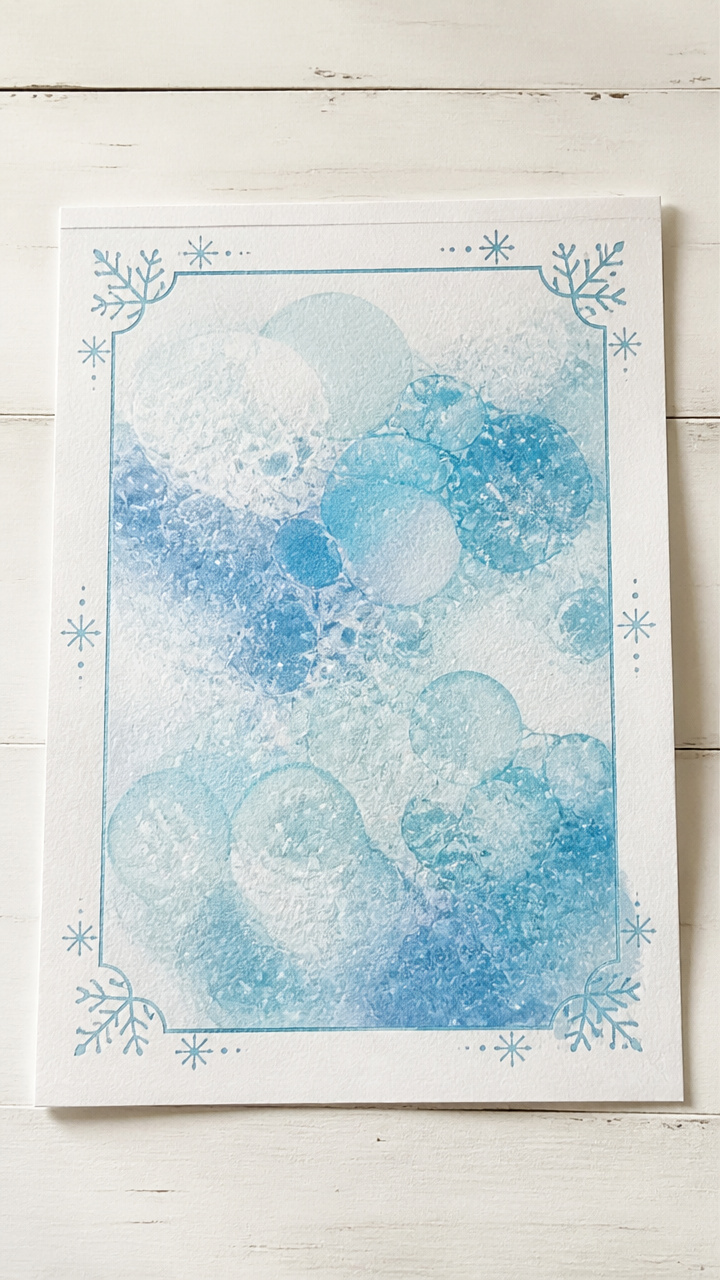
Burst bubbles leave delicate icy patterns on paper, captured using a printable guide. This science-infused craft works best on cold days.
Materials Needed
- Free printable bubble frame template
- A4 watercolor paper
- Bubble solution (1 cup water, 2 tbsp dish soap, 1 tsp glycerin)
- Shallow tray
- Straw
- Freezer
- Clothespin
How to Make It
- Print the bubble frame template and place it under a sheet of A4 watercolor paper.
- Pour bubble solution into a shallow tray to a depth of 1 cm.
- Dip one end of the straw into the solution and blow gently to create a dome of bubbles rising above the tray.
- Carefully lower the watercolor paper onto the bubbles, letting it rest for 5 seconds.
- Lift the paper with a clothespin and place it face-up in the freezer for 10 minutes to set the icy patterns.
- Remove and let thaw slightly before displaying.


18. Reindeer Handprint Keepsake
Easy
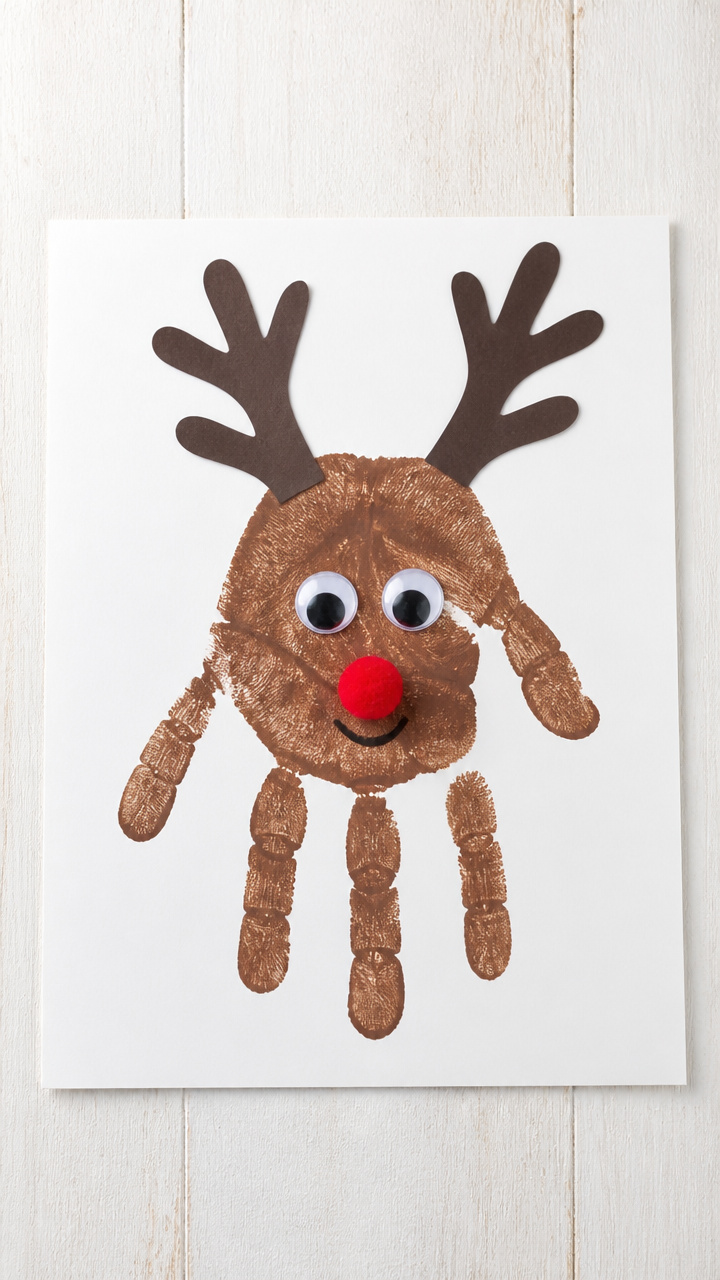
A child’s handprint transforms into a smiling reindeer with antlers and a red nose. This keepsake grows more precious with every passing year.
Materials Needed
- Free printable reindeer face template
- A4 white cardstock
- Brown washable paint
- Paintbrush (size 6)
- Red pom-pom (10 mm, 1 per reindeer)
- Googly eyes (12 mm, 2 per reindeer)
- Glue stick
- Black marker
How to Make It
- Print the reindeer face template and set it aside.
- Brush brown washable paint onto the child’s hand using the paintbrush, covering palm and fingers.
- Press the painted hand firmly onto the A4 white cardstock, fingers pointing down, and lift straight off.
- Let the print dry for 5 minutes.
- Glue the printed face above the thumb, then add two googly eyes and a red pom-pom nose with the glue stick.
- Draw antlers above the handprint with the black marker.


19. Snow Globe Writing Prompt
Easy
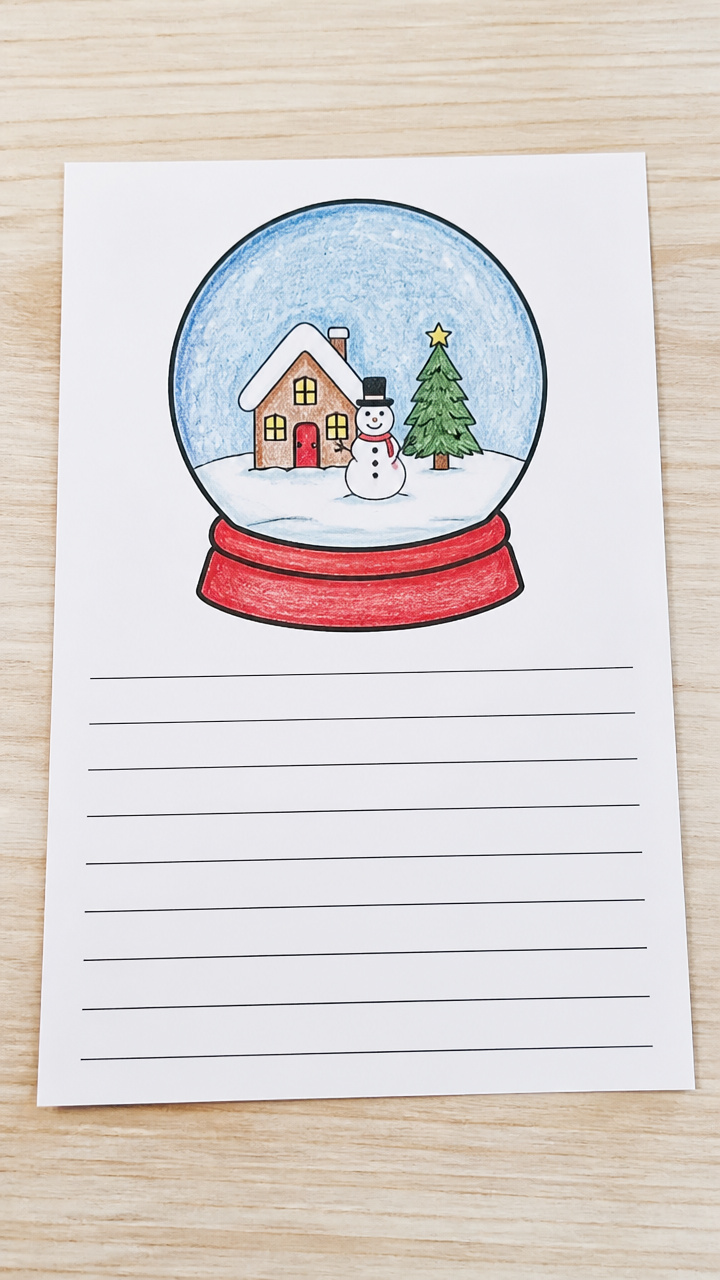
A printed snow globe scene invites children to invent a story about the tiny world inside. This craft blends art and early writing in one cozy activity.
Materials Needed
- Free printable snow globe template
- A4 white cardstock
- Crayons or colored pencils
- Scissors
- Glue stick
- Blank lined paper (12 x 18 cm)
How to Make It
- Print the snow globe template and color the scene inside with crayons or colored pencils.
- Cut out the snow globe along the outer circle with scissors.
- Glue it to the top half of a blank lined paper sheet.
- Write a short story about what happens inside the snow globe on the lines below.

![Crayola Twistables Colored Pencil Set (50ct), Cool Back to School Supplies for Kids, No Sharpen Colored Pencils for Girls & Boys, 4+ [Amazon Exclusive]](https://m.media-amazon.com/images/I/51rGfVjC03L._SL500_.jpg)

20. Yarn-Wrapped Ice Castle
Moderate
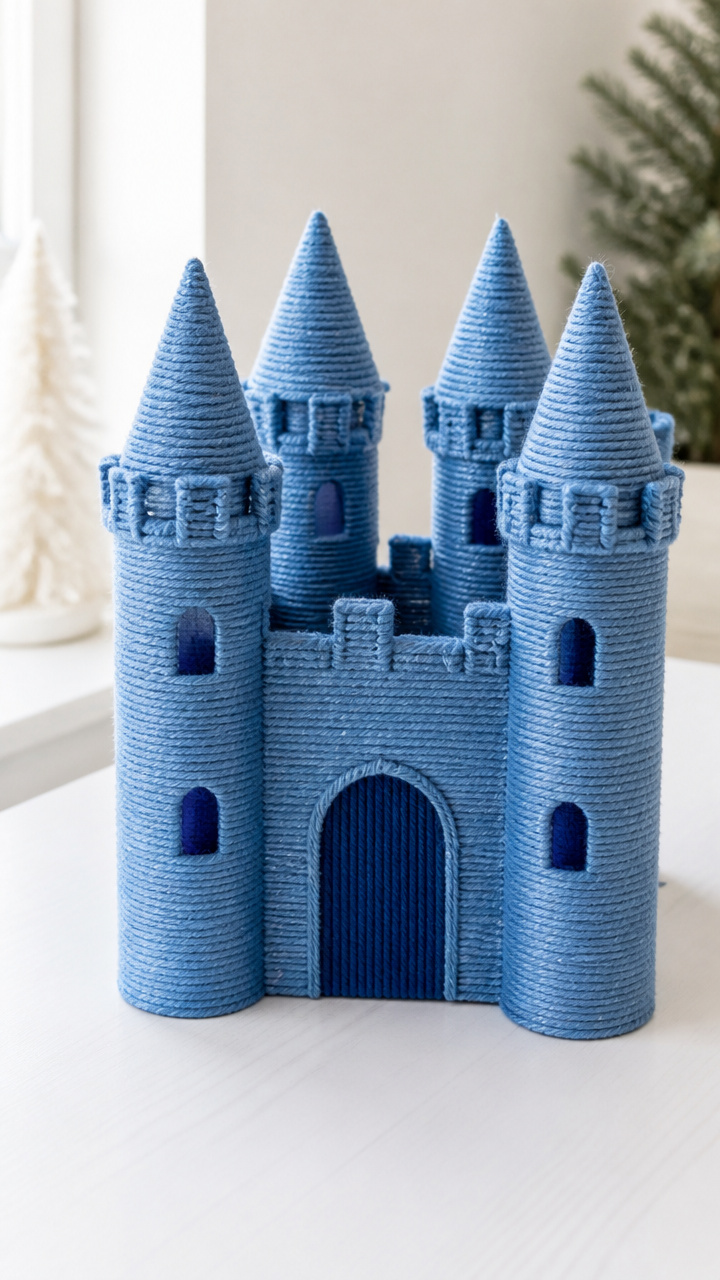
Sturdy cardboard turrets wrapped in shimmering blue yarn create a magical frozen fortress. The wrapping motion builds focus and fine motor control.
Materials Needed
- Free printable ice castle tower templates (4 turrets)
- Cardboard (from a shipping box)
- Blue yarn (40 m total)
- White glue
- Scissors
- Pencil
- Ruler
How to Make It
- Print the ice castle tower templates and trace each onto cardboard using a pencil.
- Cut out the four turrets with scissors, using a ruler to keep edges straight.
- Apply a small dot of white glue to the bottom edge of the yarn and press it to the base of the first turret.
- Wrap the yarn tightly around the turret, overlapping slightly, adding glue every 5 cm to secure.
- Continue wrapping until the entire surface is covered, then glue the end and let dry for 30 minutes.


Grab your printer and gather the supplies — these crafts are ready to bring joy, one page at a time. You’ve got everything you need to start creating right now.