20 Kindergarten Craft Activities for Kids
Little hands love to create, and simple crafts help them build confidence while exploring color, shape, and texture. These projects use everyday materials in thoughtful ways that support fine motor skills and imaginative play.
Each idea is designed to be joyful and manageable for young children with guidance. You'll find no two activities are alike, so there's always something new to try on a quiet afternoon or busy classroom day.
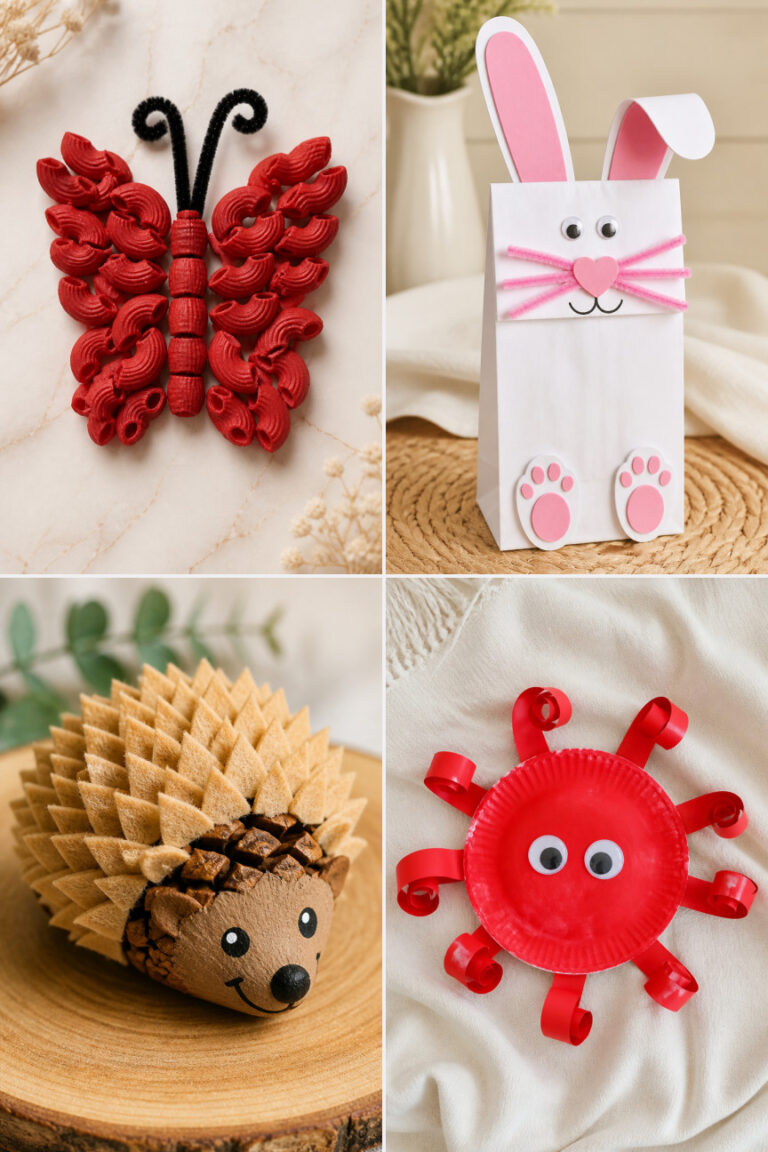
1. Paper Plate Ladybugs
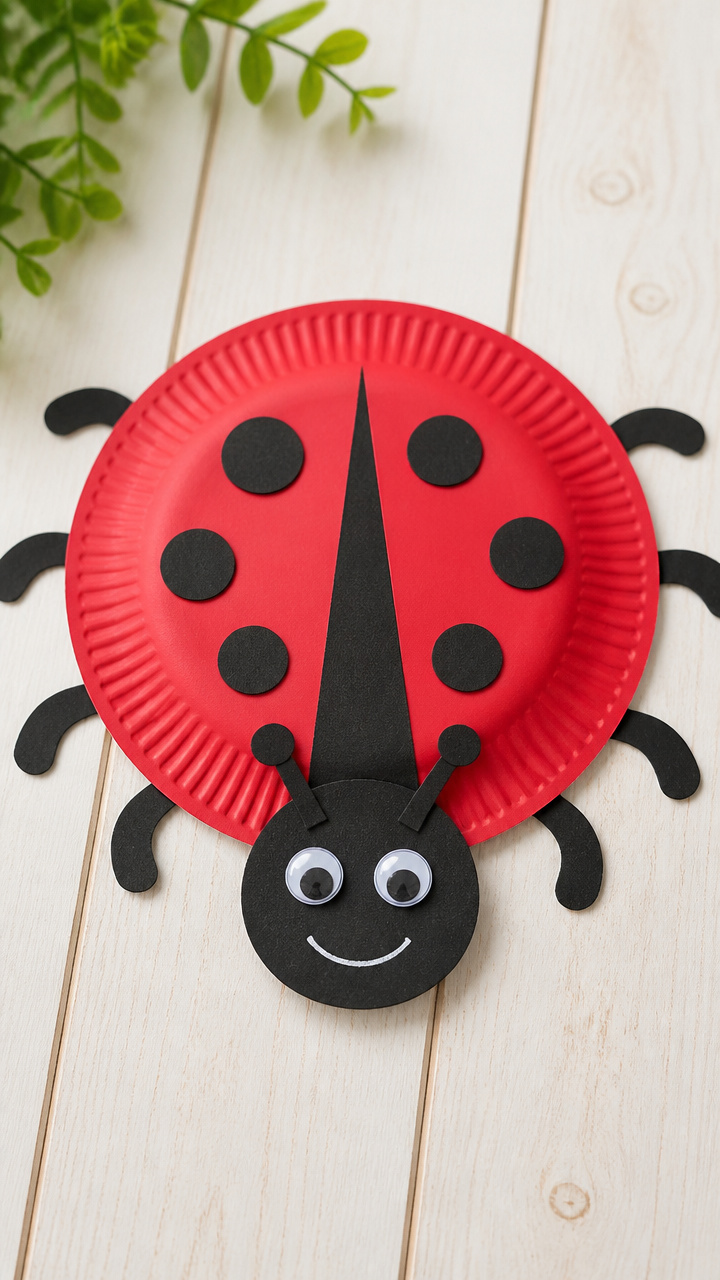
Bright red ladybugs with black spots bring garden fun indoors. This craft builds counting skills as kids add the right number of dots.
Materials Needed
- 1 paper plate per child
- red acrylic paint
- black acrylic paint
- paintbrushes (size 3)
- black foam sheets
- white glue
- googly eyes (12mm, 1 pair per child)
- black pipe cleaners (1 per child)
- scissors (blunt tip)
How to Make It
- Paint the entire paper plate red using a size 3 brush. Let it dry completely, about 20 minutes on a flat surface.
- Cut out small circles from black foam sheets for spots and a teardrop shape for the head. Use scissors carefully.
- Glue the black head to the top edge of the plate. Press firmly and wait 1 minute before adding details.
- Stick on six black foam spots, three on each side. Add one pair of googly eyes on the head with a dab of glue.
- Bend one black pipe cleaner in half and twist the ends together to form antennae. Glue to the back of the head.

2. Cotton Ball Sheep
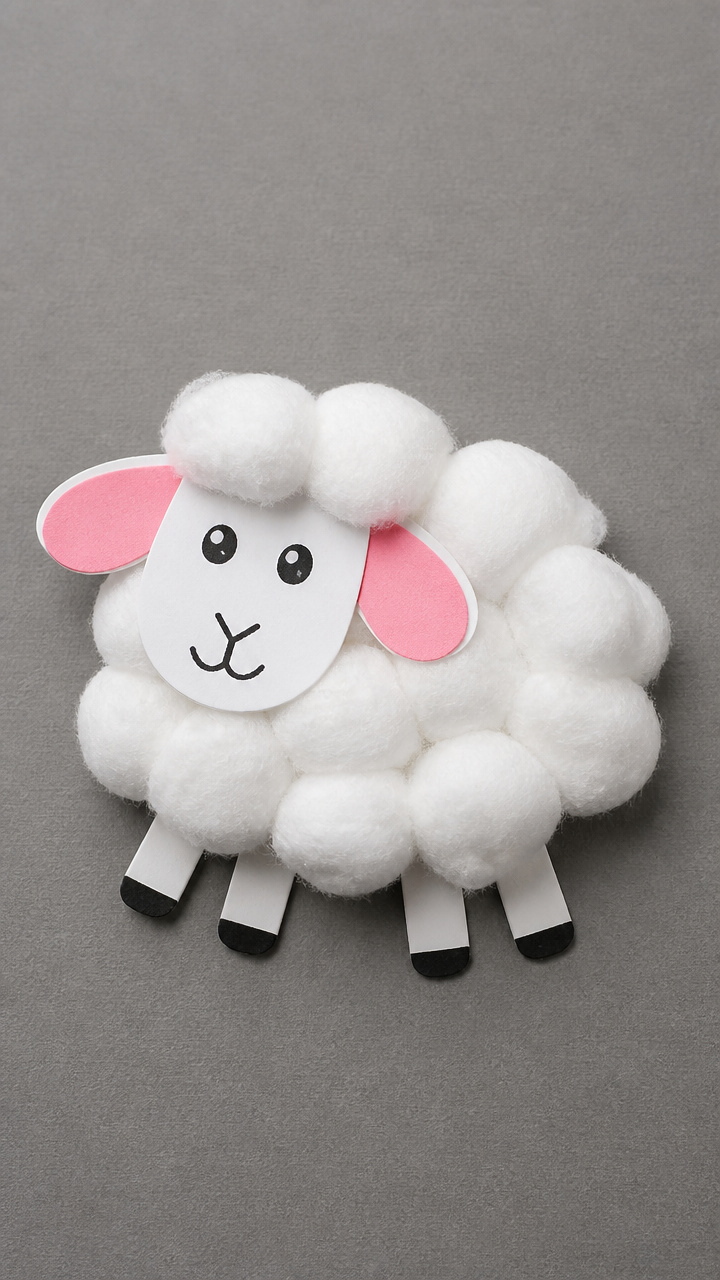
Fluffy white sheep made with cotton balls teach texture contrast and fine pincer grasp. The soft result becomes a sweet keepsake.
Materials Needed
- A4 gray cardstock (1 sheet per child)
- cotton balls (8 per child)
- black marker (fine tip)
- glue stick
- pink craft foam
- scissors (blunt tip)
- wiggly eyes (10mm, 1 pair per child)
How to Make It
- Draw a large sheep body shape on gray cardstock using pencil first, then trace with black marker. Make it take up most of the page.
- Apply glue to the center area of the sheep body only. Spread evenly with the glue stick.
- Press cotton balls into the glued area, overlapping slightly until the body looks full and fluffy.
- Cut two small ears and a face oval from pink foam. Glue ears to the top sides of the head and the oval below the cotton.
- Add wiggly eyes and draw a small mouth with the black marker. Let dry flat for 15 minutes.

![McKesson Cotton Balls [2000 Count] Bulk, 100% Pure Cotton Balls for Face, Nail Polish Remover, Makeup, Medium](https://m.media-amazon.com/images/I/312YQNHbahL._SL500_.jpg)
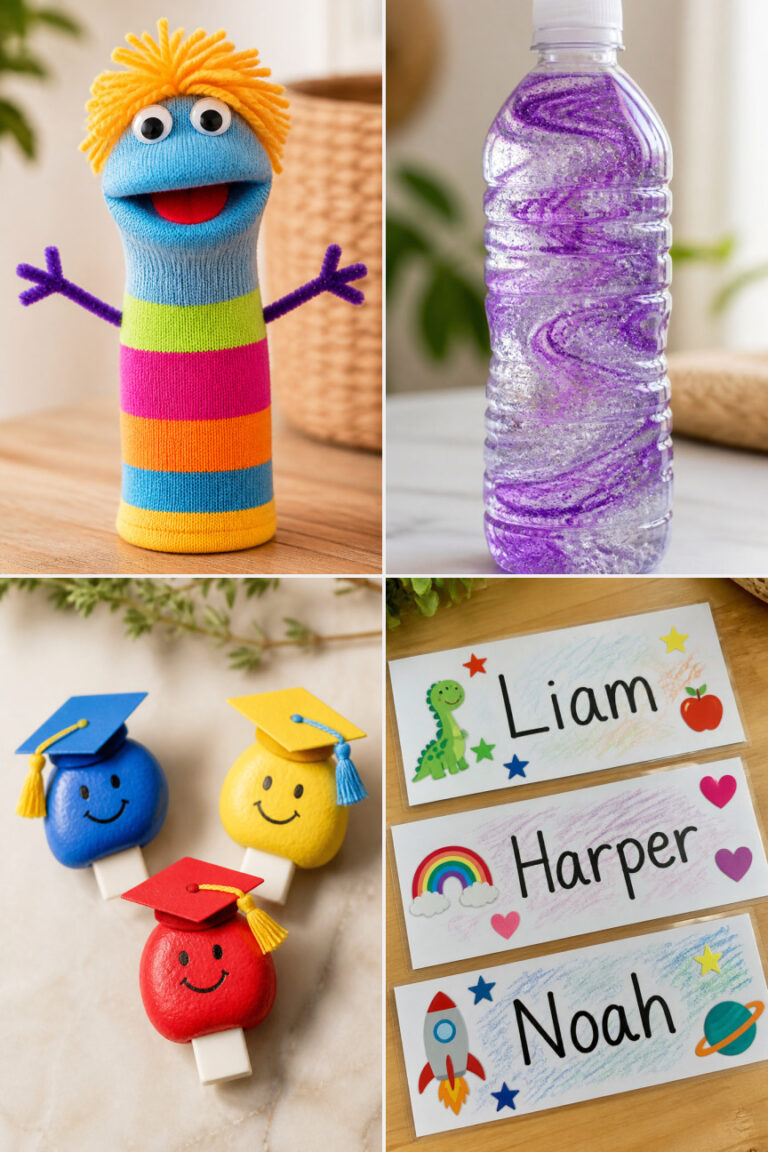
3. Popsicle Stick Puppets
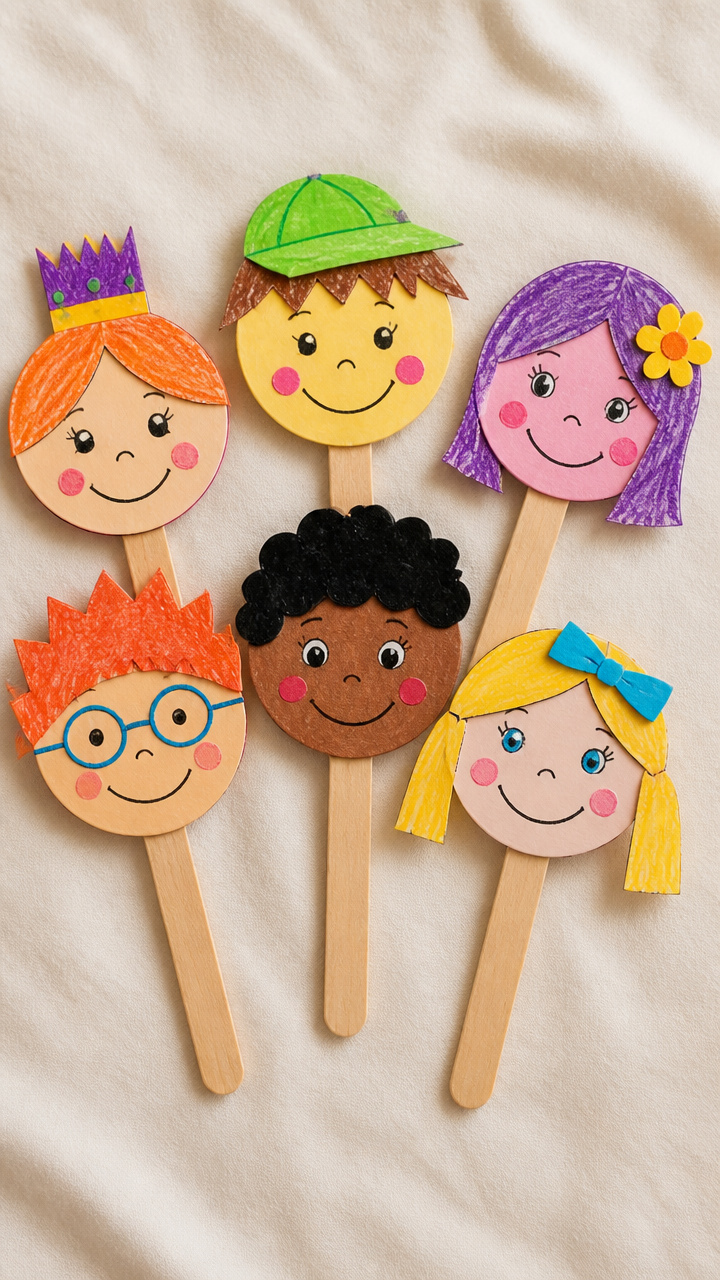
Simple puppets spark storytelling and dramatic play. Each child makes a character they can move and voice during showtime.
Materials Needed
- wooden popsicle sticks (1 per child)
- construction paper (assorted colors)
- crayons
- scissors (blunt tip)
- white school glue
- markers (washable, assorted colors)
- yarn scraps (various colors, 10cm length)
How to Make It
- Draw a face on construction paper using crayons, then cut it out with scissors. Make it larger than the stick width.
- Cut hair shapes from yarn or construction paper. Glue above the face to match the character’s style.
- Cut clothing pieces like collars or hats from colored paper. Attach with dabs of white school glue.
- Glue the back of the face to the top third of the popsicle stick. Hold for 10 seconds to set.
- Let dry completely for 20 minutes before using in a story circle.


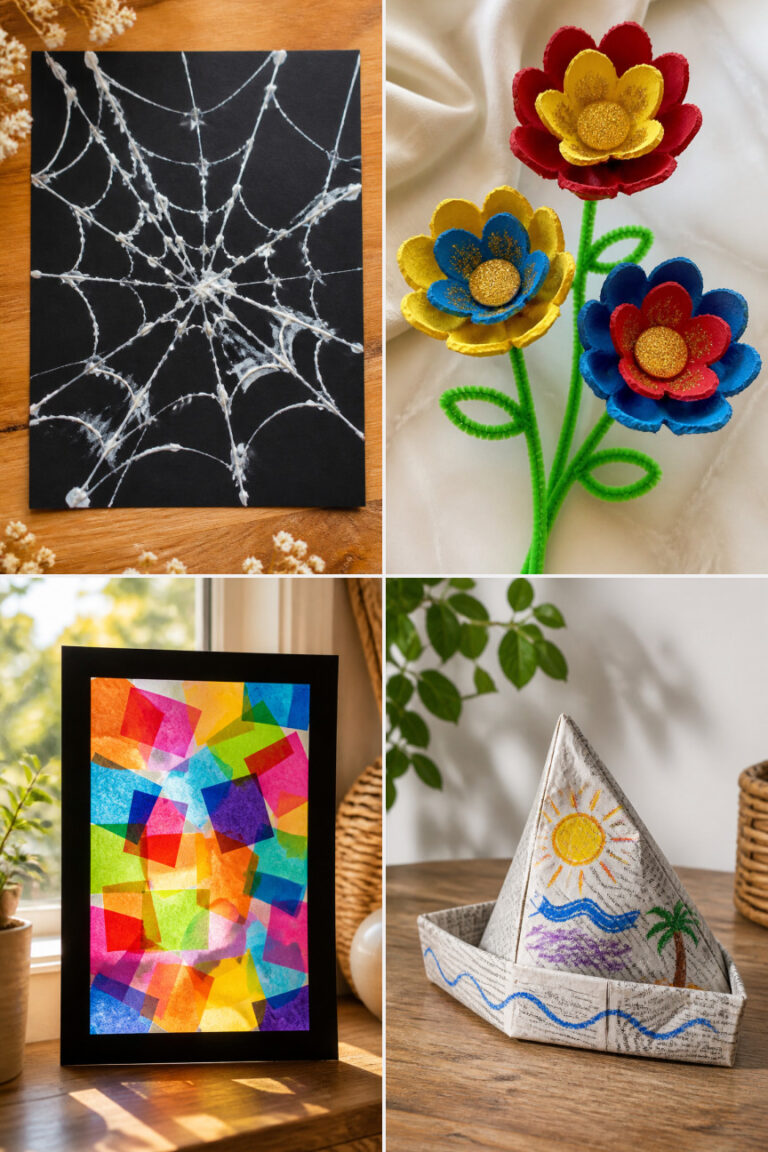
4. Tissue Paper Stained Glass
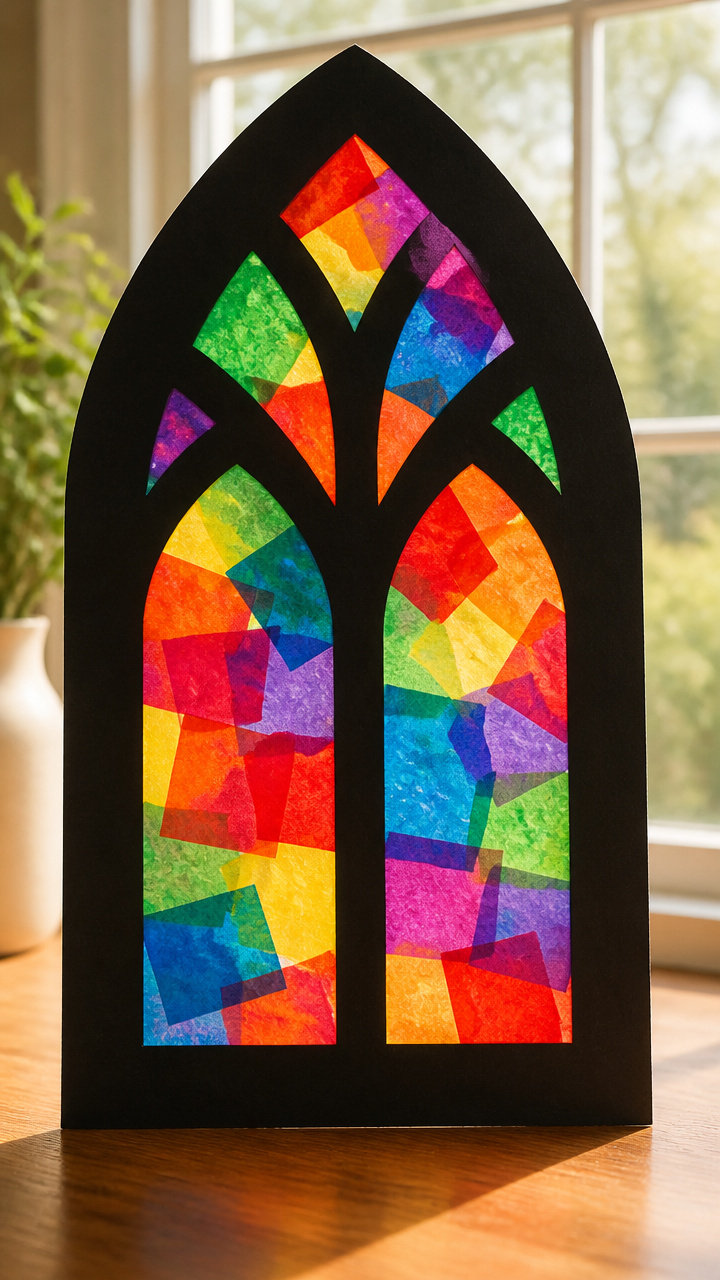
Colorful tissue paper windows catch the light and teach transparency. The final piece looks beautiful taped to a sunny window.
Materials Needed
- black construction paper (A4 size)
- tissue paper squares (15cm x 15cm, 6 colors)
- mod podge glue (matte finish)
- foam brush (2 inch)
- scissors (blunt tip)
- plastic tray (for glue)
- wax paper (same size as paper)
How to Make It
- Cut a window shape from the center of black construction paper using scissors. Leave a 2cm border around all edges.
- Tear tissue paper into 2cm pieces. Use at least three colors to fill the window space later.
- Brush a thin layer of mod podge inside the window opening. Work slowly to cover the entire surface.
- Press tissue pieces into the glue, covering the opening completely. Overlap slightly but avoid thick clumps.
- Seal with another layer of mod podge over the tissue. Cover with wax paper and press flat. Dry overnight.


5. Pasta Necklaces
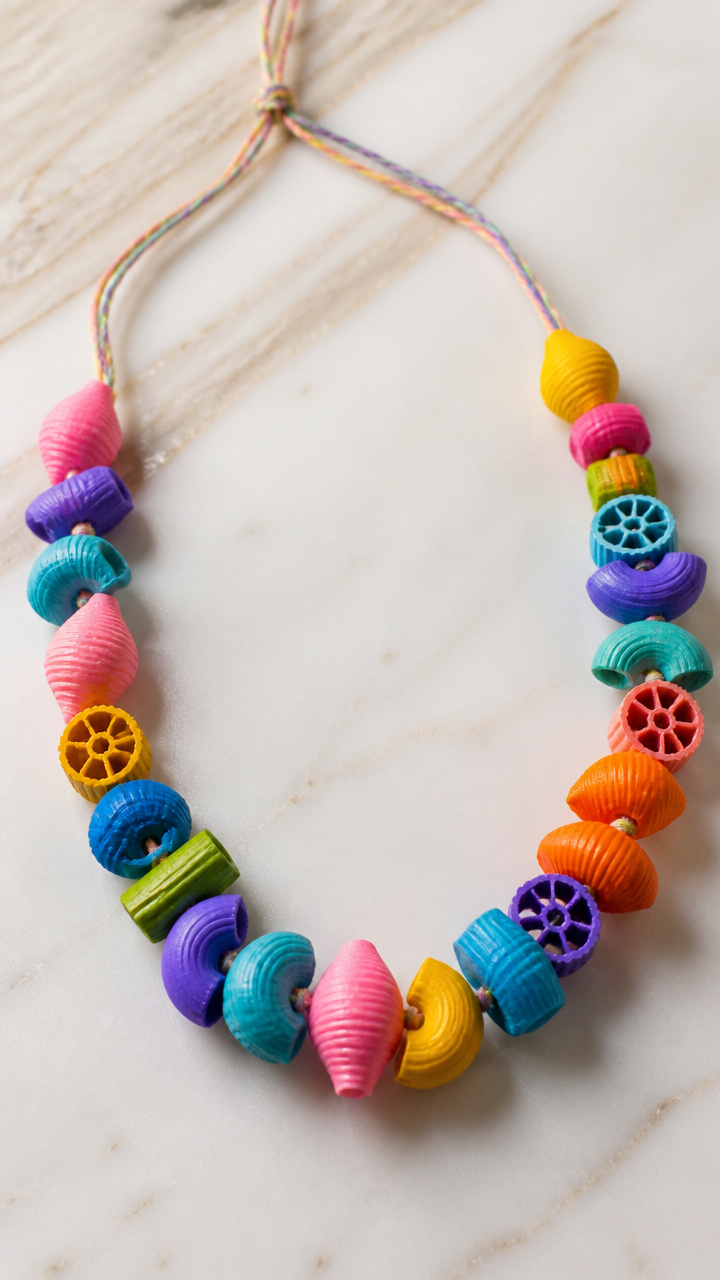
Shaped pasta strung on yarn builds hand-eye coordination. Each necklace becomes a wearable piece of art.
Materials Needed
- uncooked pasta (fun shapes like shells, elbows, wheels – 20 pieces per child)
- acrylic paint (3 bright colors)
- paint trays (disposable)
- paintbrushes (size 2)
- yarn (embroidery floss, 60cm per child)
- tape (masking tape)
- paper plates (for drying)
How to Make It
- Place pasta shapes in paint trays. Use size 2 brushes to coat each piece with acrylic paint. Try not to touch wet ones with fingers.
- Lay painted pasta on a paper plate to dry. Wait 30 minutes until fully dry and hard to the touch.
- Tape one end of the yarn to the table to hold it steady. Thread dried pasta pieces onto the yarn one by one.
- Continue until the necklace reaches desired length, leaving 5cm free at each end.
- Tie the ends together in a knot. Trim excess yarn if needed.


6. Handprint Butterflies
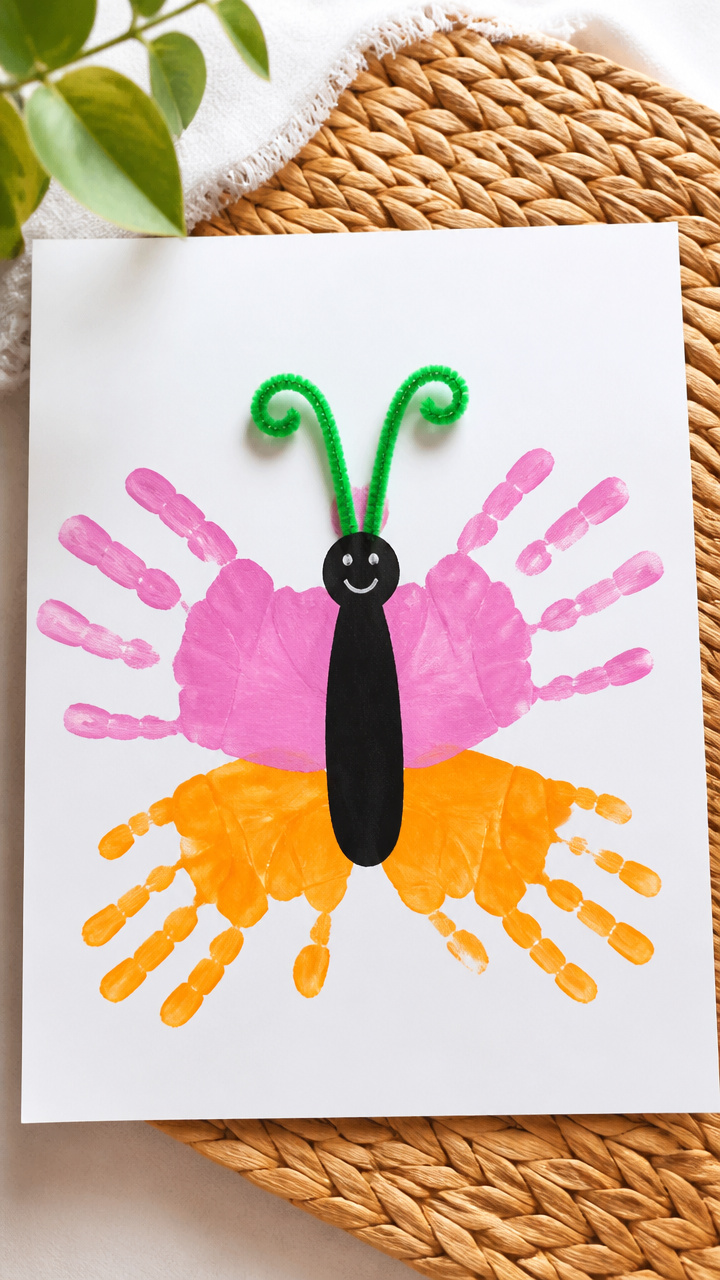
A painted handprint transforms into butterfly wings with added antennae. This keepsake shows growth year after year.
Materials Needed
- tempera paint (two colors per child)
- paint trays (small)
- A4 white drawing paper
- black marker (fine tip)
- green pipe cleaner (1 per child)
- paintbrush (for cleanup)
- wet wipes
How to Make It
- Press both palms into tempera paint, one color per hand. Make sure paint covers up to the wrist line.
- Press both hands side by side on white drawing paper, thumbs touching at the center. Lift straight up without smudging.
- Dip just the fingertips into a second color and press near the top of each handprint to make wing tips.
- Let the paint dry for 15 minutes. Draw a vertical body line between the handprints using the black marker.
- Twist a green pipe cleaner in half and glue the bent end at the top of the body for antennae.


7. Cardboard Tube Rockets
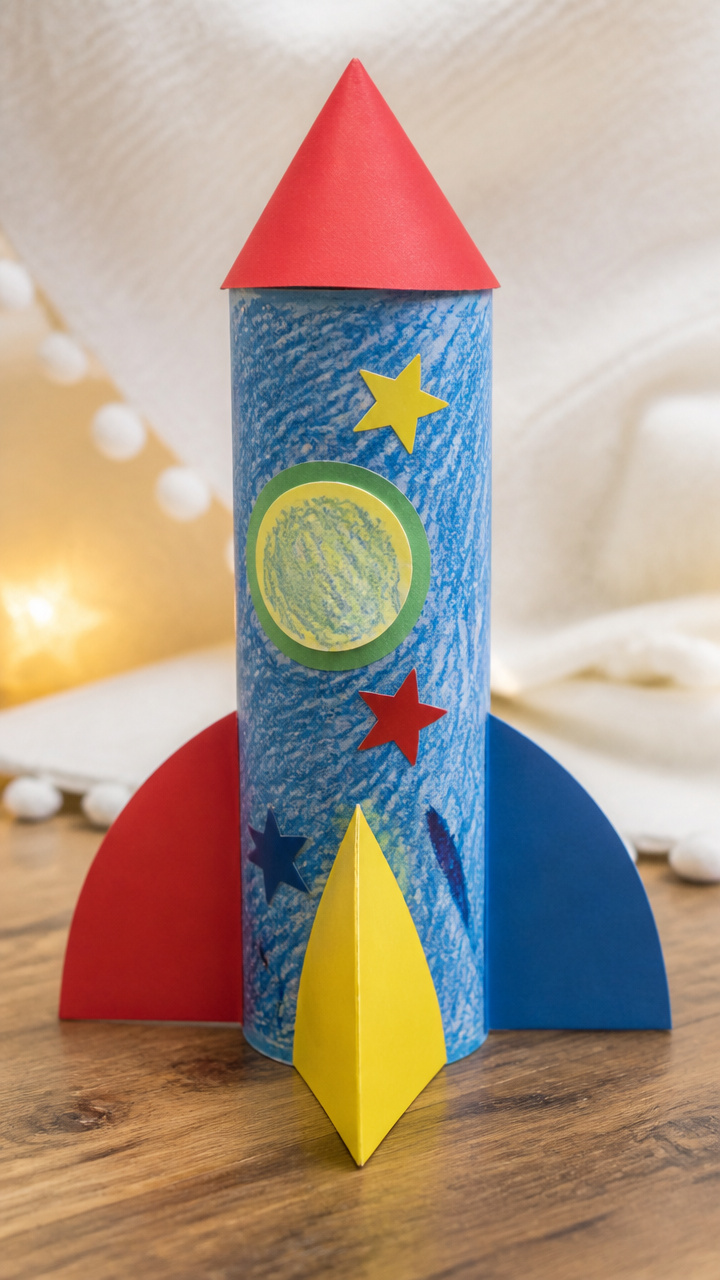
Toilet paper tubes become colorful rockets ready for blastoff. Kids love decorating and pretending to launch them.
Materials Needed
- empty toilet paper tubes (1 per child)
- construction paper (red, yellow, blue)
- crayons
- scissors (blunt tip)
- glue stick
- star stickers (assorted sizes)
- aluminum foil (10cm square per child)
How to Make It
- Wrap a toilet paper tube with construction paper using a glue stick. Overlap the edge and press to seal.
- Cut three triangular fins from leftover paper. Glue one to each side at the bottom of the tube.
- Draw flames on the bottom edge with crayons. Add star stickers around the body for decoration.
- Crumple a 10cm square of aluminum foil into a cone and press it gently onto the top of the tube.
- Let sit for 10 minutes so the foil stays in place during play.


8. Sponge Stamp Prints
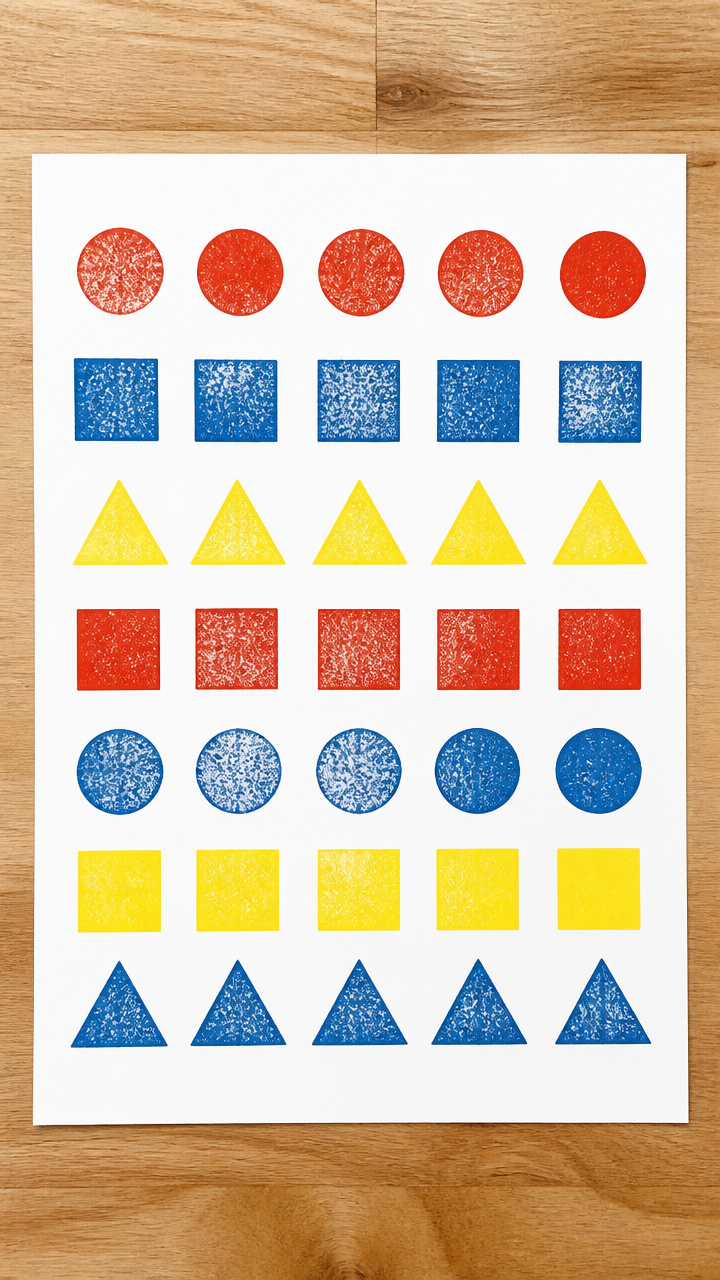
Cut sponges turn into custom stamps for bold patterned art. This activity teaches repetition and design spacing.
Materials Needed
- kitchen sponges (plain, non-scratch side used)
- scissors (sharp, adult-use only)
- tempera paint (3 primary colors)
- shallow trays (1 per color)
- A4 white paper (2 sheets per child)
- paper towels
How to Make It
- An adult cuts sponges into simple shapes like stars, circles, or squares. Use sharp scissors for clean edges.
- Pour a thin layer of each paint color into separate trays. Keep colors apart to avoid mixing.
- Press a sponge shape into one paint color. Tap once on paper towel to remove excess.
- Stamp the shape onto white paper with firm, even pressure. Leave space between prints for clarity.
- Repeat with different colors and shapes. Let dry flat for 15 minutes.


9. Glitter Jars
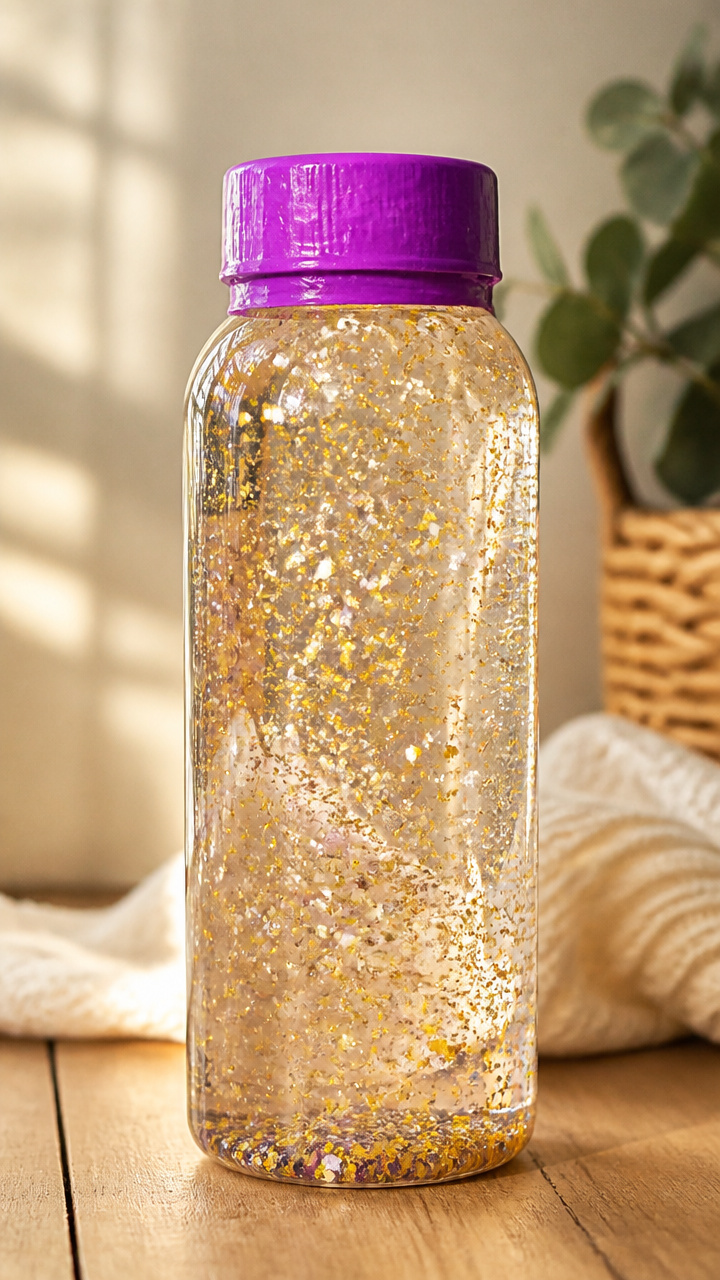
Shaking a glitter jar calms busy minds and creates mesmerizing motion. The slow fall helps kids focus and breathe.
Materials Needed
- clear plastic bottles with tight lids (250ml, 1 per child)
- warm water (200ml per bottle)
- clear school glue (60ml per bottle)
- glitter (fine, 1 tablespoon per bottle)
- glycerin (1 teaspoon per bottle)
- duct tape (colorful, wide)
How to Make It
- Fill each bottle with 200ml warm water. Add 60ml clear school glue and swirl gently to mix.
- Pour in 1 tablespoon of fine glitter and 1 teaspoon glycerin. Cap tightly.
- Shake well for 20 seconds until contents blend. Check for leaks and reinforce lid with duct tape.
- Wrap duct tape around the lid and neck for grip and decoration. Press smooth.
- Turn upside down and watch glitter fall slowly. Shake again when needed.


10. Leaf Rubbings
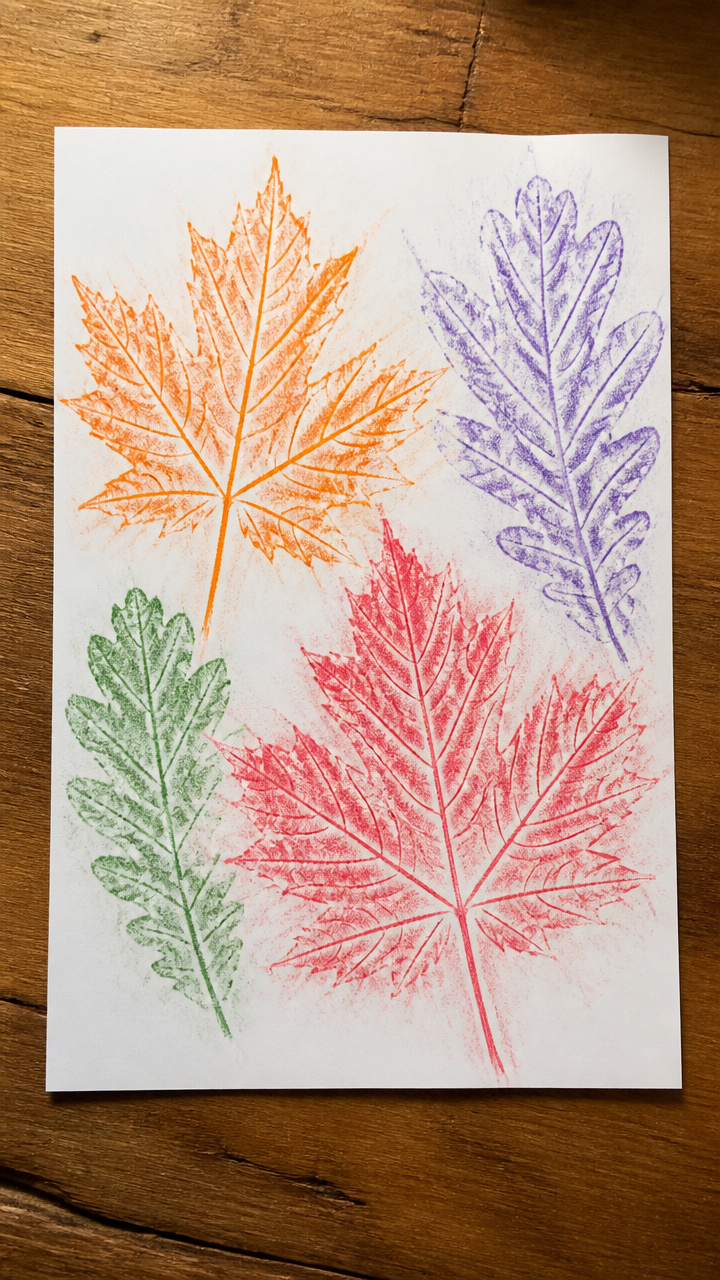
Real leaves reveal hidden textures through crayon rubbings. This outdoor-inspired craft connects nature and art.
Materials Needed
- fresh leaves (broad, flat types like maple or oak, 3 per child)
- white drawing paper (A4)
- crayons (wrappers removed)
- clipboard (1 per child)
- nature bag (to collect leaves)
How to Make It
- Place a leaf under the drawing paper on a clipboard. Choose a leaf with visible veins.
- Hold the paper still with one hand. Use the side of a peeled crayon to rub gently over the leaf area.
- Apply light, even pressure. Continue until the leaf shape and texture appear clearly.
- Slide the leaf to a new spot underneath and repeat with a different crayon color.
- Label the bottom with the leaf name and date using pencil.
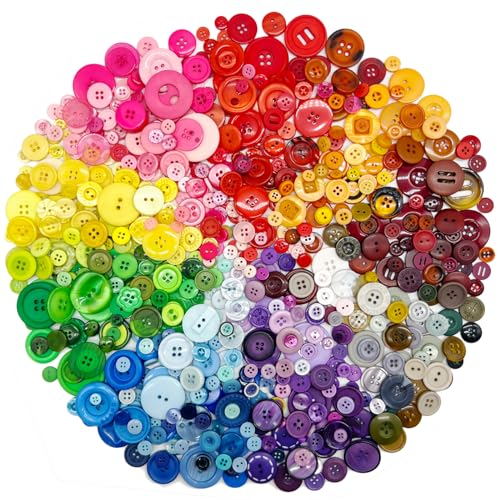
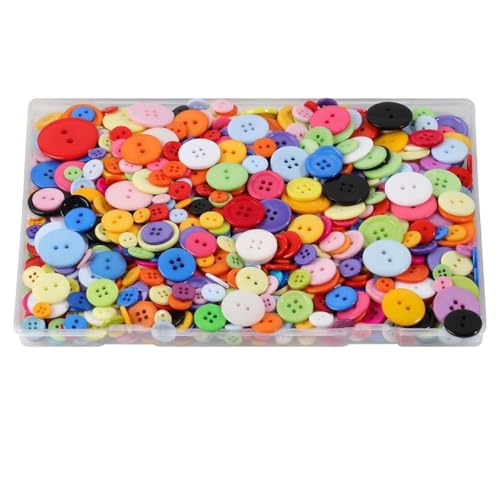
11. Button Flowers

Colorful buttons form petals around a central circle. This craft strengthens finger control and color matching.
Materials Needed
- green pipe cleaners (1 per child)
- assorted buttons (5 per flower, various sizes and colors)
- yellow felt sheets
- round hole punch (2cm diameter)
- craft glue
- scissors (blunt tip)
- glue mat
How to Make It
- Use a hole punch to cut circles from yellow felt. One circle per flower.
- Lay the yellow circle on a glue mat. Apply small dabs of craft glue around the edge.
- Press one button onto each glue spot. Use five buttons total to form a flower shape.
- Bend the top inch of a green pipe cleaner into a small loop. Glue the straight end to the back center of the flower.
- Let dry for 20 minutes. The loop allows hanging on a string or fridge.

12. Feather Fish
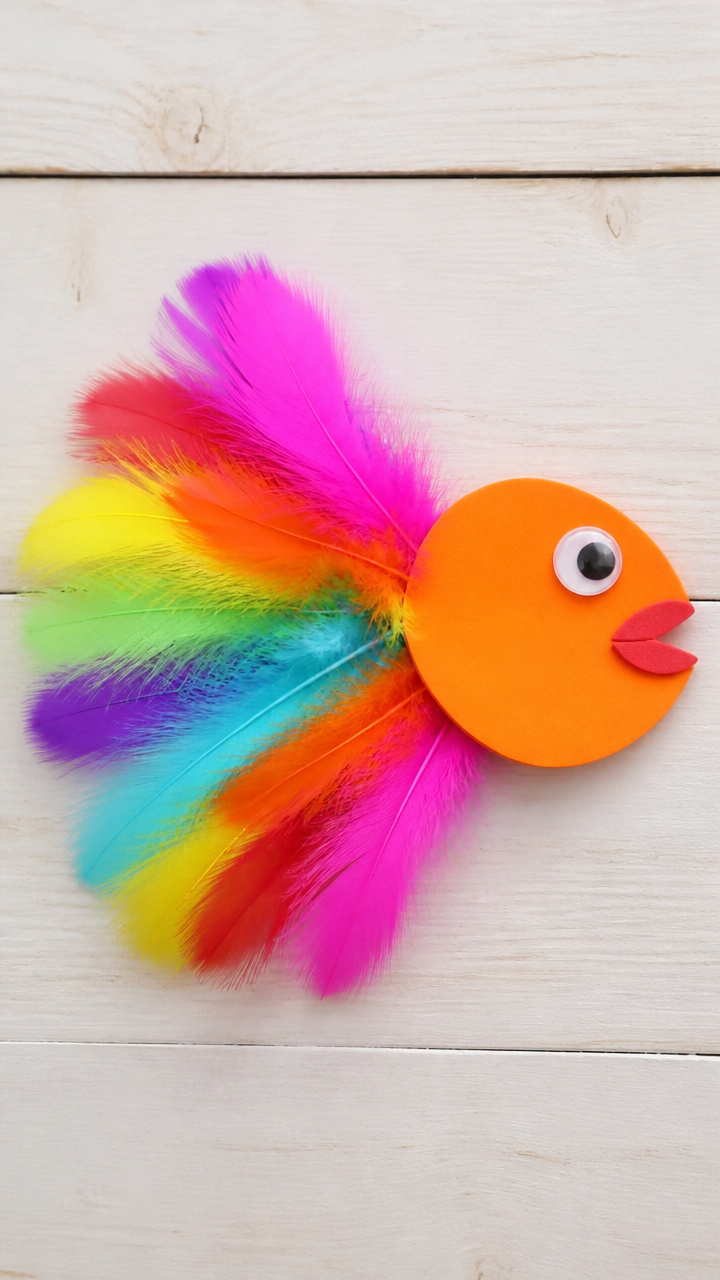
Soft feathers create flowing fish tails with personality. Bright colors invite storytelling about ocean life.
Materials Needed
- orange craft foam (1 sheet)
- feathers (assorted colors, 3 per child)
- wiggly eyes (12mm, 1 pair per child)
- white school glue
- scissors (blunt tip)
- googly mouths (optional, 1 per child)
How to Make It
- Cut a fish body shape from orange foam using scissors. Make it wide at the front and tapered at the tail.
- Apply glue to the back third of the fish body. Avoid putting glue on the head area.
- Press three feathers into the glue with their quills facing the tail. Space them evenly.
- Glue on one pair of wiggly eyes near the front. Add a googly mouth just below if using.
- Set aside to dry for 15 minutes on a flat surface.


13. Playdough Shapes
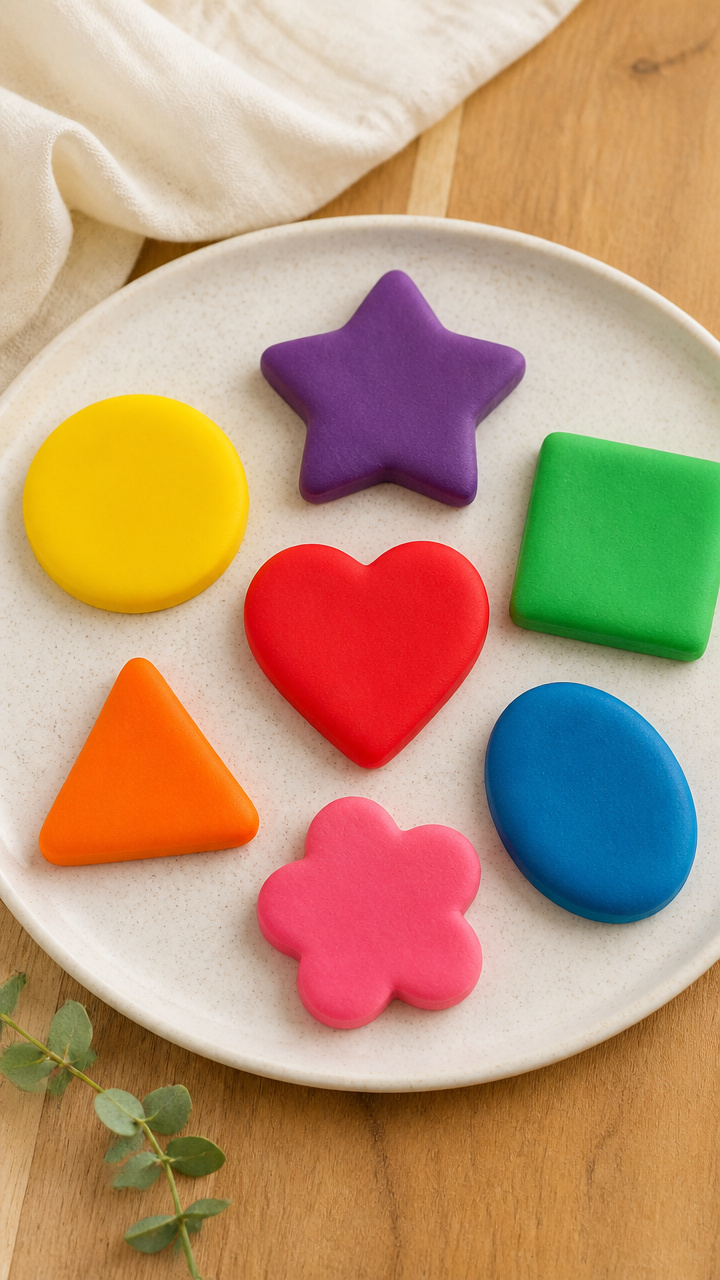
Homemade playdough molds into endless creations with cookie cutters. The soft texture invites sensory exploration.
Materials Needed
- flour (1 cup)
- salt (1/2 cup)
- cream of tartar (1 teaspoon)
- vegetable oil (1 tablespoon)
- water (1/2 cup)
- food coloring (3 drops per batch)
- saucepan
- wooden spoon
- cookie cutters (simple shapes)
How to Make It
- Mix flour, salt, and cream of tartar in a saucepan. Stir with a wooden spoon until blended.
- Add vegetable oil and water. Cook over medium heat, stirring constantly for 3 to 5 minutes until it forms a ball.
- Remove from heat. Knead in 3 drops of food coloring on a floured surface until color is even.
- Cool for 10 minutes until safe to touch. Store in an airtight container if not using immediately.
- Roll out dough and press cookie cutters into it. Lift carefully to see the shape.


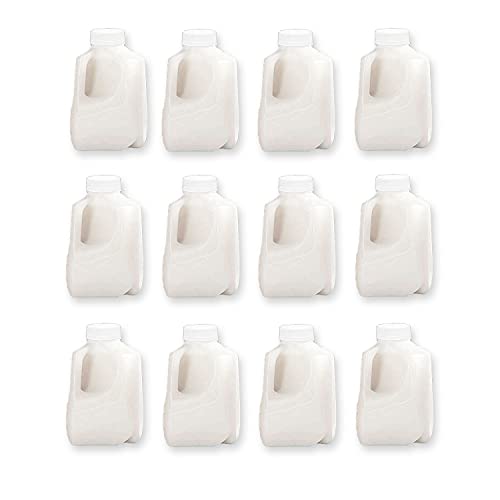
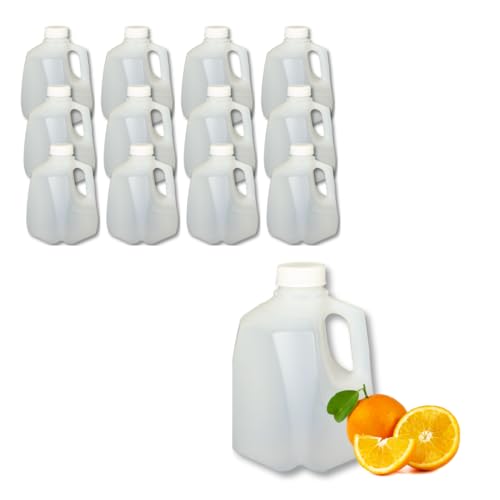
14. Milk Jug Birds

Cleaned milk jugs become sturdy bird bodies with flapping wings. Painting and assembly build persistence and pride.
Materials Needed
- clean plastic milk jugs (1 quart, 1 per child)
- acrylic paint (blue, red, yellow)
- paintbrushes (size 4)
- colored construction paper
- scissors (blunt tip)
- white school glue
- wiggly eyes (15mm, 1 pair per child)
How to Make It
- Rinse and dry a milk jug. Remove label and let sit overnight to ensure dryness.
- Paint the entire jug with one base color using a size 4 brush. Let dry for 30 minutes on its side.
- Cut two wings from construction paper. Shape them like ovals with curved edges.
- Glue one wing to each side of the jug, just below the handle. Press firmly for 10 seconds.
- Glue on wiggly eyes and draw a beak with marker. Let dry completely before playing.

15. Rainbow Salt Art
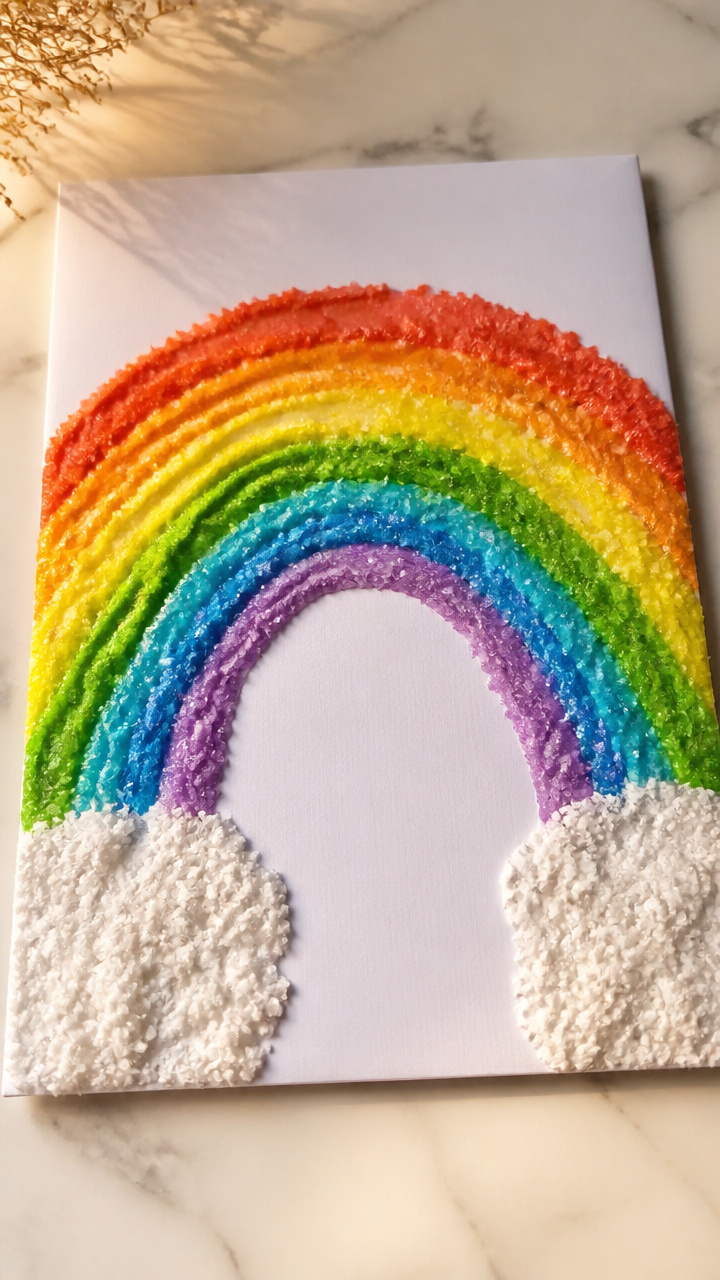
Colored salt sticks to glue lines in vibrant streaks. This tactile project teaches color order and careful pouring.
Materials Needed
- table salt (1 cup)
- food coloring (red, orange, yellow, green, blue, purple)
- ziplock bags (sandwich size, 6)
- white cardstock (A4)
- glue stick
- paintbrush (size 1)
- paper cups (6 per child)
How to Make It
- Divide salt into 6 ziplock bags. Add 2 drops of one food coloring to each bag. Seal and shake gently.
- Pour each colored salt into a separate paper cup. Let dry overnight on wax paper if damp.
- Draw a rainbow arc on cardstock with a glue stick. Make thick, continuous lines for each band.
- Sprinkle red salt over the outermost glue line. Tap off excess into a bowl.
- Repeat with orange, yellow, green, blue, and purple in order. Let dry 10 minutes before display.


16. Yarn-Wrapped Letters
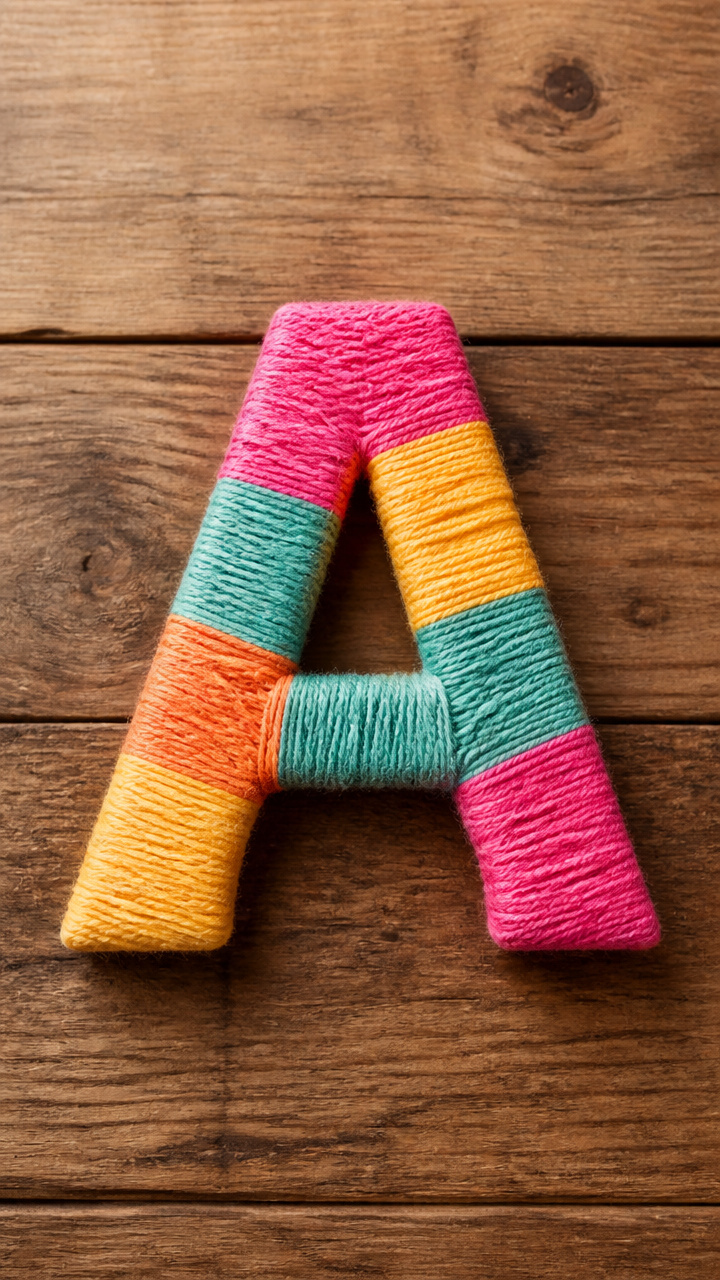
Thick yarn wraps around cardboard letters to form textured names. This personalized craft supports letter recognition.
Materials Needed
- cardboard letters (uppercase, 1 per child)
- yarn (thick, 1 meter per letter)
- white school glue
- paintbrush (size 1)
- tray (to catch drips)
How to Make It
- Place a cardboard letter on a tray. Brush a thin layer of white school glue along the front edge.
- Press the end of the yarn into the glue at the bottom. Hold for 5 seconds to secure.
- Wrap the yarn tightly around the letter, following the shape. Overlap slightly to cover all surfaces.
- When reaching the top, dab glue on the end and press the yarn down. Trim excess with scissors.
- Let sit for 20 minutes until the glue sets completely.


17. Cereal Box Weaving

Recycled cereal boxes become looms for colorful paper strips. Weaving teaches pattern and hand strength.
Materials Needed
- empty cereal box (front panel only)
- construction paper (3 colors)
- scissors (blunt tip)
- ruler
- pencil
- glue stick
- hole punch (single)
How to Make It
- Cut the front of a cereal box into a 15cm x 15cm square. Use ruler and pencil to mark edges.
- Cut slits 1cm apart along the top and bottom edges, 1cm deep. Punch holes at each slit end.
- Cut 1cm wide strips from construction paper, 20cm long. Use three colors for pattern options.
- Thread one strip vertically through the holes to form warp lines. Tape ends to the back.
- Weave horizontal strips over and under the vertical threads. Push up gently with fingers after each row.


18. Bubble Wrap Octopus
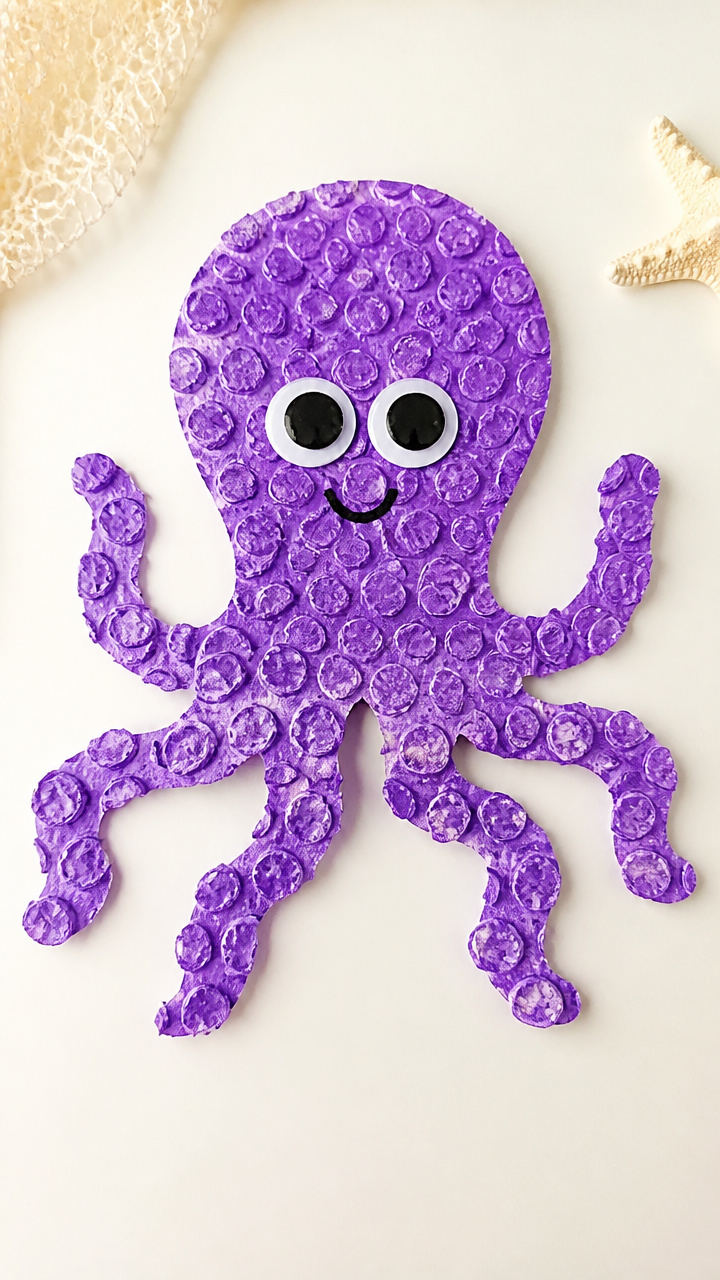
Bubble wrap tentacles wiggle and pop with fun texture. This sea creature brings laughter and creativity.
Materials Needed
- bubble wrap (15cm x 15cm per child)
- purple paint
- paintbrush (size 4)
- white drawing paper (A4)
- wiggly eyes (12mm, 1 pair per child)
- glue stick
- black marker
How to Make It
- Paint one side of bubble wrap with purple paint using a size 4 brush. Cover all bubbles evenly.
- Press the painted side down onto white drawing paper. Lift straight up to reveal the print.
- Repeat with the same sheet to make eight tentacle arms. Arrange them in a fan under the main body.
- Glue wiggly eyes to the top center of the body. Draw a smiling mouth with black marker.
- Let dry for 15 minutes. Gently pop any remaining bubbles for extra fun.


19. Clothespin Alligators
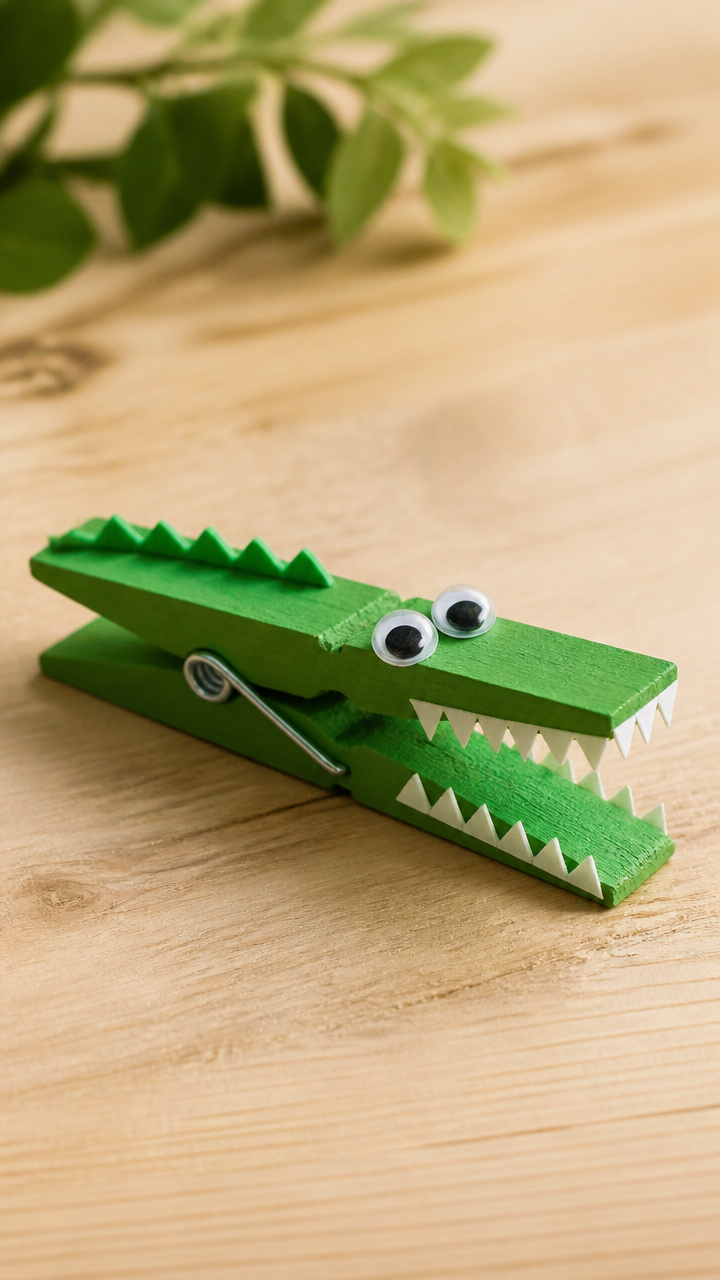
Wooden clothespins open and close like snapping alligator jaws. Adding details turns them into playful characters.
Materials Needed
- wooden clothespins (1 per child)
- green acrylic paint
- paintbrush (size 2)
- white gel pen
- googly eyes (8mm, 1 pair per child)
- green craft foam
- scissors (blunt tip)
How to Make It
- Paint the entire clothespin green using a size 2 brush. Include both the body and the clip ends.
- Let dry for 20 minutes on its side. Turn once halfway to ensure full coverage.
- Cut four small legs from green foam. Shape them like triangles with rounded tips.
- Glue two legs to each side of the clothespin body. Press and hold for 5 seconds each.
- Add googly eyes near the top. Draw teeth on the clip part with a white gel pen.


20. Egg Carton Caterpillars
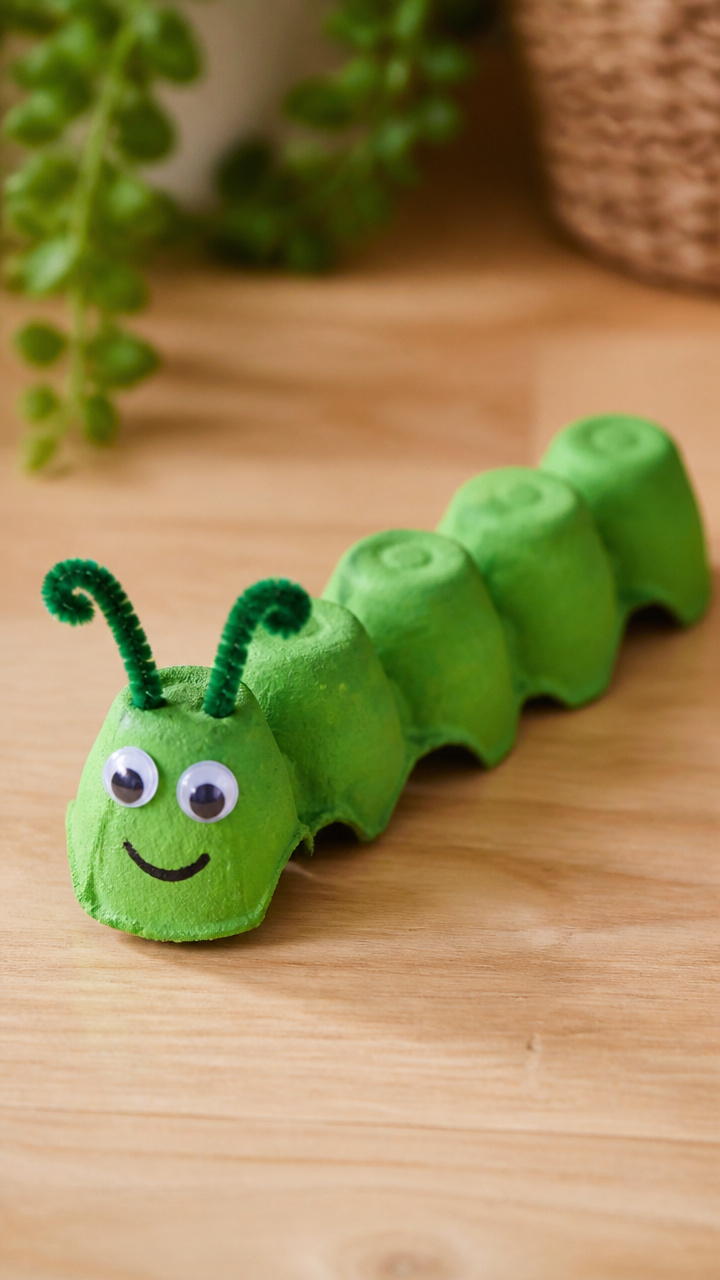
Individual egg cups link together to form bumpy caterpillars. Painting and connecting build sequencing skills.
Materials Needed
- cardboard egg carton (1 per child)
- scissors (blunt tip)
- green paint (tempera)
- paintbrush (size 3)
- wiggly eyes (10mm, 1 pair per child)
- pipe cleaners (green, 1 per child)
- white school glue
How to Make It
- Cut five connected cups from the egg carton using blunt scissors. Trim uneven edges.
- Paint all five cups green with a size 3 brush. Cover every side and let dry for 25 minutes.
- Glue wiggly eyes to the front cup. Position them just below the rim.
- Bend a green pipe cleaner in half and glue the folded end to the top of the head for antennae.
- Link additional painted sections by gluing the sides together. Let dry flat for 20 minutes.


You’ve got everything you need to start creating today. Grab a few supplies and let your child’s imagination lead the way.