15 Fun Letter B Crafts for Preschoolers
Introducing the letter B can be a joyful experience when it’s wrapped in color, texture, and hands-on fun. These crafts invite little learners to build fine motor skills while discovering words that begin with B—no worksheets required.
Each idea is designed to be simple, engaging, and doable with everyday supplies. You’ll find painting, tearing, sticking, and even squishing, all centered around one friendly letter.
1. Bumblebee Paper Plate Craft
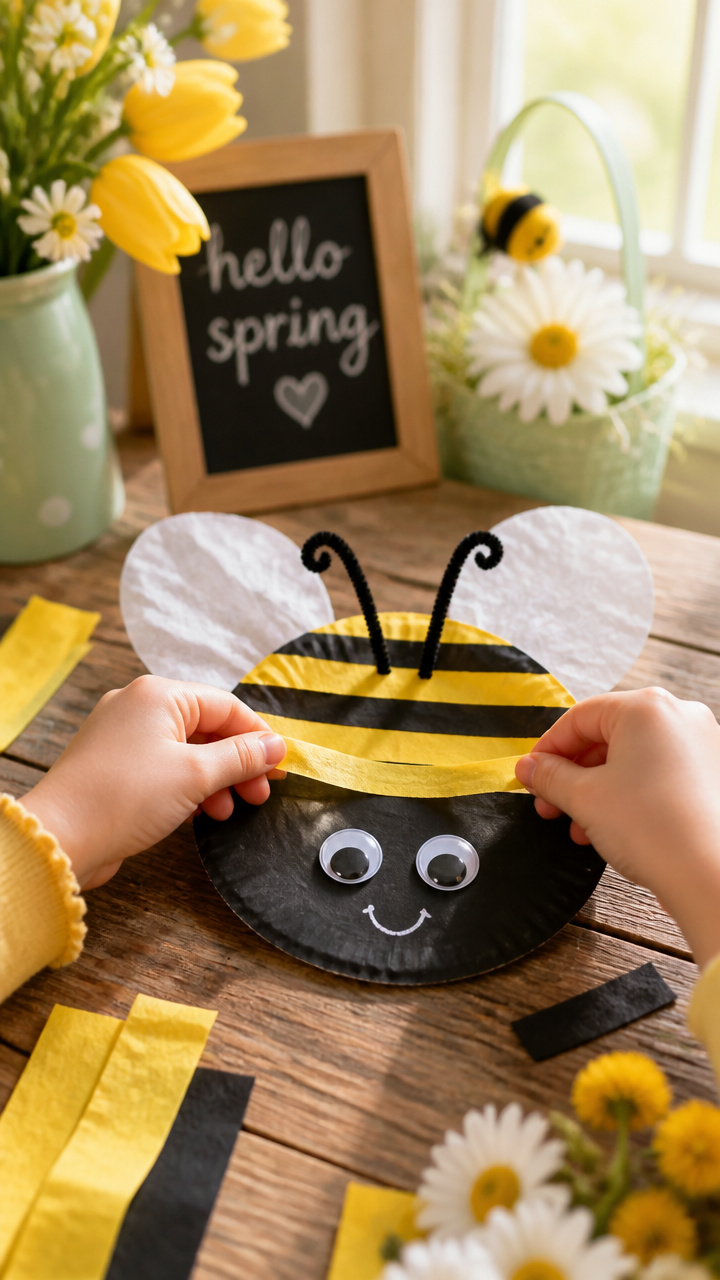
Bright yellow paper plates become buzzing bumblebees with hand-cut wings and pipe cleaner antennae. This craft builds scissor control and encourages pretend play after completion.
Materials Needed
- 1 yellow paper plate per child
- 2 black craft foam sheets
- 1 white glue stick
- 2 black pipe cleaners
- 1 pair of safety scissors
- 6 googly eyes
- 1 black fine-tip marker
How to Make It
- Cut the paper plate in half using safety scissors, then set aside one half for another project.
- Glue two oval shapes cut from black foam onto the curved edge of the plate half to form stripes.
- Draw a smiling face below the stripes with the black marker and attach six googly eyes above it.
- Poke two small holes just above the face and thread a pipe cleaner through each to make antennae, bending the ends into curls.


2. Button 'B' Mosaic
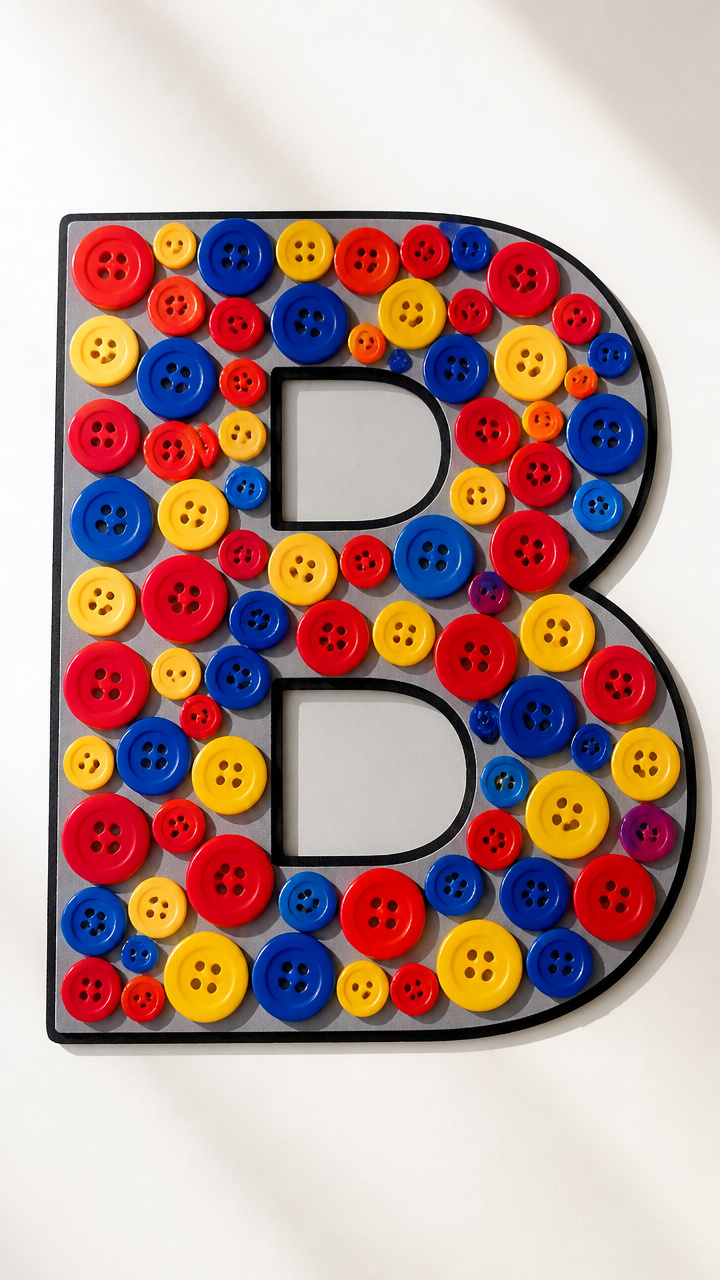
A large printed letter B becomes a colorful mosaic when preschoolers glue bright buttons inside its outline. This activity strengthens pincer grasp and color sorting skills.
Materials Needed
- 1 sheet of A4 light gray cardstock
- 1 thick black marker
- 30 assorted buttons (red, blue, yellow)
- 1 small bowl of white school glue
- 1 plastic spoon
- 1 paintbrush
How to Make It
- Draw a large uppercase B on the cardstock with the black marker, filling the page as much as possible.
- Use the paintbrush to spread a thin layer of glue inside the lines of the B.
- Spoon buttons into a bowl and let children pick them up one at a time with their fingers, placing them side by side to fill the glued area.
- Let dry flat overnight before displaying.


3. Banana Collage with Tissue Paper
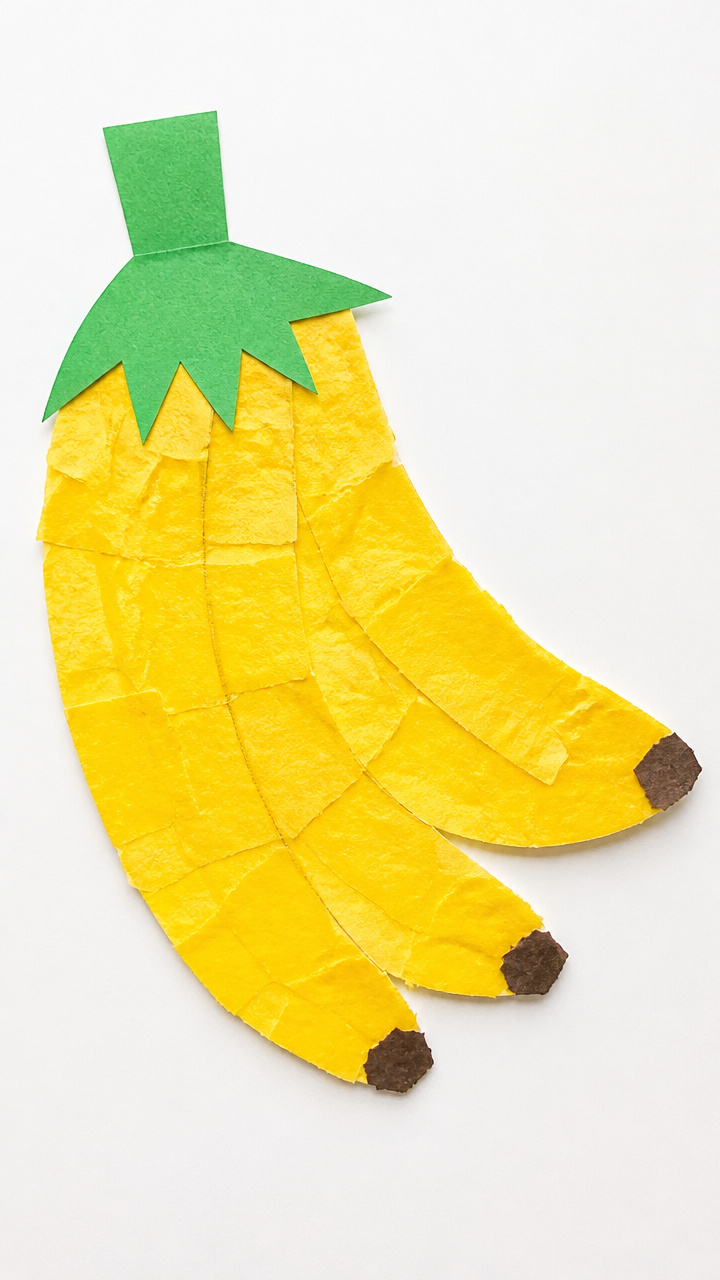
Fuzzy yellow tissue paper transforms into ripe bananas hanging from a construction paper tree. The soft texture invites sensory exploration and gentle tearing practice.
Materials Needed
- 1 sheet of green construction paper
- 1 sheet of yellow tissue paper
- 1 brown crayon
- 1 bottle of white school glue
- 1 pair of child-safe scissors
- 1 pencil
How to Make It
- Draw a short trunk and two upward branches on the green paper using the brown crayon.
- Tear the yellow tissue into 2-inch squares, encouraging slow pinching motions for fine motor development.
- Dab glue along the ends of the branches and press tissue pieces in a cluster to resemble bananas.
- Let dry completely before adding a label that says 'B is for Banana' in block letters.


4. Blotter Butterfly Art
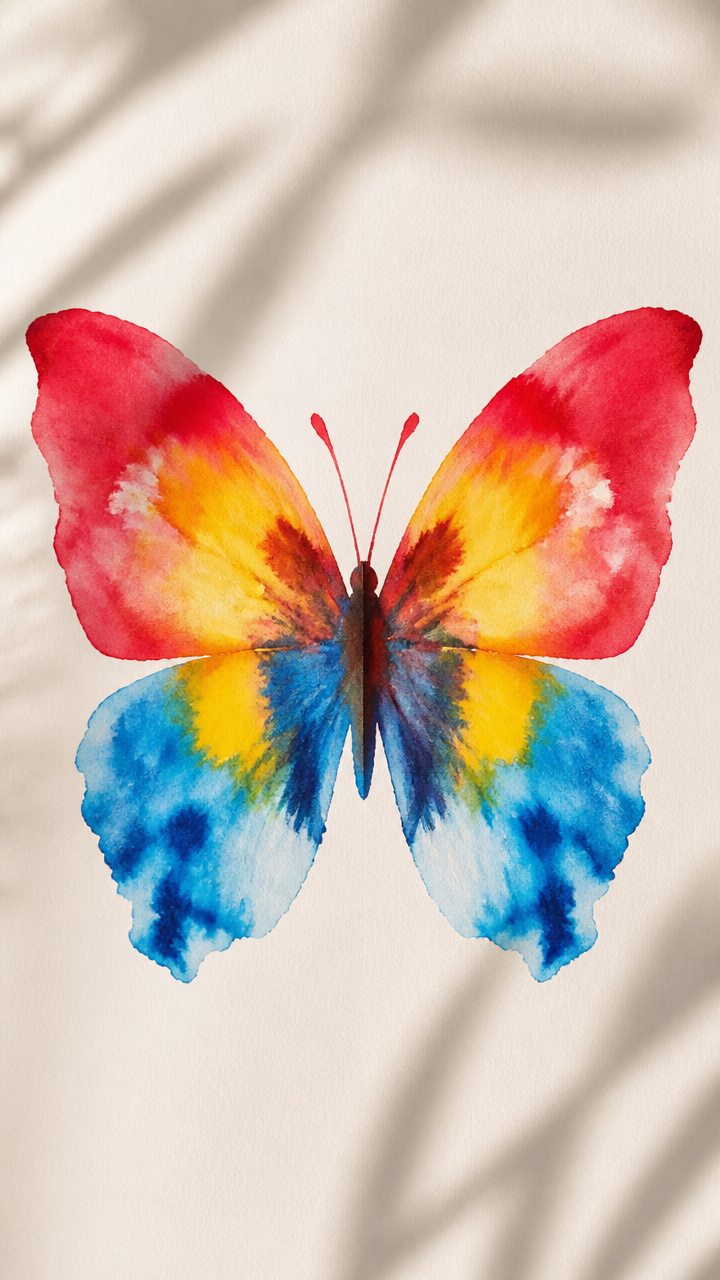
Folded paper and wet paint create symmetrical butterfly wings through the magic of blotting. This open-ended art piece teaches balance and introduces color mixing.
Materials Needed
- 1 sheet of absorbent watercolor paper
- 3 small bowls of liquid watercolor (red, yellow, blue)
- 1 pipette
- 1 clothespin
- 1 tray or baking sheet
How to Make It
- Fold the watercolor paper in half vertically and crease firmly.
- Use the pipette to drop red and yellow paint near the folded edge on one side only.
- Press the two halves together firmly, then gently rub over the surface with your palm.
- Unfold the paper to reveal a symmetrical butterfly shape and clip it upright on a tray to dry using the clothespin.


5. Brown Bear Handprint Portrait
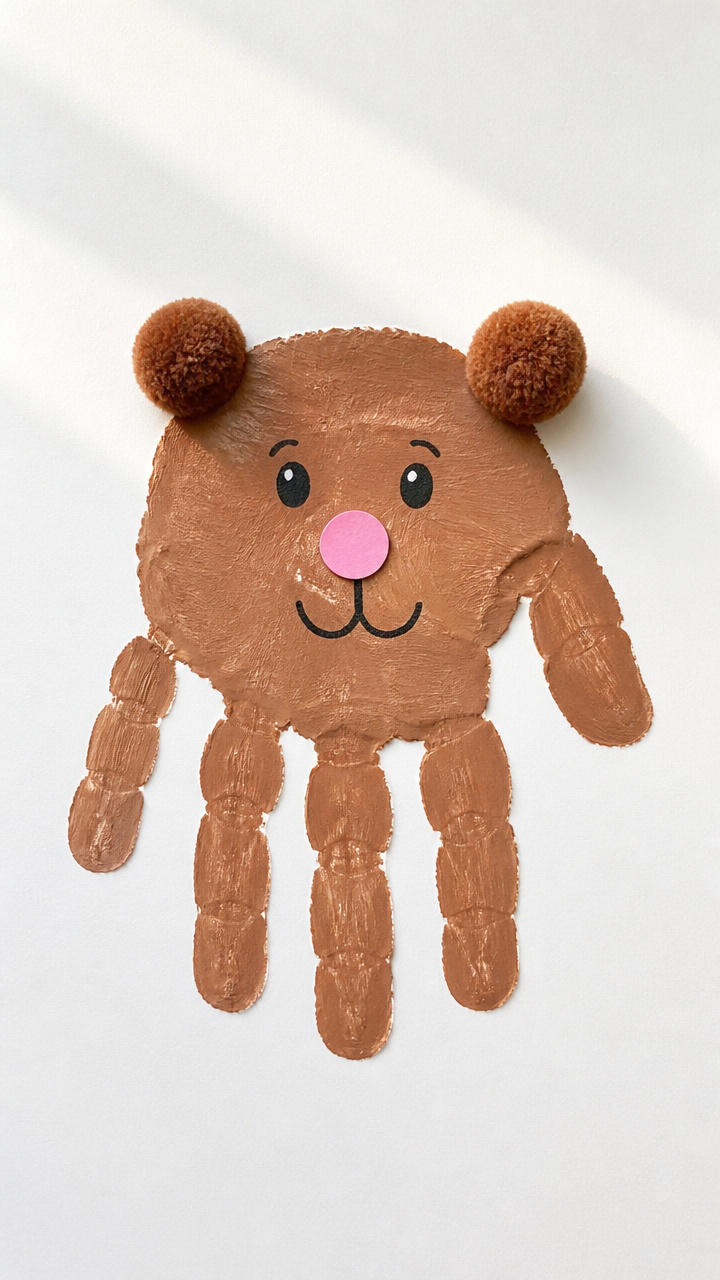
A child’s handprint becomes the bear’s body in this keepsake portrait made with brown paint and simple facial features. It's personal, memorable, and celebrates growth.
Materials Needed
- 1 sheet of A4 white drawing paper
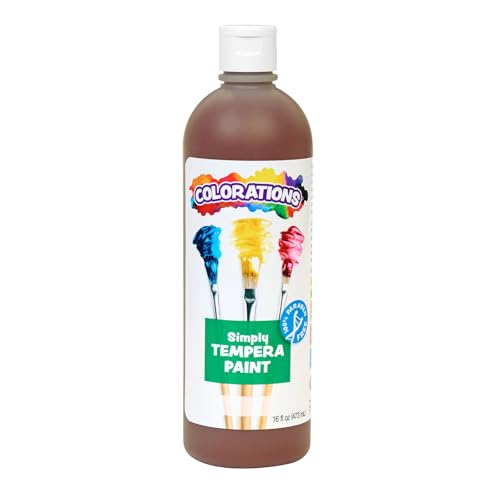
- 1 small jar of brown tempera paint
- 1 paintbrush
- 1 black fine-tip marker
- 1 pink sticker dot (for nose)
- 2 small brown pom-poms
How to Make It
- Paint the child’s palm and all fingers with brown tempera using the brush, coating evenly without drips.
- Press the hand firmly on the lower half of the paper, fingers pointing up to form the bear’s body and legs.
- Once dry, draw two small ears on top with the marker and glue a pom-pom to each.
- Add the pink nose dot and draw eyes and a mouth below it.

6. Beaded Bracelets with 'B' Letters
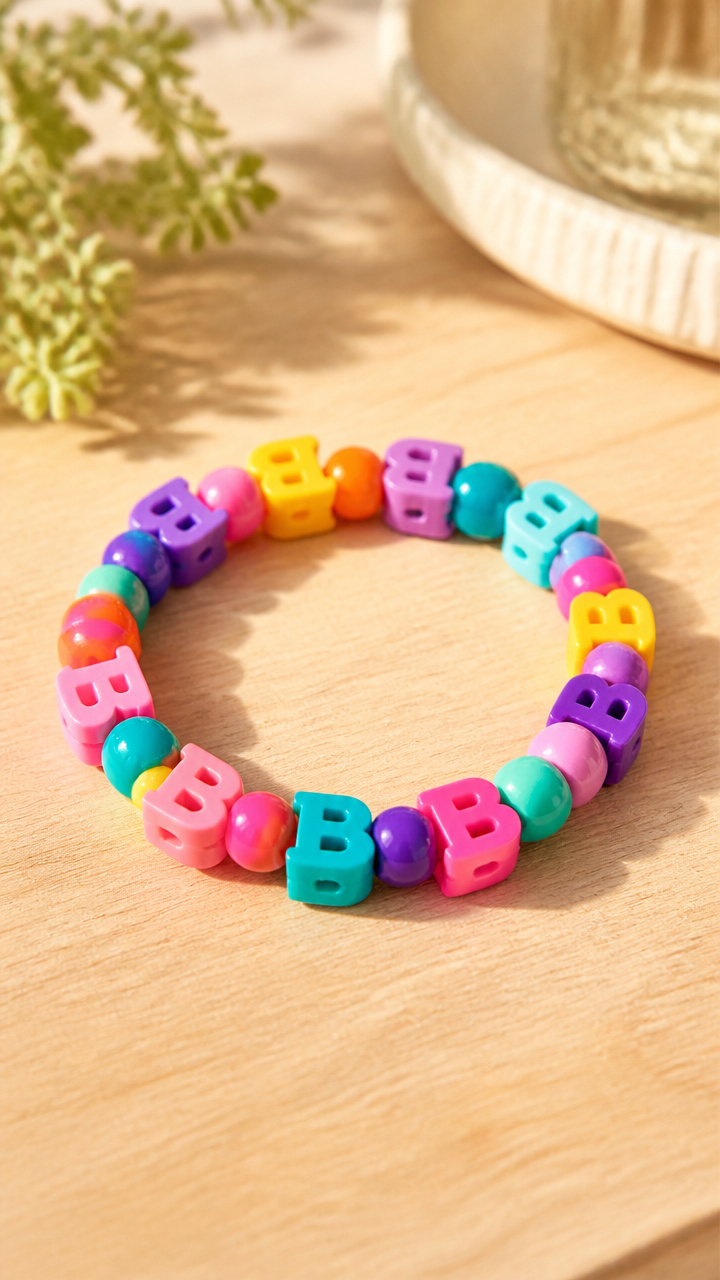
Large plastic letter beads shaped like B are strung with colorful spacers to make wearable name jewelry. Threading builds focus and hand-eye coordination.
Materials Needed
- 8 large plastic B-shaped beads per child
- 12 assorted round plastic beads per child
- 1 shoelace per child (45 cm long)
- 1 piece of masking tape
How to Make It
- Tie a knot at one end of the shoelace and wrap a small piece of masking tape around it to form a stiff tip.
- Thread beads onto the shoelace in any order, making sure to include at least four B beads.
- Continue until the lace is nearly full, leaving 5 cm at the end.
- Tie the two ends together in a double knot to form a bracelet.


7. Bubble Wrap Bubble Letters
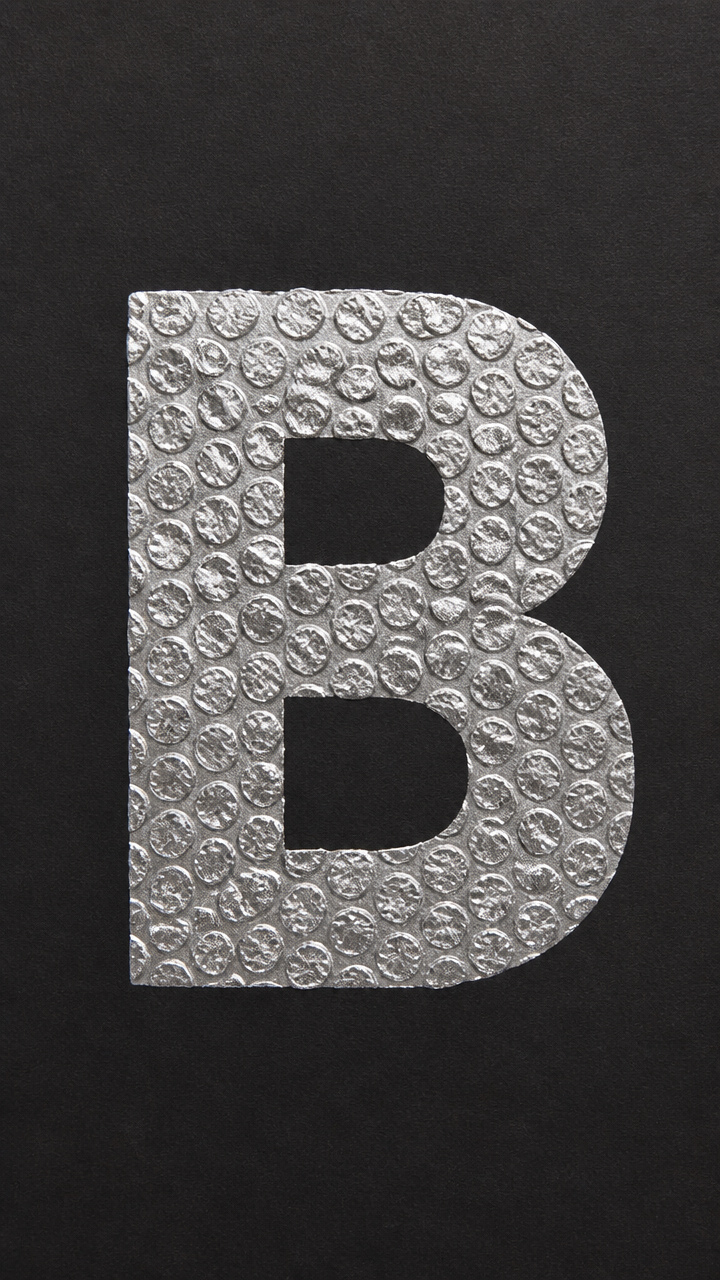
Cut bubble wrap into the shape of a B and use it as a stamp to make bubbly textured prints. The popping sensation adds fun to painting time.
Materials Needed
- 1 sheet of used bubble wrap
- 1 pair of scissors
- 1 sheet of A4 black cardstock
- 1 roller (foam, 5 cm wide)
- 1 tray of silver acrylic paint
How to Make It
- Cut a large uppercase B out of the bubble wrap using scissors, following a drawn template on top.
- Place the black cardstock on a flat surface and pour silver paint onto the tray.
- Roll paint evenly over the bubbled side of the B shape using the foam roller.
- Press the painted side firmly onto the cardstock and lift straight off to reveal a shiny textured letter.


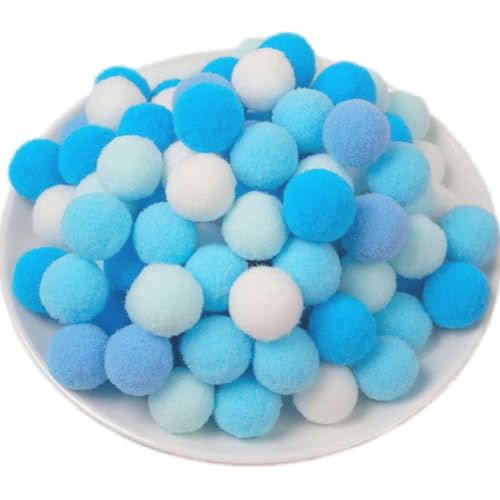
8. Bird Nest with Twigs
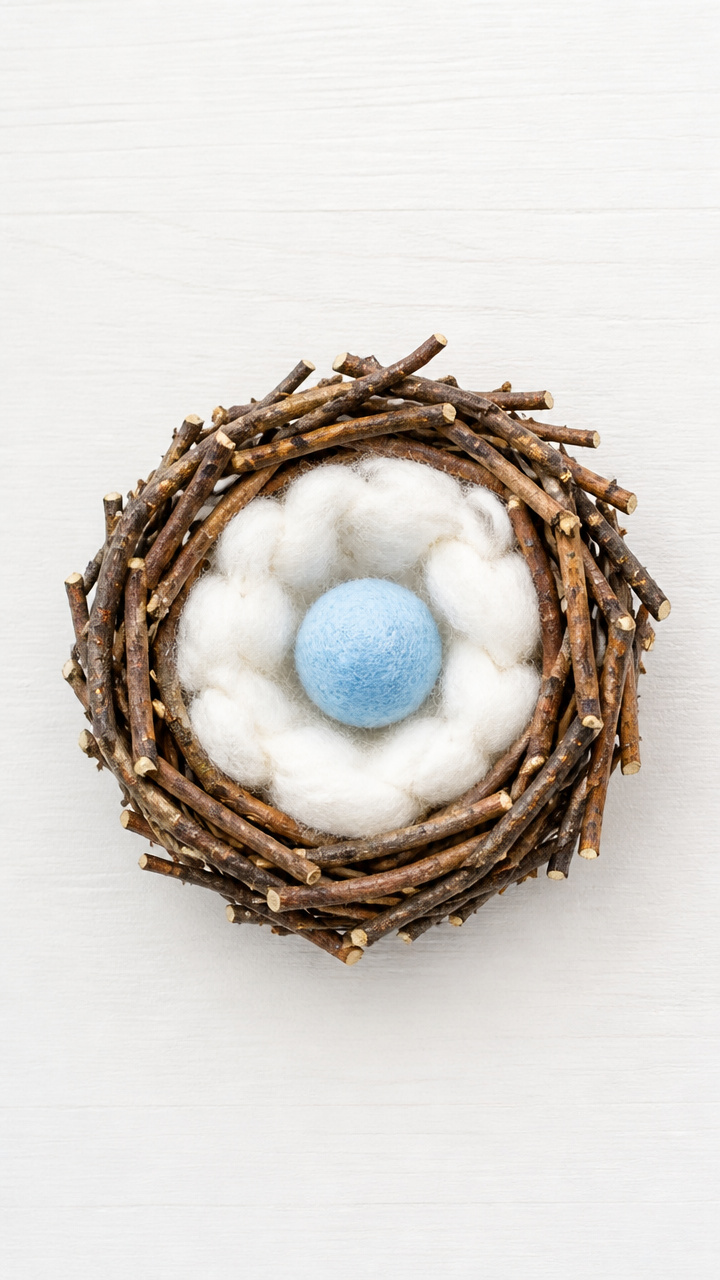
Real twigs are woven into a tiny nest around a cotton-lined center where a blue pom-pom egg rests. This nature-based craft supports storytelling and quiet focus.
Materials Needed
- 10 small twigs (10–12 cm long)
- 1 tablespoon of craft glue
- 1 cotton ball
- 1 blue pom-pom (2 cm)
- 1 small cardboard circle (8 cm diameter)
How to Make It
- Lay five twigs in a star pattern across the cardboard circle, overlapping slightly at the center.
- Weave the remaining five twigs over and under the star to form a basket weave base.
- Dot glue where each twig crosses and let sit for 5 minutes to set.
- Flatten the cotton ball into a cup shape, place it in the center, and rest the blue pom-pom inside as the egg.


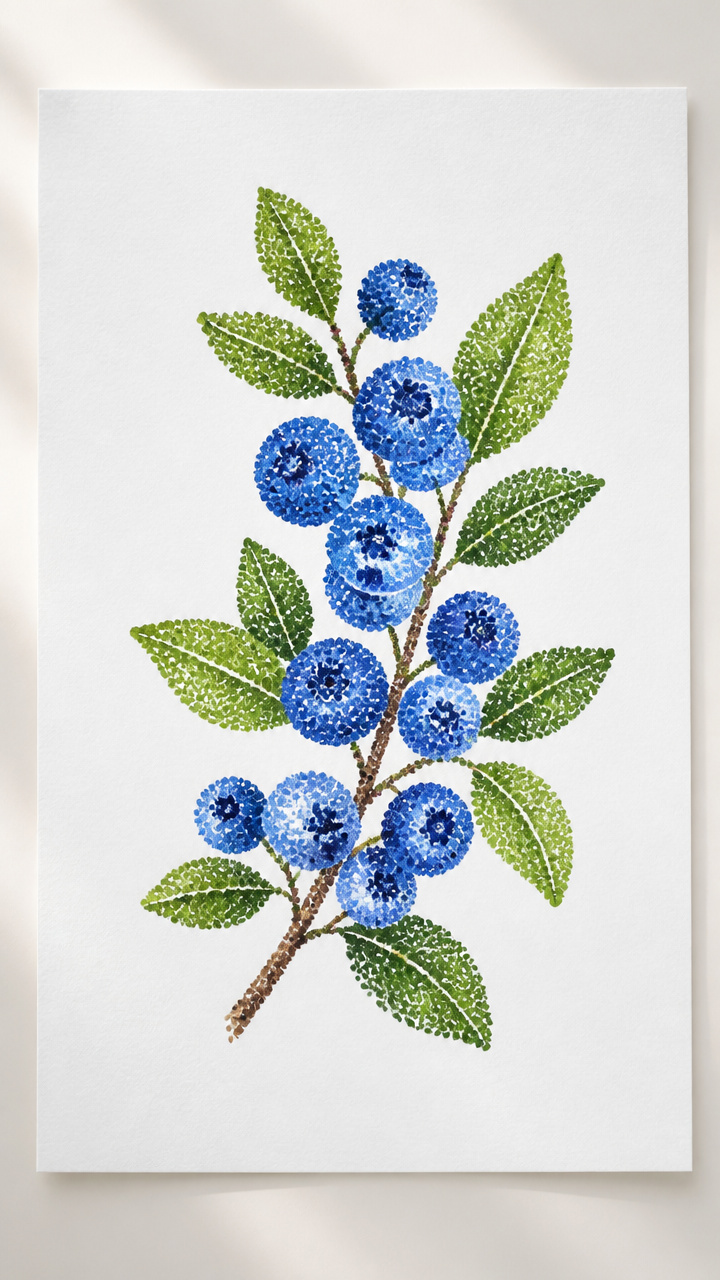
9. Blueberry Painting with Q-Tips
Cotton swabs become tiny paint tools to dab clusters of blueberries beneath a hand-drawn vine. Dabbing improves wrist control and precision.
Materials Needed
- 1 sheet of A4 white drawing paper
- 1 blue liquid watercolor bottle
- 1 green liquid watercolor bottle
- 1 box of Q-Tips
- 1 pencil
How to Make It
- Draw a wavy horizontal line across the middle of the paper with the pencil to represent a vine.
- Pour a small puddle of green watercolor on a tray and dip one end of a Q-Tip into it.
- Dab leaves above and below the vine, using quick upward and downward motions.
- Switch to blue watercolor and use the same technique to form tight clusters of round berries near the leaves.


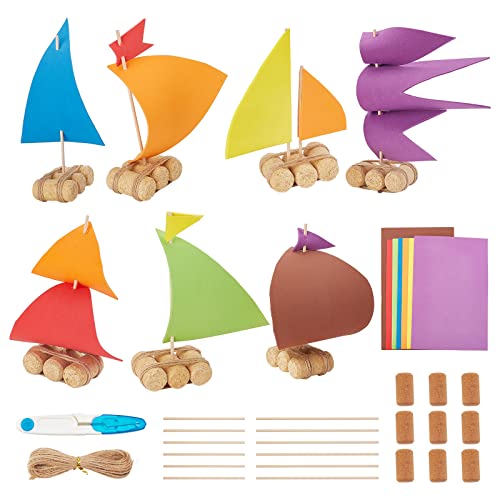
10. Boat Made from Corks
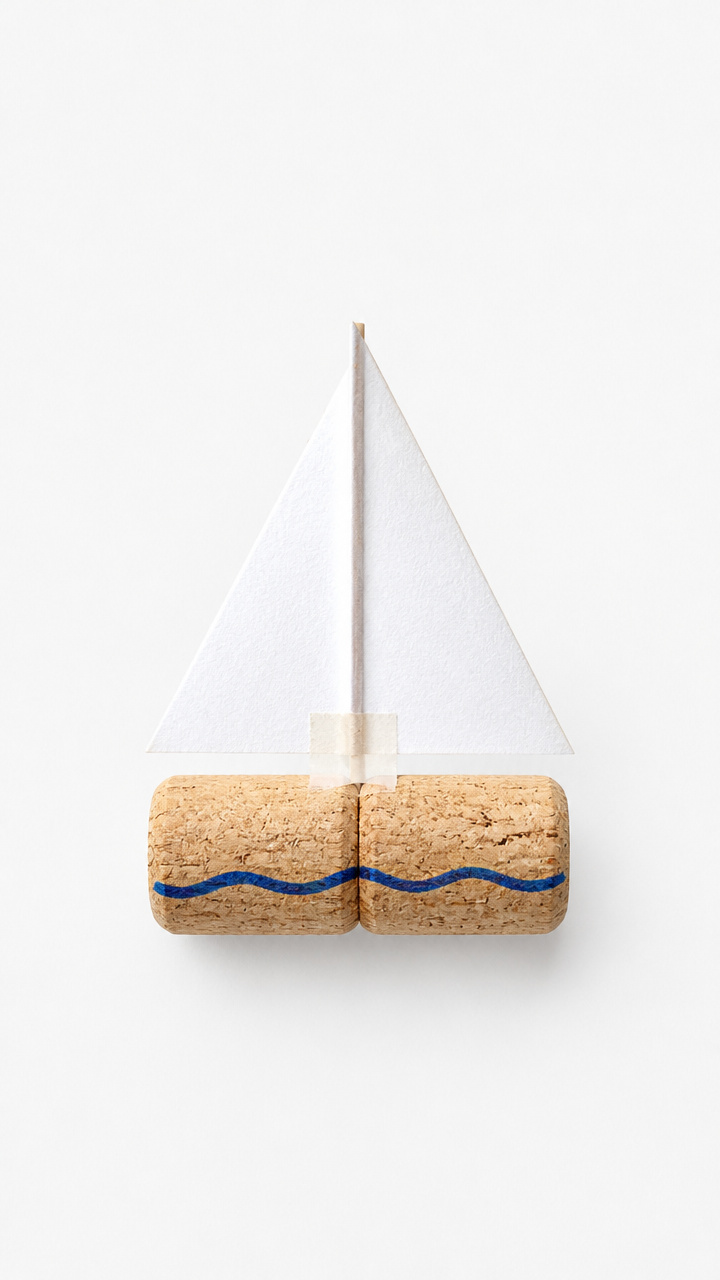
Two wine corks taped side by side hold a paper sail marked with a bold B. This floating craft doubles as a bath toy when sealed properly.
Materials Needed
- 2 wine corks per child
- 1 piece of clear packing tape (15 cm long)
- 1 triangle of white paper (10 cm tall)
- 1 glue stick
- 1 blue marker
How to Make It
- Place the corks side by side and wrap tape tightly around both ends to bind them together.
- Color a large B on the paper triangle with the blue marker.
- Apply glue along the straight edge of the triangle and press it onto the top of one cork so it stands upright.
- Allow 10 minutes for glue to dry before placing in water to test floatability.


11. Barn Door Window Craft
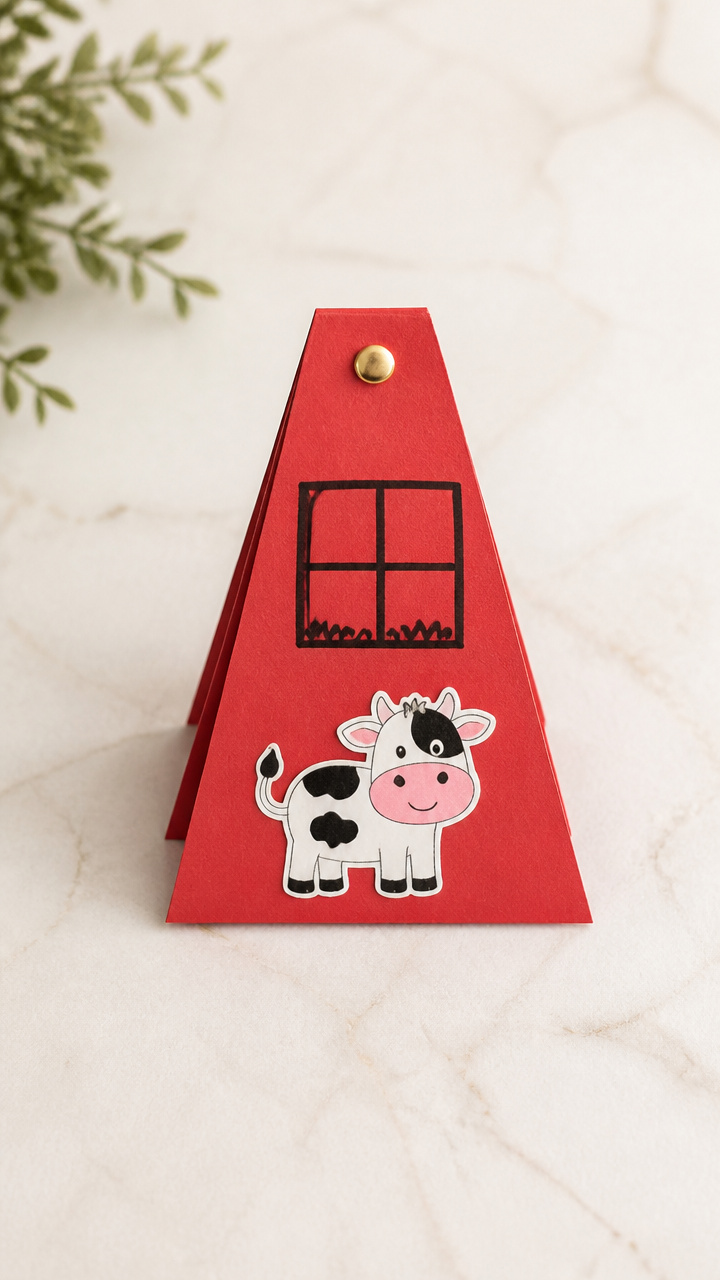
Red construction paper folds into a barn with a swinging door that opens to reveal a B animal inside. Surprise elements keep curiosity alive.
Materials Needed
- 1 sheet of red construction paper
- 1 brass fastener
- 1 cow sticker
- 1 pair of scissors
- 1 black marker
How to Make It
- Fold the red paper in half horizontally to form a rectangle.
- Cut a vertical slit from the folded edge to 4 cm down, then make a horizontal cut connecting to form a door flap.
- Write 'B is for Barn' at the top with the black marker.
- Attach the cow sticker inside using the brass fastener so it spins when the door opens.


12. Bingo Dauber 'B' Sheets
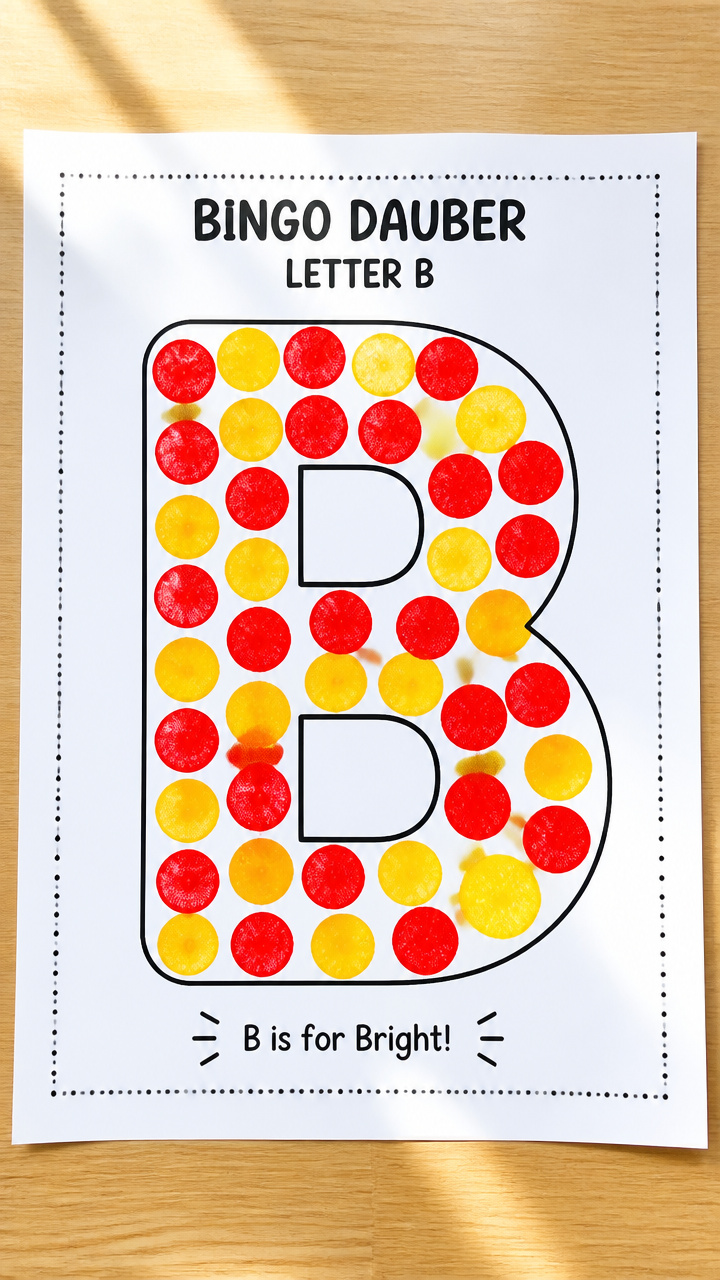
Foam daubers filled with washable ink help preschoolers stamp inside a giant letter B outline. Controlled stamping supports letter recognition and rhythm.
Materials Needed
- 1 pre-printed sheet with a large outlined B (A4)
- 1 red bingo dauber
- 1 yellow bingo dauber
- 1 clipboard
- 1 damp cloth
How to Make It
- Place the B worksheet on the clipboard for a firm writing surface.
- Show how to press the dauber straight down without sliding to keep neat dots.
- Fill the entire B shape with red and yellow dots, alternating colors if desired.
- Wipe the dauber tip with the damp cloth after use to preserve the sponge.


13. Bag Puppet with Moving Mouth
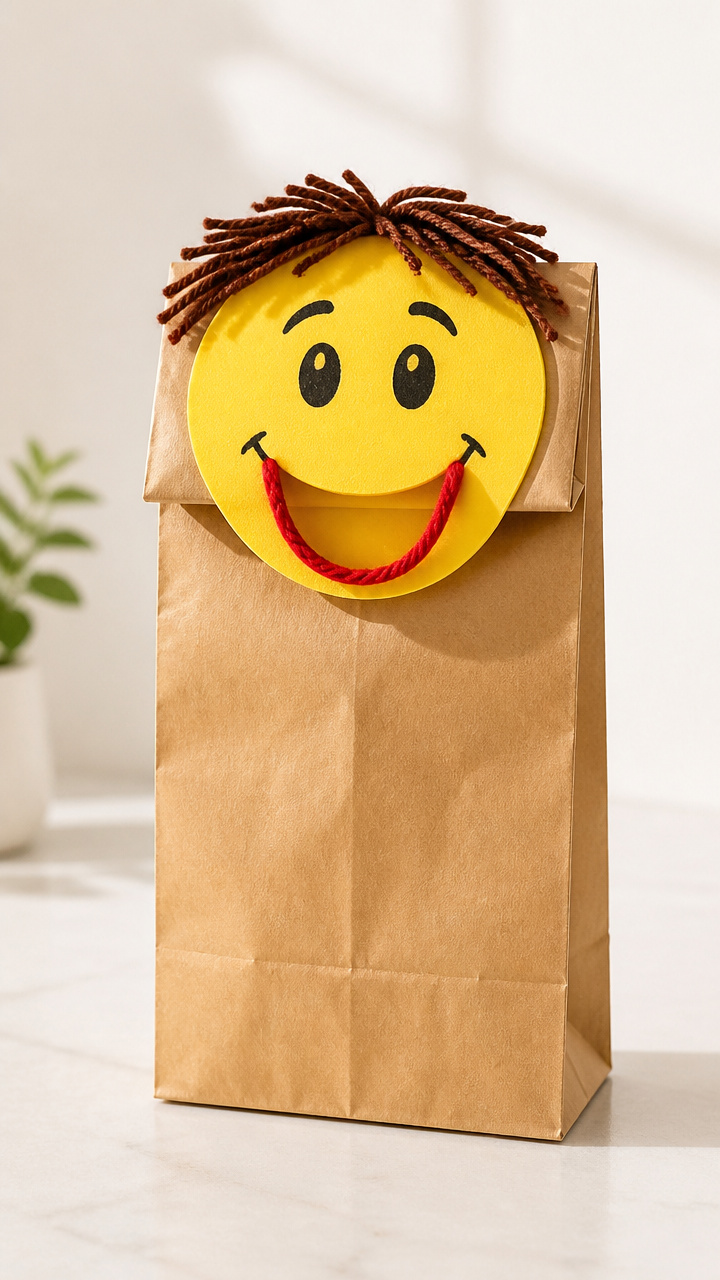
A lunch bag becomes a friendly B-character puppet with yarn hair and a hinged jaw that flaps when opened. Puppets inspire language and dramatic play.
Materials Needed
- 1 paper lunch bag
- 1 sheet of yellow craft foam
- 1 glue stick
- 1 black marker
- 1 piece of yarn (20 cm)
How to Make It
- Turn the bag so the flap is at the bottom, forming the puppet’s body.
- Cut a circle from yellow foam for the face and glue it to the front of the bag.
- Draw eyes and a nose with the marker, then cut a small horizontal slit below the nose.
- Thread the yarn through the slit and tie knots on both ends to create dangling hair.


14. Binoculars from Toilet Paper Rolls
Two cardboard tubes taped together become B-themed binoculars decorated with stickers and a B cord. Pretend play expands vocabulary naturally.
Materials Needed
- 2 empty toilet paper rolls
- 1 roll of clear tape
- 1 hole punch
- 1 string (60 cm long)
- 8 B-letter stickers
How to Make It
- Place the two tubes side by side and tape them together along both sides with clear tape.
- Punch one hole on the outside edge of each tube, near the bottom.
- Thread the string through both holes and tie knots to create a neck strap.
- Stick B-letter stickers all around the tubes and say a B word each time you place one.


15. Bearded Dragon Scales Craft

Overlapping tissue paper scales give a paper dragon shimmer and dimension. Layering teaches sequence and creates striking visual effects.
Materials Needed
- 1 green construction paper cut in lizard shape
- 1 sheet of orange tissue paper
- 1 bottle of white school glue
- 1 paintbrush
- 1 pair of scissors
How to Make It
- Tear orange tissue paper into 2 cm squares using a pinch-and-pull motion.
- Use the paintbrush to apply a small dab of glue along the back of the lizard shape.
- Press one tissue square onto the glue, then add another slightly overlapping above it, continuing down the body.
- Let dry completely before displaying near a window to catch the light.


You’ve got everything you need to turn a simple letter into a week of discovery and delight. Grab your supplies and let the little hands begin creating.