15 Aesthetic Summer Crafts for Teens
Summer light brings a special kind of energy, the kind that makes you want to create something bright and meaningful. These crafts use simple materials to make pieces you’ll actually want to keep, wear, or gift.
Each project is designed to feel satisfying from start to finish, with clear steps and real results. No fluff, no guesswork—just beautiful things you can make with your hands.
1. Tie-Dye Mesh Panel Tee
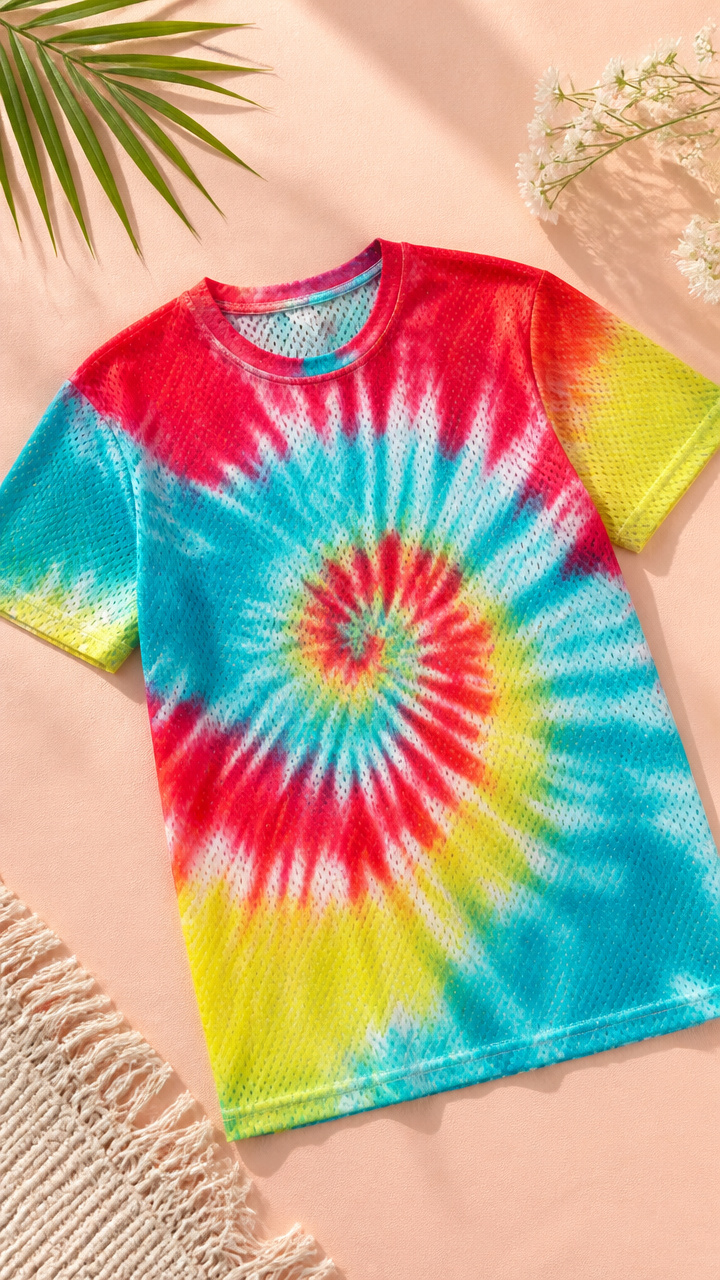
Soft swirls of color on a breathable cotton-mesh tee give this top a relaxed, beach-ready look perfect for warm days. You control the pattern with simple dye placement.
Materials Needed
- 1 white cotton-mesh panel t-shirt
- 3 squeeze bottles (4 oz each)
- Red, turquoise, and lemon yellow fiber-reactive dye powder
- Soda ash solution (1 cup soda ash in 1 gallon water)
- Rubber bands
- Plastic gloves
- Plastic drop cloth
How to Make It
- Soak the t-shirt in soda ash solution for 20 minutes, then wring it out until damp.
- Pinch vertical sections of the shirt and secure each with rubber bands to create panels.
- Fill squeeze bottles with mixed dye colors, then apply one color per panel, saturating the fabric.
- Place the shirt in a plastic bag and let it sit for 8 hours, then rinse under cold water until clear and hang to dry.
2. Pressed Flower Resin Coasters
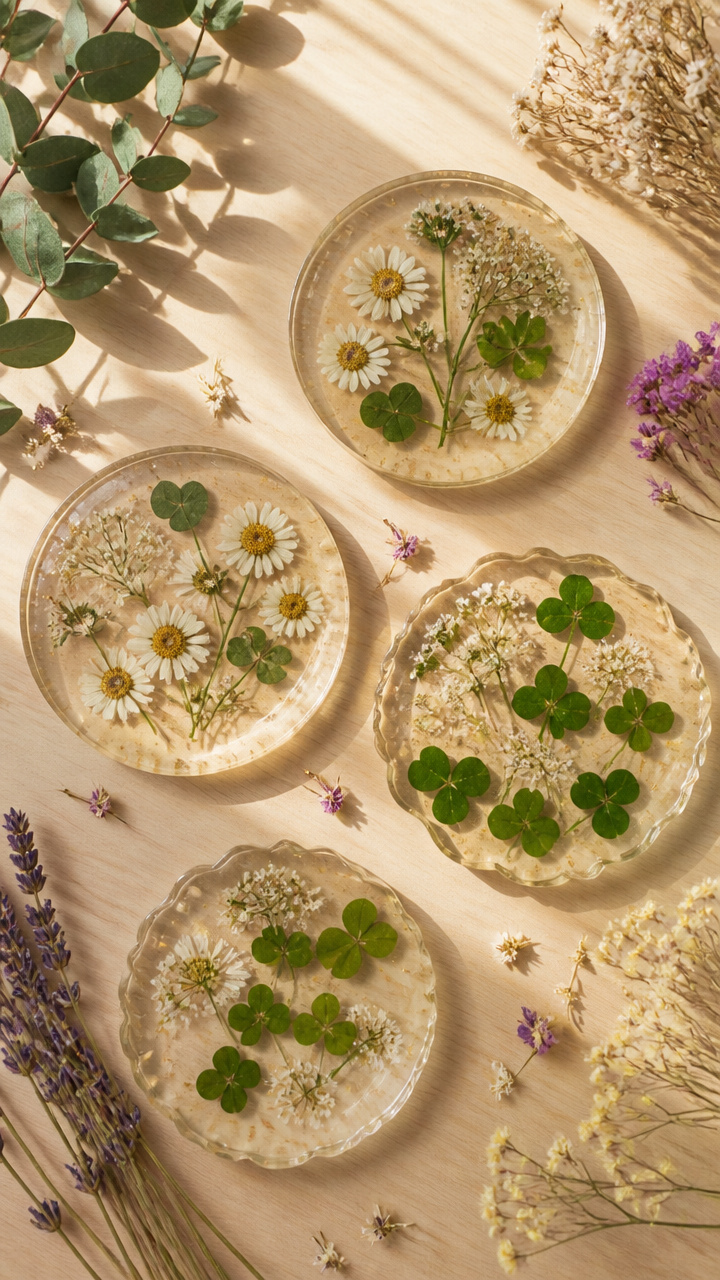
Delicate wildflowers suspended in glossy resin make these coasters both elegant and durable. They catch sunlight beautifully and protect surfaces with style.
Materials Needed
- 4 silicone coaster molds (4-inch round)
- Epoxy resin kit (8 oz total)
- Fresh daisy, clover, and yarrow flowers
- Small paintbrush
- Disposable mixing cups and stir sticks
- Toothpicks
How to Make It
- Clean and dry the flowers, removing excess moisture and stems shorter than 1/4 inch.
- Mix resin according to package instructions and pour a thin layer into each mold.
- Use the brush to place flowers face-up in the resin, then gently adjust with toothpicks.
- Pour a second layer to fully cover the flowers, let cure for 24 hours, then pop out of molds.
3. Beach Glass Wind Chime
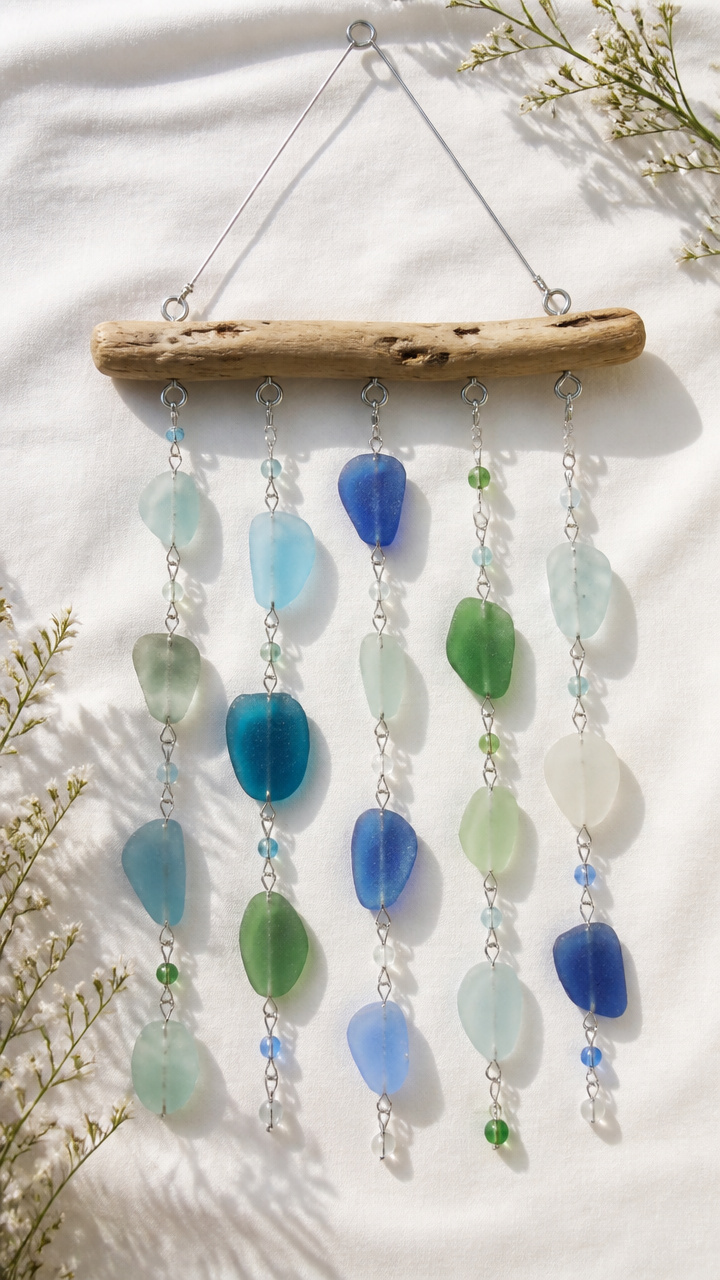
Smooth sea glass pieces clink softly in the breeze, creating a calming sound and catching afternoon light. This chime feels like a souvenir from a quiet shore.
Materials Needed
- 5 pieces of sea glass (assorted sizes, 1–2 inches)
- 1 wooden driftwood branch (8 inches long)
- Silver eye screws (5 mm, pack of 5)
- Thin stainless steel wire (10 ft, 22 gauge)
- Pliers
- Drill with 1/16-inch bit
How to Make It
- Drill a small hole through the top edge of each sea glass piece using light pressure.
- Screw an eye screw into each end and center point of the driftwood branch.
- Cut five 8-inch wire lengths, thread one through each sea glass hole, and twist securely to eye screws.
- Attach a loop of wire to the center eye screw for hanging and test balance by suspending.
4. Mini Succulent Terrarium in Jar
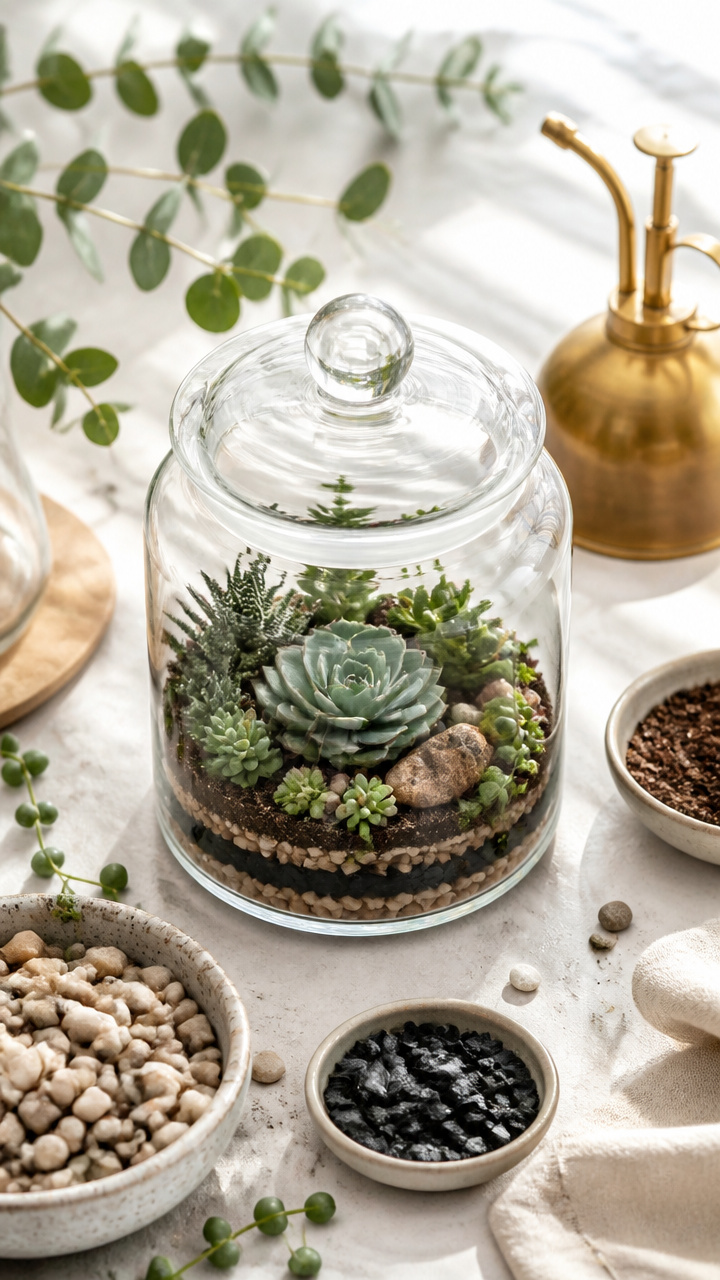
A tiny desert garden inside a clear jar adds life to desks or windowsills. Succulents need little care and thrive in this self-contained setup.
Materials Needed
- 1 clear glass jar with lid (6-inch tall, 3-inch diameter)
- 1 cup small pebbles
- Activated charcoal (1/4 cup)
- Cactus potting mix (1/2 cup)
- 3 small succulents (e.g., echeveria, haworthia, sedum)
- Spray bottle
- Long tweezers
How to Make It
- Layer pebbles on the jar bottom, then sprinkle charcoal, then add soil.
- Use tweezers to place succulents into the soil, arranging for visual balance.
- Press roots gently into the soil and mist lightly with the spray bottle.
- Leave lid off for airflow and place in indirect sunlight, watering with 2 sprays weekly.
5. Watercolor Postcard Set

Hand-painted postcards with soft washes of summer scenes make heartfelt mail. Each card feels personal and worth saving.
Materials Needed
- 6 pre-cut watercolor postcards (4×6 inches)
- Set of 12 pan watercolors
- Round watercolor brush (size 4)
- Small water container
- Paper towel
- Pencil
How to Make It
- Lightly sketch a simple scene like a sailboat, sunflower, or horizon line with pencil.
- Wet the brush and pick up color, applying light washes first and letting dry between layers.
- Add details like shadows or outlines once base is dry, using less water for precision.
- Let cards dry flat overnight before writing or mailing.
6. Macramé Plant Hanger with Beads
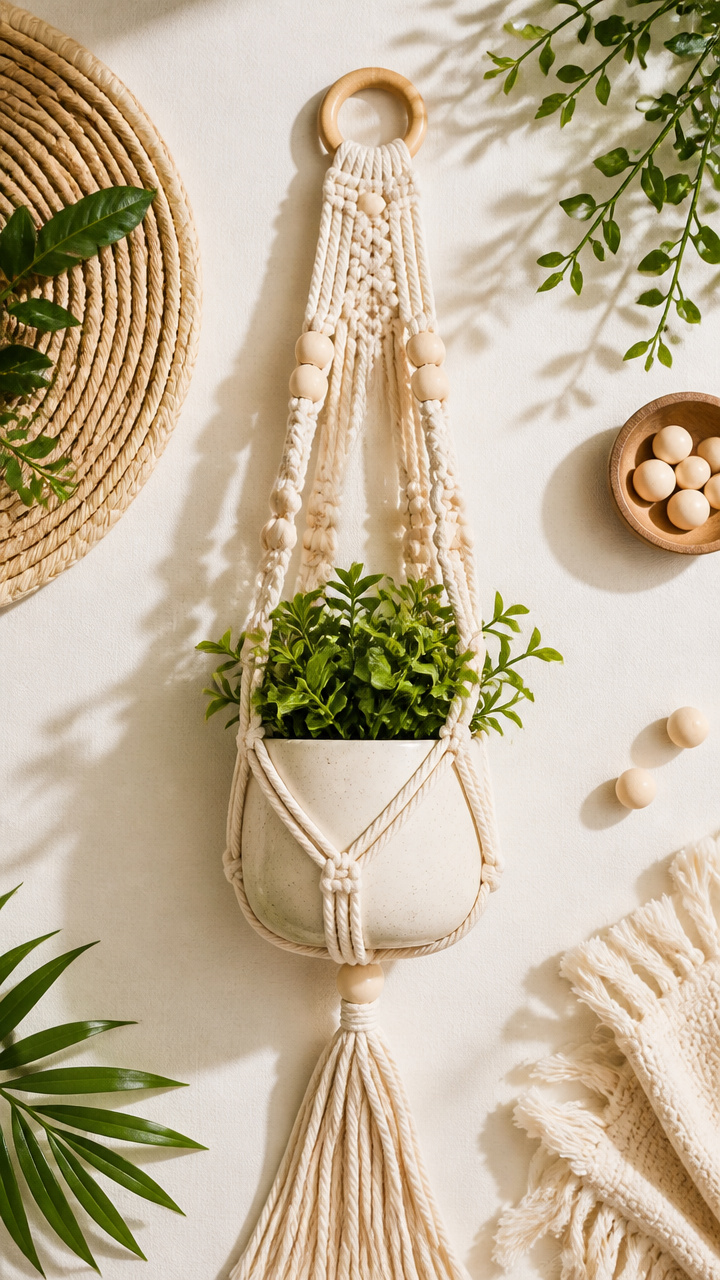
Natural cotton cord and wooden beads create a boho-style hanger that shows off small potted plants. The knot pattern is easy to learn and repeat.
Materials Needed
- 4 cords of cotton rope (each 8 feet long, 3mm thickness)
- 1 wooden ring (1.5 inches diameter)
- 2 wooden beads (1 inch wide, center hole 8mm)
- Scissors
- Measuring tape
How to Make It
- Fold each cord in half and attach to the wooden ring with a lark’s head knot.
- Divide cords into 4 groups of 2, then tie a square knot 6 inches down from the ring.
- Slide one bead onto each pair of outer cords, then tie another square knot below to secure.
- Gather all ends and tie a large overhand knot 4 inches lower to form the plant seat.
7. Sunprint Cyanotype Bookmarks
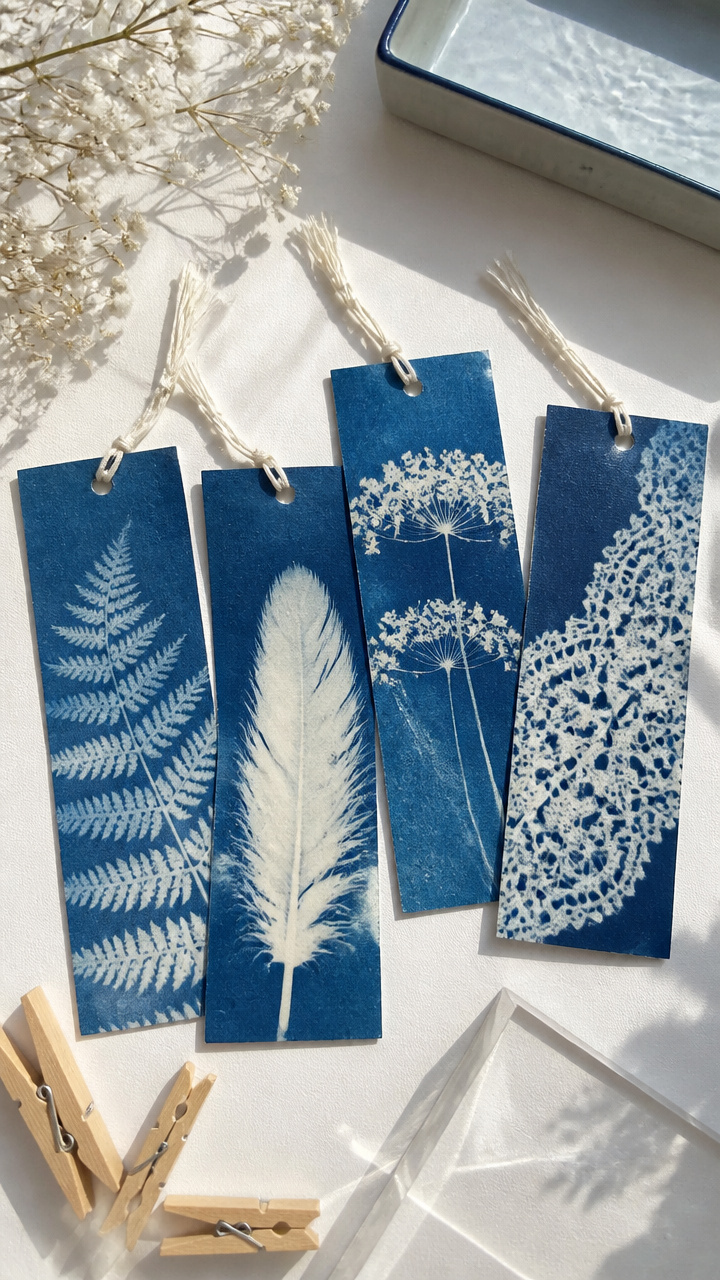
Leaves and feathers leave crisp silhouettes on deep blue paper using sunlight alone. These bookmarks double as art when not in use.
Materials Needed
- 4 sheets of sunprint paper (3×8 inches)
- Flat objects like ferns, feathers, or lace
- Clear acrylic sheet (same size as paper)
- Tray of water
- Clothespins
How to Make It
- Arrange objects on the sunprint paper in a shaded area, then place the acrylic sheet on top.
- Carry the tray outside and expose to direct sunlight for 3 minutes.
- Rinse the paper in water for 1 minute, lifting objects to reveal white shapes on blue.
- Lay flat to dry, then punch a hole at the top and thread with ribbon.
8. Glitter Dip-Dye Sandals
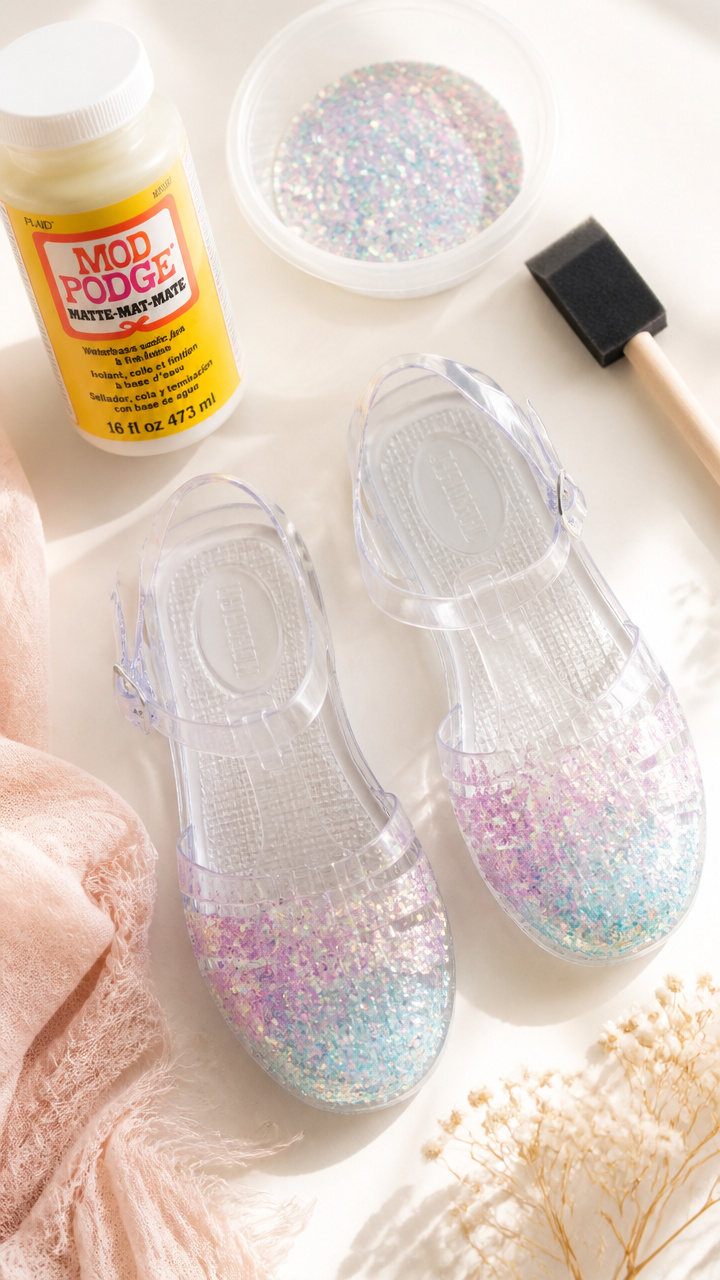
Clear jelly sandals get a shimmer upgrade with permanent glitter coating on the straps. The result is bold, weatherproof, and totally unique.
Materials Needed
- 1 pair of clear PVC jelly sandals
- Fine iridescent glitter
- Mod Podge (2 oz)
- Small foam brush
- Plastic bowl
- Painter’s tape
How to Make It
- Use painter’s tape to mask off the sole and any areas you don’t want glittered.
- Brush a thin layer of Mod Podge onto one strap, working in small sections.
- Dip the coated strap into glitter, pressing gently to adhere evenly.
- Let dry 30 minutes, then seal with a second coat of Mod Podge and air dry overnight.
9. Embroidered Denim Jacket Patches
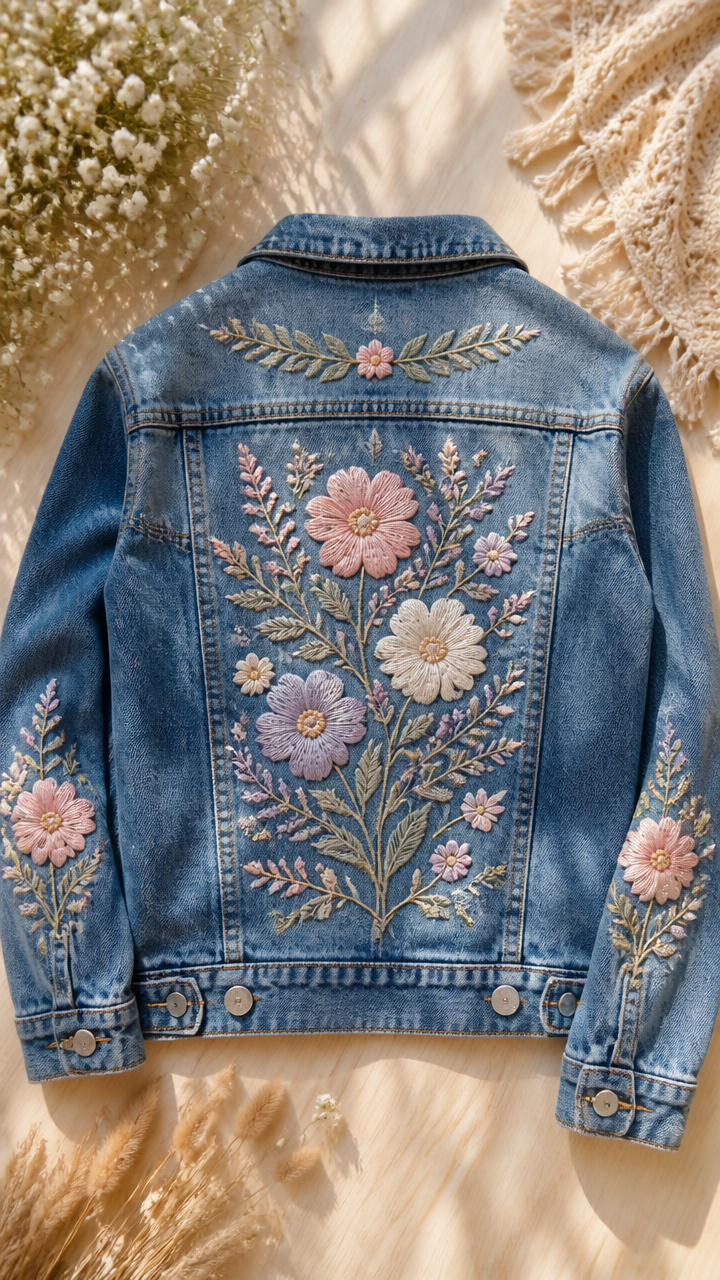
Custom embroidery designs stitched directly onto denim give jackets a personalized flair. Choose symbols that mean something to you.
Materials Needed
- 1 denim jacket
- Embroidery floss (3 colors, 6-strand)
- Size 7 embroidery needle
- Embroidery hoop (4 inches)
- Water-soluble fabric marker
- Scissors
How to Make It
- Draw a small design like a star, moon, or initial on the jacket with the fabric marker.
- Place the hoop over the area and tighten the fabric gently.
- Thread the needle with two strands of floss and use backstitch or satin stitch to trace the design.
- Remove the hoop, rinse off any remaining marks, and trim loose threads.
10. Salt Dough Clay Earrings
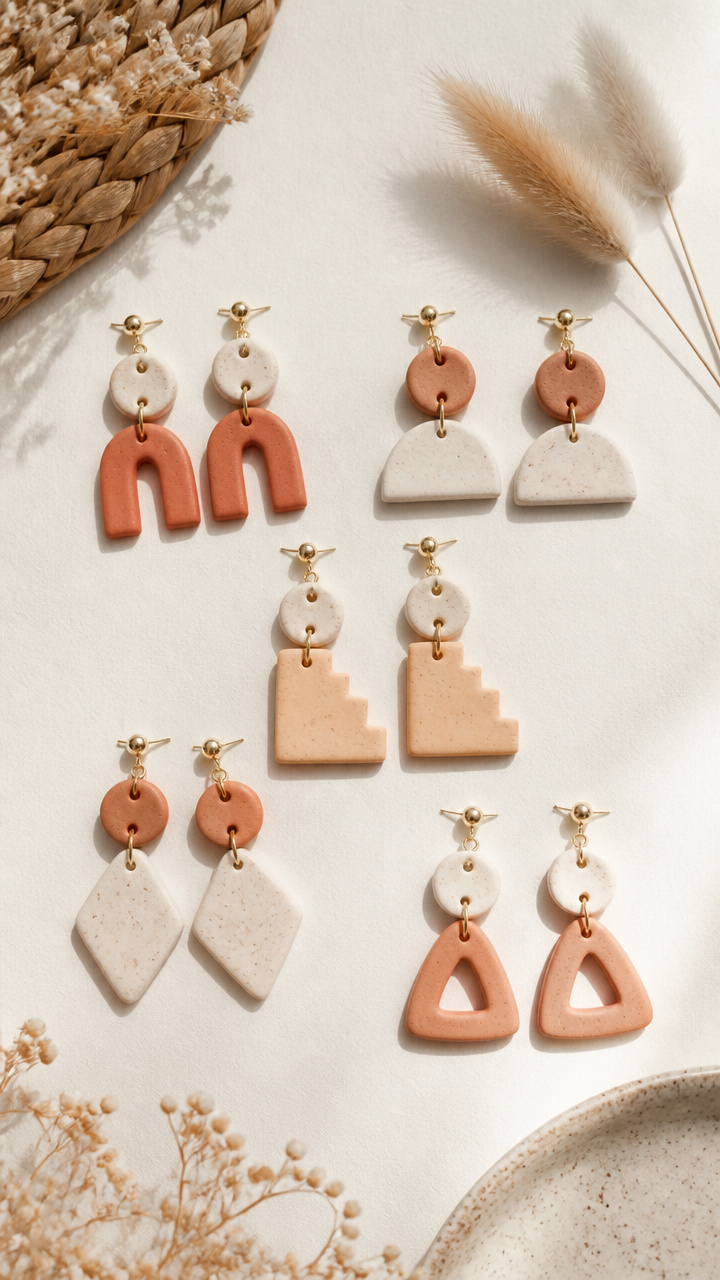
Baked salt dough shapes painted with acrylics become lightweight earrings you can customize to match any outfit. They’re fun to make and wear.
Materials Needed
- 1 cup flour
- 1/2 cup salt
- 1/2 cup water
- Rolling pin
- Small cookie cutters (geometric shapes)
- Straw (for piercing holes)
- Acrylic paint (3 colors)
- Jewelry hooks and jump rings (pair of 6)
How to Make It
- Mix flour, salt, and water into a smooth dough, roll to 1/4 inch thick, and cut shapes.
- Poke a hole near the top edge of each with a straw, then bake at 200°F for 2 hours.
- Cool completely, then paint both sides and let dry 1 hour.
- Attach jump rings through holes and add earring hooks using pliers.
11. Fabric Scrap Tote Bag
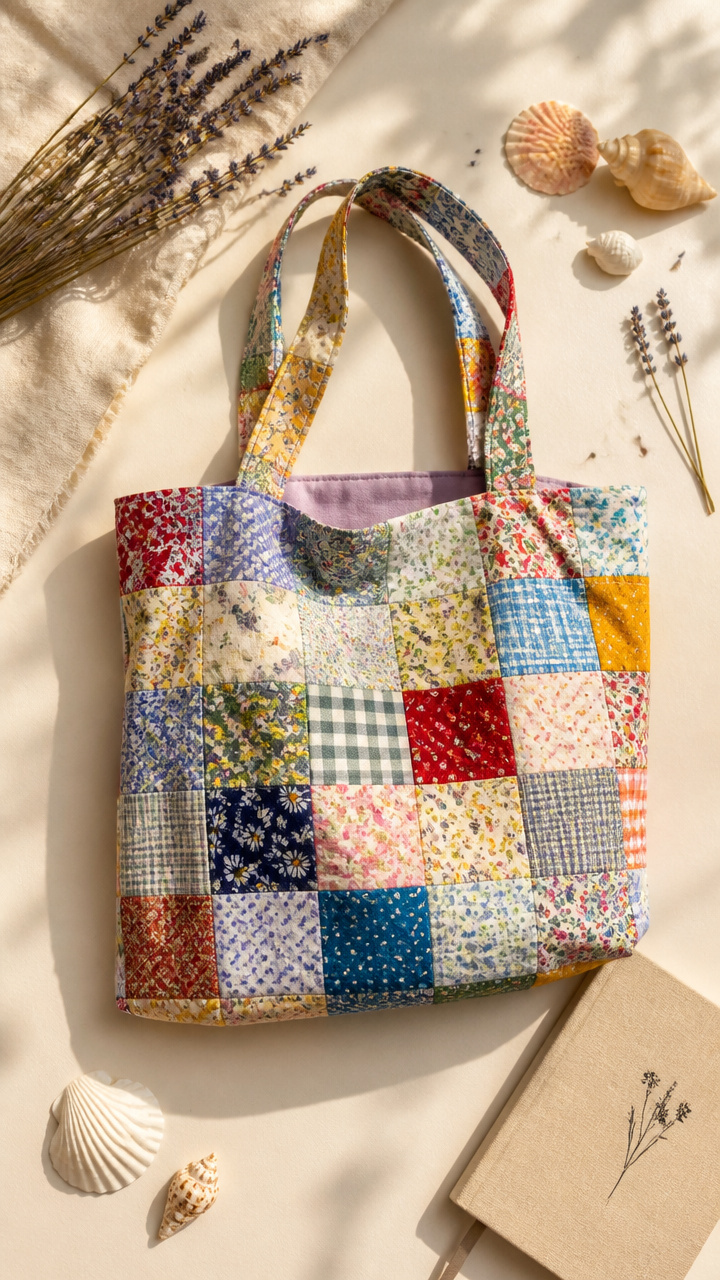
Colorful cotton fabric scraps sewn into patchwork squares make a cheerful tote perfect for markets or beach trips. It folds flat when not in use.
Materials Needed
- 6 fabric scraps (cotton, 6×6 inches each, assorted prints)
- 1 yard of lining fabric (solid cotton)
- 1 yard of fusible interfacing
- Sewing machine
- Matching thread
- Rotary cutter and mat
- Ruler
How to Make It
- Cut all fabrics into 5-inch squares, then sew nine together in a grid using 1/4 inch seam allowance.
- Press seams open, then fuse interfacing to the back of the patchwork panel.
- Cut lining and outer panels to 12×14 inches, then sew right sides together leaving the top open.
- Turn right side out, insert patchwork panel, and topstitch around the edge; add 24-inch fabric handles.
12. Painted Rock Garden Markers
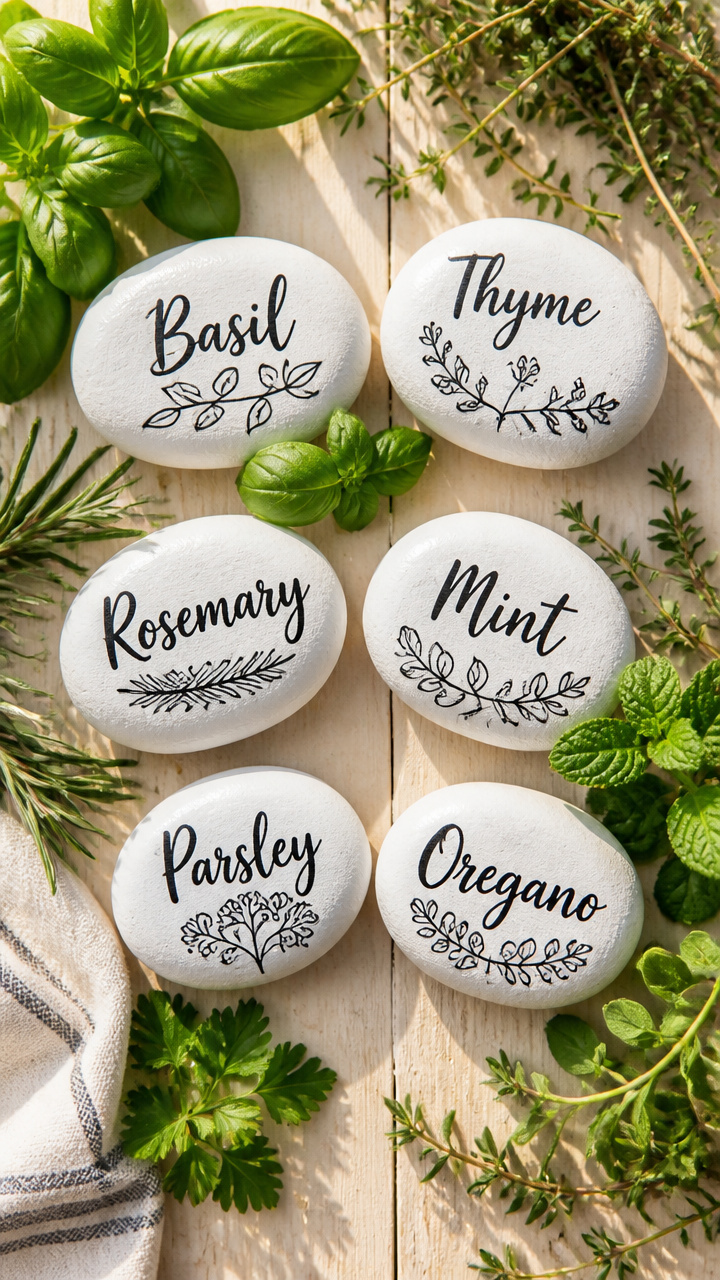
Smooth river rocks labeled with painted herb names add charm to planters. They withstand rain and sun without fading.
Materials Needed
- 6 flat river rocks (2–3 inches long)
- White acrylic paint
- Black fine-tip paint pen
- Small foam brush
- Clear outdoor sealant spray
How to Make It
- Paint each rock with a solid coat of white acrylic and let dry 1 hour.
- Write herb names like 'Basil' or 'Mint' in neat block letters using the paint pen.
- Let ink dry 30 minutes, then apply sealant in a well-ventilated area with even strokes.
- Wait 2 hours before placing in soil near the corresponding plant.
13. Dreamcatcher with Feathers
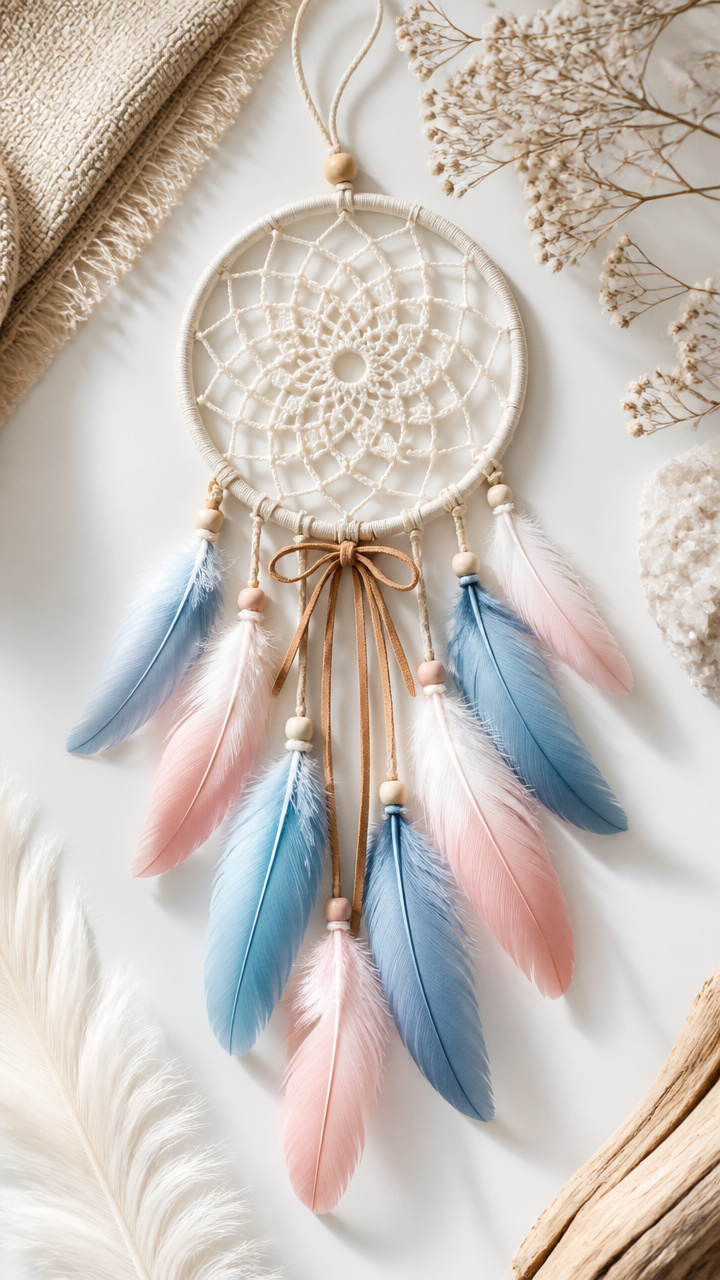
A woven web catches light and hangs above beds with dyed feathers swaying below. This version uses natural materials for a soft look.
Materials Needed
- 1 metal embroidery hoop (6 inches)
- Cream cotton yarn (50 yards)
- 3 dyed goose feathers (blue, pink, white)
- Leather lace (12 inches)
- Hot glue gun and glue sticks
- Scissors
How to Make It
- Wrap the hoop tightly with yarn, securing the end with a dot of hot glue.
- Tie the yarn end to the top of the hoop and begin wrapping a spiral web, pulling taut every few inches.
- After completing the web, tie off and glue the end underneath.
- Glue feathers to the leather lace and attach the bundle to the bottom of the hoop with a knot.
14. Citrus Peel Candle Holders
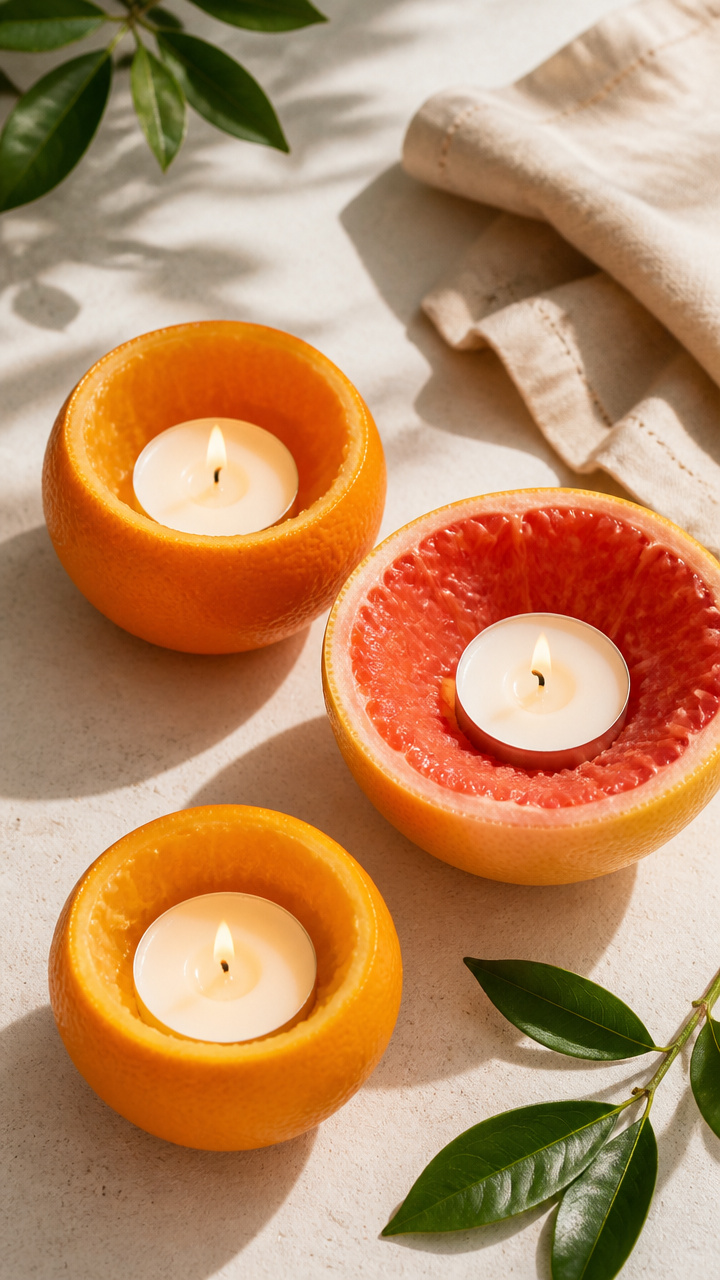
Hollowed orange and grapefruit peels hold tea lights, releasing a fresh scent as they burn. The translucent rind glows warmly.
Materials Needed
- 2 oranges
- 1 grapefruit
- 3 tea light candles
- Spoon
- Knife
- Small bowl
How to Make It
- Cut each fruit in half and scoop out the flesh with a spoon, leaving the peel intact.
- Use the knife to trim jagged edges and set the shells in a bowl to stabilize.
- Place one tea light in each hollowed half, ensuring it sits flat.
- Light only when attended and let burn no longer than 2 hours.
15. Seashell Wind Bell

Real seashells strung on monofilament create a delicate bell that sings in ocean breezes. Hang it near a window or porch.
Materials Needed
- 7 assorted seashells (with natural holes or drillable)
- Wooden ring (5 inches diameter)
- Clear monofilament fishing line (15 ft, 10 lb test)
- Scissors
- Drill with 1/16-inch bit (if needed)
How to Make It
- Drill small holes in any shells lacking openings, using light pressure to avoid cracking.
- Cut seven 10-inch line pieces and tie one shell to each, doubling the knot for security.
- Tie each shell strand to the wooden ring at even intervals, spacing them apart.
- Tie a single 12-inch line to the top of the ring for hanging and test movement indoors first.
You’ve got everything you need to start making right now. Pick one that calls to you and gather the supplies—it’s time to create something lovely.