15 Easy Macrame Christmas Ornament Ideas for Beginners

Gathering around the tree with handmade ornaments adds warmth and memory to the season. With just a few yards of cord and some quiet time, you can create special pieces that bring charm to every branch.
These beginner-friendly projects use simple knots and common supplies. Each one delivers a finished ornament you’ll be proud to hang or gift.
1. Mini Pine Tree Ornaments
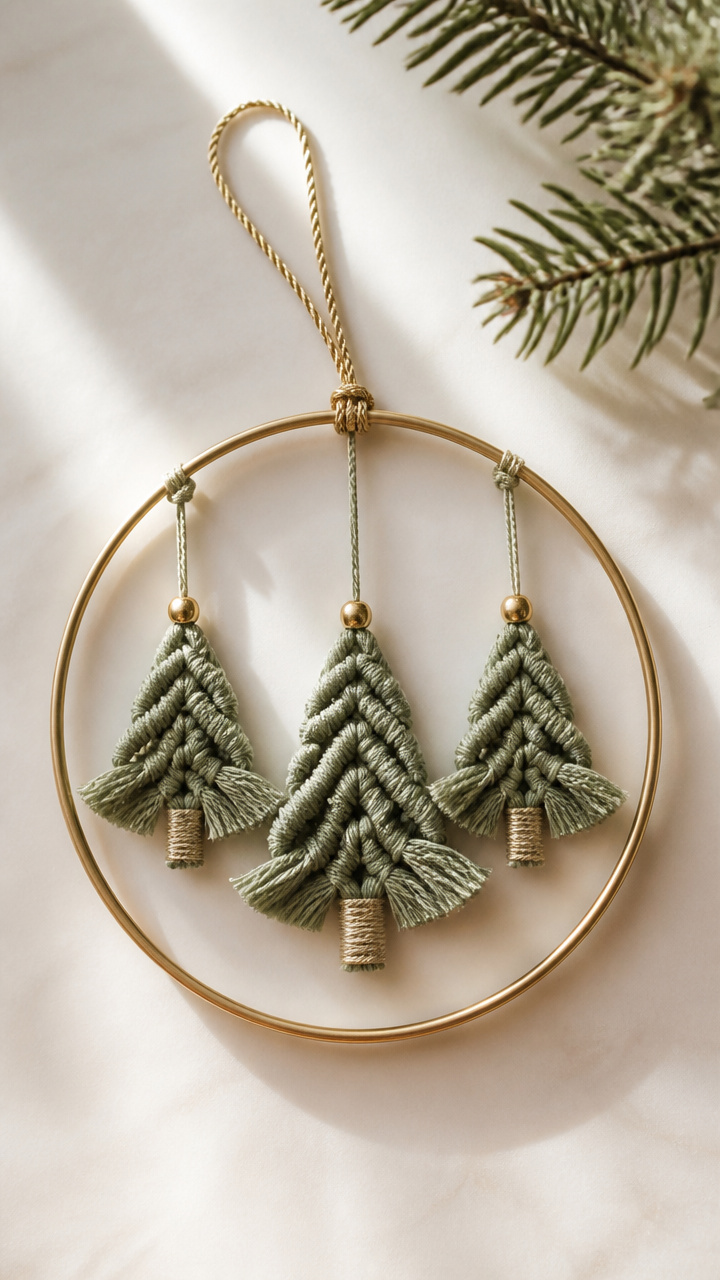
Soft sage green cords form tiny triangular trees that dangle like forest whispers. These lightweight shapes are quick to knot and perfect for filling bare spots on small trees or garlands.
Materials Needed
- 4 yards of 2mm sage green cotton macrame cord
- 6-inch gold metal embroidery hoop
- Scissors
- Glue pen
How to Make It
- Cut the cord into six 8-inch strands and one 12-inch strand. Set the 12-inch piece aside for wrapping.
- Fold each 8-inch strand in half and attach it to the hoop using a lark’s head knot, placing them side by side until the bottom third of the hoop is full.
- Take the 12-inch strand and tightly wrap it around the top of the knotted section, securing it with a dab of glue at both ends to make a treetop trunk.
- Trim the bottom ends of the knotted fringe at an angle to create a pointed tree shape, then hang with a loop of leftover cord.


2. Snowflake Charm with Beads
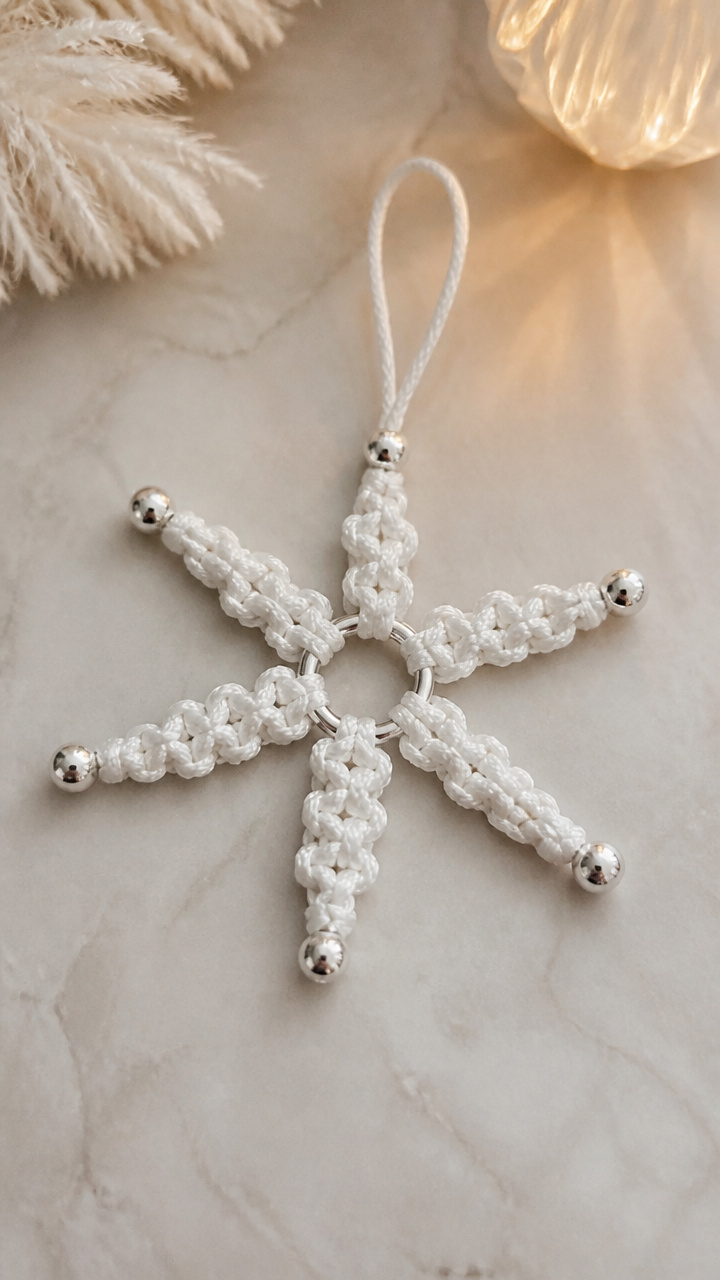
Delicate radial symmetry comes alive with silver beads spaced along knotted arms. This icy design catches light beautifully and feels more intricate than it is to make.
Materials Needed
- 1 yard of 1mm white polyester macrame cord
- 6 silver 4mm spacer beads
- Scissors
- Jump ring (15mm, silver)
- Pliers
How to Make It
- Cut the cord into six 6-inch pieces. Tie them together at the center using an overhand knot, leaving a small loop at the top for hanging.
- Slide one bead onto the end of each strand, then tie a double half-hitch knot below each bead to secure it in place.
- Adjust the knots so all arms extend evenly from the center, forming a starburst. Trim any excess above the top loop.
- Attach a jump ring to the top loop using pliers, then hang on a tree or gift.


3. Red Berry Knap Ornament
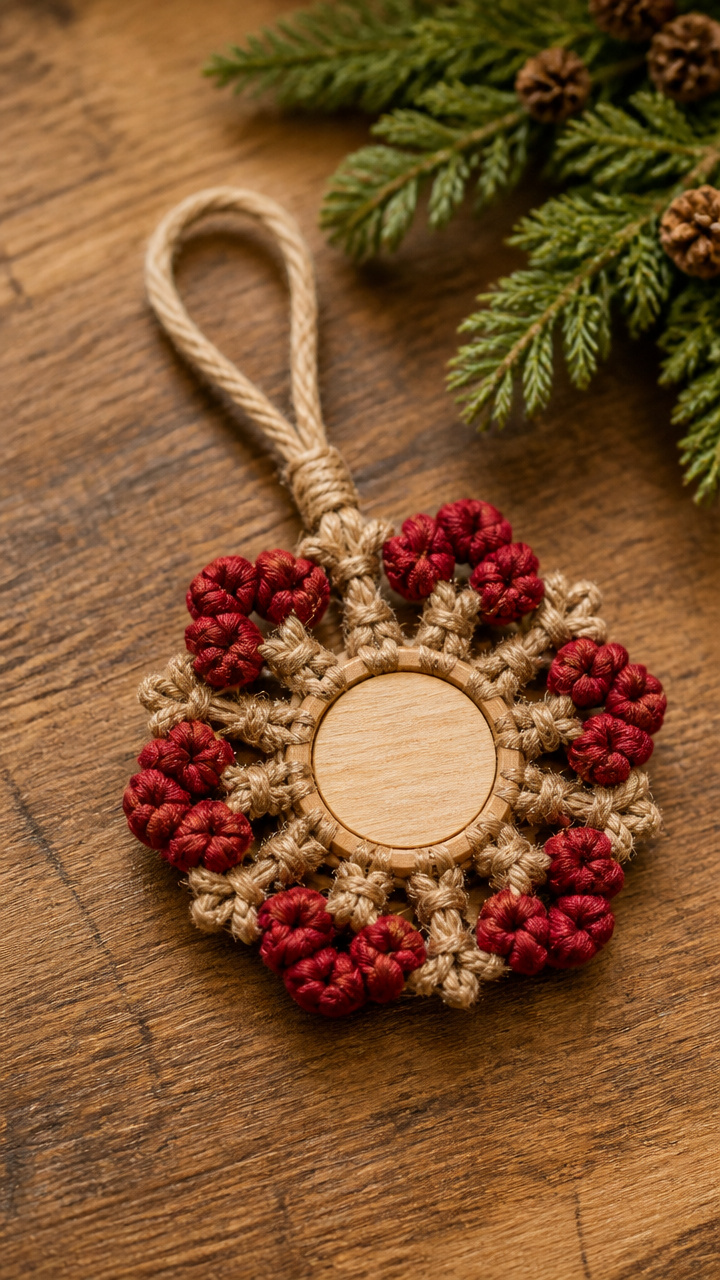
Plump red knots mimic clusters of winter berries strung on natural jute. The earthy texture contrasts with festive color, making this a rustic holiday accent.
Materials Needed
- 2 yards of 1.5mm natural jute twine
- 1 yard of 1.5mm crimson cotton macrame cord
- Scissors
- Small wooden disc (1.5 inches diameter)
How to Make It
- Cut the crimson cord into eight 4-inch strands. Fold each in half and attach them around the edge of the wooden disc using lark’s head knots, spacing them evenly.
- Take four adjacent pairs and knot them together 1 inch below the disc using a square knot.
- Repeat the square knot lower down on the same strands to form a plump berry shape. Do this for all four sections.
- Tie the jute twine to the top of the disc for hanging, then trim stray ends neatly.


4. Starburst Bauble Wrap
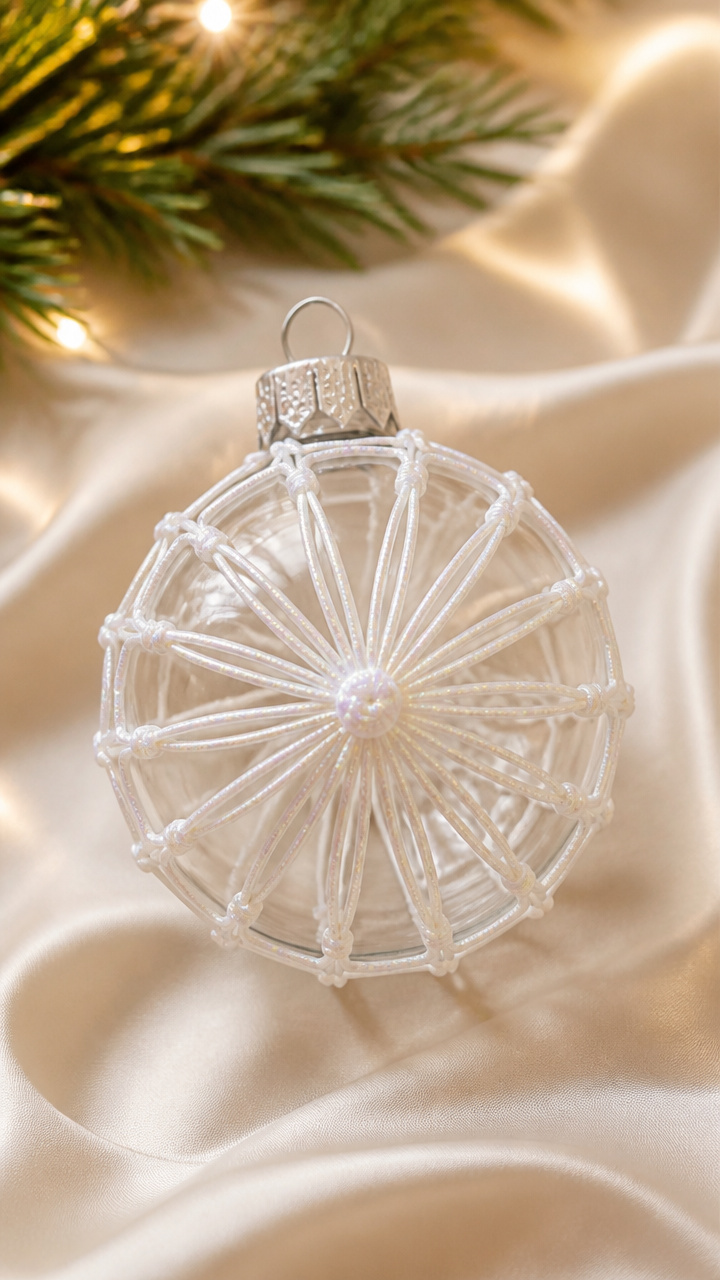
A clear glass ornament becomes magical when wrapped in radiating white threads. This project upgrades a basic bauble with handmade grace in under twenty minutes.
Materials Needed
- 1 clear glass ball ornament (3 inches)
- 3 yards of 1mm iridescent nylon cord
- Glue dot
- Scissors
How to Make It
- Remove the cap from the ornament and set aside. Start gluing one end of the cord to the cap stem using a glue dot.
- Wrap the cord diagonally across the surface, moving in random directions to create a web-like burst, covering about two-thirds of the ball.
- Overlap strands slightly for density but leave gaps to see through. Avoid covering the bottom third to preserve balance.
- When coverage feels full, cut the cord and secure the end with another glue dot on the inside near the opening. Reattach the cap.

5. Mini Ladder Wall Star
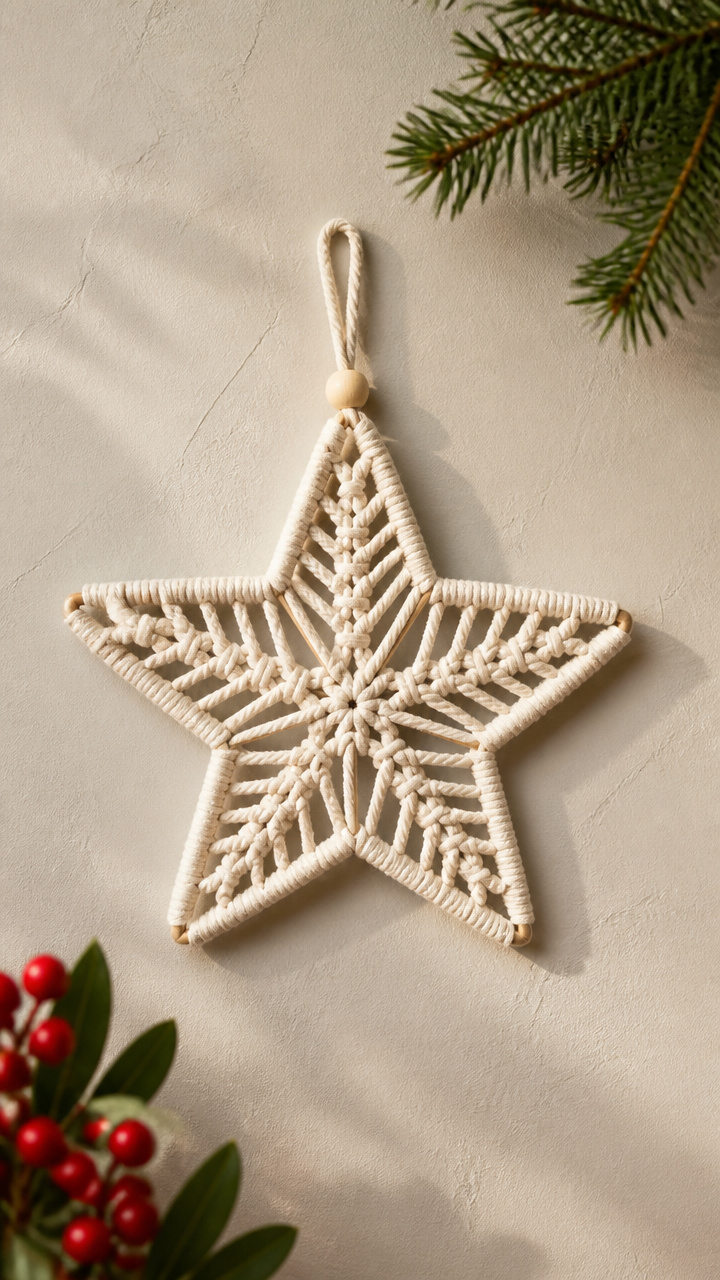
Flat woven bars form a five-pointed star with crisp lines and open spaces. This wall ornament casts pretty shadows and uses only one knot type.
Materials Needed
- 2 yards of 2mm cream cotton macrame cord
- Cardboard star template (5 inches wide)
- Scissors
- Double-sided tape
How to Make It
- Cut twelve 10-inch strands. Tape the template to your work surface and lay five strands vertically in a star shape, crossing at the center.
- Use the remaining seven strands to weave horizontal square knots across each arm, moving outward from the middle.
- After completing three rows per arm, tie off each end with a half hitch around the vertical cords and trim to 1 inch.
- Remove tape and lift the star from the template. Attach a loop of cord to one point for hanging.


6. Frosted Twig Pendant
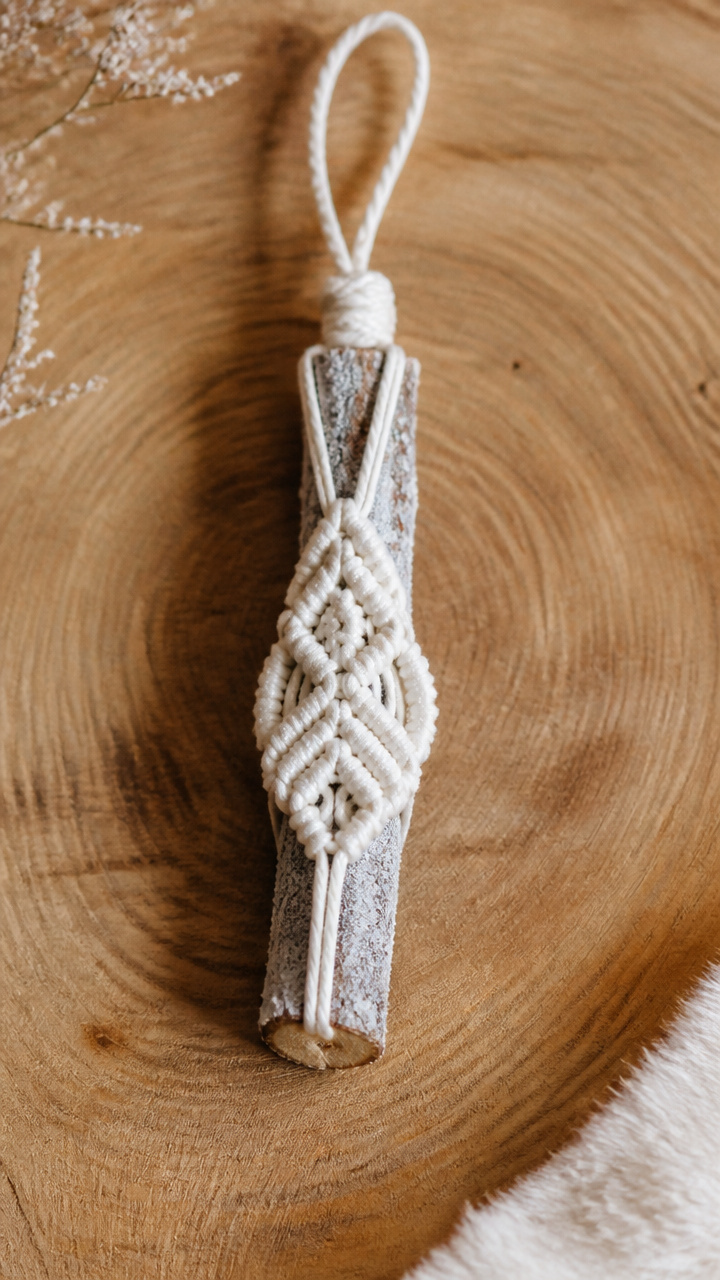
A real birch twig wears a sleeve of knotted lace and faux snow. This nature-inspired piece brings woodland calm to your decor.
Materials Needed
- 1 straight birch twig (4 inches long, pencil thickness)
- 1 yard of 1mm white silk-blend cord
- Craft glue
- White glitter
- Small paintbrush
- Scissors
How to Make It
- Lay the cord horizontally and place the twig perpendicular near one end, about 2 inches from the tip.
- Use the long end to wrap tightly around both the twig and short tail, making close spiral turns for 1 inch. Secure with a drop of glue.
- Continue wrapping loosely for 2 more inches, then add glue and sprinkle glitter over the wet areas to mimic frost.
- Tie a loop at the top end of the cord for hanging after the glue dries completely.


7. Bell-Shaped Knot Drop
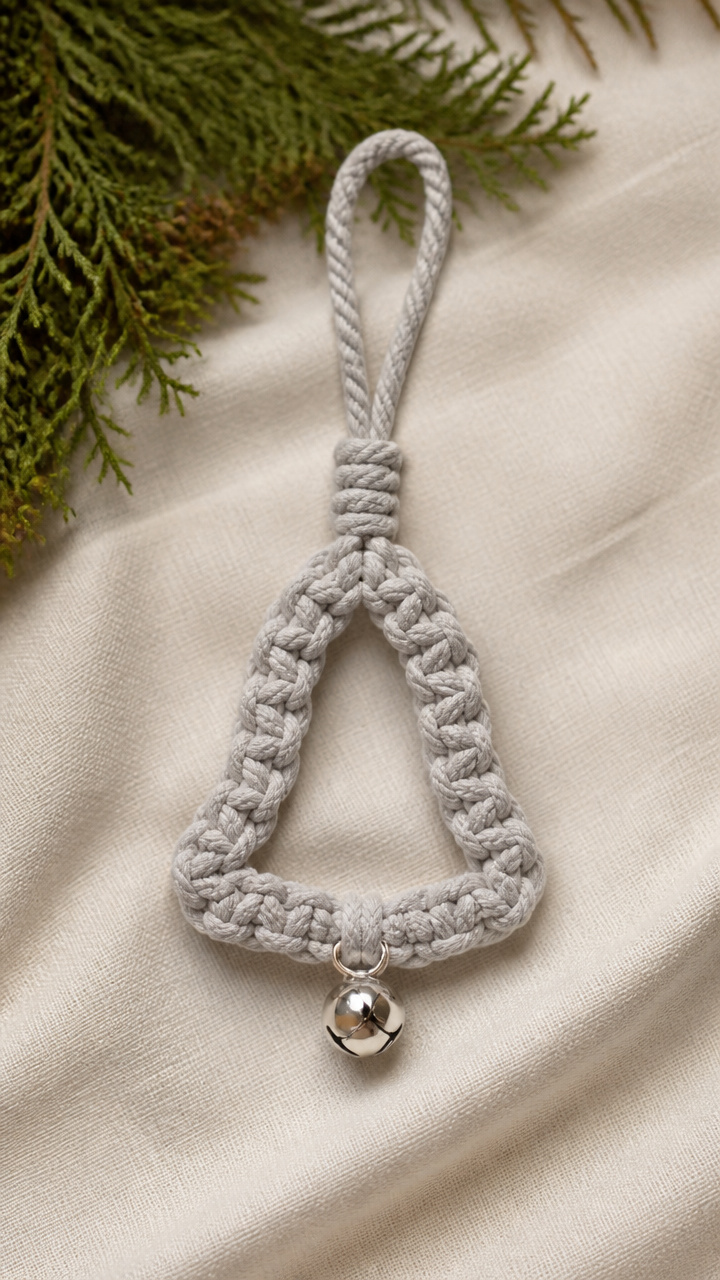
A single cascading knot forms a teardrop shape that sways gently on the tree. Minimal materials deliver maximum elegance.
Materials Needed
- 1 yard of 2mm pearl gray cotton cord
- 6mm silver bell charm
- Scissors
- Lighter
How to Make It
- Cut the cord into one 14-inch strand and one 6-inch strand. Tie the 6-inch piece to the bell charm using a square knot.
- Fold the 14-inch strand in half and attach it to the top of the knotted bell with a lark’s head knot.
- Separate the four resulting ends and tie a large square knot 2 inches below the lark’s head, using all four strands as filler and working cords.
- Trim the ends at a slight curve and singe lightly with a lighter to prevent fraying.


8. Candy Cane Swirl Hook
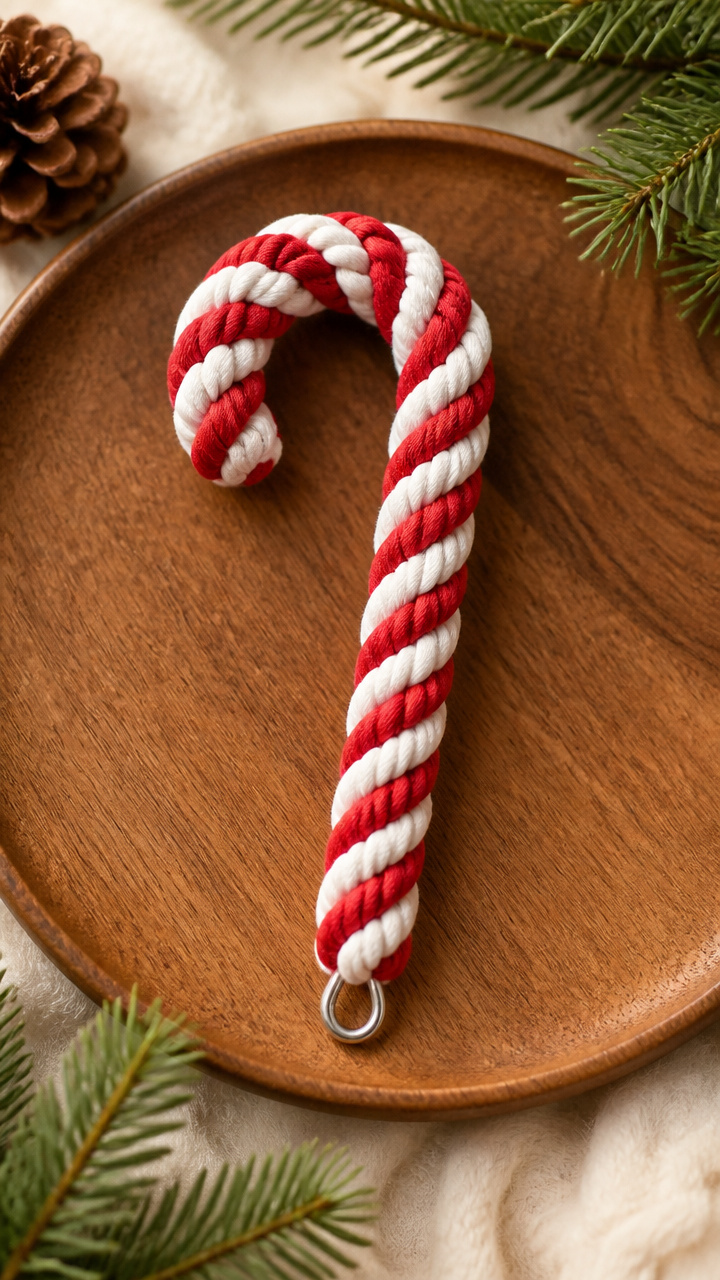
Twisted red and white cords spiral into a playful candy cane shape. This whimsical hook holds lightweight tags or treats.
Materials Needed
- 1 yard of 2mm red cotton cord
- 1 yard of 2mm white cotton cord
- Scissors
- Hot glue gun
- Small metal hook base (1 inch)
How to Make It
- Braid the red and white cords together tightly for 3 inches, then bend into a cane shape with a curved handle.
- Hold the shape in place and apply hot glue along the inner curve to secure the bend.
- Wrap the straight end around the metal hook base and glue it firmly in place.
- Let dry for 10 minutes before using to hang gift tags or mini stockings.


9. Woven Snowman Face
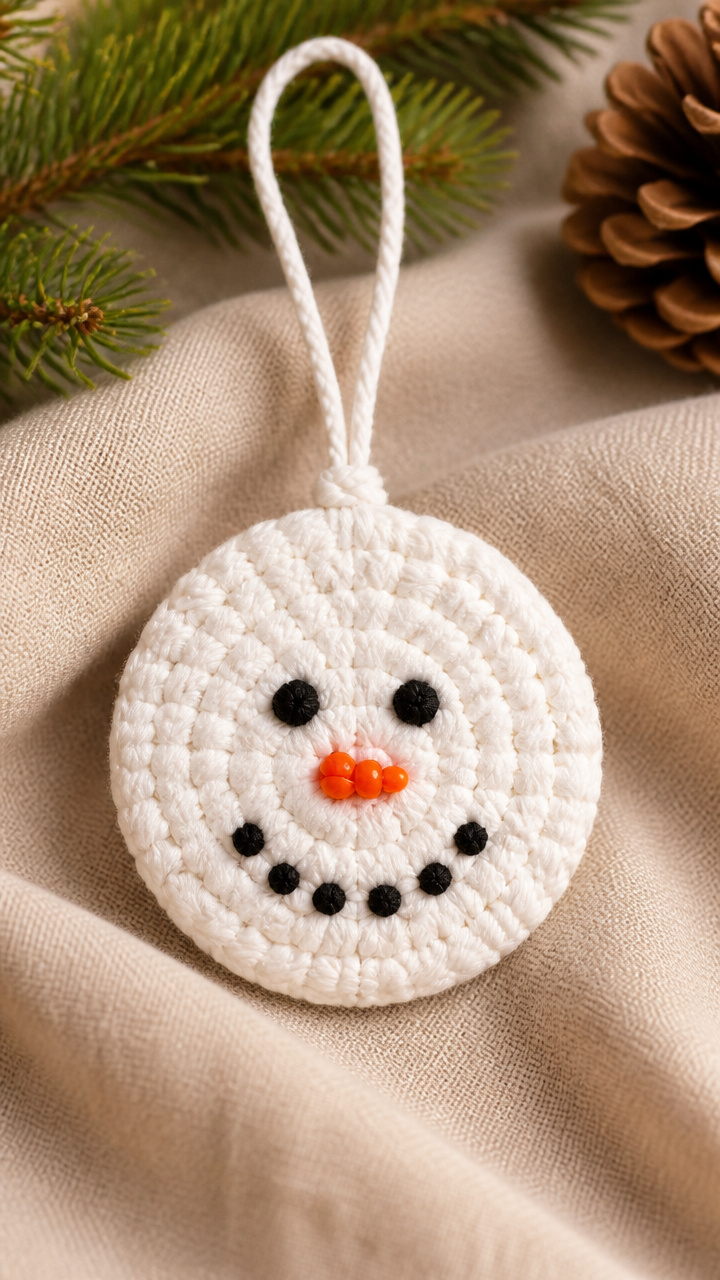
Tiny black knots become eyes and a mouth on a fluffy white disc. This clever face uses negative space and precision knotting.
Materials Needed
- 1 round foam disc (2 inches, white)
- 6 inches of 1mm black cotton cord
- Glue pen
- Scissors
- Two 3mm orange seed beads
How to Make It
- Cut the black cord into three 2-inch strands. Glue one strand horizontally across the center of the disc for the mouth.
- Glue two shorter vertical pieces above the mouth to form eyes, leaving space between them.
- Press one orange bead just below the eyes for the nose, securing it with a dot of glue.
- Tie a loop of white thread to the top edge for hanging, hiding the knot behind the disc.

10. Diamond Grid Coaster Ornament
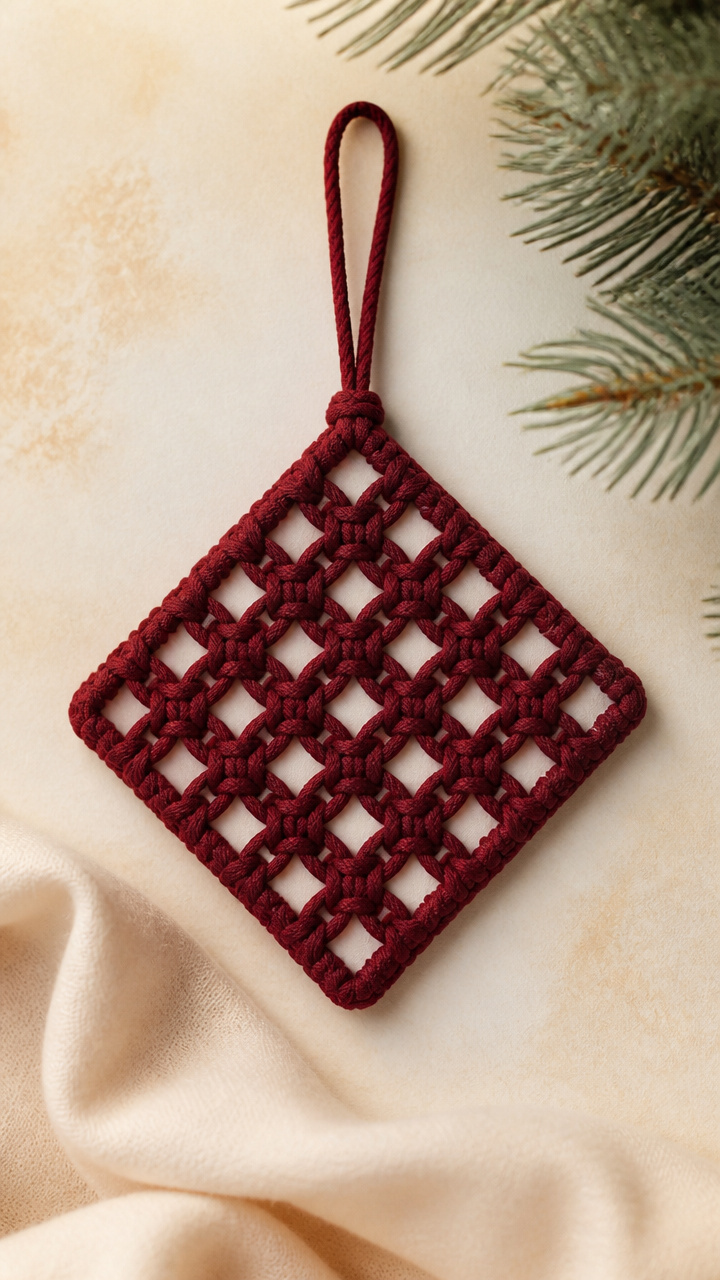
Interlocking diagonal knots form a geometric diamond pattern on stiff backing. Sturdy and stylish, it works as decor or a tiny coaster.
Materials Needed
- 1 plastic canvas sheet (3×3 inches, 7 mesh)
- 2 yards of 1.5mm burgundy polyester cord
- Scissors
- Blunt needle
How to Make It
- Thread the needle and start weaving the cord diagonally across the canvas from bottom left to top right, going over and under each strip.
- After completing the first diagonal row, weave a second layer in the opposite direction to create a diamond grid.
- Tie off both ends securely on the back with double knots and trim excess within 1/4 inch.
- String a loop through one corner hole for hanging or use flat on a shelf.


11. Feathered Edge Tree Topper
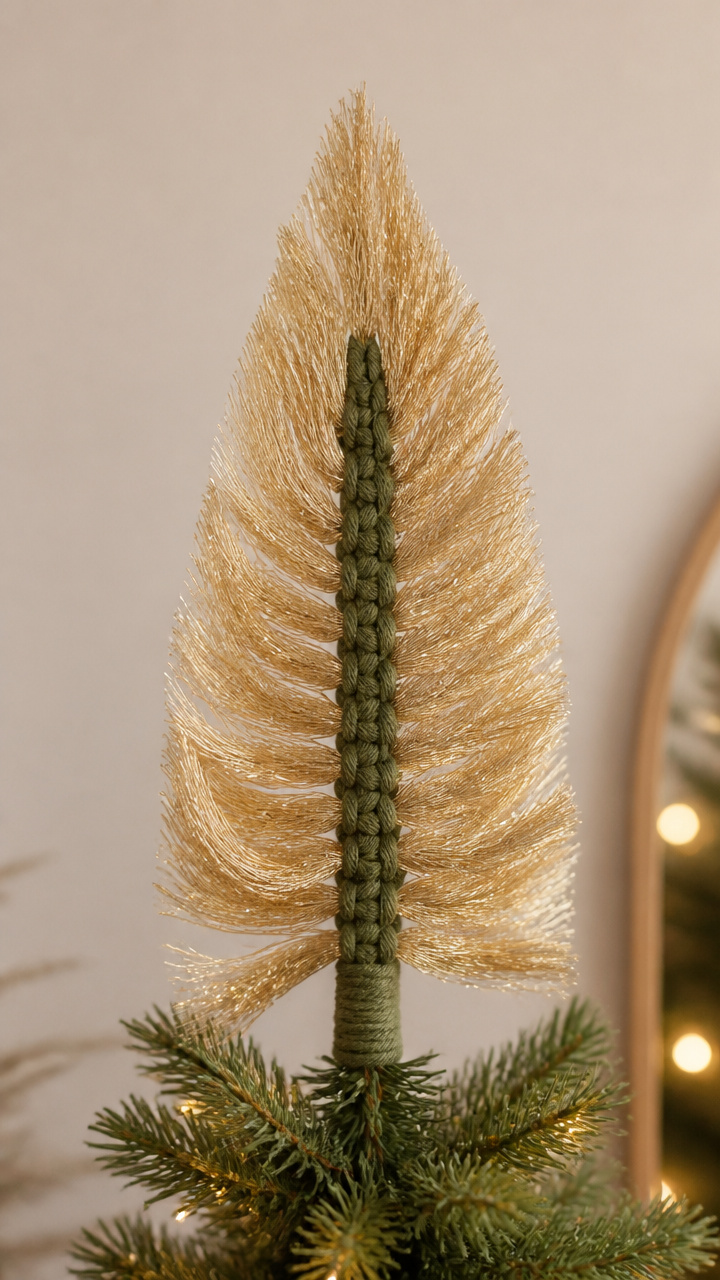
Loose feather-like strands flutter from a braided core. This airy topper catches breezes and draws the eye upward.
Materials Needed
- 3 yards of 1mm gold metallic cord
- 12 inches of 2mm green cotton cord
- Scissors
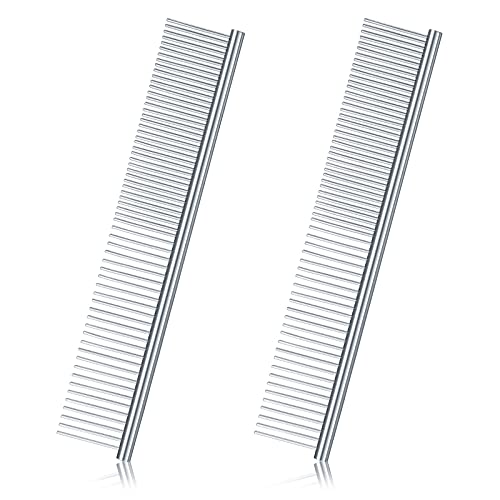
- Wire comb
How to Make It
- Braid the green cord tightly for 4 inches and tie a knot at the end to secure. This forms the central spine.
- Cut the gold cord into twelve 10-inch strands. Attach them in pairs along the spine using lark’s head knots, spacing them every 1/2 inch.
- Comb out each gold strand gently to separate fibers and create a feathery effect.
- Tie a large loop at the top end of the green braid for mounting on a tree peak.


12. Holly Leaf Accent
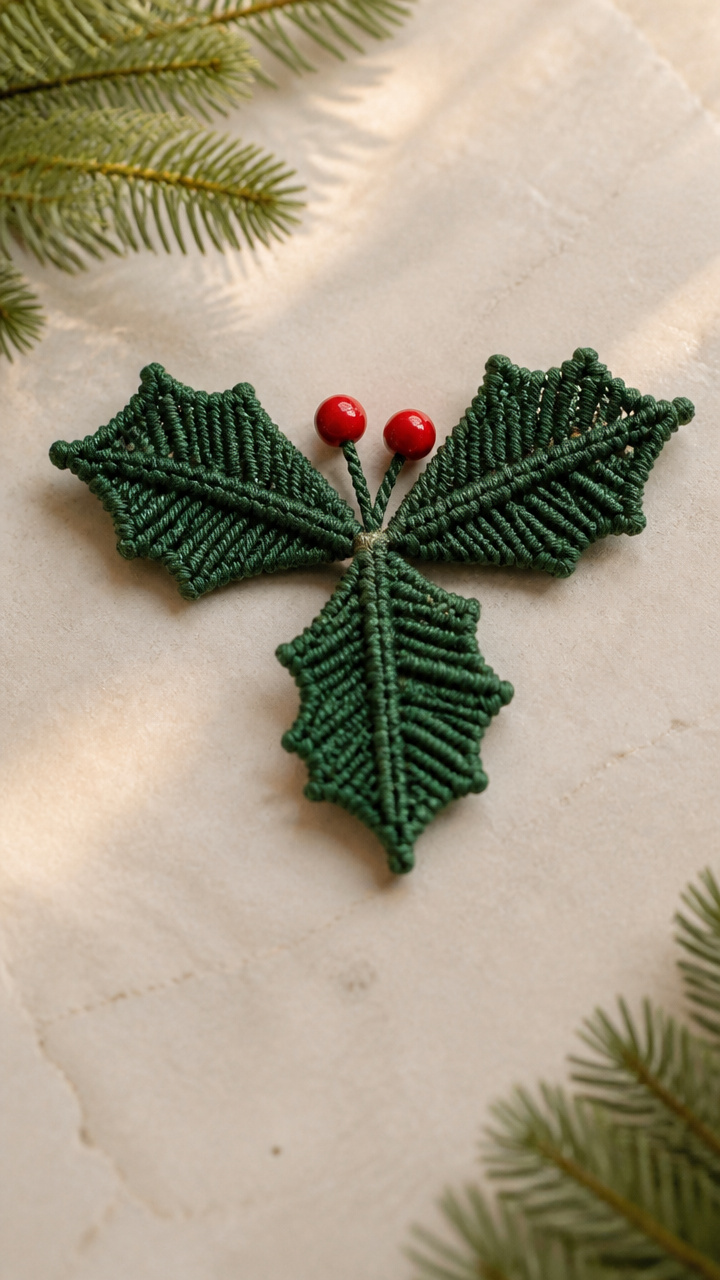
Three sharp-pointed leaves curl from knotted stems with red bead berries. This botanical piece captures holly’s spirit without prickly branches.
Materials Needed
- 1 yard of 1.5mm forest green cotton cord
- 3 red 4mm pony beads
- Scissors
- Floral wire (6 inches, green coated)
How to Make It
- Cut the cord into three 8-inch strands. Bunch the tops together and twist them around one end of the floral wire for 1 inch.
- Spread the strands into a fan and tie a square knot 2 inches down to form the first leaf shape.
- Add a red bead to each of the three outermost strands, then tie another square knot below each to trap the bead like a berry.
- Shape the wire gently into a curl and secure the hanging end with tape or a hook.


13. Knotted Gift Tag Holder
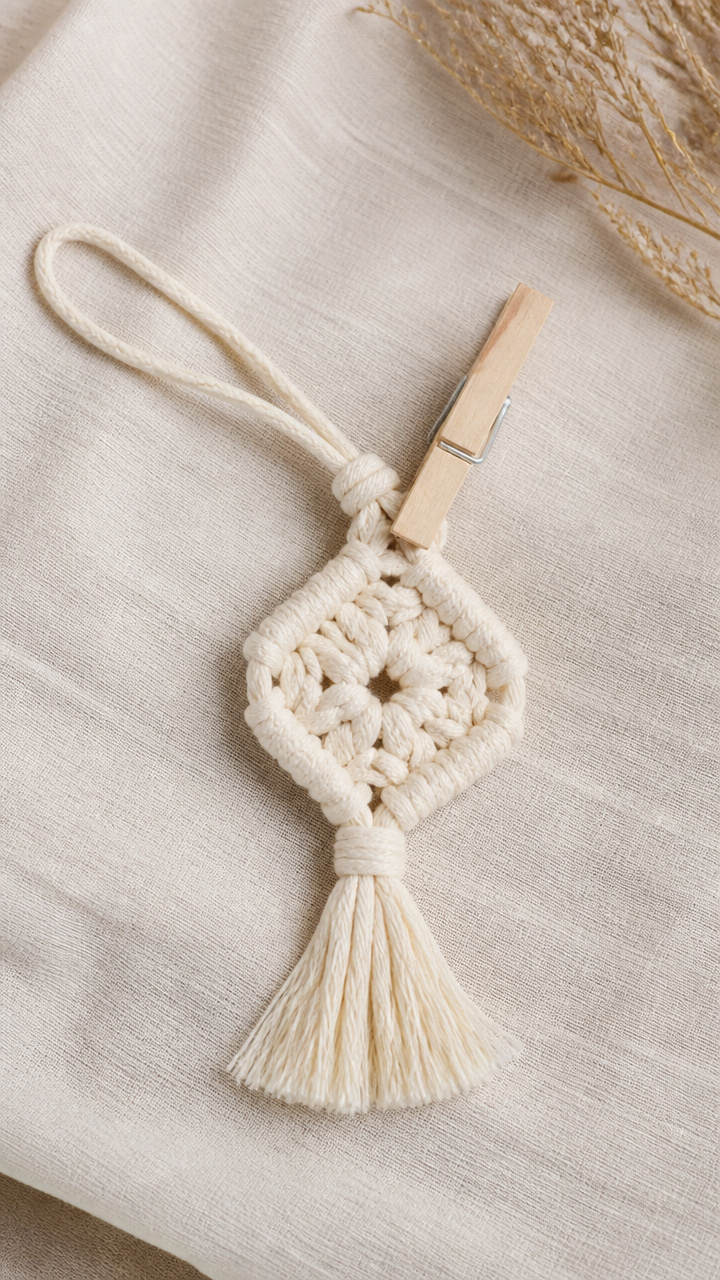
A flat macrame square clips onto presents with a sliding loop. Personalize gifts with handwritten tags tucked beneath the knot.
Materials Needed
- 1 yard of 2mm ivory cotton cord
- Clothespin clip (mini, unfinished wood)
- Scissors
- Ruler
How to Make It
- Cut four 8-inch strands. Align them and fold in half, then attach to the clothespin’s top bar using a lark’s head knot.
- Divide the eight ends into four pairs and tie a square knot with each pair 1 inch below the clip.
- Measure 1 inch lower and tie a second square knot with each pair to create a stopper for the tag.
- Slide a folded gift tag between the knots and clip the holder onto a package ribbon.


14. Icicle Tassel Drops
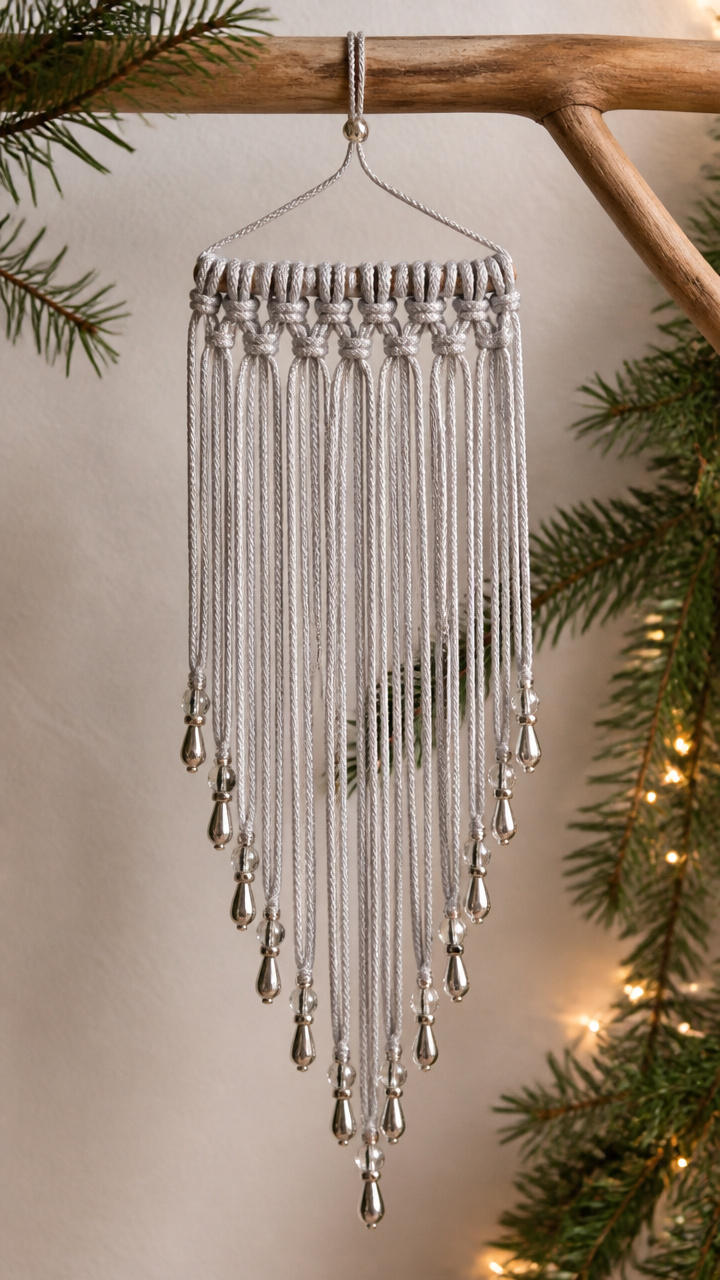
Long slender tassels taper to a bead tip and shimmer in cool tones. Hang several together for a frosty curtain effect.
Materials Needed
- 4 yards of 1mm silver nylon cord
- 4 silver 6mm end caps
- Scissors
- Jewelry pliers
How to Make It
- Cut the cord into sixteen 12-inch strands. Bundle four strands together and thread them through one end cap.
- Crimp the cap closed using pliers to secure the top of the tassel.
- Repeat for the remaining three tassels, ensuring each has four strands and a sealed top.
- Tie a loop at the crimped end of each for hanging, then space them along a mantle or window frame.


15. Wreath of Knotted Rings
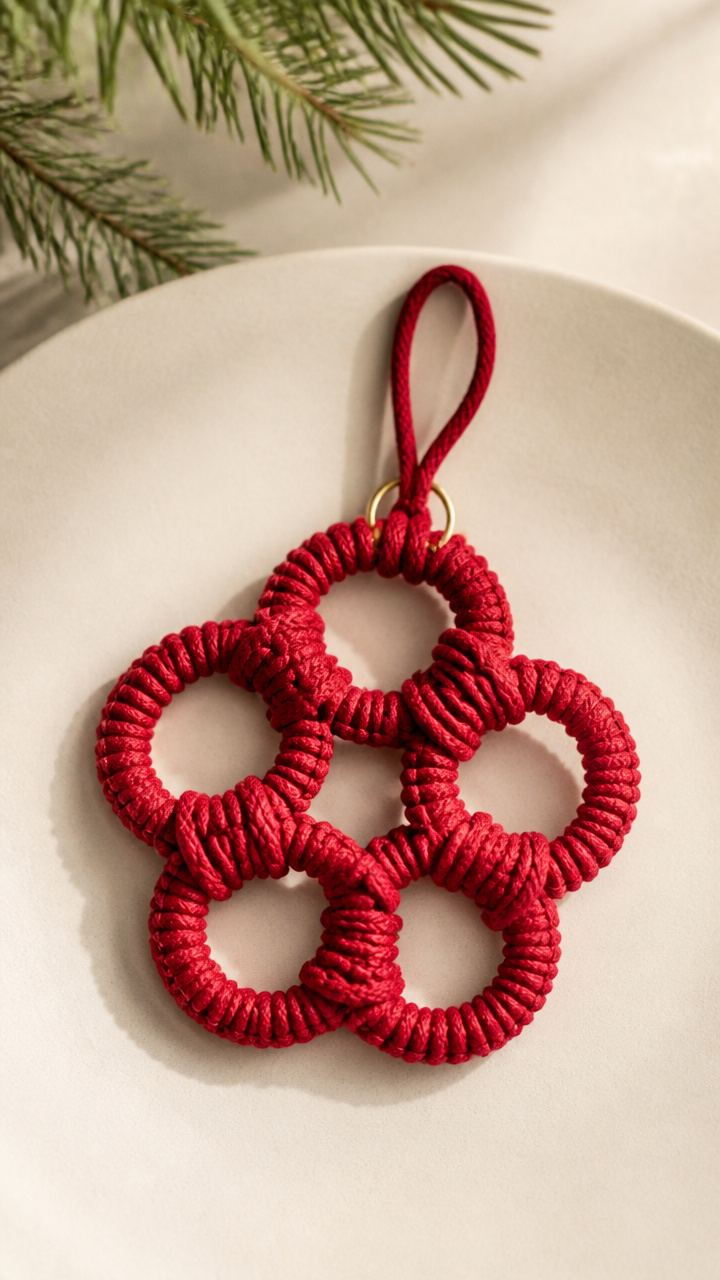
Five tiny macrame loops link into a circular garland. Each ring uses the same knot, building rhythm and confidence.
Materials Needed
- 2.5 yards of 1.5mm red cotton cord
- Scissors
- Gold jump ring (20mm)
- Pliers
How to Make It
- Cut the cord into five 12-inch strands. Tie each into a circle using a barrel knot at both ends, forming a loop.
- Link each new loop through the previous one before closing the knot, creating a chain of five connected rings.
- After closing the fifth loop, connect it back through the first to complete the wreath shape.
- Attach the gold jump ring to one loop using pliers to serve as a hanger.


Each of these ornaments carries your time and care in every knot. Pick one that speaks to you and let your hands find the rhythm.