15 Mess-Free Sensory Summer Crafts for Toddlers on a Budget
Summer days with toddlers call for simple, engaging activities that spark curiosity without turning your living room into a cleanup zone. These crafts deliver rich sensory experiences using everyday materials you likely already have at home.
Each idea is designed to be safe, easy to set up, and low on mess but high on fun. You’ll find textures, colors, sounds, and movement all woven into projects that keep little hands busy and minds exploring.
1. Shaving Cream Cloud Art
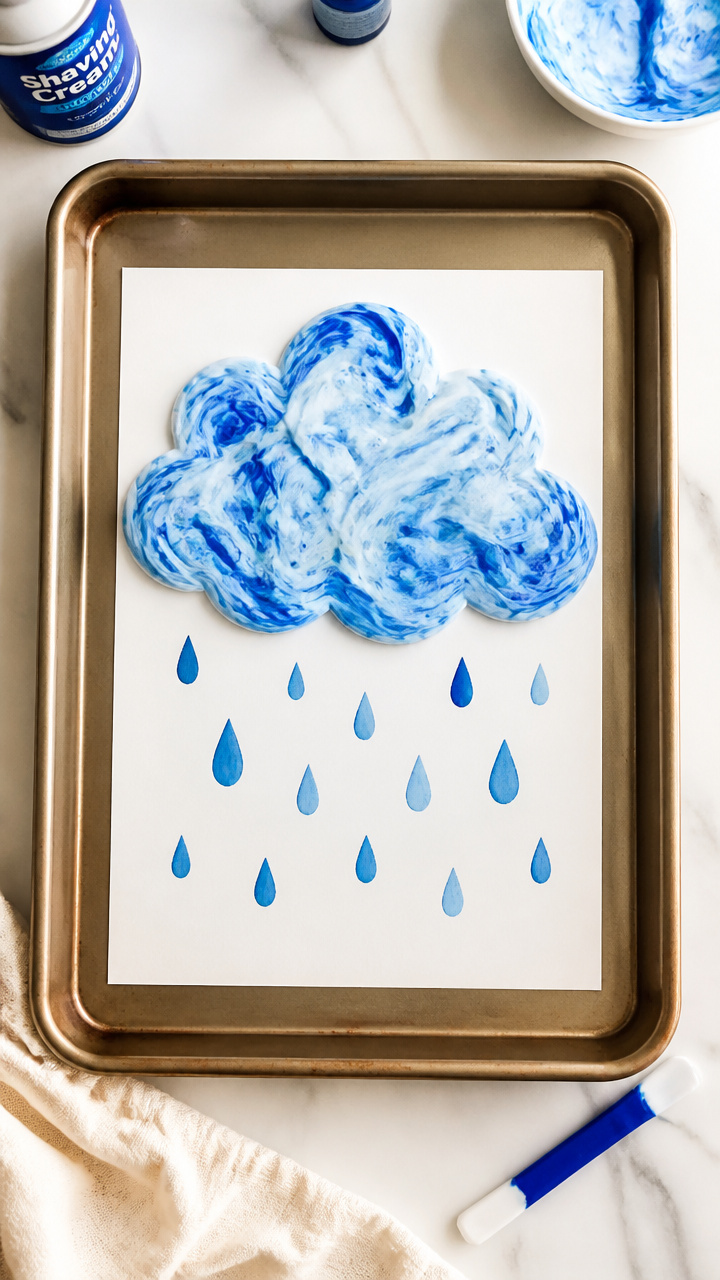
Silky swirls of shaving cream spread on paper create soft cloud prints with a cool, pillowy texture toddlers love to touch. This version uses glue to lock the foam in place so it won’t drip or stain.
Materials Needed
- 1 cup white school glue
- 2 cups foaming shaving cream
- 3 drops blue food coloring
- A4 white cardstock, 6 sheets
- 9×12 inch baking tray
- Popsicle stick
How to Make It
- Pour the glue into the baking tray and add the shaving cream on top.
- Gently fold them together with the popsicle stick until just blended, avoiding overmixing to keep the fluff.
- Let your toddler spread the mixture across the cardstock with their fingers, then lift the paper and set it flat to dry for 4 hours.
2. Ice Cube Paint Exploration
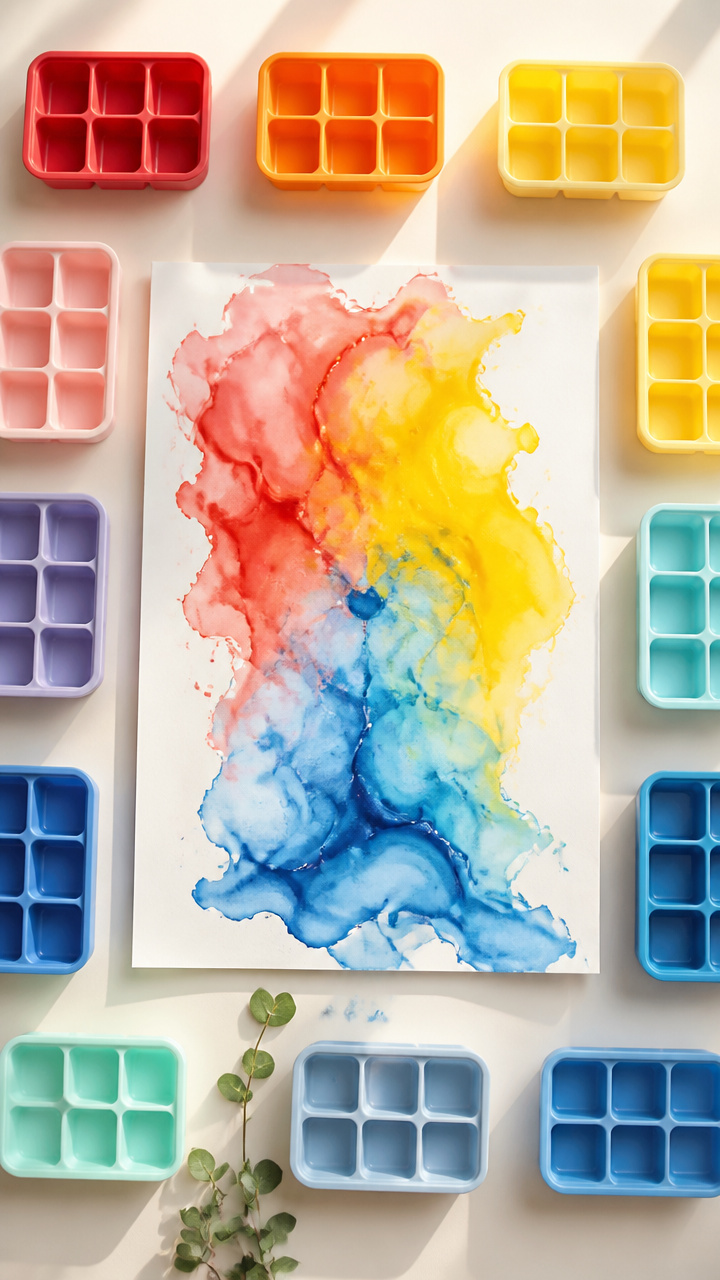
Frozen cubes tinted with food coloring melt slowly on paper, leaving watery trails that shift and blend as they glide. The cold temperature adds a surprising sensory layer.
Materials Needed
- 12 silicone ice cube trays
- 1/2 cup water
- 6 drops red food coloring
- 6 drops yellow food coloring
- 6 drops blue food coloring
- A4 white drawing paper, 4 sheets
- Large shallow tray
How to Make It
- Fill each ice cube compartment with water and add two drops of one color per section, then freeze for 6 hours.
- Place a sheet of drawing paper in the shallow tray and hand your toddler three frozen cubes of different colors.
- Let them push the cubes around the paper, watching how the melting paths mix and streak.
3. Tissue Paper Window Sun Catchers
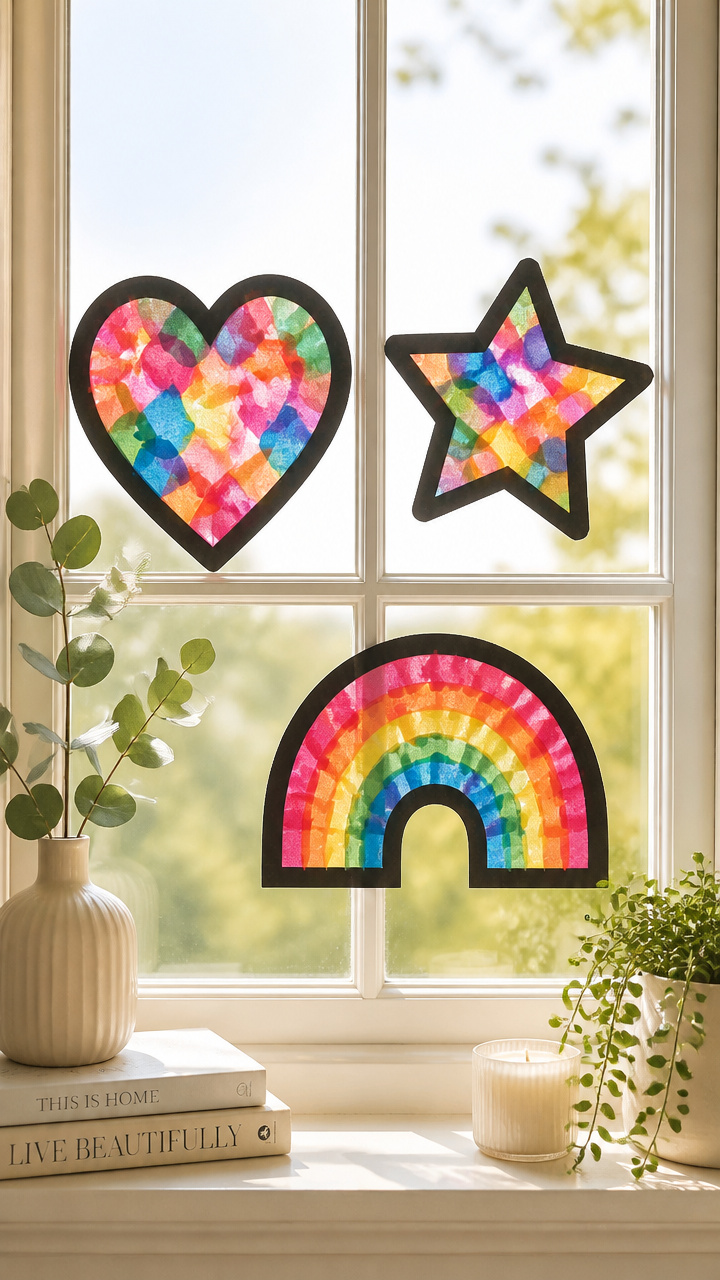
Bright layers of crumpled tissue paper pressed inside contact paper glow when hung in sunlight. The crinkle texture invites pinching and smoothing.
Materials Needed
- 1 roll clear contact paper
- 15 squares colored tissue paper, 2×2 inches each
- Scissors
- Rolling pin
- Black construction paper, 8.5×11 inch
How to Make It
- Cut a 9×12 inch rectangle from the contact paper and peel off the backing.
- Let your toddler arrange tissue squares on the sticky side, slightly overlapping them.
- Cover with the second layer of contact paper, then seal by rolling with the rolling pin to flatten air bubbles.
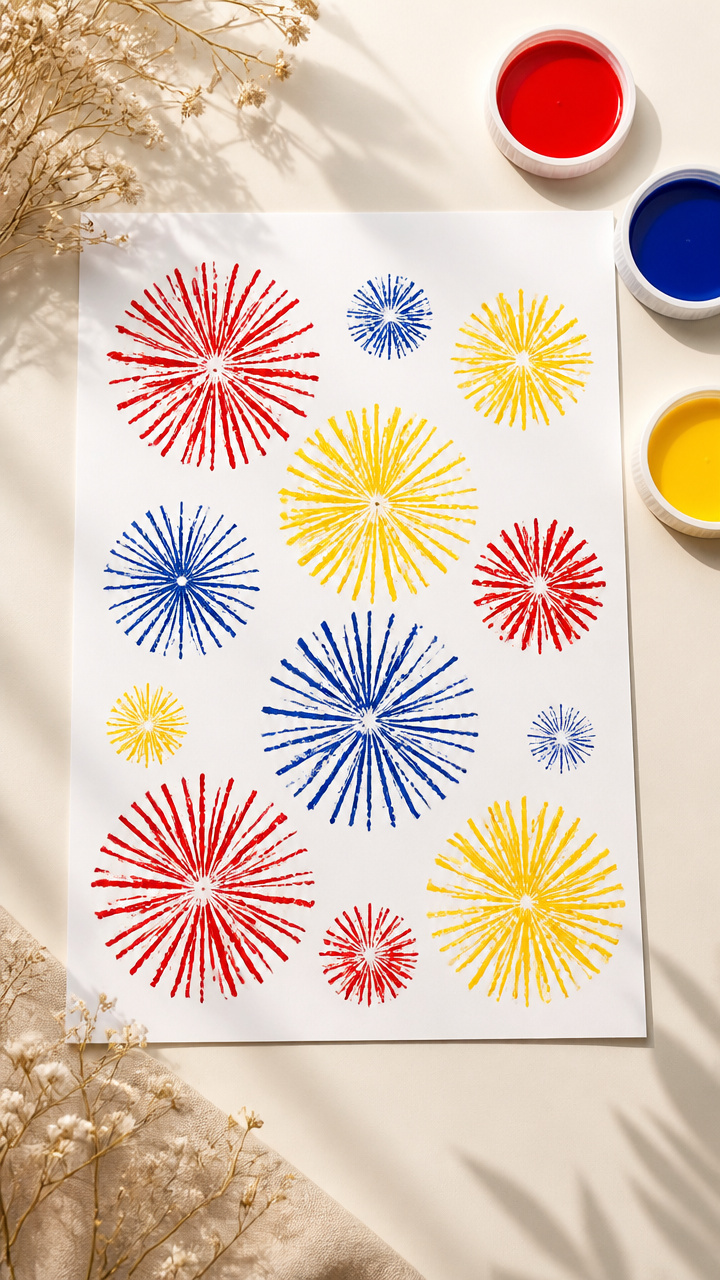
4. Puffy Paint Dot Prints
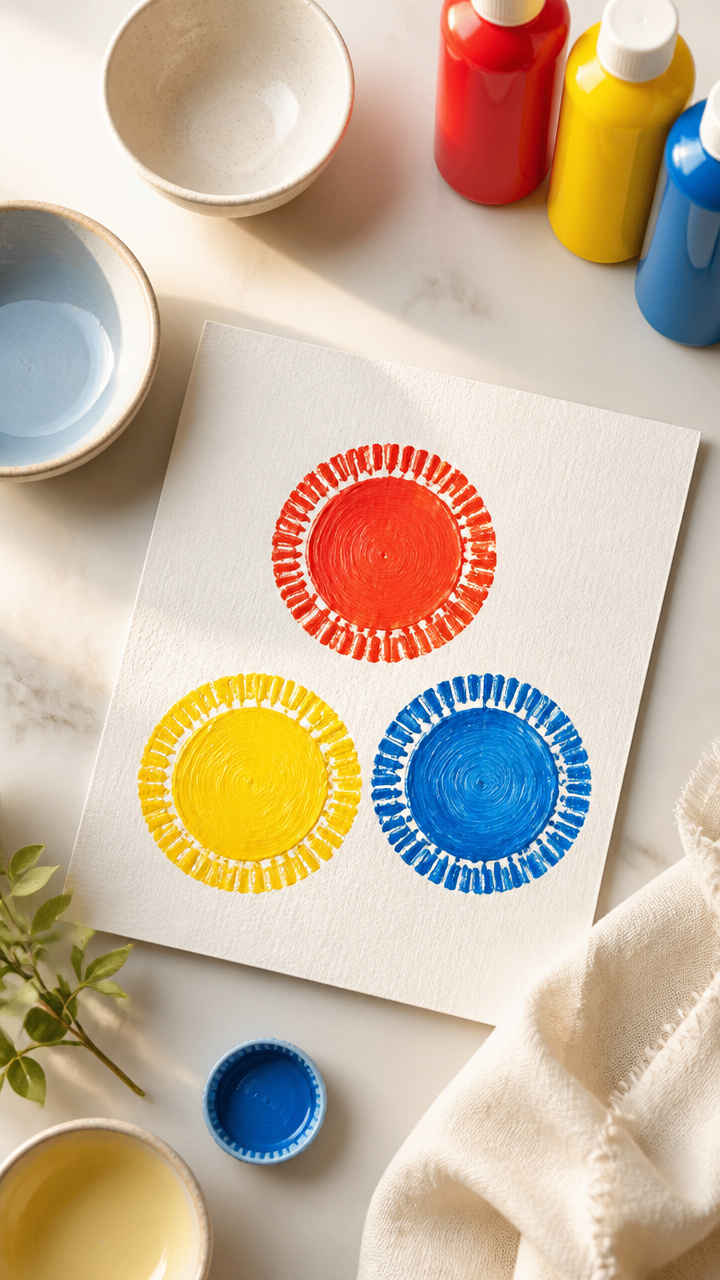
Thick dollops of puffy paint made from flour and salt rise slightly when dried, giving a bumpy texture perfect for fingertip tracing. Use bottle caps as safe applicators.
Materials Needed
- 1/2 cup all-purpose flour
- 1/4 cup table salt
- 1/3 cup water
- 3 small bowls
- Red, yellow, and blue liquid watercolors, 1 teaspoon each
- Bottle caps, 3 clean ones
- Index cards, 6 pieces
How to Make It
- Mix flour, salt, and water in a bowl until smooth, then divide into three small bowls and tint each with a different color.
- Spoon one color into each bottle cap and let your toddler press the rim onto index cards to make dots.
- Set cards flat and let them dry overnight before touching.
5. Cotton Ball Beach Scene
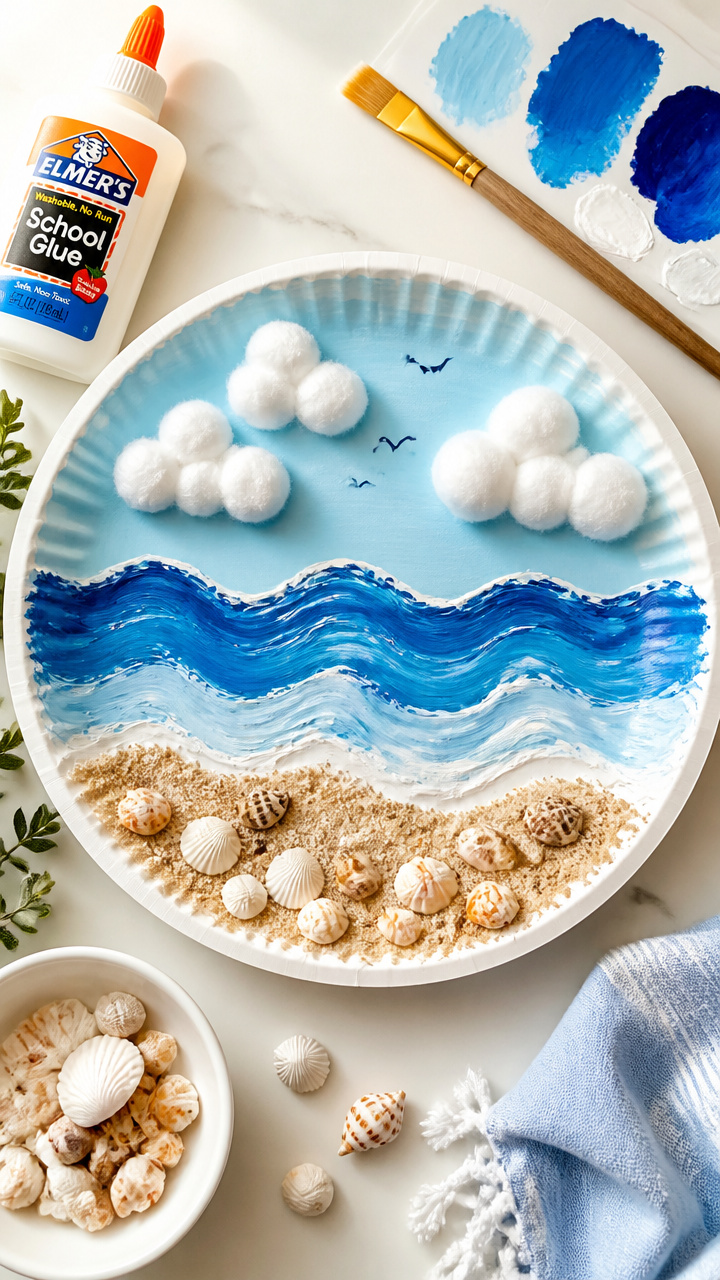
Soft cotton balls mimic sand and clouds in a layered collage that builds fine motor control through gentle pressing and arranging. A paper plate frame keeps materials contained.
Materials Needed
- 6 paper plates
- Blue finger paint, 2 tablespoons
- White glue, 1/4 cup
- Cotton balls, 30
- Small seashells, 12
- Paintbrush
How to Make It
- Cut a U-shape out of the bottom edge of each paper plate to create a frame with a curved opening.
- Use the paintbrush to apply blue paint across the top half of the frame for the sky and bottom for water.
- Let your toddler dot glue along the lower curve and press cotton balls to form a beach, adding shells on top.
6. Aluminum Foil Sound Mirror
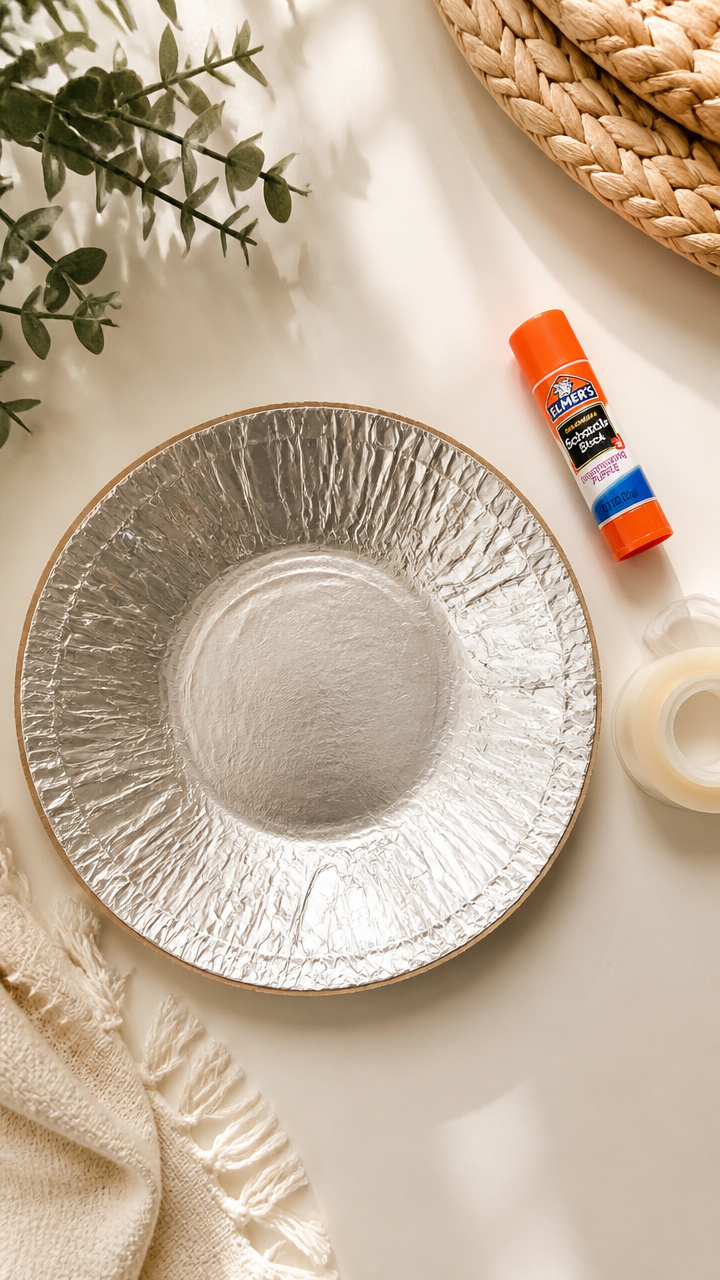
Crumpling shiny foil creates a crackling sound and a rippled surface that reflects light in dancing patterns. Mounted on cardboard, it becomes a safe handheld mirror.
Materials Needed
- 12×12 inch sheet aluminum foil
- 9×12 inch cardboard rectangle
- Glue stick
- Clear packing tape
How to Make It
- Lay the foil shiny side down and crumple it loosely into a ball, then unfold it gently to keep the texture.
- Adhere the foil to the cardboard with the glue stick, starting at one corner and smoothing outward.
- Seal the edges with packing tape to prevent peeling and hand it to your toddler to explore light and sound.
7. Straw Stamping Patterns
Short lengths of plastic straws stamp crisp circles when dipped in paint and pressed firmly. The hollow shape fits perfectly in tiny palms.
Materials Needed
- 20 plastic drinking straws
- Red, blue, and yellow washable paint, 1 tablespoon each
- Shallow plastic lids, 3
- A4 white printer paper, 5 sheets
How to Make It
- Cut each straw into 1 inch lengths using scissors.
- Pour one color of paint into each lid and let your toddler dip one end of a straw piece into the paint.
- Press the wet end straight down onto the paper to make a clean circle, repeating to fill the page.
8. Dry Erase Bag Scribbles
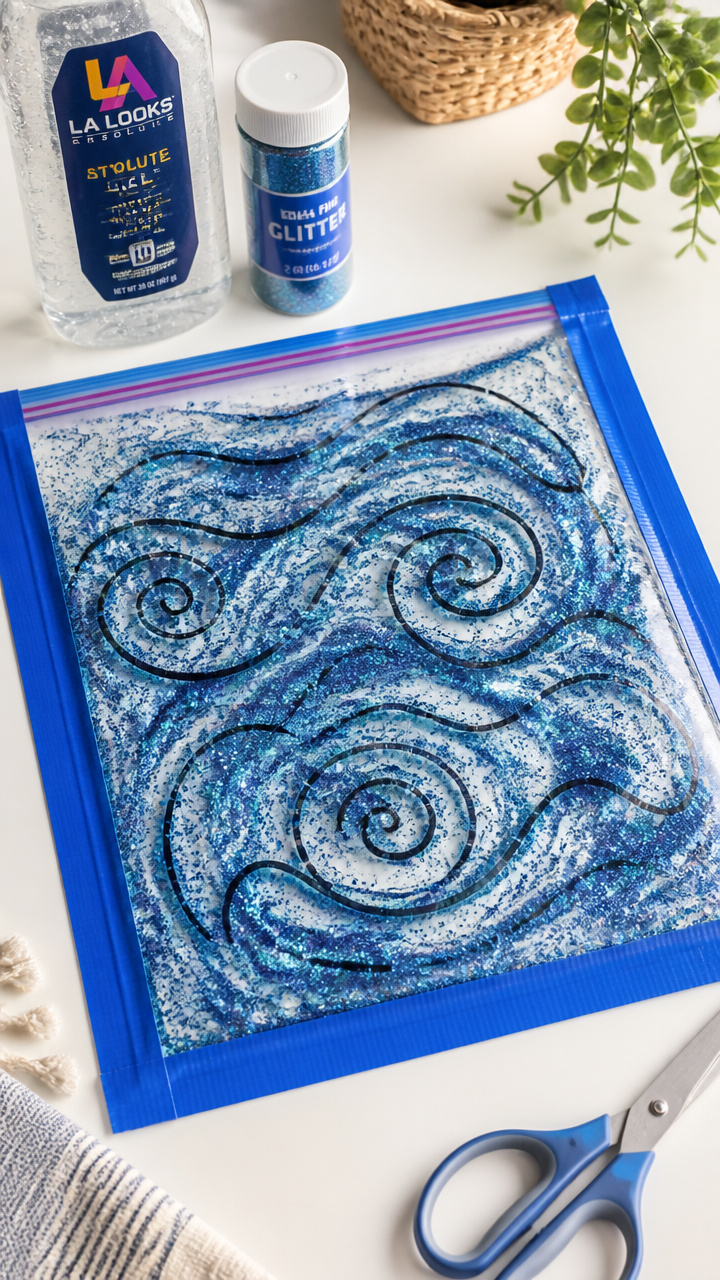
A zip-top bag filled with hair gel and glitter becomes a reusable drawing surface that responds to fingertip pressure. No spills, no stains, endless looping lines.
Materials Needed
- 1 gallon-sized zip-top plastic bag
- 1/2 cup clear hair gel
- 1/2 teaspoon blue glitter
- Duct tape
- Permanent marker
How to Make It
- Squeeze the hair gel into the bag and add the glitter, then seal the bag tightly.
- Run duct tape around all four edges of the sealed bag to reinforce it.
- Use the permanent marker to draw a simple shape like a sun on the outside and let your toddler trace it with their finger inside the gel.
9. Yarn Wrapping Cards
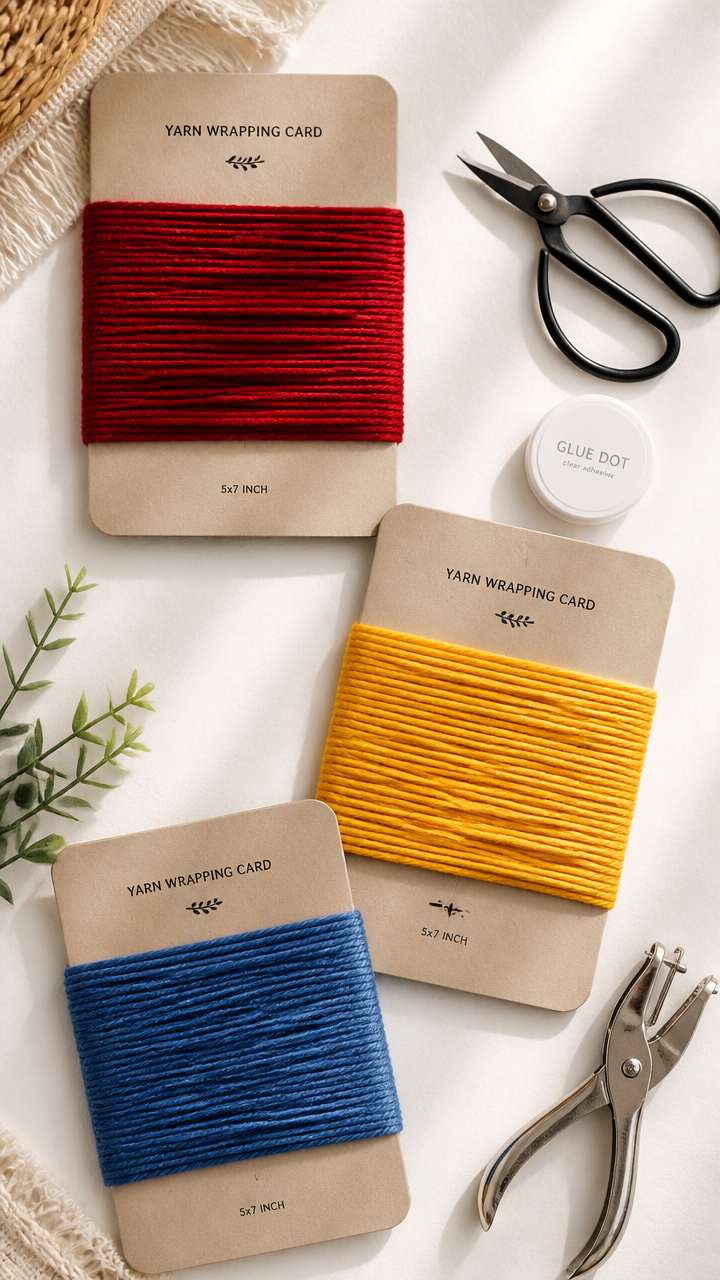
Stiff cardboard cards with pre-punched holes let toddlers weave yarn through slots, building hand strength and pattern recognition. The fuzzy texture holds attention.
Materials Needed
- Cardboard, 5×7 inches, 3 pieces
- Hole punch
- Yarn, 3 colors, 1 yard each
- Scissors
- Glue dot
How to Make It
- Use the hole punch to make eight even holes along both long edges of each cardboard piece.
- Tie one end of a yarn color to a bottom hole with a knot and secure it with a glue dot.
- Let your toddler pull the yarn up through the opposite hole and continue weaving back and forth until the card is full.
10. Pasta Shape Sort and String
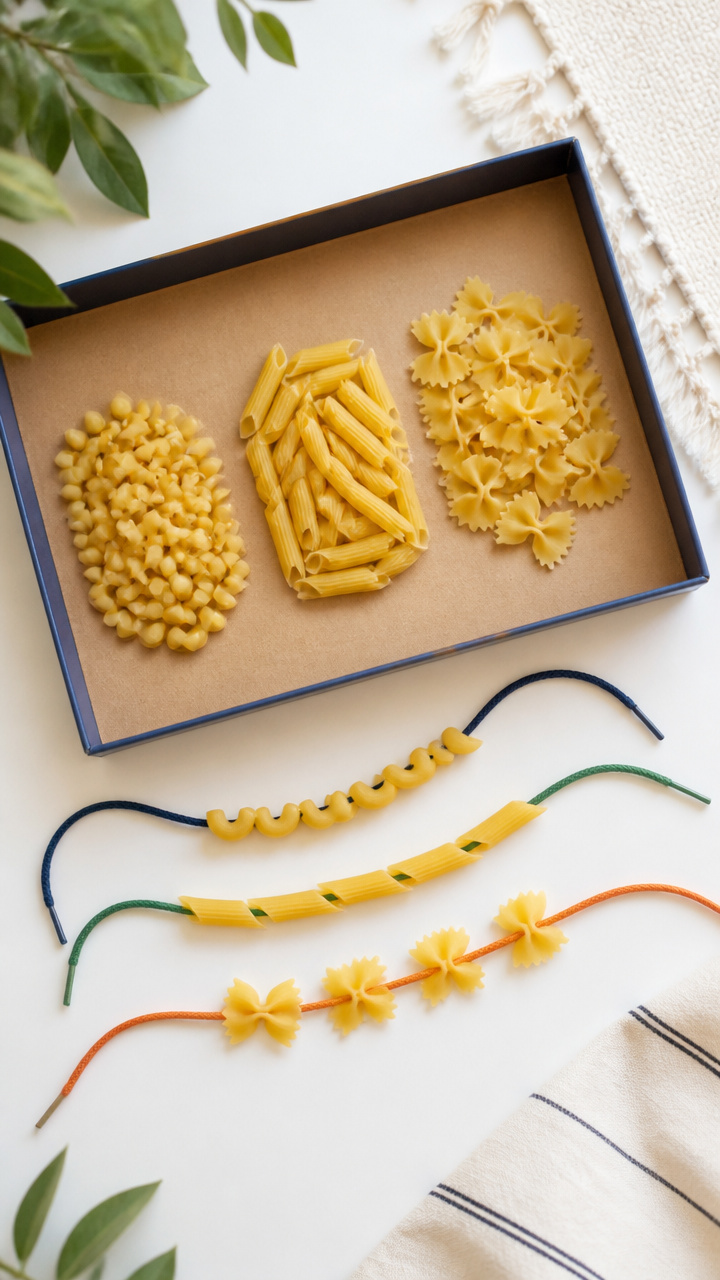
Uncooked pasta shapes in ridged tubes and spirals slide easily onto shoelaces, offering varied textures and resistance. A shoebox lid keeps pieces from scattering.
Materials Needed
- 1 cup uncooked elbow macaroni
- 1/2 cup uncooked penne
- 1/2 cup uncooked farfalle (bow ties)
- 3 waxed cotton shoelaces, 24 inches each
- Shoebox lid
How to Make It
- Pour all pasta shapes into the shoebox lid to contain them.
- Tie a large knot at one end of each shoelace to stop pasta from slipping off.
- Let your toddler pick shapes and push them onto the lace, feeling how each type slides differently.
11. Bubble Wrap Stomp Painting
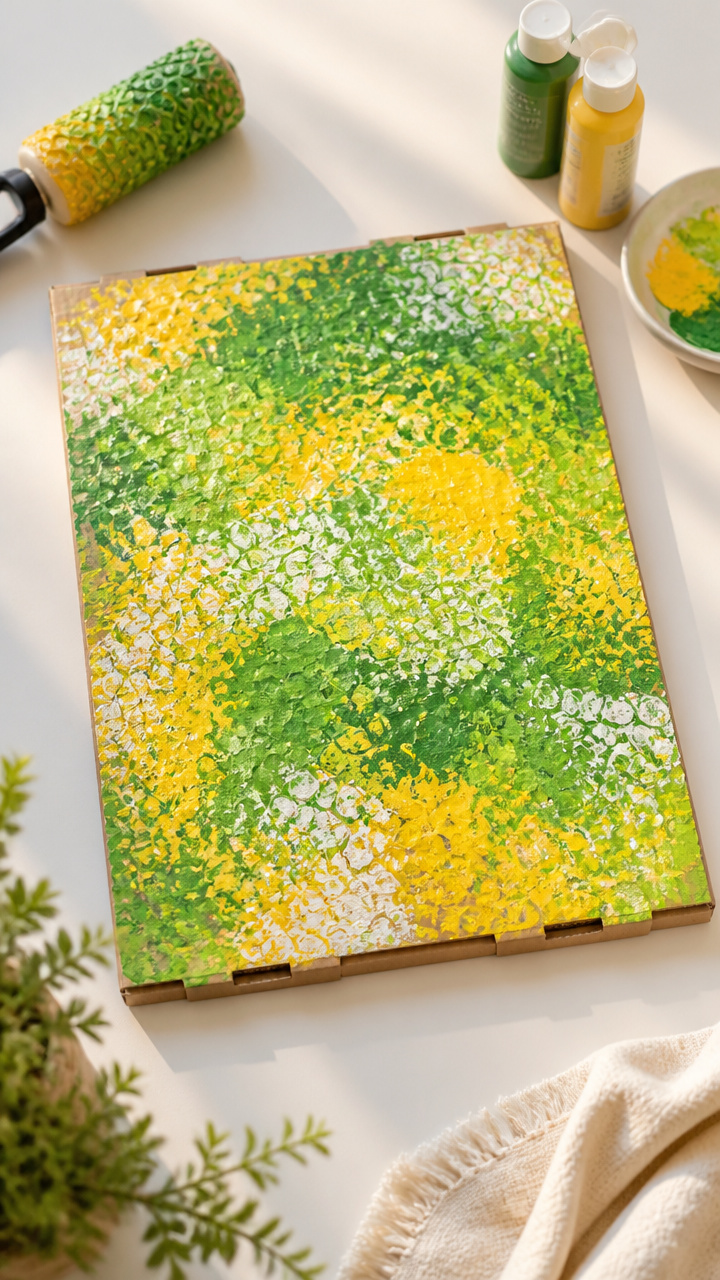
Firmly taped bubble wrap stretched over a box turns into a giant stamping pad when rolled with paint. Toddlers can stomp with hands or feet safely.
Materials Needed
- Cardboard box lid, 12×16 inches
- 12×16 inch sheet bubble wrap
- Masking tape
- Green and yellow washable paint, 2 tablespoons each
- Foam roller
How to Make It
- Lay the bubble wrap bubble-side up over the box lid and tape all edges securely with masking tape.
- Pour green paint across one half and yellow on the other, then roll evenly with the foam roller.
- Let your toddler press hands or bare feet onto the surface and then onto plain paper to make textured prints.
12. Magnetic Drawing Tray
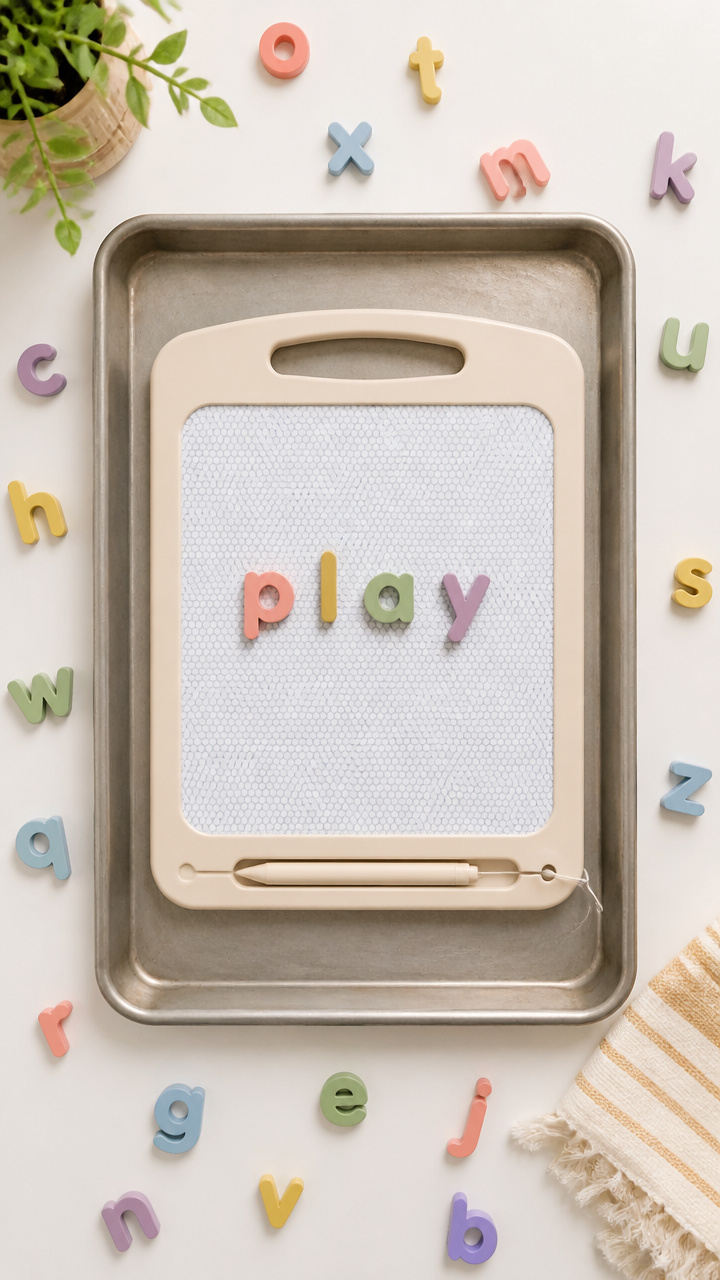
A recycled cookie sheet and loose magnetic letters offer a sliding, clicking play surface where shapes move with a nudge. No markers or ink needed.
Materials Needed
- 1 clean metal cookie sheet
- 1 set lowercase magnetic letters
- Small towel
How to Make It
- Wipe the cookie sheet with the towel to remove dust.
- Pour the magnetic letters onto the sheet and let your toddler slide them around with their fingers.
- Encourage sorting by color or pushing letters together to feel the magnetic snap.
13. Crayon Rubbing Discovery
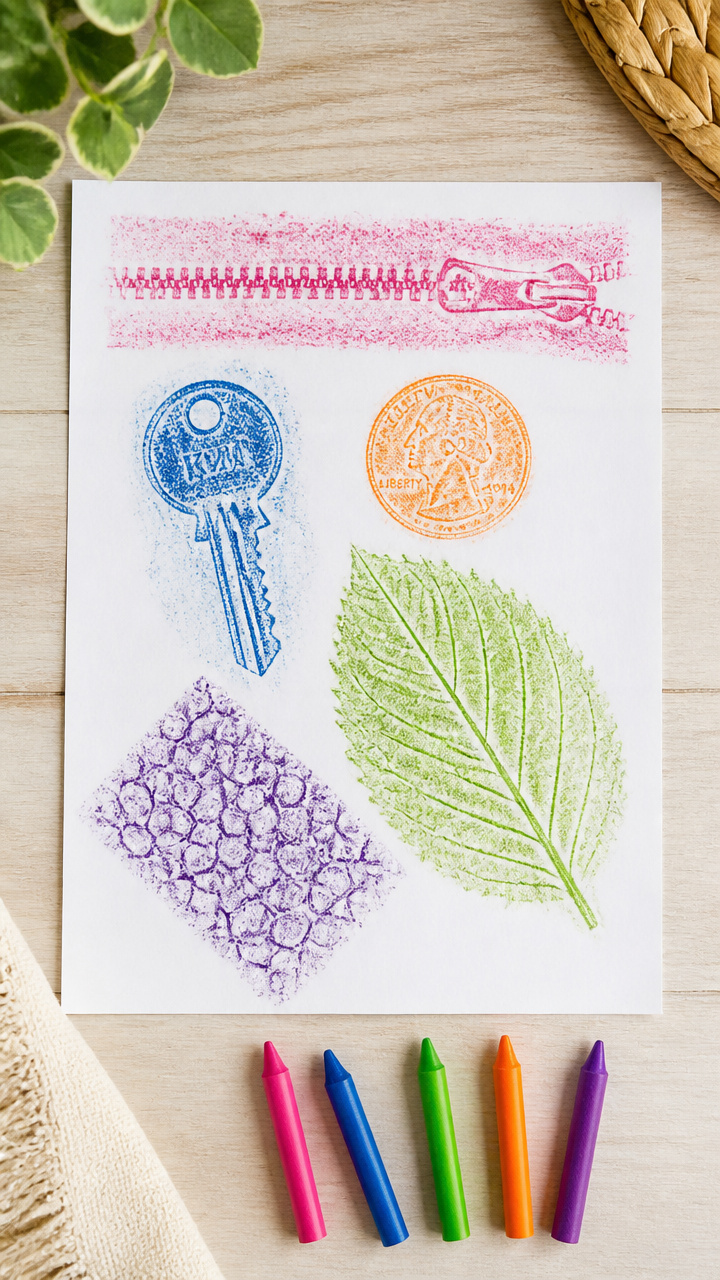
Placing paper over textured objects and rubbing with crayons reveals hidden patterns. Peeled crayons work best for wide, smooth strokes.
Materials Needed
- 5 peeled crayons, different colors
- White printer paper, 6 sheets
- Textured items: zipper, key, coin, sandpaper, leaf
- Tape
How to Make It
- Tape one textured item to the table under a sheet of paper, ensuring it lies flat.
- Let your toddler hold a crayon sideways and rub gently over the paper above the object.
- Lift the paper to reveal the impression and swap in a new texture underneath.
14. Feather Fan Wands
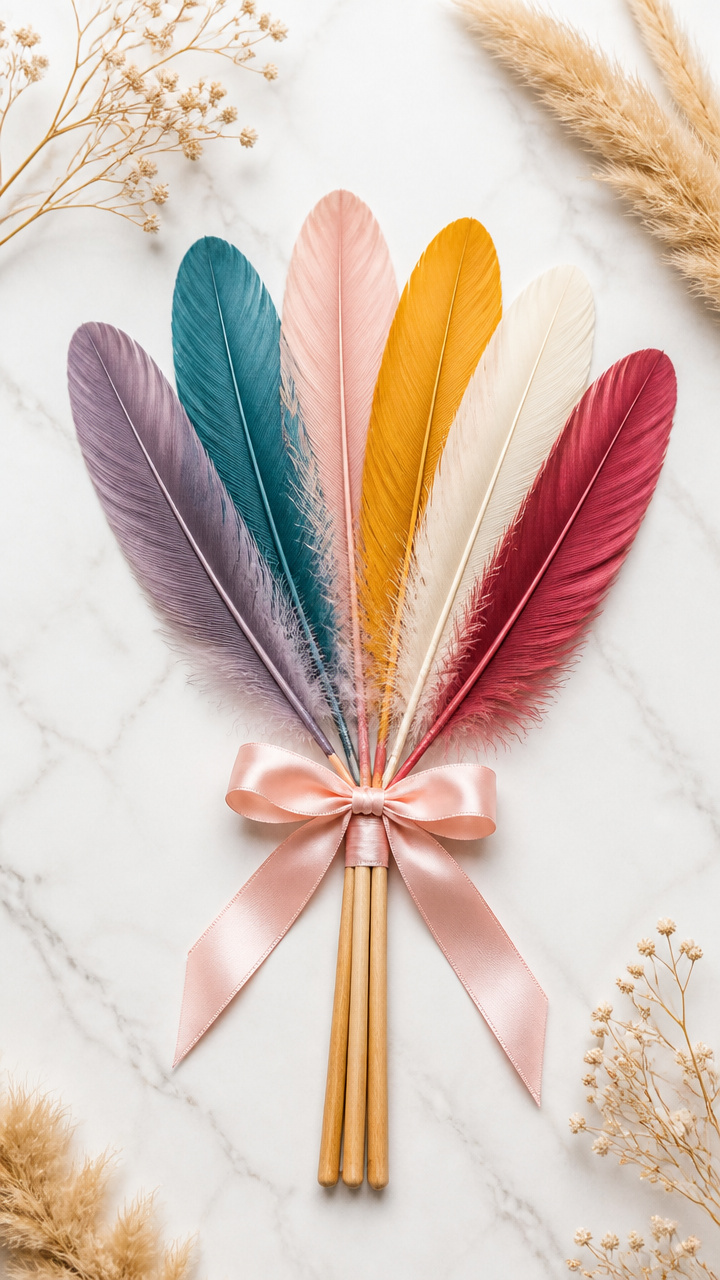
Lightweight craft feathers tied to sticks flutter with the slightest movement, offering visual tracking and soft tactile input. Colored ribbons add flow.
Materials Needed
- 6 craft feathers, assorted colors
- 3 wooden craft sticks
- 1 yard satin ribbon, 1/4 inch wide
- Glue gun with glue sticks
- Scissors
How to Make It
- Cut the ribbon into three 12 inch lengths.
- Use the glue gun to attach two feathers and one ribbon end to the top of each craft stick.
- Hold the stick upright and let the glue set for 2 minutes before handing it to your toddler to wave.
15. Sensory Rice Bin Play

Colored rice dyed with vinegar stays vibrant and dry, filling a bin with pourable, scoopable grains that sift through fingers like tiny beads.
Materials Needed
- 2 cups white rice
- 1 tablespoon white vinegar
- 5 drops green food coloring
- 9×13 inch plastic container with lid
- Small cups and spoons, 3 each
How to Make It
- Mix rice, vinegar, and food coloring in a bowl until evenly tinted, then spread on a tray to dry for 3 hours.
- Pour the dry rice into the plastic container and add the cups and spoons.
- Let your toddler scoop, pour, and transfer rice while describing how it feels between fingers.
You’ve got everything you need to bring calm, creative moments into your summer days. Pick one craft, gather what’s close at hand, and let your toddler’s senses lead the way.