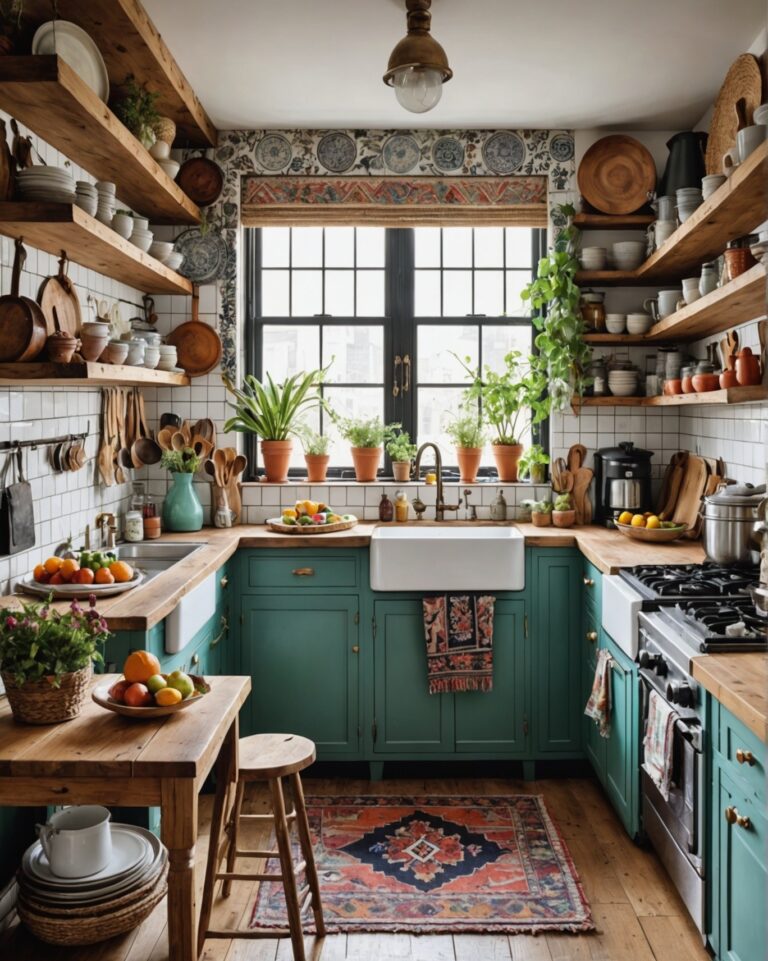
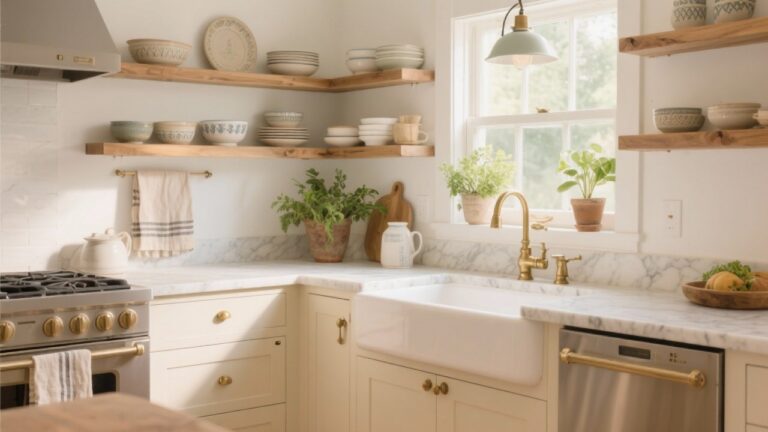
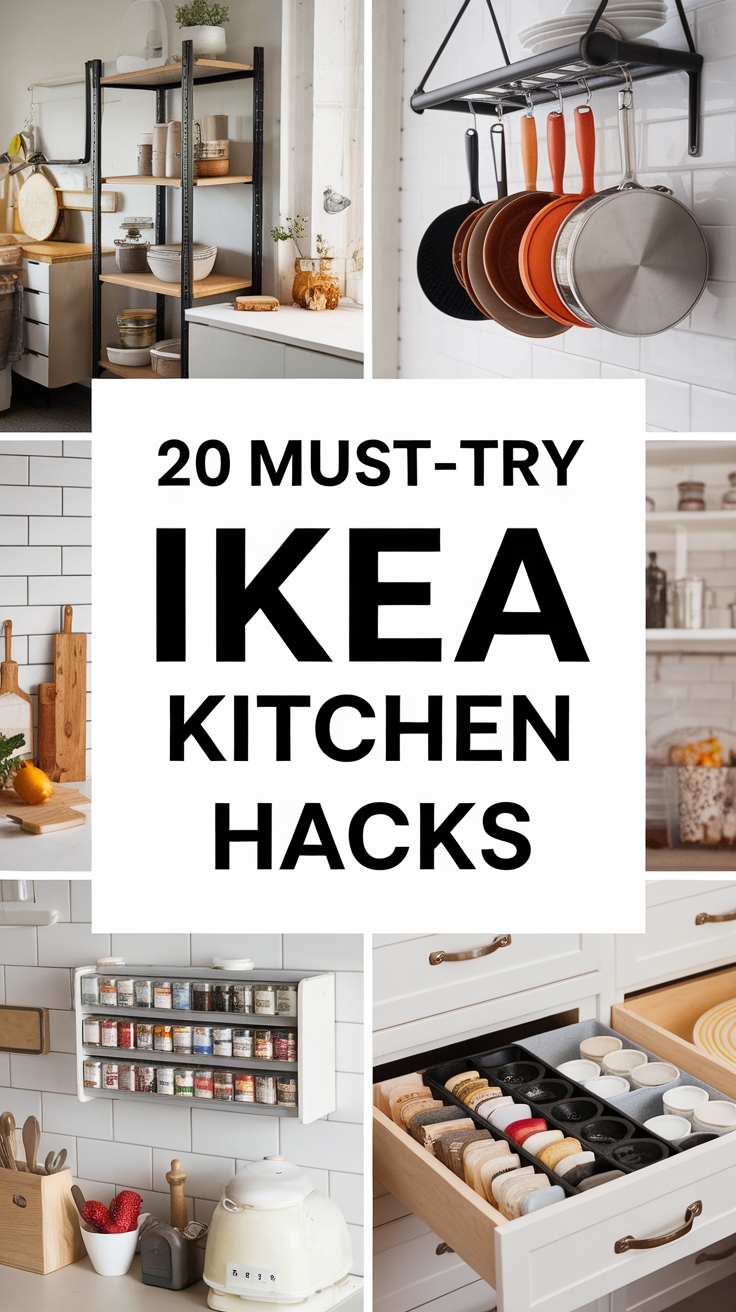
20 Must-Try IKEA Kitchen Hacks for a Stylish Upgrade
Did you know that IKEA hacks can transform your kitchen into a stylish and functional space without breaking the bank? If you’re feeling overwhelmed by clutter or want to refresh your cooking area, you’re not alone. This article offers 20 creative solutions that fit any budget, helping you create a more organized and gorgeous kitchen today!
Shop Our Must-Haves


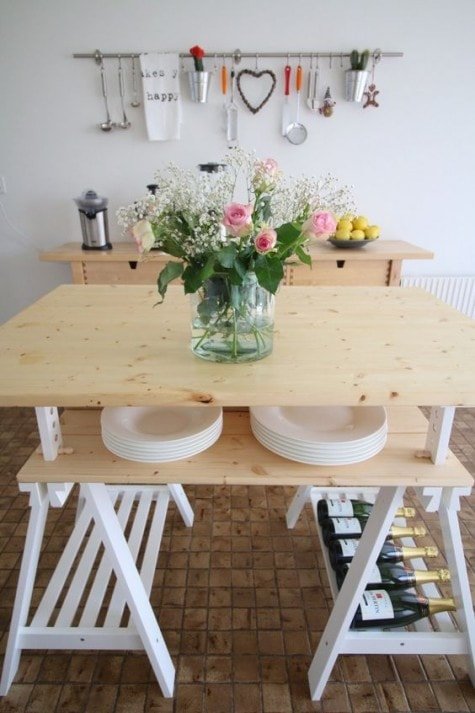
1 DIY Minimalist Dining Table Guide
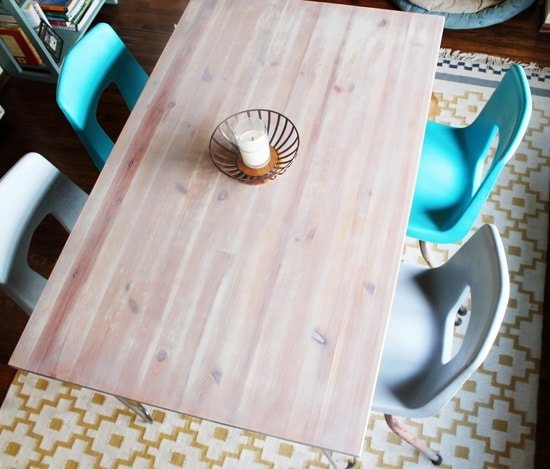
Creating a DIY minimalist dining table can be a fun and rewarding project! You can easily upgrade a regular table into a sleek, modern design without breaking the bank.
Start with the JOKKMOKK table from IKEA. It has a simple structure that makes it perfect for a DIY transformation. First, grab some wood stain to enhance the tabletop’s color. This simple step adds a touch of elegance!
Next, attach hairpin legs for that trendy, minimalist look. You can find heavy-duty metal legs at most hardware stores or online. Just screw them onto the finished tabletop, and you’ve got yourself a stylish dining table that’s sure to impress!
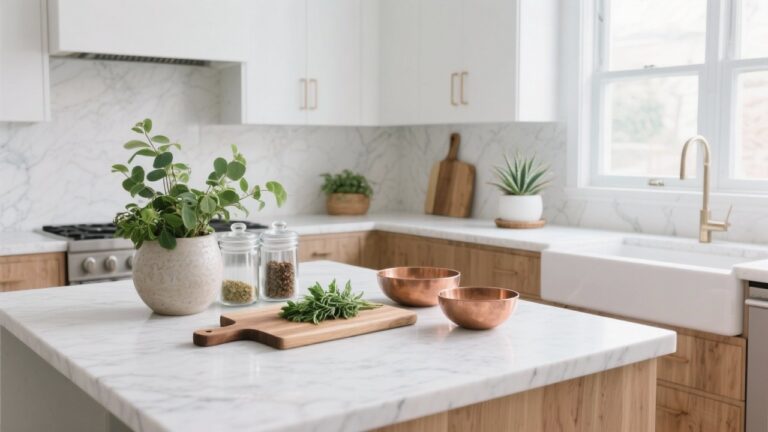
2 Stylish Indoor Herb Garden Ideas
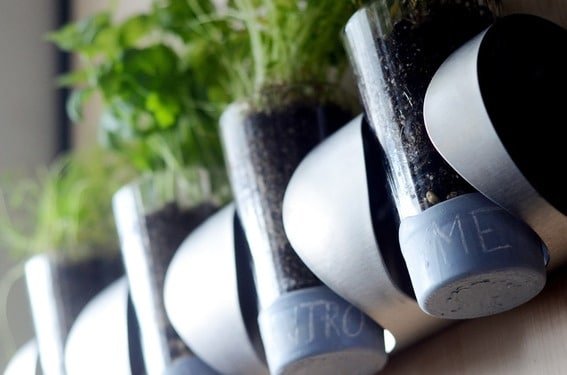
Create a stylish indoor herb garden using an IKEA wine rack. Mount the VURM wine rack horizontally on your wall. This not only saves space but also gives your kitchen a chic touch.
Fill up glass containers with decorative pebbles and plant your favorite herbs, like basil, cilantro, or mint. This makes it easy to keep your herbs fresh and ready for cooking. You can even use different containers to create a mini herb display!
Don’t forget to position your garden near a window for plenty of natural light. It’s a fun, practical, and beautiful way to spice up your kitchen!
3 Stylish IKEA Utility Cart Ideas
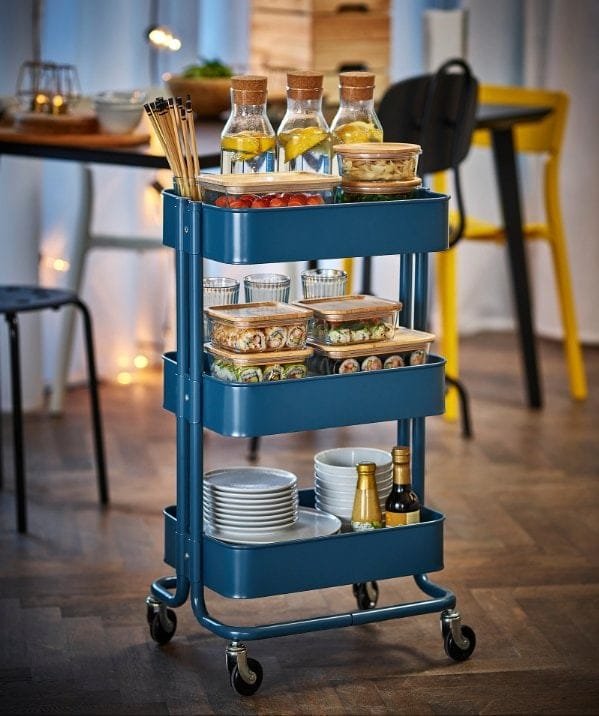
A utility cart from IKEA can be a game-changer for your kitchen! You can use it to store kitchen gadgets, snacks, or even spices. I love that it’s mobile, allowing you to move it wherever it’s needed.
Personalize your cart with a fresh coat of spray paint. Choose your favorite color to match the kitchen vibe. For an added touch of flair, consider filling one shelf with fake flowers or plants. This not only looks chic but also brings a pop of color into your space. You can make your cart a stylish focal point while keeping everything organized!
4 Build Your Own Credenza
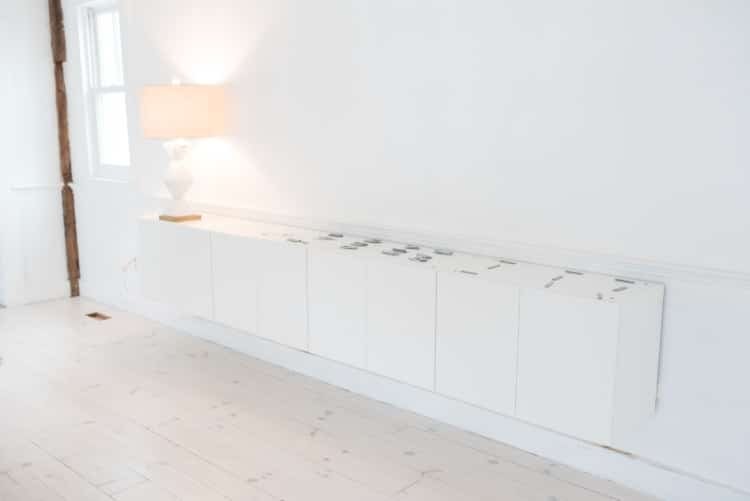
Want more storage space in your living room? You can easily make your own credenza by using some upper wall cabinets from IKEA. This DIY project is not only budget-friendly but also lets you customize it to fit your style!
Start with two or three wall cabinets that you like. Choose a color or finish that matches your decor. I recommend using cabinets with glass doors to show off your favorite items.
Next, you can attach the cabinets to a sturdy base or directly to the wall. Consider adding some decorative legs for an elegant touch. Finally, fill your new credenza with books, plants, or anything else that makes your space feel cozy!
5 Stylish Industrial Wall Shelves
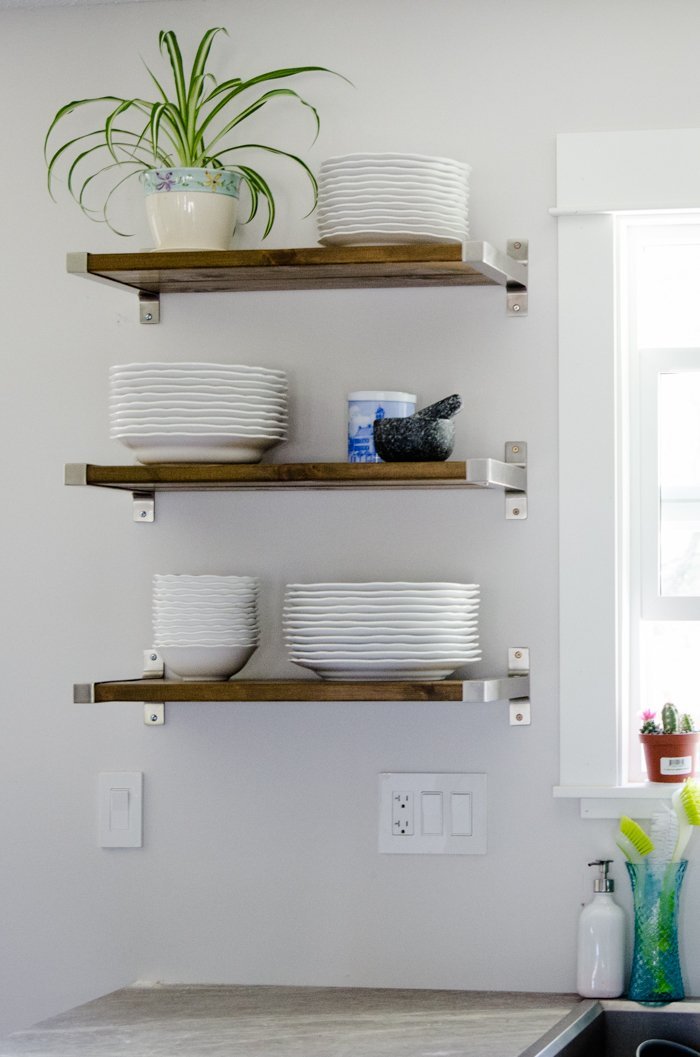
Stylish industrial wall shelves can add a cool vibe to your kitchen while giving you extra storage. You can take a few simple steps to create your own eye-catching design.
Start with some stainless steel wall brackets from IKEA. They’re durable and add that industrial feel you want. Pick a piece of wood that matches your style; it could be reclaimed wood or a fresh cut. Just make sure it’s the right size for your space.
Mount the brackets to your wall and then place the wood on them. This way, you can display your favorite plates, cookbooks, or even some cute plants. Not only will your kitchen look amazing, but you’ll also have a far more organized space!
6 Create Your Own Kitchen Island
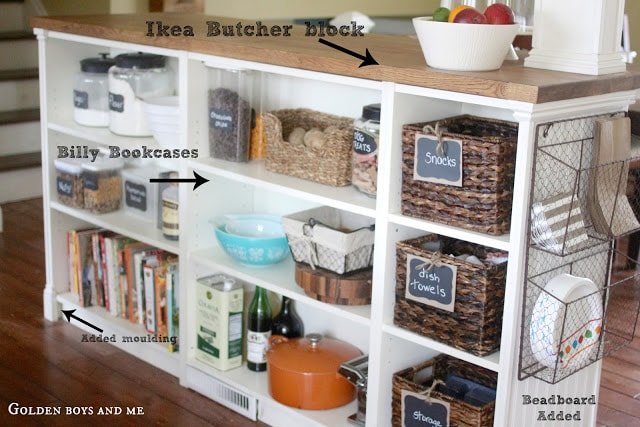
A kitchen island can transform your space dramatically. It adds not only extra counter space but also a cozy area to gather when family and friends visit. Plus, who doesn’t love a stylish kitchen?
You can easily create your own island using two BILLY Bookcases from IKEA. Just place them back-to-back for sturdy support. Then, add a wood panel on top for a beautiful countertop. You can even stain or paint the wood to match your kitchen’s style!
Don’t forget about seating! Adding some bar stools will make your island inviting. A quick spray paint can change their look, so they fit perfectly with your kitchen’s theme! This DIY project is fun and gives you a chance to show off your creativity.
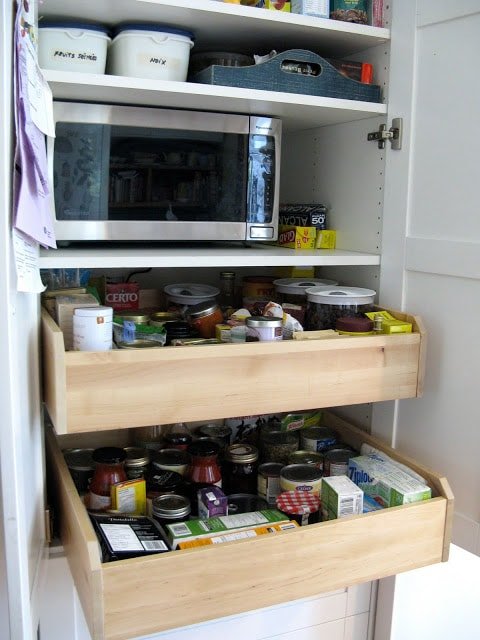
7 Optimal Kitchen Pantry Solutions
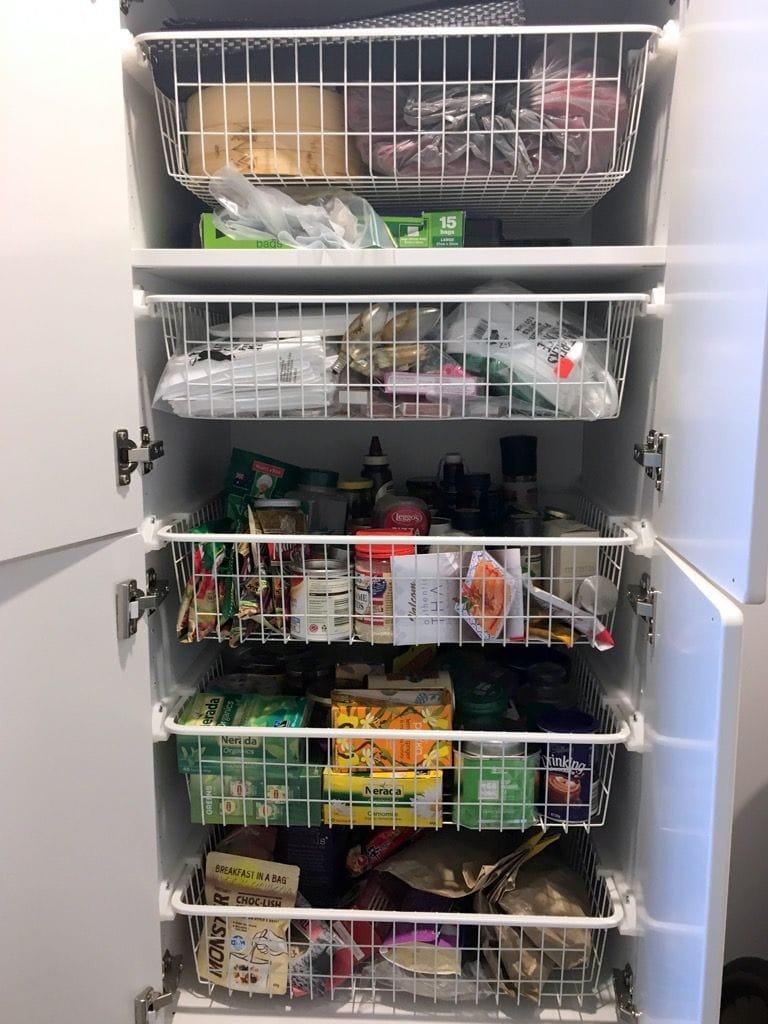
Want to keep your kitchen organized? Consider using pull-out pantry shelving units. These can easily save you space and make it simpler to find snacks or meal ingredients.
I recommend using the STUVA GRUNDLIG wire baskets from IKEA. They are perfect for storing snacks, cans, and other essentials. You can set them up almost anywhere in your pantry.
Try grouping similar items together in each basket. For example, keep all your snacks in one basket and canned goods in another. This way, you can quickly grab what you need without rummaging through disorganized shelves.
8 Create a Vintage Kitchen Island

You can create a vintage kitchen island using two BEKVAM kitchen carts from IKEA! I love this hack because it gives your kitchen an old-school charm without spending a fortune.
Start by painting the carts white. This will give them a nice, clean look that works perfectly in a vintage setting. Don’t forget to leave the tabletop in its natural birch finish to add some contrast and character.
Once the paint is dry, simply push the two carts together. This will create a functional and stylish island that offers extra storage and workspace in your kitchen. Plus, you can add some cute decorations or kitchen accessories on top to make it even more inviting!
9 Stylish Urban Kitchen Storage Solutions
Transform your kitchen with stylish urban storage that’s both practical and chic. One amazing idea is to use the FINNVARD trestle from IKEA. This versatile piece can be turned into a sleek storage unit for your plates and wine bottles.
You might consider adding a countertop to the trestle, creating a perfect island for cooking. This not only gives you extra space for preparing meals but also makes a beautiful spot to display your favorite kitchen items.
To go a step further, use baskets on the shelves for easy access to utensils and napkins, keeping your kitchen organized while adding an eye-catching design. Remember, stylish storage is all about making the most of your space!
10 Stylish DIY Bar Cart Idea
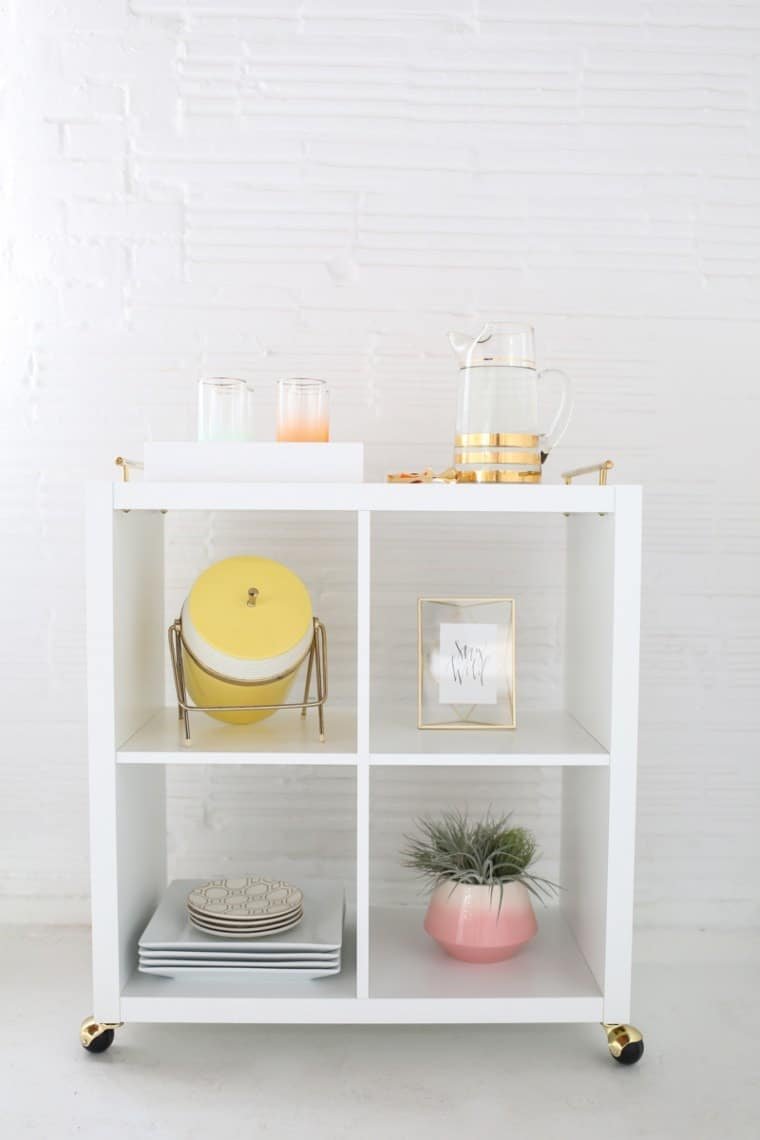
A DIY bar cart can really jazz up your home, and using an IKEA KALLAX shelf is a smart choice! You can easily transform this simple shelf into a chic bar cart that will impress your friends.
Start by adding antique brass hooded swivel ball casters. These not only make your cart mobile but also add an elegant touch. I love how they look against a white KALLAX unit—it’s a perfect match!
To make your bar cart even more stylish, arrange your favorite drinks, glassware, and some decorative items. A few fresh flowers or a fun cocktail shaker can bring in extra flair. With just a little creativity, you’ll have a functional and fashionable addition to your space!
11 Build Your Own Charging Station

Creating your own charging station is a game-changer for keeping your space organized. Imagine having a designated spot where your chargers and devices can stay together, away from the clutter of your kitchen table. You’ll always know where to find everything!
Start with the FINTORP series from IKEA. Use a simple wall-mounted rail and attach hooks or small baskets to hold your chargers. This setup not only saves space but also looks stylish.
Here’s how to do it:
- Choose a wall near your kitchen or workspace.
- Mount the FINTORP rail at a comfortable height.
- Add hooks for cords and small baskets for your devices.
It keeps everything neat and easily accessible, so you’ll never lose a charger again!
12 Easy Pull-Out Trash Solution

Creating an easy pull-out trash solution can transform your kitchen experience! You can make garbage disposal quicker and more organized. All you need is a base cabinet from IKEA.
First, grab a drawer unit that fits inside the cabinet. Attach it to the bottom of the cabinet. Then, add your trash bin or two smaller bins for recycling! I suggest using bins with handles for easy lifting. This setup keeps trash hidden and ensures your kitchen stays neat.
You can also customize the height to fit your needs. Just pull out the drawer when you need to toss something away. It’s a simple hack that makes a big difference in your daily routine.
13 DIY Mobile Kitchen Island Tips
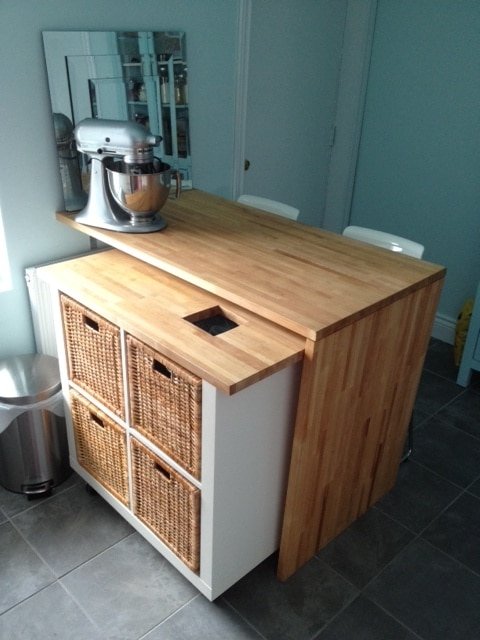
If you want a mobile kitchen island on a budget, I’ve got an easy idea for you! Start with a KALLAX shelf unit from IKEA. It’s sturdy and perfect for creating extra workspace in your kitchen.
Simply place a countertop on top of the shelf unit. This gives you a nice flat surface to prep food or enjoy a snack. Add some storage baskets underneath the countertop to keep your kitchen organized.
Don’t forget to get heavy-duty caster wheels! These wheels need to handle the weight, so pick ones that have a good loading capacity and locking feature. This way, your island stays in place when you’re using it. How cool is that?
14 Transforming Fixtures with Copper Paint
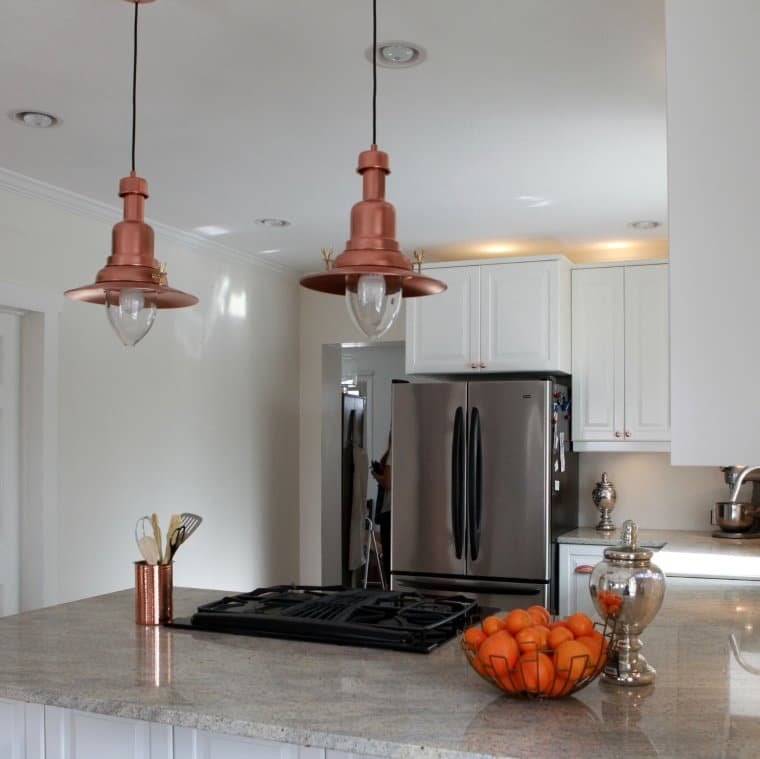
Transform any boring light fixture into a stunning copper masterpiece! If you’ve found an aluminum fixture that’s just not the right color, don’t fret. With some primer and metallic spray paint, you can give it a whole new look.
First, make sure to clean the fixture well. Once it’s dry, cover any parts you don’t want to paint with tape. Apply a coat of primer to help the paint stick. After it dries, grab your favorite metallic spray paint and start spraying! Just a couple of coats can make a huge difference.
Trust me, seeing your DIY project transform will be so satisfying! Plus, it’s a cost-effective way to match your kitchen decor perfectly.
15 Charming Farmhouse Kitchen Cart Ideas
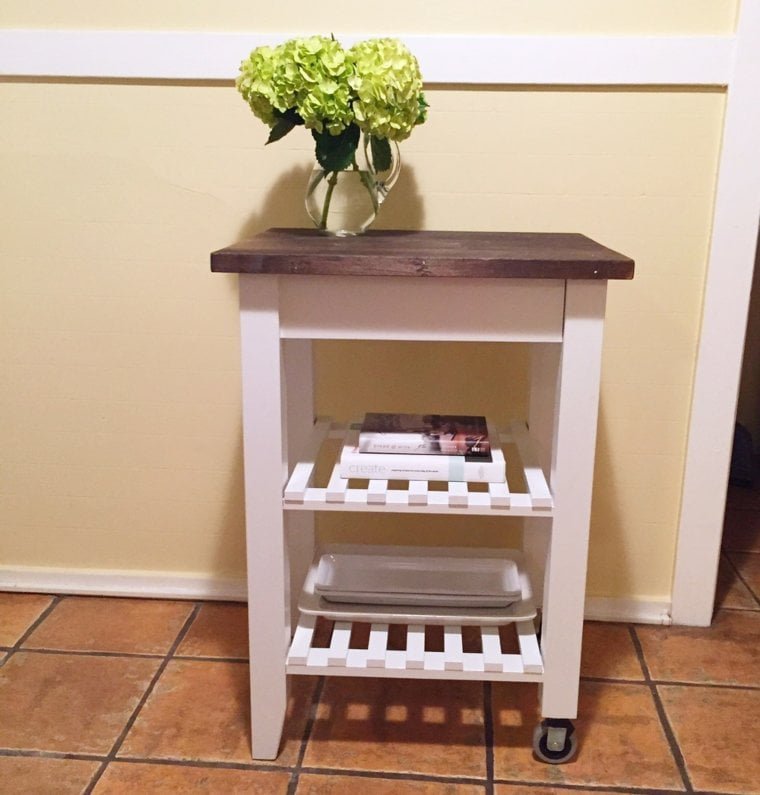
A farmhouse kitchen cart can add charm and functionality to your kitchen. You can transform a standard IKEA cart into a stunning piece by using some rustic paint and wood stain. Imagine a warm, espresso finish that complements your kitchen decor!
For a fun DIY project, grab some sandpaper, your preferred paint, and wood stain. After preparing the cart, paint it in a soft color like sage green or a classic white. Then, apply the wood stain for a rich, warm touch. This simple upgrade not only enhances your space but also creates extra storage.
Once finished, use your cart to display a beautiful floral arrangement or store your favorite cookbooks. The possibilities are endless!
16 Stylish Metallic Salt Shakers
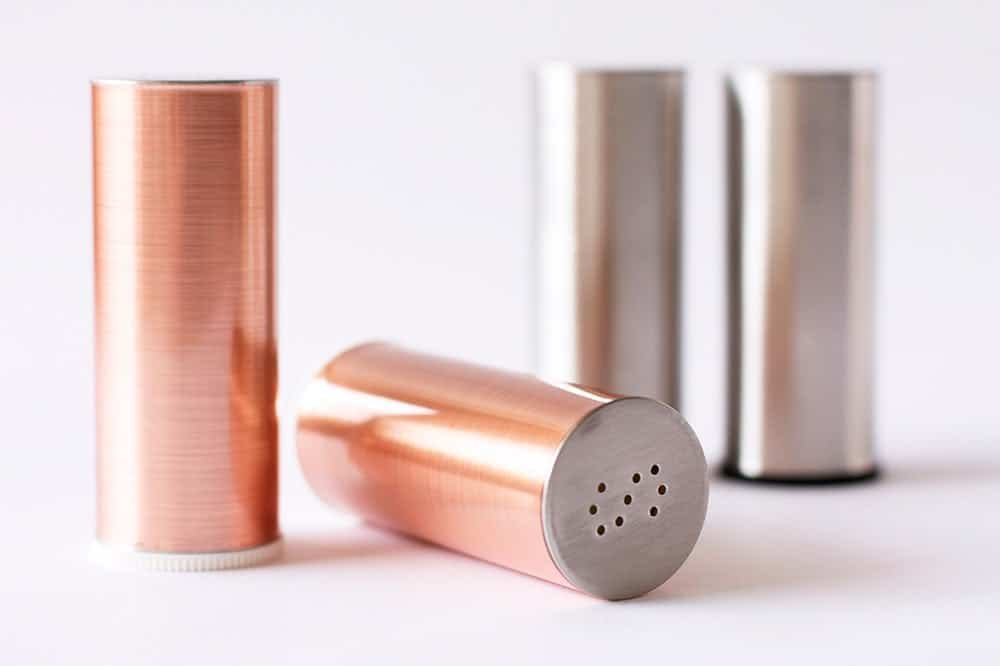
Elevate your kitchen decor with stylish metallic salt shakers! You can easily transform simple salt and pepper shakers from IKEA into stunning decorative pieces. Just grab some copper contact paper and get started!
To make this DIY project work, here’s what you’ll need:
- A set of glass salt and pepper shakers from IKEA
- Metallic contact paper in your choice of color
- Scissors and a ruler
First, measure the height and circumference of your shakers. Cut the contact paper to fit, then carefully wrap it around each shaker. This simple trick gives your kitchen a modern touch without breaking the bank. You’ll love the shiny finish and how it catches the light!
17 DIY Mounted Spice Rack Ideas
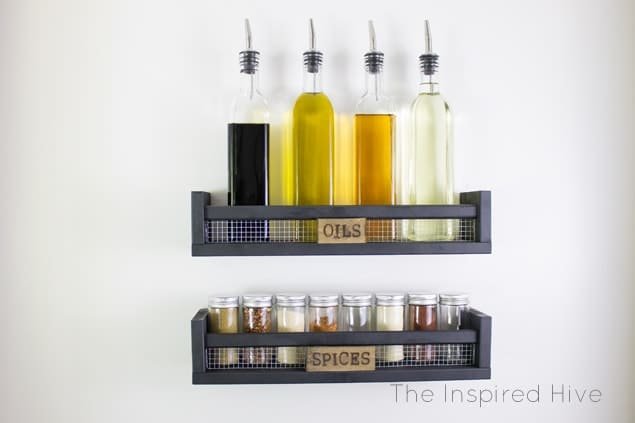
Mounting a DIY spice rack is a fun way to clear up clutter while adding style to your kitchen. You can easily make one using IKEA’s BEKVÄM spice racks. These wooden shelves are perfect for holding all your spices within reach.
For a twist, try giving your racks an industrial look! Use a metal hardware cloth to create a cool backing. Just cut it to size, paint your shelves, and attach the hardware cloth for a trendy vibe.
Fix the spice rack to the wall, and let your spices shine! It’s easy, stylish, and keeps your kitchen organized—just the way I like it.
18 Maximize Pantry Space with Drawers
Creating sliding drawers in your pantry can save you time and frustration! It’s so annoying to not see what’s in the back of your shelves, right? You can easily fix that with a fun DIY project using wooden drawers from the PAX Wardrobe at IKEA.
Start by measuring the space in your pantry. Then, install the drawers to fit snugly within the shelves. This allows you to pull the drawers out to access everything without digging through stacks of items.
You’ll love how organized everything looks! Use one drawer for snacks, another for canned goods, and maybe a third for baking supplies. This will make your cooking and snacking choices so much easier!
19 Stylish Mid-Century Bar Cabinet
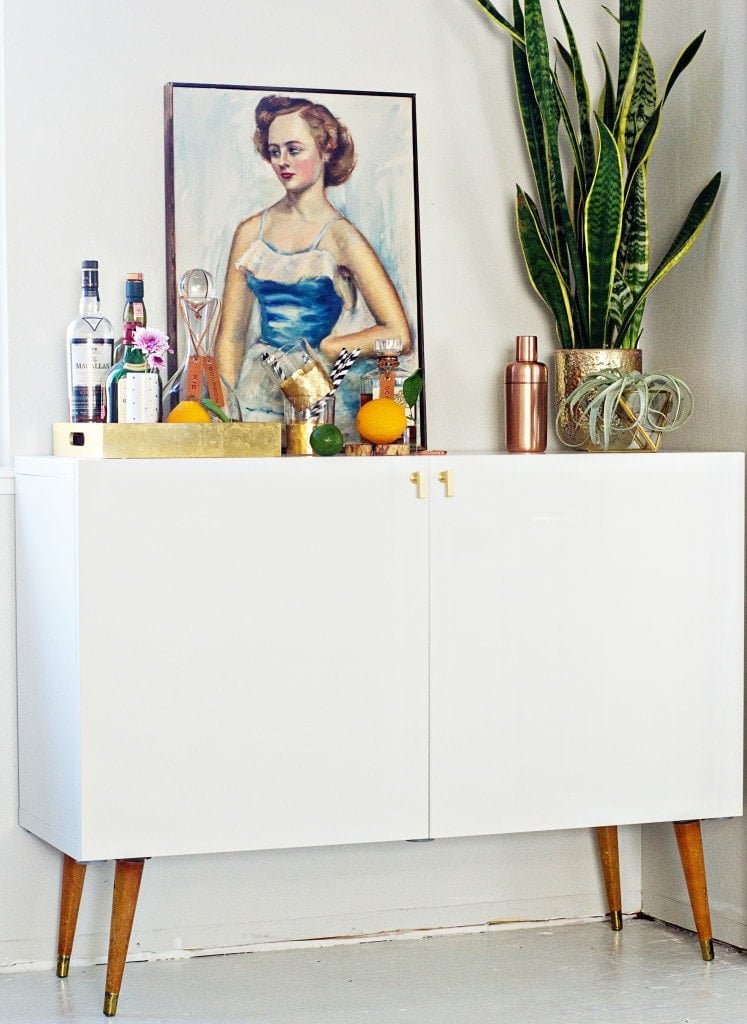
A mid-century bar cabinet can truly transform a room with its stylish design. If you have an empty space that needs a bit of life, this is a great solution!
To make a simple IKEA cabinet stand out, consider changing the knobs to something more unique. You could choose some shiny gold or colorful ceramic ones to add a pop of personality.
For an extra touch, line the inside shelves with gold foil wrapping paper. This can create a fun surprise when you open the cabinet. Your friends will be impressed the next time they see your chic drink station!
20 DIY Sack Wall Organizer
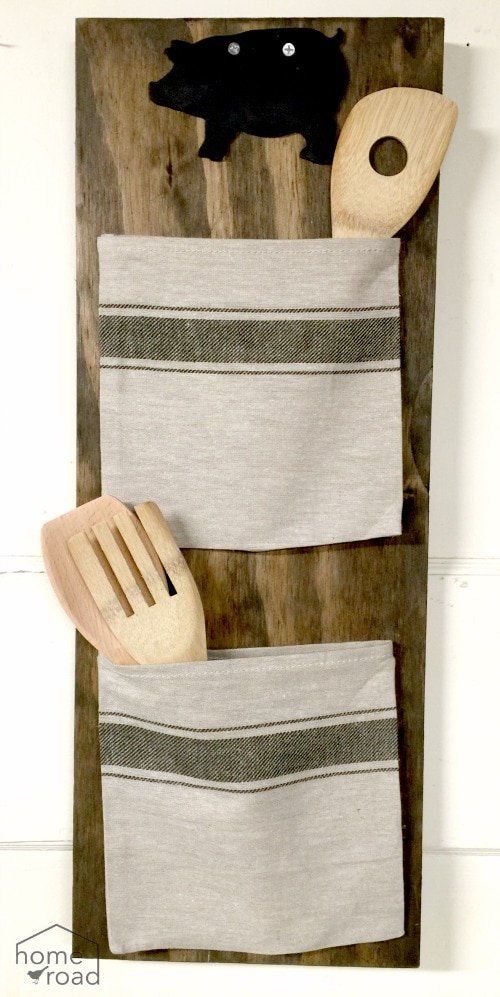
Create a DIY sack wall organizer to keep your kitchen tidy and stylish! All you need is a sturdy wooden plank, some wood stain to match your kitchen, and a few cloth napkins from IKEA.
Start by staining the plank to give it a nice finish. Once dried, attach the napkins to the plank with a staple gun. These will create pockets for storing items like utensils, spice jars, or small cookware.
Hang your organizer on the wall, and you’ll have easy access to your most-used items right where you need them! This is not only practical but also a fun way to add a personal touch to your kitchen.