21 Creative Clothespin Organization Hacks
Did you know that simple clothespins can transform your home into a perfectly organized haven? If you’re tired of clutter and disorganization, you’re not alone! This article will show you 21 creative ways to make your life easier and more beautiful using clothespins. Get ready to discover practical solutions that save space and make organizing fun!
Shop Our Must-Haves


1 Chic Wall Organizer Ideas
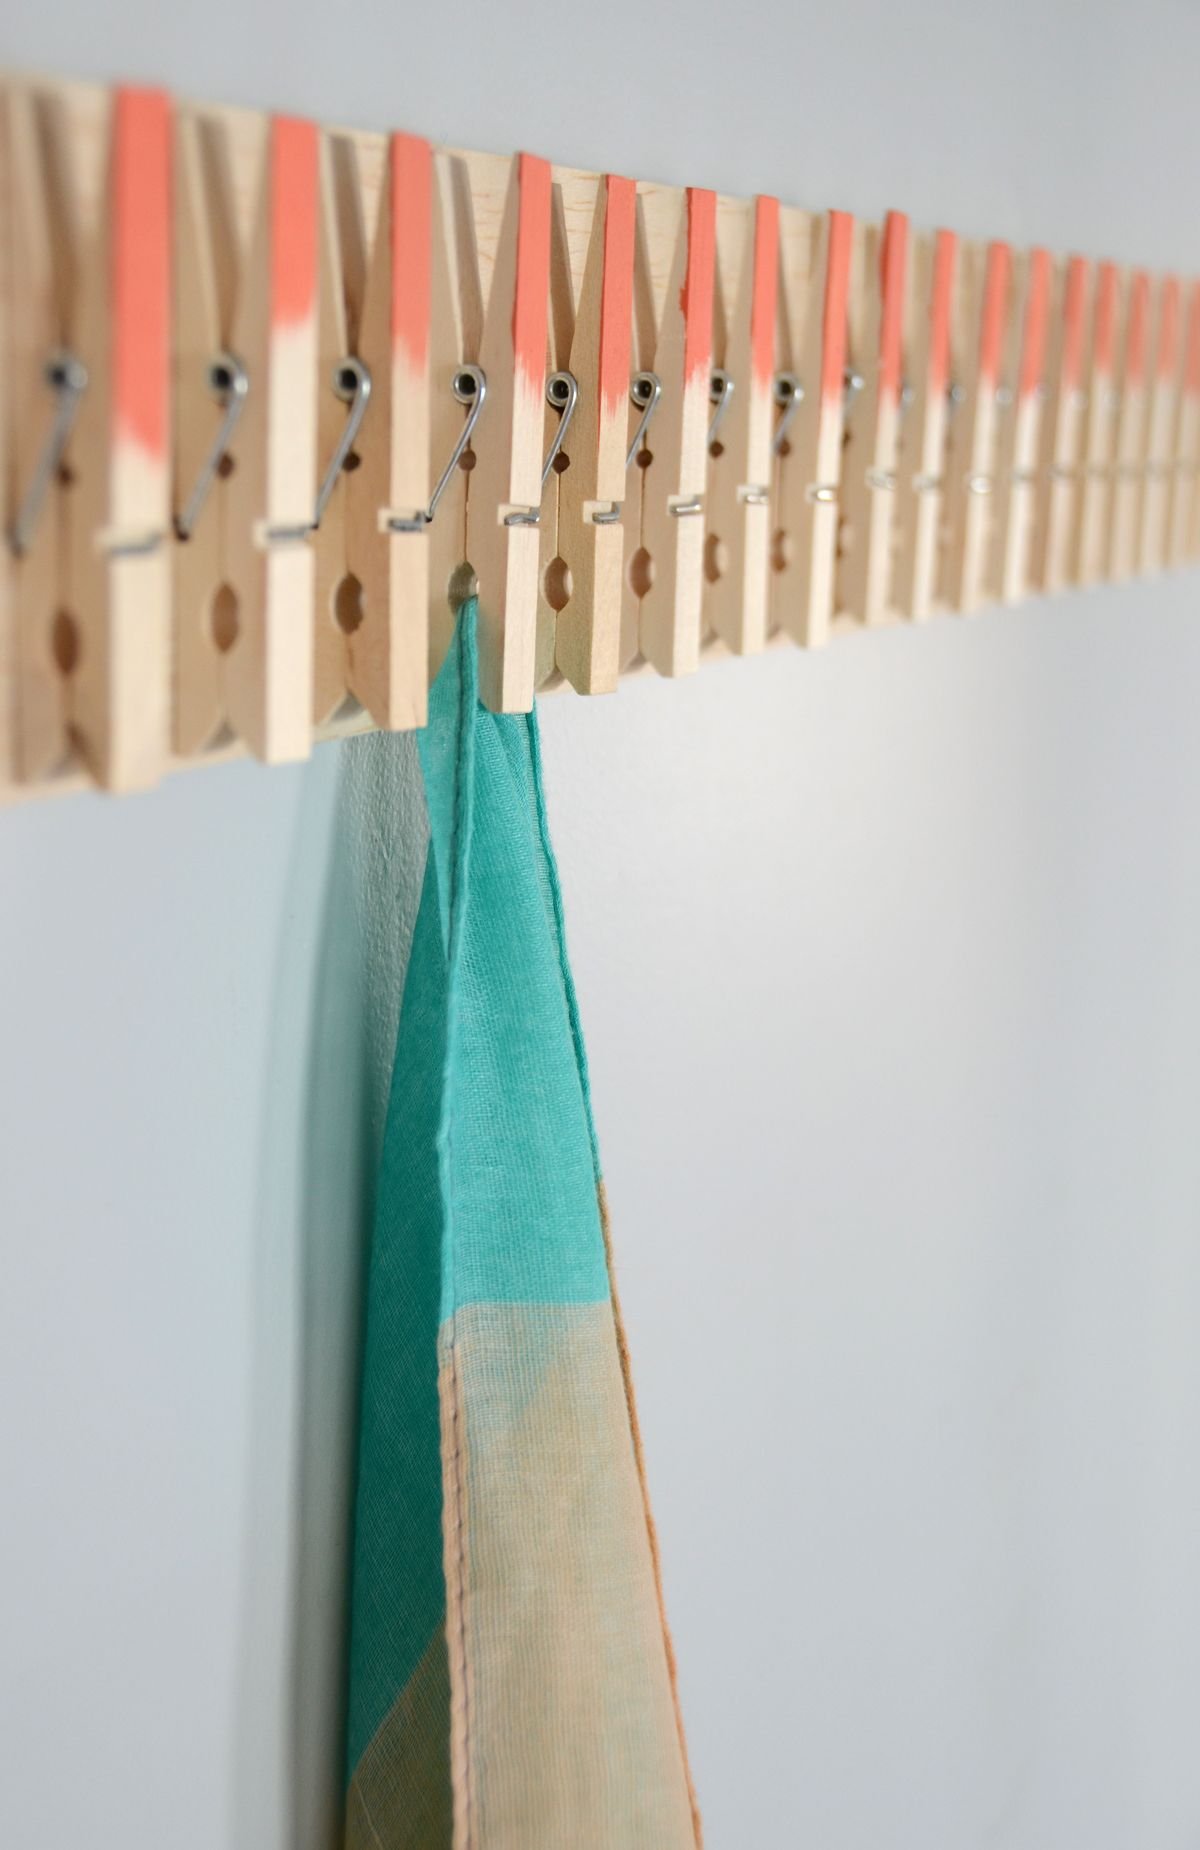
Transform your walls into stylish organizers using clothespins and a trendy base. A fun option is using marble contact paper to wrap a sturdy piece of cardboard or wood. This gives your organizer a modern feel and looks great in any room.
To create this chic wall organizer, follow these steps:
- Choose a size for your base—make it big enough to hold multiple items.
- Cover it with marble contact paper for a sleek look.
- Attach clothespins at various spots for hanging photos, notes, or small plants.
This fun DIY project not only keeps your space tidy but also adds a touch of style!
2 Fun Task Management Tips
Using colorful clothespins can make managing tasks a lot more fun! Try matching the pin color to your task cards to create a cheerful display. For example, use red pins for urgent tasks and blue pins for less important ones. This way, you can easily spot what needs your attention.
You can also attach mini cards to the pins with your tasks written on them. Hang these on a corkboard or a string in your room. By seeing your tasks in a creative way, you’ll be more motivated to complete them! Plus, your workspace will look colorful and organized.
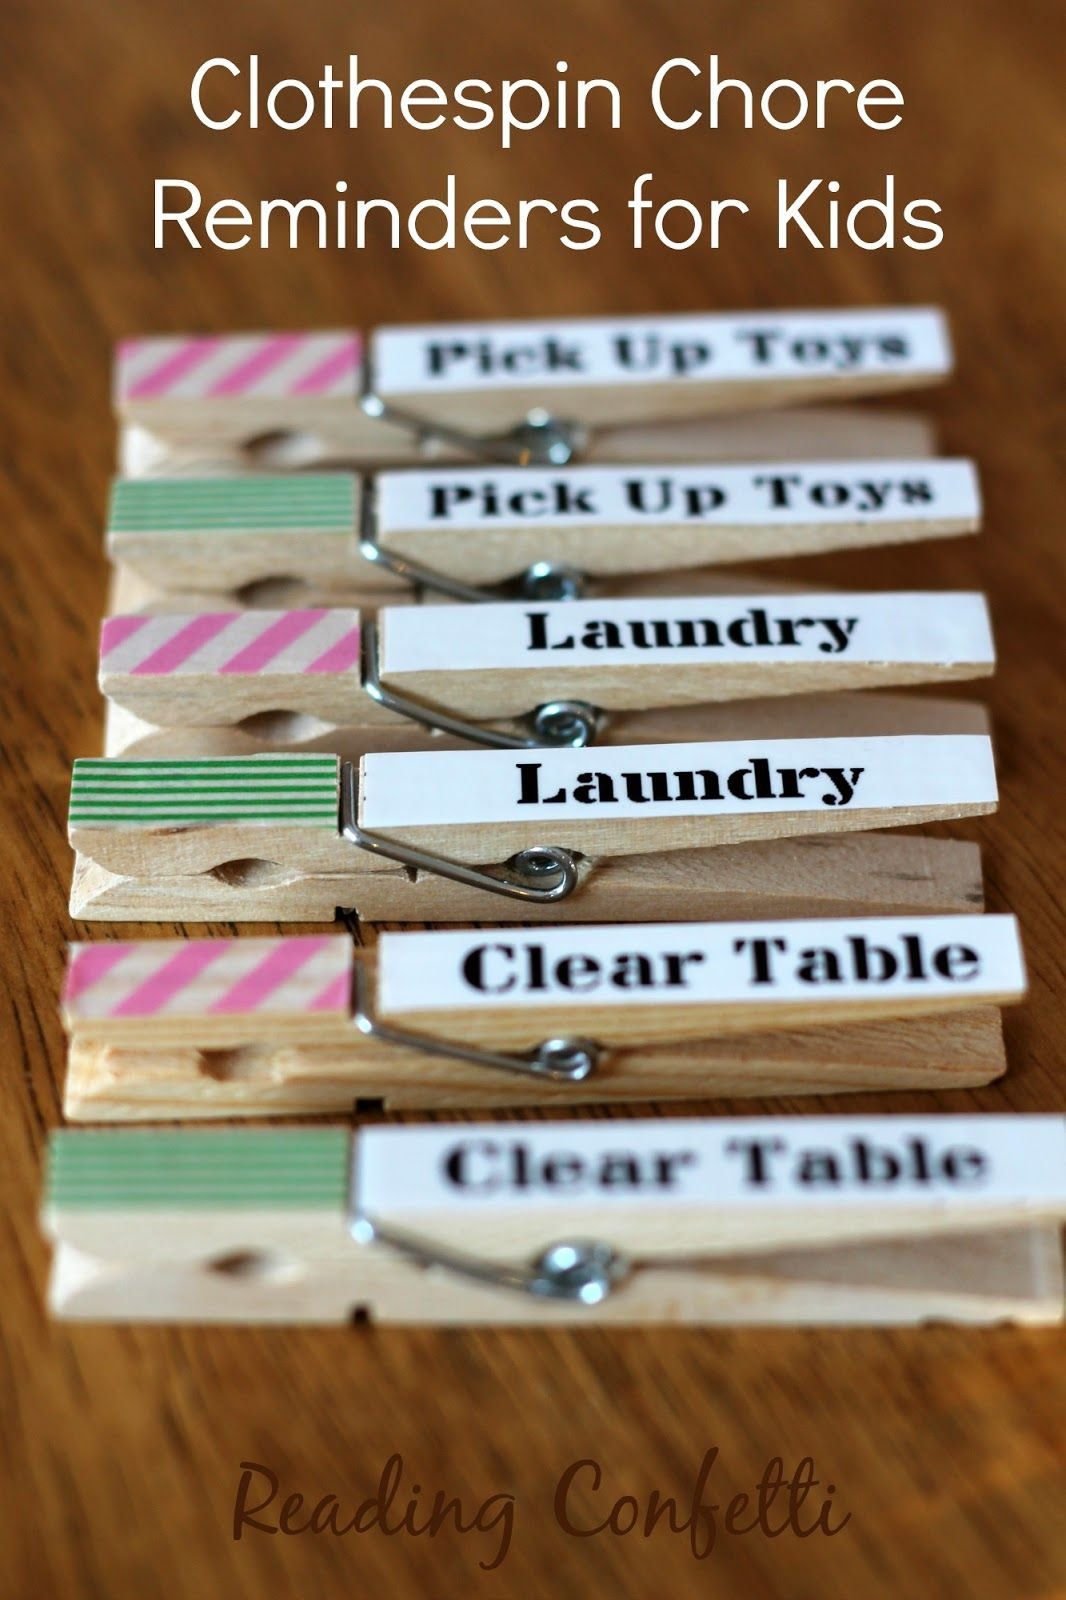
3 Charming Laundry Labels
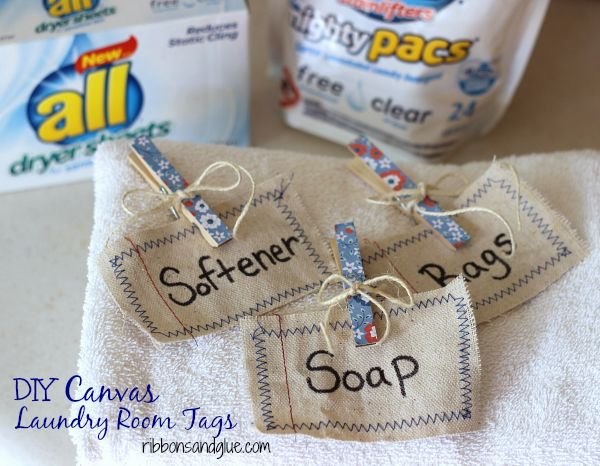
Turn plain clothespins into charming laundry labels for an organized space! Start by picking some cute, patterned clothespins. These add a fun touch while helping you keep everything sorted.
Next, grab a fabric marker and label each clothespin. You can write things like "Whites," "Colors," or even specific items you wash often, like "Towels" or "Delicates." Clip them onto your laundry baskets or hampers to signal where each pile belongs.
This simple idea not only helps with organization but also adds a playful décor to your laundry area. Don’t be afraid to mix and match colors and patterns for a unique look!
4 DIY Garage Organizer Solution
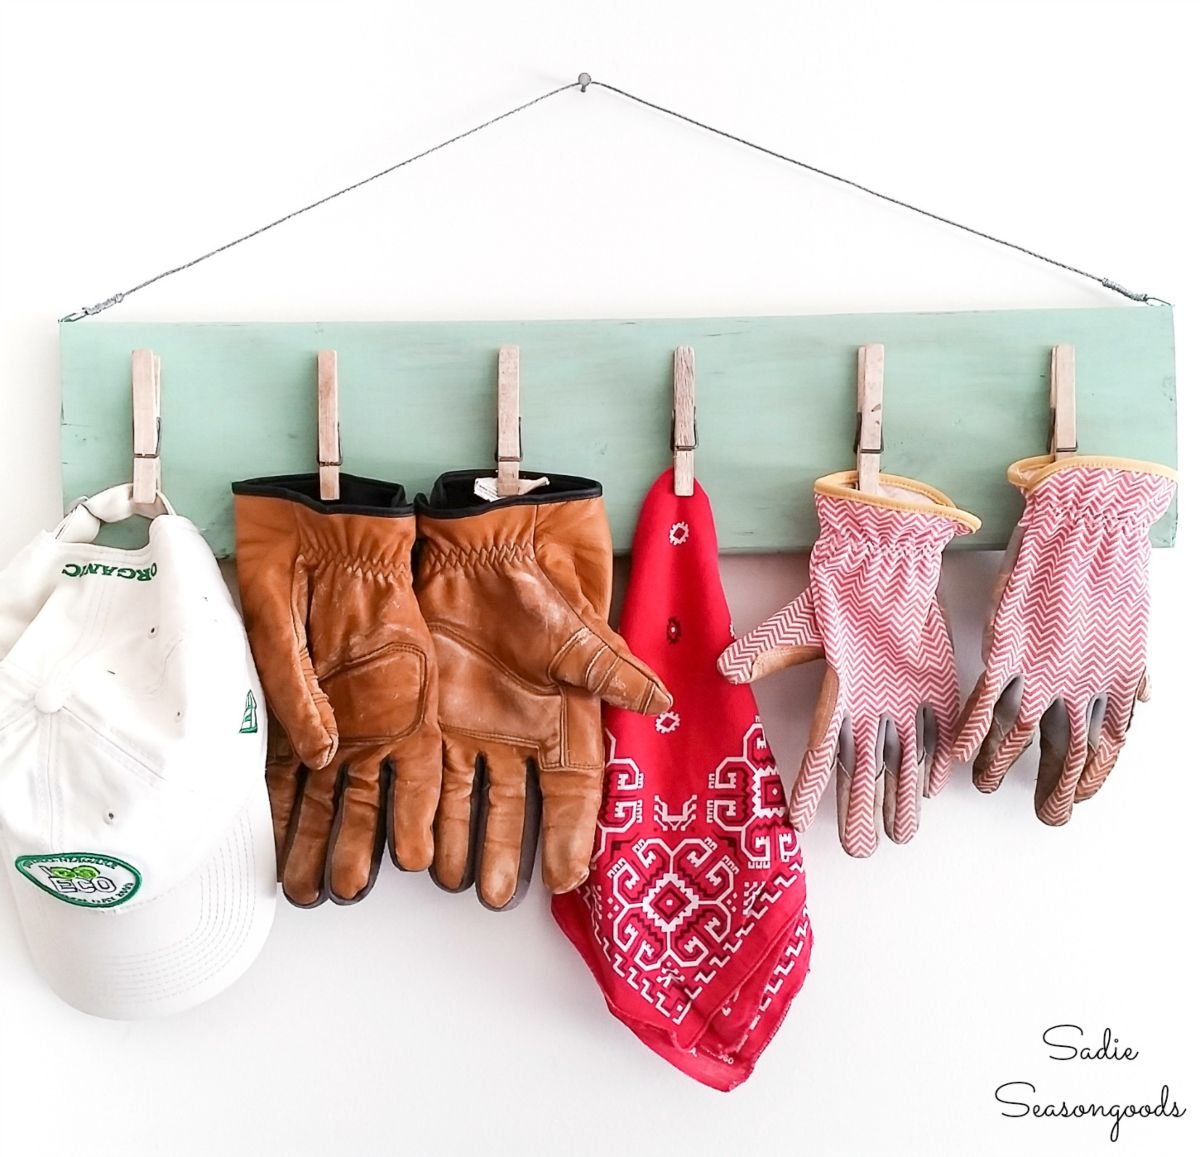
You can quickly create a DIY garage organizer using clothespins and a wooden board. Gather a few wooden pegs, a sturdy board, and some strong glue.
Start by gluing the clothespins onto the board in a neat row. Make sure to space them out so you can easily clip on items like gardening gloves, caps, or tools. Once the glue dries, hang the board in your garage. This keeps your essentials within reach and prevents them from getting lost.
For added functionality, use some twine or string to hang small items that might slip out. Your garage will look tidier, and you’ll always know where your stuff is!
5 Reminder Pegs for Visibility
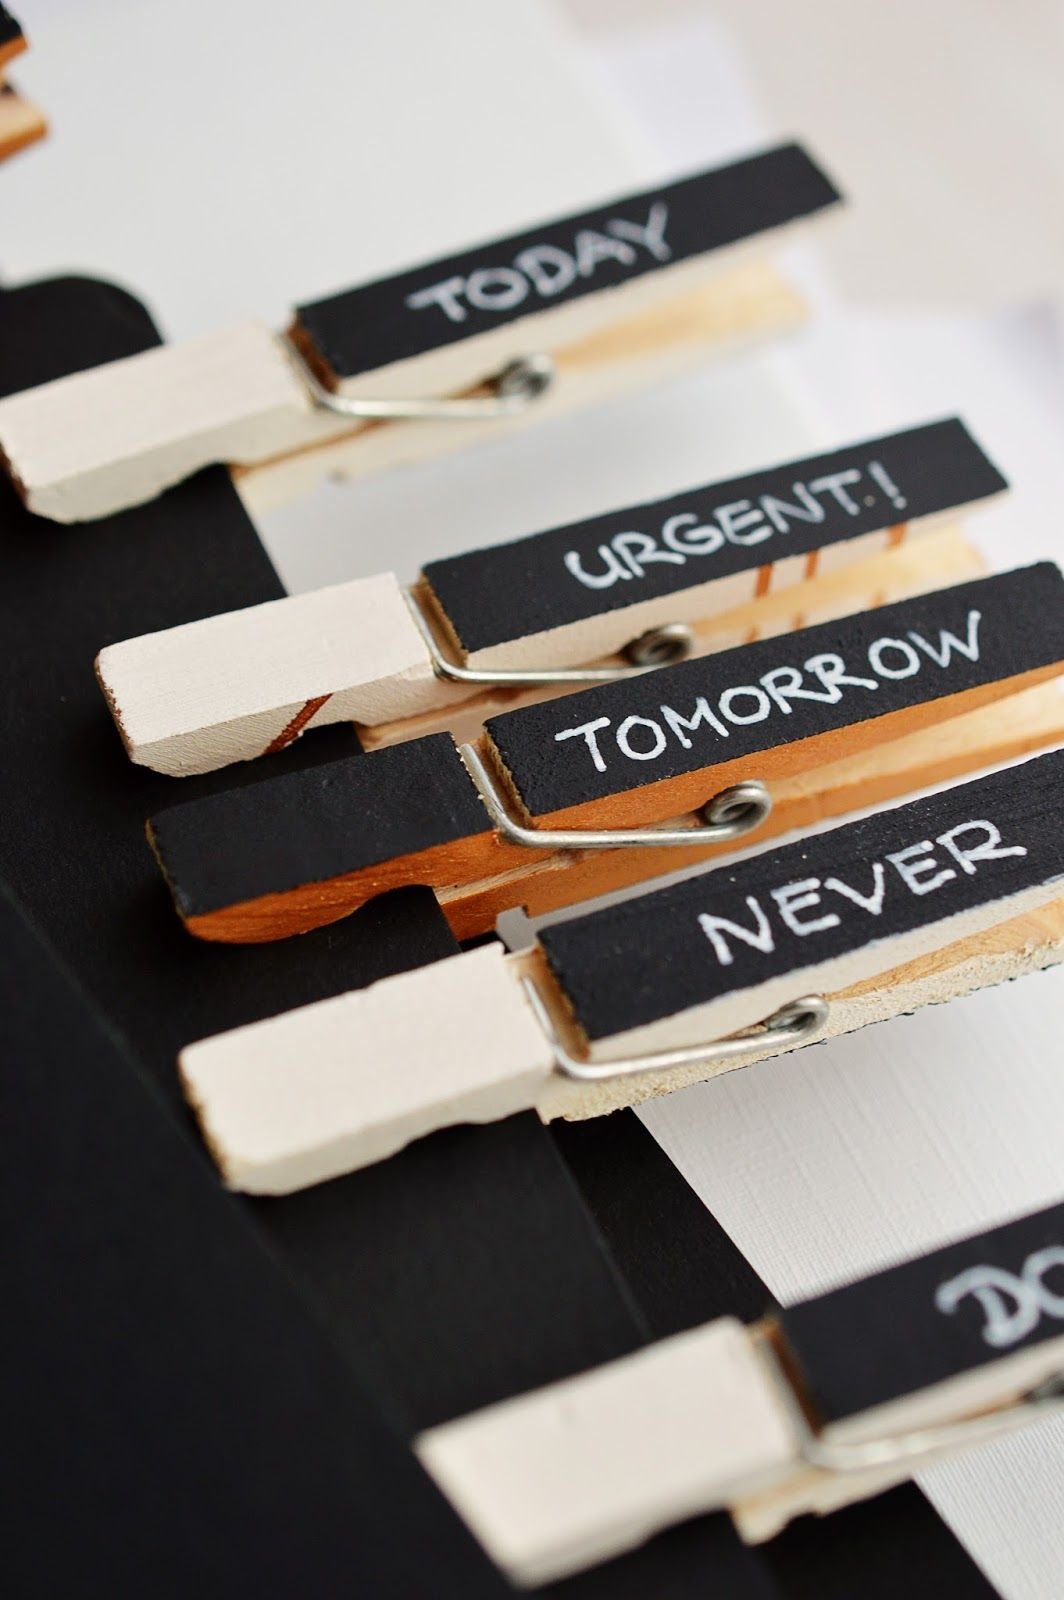
Reminder pegs can make your tasks much easier to see and remember. You can use them to clip important notes, bills, or lists where you will notice them throughout the day.
To set up reminder pegs:
- Find a board or a wall hook in a high-traffic area, like your kitchen or study space.
- Use different colored clothespins to represent different tasks or reminders. For example, use red for urgent tasks and blue for fun activities.
- Write your reminders on small pieces of card stock or paper and clip them in the pegs.
By keeping your goals and tasks visible, you’re more likely to remember them!
6 Creative Jar Organizer
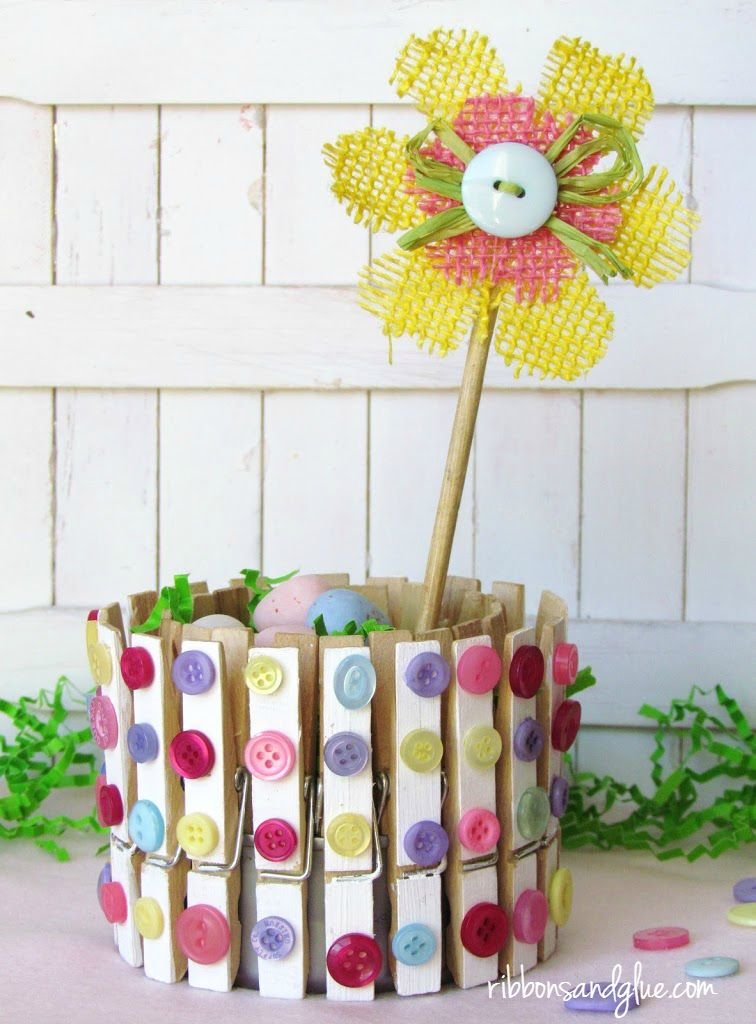
Transforming a recycled jar into a stylish organizer is a fun and creative project! Start by grabbing an empty jar and gather some buttons and clothespins.
You can paint the clothespins to match your style. Once they’re dry, glue the buttons on the jar in a fun pattern, then attach the clothespins around the jar’s rim. Use the jar for storing pencils, brushes, or even to hold small flowers for a cheerful touch on your desk.
This simple DIY not only helps keep your space tidy but also adds a personal and colorful flair to your workspace!
7 Clothespin Organizer Basket
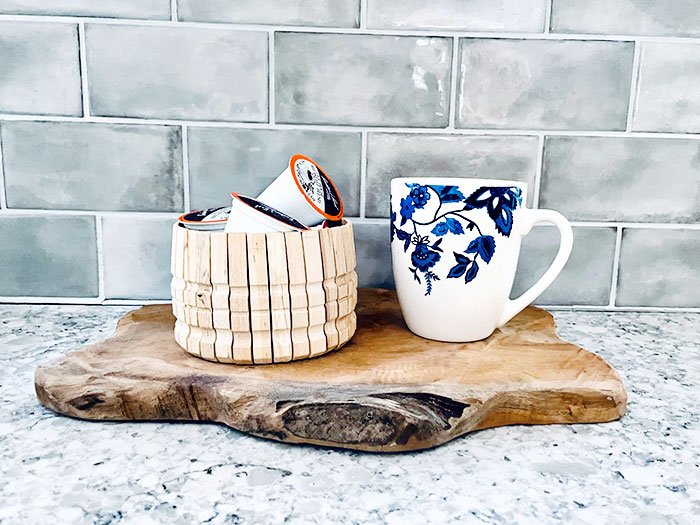
Start by taking a clean tin can and removing the label. Make sure the edges are smooth to avoid cuts. Next, grab a pack of wooden clothespins. You’ll use these to create a stylish and functional basket.
Simply attach the clothespins around the can, spacing them evenly. You can glue them if needed for extra stickiness. This basket is perfect for holding things like coffee pods, sewing supplies, or small toys. Place it on your kitchen counter or desk for easy access to your clutter!
8 Visual Menu Organization

Create a visual menu organization system to keep your family meals on track! Start by using a paper calendar displayed on a wall or a refrigerator. This helps everyone see what’s for dinner each day.
Next, attach a wooden bar underneath the calendar. Use clothespins to clip recipe cards or meal ideas to the bar. You can write out your favorite meals on colorful cards. This way, everyone can pick what they want to eat for the week.
Make it even more fun by having a family meal night where everyone takes turns choosing the meal of the day. This system makes planning meals easier and adds excitement to dinnertime!
9 Tangle-Free Earphone Solution
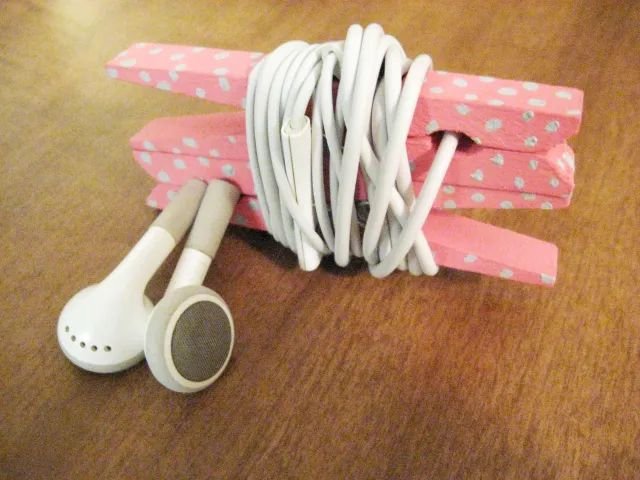
To keep your earphone cords from tangling, you only need a few wooden clothespins. Start by gluing two clothespins back-to-back. This creates a holder for your cords that’s super easy to use.
When you’re ready to store your earphones, simply wrap the cord around the clothespin and clip it in place. This not only prevents tangles but also keeps your earphones organized and ready to go.
It’s a quick and fun project that can save you time and frustration every day!
10 Kitchen Paper Storage Solution
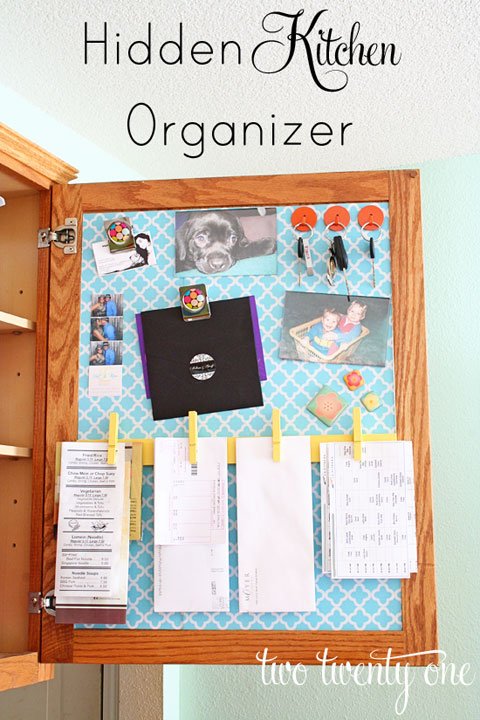
Using clothespins can turn ordinary kitchen paper storage into an organized and stylish solution. Instead of letting takeout menus, invitations, and permission slips pile up, create a dedicated space for them.
Start by choosing a wall or a clip board near your kitchen area. Clip several clothespins to the board to hold different types of papers. For example, assign one clothespin for takeout menus, another for important reminders, and a third for school-related documents. This keeps everything visible and easily accessible.
To add a personal touch, decorate the clothespins with paint or washi tape. This fun twist not only looks great but also helps your family quickly recognize where to find their papers. With this simple setup, you’ll never wonder where an important paper is again!
11 Clothespin Magnet Solutions
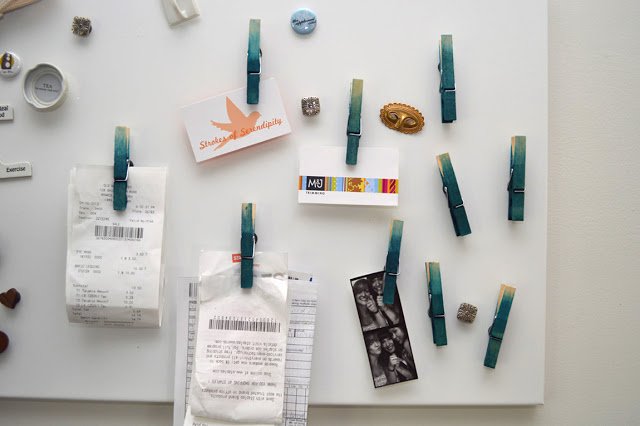
Clothespin magnets are a fun and creative way to organize papers and notes on your fridge. Unlike regular fridge magnets that often drop items, clothespins securely hold multiple papers in place. You can easily make them stylish by painting or decorating the clothespins in colorful designs.
To create your own, just attach a small magnet to the back of each clothespin. You can find magnets at craft stores or online. This way, they not only look great but also hold up important reminders, like grocery lists or kids’ drawings. Use a few of these magnets to brighten up your kitchen and keep it organized!
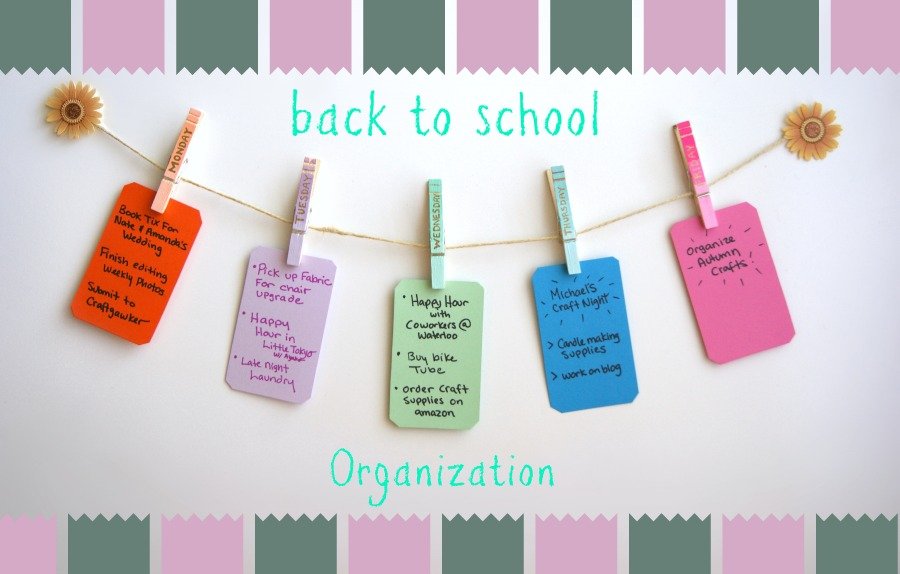
12 Weekday Organization Made Easy
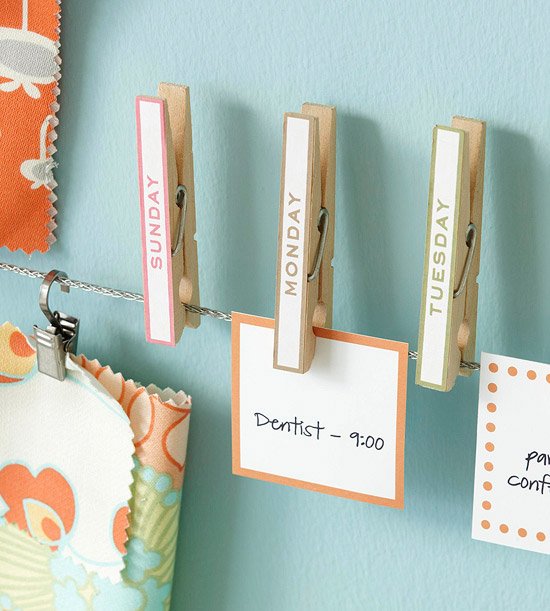
Setting up a weekday organization system with clothespins is super simple! Start by stringing a piece of twine or yarn across a wall or corkboard. Label each section with the days of the week: Monday, Tuesday, Wednesday, and so on.
Next, use clothespins to attach colorful tags or sticky notes, indicating appointments or tasks. For example, pin a note about your soccer practice on Wednesday and a reminder for your math test on Friday.
This visual way to organize keeps everything clear and helps you stay on track! Plus, you can make it fun by using different colored clothespins for each family member or for different activities!
13 Floss Organization Made Easy
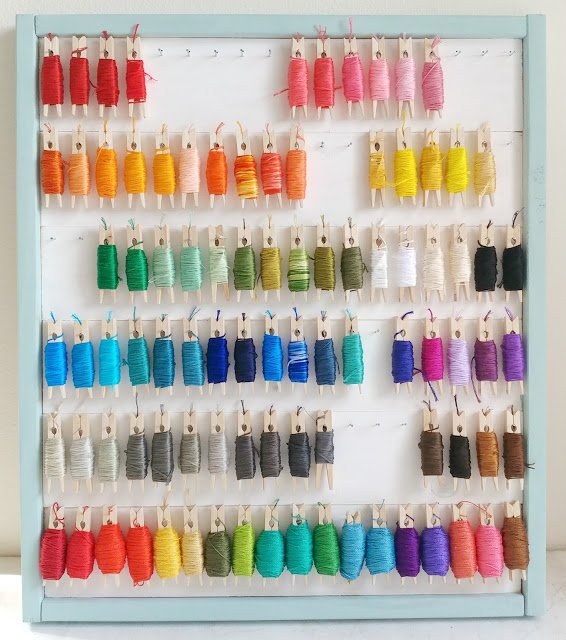
To organize your floss, grab an old picture frame. First, remove the glass and backing. Then, attach small hooks or nails inside the frame where you want to hang your floss.
Next, use clothespins to hold each color of floss. Simply clip them onto the hooks. This way, your floss stays tangle-free and easily visible. You can even label each clothespin with the color name for quick access.
Now, display your beautiful organizer on a wall or a crafting table. Enjoy your neat and tidy embroidery supplies!
14 Clothespin Picture Frame Project
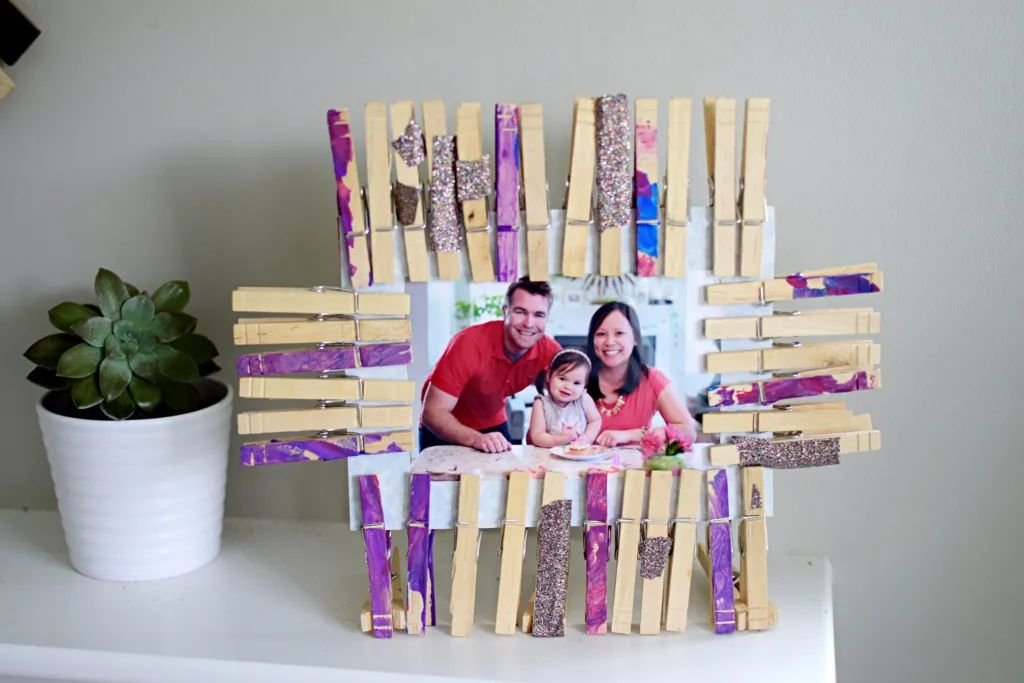
Create a clothespin picture frame with just a few materials. Gather wooden clothespins, your favorite paint in vibrant colors, and a photo you want to showcase.
Start by having fun painting the clothespins. You can even add some glitter for a special touch! Let them dry, then grab a piece of cardboard or a canvas to use as the frame’s base.
Attach the painted clothespins along the edge using hot glue. Clip your photo in the middle of the frame. It’s a simple, creative project that can brighten up your space and let your personality shine!
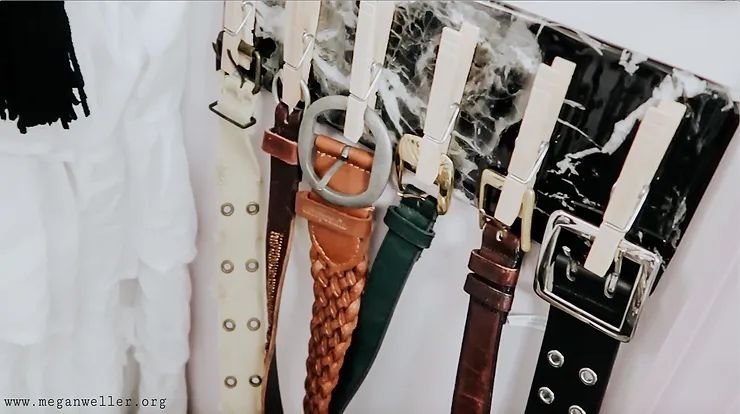
15 DIY Accessory Organizer
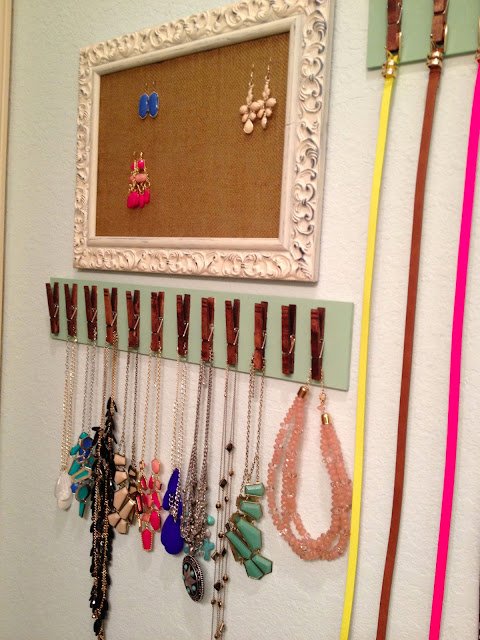
Create a DIY accessory organizer with just a few simple materials! Start with a wooden board, which you can paint in your favorite color to match your style. A size of 12×24 inches works well for many spaces.
Use vintage wooden clothespins to hold your accessories. Superglue them onto the board, spaced a few inches apart. You can place them horizontally or vertically, depending on your preference.
Hang your earrings, necklaces, or even belts by clipping them right into the clothespins. This keeps everything visible, organized, and showcases your collection beautifully!
16 Chore Alerts Made Easy
Transforming clothespins into chore alerts is a fun and easy way to keep your kids focused on their tasks. Simply pick a few wooden clothespins and decorate them with bright colors or stickers to make them eye-catching.
Next, write down each child’s name on a separate pin. Attach these pins to a board or a string in a common area, like the kitchen. Each week, assign specific chores by moving the pins around. For example, if Alex has to take out the trash, pin his name next to that chore. This makes it easy for everyone to see who needs to do what.
By making chores visible and engaging, you empower your kids to take responsibility while adding a splash of creativity to daily tasks!
17 DIY Placecard Holders
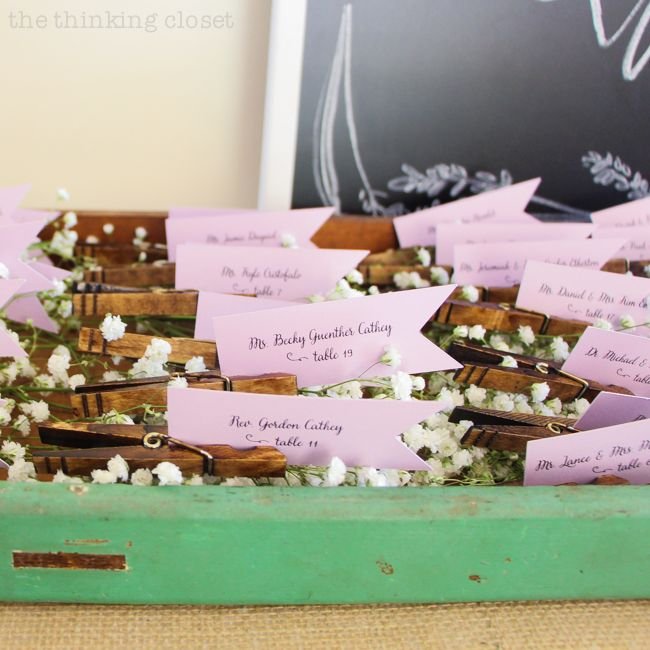
Making your own placecard holders using clothespins is a fun and budget-friendly project! Start by printing your placecards with your guests’ names. You can use colorful paper for a lively touch.
Next, choose some wooden clothespins. Stain or paint them to match your theme. Once they’re dry, simply clip the placecards into the clothespins. Arrange them on a decorative tray or a small table.
This simple craft not only helps guests find their seats, but it also adds a personal, unique touch to your event!
18 Whimsical Bookworm Organizer
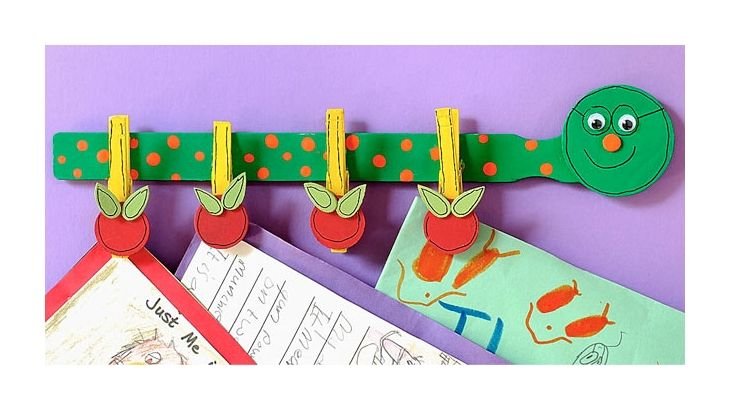
Create a Whimsical Bookworm Organizer to help kids keep track of their favorite reads! This fun project uses clothespins and a simple wooden paint stirrer. Start by painting the stirrer green and adding eyes and a smiley face to make it look like a cute bookworm.
Attach clothespins along the stirrer to hold book covers or notes about what they are reading. Use Command strips or magnets on the back to hang it on a wall or refrigerator. This offers a fun way for kids to showcase their reading list and stay organized!
19 Ribbon Storage Solution
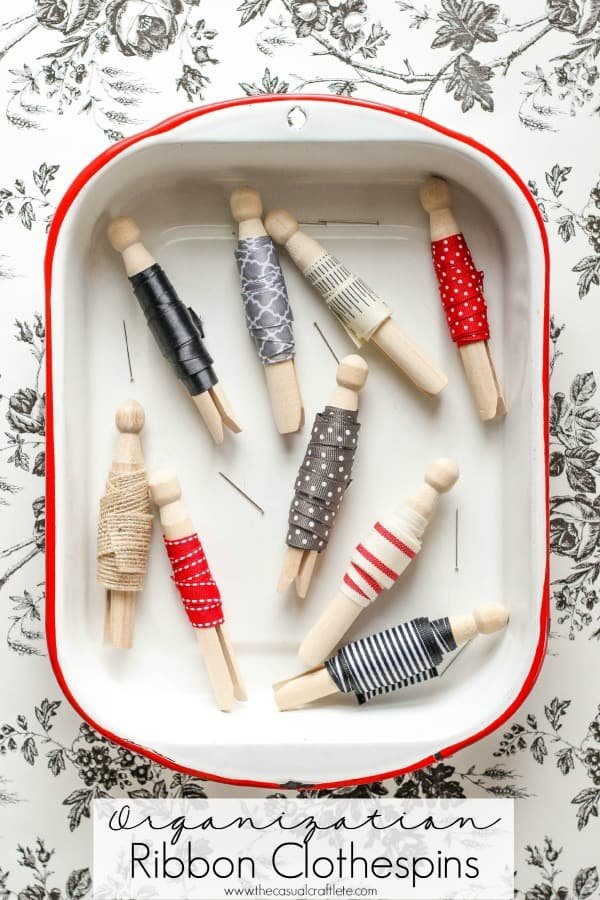
Tired of tangled ribbons? It’s a common problem, especially when you’re not using them right away. A great way to keep everything organized is to use wooden clothespins. They are simple, easy to find, and work amazing!
Wrap your ribbon scraps around each clothespin. This keeps them from getting knotted up and makes it easy to see what you have. You can even label the clothespins with the ribbon type or color using washi tape for quick identification.
Consider storing these wrapped clothespins in a small basket or a drawer. This way, they are all together and ready for your next creative project!
20 Efficient Scarf Organizer
Scarves can easily get tangled and lost, but a scarf organizer made from clothespins is an awesome solution! Here’s how to create one:
- Gather Materials: You’ll need clothespins, a wooden board, and some paint (if you want to decorate).
- Attach Clothespins: Space the clothespins evenly along the board. Glue or nail them down securely.
- Hang the Board: Mount the board on a wall in your closet or bedroom. This helps free up drawer space and makes your scarves easy to see.
Now, you can quickly grab any scarf while keeping them tangle-free!
21 Scrunchie Organizer Solution
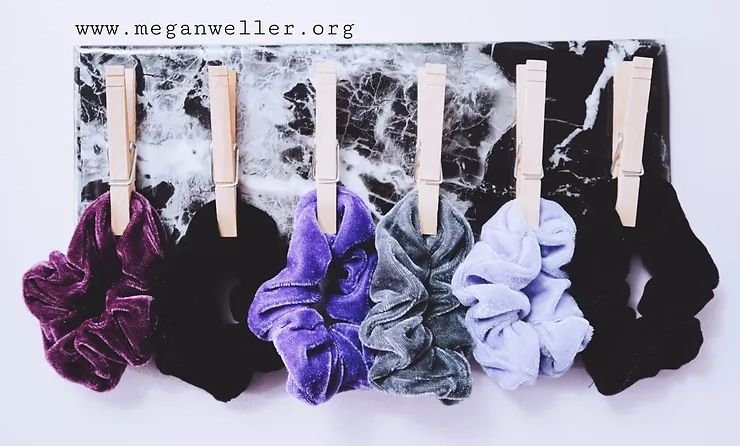
Do you ever find your scrunchies and hair ties all over the place? A scrunchie organizer made with clothespins can help! With this fun DIY project, you can keep your favorite hair accessories neatly arranged.
To create your organizer, simply attach several clothespins to a small board or a picture frame. Space them out so you can easily clip on your scrunchies. You can even paint the clothespins in bright colors for a fun look!
This organizer isn’t just for scrunchies. You can also hang hair clips and bands on it. This way, everything is visible and easy to grab when you’re in a hurry! Keep your space tidy and your hair accessories ready to go.