23 Fun Spring Art Projects Kids Will Love
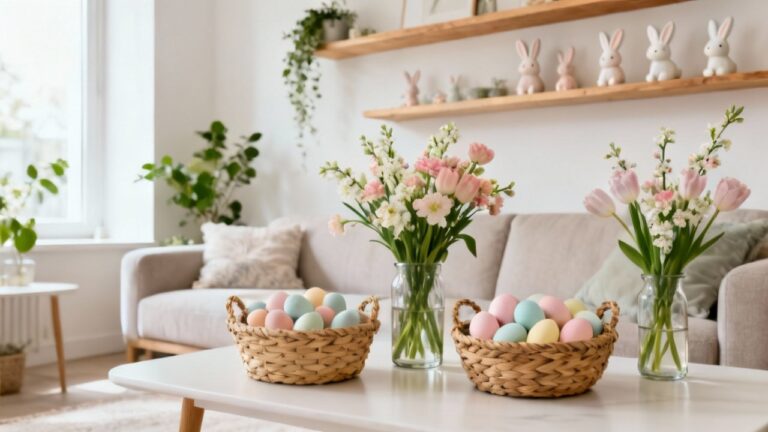
Spring brings fresh energy and warmer days – perfect for getting kids excited about art again. Nothing beats watching little ones discover new ways to paint flowers with Q-tips or stamp colorful tulips using forks from the kitchen drawer.
Art projects help children explore the season’s beauty while building fine motor skills and creativity. From simple coffee filter flowers to cheerful butterfly suncatchers, these hands-on activities use everyday items you likely have at home. Each project offers a chance for kids to express themselves while celebrating spring’s vibrant colors and themes.
Highly Recommended


![Crayola Twistables Colored Pencil Set (50ct), No Sharpen Colored Pencils For Kids, Kids Art Supplies for Back to School, 4+ [Amazon Exclusive]](https://m.media-amazon.com/images/I/51rGfVjC03L._SL500_.jpg)


1 Cardboard Roll Stamps
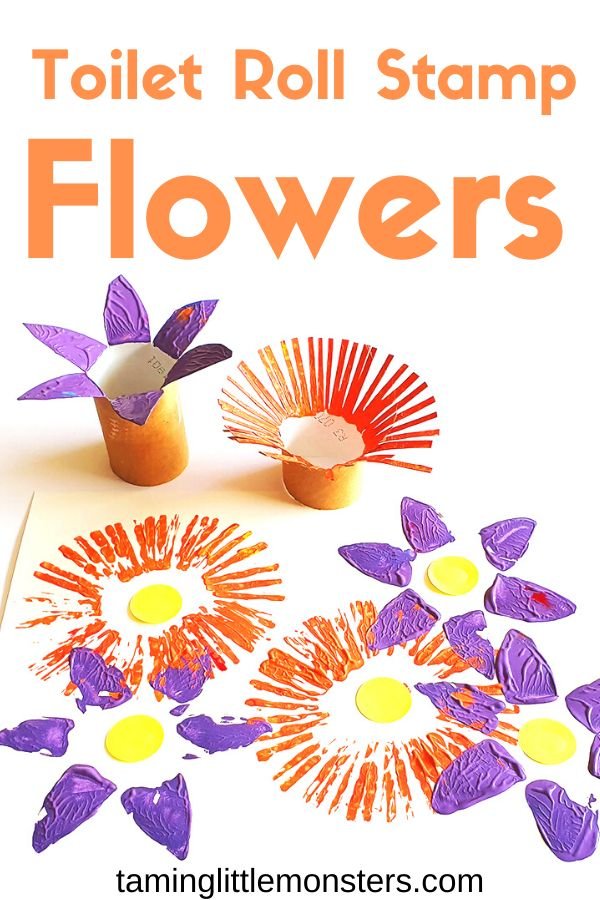
Save those empty toilet paper tubes for a fun stamping project! Cut different shapes into the ends to make unique stamps that kids can dip in paint.
Round cuts make perfect circles for flowers and bubbles. Try cutting zigzag edges for star shapes or wavy lines for clouds. The cardboard soaks up just enough paint to make clean prints.
Kids love the surprise of seeing what pattern each stamp makes. Plus, you can make several different stamps from one tube by cutting it into smaller pieces.
2 Cardstock Bunny Crafts
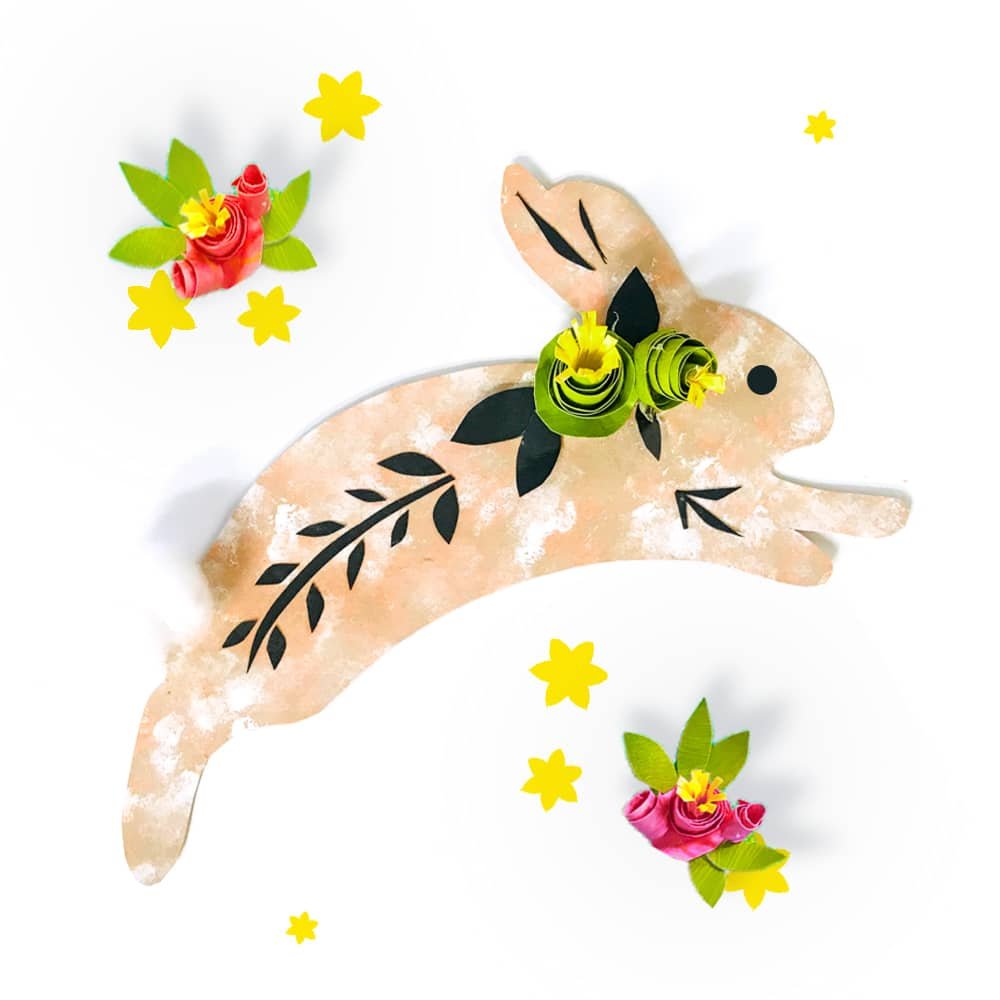
Kids love making bunny crafts, and cardstock makes it super easy. White cardstock works great as your base material, but you can also cut up old cereal boxes for a bigger project.
Start simple with basic bunny shapes, then let kids add their own fun touches. They can use markers, stickers, or colored paper to make each bunny unique. The best part? You can make these as easy or fancy as you want depending on your child’s age and skills.
3 Rainbow Cloud Craft
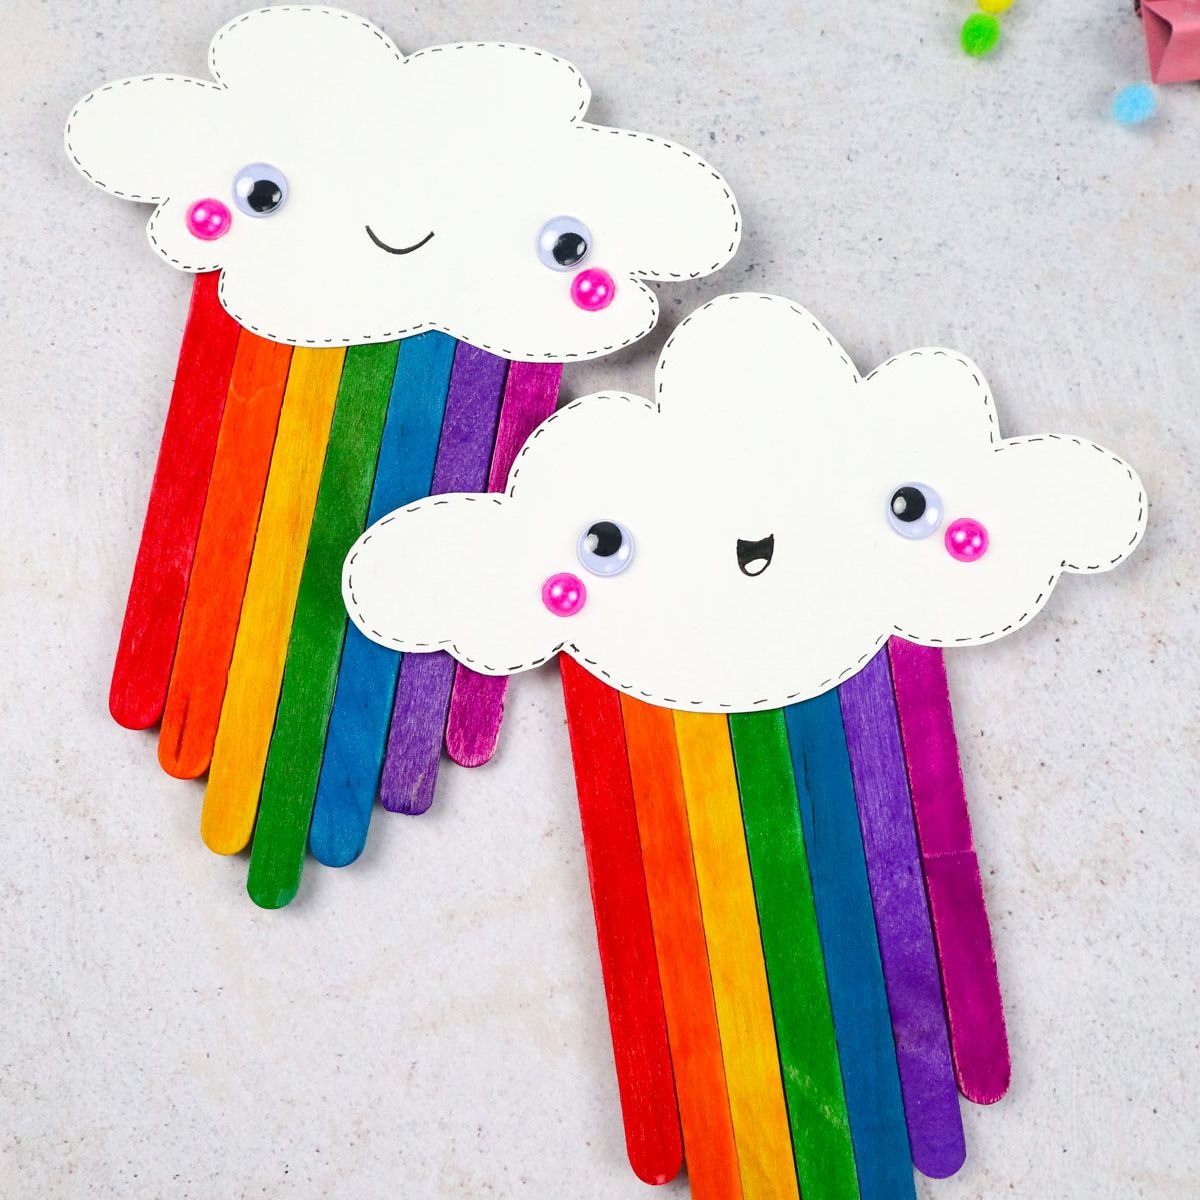
Kids love making colorful rainbows, and adding fluffy clouds makes it even better! You’ll need just a few basic supplies from around the house – popsicle sticks, paper, and some googly eyes to give your cloud a fun face.
While your little ones work on their craft, help them learn the rainbow colors in the right order. Red, orange, yellow, green, blue, indigo, and violet – it’s like a fun song they can remember forever.
The finished clouds look amazing hanging in bedrooms or playrooms. They bring instant cheer to any space and remind kids of sunny days after storms.
4 Tissue Paper Blossoms
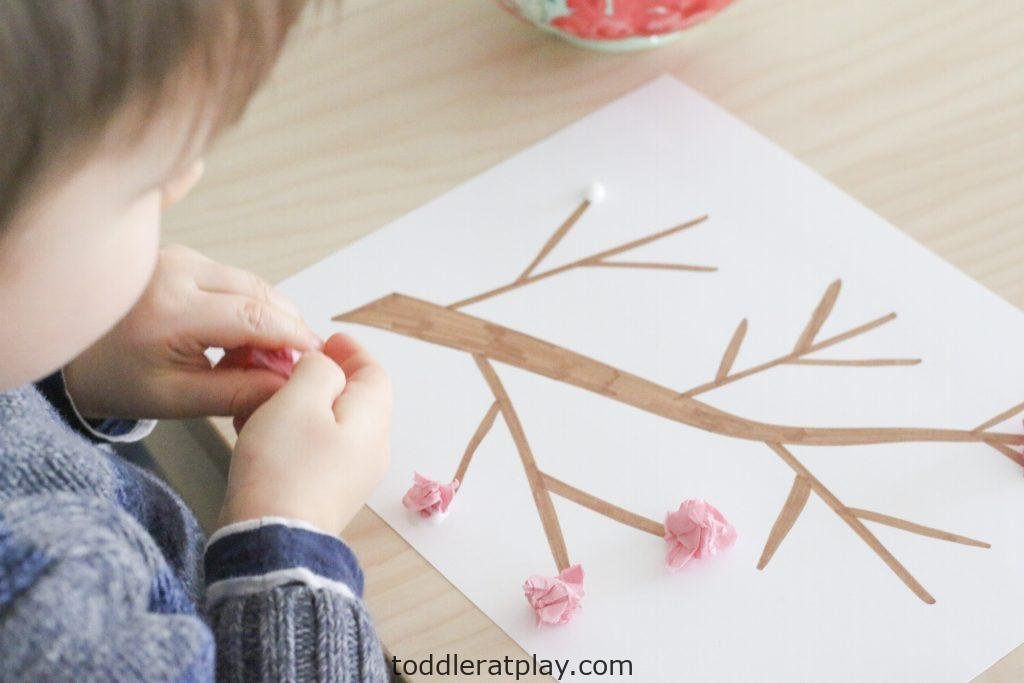
Kids can learn about Japan’s famous cherry blossoms while making their own colorful flowers. Just scrunch up small pieces of tissue paper and glue them onto paper branches.
The scrunching part is super fun and helps little hands practice fine motor skills. Each crumpled piece becomes a tiny bloom that looks surprisingly real when finished.
Liquid glue works best for keeping everything in place. Your child can make pink, white, or even rainbow cherry blossoms that celebrate spring’s beauty year-round.
5 Paper Filter Crafts
Coffee filters make amazing spring flowers that look surprisingly real. Kids love watching the colors spread when they use washable markers on the white filters.
Green pipe cleaners work perfectly as stems – just twist them through the center of each filter. The petals end up soft and delicate, just like real blooms.
Put your finished flowers in a jar or vase for a bright table display. They also make sweet additions to homemade cards or small gifts for grandparents.
6 Paper Butterfly Suncatchers

Kids love making suncatchers, and butterflies make them even more special. Cut colorful tissue paper into butterfly shapes and sandwich them between contact paper or wax paper.
Hang your finished butterflies in a sunny window. The light shines through the paper wings and fills your room with bright, pretty colors. It’s like having real butterflies that glow!
You can make them in any colors you want. Try mixing different shades together for rainbow wings.
7 Coffee Filter Rainbows
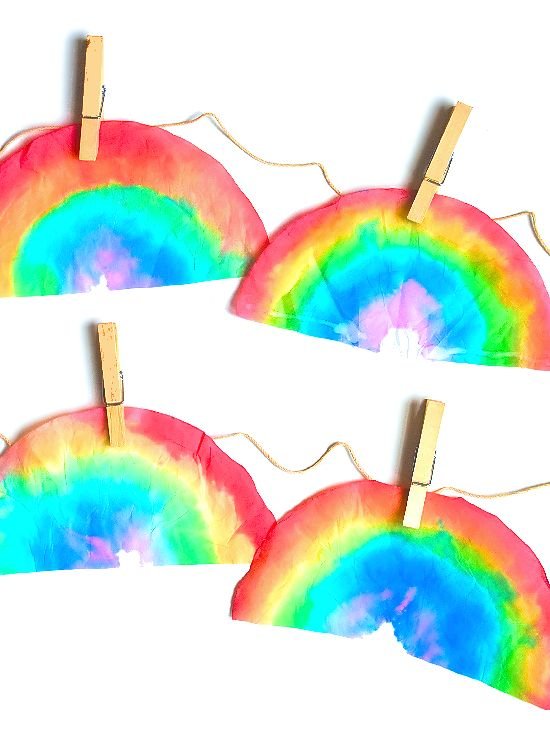
White coffee filters turn into colorful art magic with just a few drops of paint. Kids love watching the colors spread and blend together as they work from the center out.
The paint soaks through the filter paper, making soft rainbow patterns that look amazing when they dry. Each one comes out different, so no two rainbows are exactly alike.
Add a fluffy cotton ball to the center once everything dries. Your little artists will have bright, cheerful decorations perfect for hanging in windows or on walls.
8 Yellow Cardstock Chicks
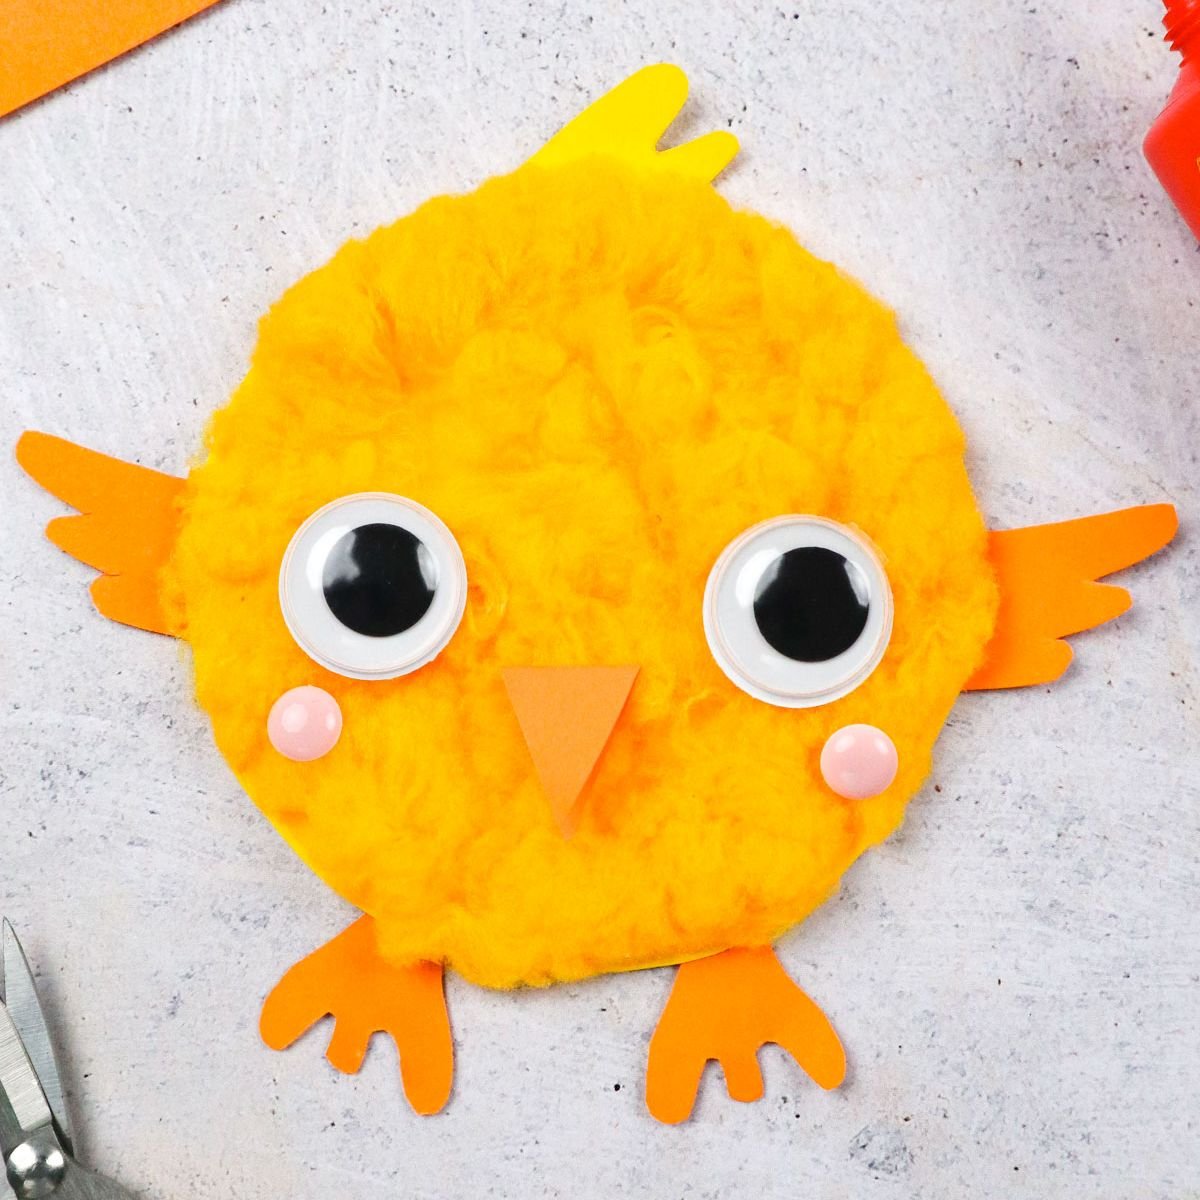
Kids love making these adorable fluffy chicks using bright yellow cardstock and cheerful pom poms. Just add googly eyes and an orange beak, and watch your little ones beam with pride.
The craft uses simple supplies you probably have at home already. Your children can make a whole flock and turn them into a fun farm display on the bedroom wall.
Each chick takes just minutes to put together, making it perfect for short attention spans. The finished birds look so cute that everyone will want to make their own!
9 Q-Tip Flower Art
Your kids will love making colorful flowers using simple Q-tips and paint. Just brush on green stems with regular paint, then dab Q-tips in bright colors to make cheerful flower tops.
The best part? You get a free flower pot template to print and use. Your little artists can make dozens of tiny blooms by dipping cotton swabs in different paint colors.
Each Q-tip creates perfect round petals that look surprisingly real. Soon your fridge will be covered in these sweet handmade masterpieces.
10 Butterfly Watercolor Project
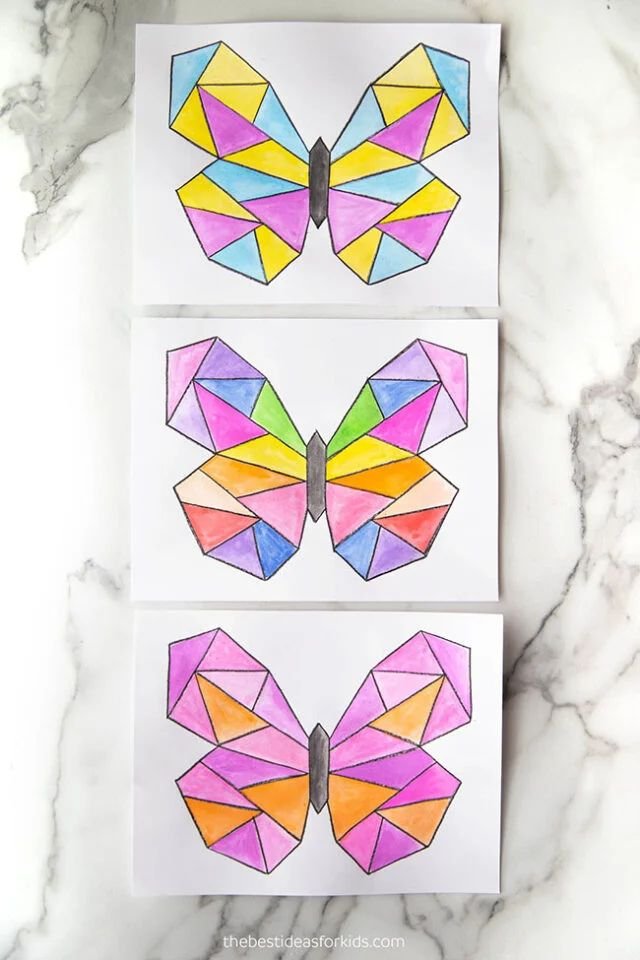
Kids love watching butterflies flutter around the yard, and now they can make their own colorful versions with watercolors. The geometric wing patterns make it simple for little hands to stay within the lines.
Start by folding paper in half and drawing half a butterfly shape. When you unfold it, you’ll have perfect matching wings. Add fun patterns like circles, triangles, or stripes to each section.
Let kids pick their favorite bright colors and paint away. The watercolors blend beautifully together, making each butterfly one-of-a-kind. Hang them around the house for a cheerful spring display.
11 Tissue Paper Shamrocks
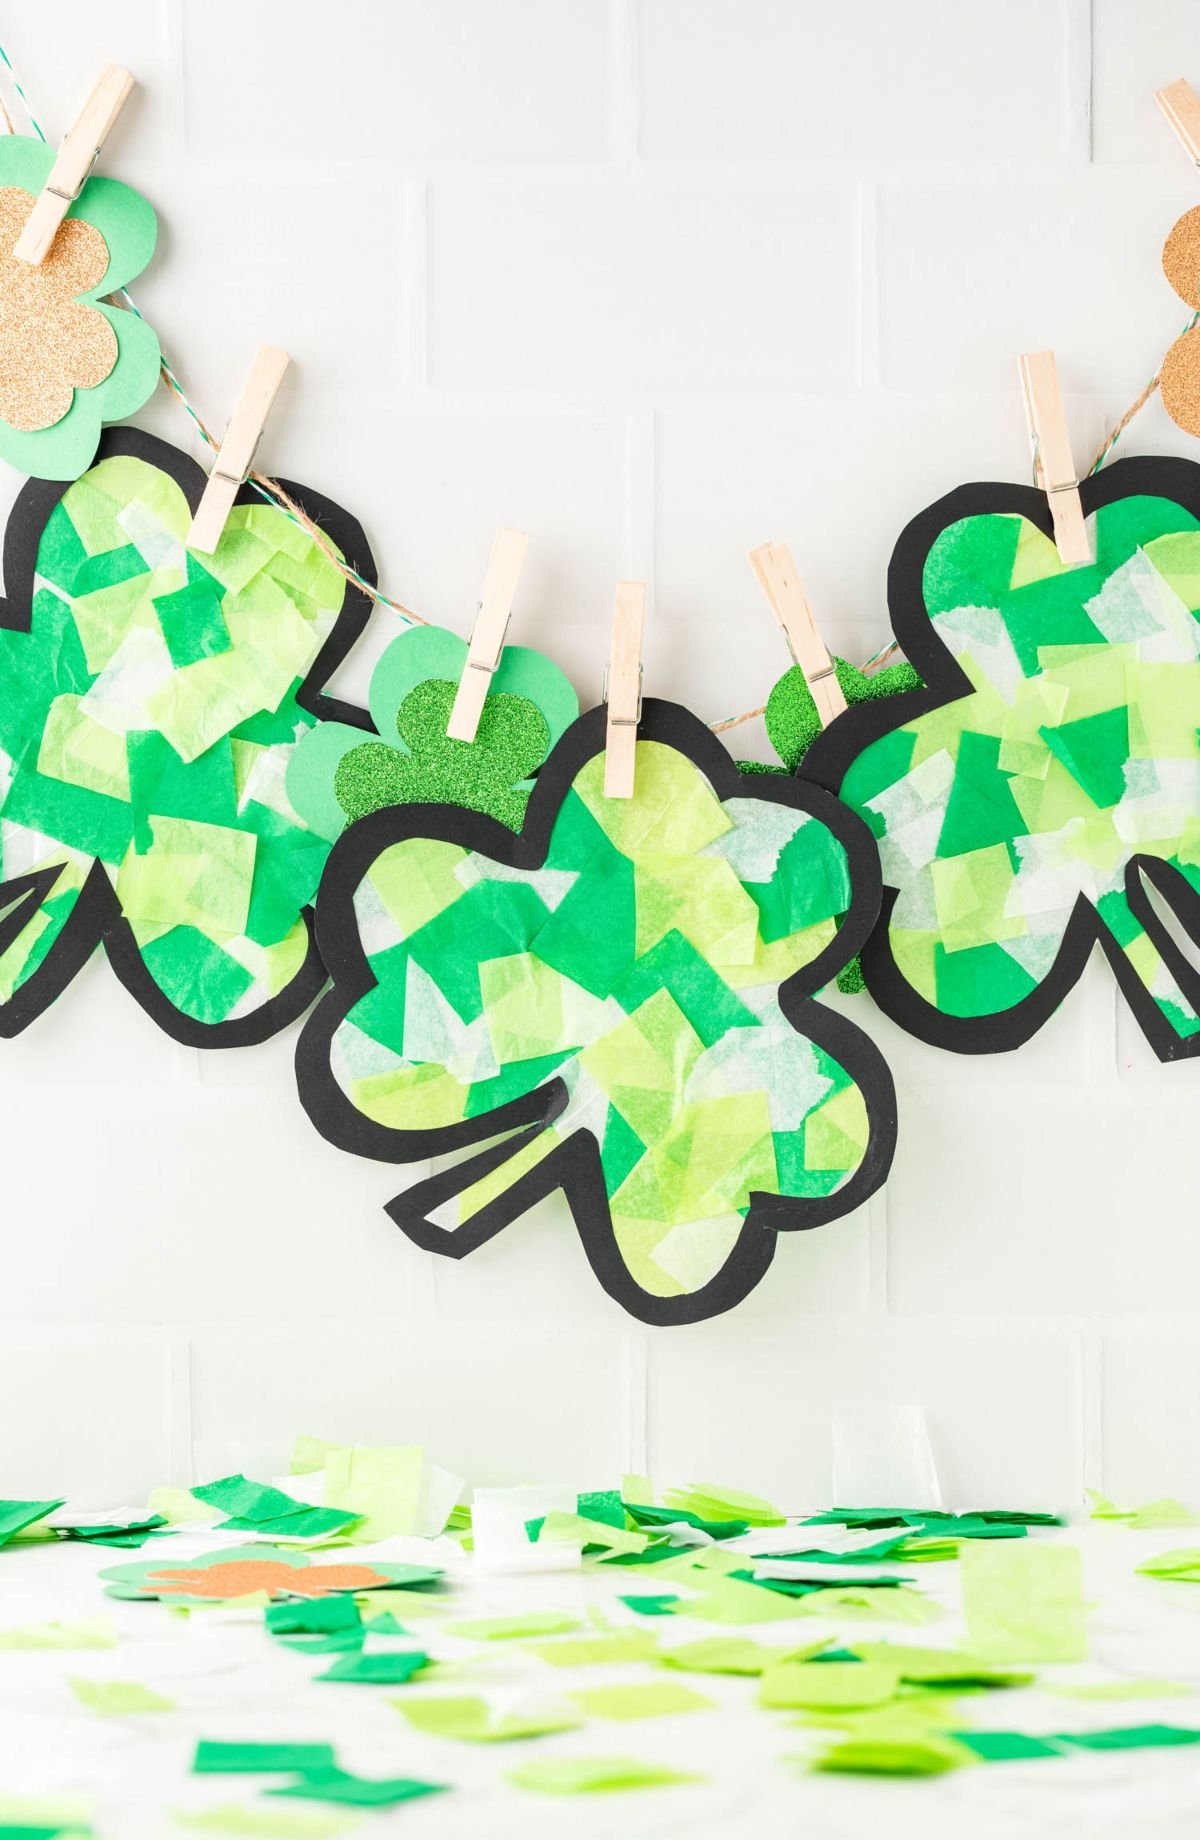
Kids love making colorful shamrocks that catch sunlight in windows. Mix different shades of green tissue paper with white pieces for a fun St. Patrick’s Day craft.
Cut shamrock shapes from clear contact paper, then let children press torn tissue pieces onto the sticky surface. The overlapping colors make beautiful patterns when light shines through.
Hang your finished shamrock suncatchers in classroom or bedroom windows. Your little ones will beam with pride seeing their artwork brighten up the space for the holiday.
12 Broccoli Paint Brushes
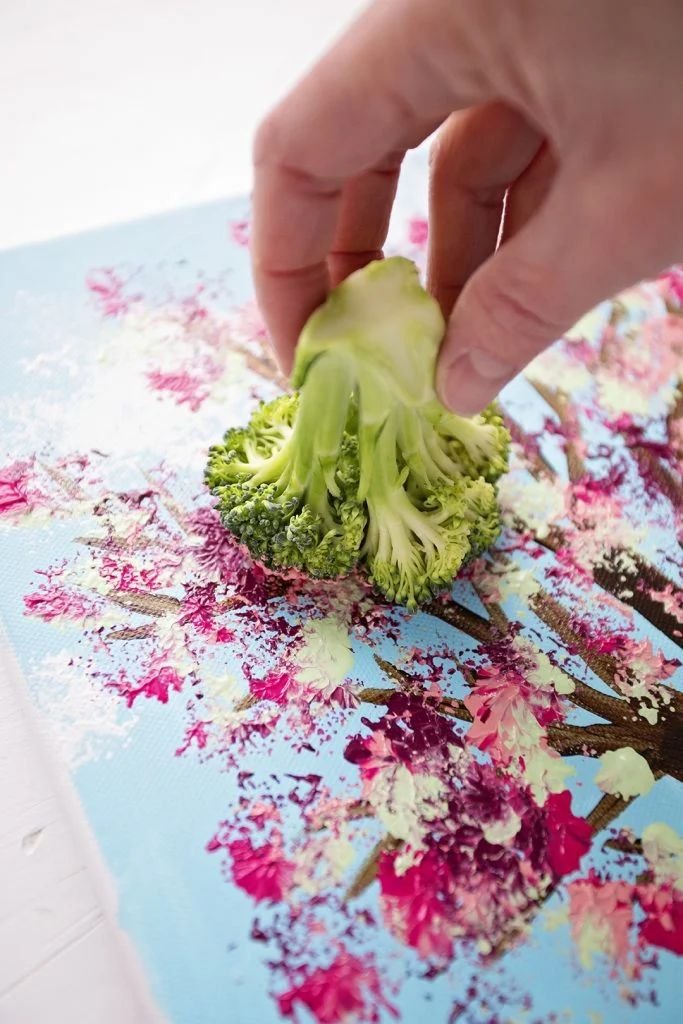
Got kids who won’t touch their veggies? Turn that rejected broccoli into art supplies instead!
The bumpy tops work like natural sponges when you dip them in paint. Your little ones can press and dab to make fluffy clouds, leafy trees, or colorful flowers.
It’s messy, fun, and way better than watching good food go to waste. Plus, you might even convince them to try a bite while they paint.
13 Bubble Wrap Painting
Kids love popping bubble wrap, but here’s a way to make it even more fun. Dip bubble wrap in paint and press it onto paper to make cool textured prints.
The bubbles leave behind perfect circles that look like flower petals or fun patterns. Use bright spring colors like yellow, pink, and green for the best results.
Your little artists can make beautiful 3D-looking flowers that grandparents will love to display. It’s messy, easy, and keeps kids busy while making something special.
14 Paper Bird Craft
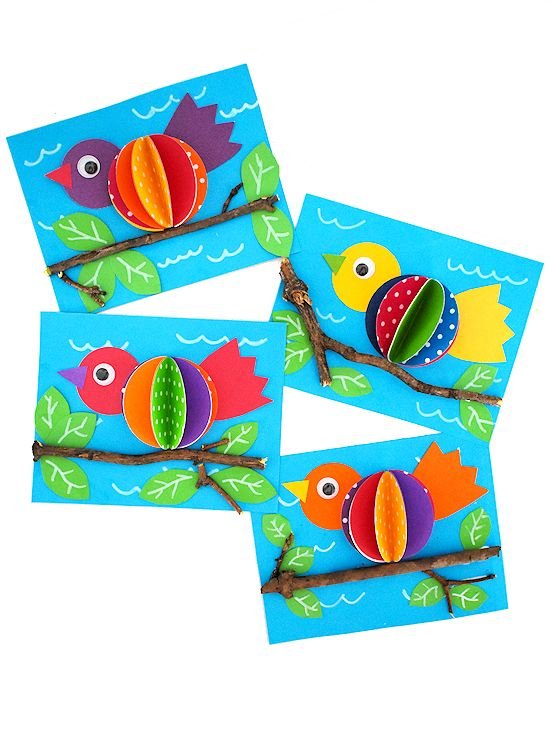
Kids love making colorful paper birds that seem to jump right off the page. You’ll need some basic cardstock and a few fallen twigs from your backyard or local park.
The pop-out effect makes these feathered friends look almost real. Try using dotted or striped paper to give each bird its own personality. Your little ones can hunt for the perfect branch while you gather the craft supplies.
15 Watercolor Flower Painting
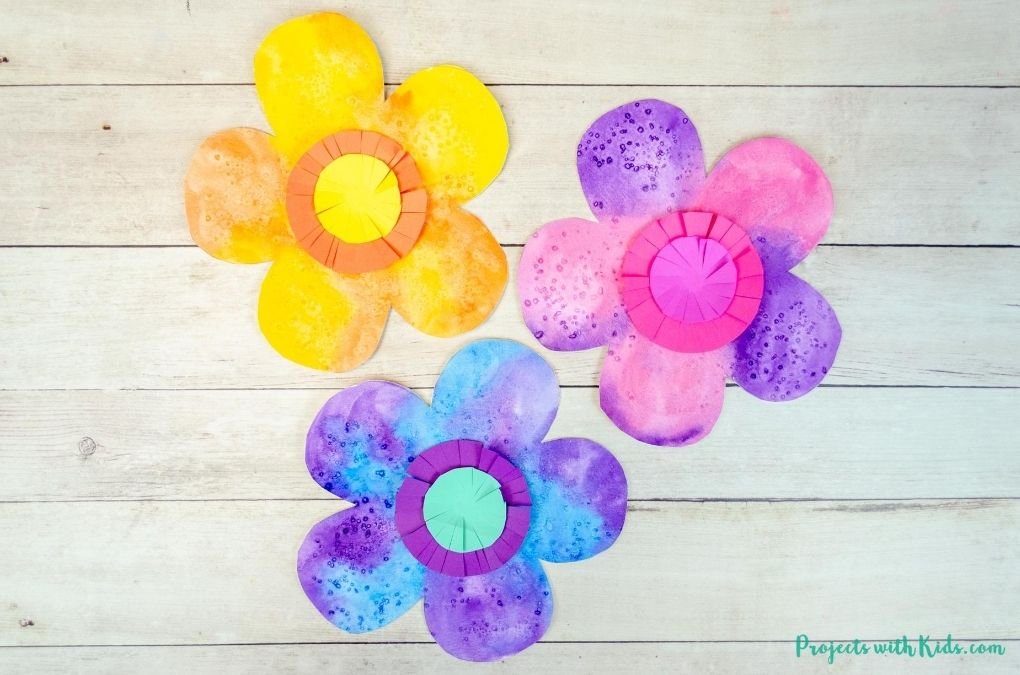
Watercolor flowers make a perfect first painting project for young artists. Kids can practice two simple brush techniques while making colorful blooms that look different every time.
The best part? Adding a 3D paper center gives each flower extra pop and makes it special. Help children pick colors from the same family – like blues and purples or reds and oranges.
They’ll learn how colors blend together naturally while having fun with their brushes. Each flower turns out unique, just like real ones in a garden.
16 Paper Bee Crafts
Buzzing bees bring gardens to life, and kids can make their own colorful paper versions. Using simple materials like yellow and black paper, children learn about these important insects while crafting.
Each bee becomes a chance to talk about how these tiny workers help flowers grow and give us food. Kids love adding stripes, wings, and even little antennas to their buzzing friends.
The craft works perfectly for group activities or quiet afternoon projects. Your little ones will buzz with excitement as they build their own paper hive.
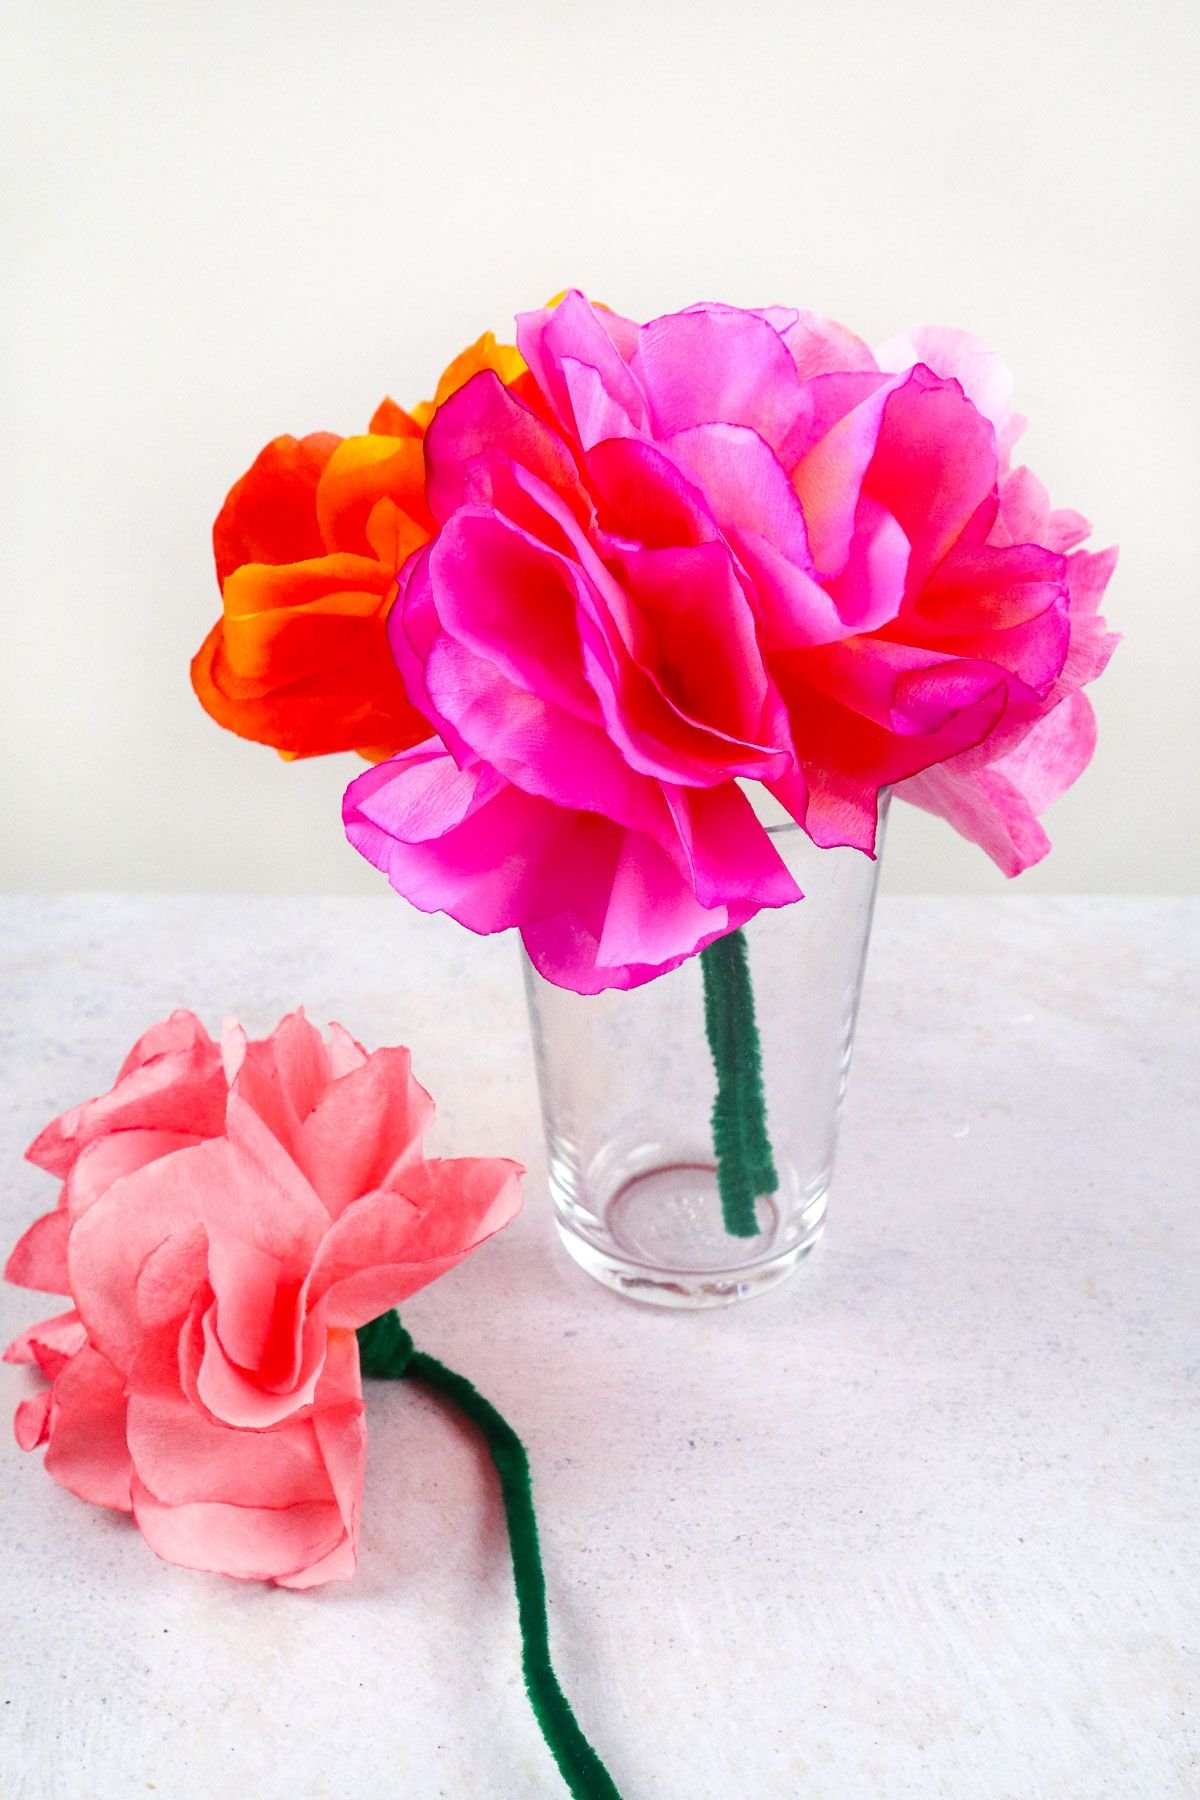
17 Paper Hyacinth Flowers
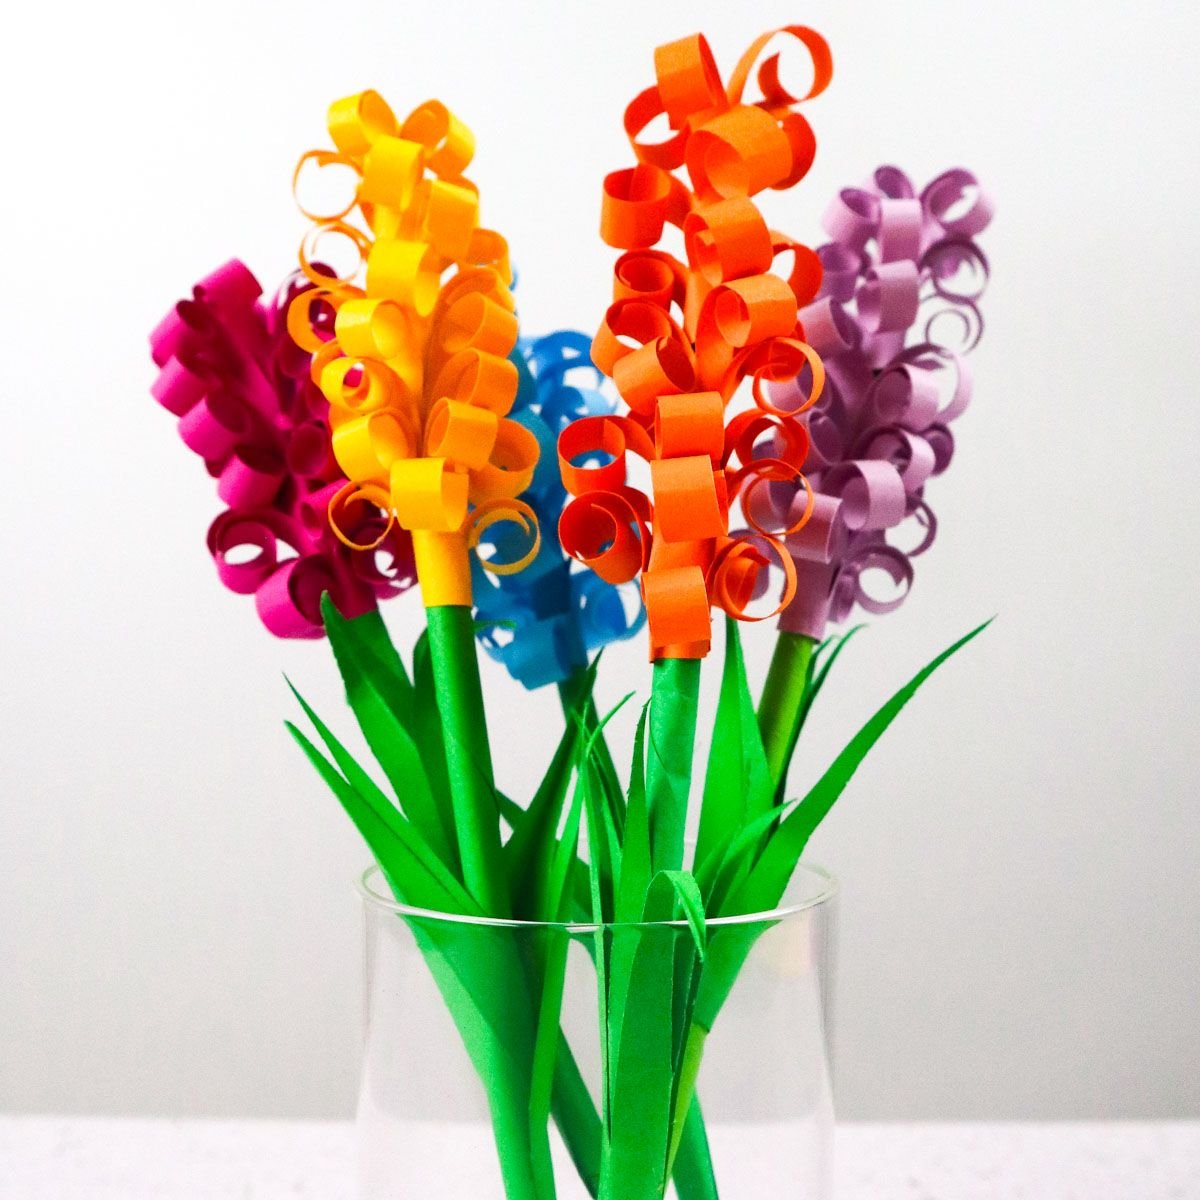
Kids love making colorful flowers that never wilt. Paper hyacinths are perfect for this – they’re simple to craft and look amazing when done.
Your little artists can choose any colors they want. Make them tiny for a cute bouquet or go big for room decor. The best part? No watering needed!
All you need is colored paper, scissors, and glue. Kids can practice their cutting skills while making something beautiful for spring.
18 Brushless Meadow Art
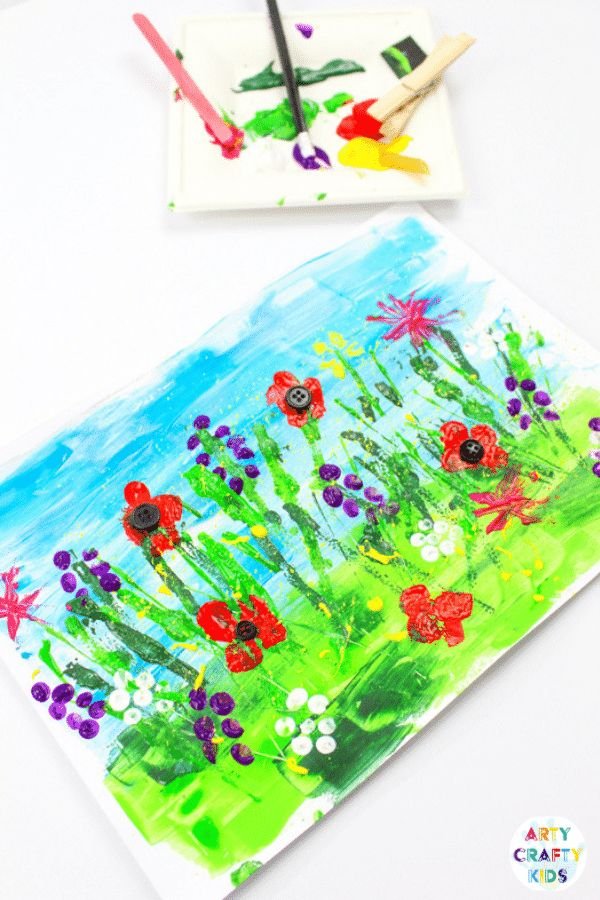
Who says you need a paintbrush to make amazing art? Kids can paint a beautiful spring meadow using pasta, popsicle sticks, pipe cleaners, and even pom poms.
Grab clothes pegs, scrap cardboard, and other household items to dab and press paint onto paper. Each tool makes different textures and shapes that bring your meadow to life.
The whole family can join in and try new ways to apply paint. You’ll be surprised how creative kids get when they ditch the brush and explore these fun tools instead.
19 Yarn Birds
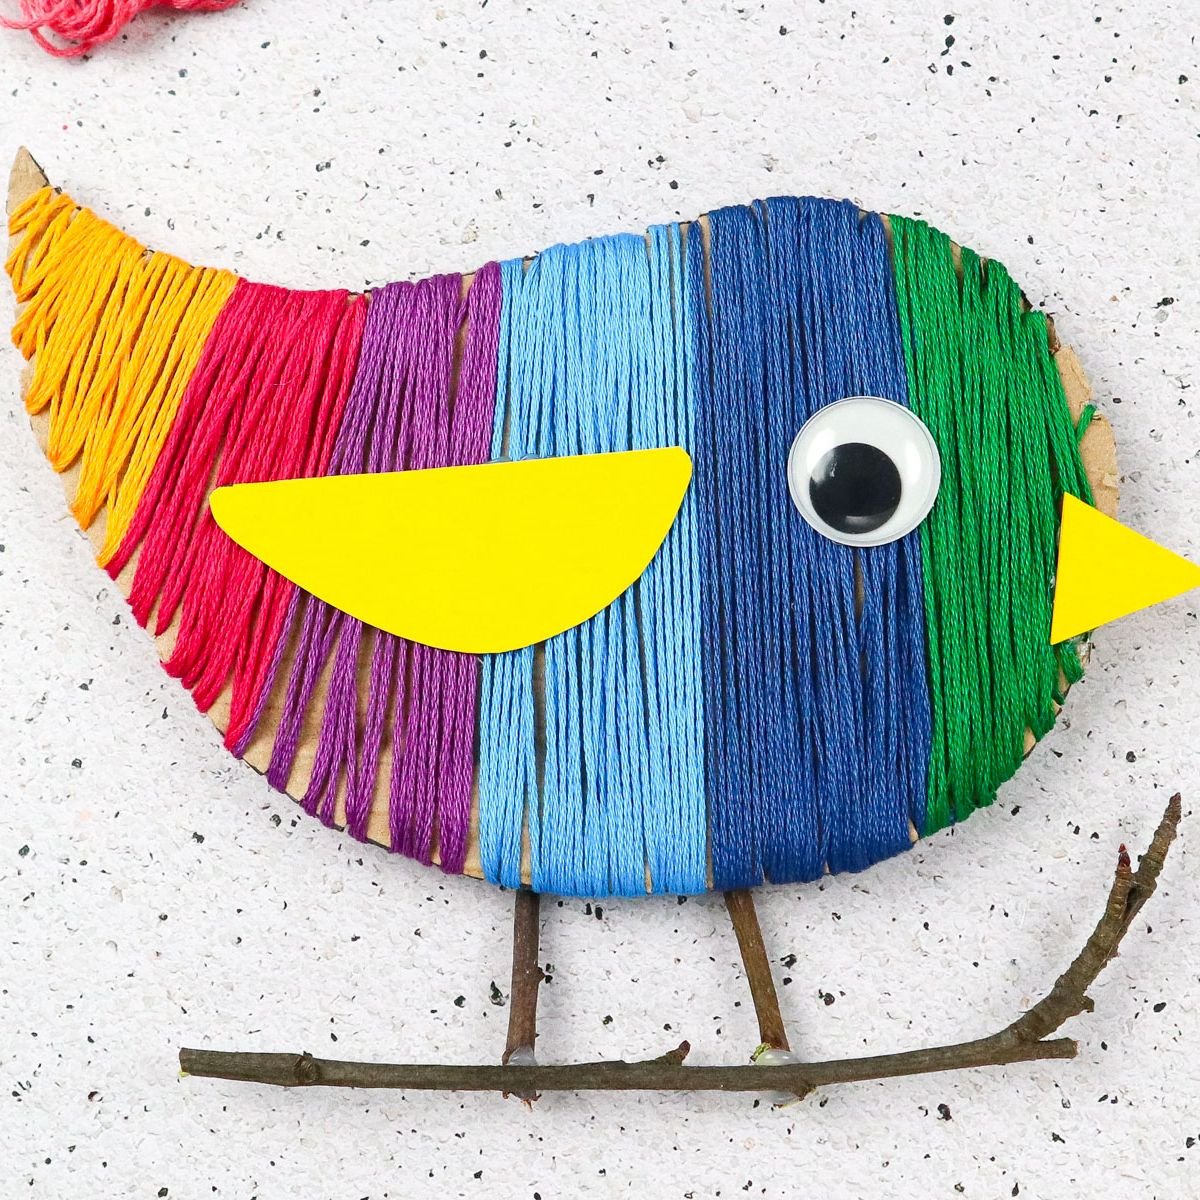
Got yarn scraps lying around? Turn them into cute feathered friends that’ll make any space more cheerful. These fluffy little birds are super easy for kids to make and need just basic supplies you probably have at home.
Wind different colored yarn around cardboard, tie it tight, and fluff out the ends. Kids love picking their favorite colors and watching their bird come to life. Hang them in bedrooms, on porches, or anywhere that needs a pop of spring color.
20 Fork Print Flowers
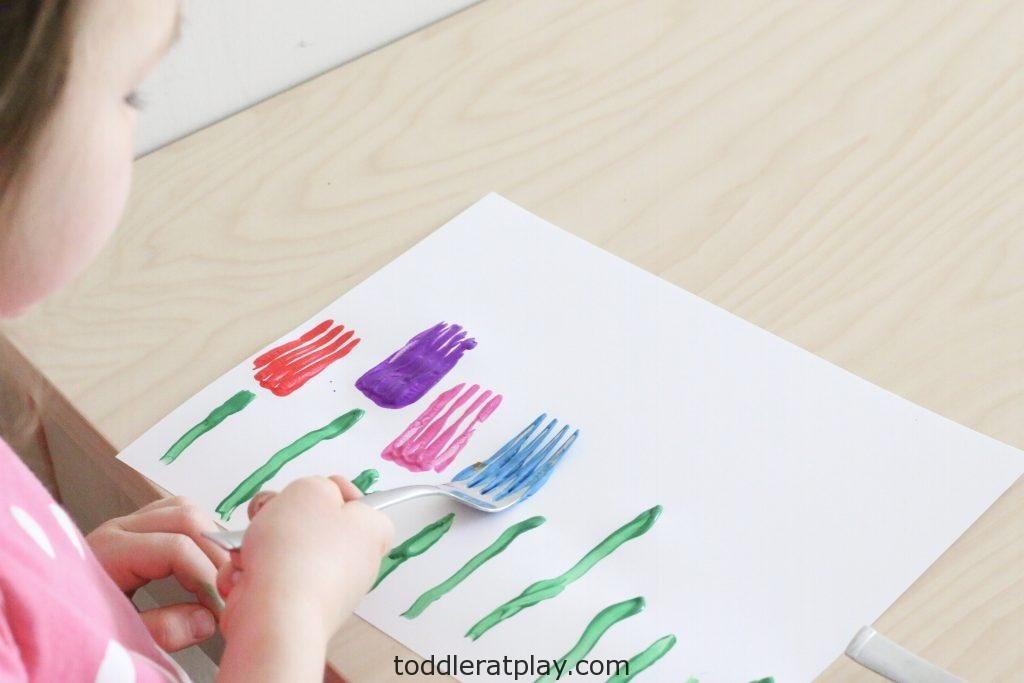
Grab some plastic forks from your kitchen drawer and watch magic happen. Your little ones can dip the fork tines in paint and press them onto paper to make perfect tulip shapes.
The fork creates natural petal lines without any fancy art skills needed. Just add green stems with a brush or crayon, and you’ve got a beautiful spring bouquet.
Best part? No scissors or glue mess to clean up afterward. Even toddlers can handle this one safely while making something they’ll want to hang on the fridge.
Use disposable forks so you don’t have to scrub paint off your good silverware later.
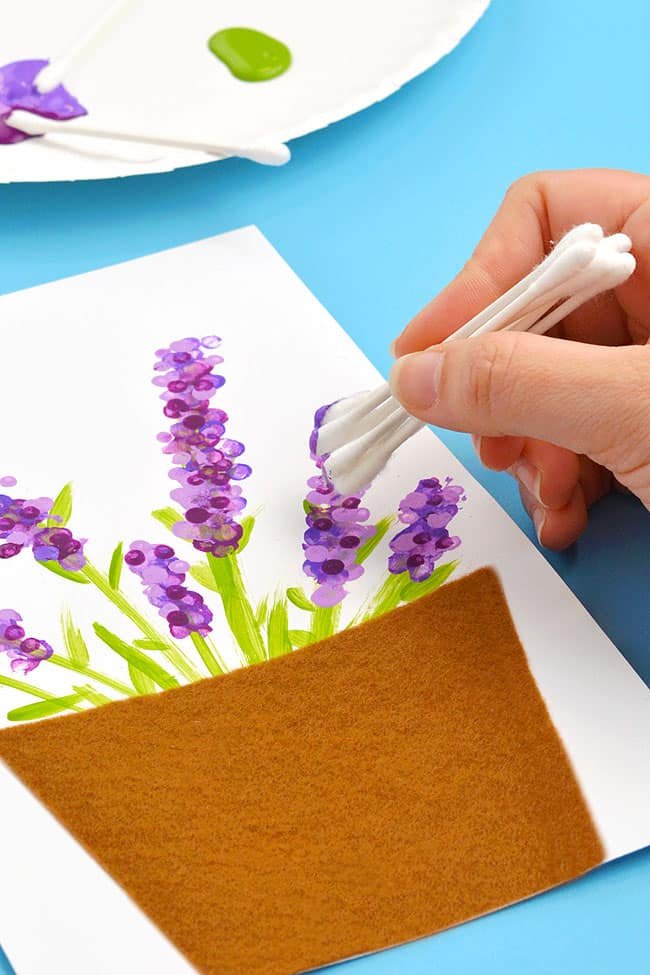
21 Q-Tip Lavender Painting
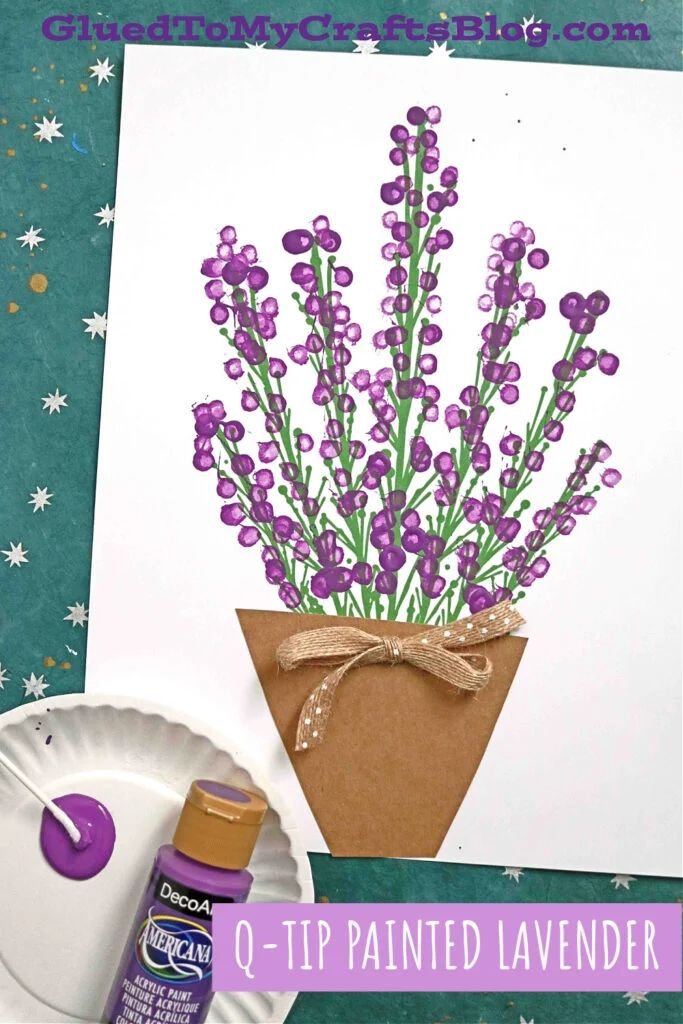
Q-tips make amazing paintbrushes for tiny hands! Kids can dip them in purple and green paint to dot beautiful lavender flowers onto paper. The soft cotton tips help children practice grip and control while making art.
Each gentle dab builds hand strength that helps with writing skills later. Let little artists decorate their painted flower pots with sparkly gems or colorful ribbons. The finished artwork makes a perfect spring decoration for any room.
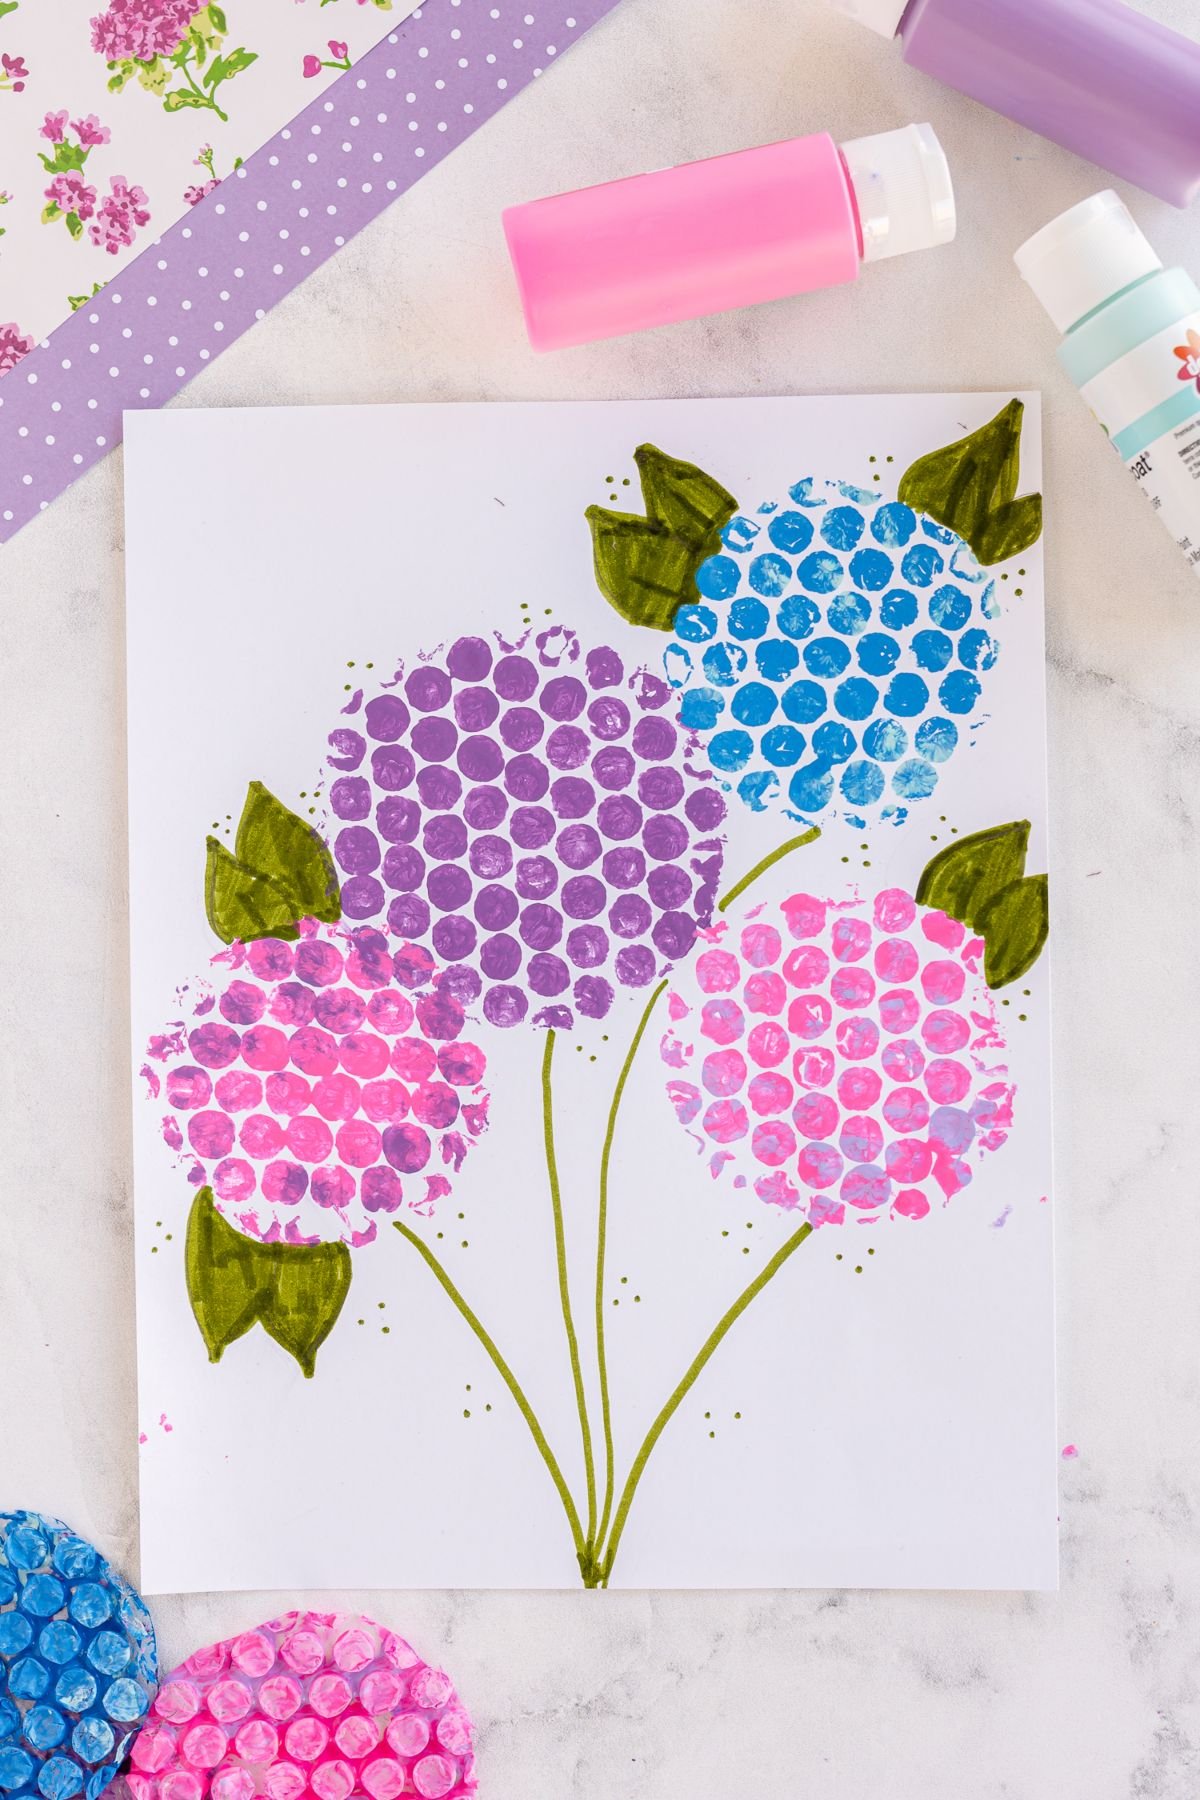
22 Bubble Paint Technique
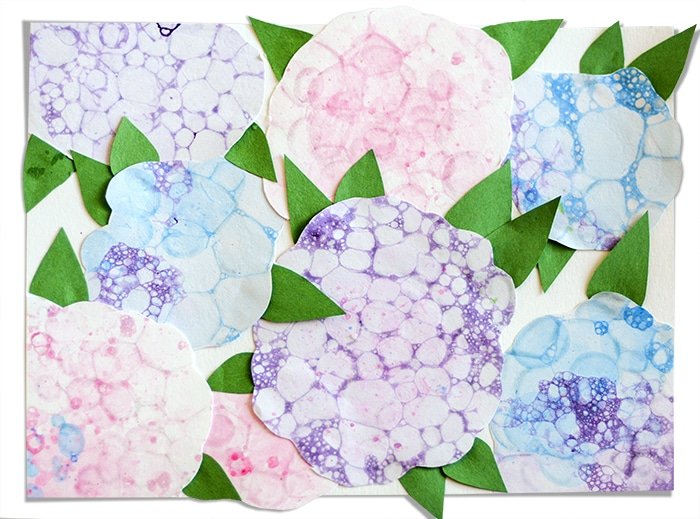
Kids love blowing bubbles, and now they can paint with them too! Mix equal parts of acrylic paint, dish soap, glycerin, and water in a bowl.
Give each child a straw and let them blow gently into the colorful mixture. The painted bubbles that form make beautiful prints when they pop on paper.
Try different paint colors to make amazing flower designs. The bubble marks look just like hydrangea petals when they dry. Your little artists will be amazed at how something so simple can make such pretty art.
23 Straw Brush Flowers
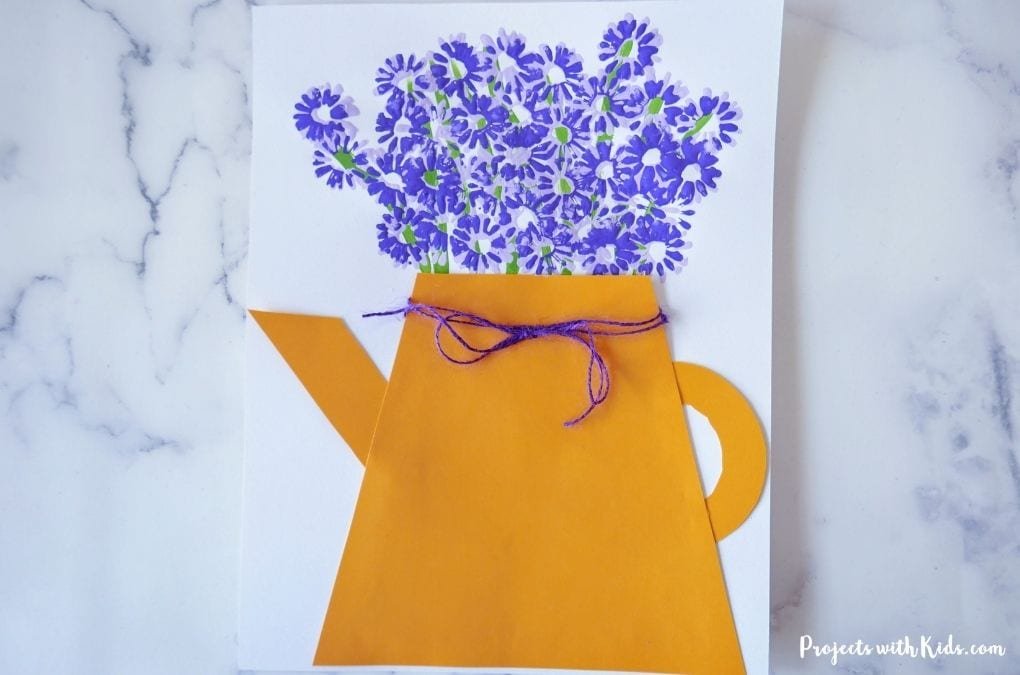
Want to make flowers that never wilt? Grab some plastic straws and scissors for this clever art trick.
Cut small slits about an inch down from one end of the straw. Fan out those cut pieces to form petals. Dip your new "brush" in paint and press it onto paper.
Each stamp makes a perfect flower bloom. Mix different paint colors for a whole garden of bright flowers. Kids love how quick and easy each flower appears.
Use the printable flower pot template to arrange your straw-painted flowers into a sweet bouquet. Makes a lovely gift that Mom will treasure.